How to fix Windows 10 'network resource unavailable' errors
If you're installing software on Windows 10, you could encounter an issue with network resources being unavailable for access. Here's how to fix the problem.

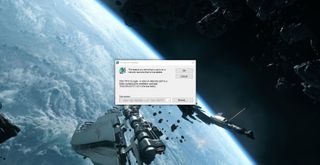
When you install and remove software on Windows there are a number of processes that take place, and most of them are not shown in the GUI. Unfortunately, due to the complexity of the OS and underlying software, things can sometimes go wrong. Should you be installing some software and see an unexpected error that states, "The feature you are trying to use is on a network resource that is unavailable," you'll usually need to close down the wizard, because the install or uninstall process is unable to progress past that stage.
Searching around Microsoft's online resources brings up a few potential fixes. We'll go through them in this guide to get you back on track.
Check Windows Installer
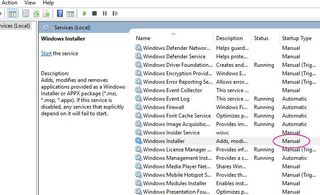
First, you should check that the Windows Installer service is actually running. Here's how to make sure everything is working:
- Hit Windows Key + R.
- Type in "services.msc".
- Hit OK.

- Check if "Windows Installer" is enabled.
- If disabled, double-click the listing.
- Change Startup type to "Automatic" or "Manual".
If the Windows Installer service is already enabled (set to automatic or manual) and working fine, or you activated it manually and things still aren't going well in the software installer, you'll need to move onto another possible fix.
Run Troubleshooter

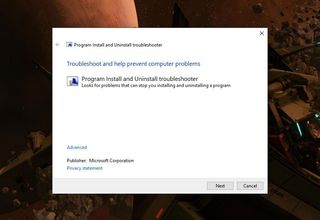
The Windows Installer troubleshooter suite will automatically check and attempt to fix any detected issues that may be preventing you from adding or removing software.
Download the Windows Installer Troubleshooter
Here's a list of the things this tool can fix:
Get the Windows Central Newsletter
All the latest news, reviews, and guides for Windows and Xbox diehards.
- Corrupted registry keys on 64-bit OSes.
- Corrupted registry keys that control the update data.
- Problems that prevent new programs from being installed.
- Problems that prevent existing programs from being completely uninstalled or updated.
- Problems that block you from uninstalling a program through Add or Remove Programs (or Programs and Features) in Control Panel.
Simply run the downloaded executable and let the tool do its thing. Hopefully, this should pick up on what's going wrong. If it finds nothing to fix, you'll need to move onto the final step which involves making edits to the registry.
Edit the Registry
This may work for you if all other options fail, but it should be a last resort. You should always take extra care when dealing with the Windows Registry, because deleting the wrong thing can negatively impact system stability.
- Hit Windows Key + R.
- Type in "regedit".
- Hit OK.
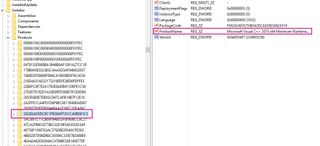
- Navigate to "HKEY_LOCAL_MACHINE\SOFTWARE\Classes\Installer\Products".

- Manually select each listing within this folder until you come across any with the software name under "ProductName".
- For any of these entries you find, right-click on each one.
- Choose "Export".
- Once again right-click the listing.
- This time, choose "Delete".
Finally, you should reboot your PC and then re-run the installer executable.
More Windows 10 resources
For more help articles, coverage, and answers to common questions about Windows 10, visit the following resources:
- Windows 10 on Windows Central – All you need to know
- Windows 10 help, tips, and tricks
- Windows 10 forums on Windows Central

Rich Edmonds was formerly a Senior Editor of PC hardware at Windows Central, covering everything related to PC components and NAS. He's been involved in technology for more than a decade and knows a thing or two about the magic inside a PC chassis. You can follow him on Twitter at @RichEdmonds.
