
Being actively social while on-the-go is Microsoft's main aim with Windows Phone, and both Messenger and Facebook Chat provide the means for owners to communicate with contacts via the social network and popular IM service. What's great about these features is that they are integrated into the operating system. Switching between text, Messenger, and Facebook can be achieved in the conversation itself with zero apps.
The only issue with such integration is actually setting it all up - it's not as simple as one would like to believe (there's no click-and-go here). Messenger is automatically connected and ready to fire up once you'd attached your Live ID in the Windows Phone setup walkthrough, but to activate Facebook Chat, you'll be required to login on your Live account and set up Facebook Connect via the web browser, as well as adding your Facebook account to your phone. Simply connecting your Facebook account to your Windows Phone only kick-starts the social integration for the People hub and Me tile. Too much, too fast?
Read on for our full tutorial on Facebook Chat and Messenger for Windows Phone....
- Add your Facebook account to your Windows Phone (Settings > Email and Accounts).

- Head to live.com and login using your Live ID (the same one that's used on your handset).
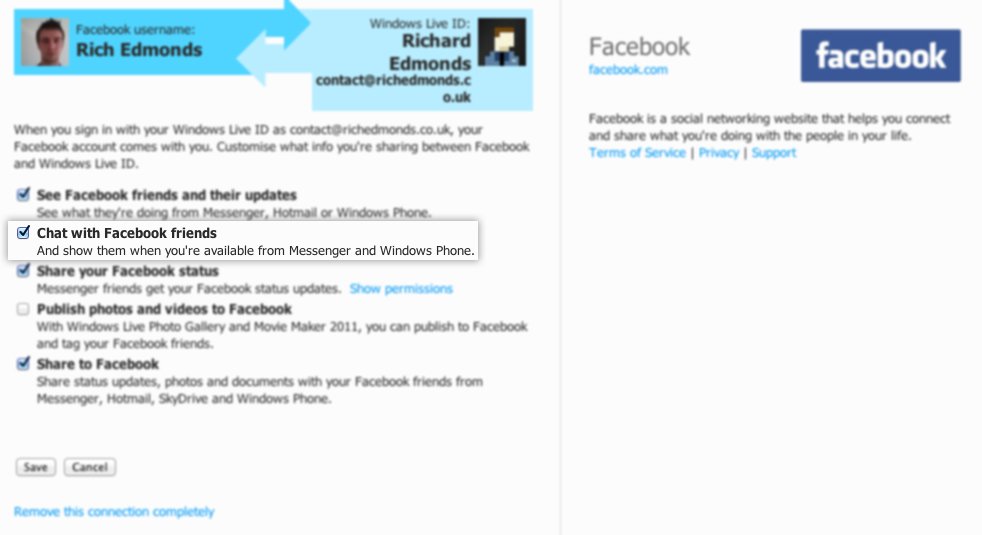
- Under "Messenger Social" (where all your contacts updates are displayed) select "Add" next to the list of connected networks.

- Connect your Facebook account to your Live ID and grant permissions.
- Ensure that ample permissions are selected, especially "Chat with Facebook friends".

Now you'll be able to utilise Facebook Chat on your Windows Phone with the above steps carried out. To connect to both Messenger and Facebook Chat, you simply pop into the messaging hub and swipe to the left to change your chat availability.
If you're unable to connect to Facebook Chat, be sure to check and see if the service is active in the messaging hub settings (select the "..." to bring up the menu and select "settings", ensure Facebook Chat is switched on).
Once up and running, much like any IM client on Windows, Linux or Mac, you're able to set your status to:
- Available - activate both Messenger and Facebook Chat
- Busy - appear as "busy" (affects Messenger only)
- Away - appear as "Away" (affects Messenger only)
- Appear Offline - activate Messenger only, appear "offline" (Facebook Chat is not activated with this option)
- Offline - close all connections to the IM services
The messenger services will now be available in conversations present in the messaging hub. Text/SMS, Messenger and Facebook Chat are all integrated into the single location. When conversing with a contact you're able to select which means of communication you wish to use by selecting "Switch" from the application bar (the contact will need to be online as well as yourself to use Messenger or Facebook Chat - statuses are displayed when service switching for convenience).
Check out our speedy visual walkthrough below:
Note that actual Facebook messages are not displayed or loaded in conversations in the messaging hub, nor can you message a Facebook contact who is offline on the Chat service. To use messaging on the social network, the official Facebook app is a superb client (and is available for free).


