How to set up and use Windows 10 Speech Recognition
Windows 10 has a hands-free using Speech Recognition feature, and in this guide, we show you how to set up the experience and perform common tasks.
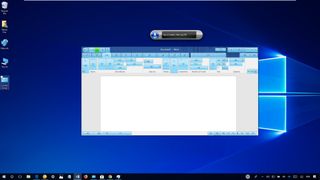
On Windows 10, Speech Recognition is an easy-to-use experience that allows you to control your computer entirely with voice commands.
Anyone can set up and use this feature to navigate, launch applications, dictate text, and perform a slew of other tasks. However, Speech Recognition was primarily designed to help people with disabilities who can't use a mouse or keyboard.
In this Windows 10 guide, we walk you through the steps to configure and start using Speech Recognition to control your computer only with voice.
- How to configure Speech Recognition on Windows 10
- How to train Speech Recognition to improve accuracy
- How to change Speech Recognition settings
- How to use Speech Recognition on Windows 10
How to configure Speech Recognition on Windows 10
To set up Speech Recognition on your device, use these steps:
- Open Control Panel.
- Click on Ease of Access.
- Click on Speech Recognition.
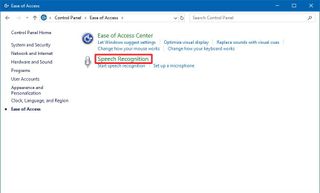
- Click the Start Speech Recognition link.
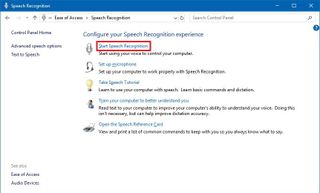
- In the "Set up Speech Recognition" page, click Next.
- Select the type of microphone you'll be using.Note: Desktop microphones are not ideal, and Microsoft recommends headset microphones or microphone arrays.
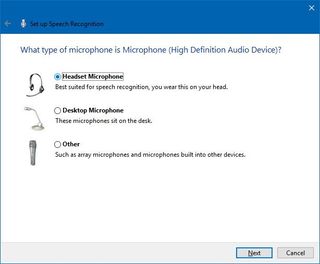
- Click Next.
- Click Next again.
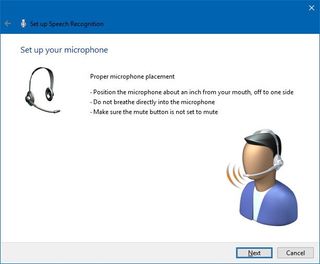
- Read the text aloud to ensure the feature can hear you.
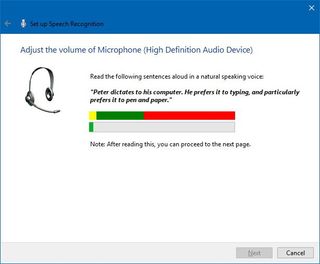
- Click Next.
- Click Next again.
- Speech Recognition can access your documents and emails to improve its accuracy based on the words you use. Select the Enable document review option, or select Disable document review if you have privacy concerns.
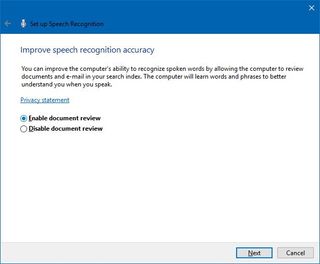
- Click Next.
- Pick an activation mode:
- Use manual activation mode — Speech Recognition turns off the "Stop Listening" command. To turn it back on, you'll need to click the microphone button or use the Ctrl + Windows key shortcut.
- Use voice activation mode — Speech Recognition goes into sleep mode when not in use, and you'll need to invoke the "Start Listening" voice command to turn it back on.
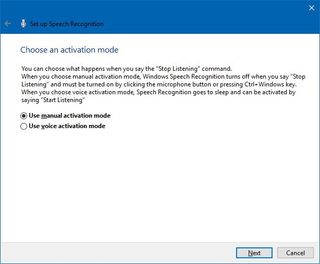
- Click Next.
- If you're not familiar with the commands, click the View Reference Sheet button to learn more about the voice commands you can use.
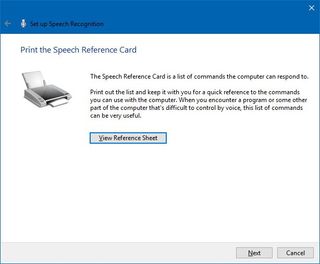
- Click Next.
- Select whether you want this feature to start automatically at startup.
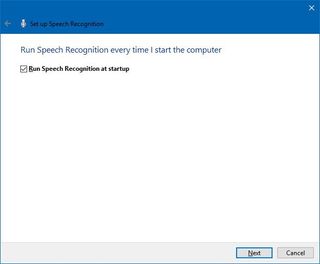
- Click Next.
- Click the Start tutorial button to access the Microsoft video tutorial about this feature, or click the Skip tutorial button to complete the setup.
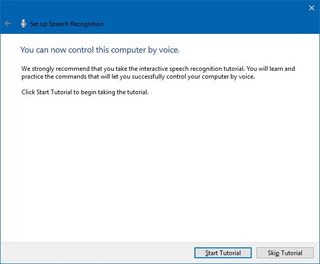
Once you complete these steps, you can start using the feature with voice commands, and the controls will appear at the top of the screen.
Quick Tip: You can drag and dock the Speech Recognition interface anywhere on the screen.
How to train Speech Recognition to improve accuracy
After the initial setup, we recommend training Speech Recognition to improve its accuracy and to prevent the "What was that?" message as much as possible.
Get the Windows Central Newsletter
All the latest news, reviews, and guides for Windows and Xbox diehards.
- Open Control Panel.
- Click on Ease of Access.
- Click on Speech Recognition.

- Click the Train your computer to better understand you link.
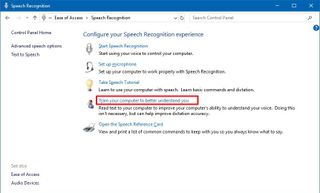
- Click Next to continue with the training as directed by the application.
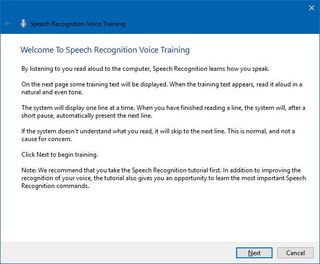
After completing the training, Speech Recognition should have a better understanding of your voice to provide an improved experience.
How to change Speech Recognition settings
If you need to change the Speech Recognition settings, use these steps:
- Open Control Panel.
- Click on Ease of Access.
- Click on Speech Recognition.

- Click the Advanced speech options link in the left pane.
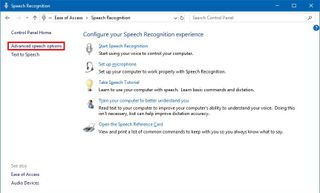
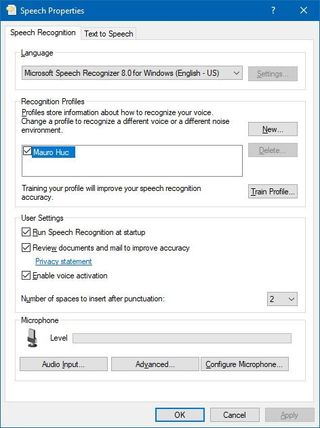
Inside "Speech Properties," in the Speech Recognition tab, you can customize various aspects of the experience, including:
- Language.
- Recognition profiles.
- User settings.
- Microphone.
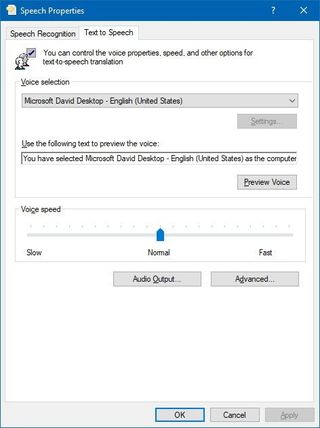
In the Text to Speech tab, you can control voice settings, including:
- Voice selection.
- Voice speed.
Additionally, you can always right-click the experience interface to open a context menu to access all the different features and settings you can use with Speech Recognition.

How to use Speech Recognition on Windows 10
While there is a small learning curve, Speech Recognition uses clear and easy-to-remember commands. For example, using the "Start" command opens the Start menu, while saying "Show Desktop" will minimize everything on the screen.
If Speech Recognition is having difficulties understanding your voice, you can always use the Show numbers command as everything on the screen has a number. Then say the number and speak OK to execute the command.
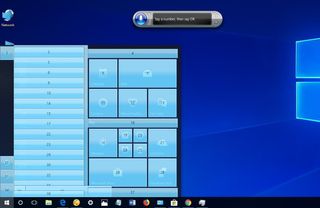
Here are some common tasks that will get you started with Speech Recognition:
Starting Speech Recognition
To launch the experience, just open the Start menu, search for Windows Speech Recognition, and select the top result.
Turning on and off
To start using the feature, click the microphone button or say Start listening depending on your configuration.
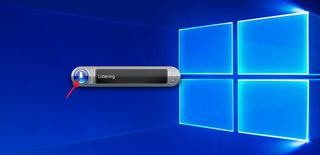
In the same way, you can turn it off by saying Stop listening or clicking the microphone button.
Using commands
Some of the most frequent commands you'll use include:
- Open — Launches an app when saying "Open" followed by the name of the app. For example, "Open Mail," or "Open Firefox."
- Switch to — Jumps to another running app when saying "Switch to" followed by the name of the app. For example, "Switch to Microsoft Edge."
- Control window in focus — You can use the commands "Minimize," "Maximize," and "Restore" to control an active window.
- Scroll — Allows you to scroll in a page. Simply use the command "Scroll down" or "Scroll up," "Scroll left" or "Scroll right." It's also possible to specify long scrolls. For example, you can try: "Scroll down two pages."
- Close app — Terminates an application by saying "Close" followed by the name of the running application. For example, "Close Word."
- Clicks — Inside an application, you can use the "Click" command followed by the name of the element to perform a click. For example, in Word, you can say "Click Layout," and Speech Recognition will open the Layout tab. In the same way, you can use "Double-click" or "Right-click" commands to perform those actions.
- Press — This command lets you execute shortcuts. For example, you can say "Press Windows A" to open Action Center.
Using dictation
Speech Recognition also includes the ability to convert voice into text using the dictation functionality, and it works automatically.
If you need to dictate text, open the application (making sure the feature is in listening mode) and start dictating. However, remember that you'll have to say each punctuation mark and special character.
For example, if you want to insert the "Good morning, where do you like to go today?" sentence, you'll need to speak, "Open quote good morning comma where do you like to go today question mark close quote."
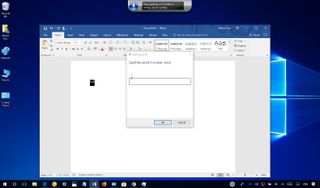
In the case that you need to correct some text that wasn't recognized accurately, use the "Correct" command followed by the text you want to change. For example, if you meant to write "suite" and the feature recognized it as "suit," you can say "Correct suit," select the suggestion using the correction panel or say "Spell it" to speak the correct text, and then say "OK".
Wrapping things up
Although Speech Recognition doesn't offer a conversational experience like a personal assistant, it's still a powerful tool for anyone who needs to control their device entirely using only voice.
Cortana also provides the ability to control a device with voice, but it's limited to a specific set of input commands, and it's not possible to control everything that appears on the screen.
However, that doesn't mean that you can't get the best of both worlds. Speech Recognition runs independently of Cortana, which means that you can use the Microsoft's digital assistant for certain tasks and Speech Recognition to navigate and execute other commands.
It's worth noting that this speech recognition isn't available in every language. Supported languages include English (U.S. and UK), French, German, Japanese, Mandarin (Chinese Simplified and Chinese Traditional), and Spanish.
While this guide is focused on Windows 10, Speech Recognition has been around for a long time, so you can refer to it even if you're using Windows 8.1 or Windows 7.
More Windows 10 resources
For more helpful articles, coverage, and answers to common questions about Windows 10, visit the following resources:
- Windows 10 on Windows Central – All you need to know
- Windows 10 help, tips, and tricks
- Windows 10 forums on Windows Central
Mauro Huculak is technical writer for WindowsCentral.com. His primary focus is to write comprehensive how-tos to help users get the most out of Windows 10 and its many related technologies. He has an IT background with professional certifications from Microsoft, Cisco, and CompTIA, and he's a recognized member of the Microsoft MVP community.

