How to use the Windows Phone 8.1 camera burst mode

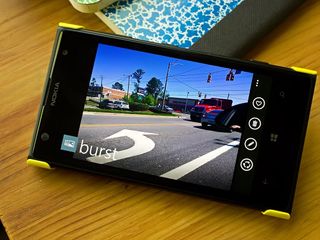
One of the many new features Windows Phone 8.1 brings to the table is a burst mode for the native camera app. The burst mode allows you to capture a series of images then select the best of the group to save to your Pictures Hub.
Think of it as a motor drive back in the old film camera days or a 10 frame per second drive for today’s digital cameras.
Burst Mode Operations
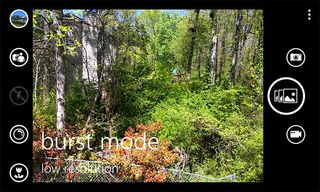
The Windows Phone 8.1 camera has three mode buttons sitting in the right of the screen (bottom if you are holding the camera vertically), one for still images, one for video capture and the third for the new burst mode (icon with the three image frames). Just tap on the burst mode and you are ready to capture your kids running across the backyard, your pets chasing its tail or any other action scene.

A single press of the shutter button (on-screen or physical button) will capture 15 frames, more if you continuously hold down the shutter button. I’m not sure if there is a buffer limit on the number of frames you can capture while holding down the shutter button but I was able to capture over 100 frames without any issues.
It should be noted, if you tap the screen to focus/shoot your photos the burst mode is only good for the 15 frames. To capture more images at once you will need to use the on-screen or physical shutter buttons.
Limitations
There are two caveats with burst mode. No deal breakers, just some limitations you should be aware of.
First, the burst mode will only captures images at low resolution (1024x768). The lower resolution is needed to keep processing time down. I can imagine it would take several minutes to process 15+ high resolution, 38MP files. Images may not be good enough for large prints but are just fine for electronic sharing.
Get the Windows Central Newsletter
All the latest news, reviews, and guides for Windows and Xbox diehards.
Second, there isn’t a continuous focus with burst mode. It locks focus and then captures the series of images. It is not the end of the world but may limit your camera’s focus range on moving subjects.
You will need to time things just right to avoid focusing on subjects too far away, which will result in out-of-focus images as they get closer to you. The same can be said of subjects moving away from you.
Reviewing Your Images

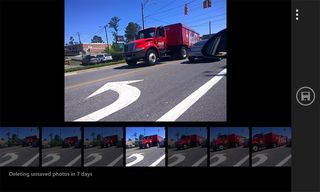
Once captured, you can preview the entire series and select particular frames to save and discard the rest. Here’s how to go about it.
- When you review a burst image (either from the Pictures Hub or from the camera viewfinder) a burst icon will appear in the lower left corner of the image.
- Tap the icon and your full series of images will appear.
- Scroll through the images and tap the frames you want to save.
- Once you’ve selected all the frames, tap the save control button that sits to the side of the screen and those individual frames will be saved to your Pictures Hub.
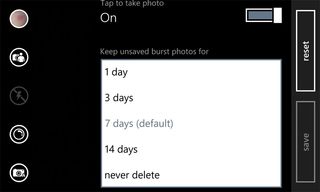
Any images not saved will be automatically deleted, by default, after seven days. You can change this duration in the camera’s setting to as short as one day or never delete the burst images. You also have the option to manually delete any un-saved images. That option is up under the three-dot menu on the review screen for the burst mode.

While it’s not perfect (no high resolution files or continuous focus) the new burst mode with Windows Phone 8.1 does expand our camera’s capabilities. If you’ve tried the new burst mode, let us know what you think of it in the comments below.
George is the Reviews Editor at Windows Central, concentrating on Windows 10 PC and Mobile apps. He's been a supporter of the platform since the days of Windows CE and uses his current Windows 10 Mobile phone daily to keep up with life and enjoy a game during down time.

