How to split a 3D model in 3D Builder
Splitting models is one of the easiest ways to get good prints.

There is a big difference between a 3D model and a 3D model designed for 3D printing. 3D printing a model requires a lot of specific parameters on the model to be exact for the print to succeed. For example, too big an overhang on a print will cause the printer to try and print in midair making it look stringy or may just collapse the model unless you use supports. By using supports, however, you can scar the surface of the print which you will then need to sand away before the print looks good.
So whats the answer?

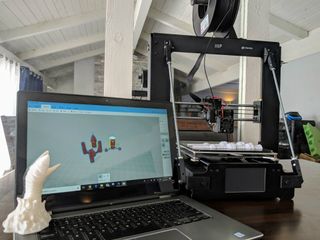
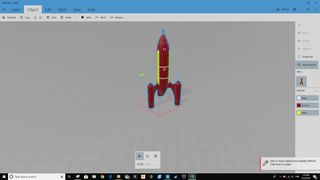
Ideally, you want to be able to minimize the overhangs and supports on the model before you actually print it, and that's where splitting comes in. Using the split function in 3D builder you can slice a model into a number of smaller parts along certain planes or axis to reduce the need for support or to eliminate overhangs. In this How-To we will be using this model of a Rocketship made by hayling99 on Thingiverse to show where and how to cut. As you can see if you tried to print this the way it is right now you will either need a lot of support around the bottom or watch the whole model fall to pieces as you print.
Step by Step
- Open 3D Builder and choose Open to select your model.
- Select the Edit tab on the top menu.
- Select the split action from the edit menu.
- Select the Keep Both option from the split menu.
- Position the cutting plane using the rotation gyroscope.
- Select Cut to select your choice.
- Select Done to finalize your selection.
- Select the Object tab in the top menu.
- Select the floating model then click Settle.
- Rotate the bottom model 180 degrees.
- Repeat step by step instructions 8 and 9 to Settle the bottom object.
- Select Save as and save as a .STL file.
The details

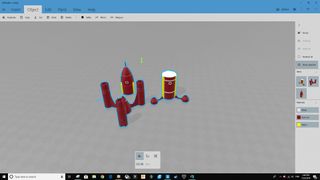
Slicing a 3D model with 3D Builder is incredibly simple, much simpler than most apps, even Tinkercad — in Tinkercad you have to create two square holes and then two copies of the model and group them to make the slices — a few simple clicks and 3D builder will have it done. The most difficult part is deciding where to cut and how many cuts you will need. Working with our rocket demo you can see that the cut is made just high enough that thrusters can be placed upside down on a flat print bed. This also makes lining the prints up to glue them back together much easier.
When you select Split from the Edit tab you will need to make sure you select the Keep Both option or 3D builder will assume you don't want to keep some of the models and delete it which can be a pain. now you have the cutting plane you can choose the position you want it to slice. I went for just above the thrusters and then decided to make a second cut above the fuselage so that all the printed parts are roughly the same height. By keeping the prints the same height you increase the layer cooling time, giving small layers like the nose point sufficient time to cool so it doesn't look ugly and melted.

Once you have completed the slices it is important to make sure all the models are orientated correctly so no overhangs are left or that any that are have a minimum need for support. As you can see in the model nowhere in this model will support be needed now that it is sliced. It would be amazing if we could do this with all models but unfortunately, you will have to use the occasional support, though, if your overhang is less than 35 degrees then your printer should be able to cope with it just fine.
Once you have rotated them all to the right way you can choose to settle the models. This will drop them down onto the print bed and allow them to be printed easily. If you forget this part and save your model as a .STL file without settling them your printer will try to print your model in midair which will make a lovely 3D model of spaghetti rather than the model you actually wanted. don't worry though if you followed the Step by Step guide that shouldn't happen to you and your prints should print with minimal fuss. Maybe. There are still a lot of variables but splitting really does help.
Get the Windows Central Newsletter
All the latest news, reviews, and guides for Windows and Xbox diehards.
More: Getting started with 3D printing
Any questions?
Let me know down in the comments section if you need more information or if you guys have found an easier way to slice 3D models than using 3D Builder. With 3D builder coming free with Windows 10 now It feels like a no-brainer to use its best feature.
James built his first PC when he was 13 and has never looked back. He can be found on Windows Central, usually in the corner where all the 3D printers are, or huddled around the Xbox playing the latest games.

