Four different ways to do a Windows 8 screenshot
Beginner's Tips Series!
There are tons of reasons why you might want to capture an image on your Surface Pro 3, or other Windows 8 computer. Maybe you want to preserve a pic of your high score for posterity. Perhaps your IT guy won't accept "My Outlook isn't working" as a legitimate gripe and wants a screenshot of the error message. Or just maybe, you write for a technology website and often find yourself needing images when creating "How To's" for your readers.
Whatever the reason, Windows 8 makes is super easy to getting a pic of your screen. If you are new to Windows 8.1 or have a Surface Pro 3, you may be wondering what your screenshot options are, so we break 'em down for you.
Method 1: I want options
The most versatile way of grabbing images off your device's screen is the Snipping Tool, which has been included in Windows since the Vista days. The Snipping Tool can be found in the full Apps List under the Windows Accessories section. You can also do a search for it in the Charms bar.
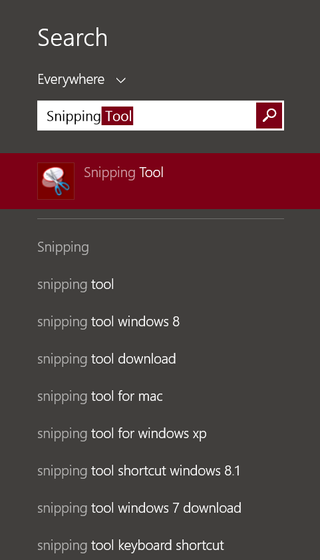
Once you open it, just click on New, and then use the cursor to select the portion of your screen that you would like to save.
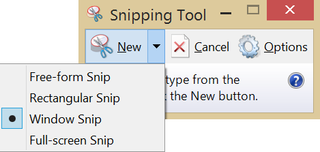
The Snipping Tool gives you the option of capturing your entire screen, an individual window, or by drawing either a rectangle or free-form box around the area to be saved. From there, you can even use the Snipping Tool to mark up the image and save it to wherever you'd like.
Method 2: I don't need options, just a quick snapshot
- Press and hold the Home button (aka, Windows button) on the front the Surface, then just press and release the Volume Down button, as if you were taking a picture.
- The screen will dim briefly and then go back to its original brightness.
- The screenshot will be placed in a subfolder of your Pictures folder called Screenshots. If the Screenshots folder does not already exist, it will be created automatically.
Method 3: I have an external keyboard
If you are using a desktop computer setup and have an external keyboard, you can press the Windows key + PrtScn to perform the same function as above. Again, the resulting image will be saved to your Screenshots folder.

Method 4: Old style
In the event you want to keep it oldschool, the PrtScn button alone still gets the job done in Windows 8. Pressing that will copy a picture of your Desktop to the Clipboard, so it can be pasted into an application like Paint or Word. Using Alt+PrtScn together captures only an individual window.
Get the Windows Central Newsletter
All the latest news, reviews, and guides for Windows and Xbox diehards.
Got any other tips for doing screen captures? Let us know in the comments below.
