How to monitor and control data usage on Windows 10 April 2018 Update
You can use the Data Usage settings on the Windows 10 April 2018 Update (version 1803) to monitor network usage and prevent going over your data plan.
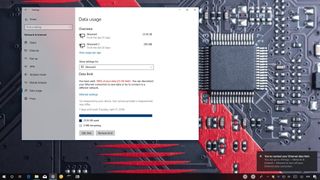
On Windows 10, you've been able to use the "Data Usage" settings to track your network consumption to prevent going over your data plan when using a limited internet connection, but it's been a limited experience because you were only able to monitor your data usage.
However, with the Windows 10 April 2018 Update (version 1803), Windows 10 brings a number of improvements to its built-in network traffic monitor, and now, in addition to viewing and resetting the stats, you can set data limits and background data restrictions when using a Wi-Fi or Ethernet connection to reduce usage and stay under the ceiling.
In this Windows 10 guide, we walk you through the steps to view your device's current data usage and provide instructions on how to limit data to help you prevent going over your data plan.
- How to view data usage on Windows 10
- How to reset data usage on Windows 10
- How to configure data usage limit on Windows 10
How to view data usage on Windows 10
By default, Windows 10 monitors the traffic for all network adapters. If you need to review the network data usage, use the following steps:
- Open Settings.
- Click on Network & Internet.
- Click on Data Usage.
Under the "Overview" section, you can see your current data usage from the last 30 days for each network adapter.
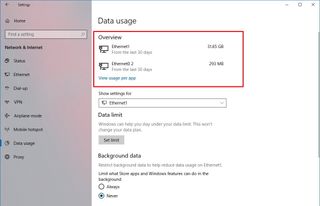
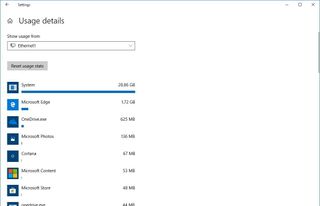
You can also click View usage per app to see which apps are using the most data.
How to reset data usage on Windows 10
Although Windows automatically resets the data usage stats every 30 days, the schedule might not line up with your plan's billing schedule, making this information useless. If you need to flush and restart the data counters, use these steps:
Get the Windows Central Newsletter
All the latest news, reviews, and guides for Windows and Xbox diehards.
- Open Settings.
- Click on Network & Internet.
- Click on Data Usage.
- Click the View usage per app link.
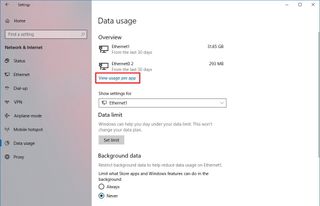
- Use the "Show usage from" drop-down menu, and select the Wi-Fi or Ethernet adapter you want to reset.
- Click the Reset usage stats button.
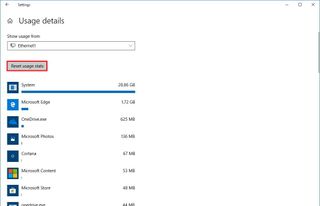
- Click the Reset button to confirm.
After completing the steps, if you use multiple adapters, repeat steps No. 5, 6, and 7 for each one that you want to reset.
How to configure data usage limit on Windows 10
If you're using an internet connection with a limited data plan, you can set limits for a Wi-Fi or Ethernet network adapter to allow Windows 10 to monitor, restrict unnecessary usage, and provide notifications to help you avoid going over your plan. Here's how using the Data Usage settings:
- Open Settings.
- Click on Network & Internet.
- Click on Data Usage.
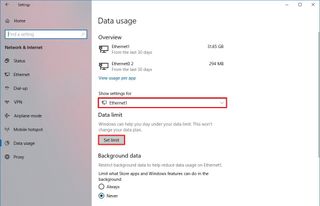
- Use the "Show settings for" drop-down menu, and select the wireless or wired network adapter to want to restrict.
- Under "Data limit," click the Set limit button.
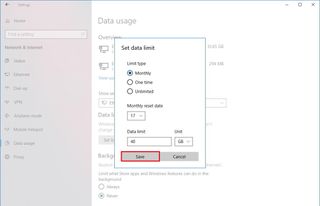
- Select the limit type you want to use, including:
- Monthly.
- One time.
- Unlimited.
- Depending on your selection on step No. 6, specify the information required. For example, if you selected the "Monthly" option, you'll need to specify:
- Monthly reset data — Select exactly when the data usage should reset the counter. (Usually, this is when your billing cycle starts.)
- Data limit — Lets you specify the data plan allowance.
- Unit — Specifies the data limit in megabytes (MB) or gigabytes (GB).
- Click the Save button.
Once you completed these steps, Windows 10 will monitor your device data usage, set the network adapter as metered, and pause OneDrive (if applicable) and other activities to reduce network consumption. Then as you get closer to the limit, you'll start getting alerts that you're reaching the data cap.
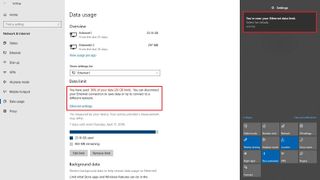
You can always go back to the settings page to check the current use, remaining data, and the number of days until the counters reset.
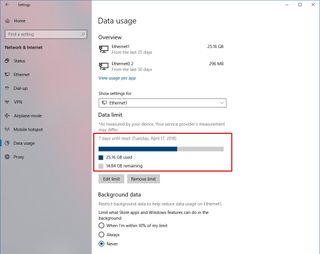
Even after reaching the limit, you'll still be able to use the internet. If you want to avoid extra charges, either disconnect your device from the network or connect to another network.
Quick tip: You can quickly disconnect from a wireless network by clicking the wireless icon in the notification area of the taskbar and then clicking the Wi-Fi button.
Restricting background data
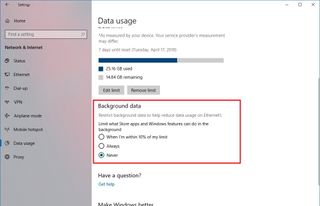
It's also possible to restrict background data to limit data usage even further for Windows 10 features and Microsoft Store apps.
You can set this limit under the Background data section. Options available include Always, Never, and When I'm within 10% of my limit, but this last option is only available after setting a connection data limit.
Editing or removing data limit
After setting up a data limit for a network adapter, you can always edit your settings or remove the current limit.
If you made a mistake setting the limit, or you upgraded your plan, under "Data limit," click the Edit button to change your configuration.
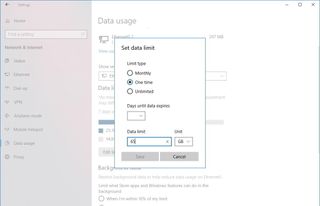
In the case that you no longer need to monitor and restrict data usage, you can simply click the Remove limit button.
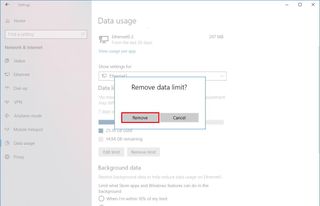
The background data option works independently from the data limit options, so make sure to change this option to Never to disable it.
Wrapping things up
Windows 10 only monitors the data usage on your device, not every device in the network. You have to keep this in mind when sharing, for example, a mobile data connection.
Also, remember that the method to measure network data on Windows 10 may be different from the method used by your Internet Service Provider (ISP). In order to further reduce the chances of extra charges, it's always a good idea to configure a data limit using an amount that is less (around two to five percent) than the actual limit specified in your plan.
More Windows 10 resources
For more helpful articles, coverage, and answers to common questions about Windows 10, visit the following resources:
- Windows 10 on Windows Central – All you need to know
- Windows 10 help, tips, and tricks
- Windows 10 forums on Windows Central
Mauro Huculak is technical writer for WindowsCentral.com. His primary focus is to write comprehensive how-tos to help users get the most out of Windows 10 and its many related technologies. He has an IT background with professional certifications from Microsoft, Cisco, and CompTIA, and he's a recognized member of the Microsoft MVP community.

