How to defragment your PC's hard drive on Windows 10
Is your PC slowing you down? Use this guide to defragment files using the Optimize Drives tool on Windows 10.

In order to minimize slow hard drive performance, Windows 10 (and so Windows 8.1, Windows 7, and previous versions), includes a built-in tool to defragment all fragmented files and help your PC stay at top speeds.
Over the years, improvements have been made to the Windows drive optimization tool. However, even when the operating system can accurately detect the type of storage and handle defragmentation of files automatically, it's not always optimal. Because you may not keep your PC turned on long enough or you may have an external hard drive that it's not always connected to your computer that prevents maintenance from running properly.
As a result, the time will come when you'll begin to notice that opening apps and saving files to disk will take longer than usual, in which case manual optimization may be required. In this Windows 10 guide, we'll show you the easy steps to check if your hard drive is fragmented and defragment as necessary to keep your computer running more efficiently.
How to use Optimize Drives on Windows 10
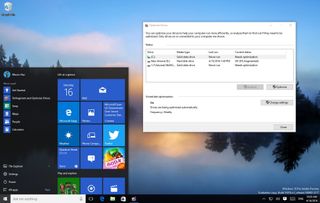
- Open Start type Defragment and Optimize Drives and press Enter.
- Select the hard drive you want to optimize and click Analyze.Note: You always want to analyze the drive first to figure out if the drive needs optimization. If the result shows less than 10% fragmented, you probably don't need to optimize the drive.
- If the files stored on your PC's hard drive are scattered everyone and defragmentation is needed, then click the Optimize button.

- Once the process complete, the current status should display "0% fragmented".
Note: Keep in mind that depending on the number of files, the size of the drive, and fragmentation, the defragmentation tool may take some time to complete the task. It's also recommended to perform this task when you know, you won't be around your computer.
How to change the optimization schedule
By default Windows automatically runs maintenance on drives every week, but depending on how you use your computer, the operating system offers the option to change the frequency in which drivers are optimize.
If you prefer to modify the schedule, then follow the steps below:
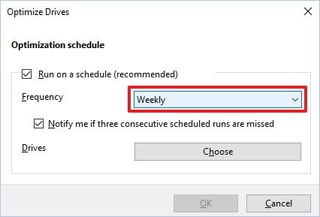
- While in the Optimize Drives window, click the Change settings button.
- Change the frequency to: Daily, Weekly (default), or Monthly.
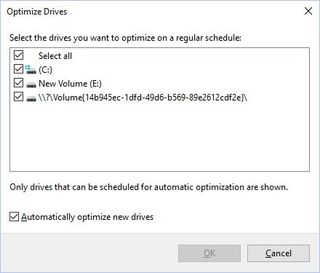
- On Drives, click the Choose button.

- Check the drives you want to apply the new schedule.

- Click OK to apply the settings.
- Click OK.
- Click Close to quit the tool.
Remember that these optimization options only apply to traditional rotating platters hard drives. Solid-state drives work differently. They don't have any motors or moving parts. They only use banks of memory to store data, which means that these drives don't need to be defragmented (you shouldn't defragment SSDs, as it may cause performance issues and even reduce the life of the drive).
Get the Windows Central Newsletter
All the latest news, reviews, and guides for Windows and Xbox diehards.
However, you'll still see "Solid state drive" listed under the Optimize Drives tool, because Windows can also perform different maintenance tasks to optimize your SSD, including the ability to inform the drive that certain blocks of data are no longer in use and can be erased making them writable again.
Although Windows 10 can detect and configure the appropriate optimization options for storage devices, if you have a traditional hard drive or an external drive that it's now always connected to your system, you should run maintenance on them manually.
More on Windows 10
For more help articles, coverage, and answers on Windows 10, you can visit the following resources:
- Windows 10 on Windows Central – All you need to know
- Windows 10 help, tips, and tricks
- Windows 10 forums on Windows Central
Mauro Huculak is technical writer for WindowsCentral.com. His primary focus is to write comprehensive how-tos to help users get the most out of Windows 10 and its many related technologies. He has an IT background with professional certifications from Microsoft, Cisco, and CompTIA, and he's a recognized member of the Microsoft MVP community.

