How to upgrade Windows 10 to 11 using a local account — A step-by-step guide to skipping the Microsoft account requirement
If you already use a local account, the Windows 11 upgrade won't require you to use a Microsoft account.

All the latest news, reviews, and guides for Windows and Xbox diehards.
You are now subscribed
Your newsletter sign-up was successful
Upgrading to Windows 11 is still possible even after Windows 10 reached the end of support on October 14, 2025. Although many devices continue to run the retired operating system, switching to Windows 11 is crucial to ensure you receive security fixes, feature updates, and ongoing support.
One of the most common concerns for users making the transition is whether a Microsoft account is required during the upgrade process. Fortunately, if your computer is already using a local account on Windows 10, the upgrade fully preserves that configuration.
If you're currently using a Microsoft account and prefer not to use one on Windows 11, you can switch to a local account first, then perform the upgrade. The process only requires updating your account type before starting installation. Regardless of the method you choose, the upgrade keeps your apps, settings, files, and account type intact.
In this how-to guide, I'll show you exactly how to switch from Windows 10 to 11 without using a Microsoft account.
Important: Before proceeding, it's still (highly) recommended to create a full backup of your current setup in case something goes wrong and you have to roll back to the previous version.
How to upgrade Windows 10 to 11 using a local account
The process to upgrade your Windows 10 computer to Windows 11, skipping the Microsoft account, is straightforward because the installation still respects the current setup configuration, meaning that if you're already using a local account on Windows 10, that account type will be retained during the upgrade process.
If you're using a Microsoft account on Windows 10 and want to switch to a local account on Windows 11, it's recommended to unlink the Microsoft account or create a local account on Windows 10 before upgrading.
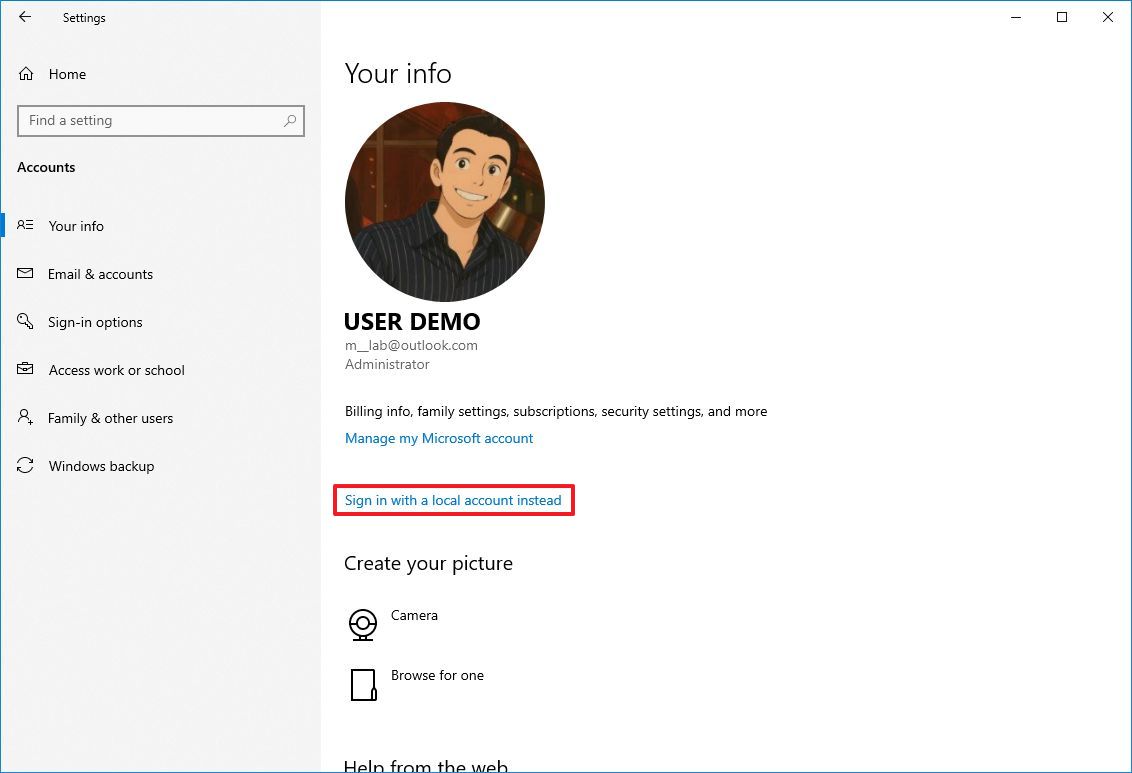
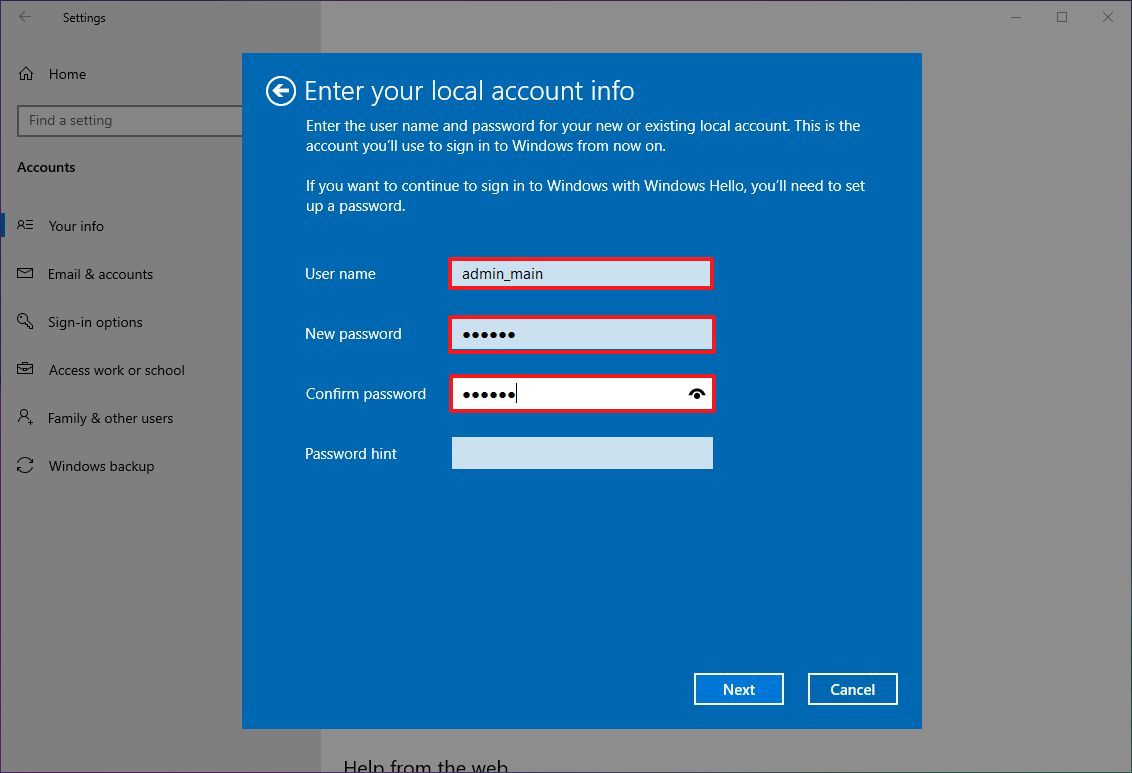
Switch to a local account on Windows 10
To switch to a local account on Windows 10, use these steps:
- Open Settings.
- Click on Accounts.
- Click on Your Info.
- Click the "Sign in with a local account instead" option.
- Click the Next button.
- Confirm your account.
- Choose a name for your local account.
- Confirm a password for the account.
- Create a password hint.
- Click the Next button.
- Click the Sign out button.
After you complete the steps, the account will no longer use a local account, and you can proceed with the Windows 11 upgrade without a Microsoft account.
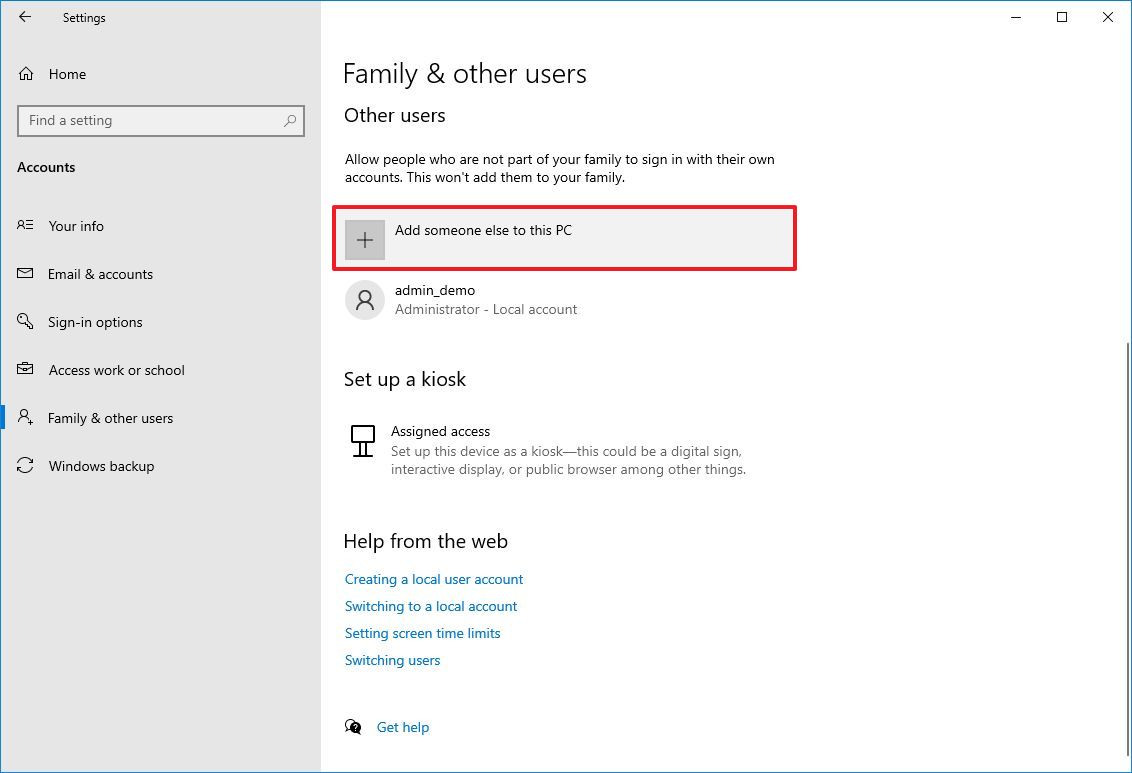
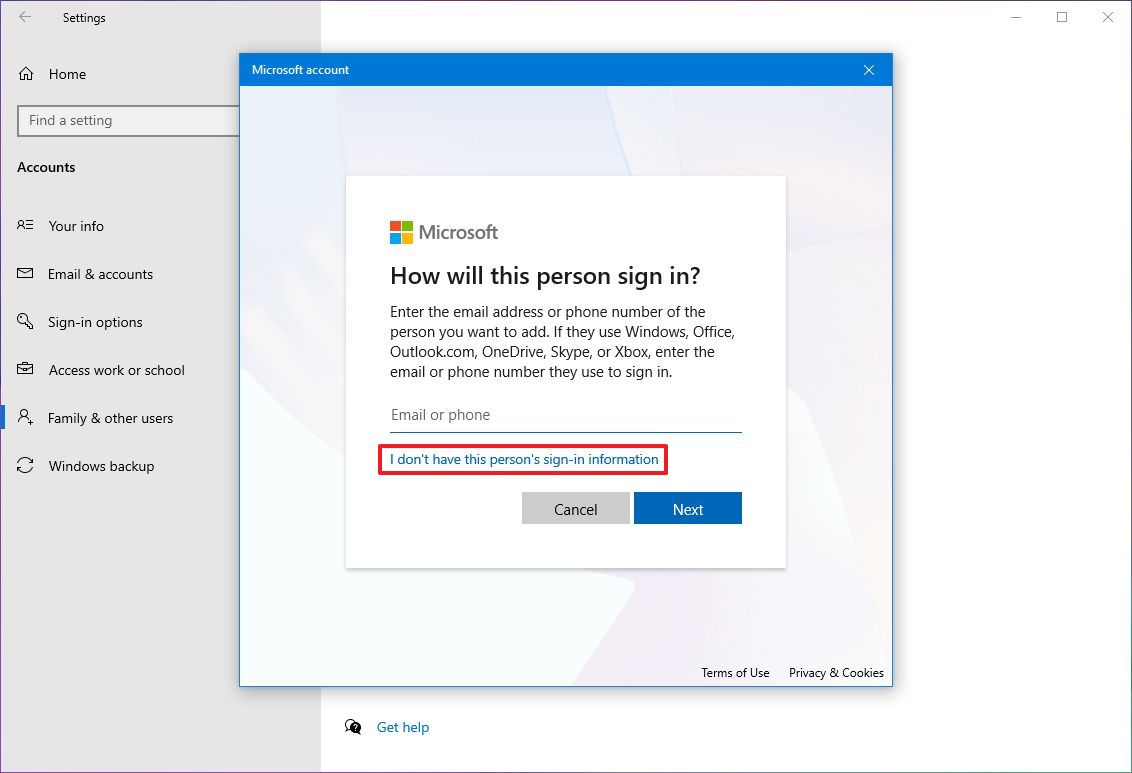
Create a local account on Windows 10
To create a local administrator account, use these steps:
- Open Settings.
- Click on Accounts.
- Click on Family & other users.
- Click the "Add someone else to this PC" option under the "Other users" section.
- Click the "I don't have this person's sign-in information" option.
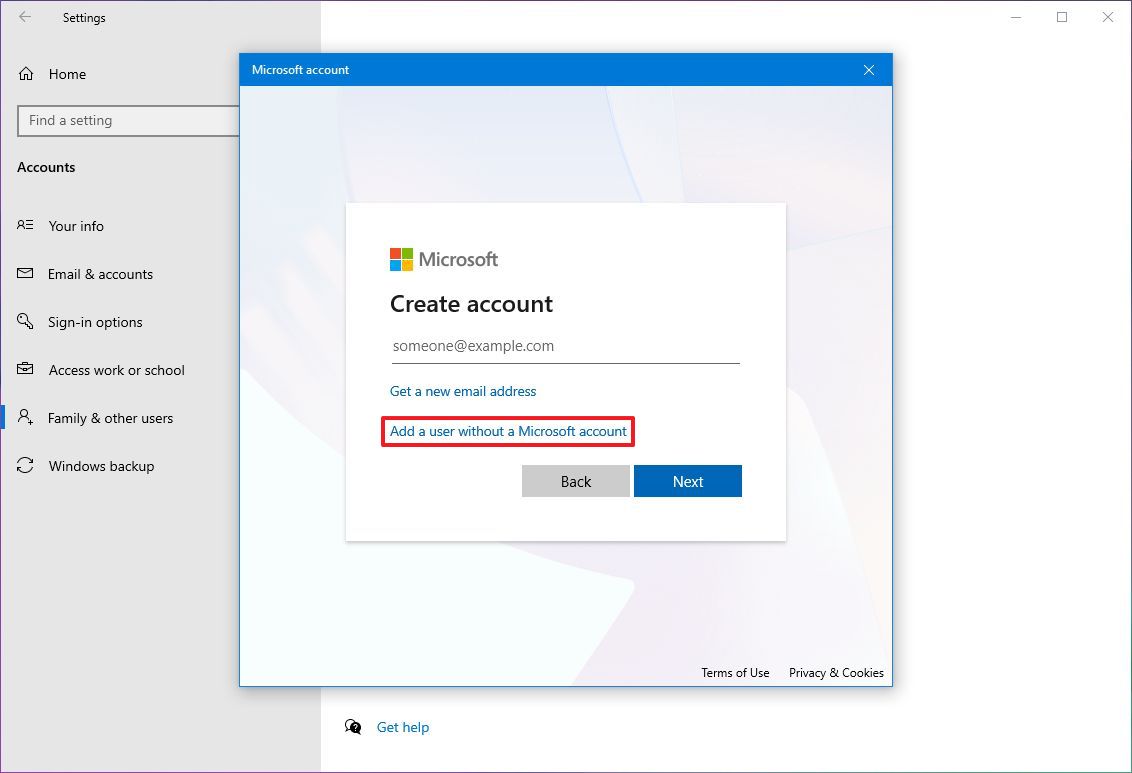
- Click the "Add a user without a Microsoft account" option.
- Confirm the username and password.
- Complete the security passwords in case you complete your steps.
- Click the Next button.
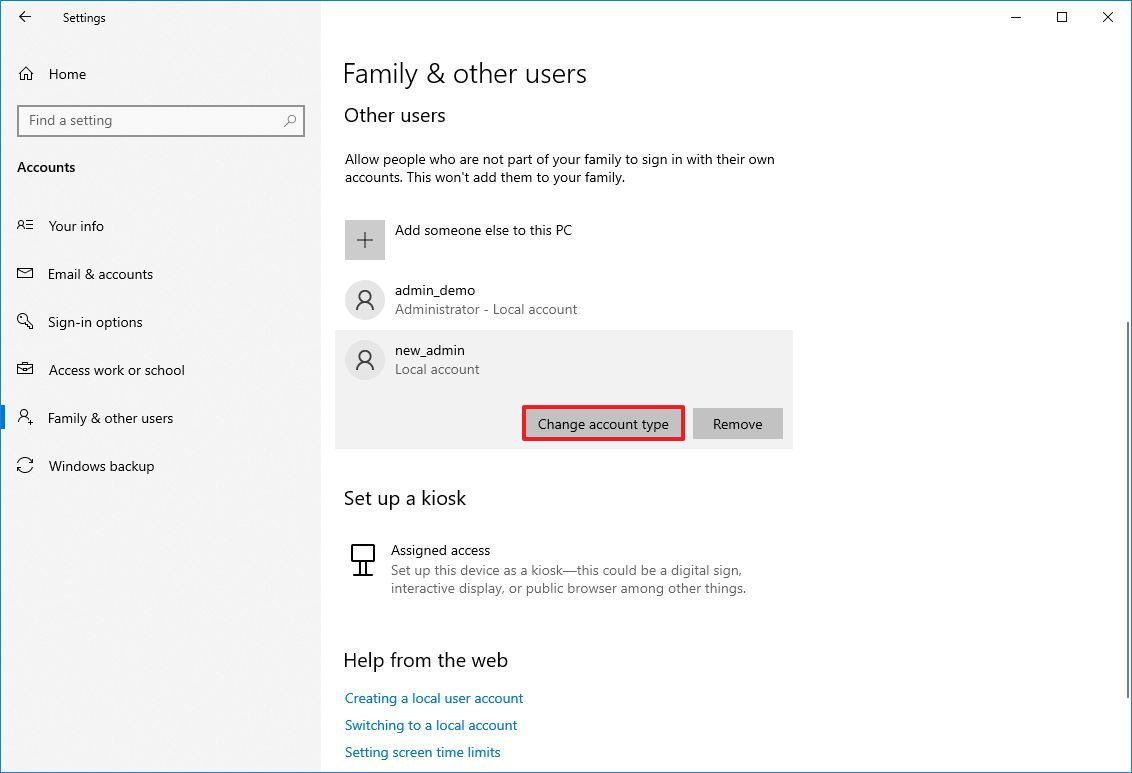
- Select the account and click the "Change account type" button.
- Choose the Administrator option.
- Click the OK button.
Once you complete the steps, you can sign in with a new account to continue with the upgrade process without a Microsoft account.
If you were using a Microsoft account before the upgrade, you may have to transfer your files to the new local account.
Upgrade to Windows 11 without a Microsoft account via Windows Update
To upgrade your computer to the latest version of the operating system from Windows 10, use these steps:
- Open Settings.
- Click on Update & Security.
- Click on Windows Update.
- Click the Check for updates button.
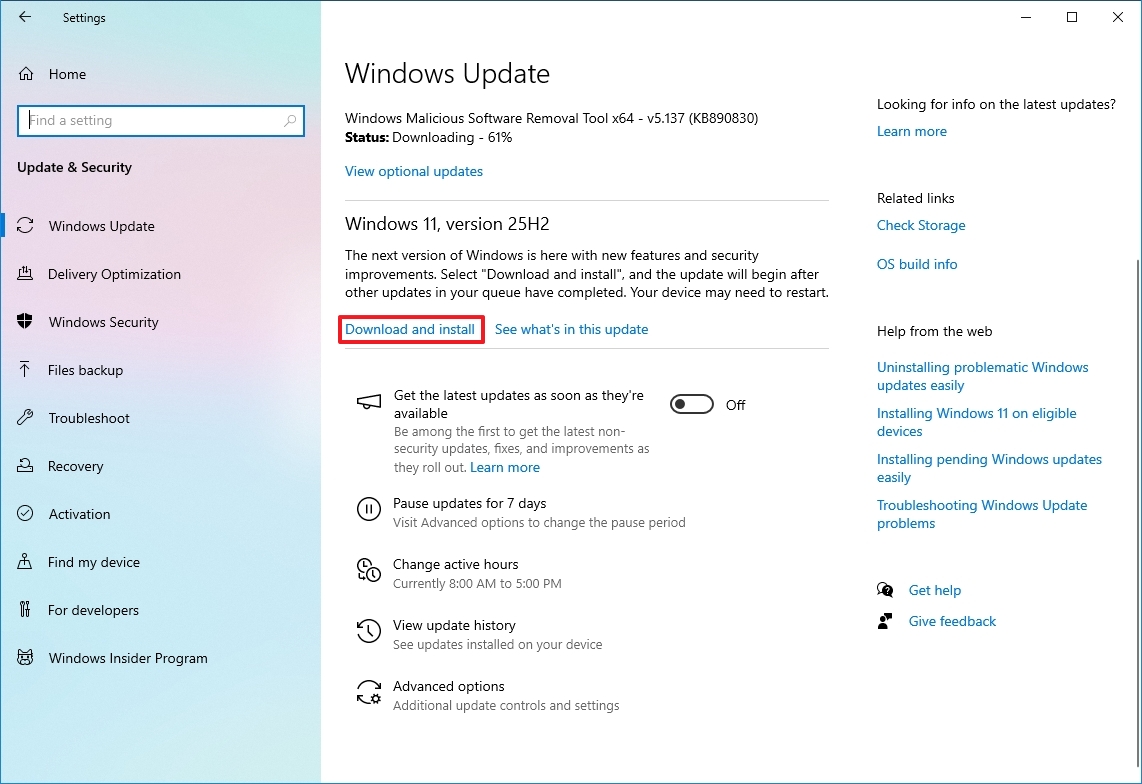
- Click the "Download and install" button.
- Click the Accept & install button.
- Click the Restart now button.
After you complete the steps, the computer will upgrade to Windows 11, preserving your local account without requiring you to create a Microsoft account.
Upgrade to Windows 11 without a Microsoft account via Installation Assistant
To upgrade the system to Windows 11 with the Installation Assistant tool, use these steps:
- Open this Microsoft support website.
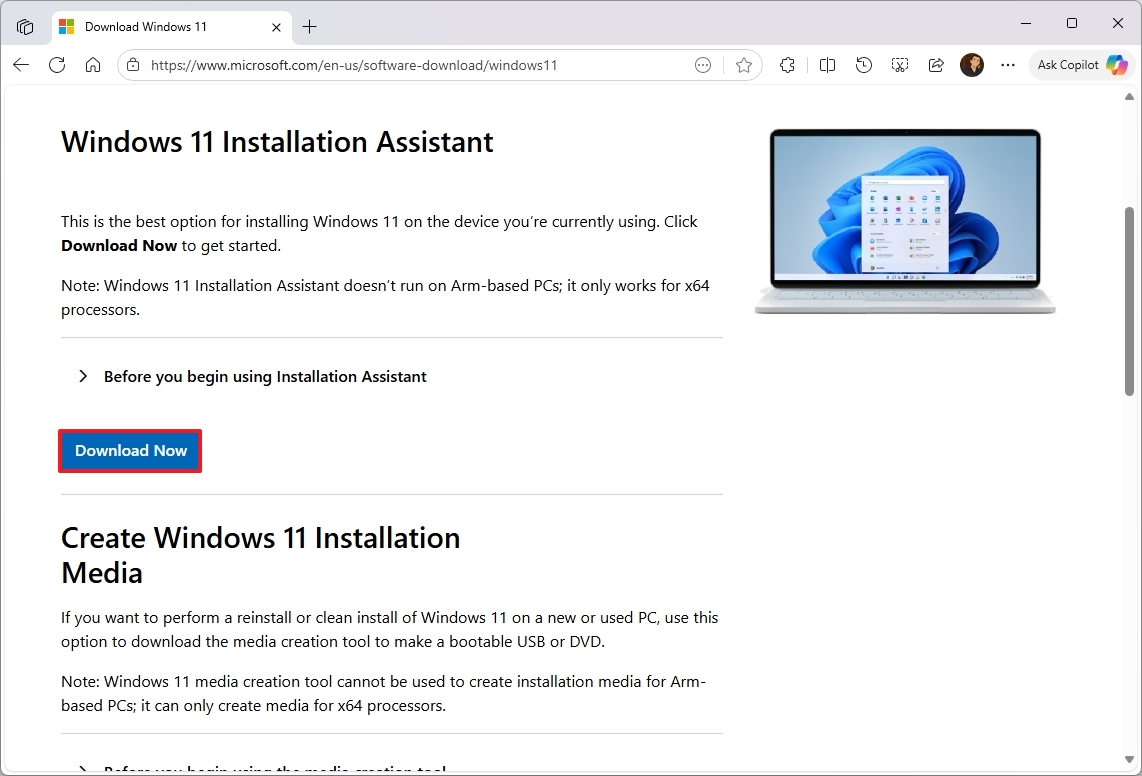
- Click the Download Now button under the "Windows 11 Installation Assistant" section.
- Double-click the Windows11InstallationAssistant.exe file to launch the tool.
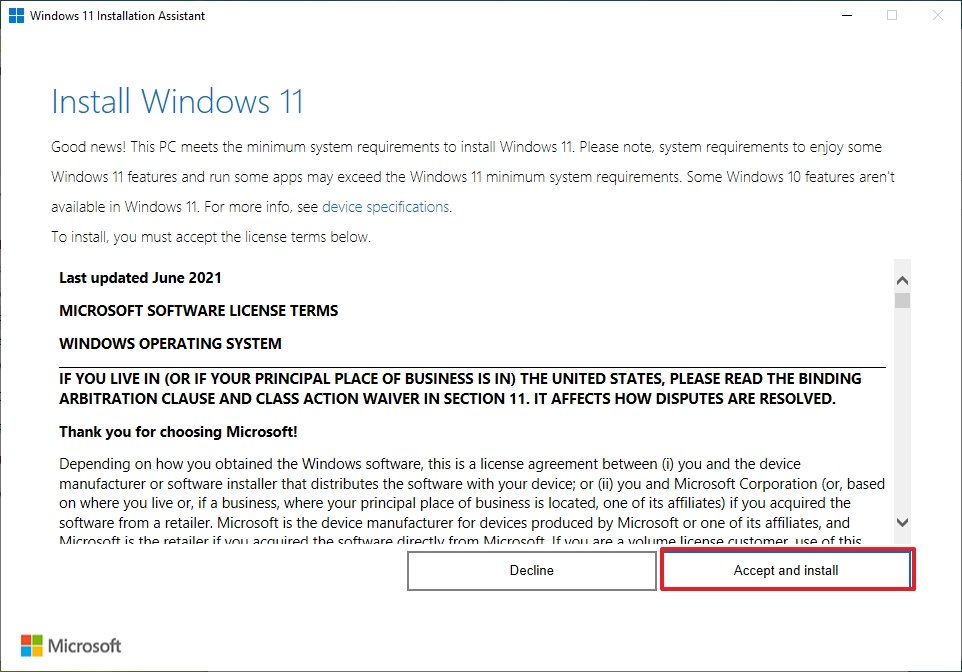
- Click the Accept and install button.
Once you complete the steps, the utility will download the necessary files and install Windows 11, preserving your local account, files, settings, and apps.
More resources
Explore more in-depth how-to guides, troubleshooting advice, and essential tips to get the most out of Windows 11 and 10. Start browsing here:
- Windows 11 on Windows Central — All you need to know
- Windows 10 on Windows Central — All you need to know

Follow Windows Central on Google News to keep our latest news, insights, and features at the top of your feeds!

Mauro Huculak has been a Windows How-To Expert contributor for WindowsCentral.com for nearly a decade and has over 22 years of combined experience in IT and technical writing. He holds various professional certifications from Microsoft, Cisco, VMware, and CompTIA and has been recognized as a Microsoft MVP for many years.
You must confirm your public display name before commenting
Please logout and then login again, you will then be prompted to enter your display name.
