These are my 5 favorite ways to optimize my Windows 11 PC for gaming — Here's how I tweak my settings for extra performance
Speed up your gaming experience on Windows 11 with these easy-to-configure tweaks.
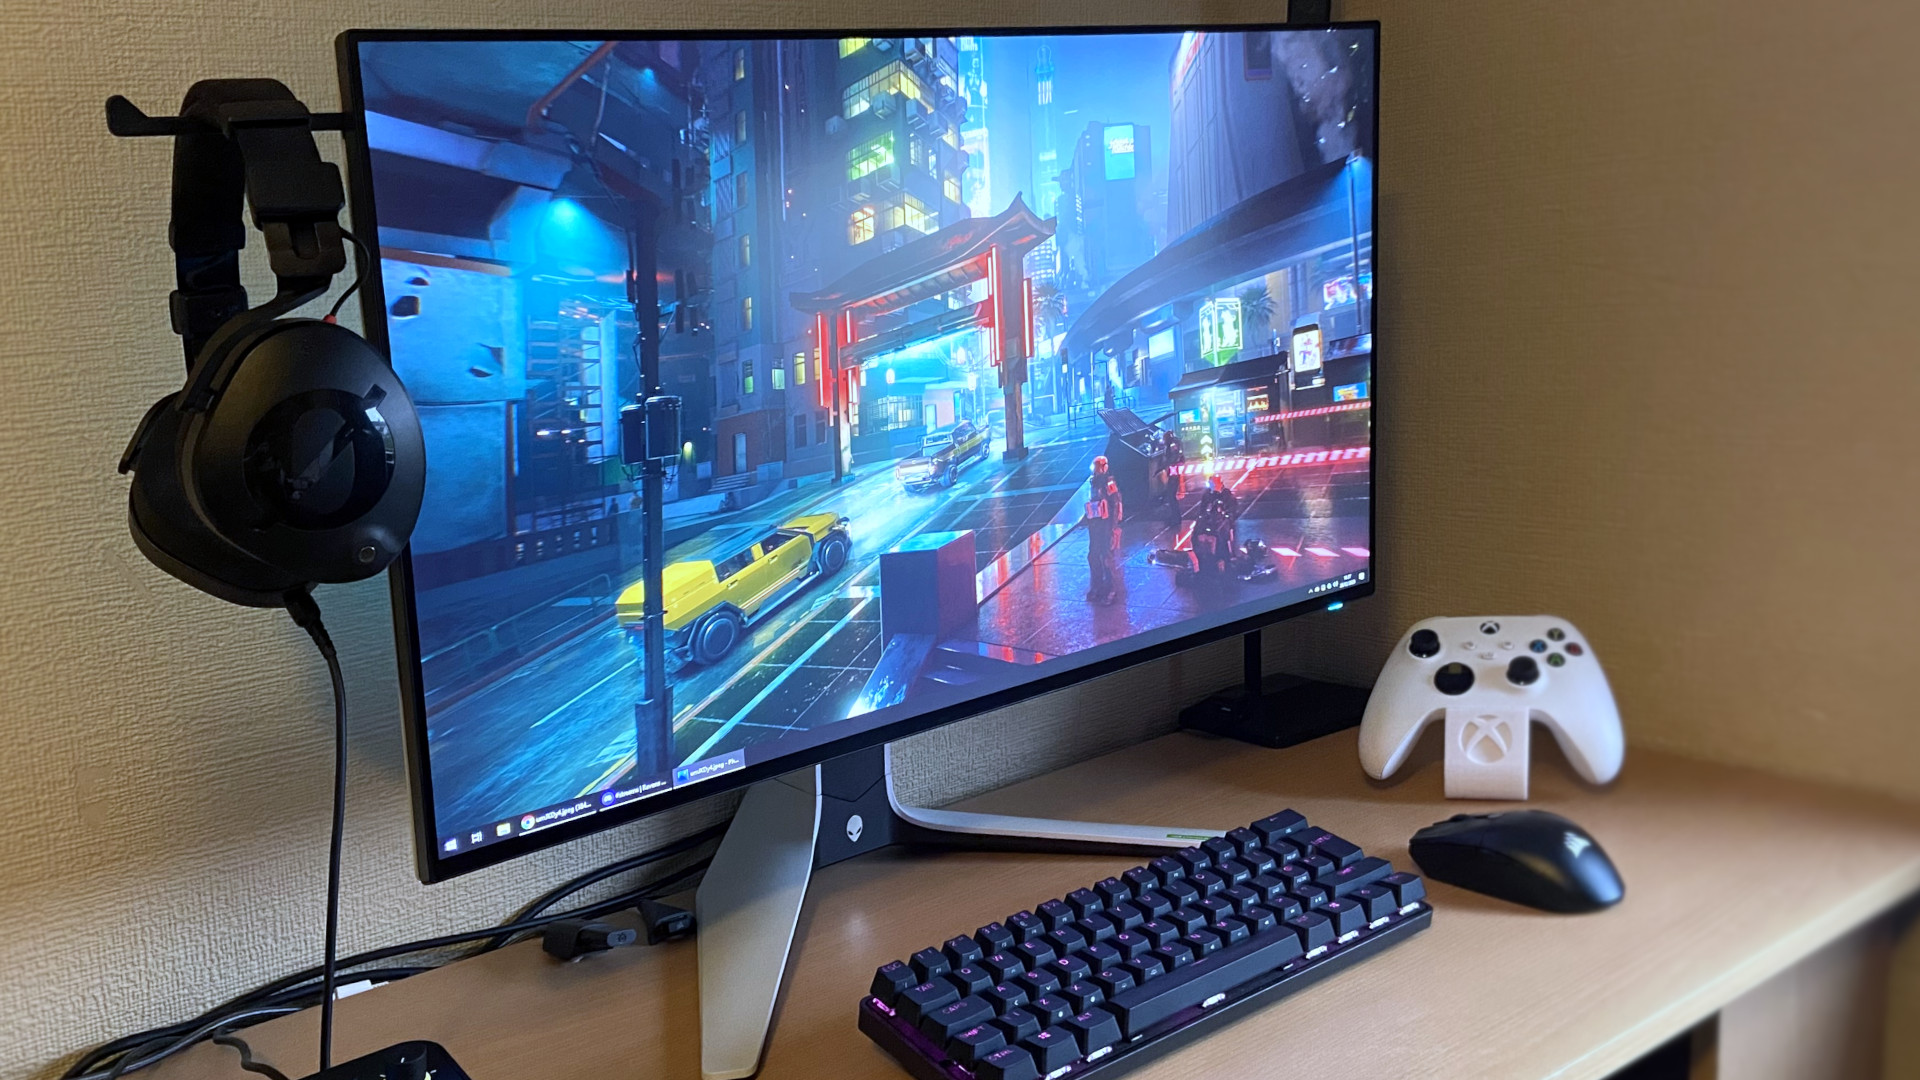
If you use Windows 11 for gaming, there are several settings you can change and features you can turn on or off to get better performance. However, if I were asked to pick just five of the most effective changes, here's what I'd recommend.
First, I recommend turning off Memory Integrity and Virtualization Platform features, as Microsoft has noted, even though they are designed to improve security, they can slow down gaming performance.
We often install many apps, and some of them run in the background every time the computer starts, wasting valuable system resources. If you turn off these apps, you can free up memory and processor, giving your games more breathing room.
If your device supports it, turning on Variable Refresh Rate (VRR) helps reduce screen tearing and stuttering. It makes your gameplay look and feel smoother, especially in fast-paced titles.
Finally, updated drivers often include performance optimizations and bug fixes for new games. Whether you're using NVIDIA, AMD, or Intel graphics, always make sure you have the latest version installed. (However, before updating, it's best to research the new version to make sure other users are not having issues to avoid a negative impact on your gaming experience.)
In this how-to guide, I'll share my favorite tips to improve the gaming experience on Windows 11.
Best tweaks to improve the gaming experience on Windows 11
The following tweaks are listed in no particular order. These are my personal recommendations, though I understand others may have different preferences.
1. Disable Memory Integrity
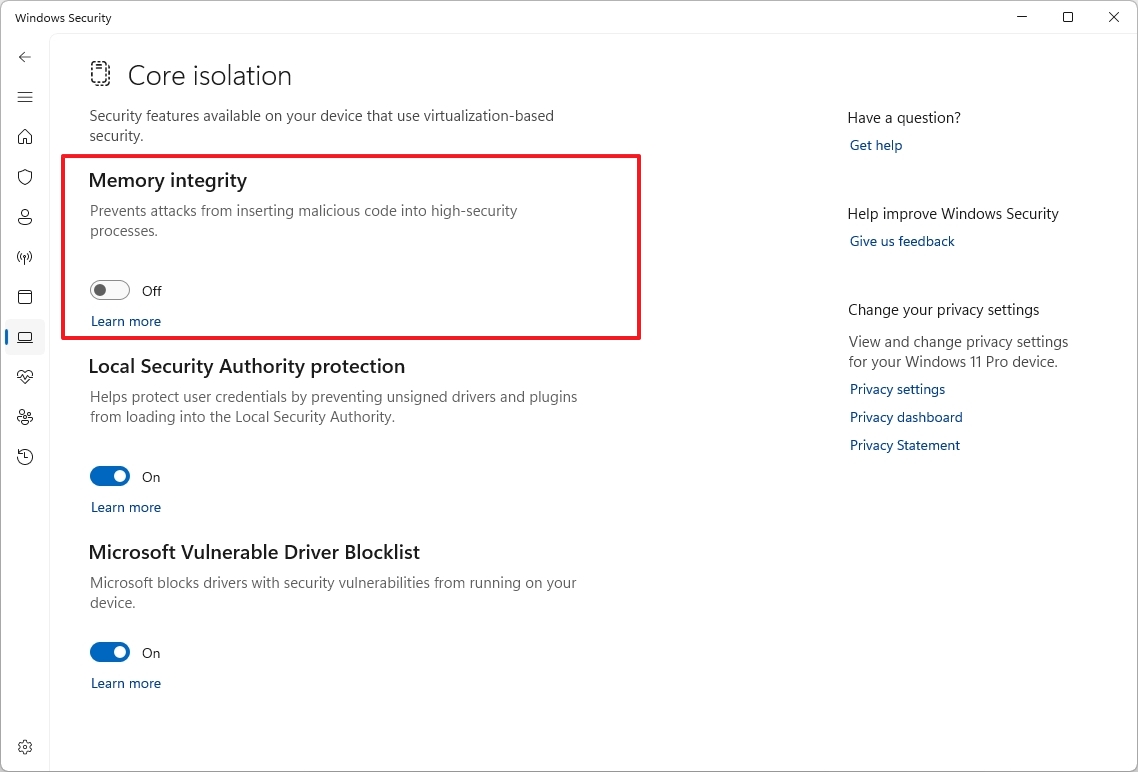
According to Microsoft, if you're noticing performance issues while playing games on Windows 11, this can be due to two specific security features, including Hypervisor-protected code integrity (HVCI), also known as "Memory Integrity" in the Windows Security app, and the Virtual Machine Platform security features.
If you want to prioritize gaming performance, you should turn off these security features during gameplay. However, after you're done playing, you should turn them on again.
To disable Memory Integrity on Windows 11, use these steps:
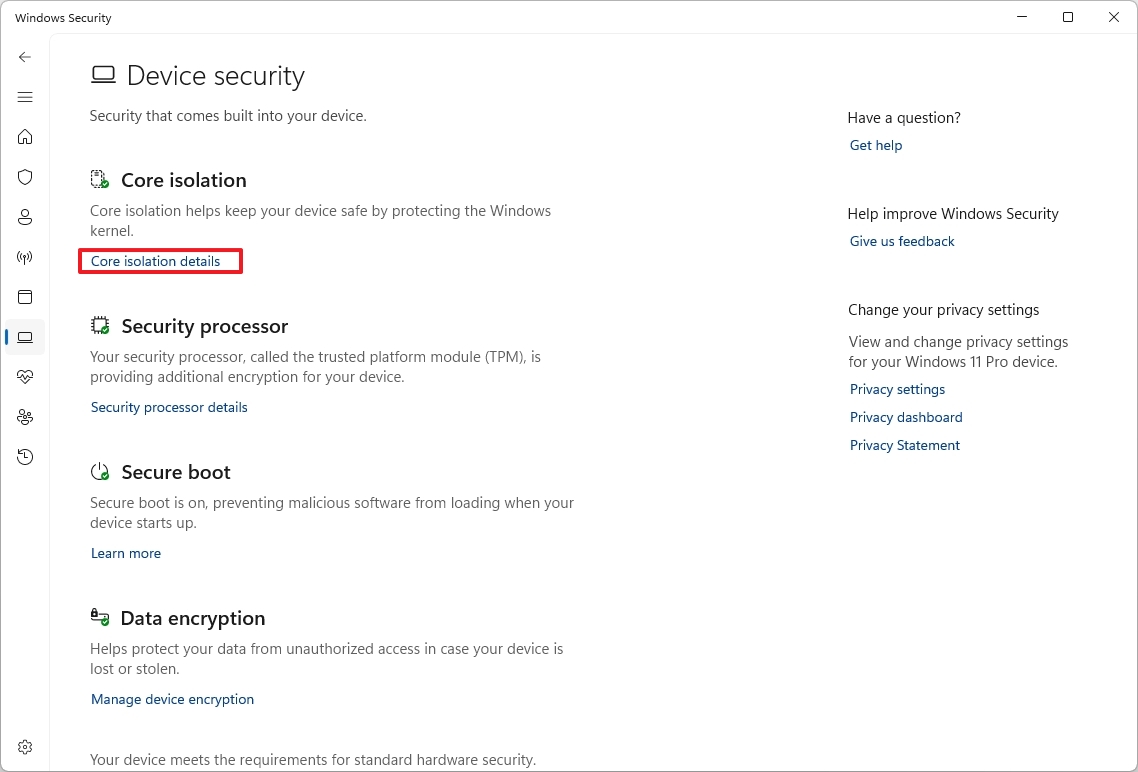
- Open Windows Security.
- Click on Device Security.
- Click the "Core isolation details" option on the right.
- (Option 1) Turn off the Memory Integrity toggle switch to disable the feature.
- (Option 2) Turn on the Memory Integrity toggle switch to enable the feature.
- Restart the computer.
Once you're done playing, remember to turn on the security feature.
2. Disable Virtual Machine Platform
To turn off the virtualization component, use these steps:
- Open Settings.
- Click on System.
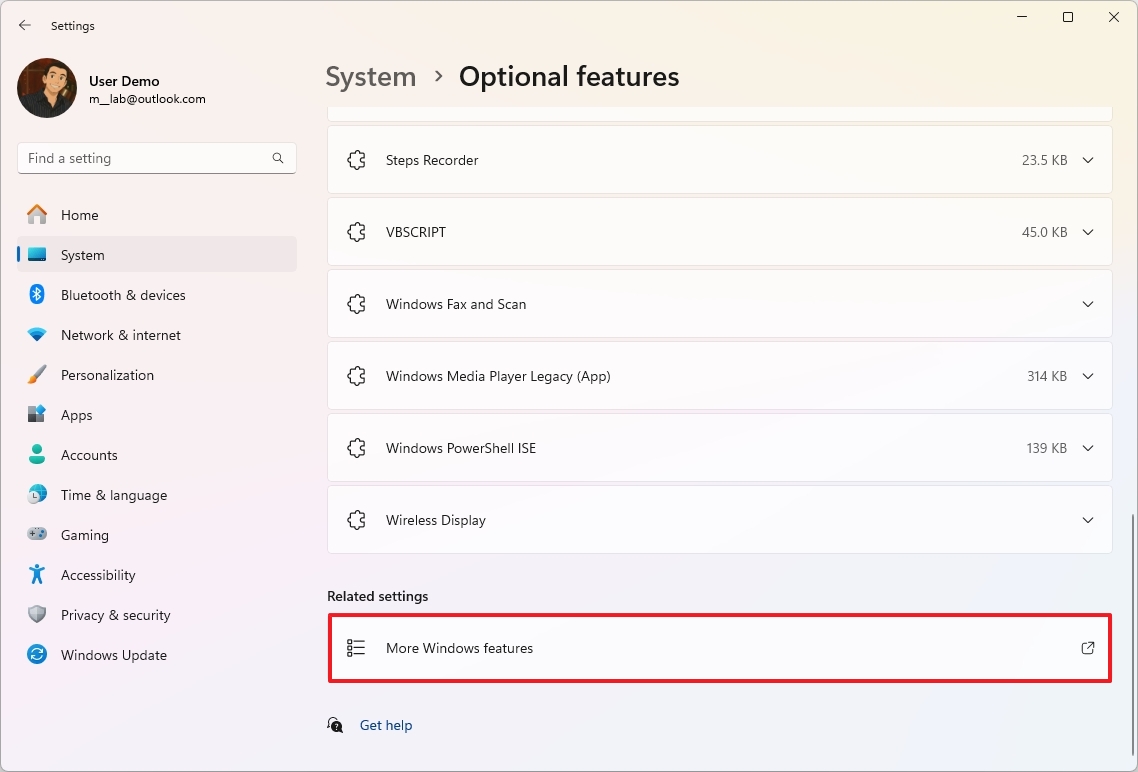
- Click the Optional features page on the right side.
- Click the "More Windows features" setting.
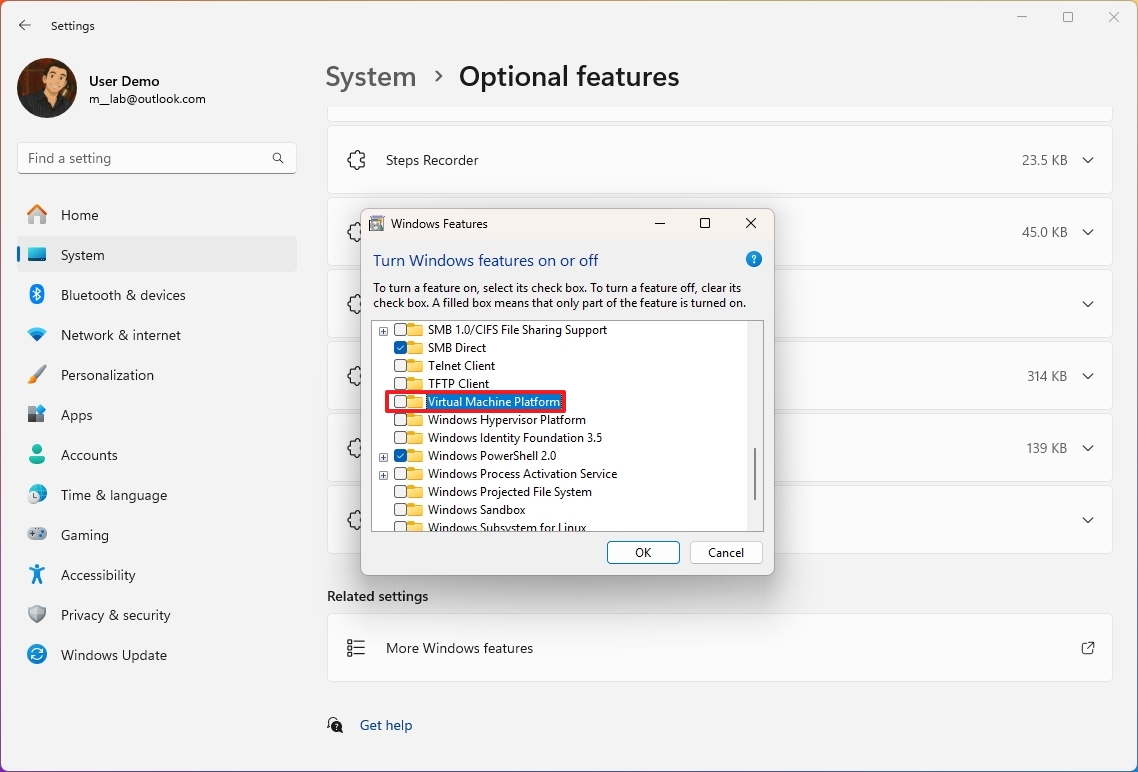
- (Option 1) Clear the "Virtual Machine Platform" option to disable the feature.
- (Option 2) Check the "Virtual Machine Platform" option to enable the feature.
- Click the OK button.
- Restart the computer.
After you're done playing games, re-enable the feature.
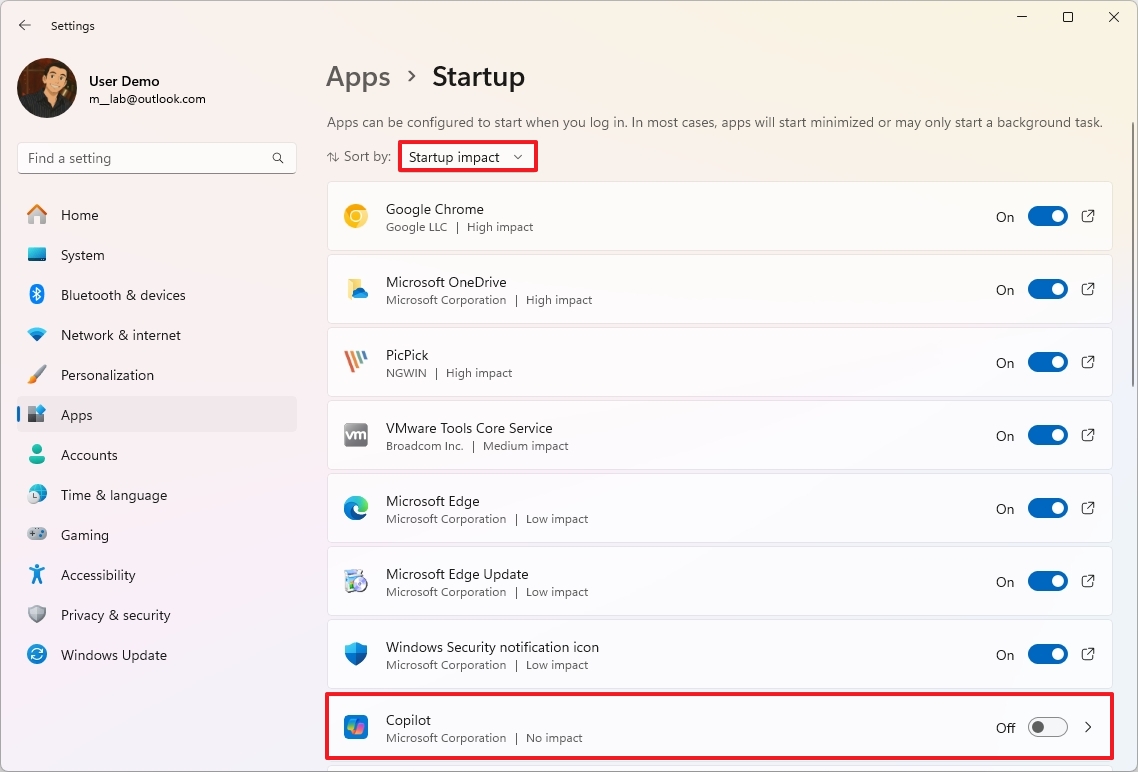
3. Disable startup apps
It's not a secret that apps configured to launch at startup will consume more system resources, and this can negatively affect gaming performance.
To manage apps running at startup, use these steps:
- Open Settings.
- Click on Apps.
- Click the Startup page on the right side.
- Choose the Startup impact option in the "Sort by" menu.
- Turn off the most impactful apps running on your system.
Once you complete the steps, restart your computer, and depending on the applications that were previously loading at startup, your computer should be able to dedicate more resources for gaming.
If you're unsure which applications to remove from the startup process, you can proceed with the apps you've installed. However, it's not recommended to turn off apps like Microsoft Defender and other system services.
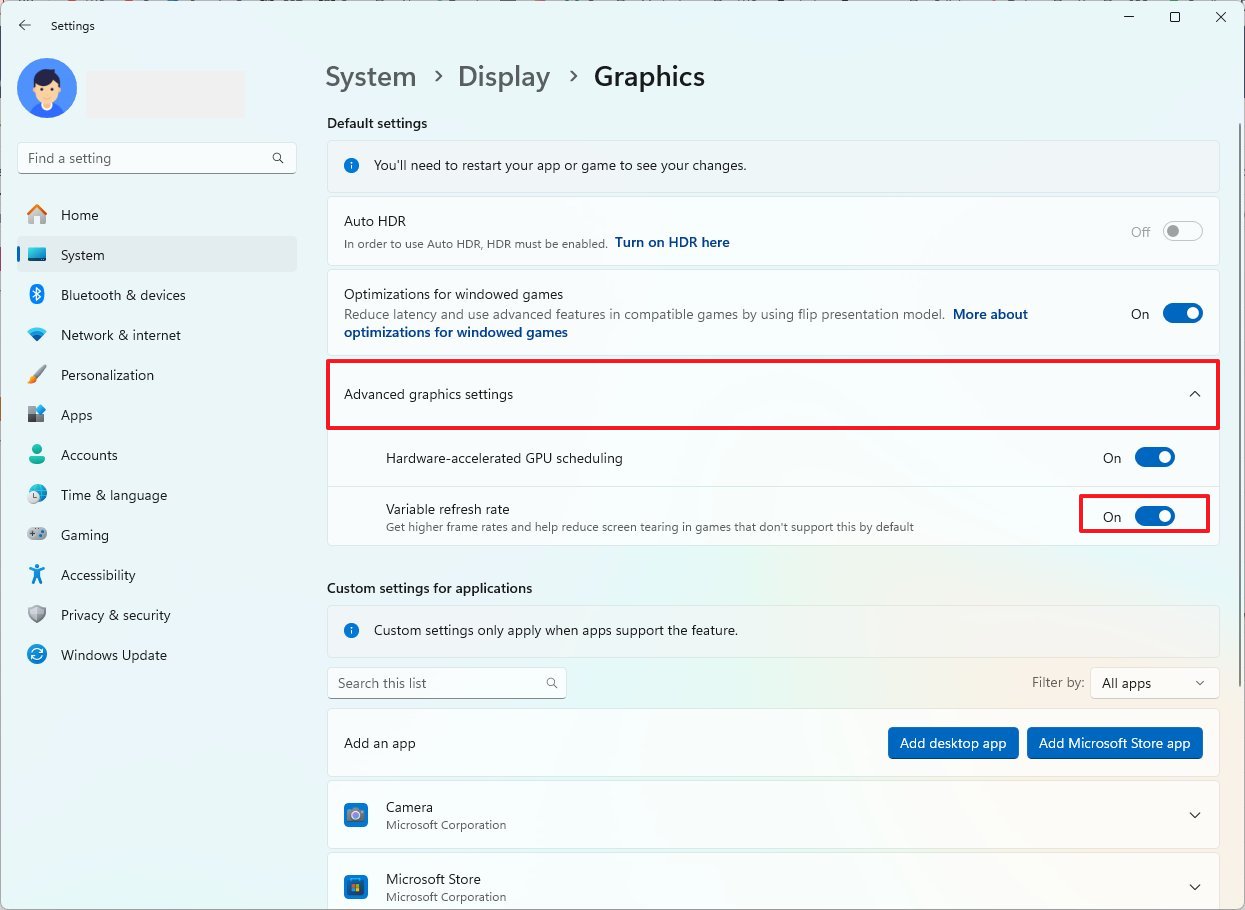
4. Enable Variable Refresh Rate
On Windows 11, Variable Refresh Rate (VRR) is a feature that automatically adjusts the refresh rate of the monitor based on the frames generated by the graphics card, thereby increasing frame rates while reducing screen tearing and stuttering.
If the feature is available on your Nvidia G-SYNC, AMD FreeSync, or VESA DisplayPort Adaptive-Sync monitor, use these instructions to enable it:
- Open Settings.
- Click on System.
- Click the Display page on the right side.
- Click on Graphics.
- Click on Advanced graphics settings at the bottom of the page.
- Turn on the "Variable Refresh Rate" toggle switch.
After you complete the steps, the feature will be enabled and work with the same feature available in the graphics card. If the feature doesn't start from the graphics card, the operating system will activate its own version of VRR.
5. Upgrade graphics drivers
It's always recommended to have the latest device drivers for any component, especially your graphics card, since manufacturers usually release improvements and bug fixes, which sometimes can have a significant impact on your gaming performance, and even on specific games.
However, drivers and system updates can sometimes cause more problems than they solve. As a result, important to research the driver update before installing it.
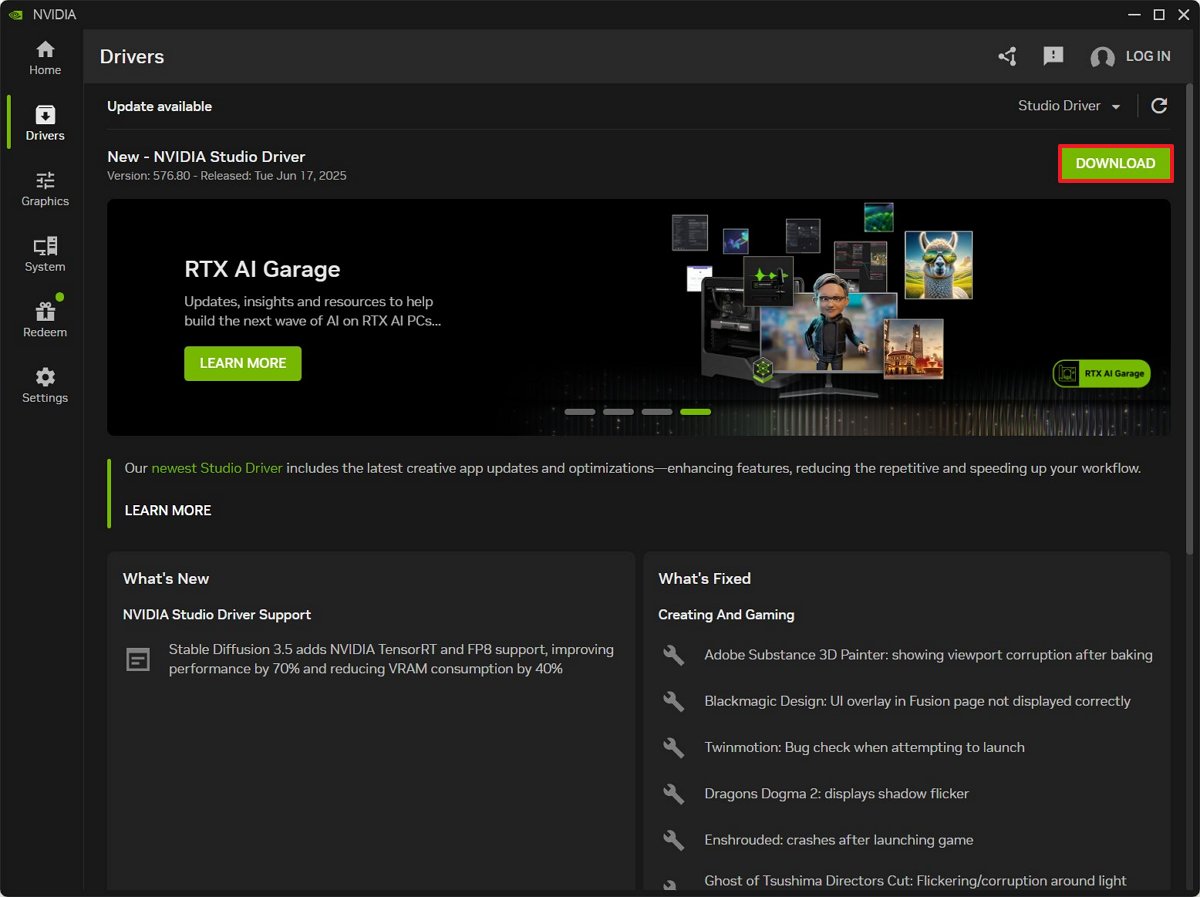
For example, to update the graphics drivers from the Nvidia app, use these steps:
- Open the Nvidia app.
- Click on Drivers from the left pane.
- Click the Download button.
- Continue with the on-screen directions.
Once you complete the steps, you may have to restart your computer to apply the changes.
If you have an AMD system, the steps are obviously different using the Adrenalin Edition app, but the concept is the same.
Although I am focusing on only a select number of improvements, you can also refer to my comprehensive guide, which offers more than twenty tips, from enabling Game Mode and selecting the most optimal power plan to Hardware-accelerated GPU scheduling and performing a clean installation of the graphics drivers.
What are your top tweaks to make gaming better on Windows 11? Let me know in the comments.
More resources
Explore more in-depth how-to guides, troubleshooting advice, and essential tips to get the most out of Windows 11 and 10. Start browsing here:

Mauro Huculak has been a Windows How-To Expert contributor for WindowsCentral.com for nearly a decade and has over 22 years of combined experience in IT and technical writing. He holds various professional certifications from Microsoft, Cisco, VMware, and CompTIA and has been recognized as a Microsoft MVP for many years.
You must confirm your public display name before commenting
Please logout and then login again, you will then be prompted to enter your display name.
