10 secret Office 365 features you need to know
All the latest news, reviews, and guides for Windows and Xbox diehards.
You are now subscribed
Your newsletter sign-up was successful
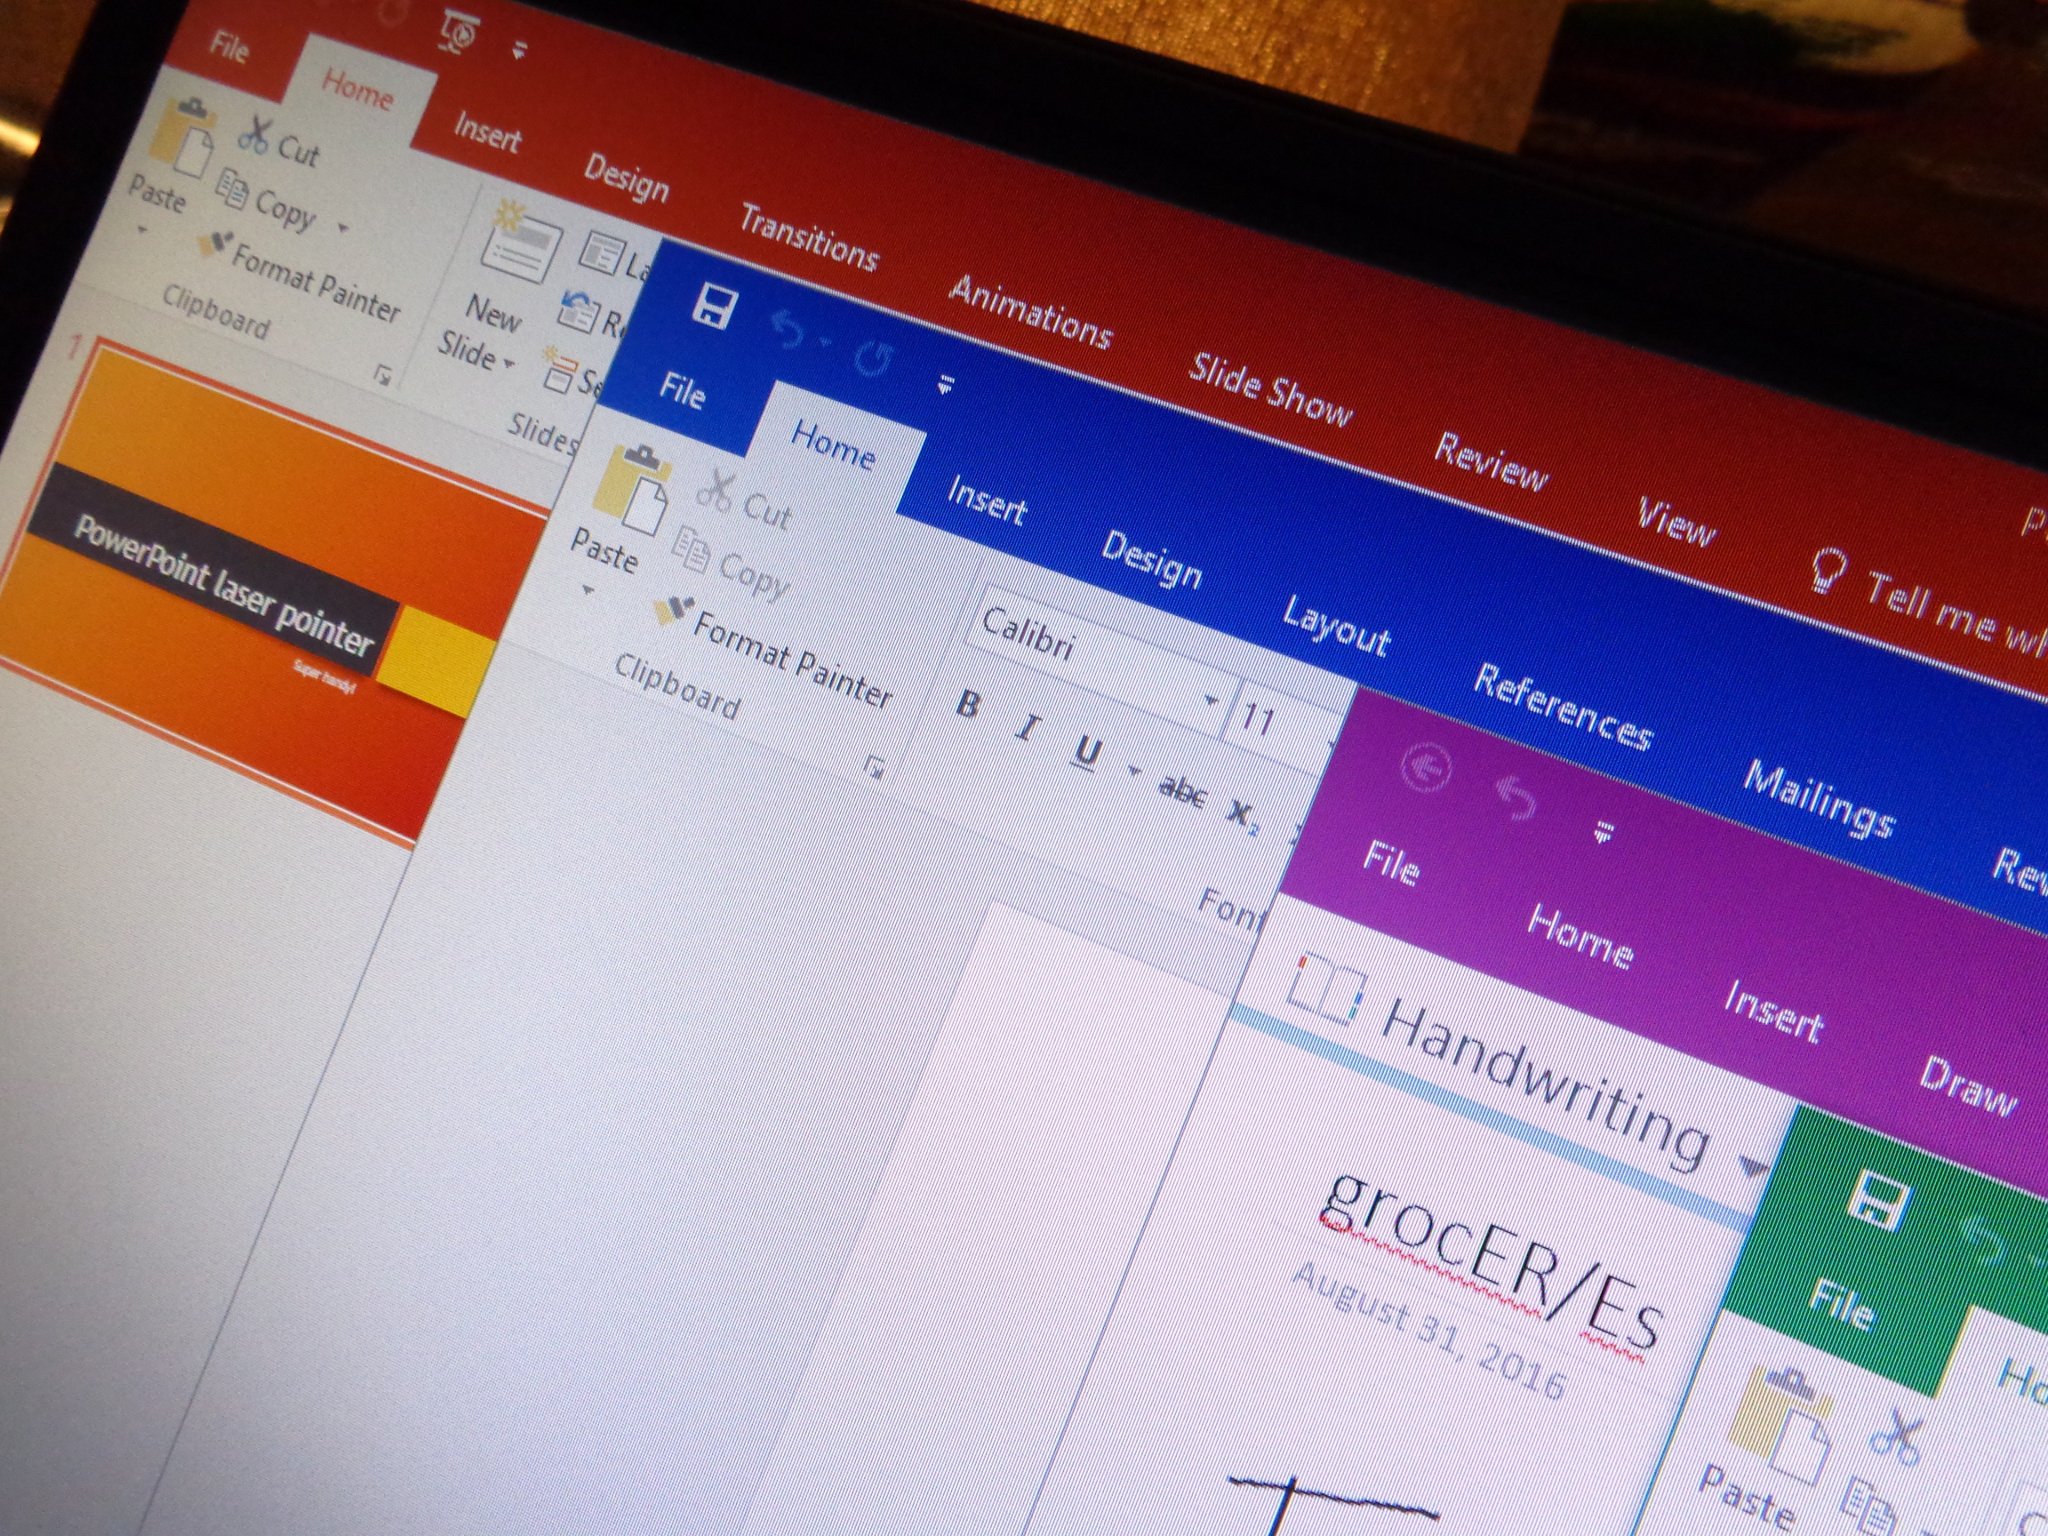
Office 365 has built on previous versions of Microsoft Office to deliver the best-yet software for getting stuff done. There are a bunch of great features across its apps that save you time and effort, which is really what makes Office 365 the success it is.
Some of these features are not always well known, so we rounded up some of our favorites that we use every day to help handle our workload.
- PowerPoint laser pointer
- Create PDF files in Word
- Edit the text of a PDF file in Word
- Create a password-protected Notebook in OneNote
- Access password-protected notebook sections in OneNote
- Get help, fast
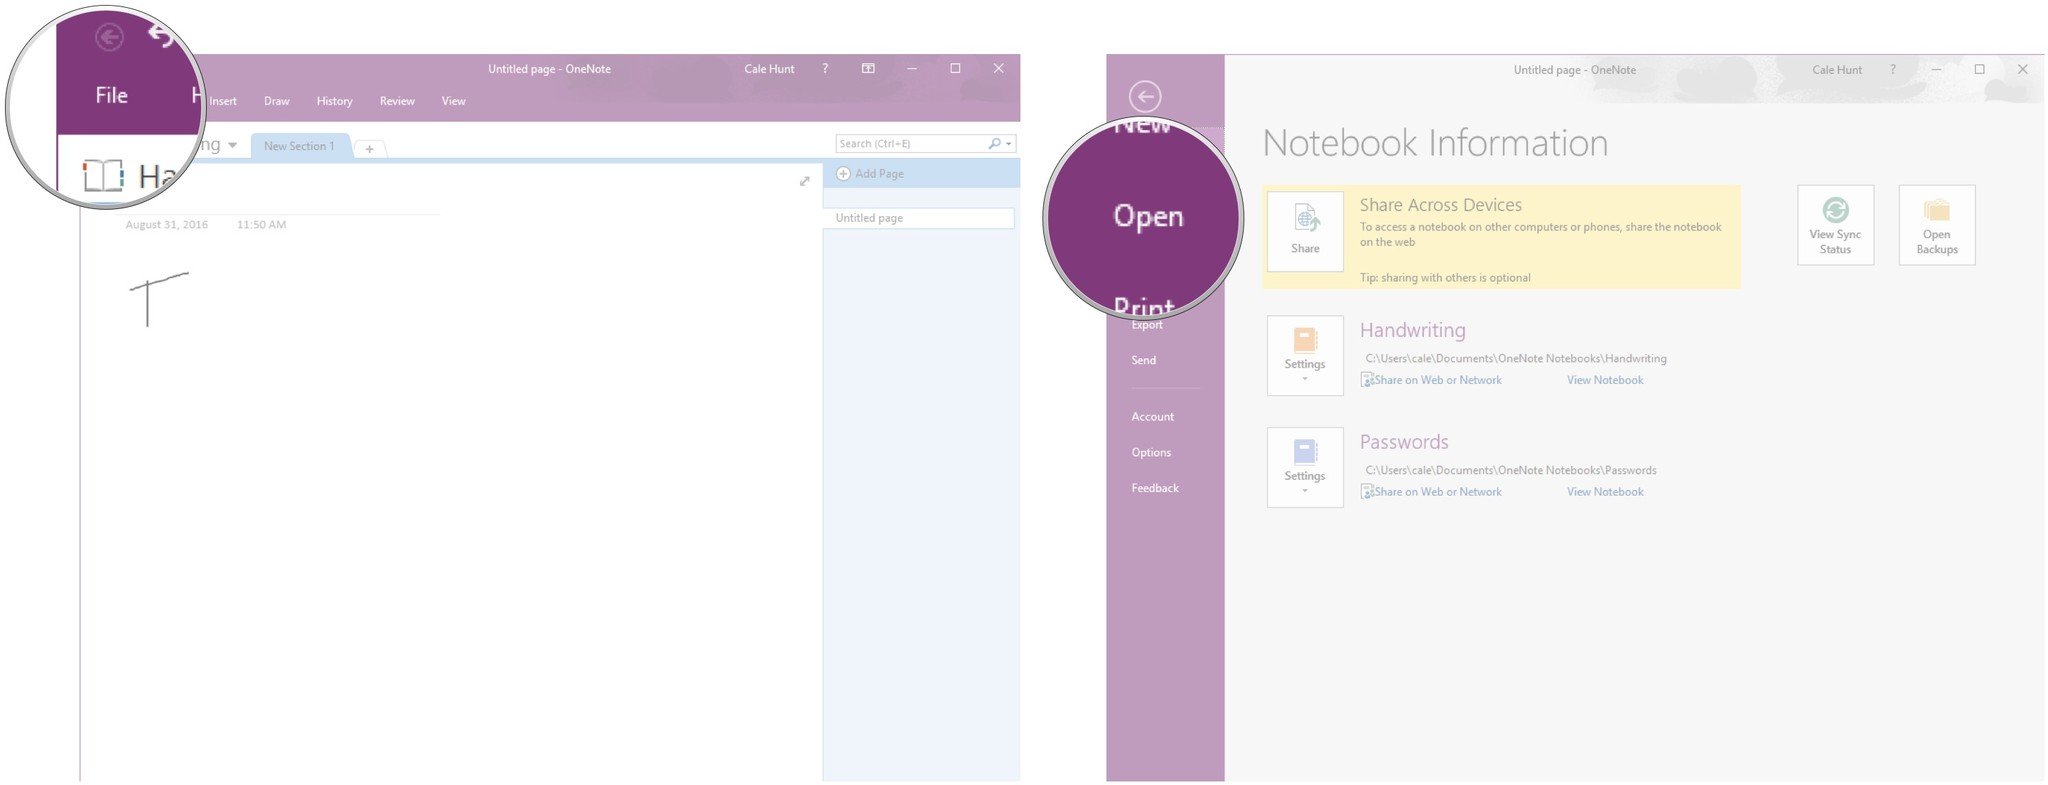
- Change OneNote handwriting into text
- Save time with Flash Fill in Excel
- Create custom animations in PowerPoint
- Create instant charts with Excel
PowerPoint laser pointer
If you're ever about to begin a PowerPoint presentation and realize you left your trusty laser pointer at home, PowerPoint has a feature that lets you turn your cursor into a glowing red dot.
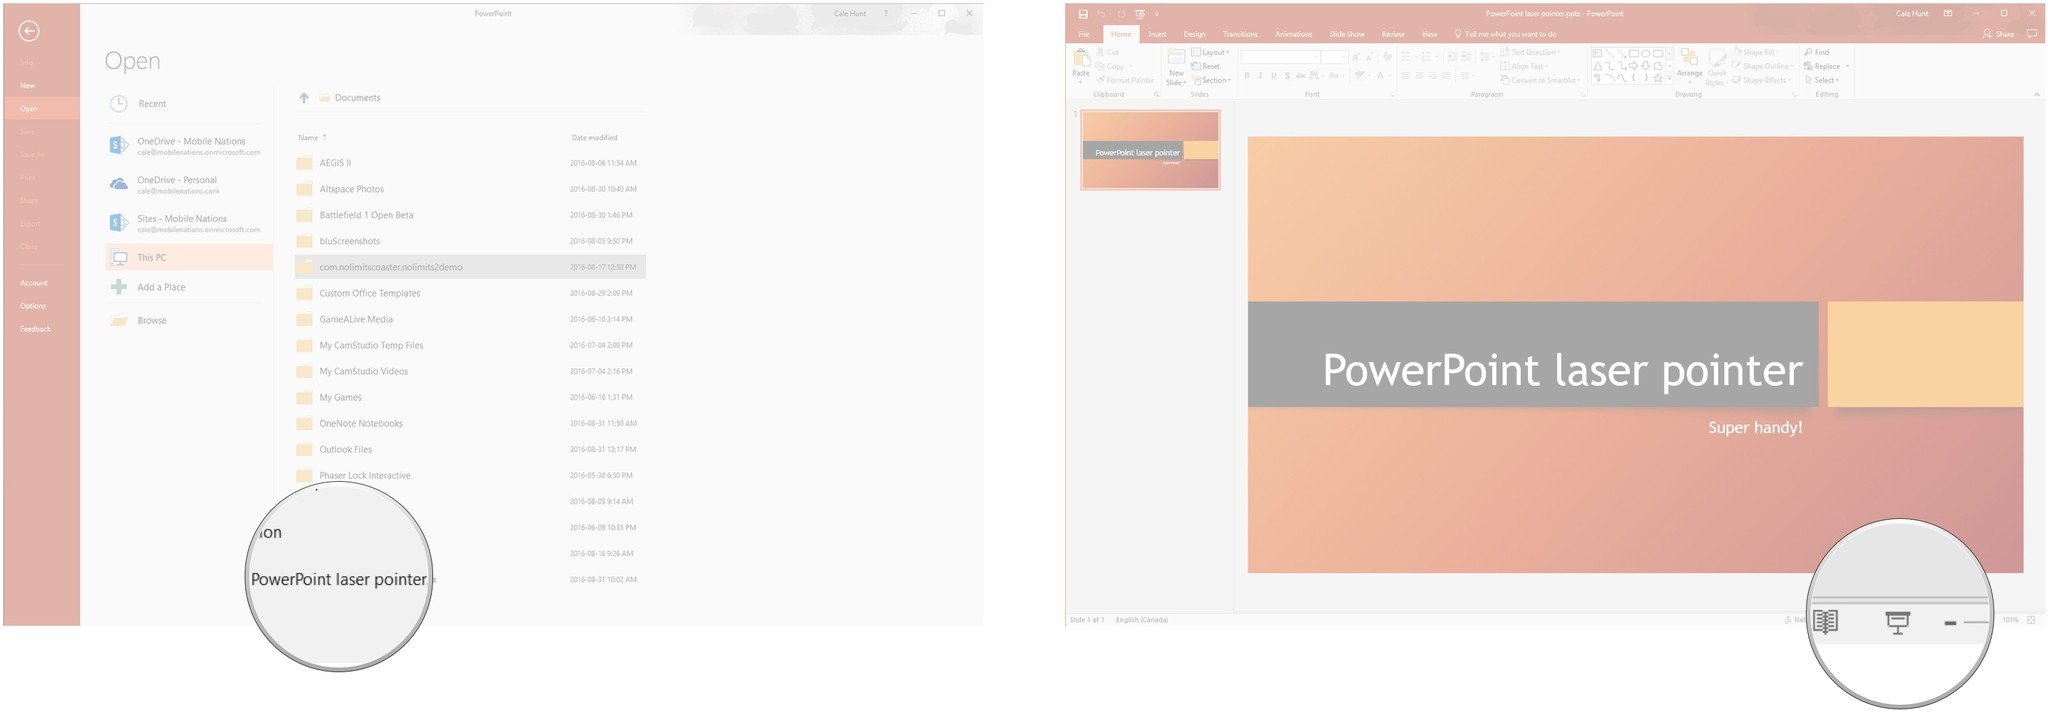
Here's how to use a PowerPoint laser pointer in an existing PowerPoint document:
- Launch PowerPoint from your Start menu, desktop, or taskbar.
- Click Open Other Presentation.
- Click the PowerPoint file you'd like to open.
- Click the Slide Show button near the bottom of the window. It looks like a projector.
- Hold Ctrl on your keyboard.
- Click and hold the left mouse button.
Your mouse cursor will now turn into a glowing red dot, just as if you were holding and pointing a real laser pointer.
Create PDF files in Word
Switching between software to work with PDF files slows you and your PC down. Word can handle creating PDFs, so that you can stay focused on the task at hand.
Here's how to create a new Word document and export it as a PDF file:
All the latest news, reviews, and guides for Windows and Xbox diehards.
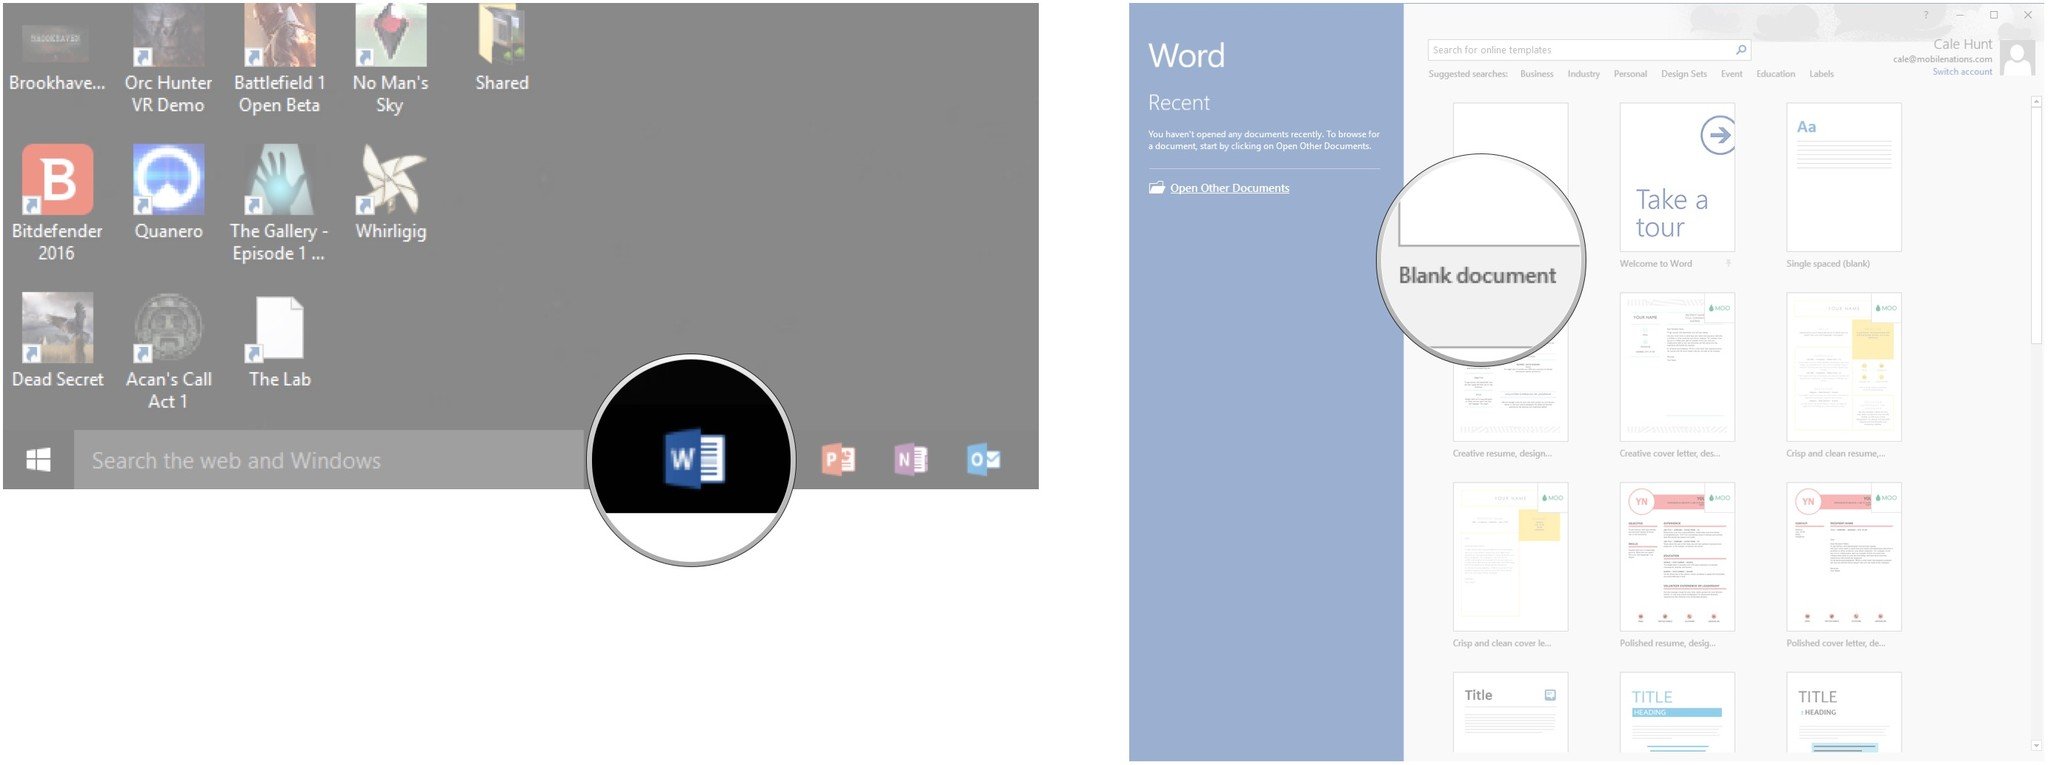
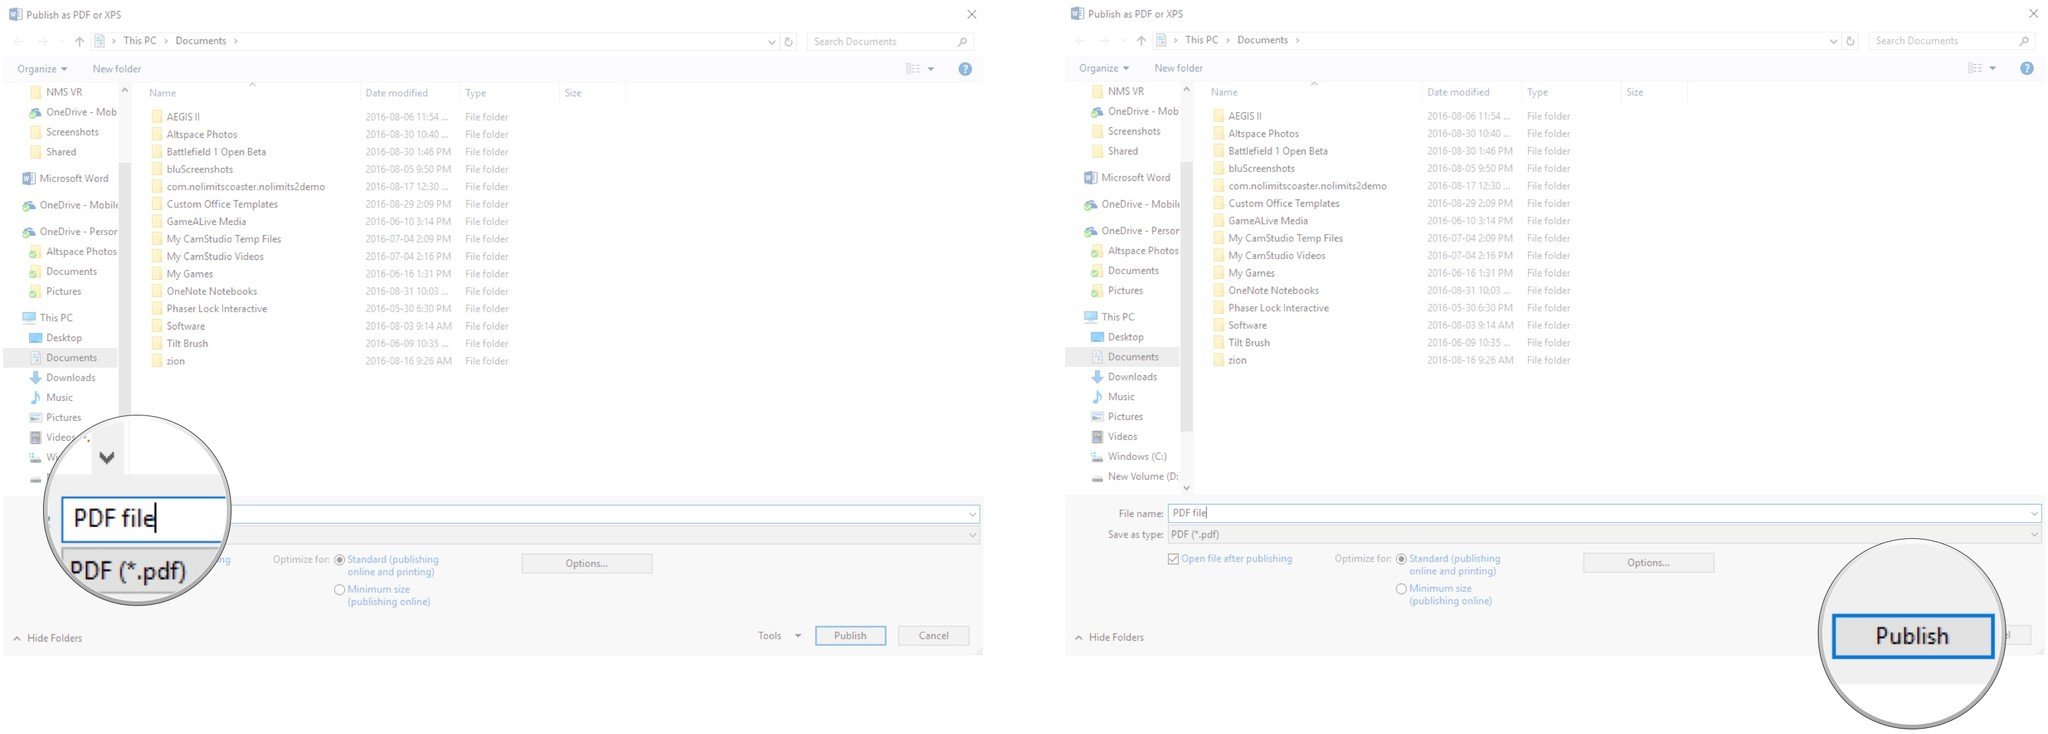
- Launch Word from your Start menu, desktop, or taskbar.
- Click Blank document to open a new document.
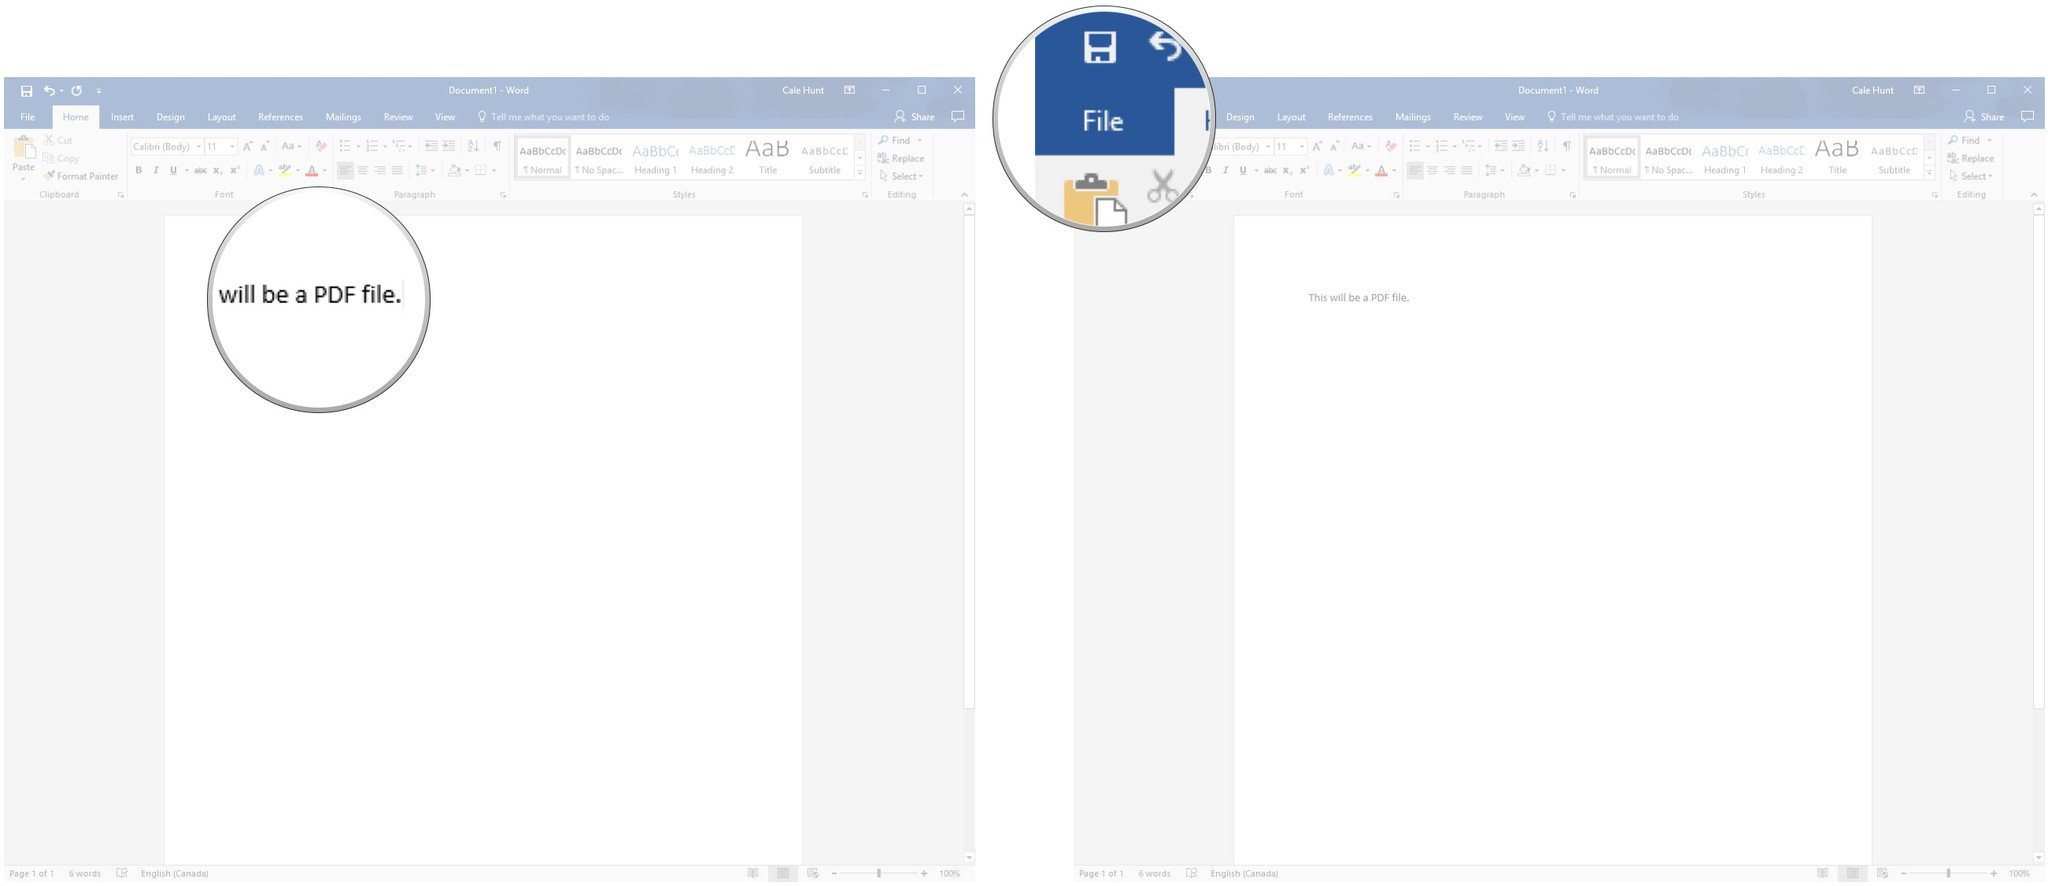
- Type any content you'd like to be in the PDF file.
- Click File in the top left corner.
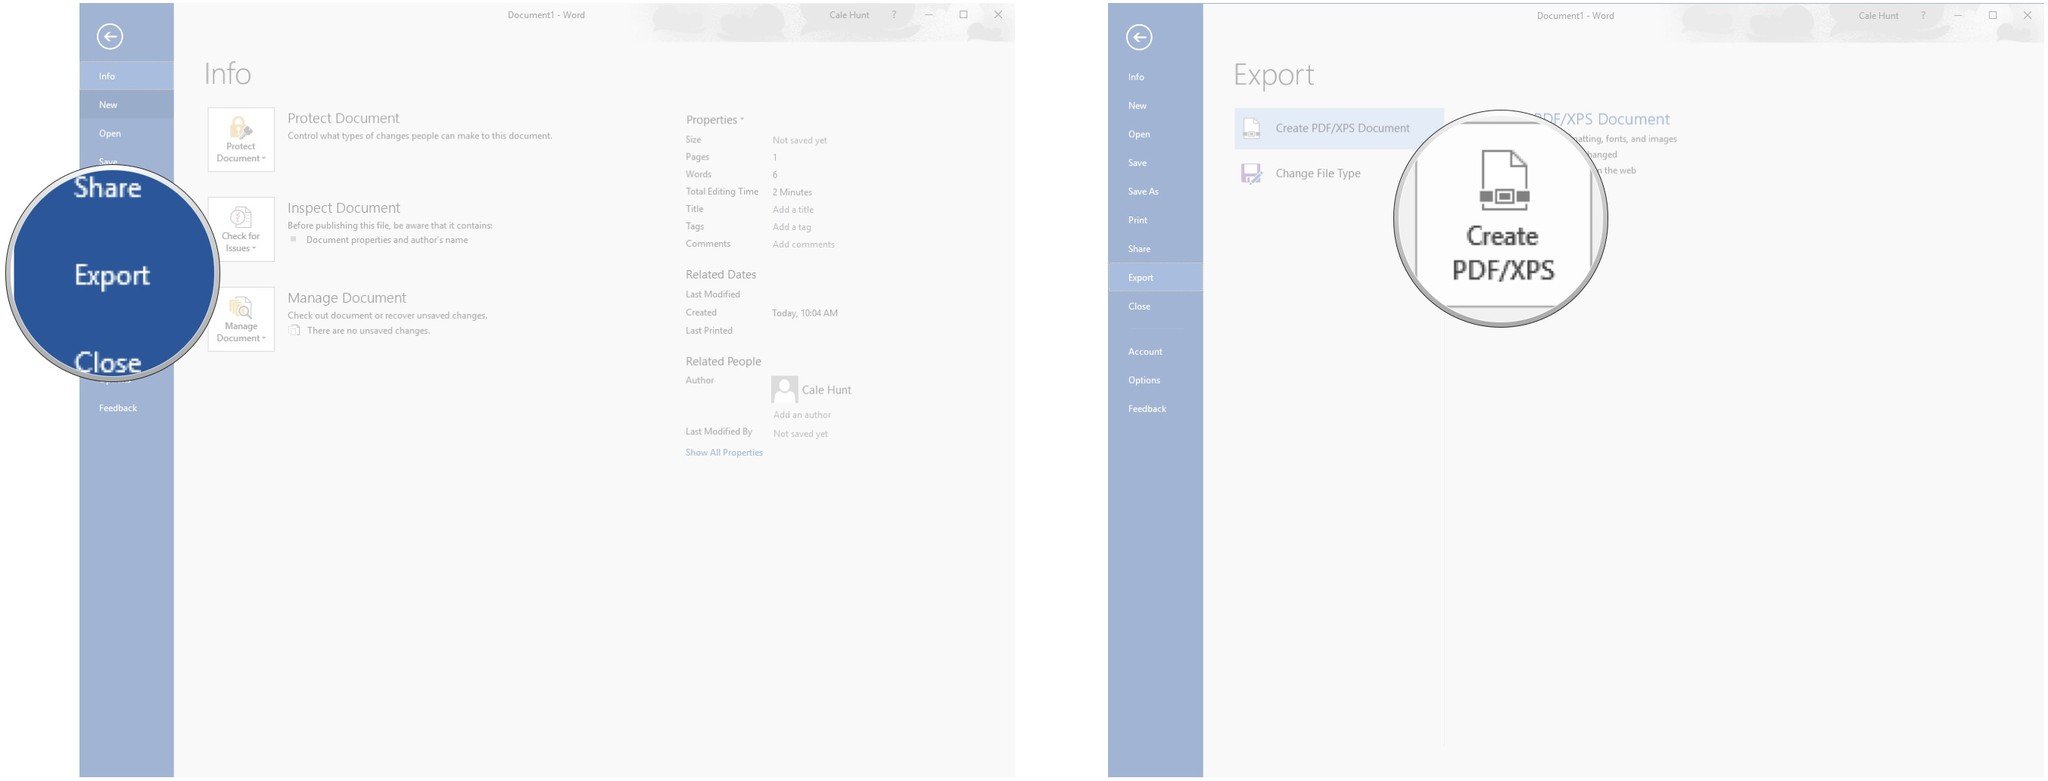
- Click Export.
- Click Create PDF/XPS.
- Type a filename for the PDF document
- Click Publish.
Edit the text of a PDF file in Word
The content of existing PDF files can be imported into Word to be edited, then saved as a DOC or other filetype.
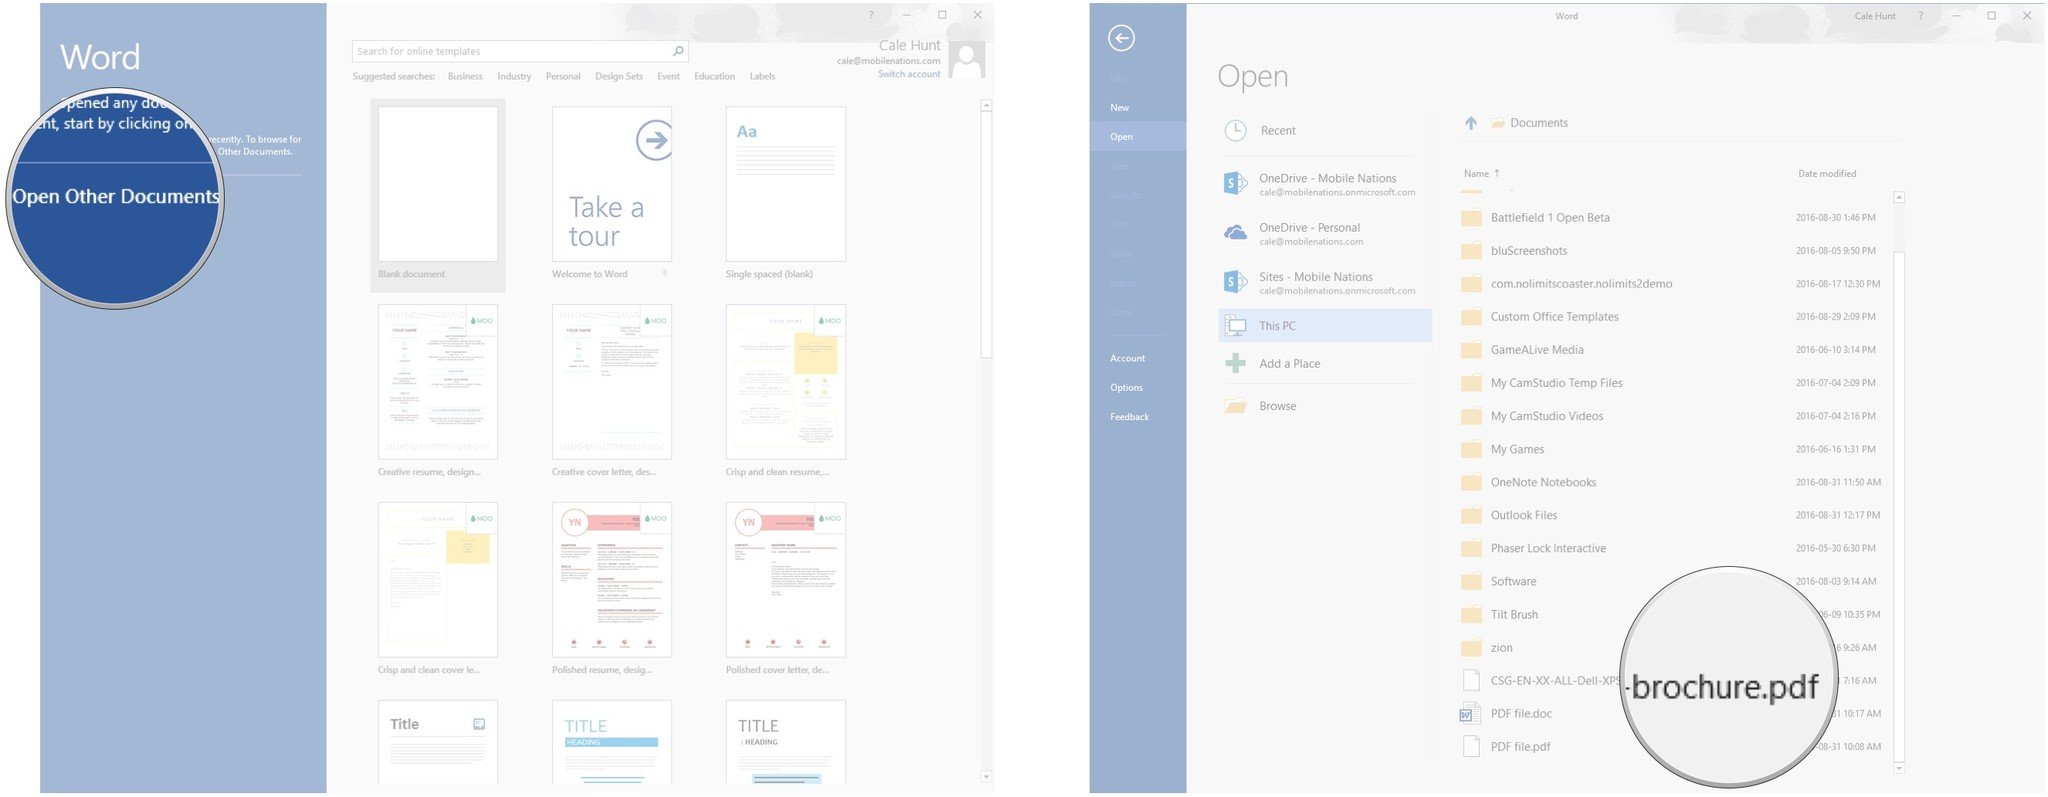
- Launch Word from your Start menu, desktop, or taskbar.
- Click Open Other Documents.
- Double-click the PDF file you'd like to open.
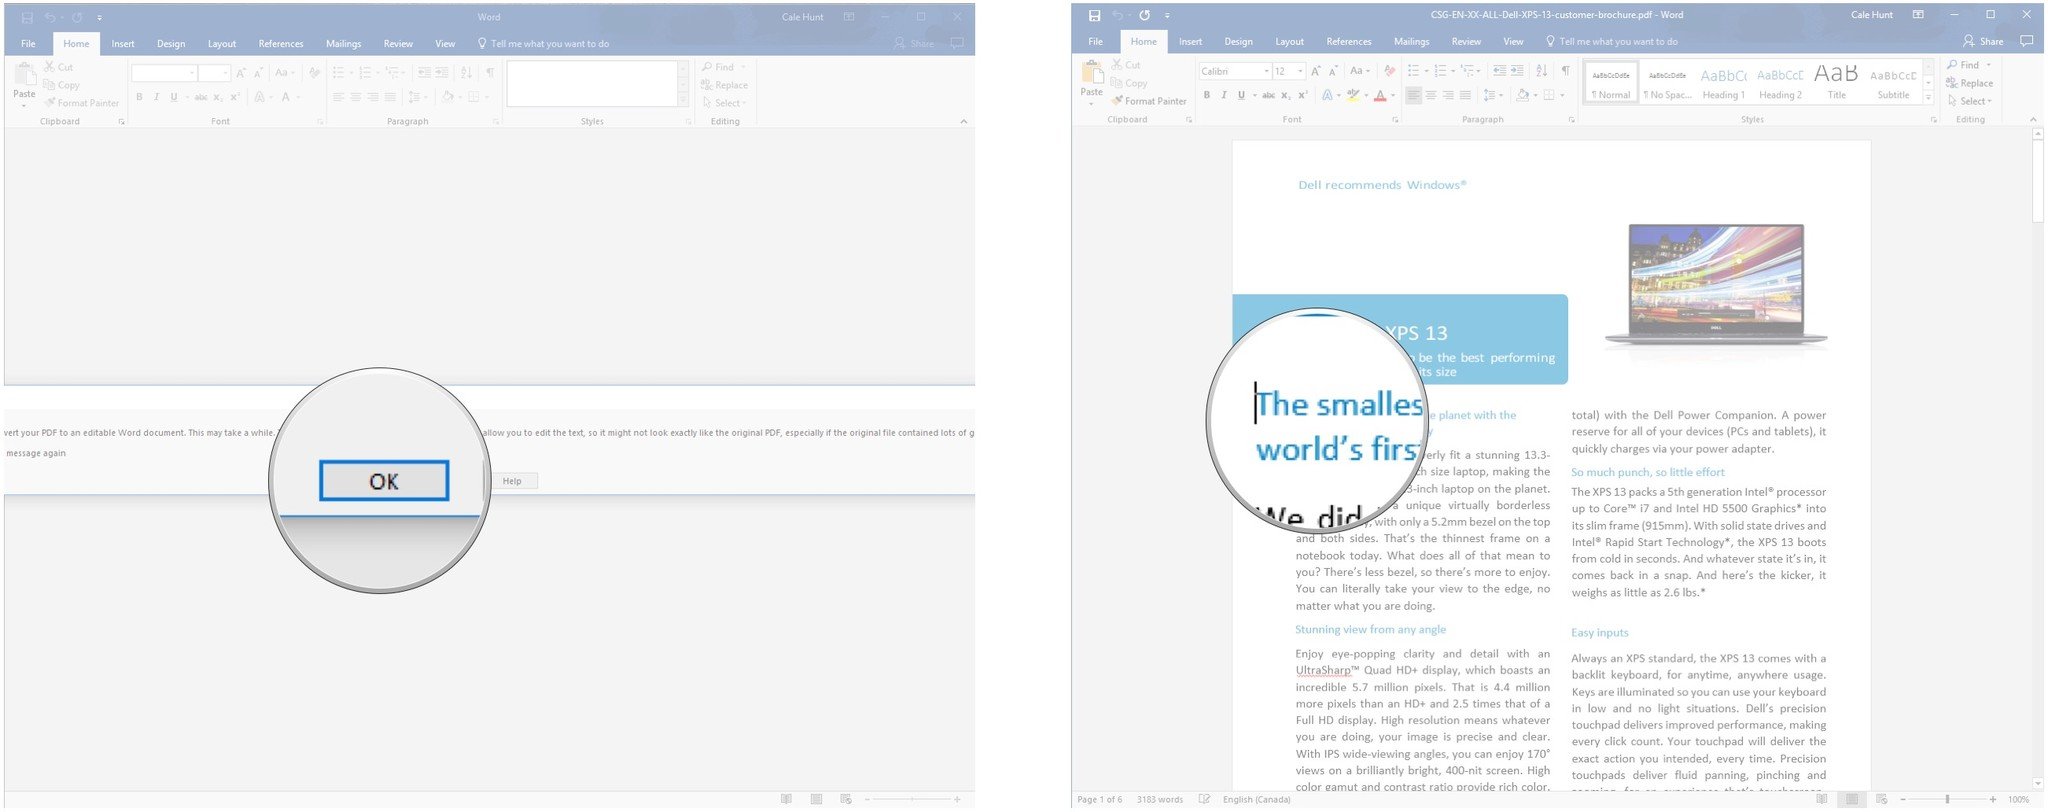
- Click OK.
- Make any changes to the PDF.
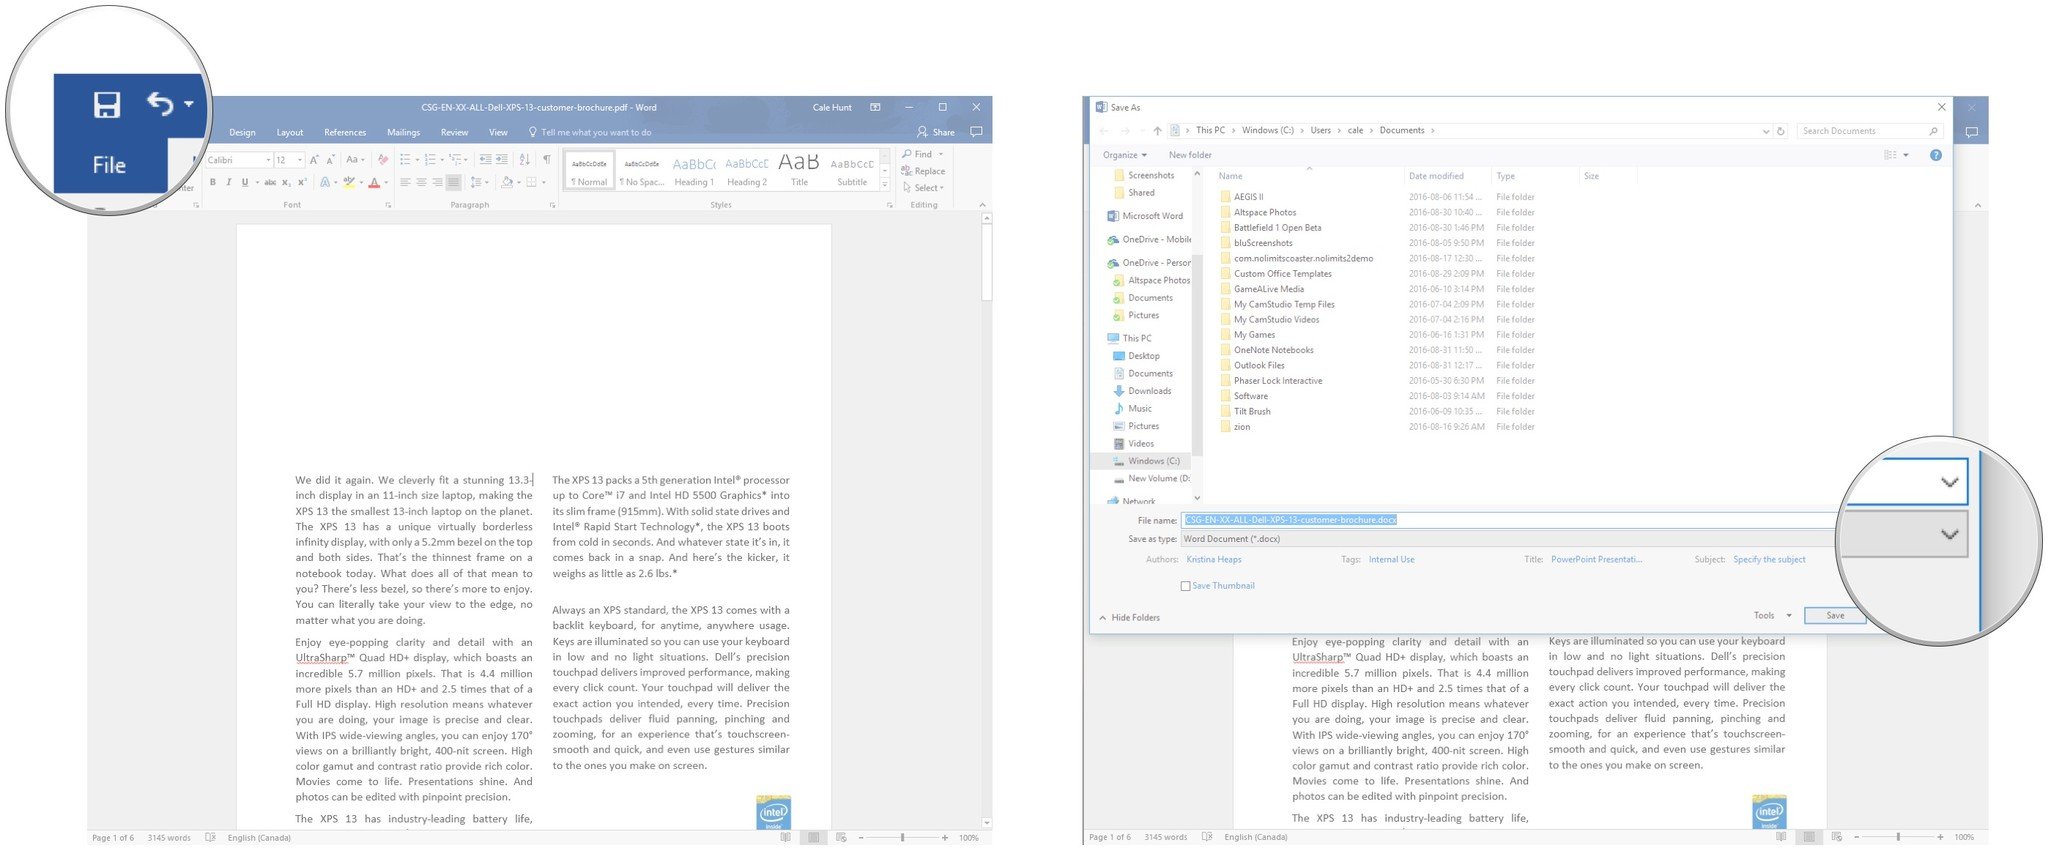
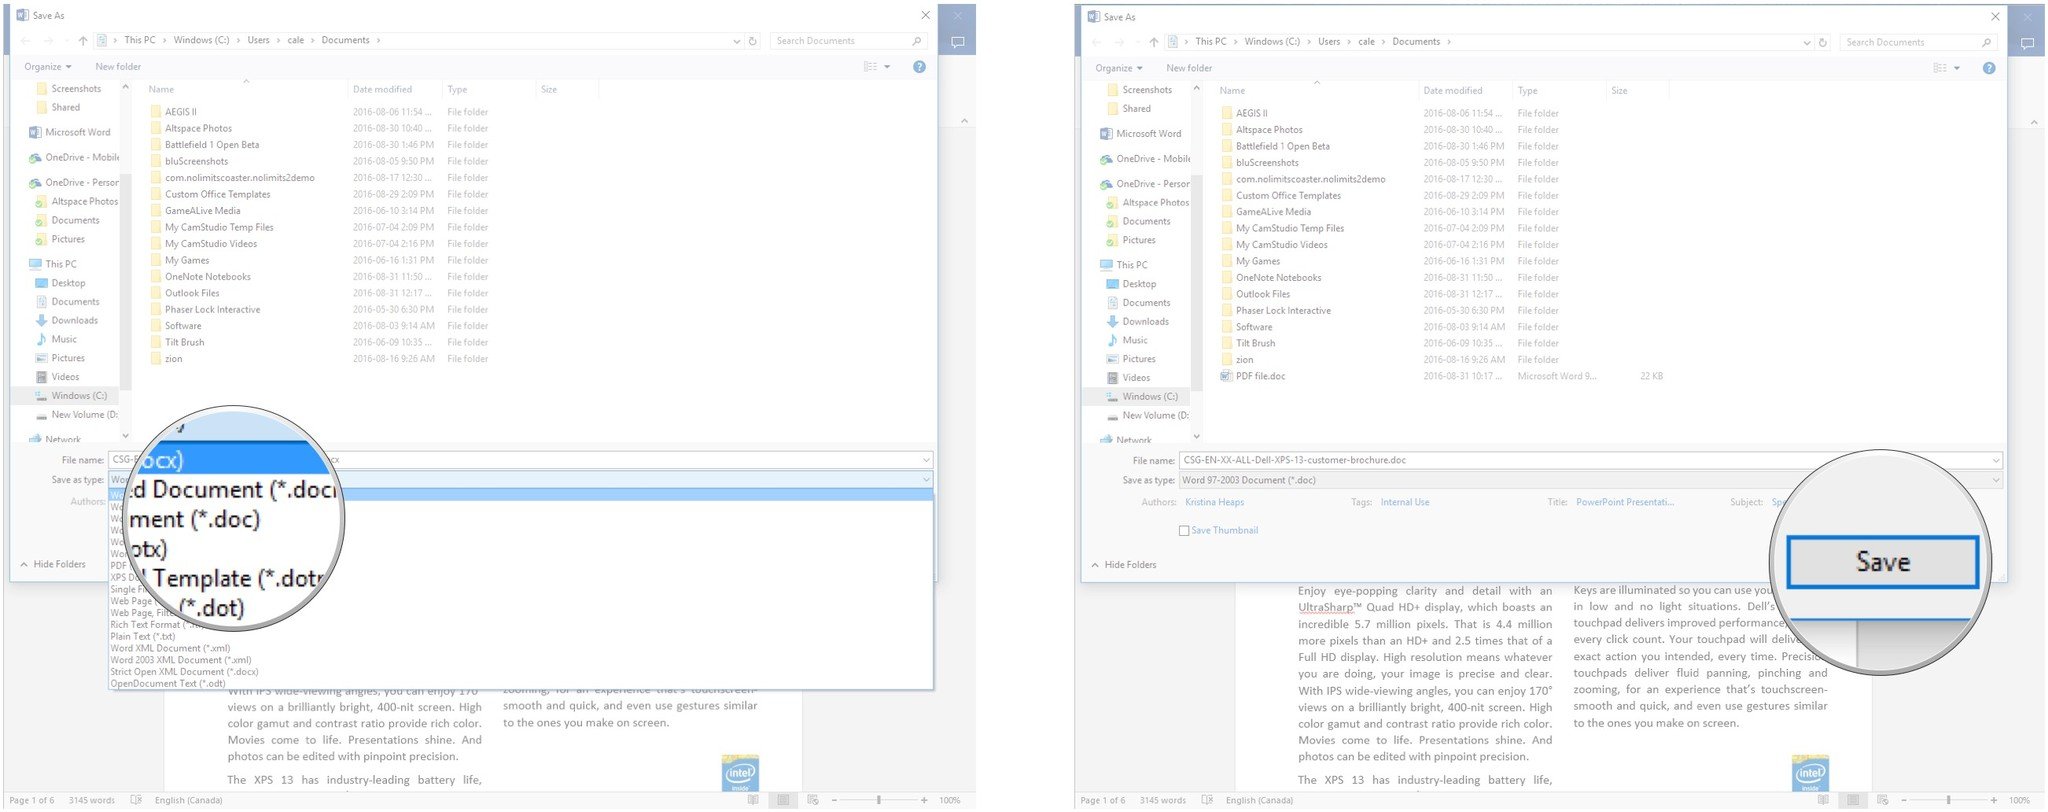
- Click the Save button in the top left corner of the screen. It looks like a floppy disk.
- Click the dropdown arrow next to Save as type.
- Click the filetype you'd like to save the PDF as.
- Click Save.
Create a password-protected section within a OneNote notebook
If you share your OneNote notebooks with other people, you sometimes want to keep certain information private. No problem! You can add password protection to selected sections of OneNote notebooks.
Here's how to create a new notebook and add a password to a section:
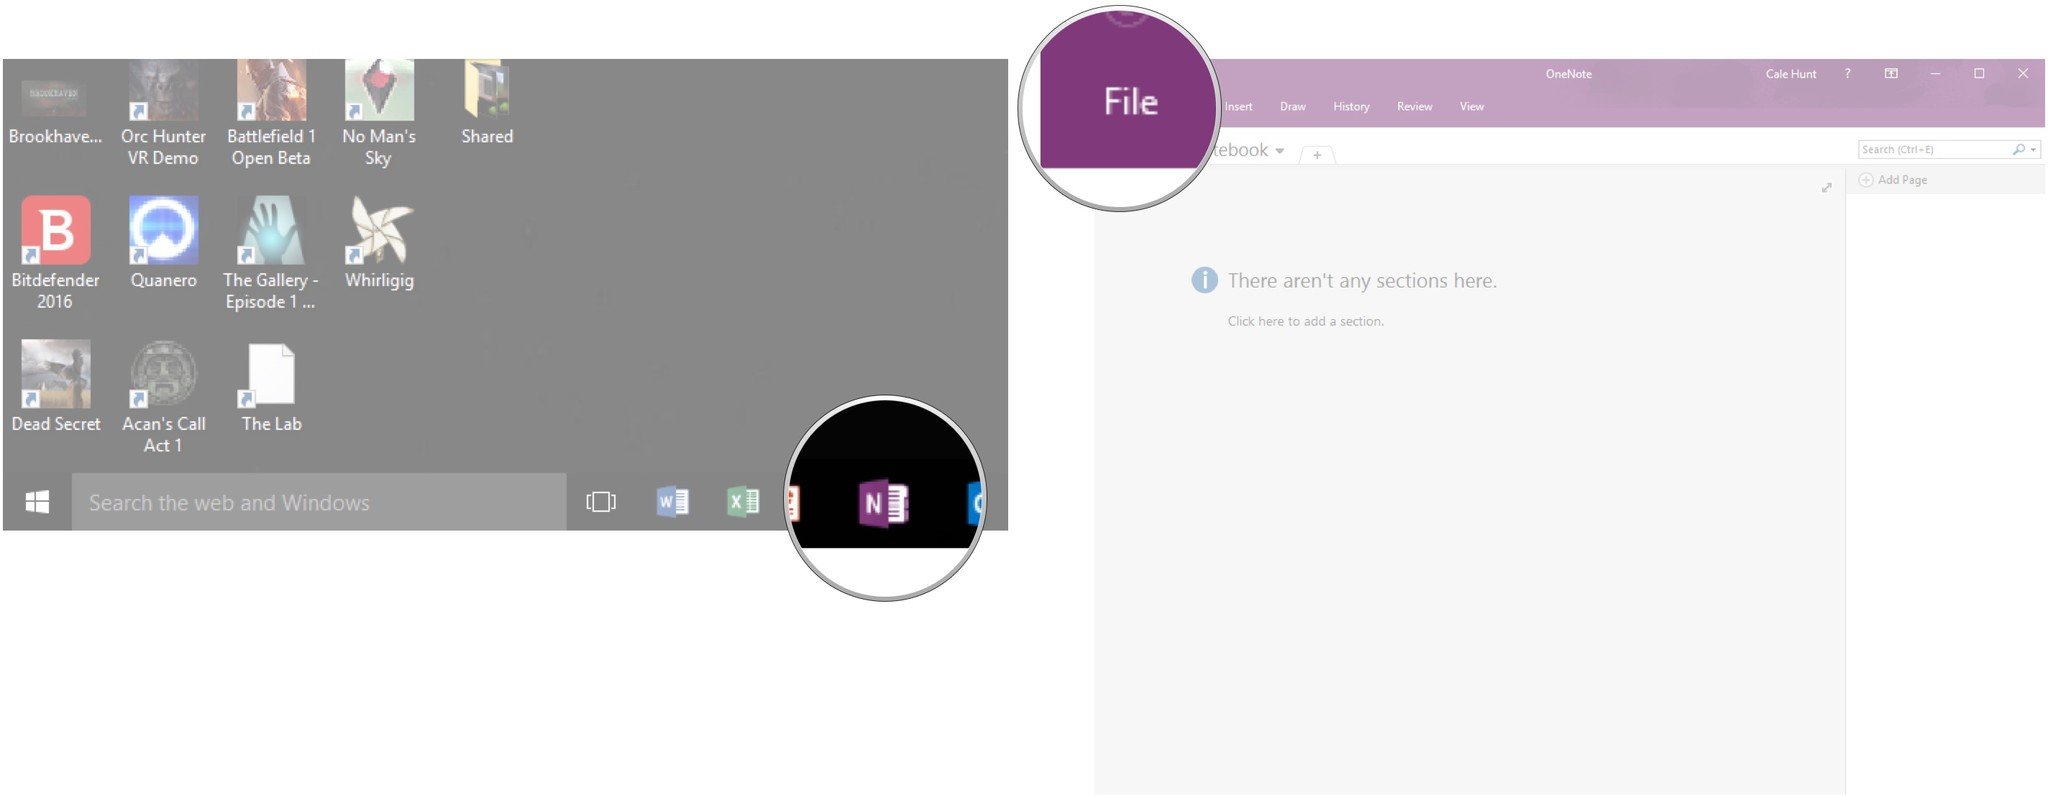
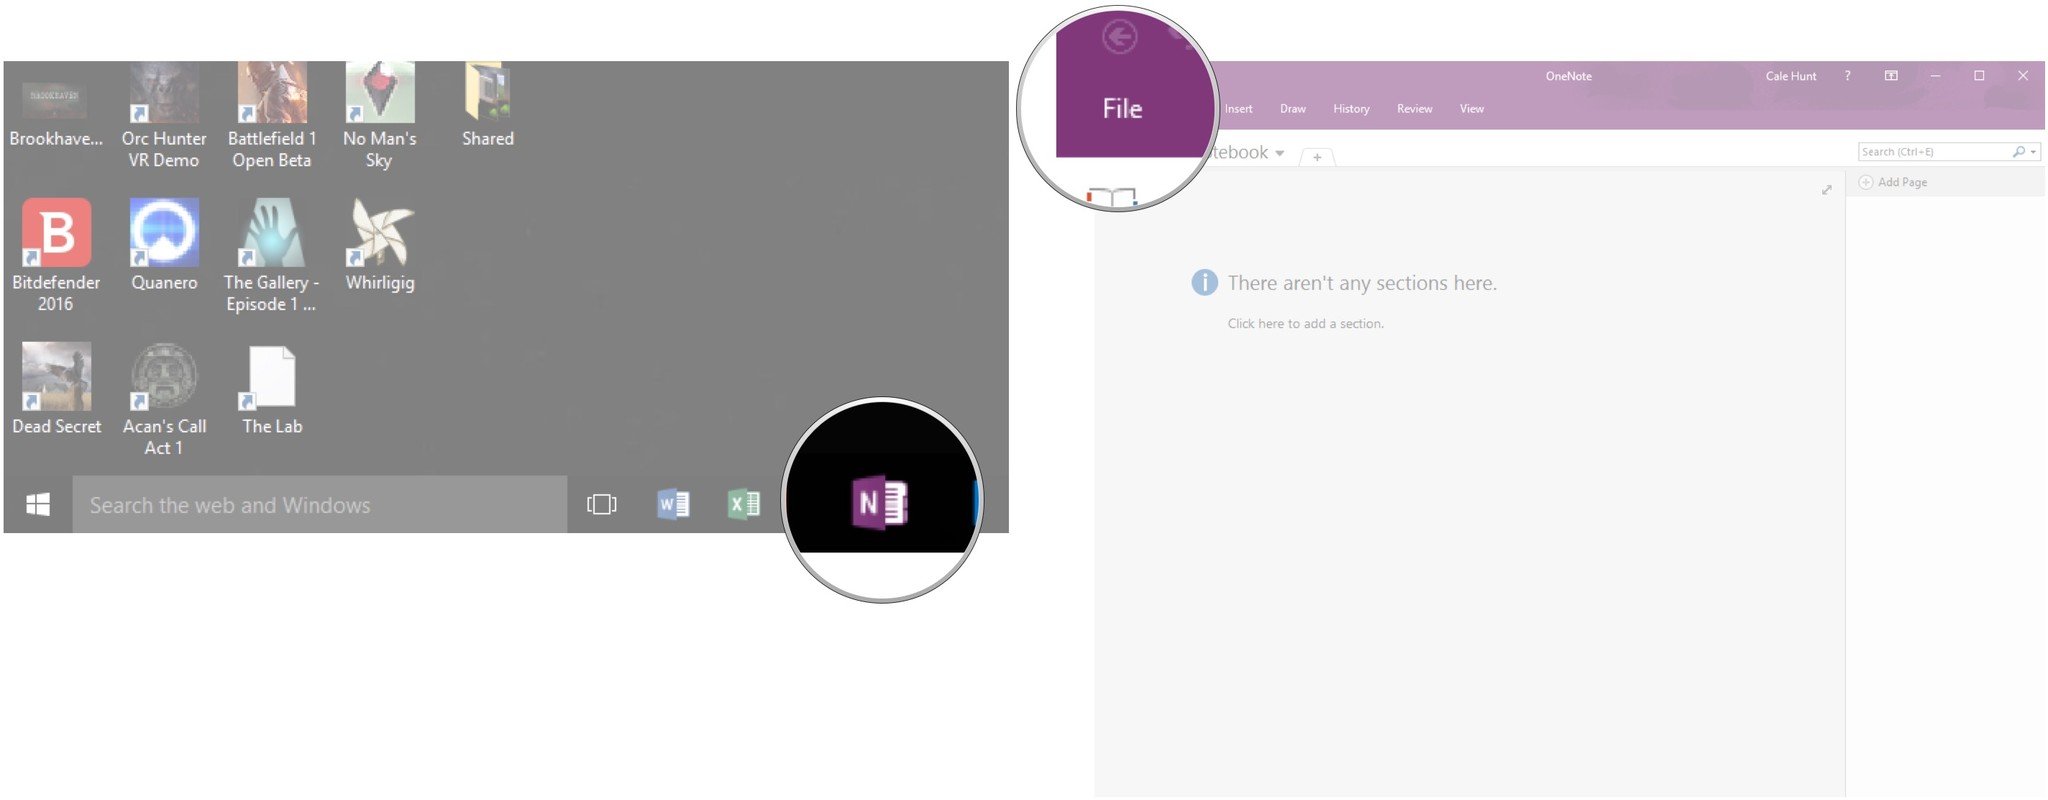
- Launch OneNote from your Start menu, desktop, or taskbar.
- Click File in the top left corner.
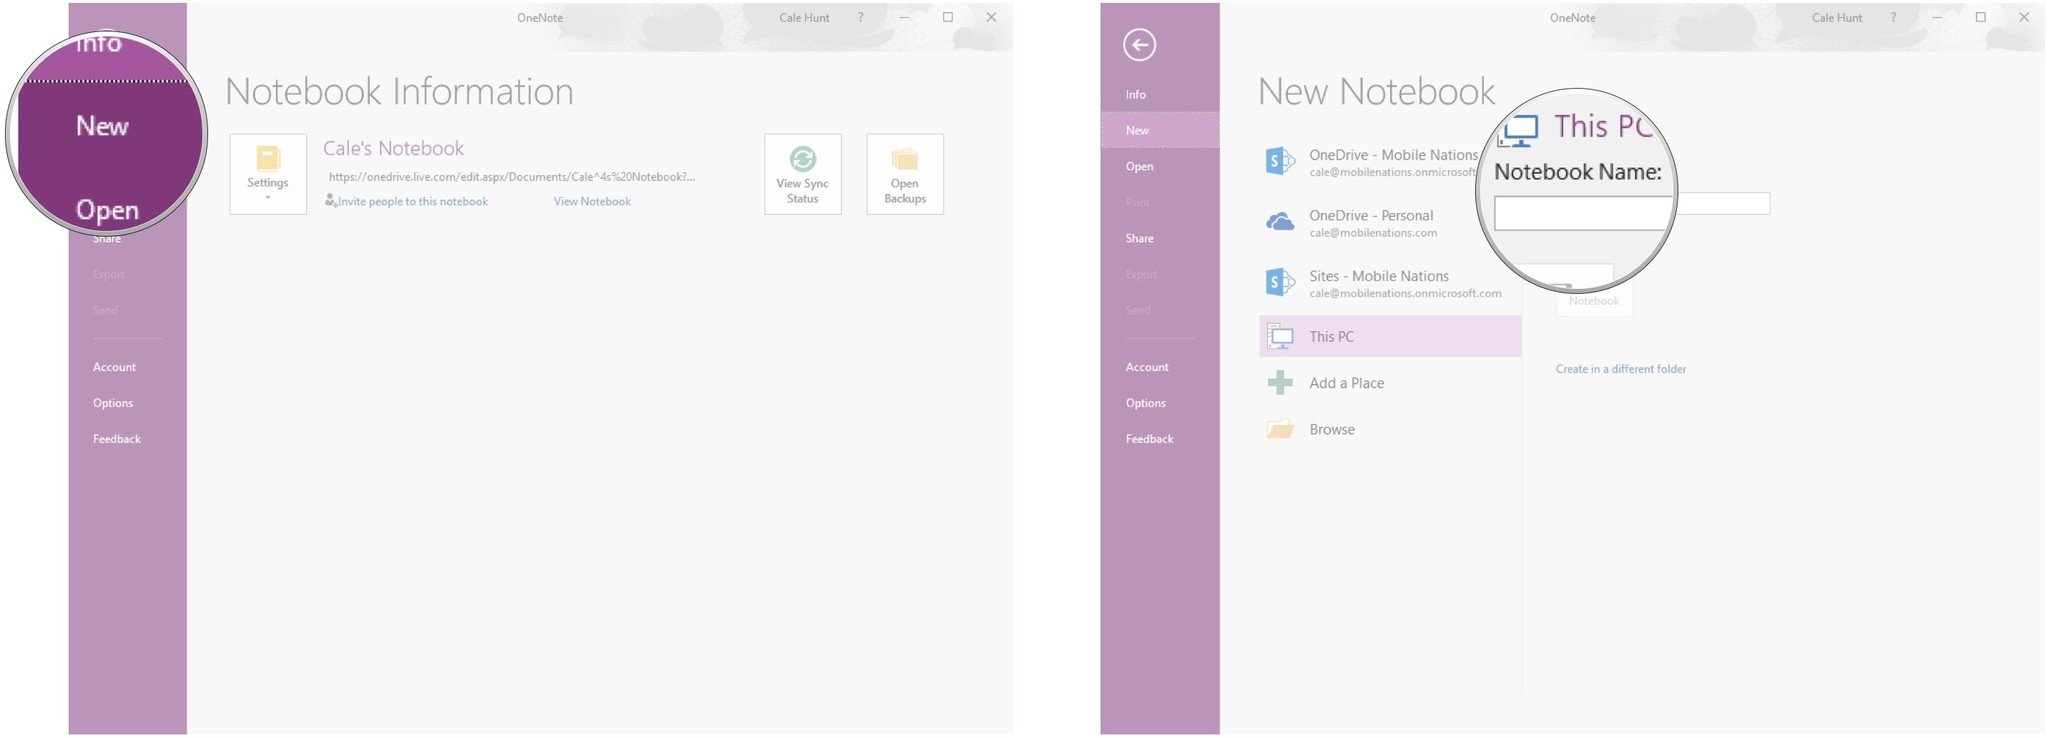
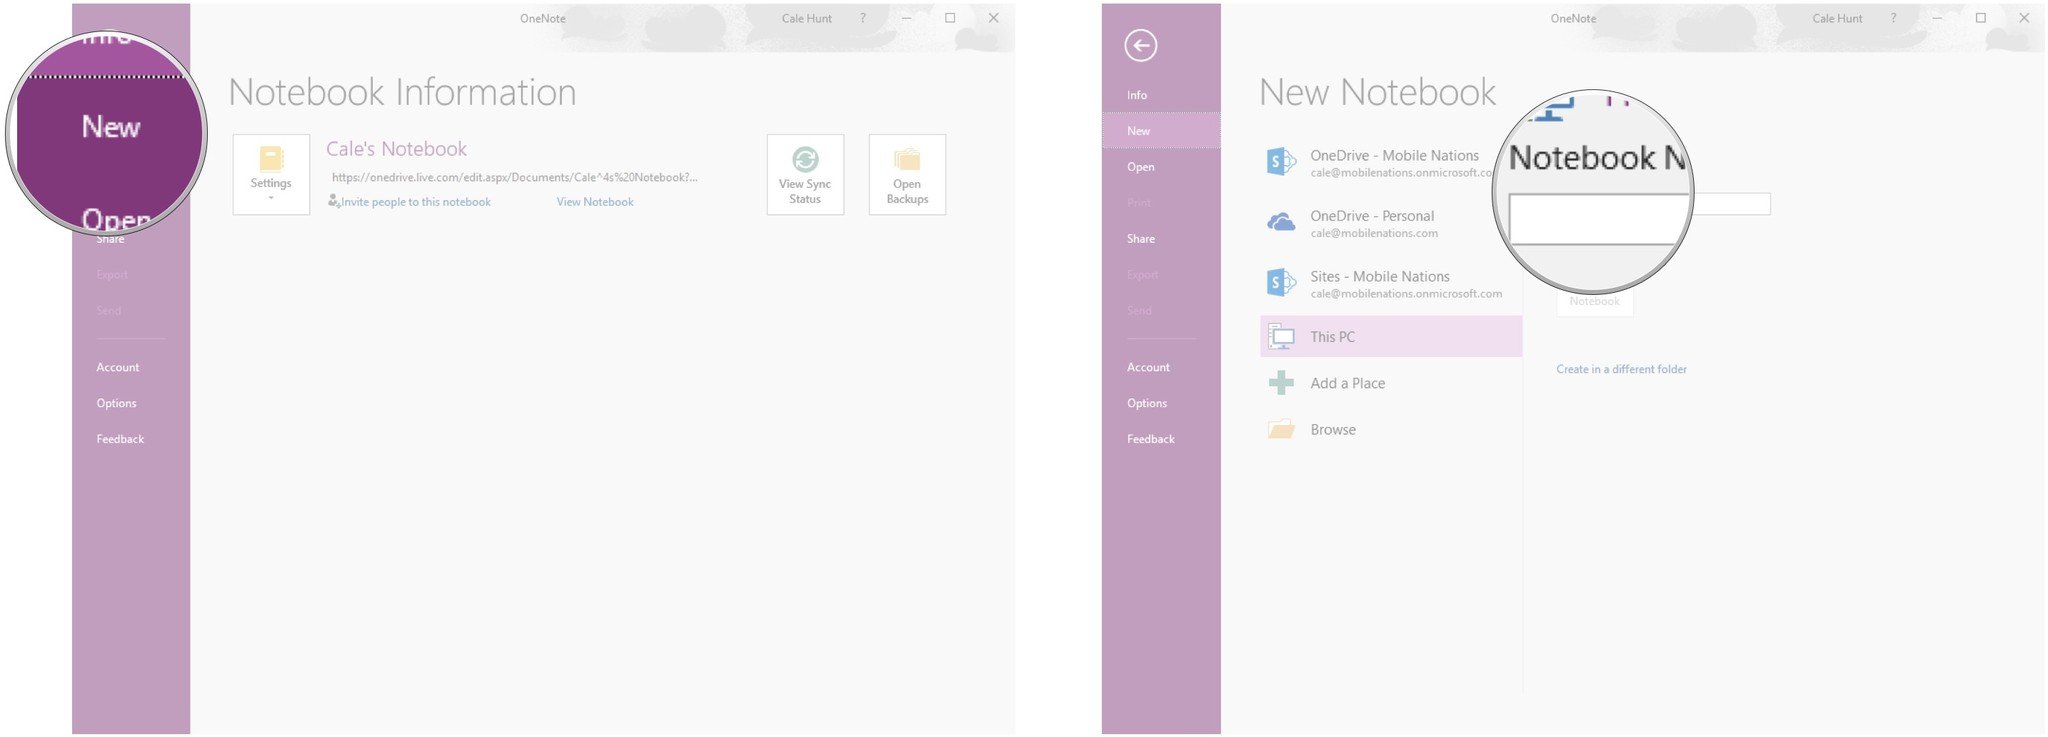
- Click New.
- Click the Notebook Name field.
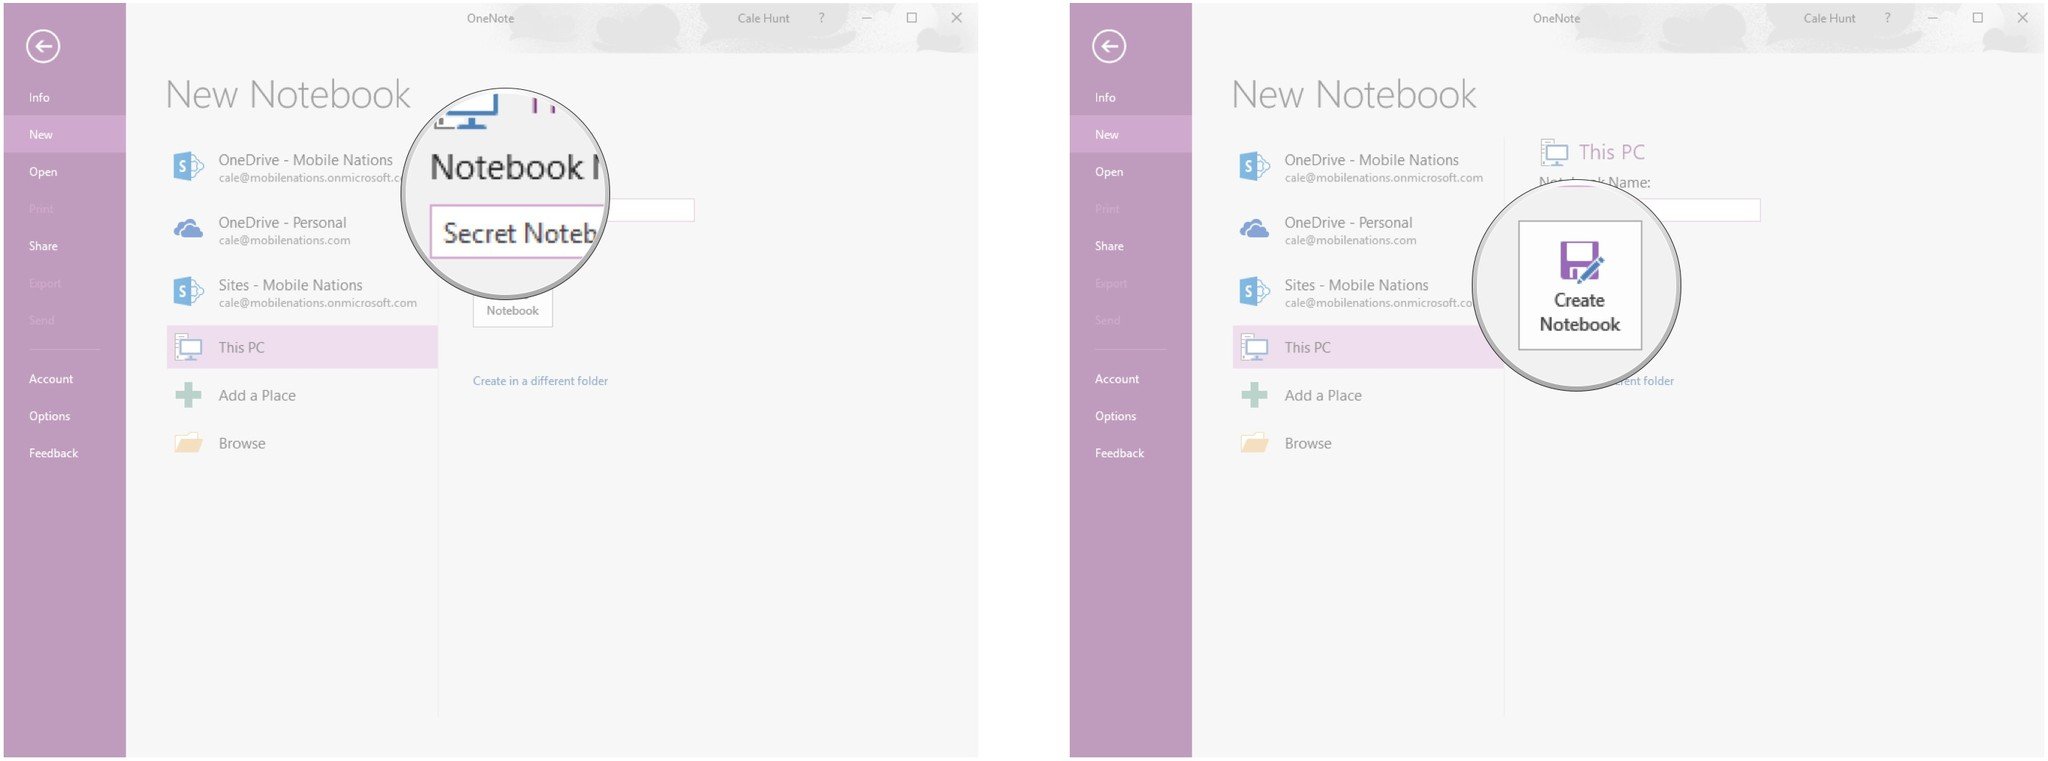
- Type a name.
- Click Create Notebook.
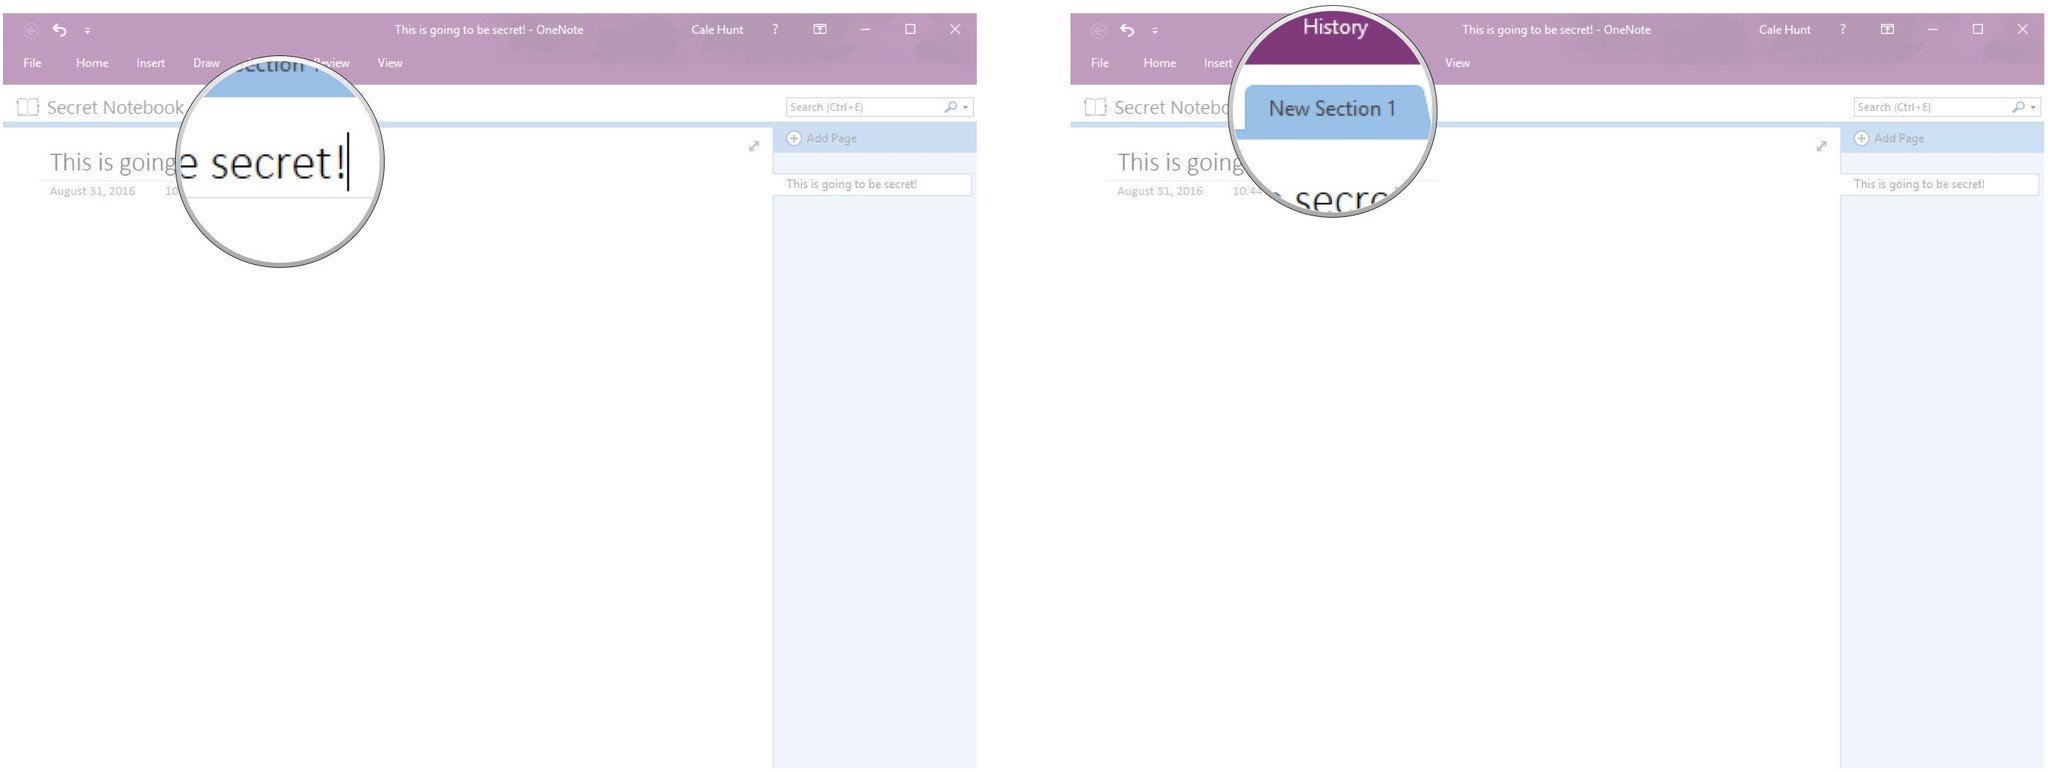
- Type content you'd like to password protect.
- Right-click the New Section 1 tab.
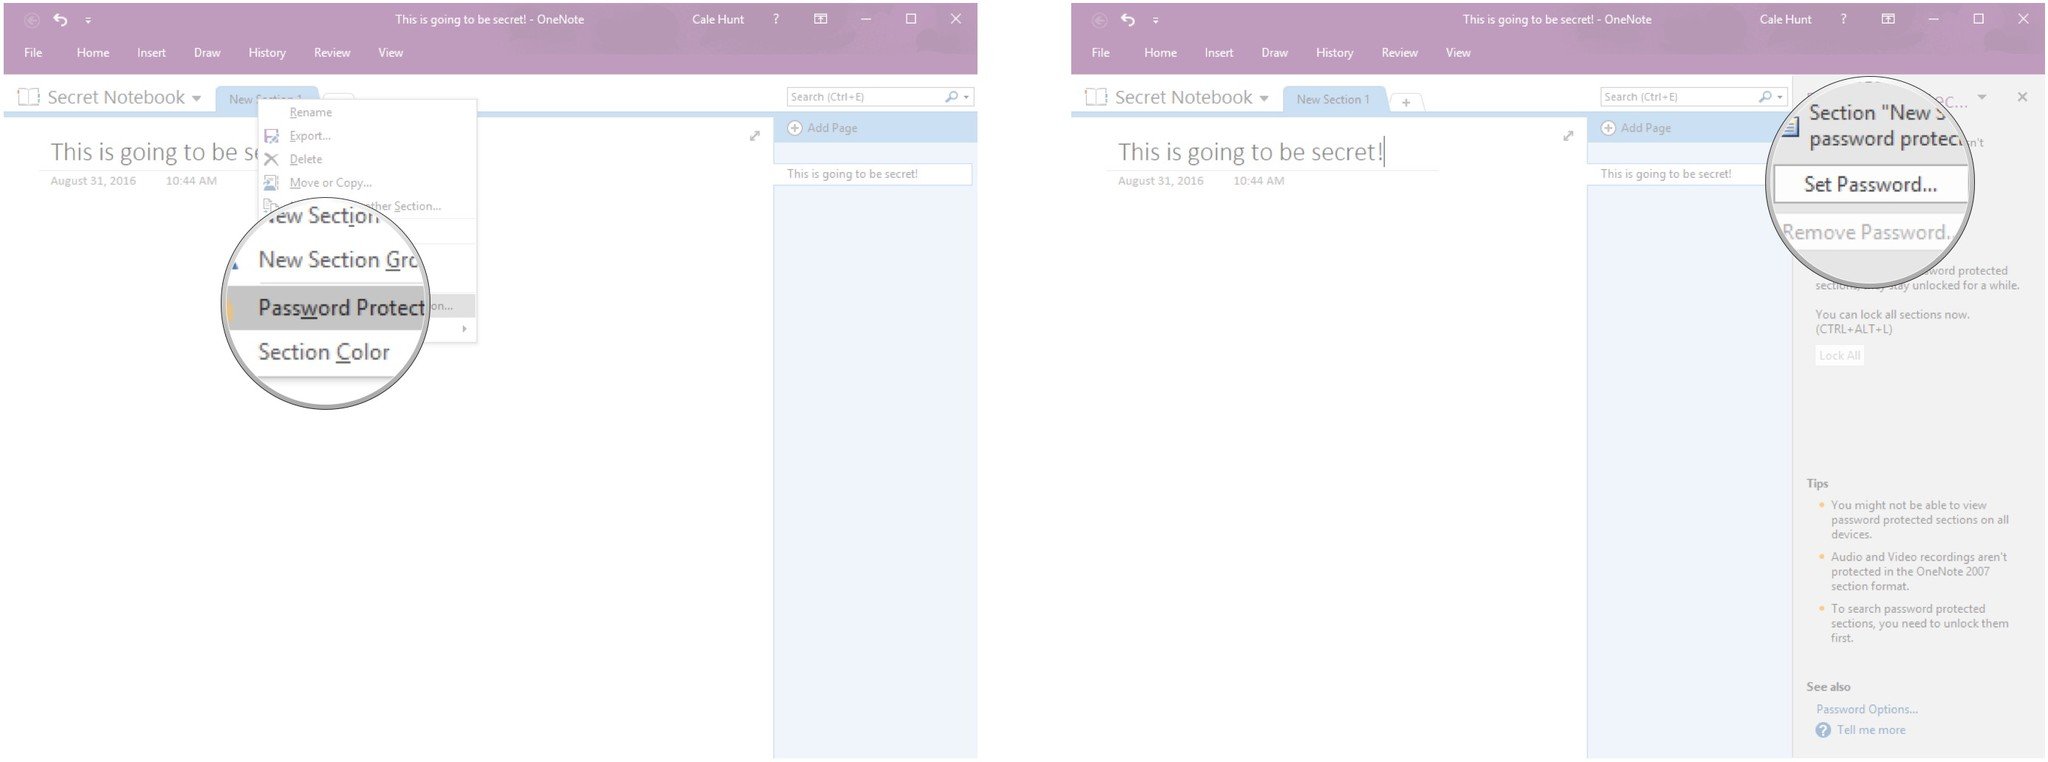
- Click Password Protect This Section.
- Click Set Password.
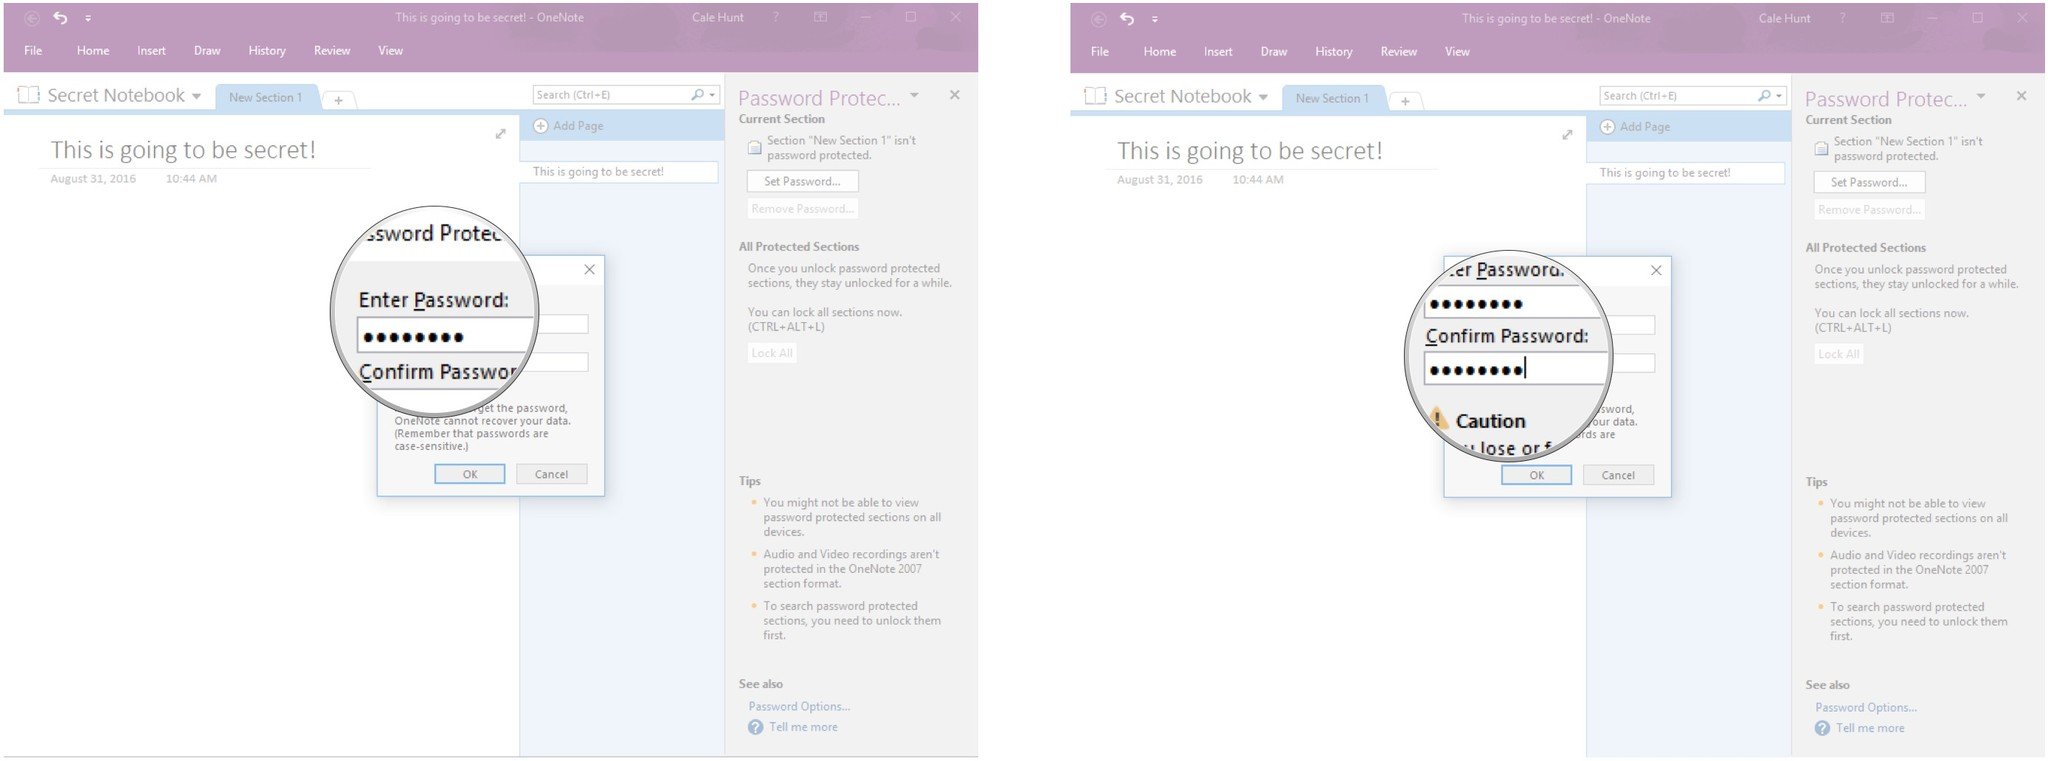
- Type a password and hit Tab on your keyboard.
- Type the same password to confirm.
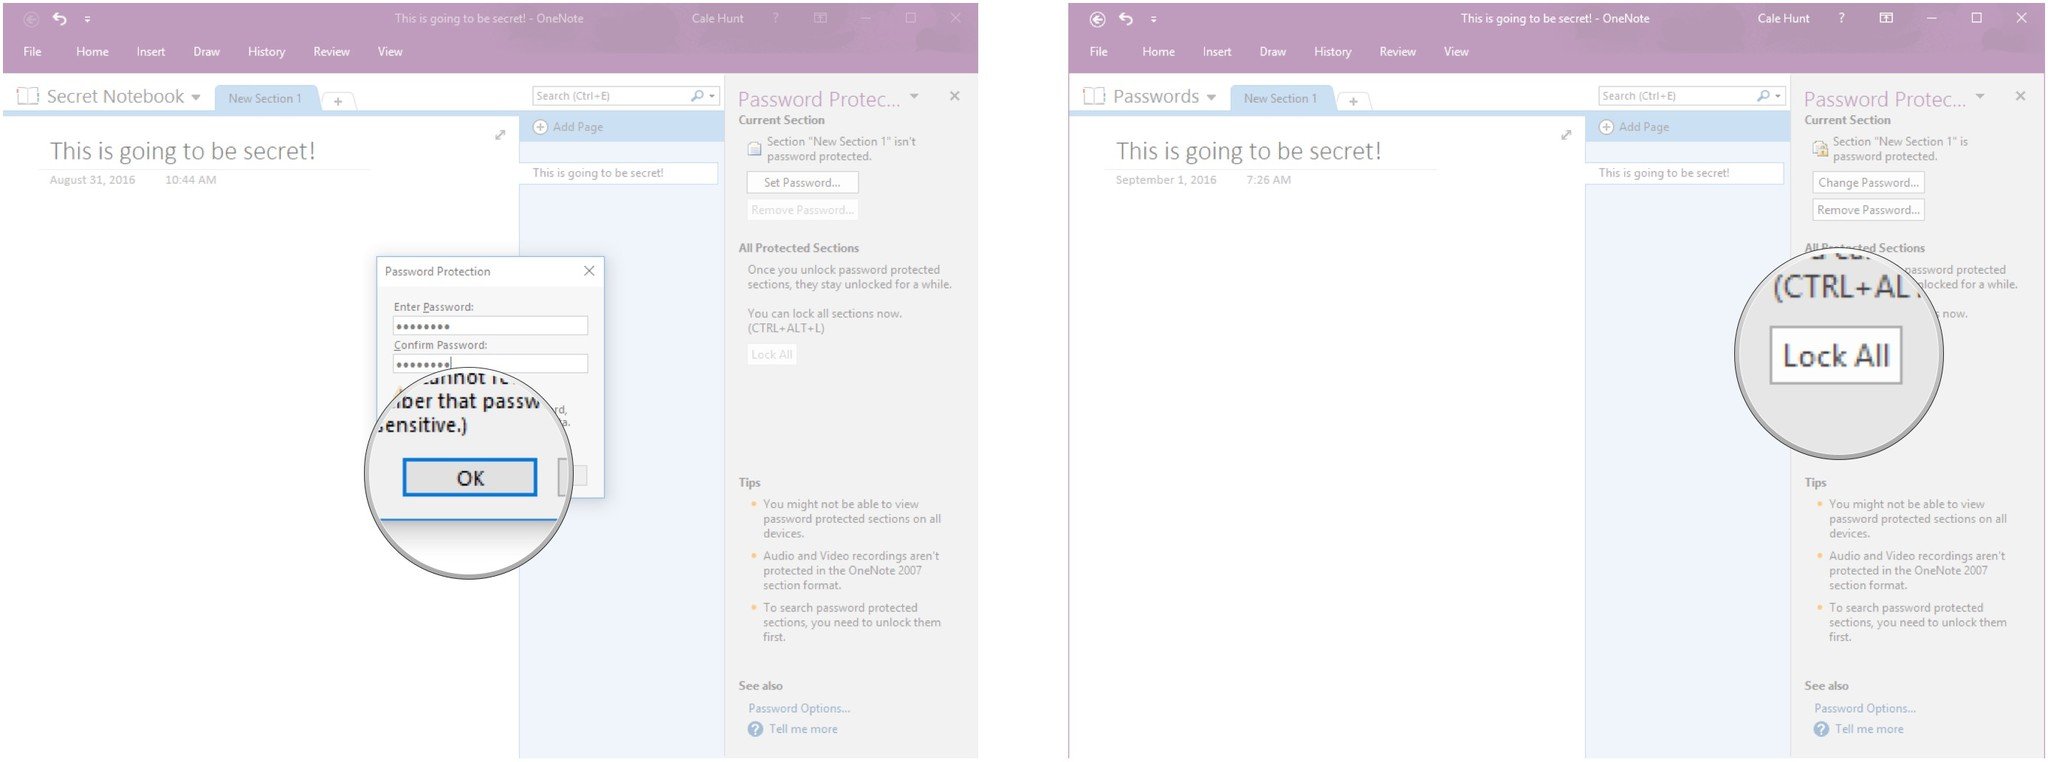
- Click OK.
- Click Lock All to lock any sections of the notebook you created a password for.
Your password protected sections within this notebook are now locked down. There are no backup for the password, so don't forget it or you will also be locked out.
Access password-protected notebook sections in OneNote
Once you've created a password-protected section of a notebook, you need to know how to open it!
- Launch OneNote from your Start menu, desktop, or taskbar.
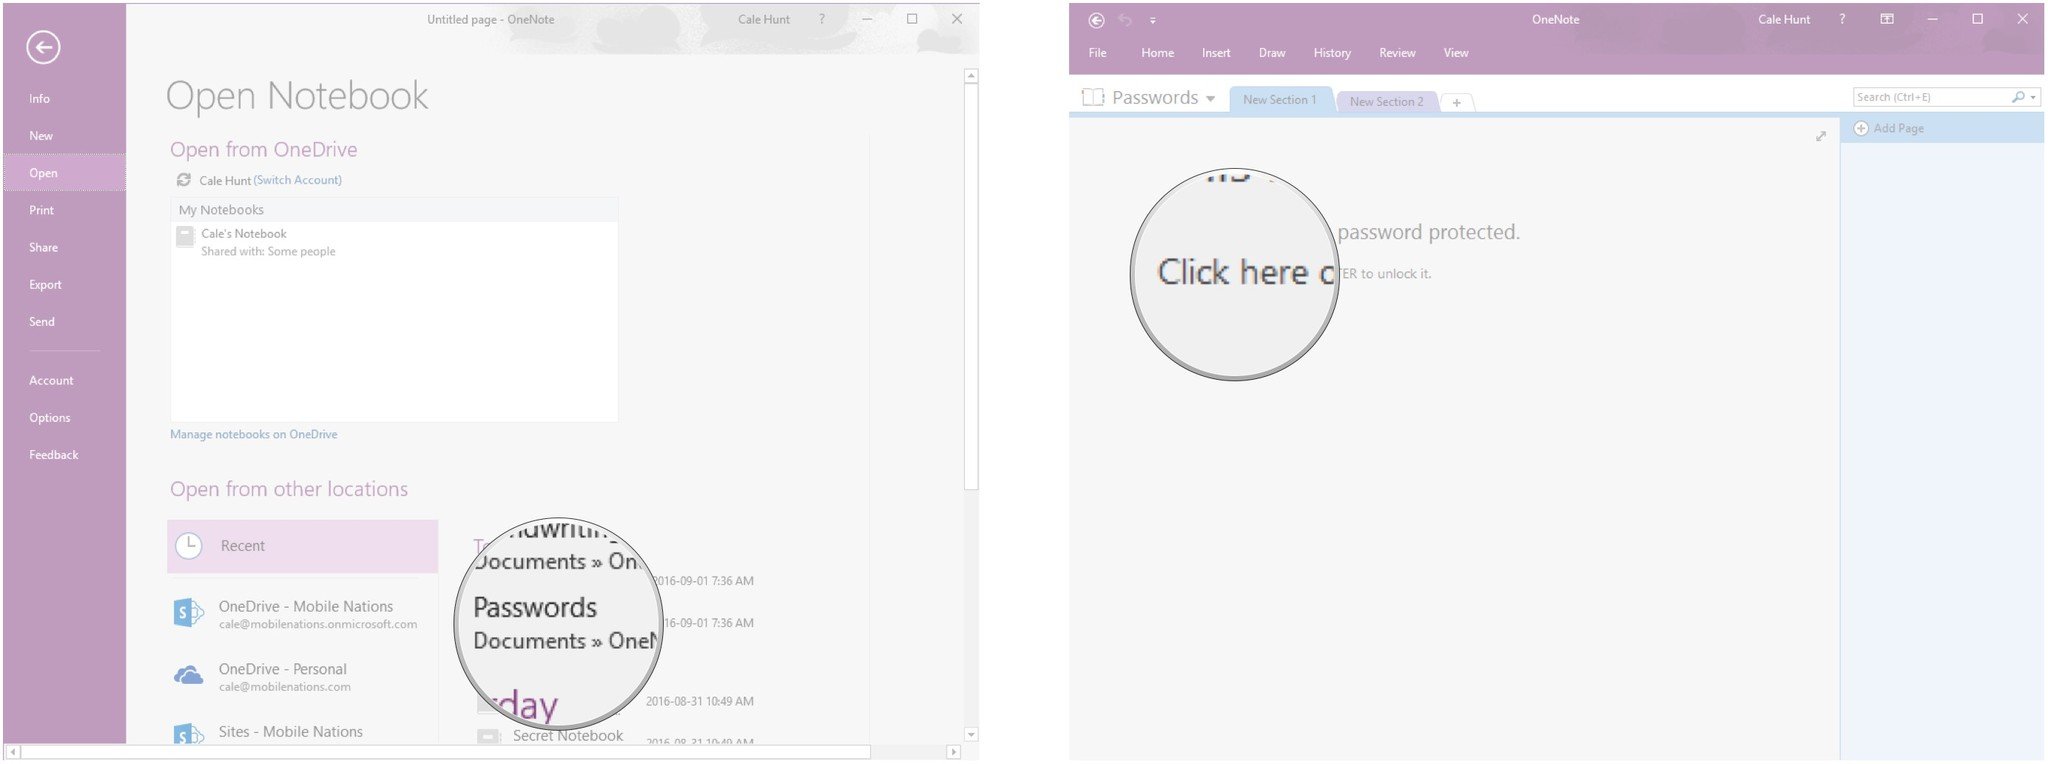
- Click File in the top left corner.
- Click Open.
- Click the file you'd like to open.
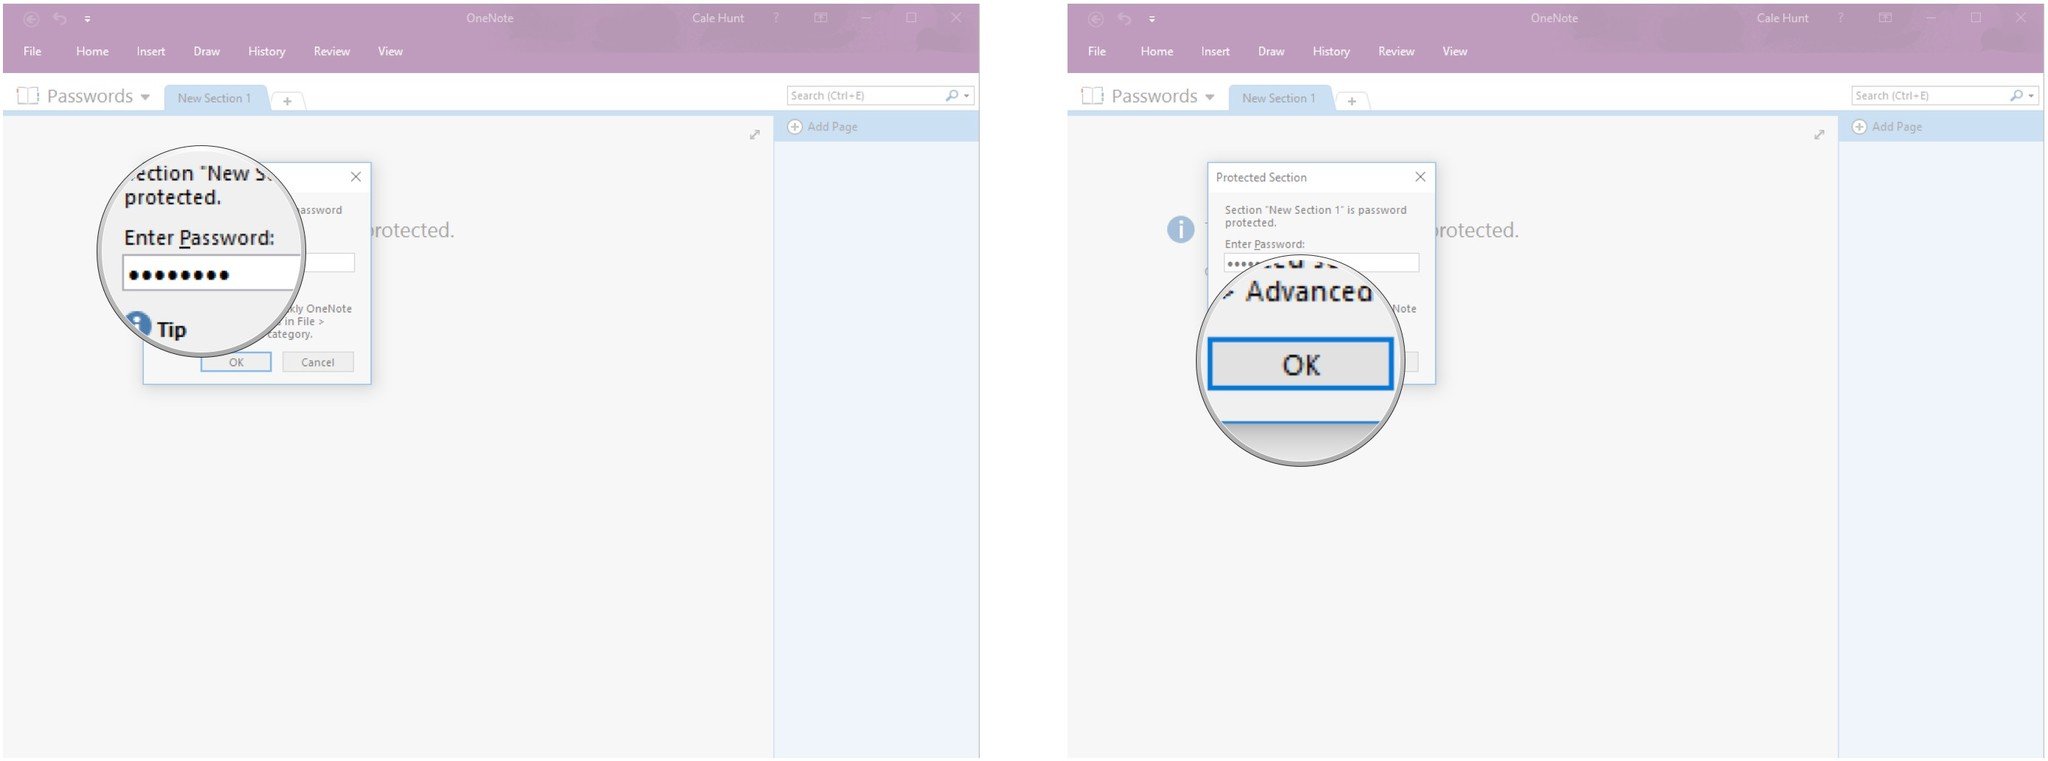
- Click within the section or hit Enter on your keyboard to begin the unlock process.
- Type your password.
- Click OK.
Get help, fast
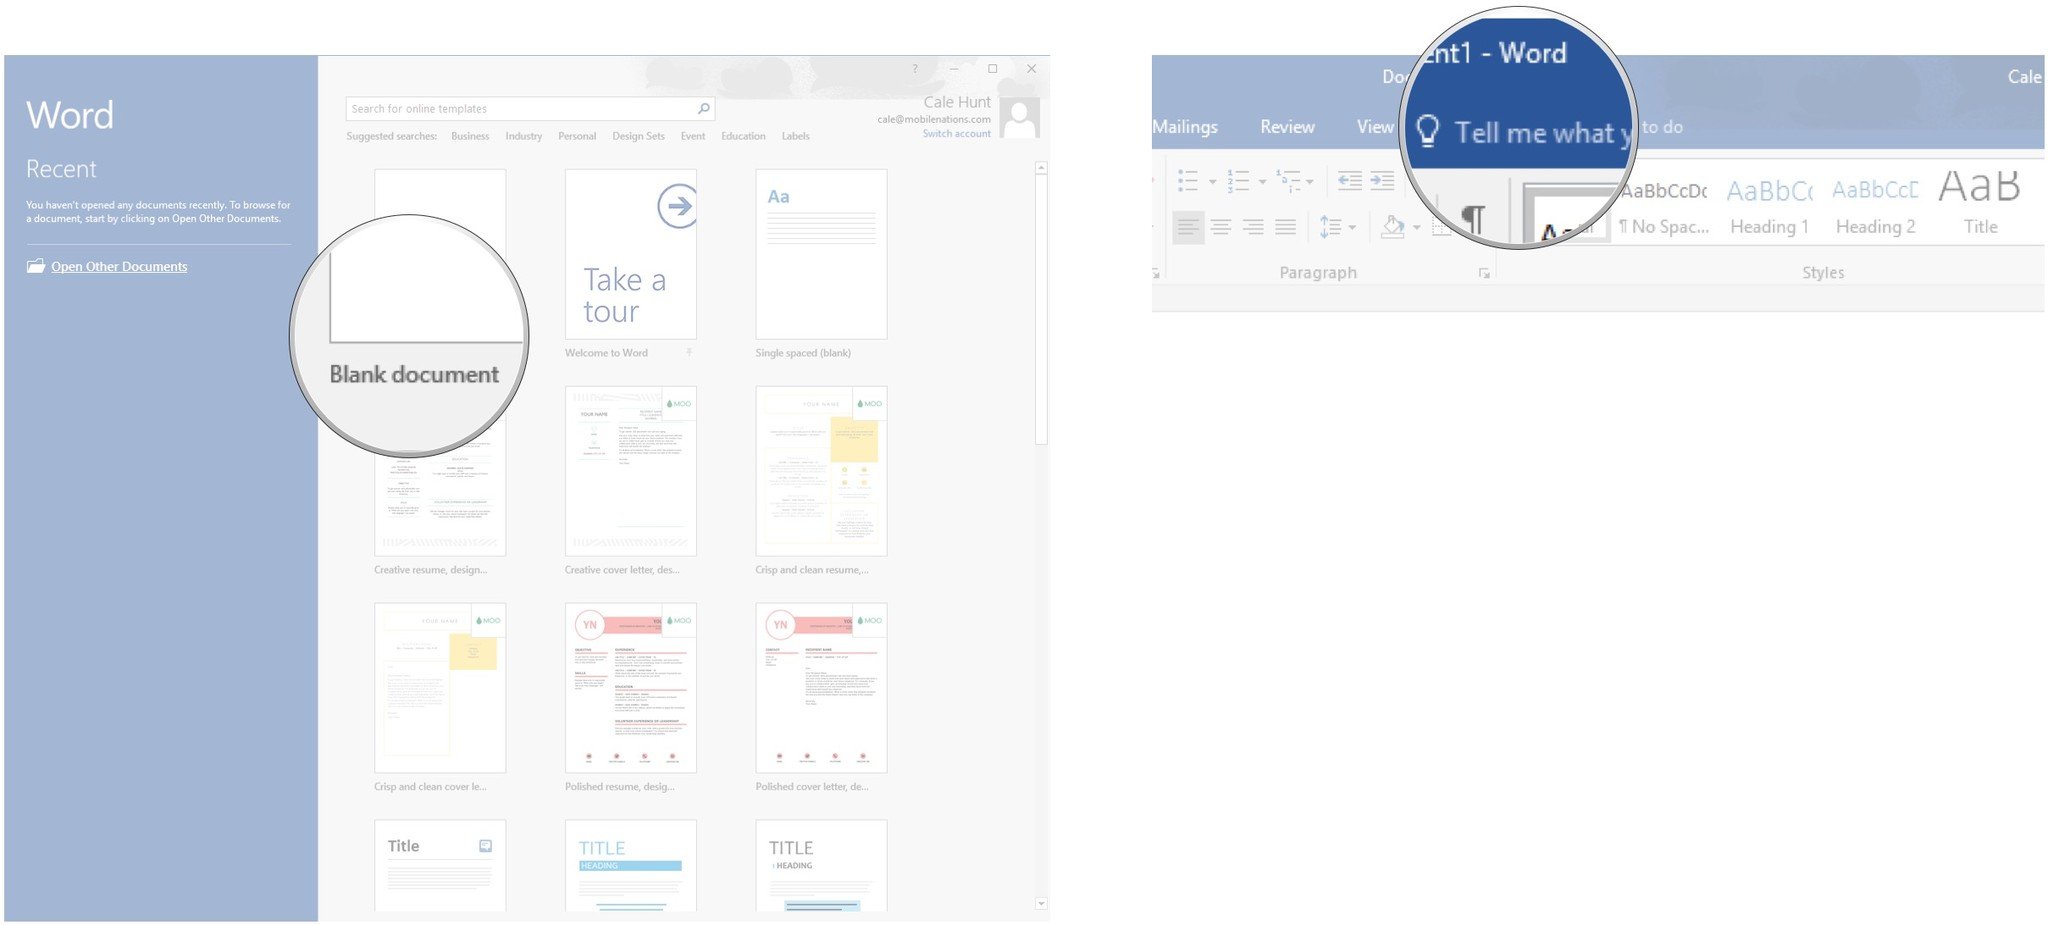
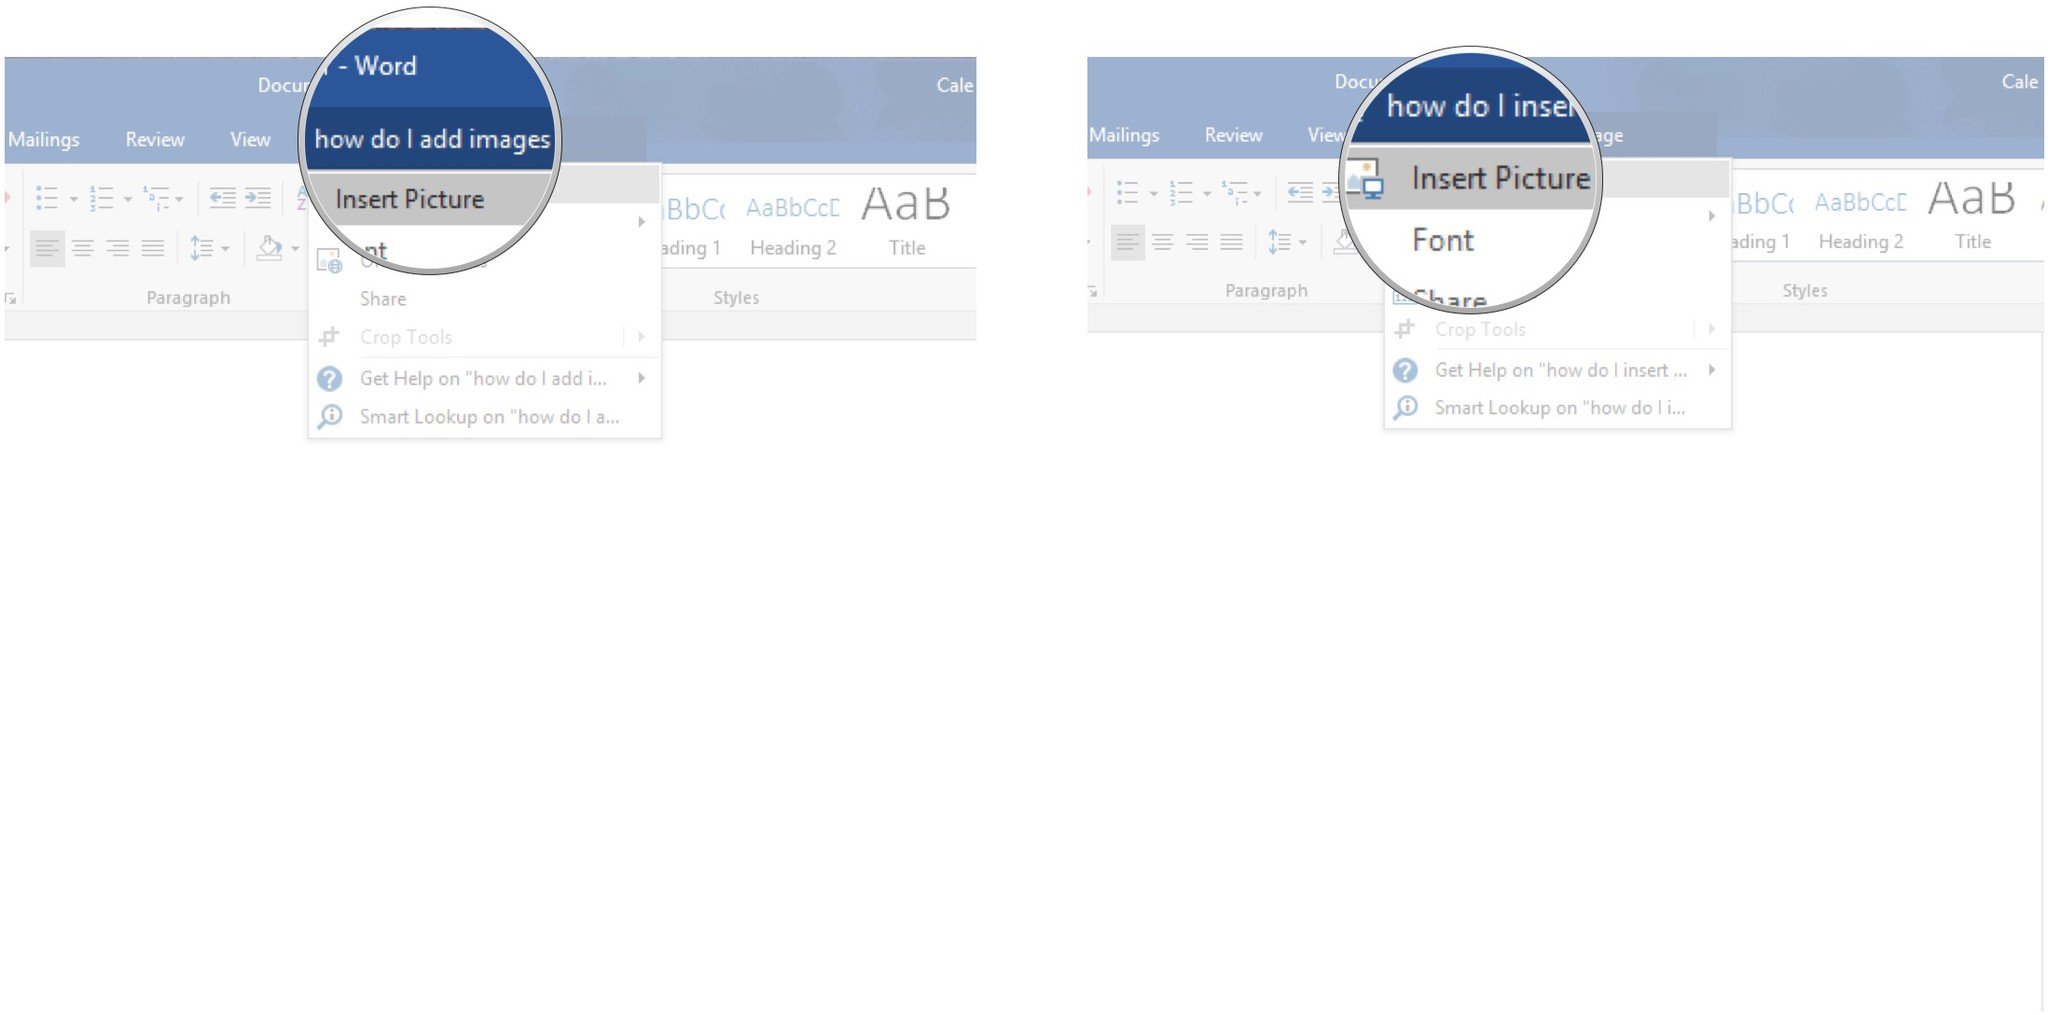
If you can't find a tool in the Office 365 app's menu, you can type a quick question and you'll be shown the tool you're looking for from a dropdown menu.
Here's how to open a new Word document and get help fast:
- Launch an Office 365 app from your Start menu, desktop, or taskbar. In this case we use Word.
- Click Blank document.
- Click the Tell me what to do field. It's located near the top of the window and has a lightbulb beside it.
- Type your question or problem.
- Click the corresponding action from the dropdown menu.
Change OneNote handwriting into text
Did you have a great idea that you jotted down using OneNote's drawing tool? Maybe they've piled up for awhile, but now you want to change the written notes to text.
Here's how to create a new Notebook, draw a note, then change it into text:
- Launch OneNote from your Start menu, desktop, or taskbar.
- Click File in the top left corner.
- Click New.
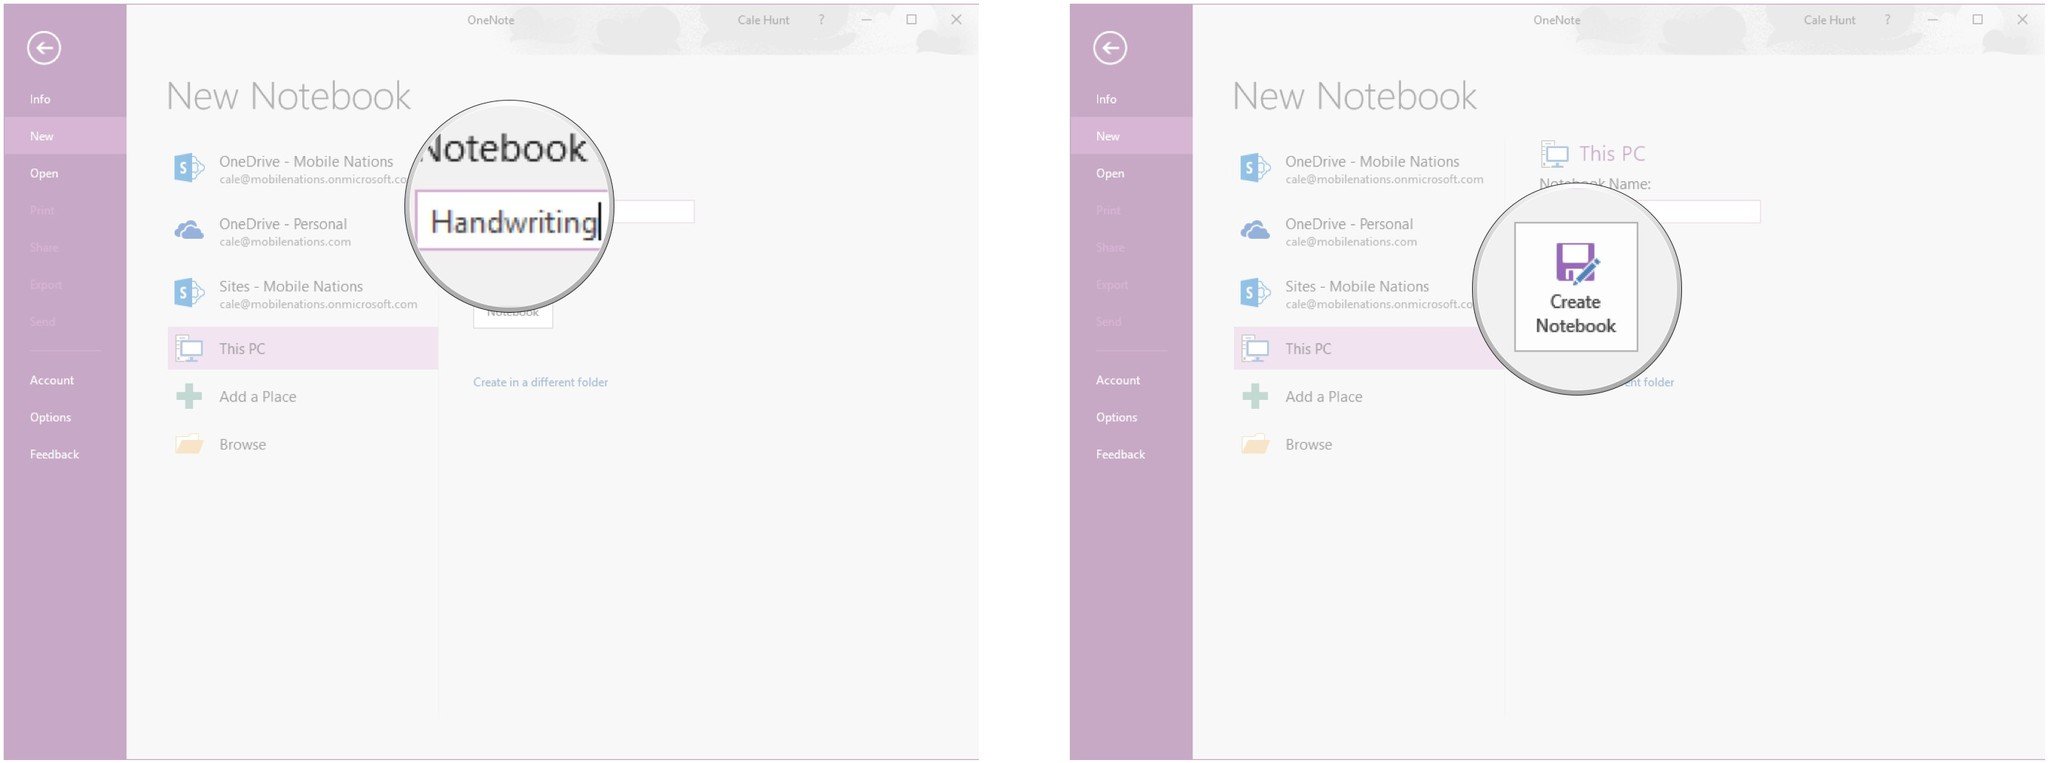
- Click the Notebook Name field.
- Type a name.
- Click Create Notebook.
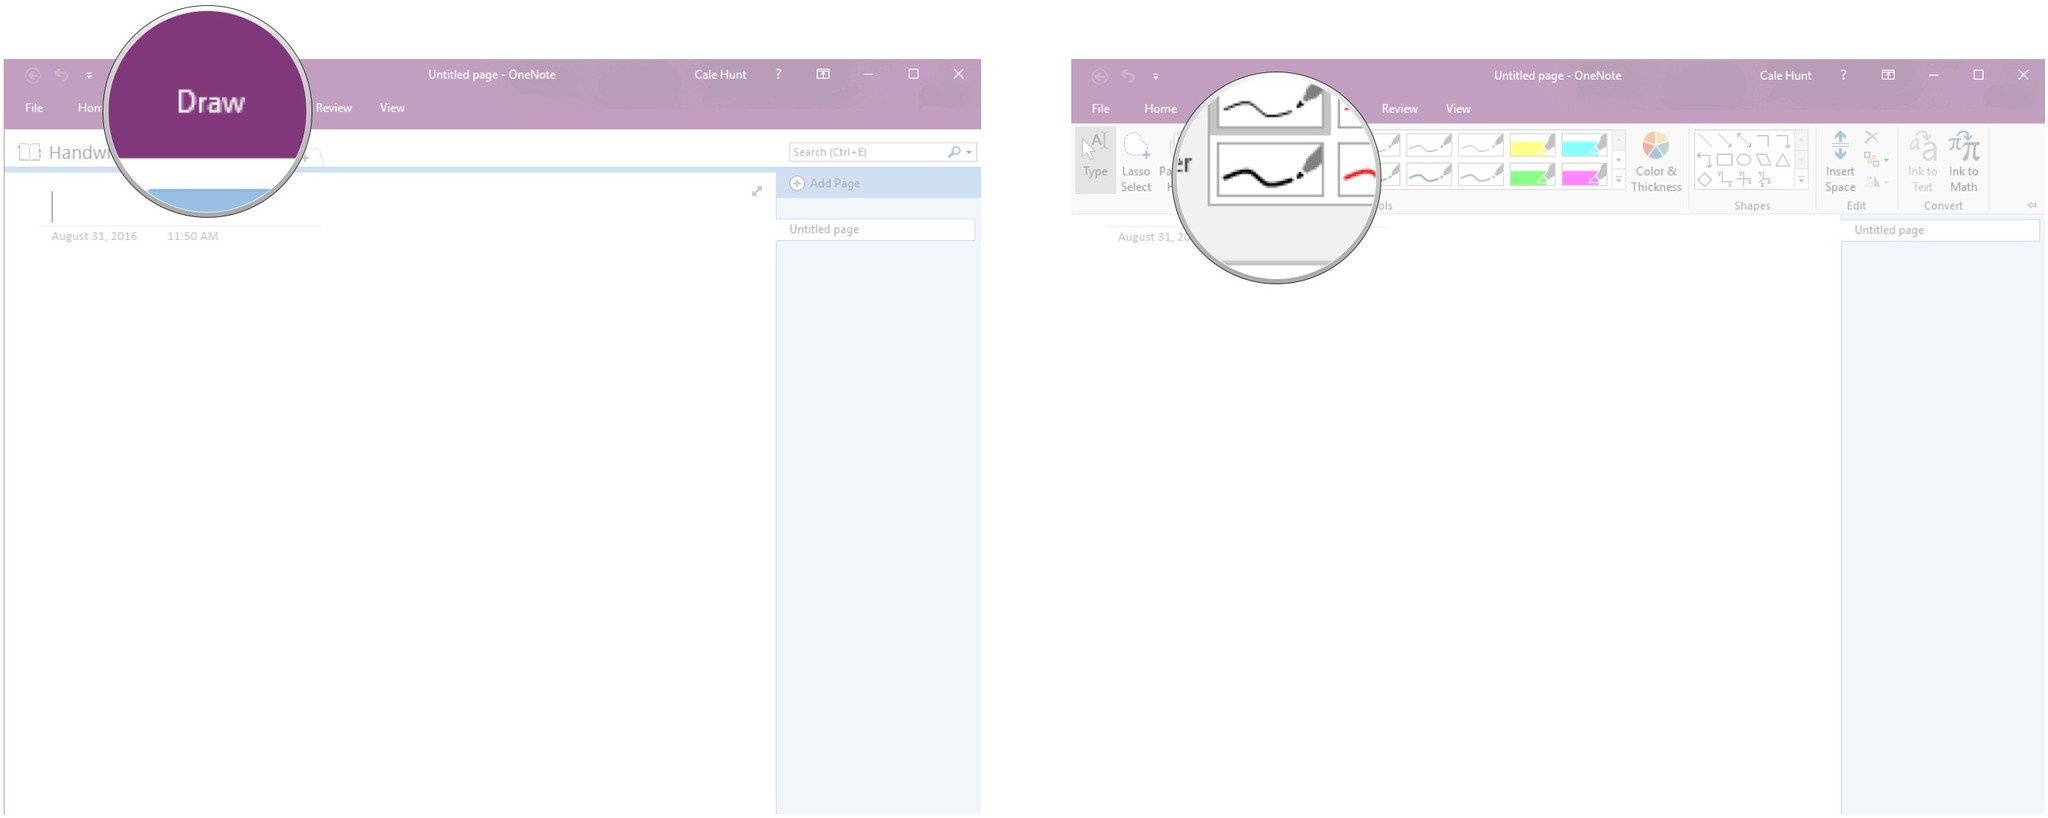
- Click Draw.
- Cick a drawing tool.
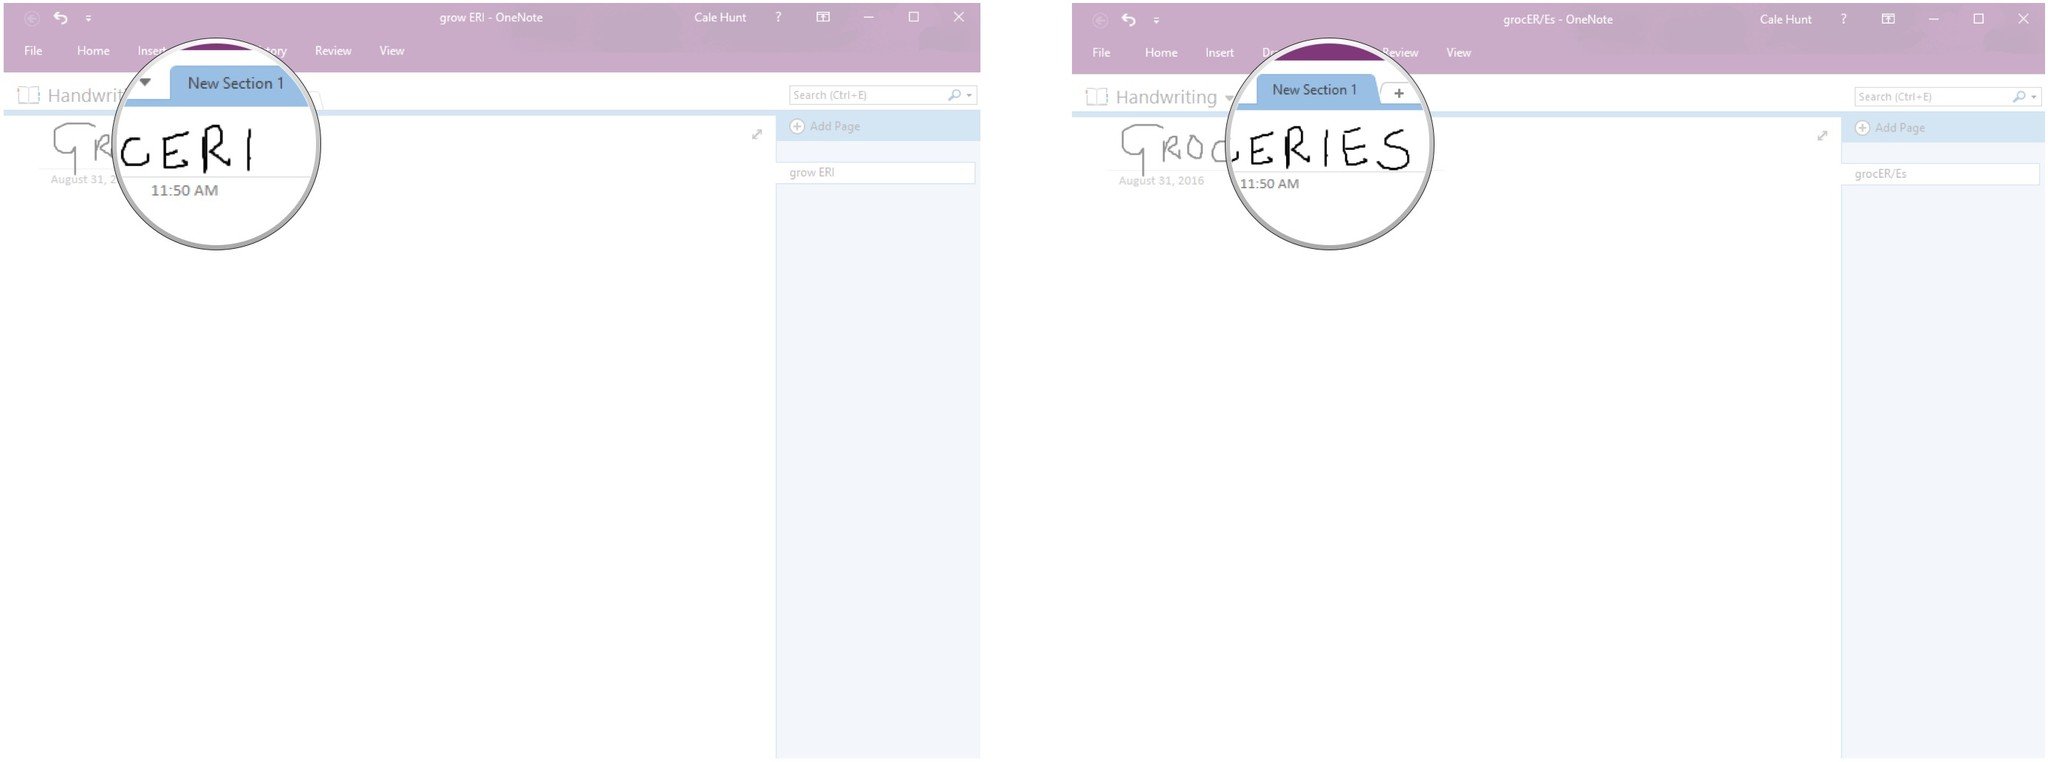
- Click and hold to draw a note.
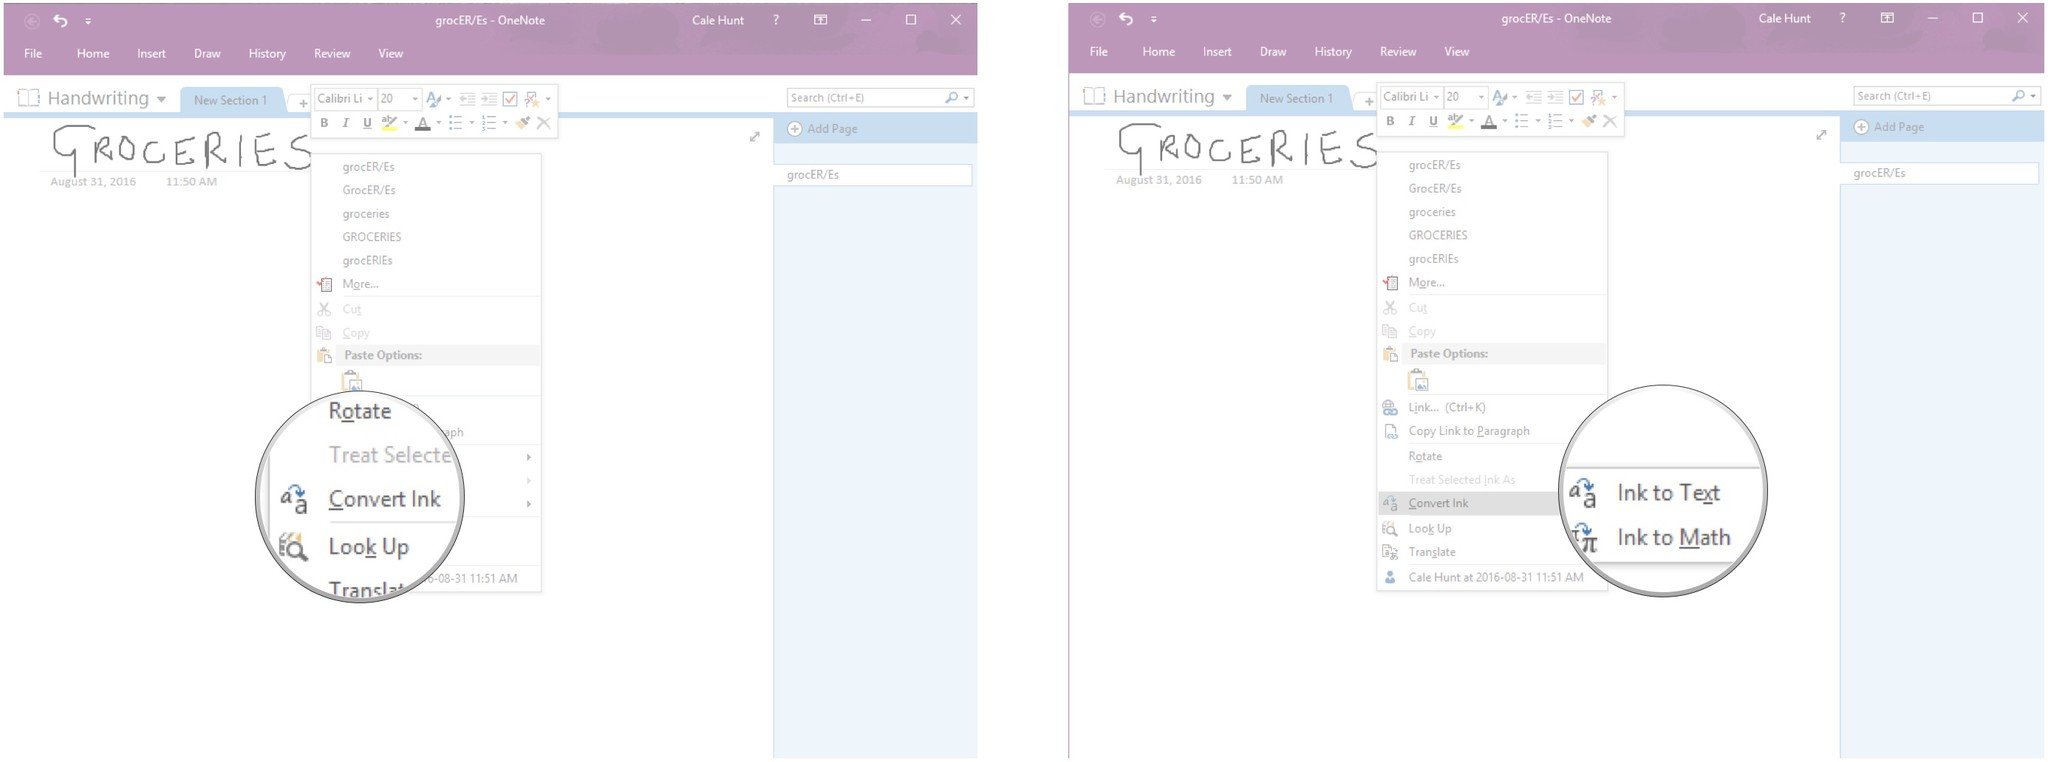
- Right-click the drawn text.
- Click Convert Ink.
- Click Ink to Text.
No, it's not perfect, but those of you with nice handwriting will have a much better time with this feature.
Save time with Flash Fill in Excel
If you're ever working in Excel with an enormous table of data, Excel can help you out by automatically filling in values. All you need to do is insert enough data for Excel to notice a pattern, and it will take care of the rest.
Here's how to open an existing Excel spreadsheet and use Flash Fill on the data already within:
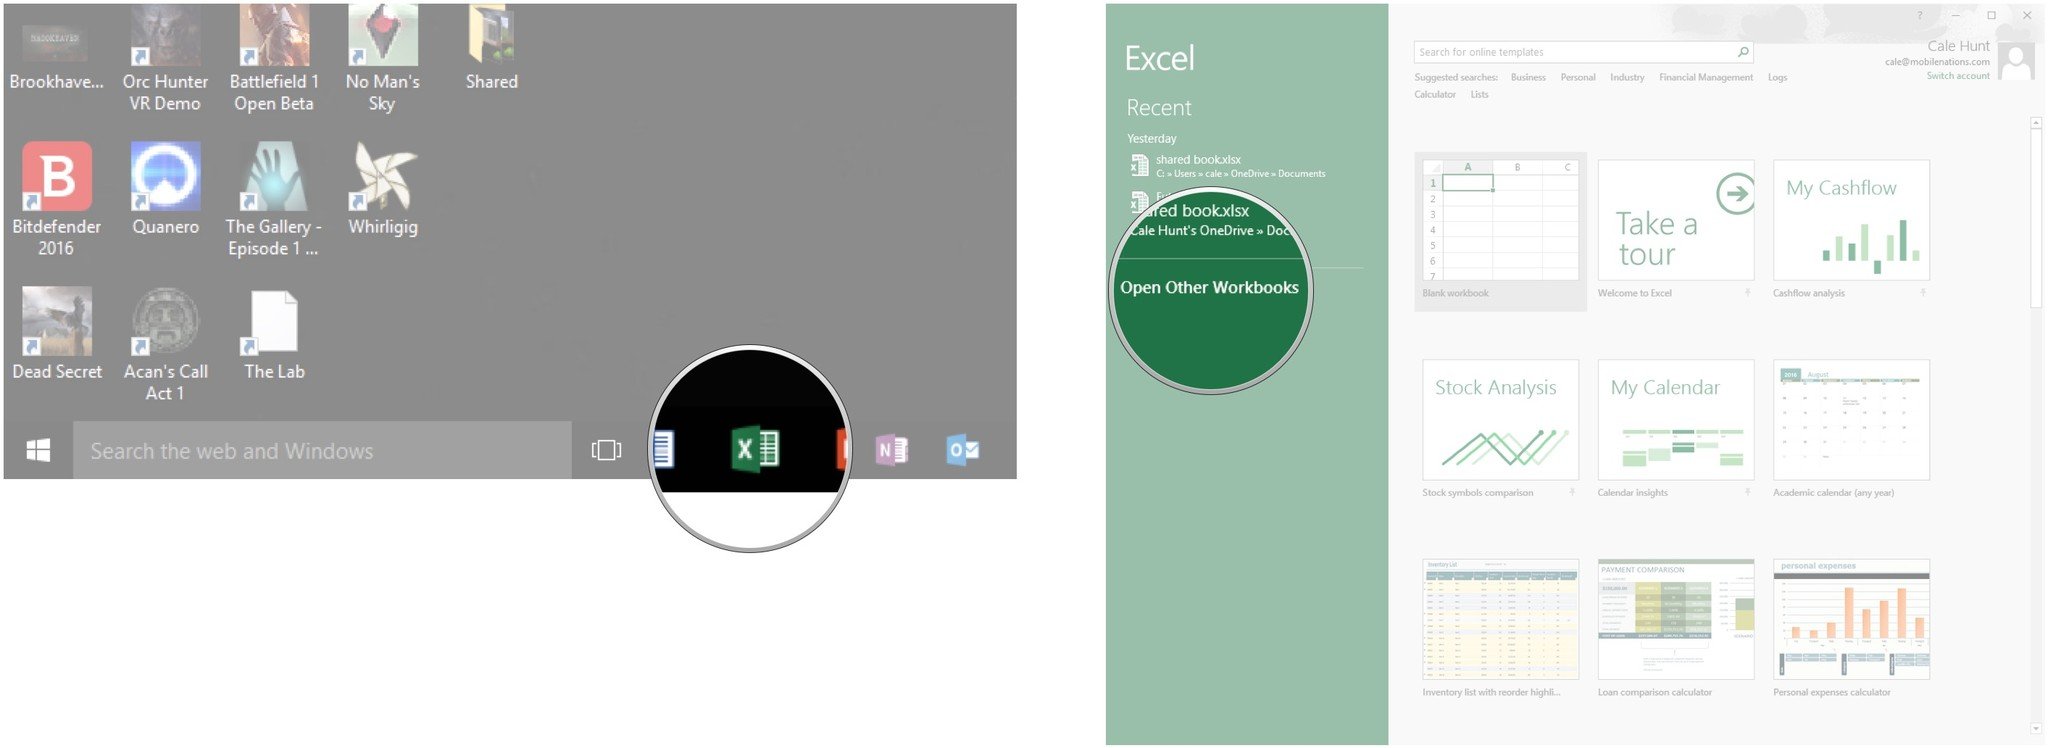
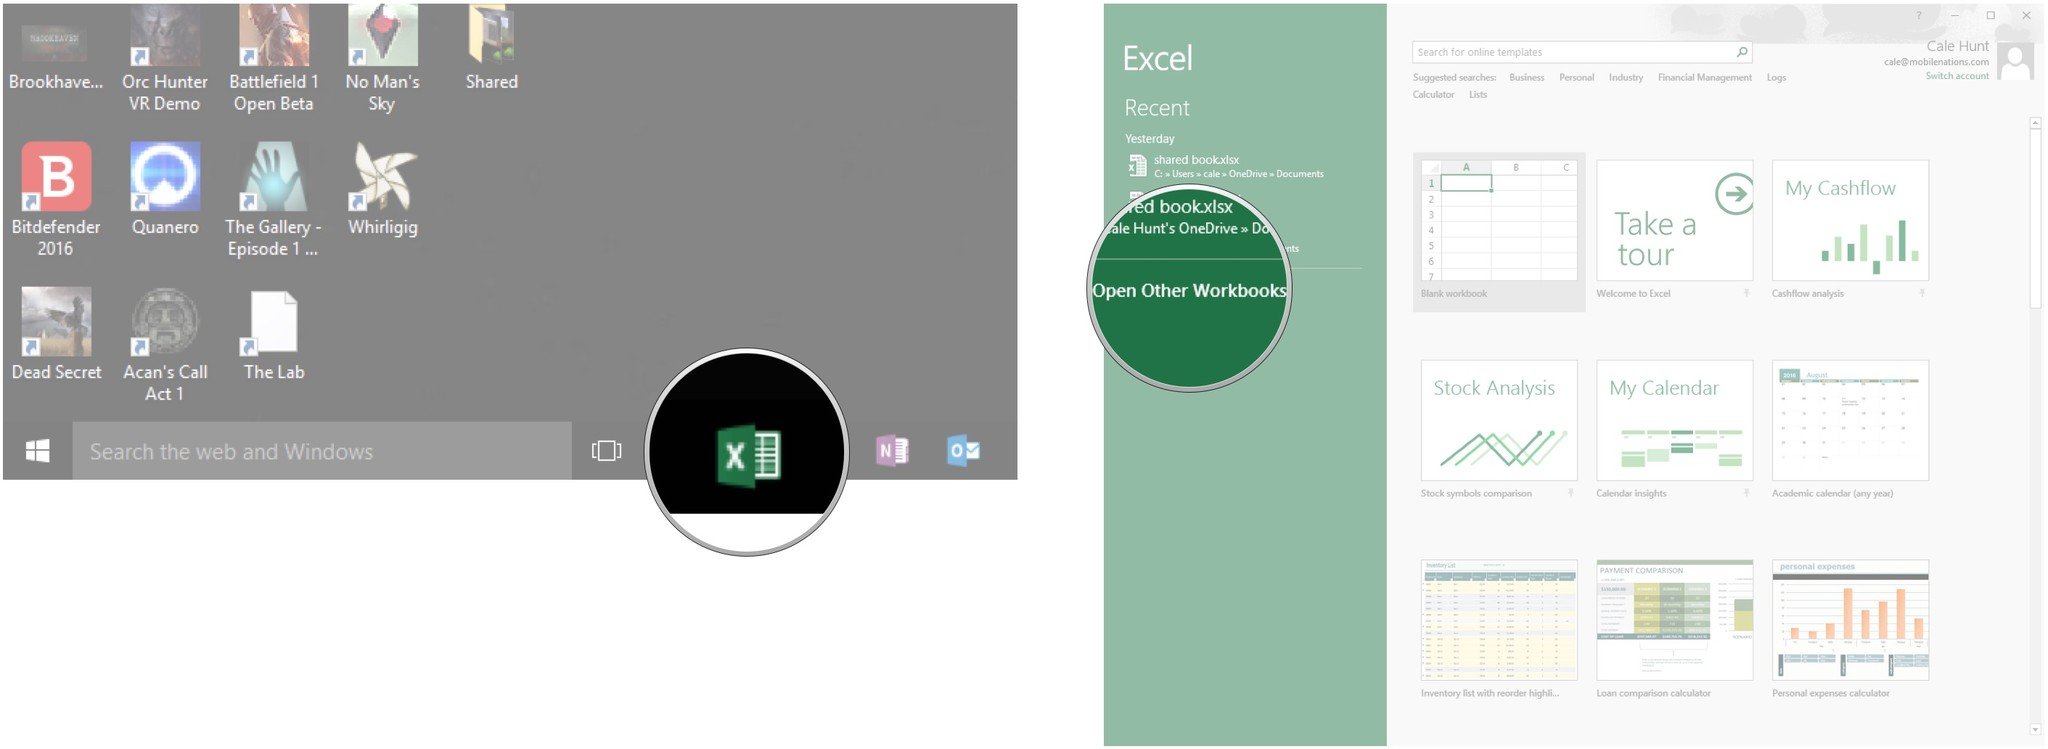
- Launch Excel from your Start menu, desktop, or taskbar.
- Click Open Other Workbooks.
- Click the file you'd like to open.
- Type a value in a cell and hit Enter on your keyboard.
- Hit Ctrl + E on your keyboard to automatically fill in the rest of the column values.
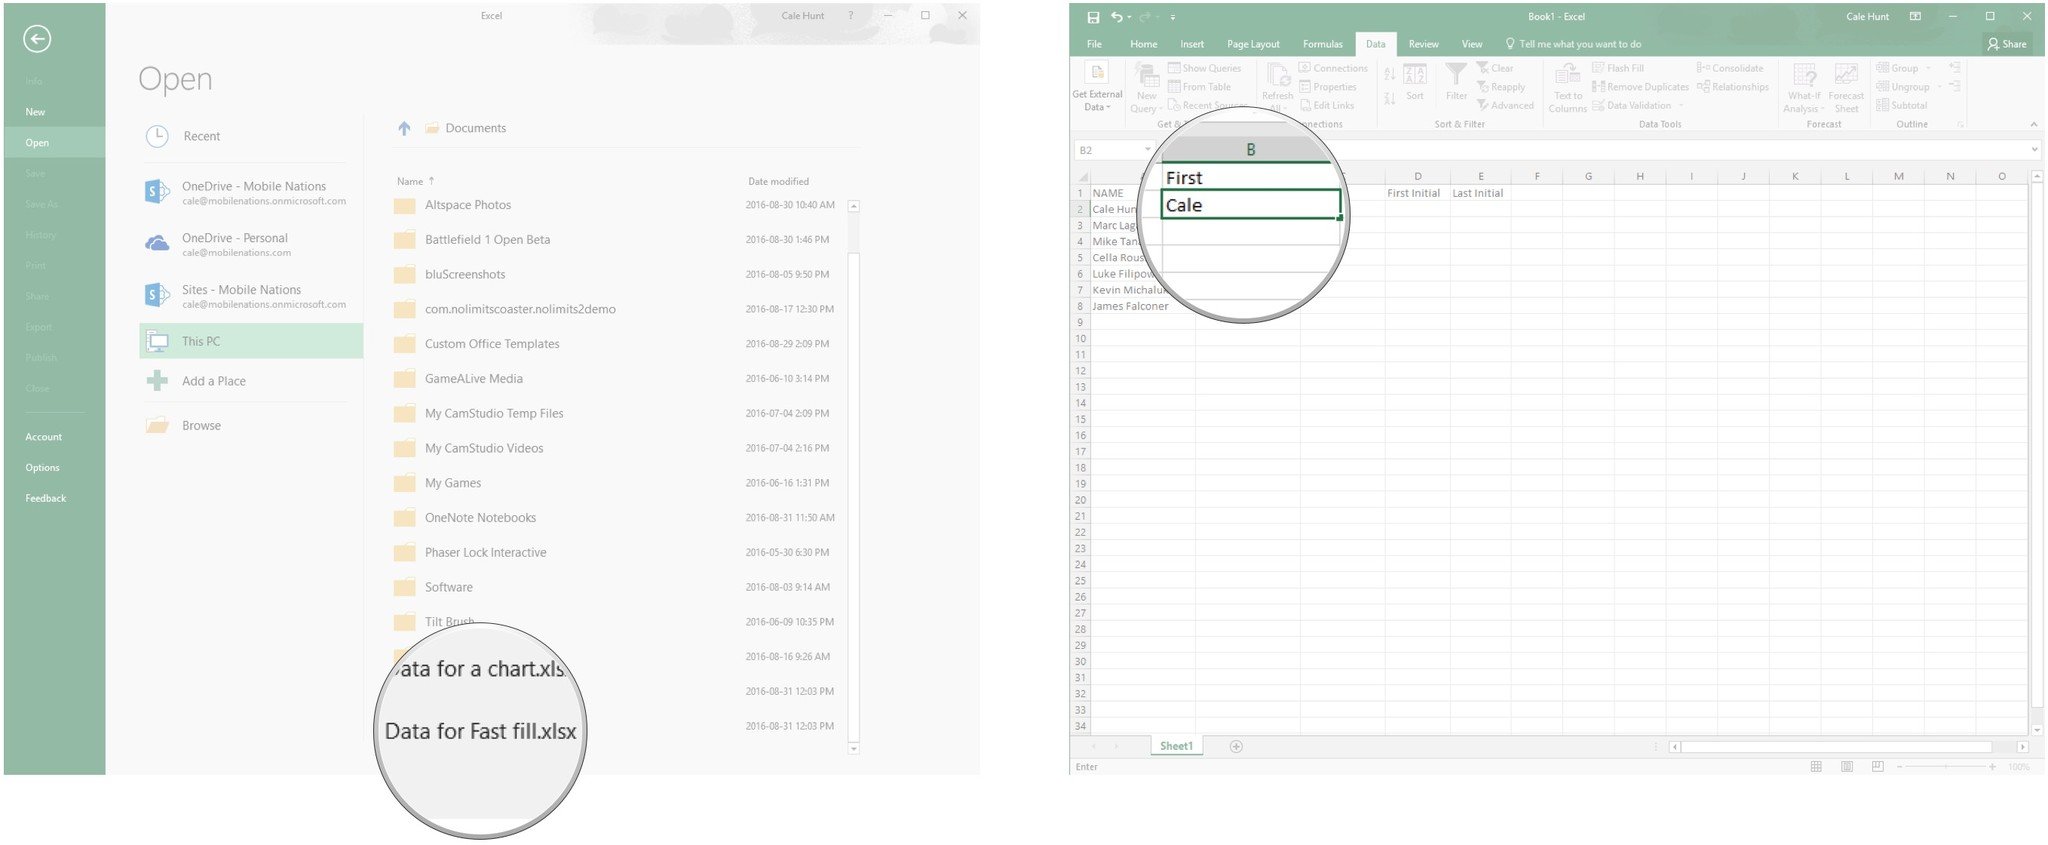
If Flash Fill doesn't work immediately, keep filling in values until Excel recognizes a pattern.
Create custom animations in PowerPoint
Morph in PowerPoint allows you to create custom animations using virtually any art or text inserted into your slides. It's really up to you what you do with the tool, and some people get very creative with weaving images in and out of their presentations.
We'll leave the intricate art up to you, but here's how to create a new PowerPoint presentation and float a star between two slides.
- Launch PowerPoint from your Start menu, desktop, or desktop.
- Double-click a presentation template.
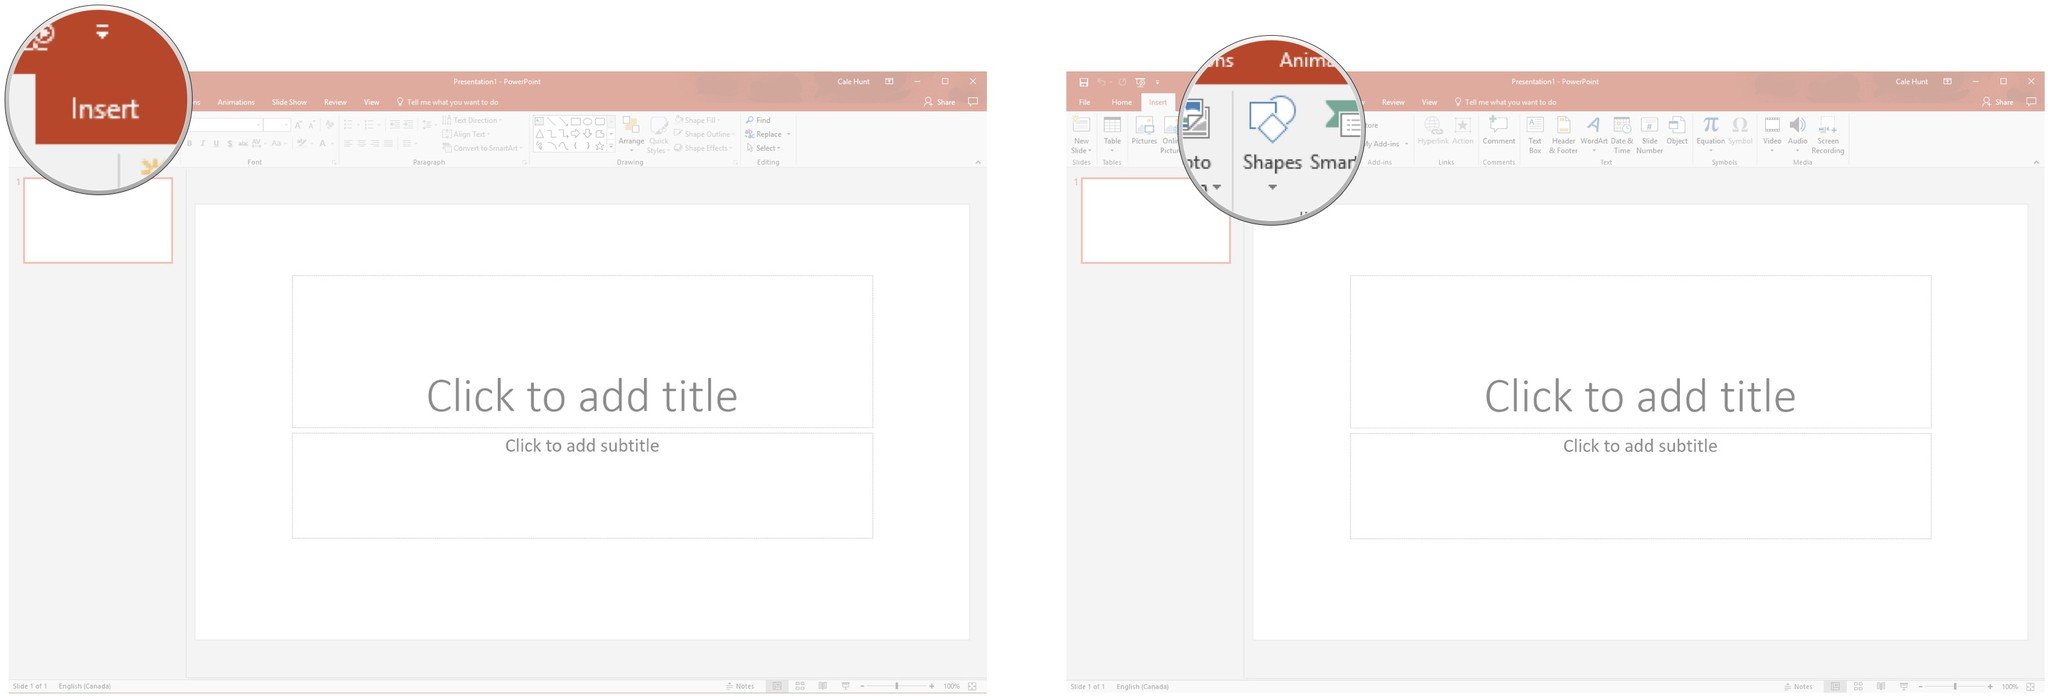
- Click Insert.
- Click Shapes.
- Click a star.
- Click and drag your mouse to create a star.
- Right-click the slide thumbnail to the left of the window.
- Click Duplicate slide.
- Click and drag the star to a new location.
- Hold Shift on your keyboard and click the first slide thumbnail.
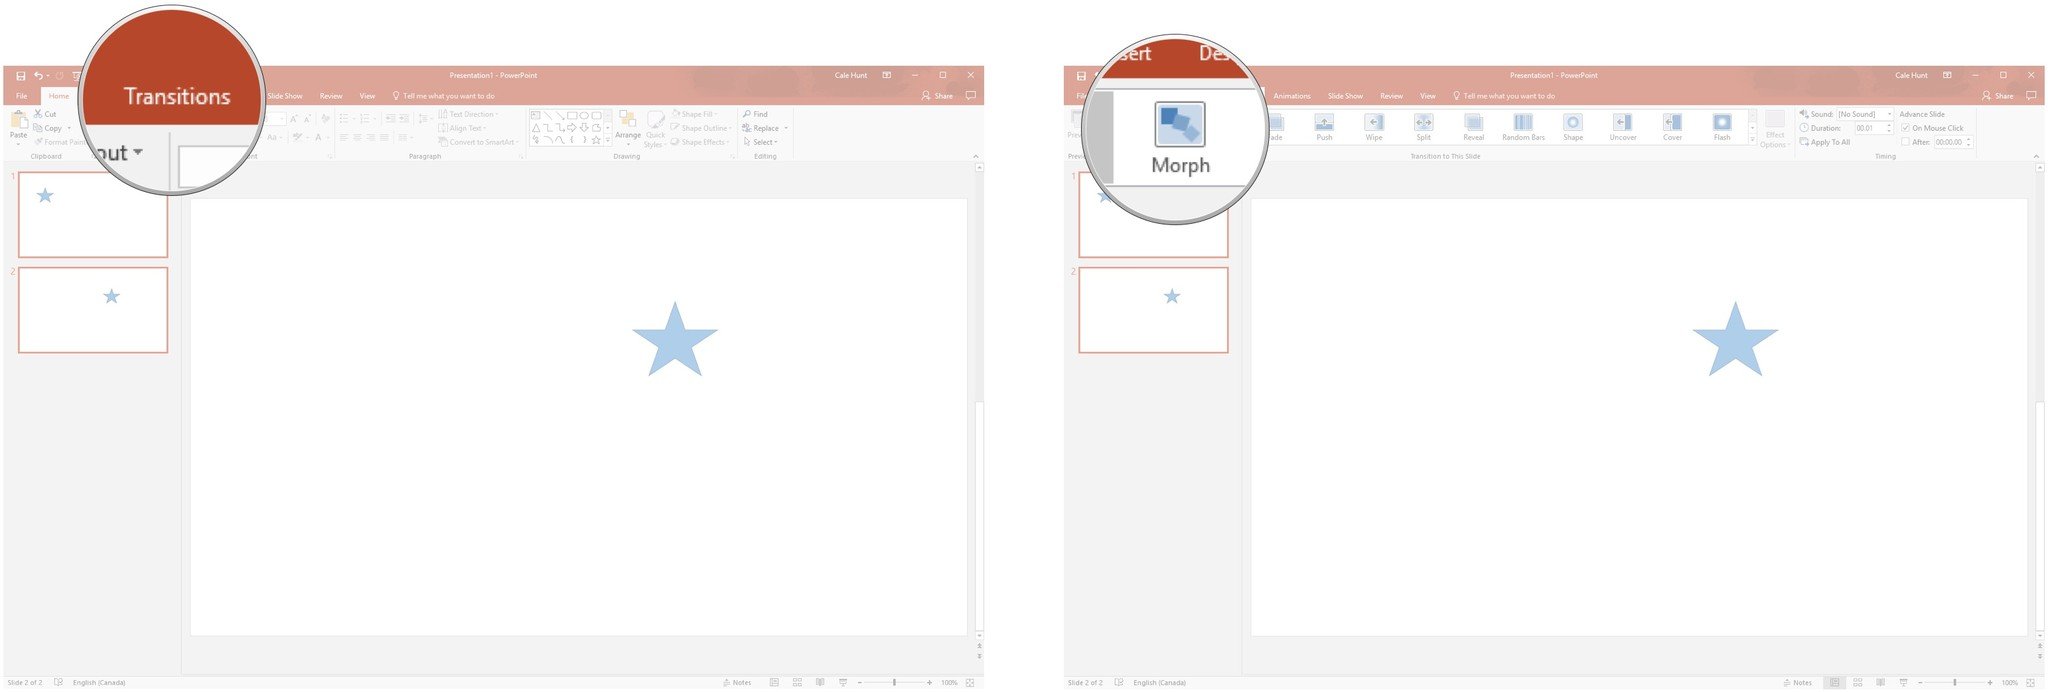
- Click Transitions.
- Click Morph.
You'll be shown a preview of the animation you just created. This can be chained along multiple slides, and with much more intricate artwork.
Create instant charts with Excel
Having a lot of data in Excel can be confusing, especially if you just need to reference the data quickly and often. Excel has an included tool that automatically creates a chart from data.
Here's how to open an existing Excel spreadsheet and create a chart from the data within:
- Launch Excel from your Start menu, desktop, or taskbar.
- Click Open Other Workbooks.
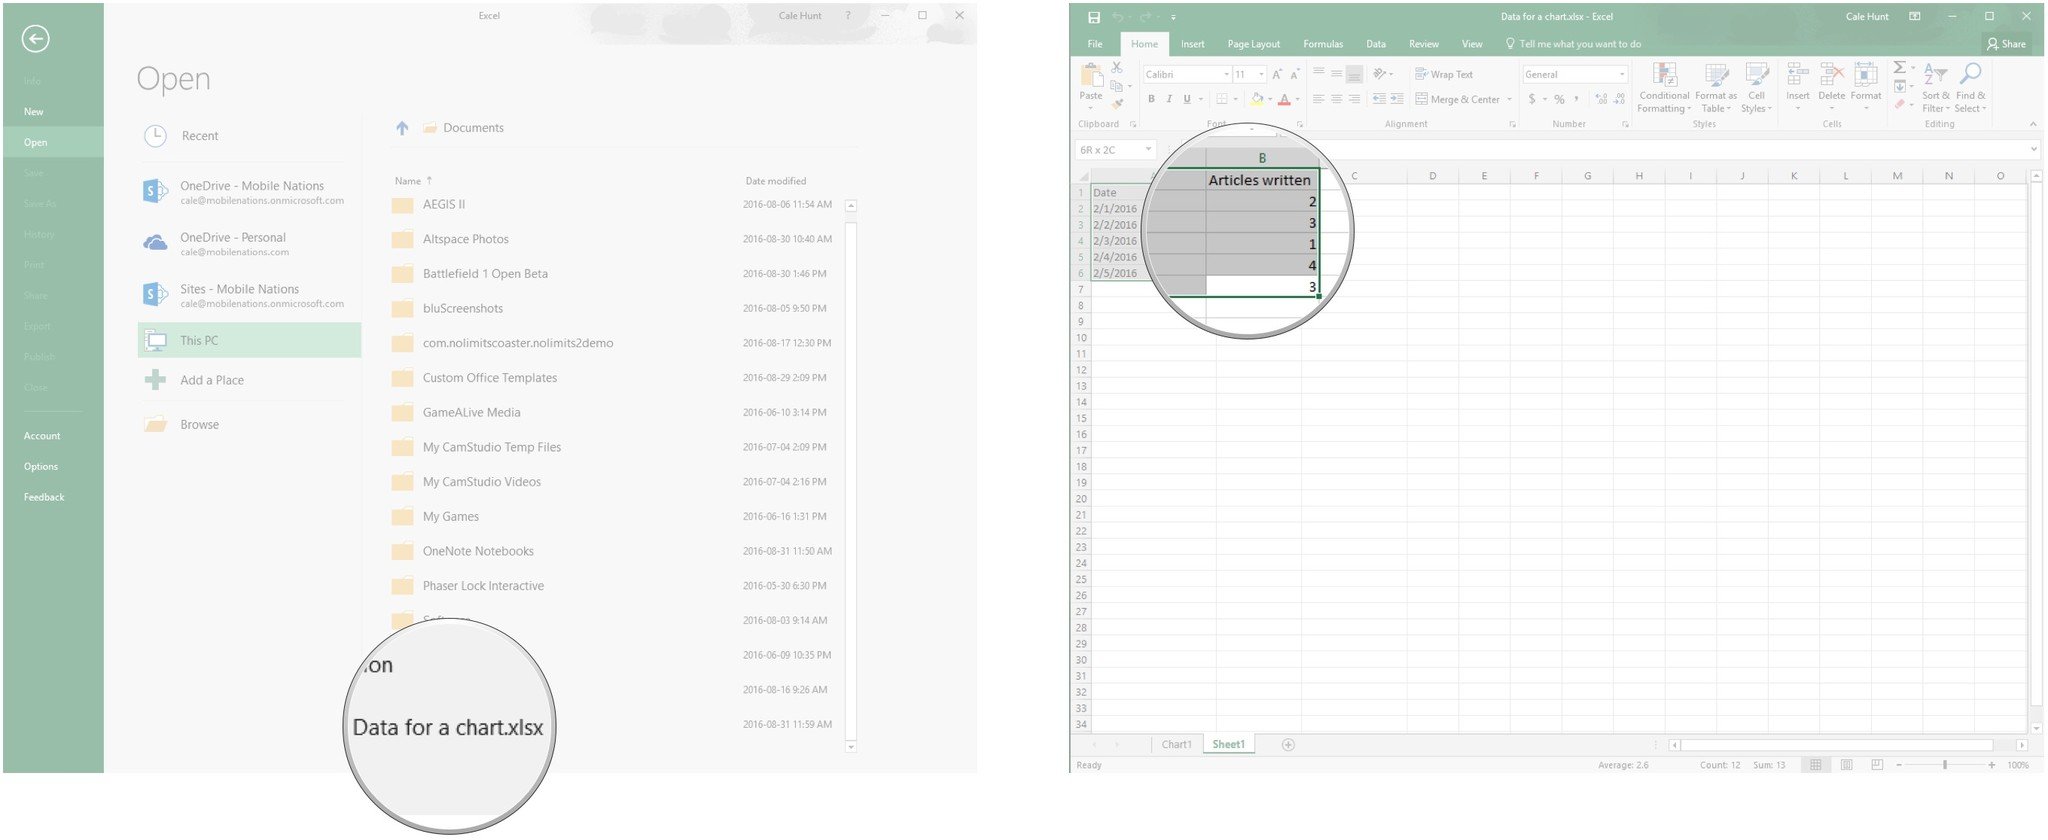
- Click the file in which you'd like to create a chart.
- Click and drag to highlight the data you'd like made into a chart.
- Hit F11 on your desktop keyboard, or Fn + F11 if you're using a laptop.
That's all there is to it. Excel will switch over to the sheet containing the chart.
Here's how to switch back to your sheet containing numerical data:
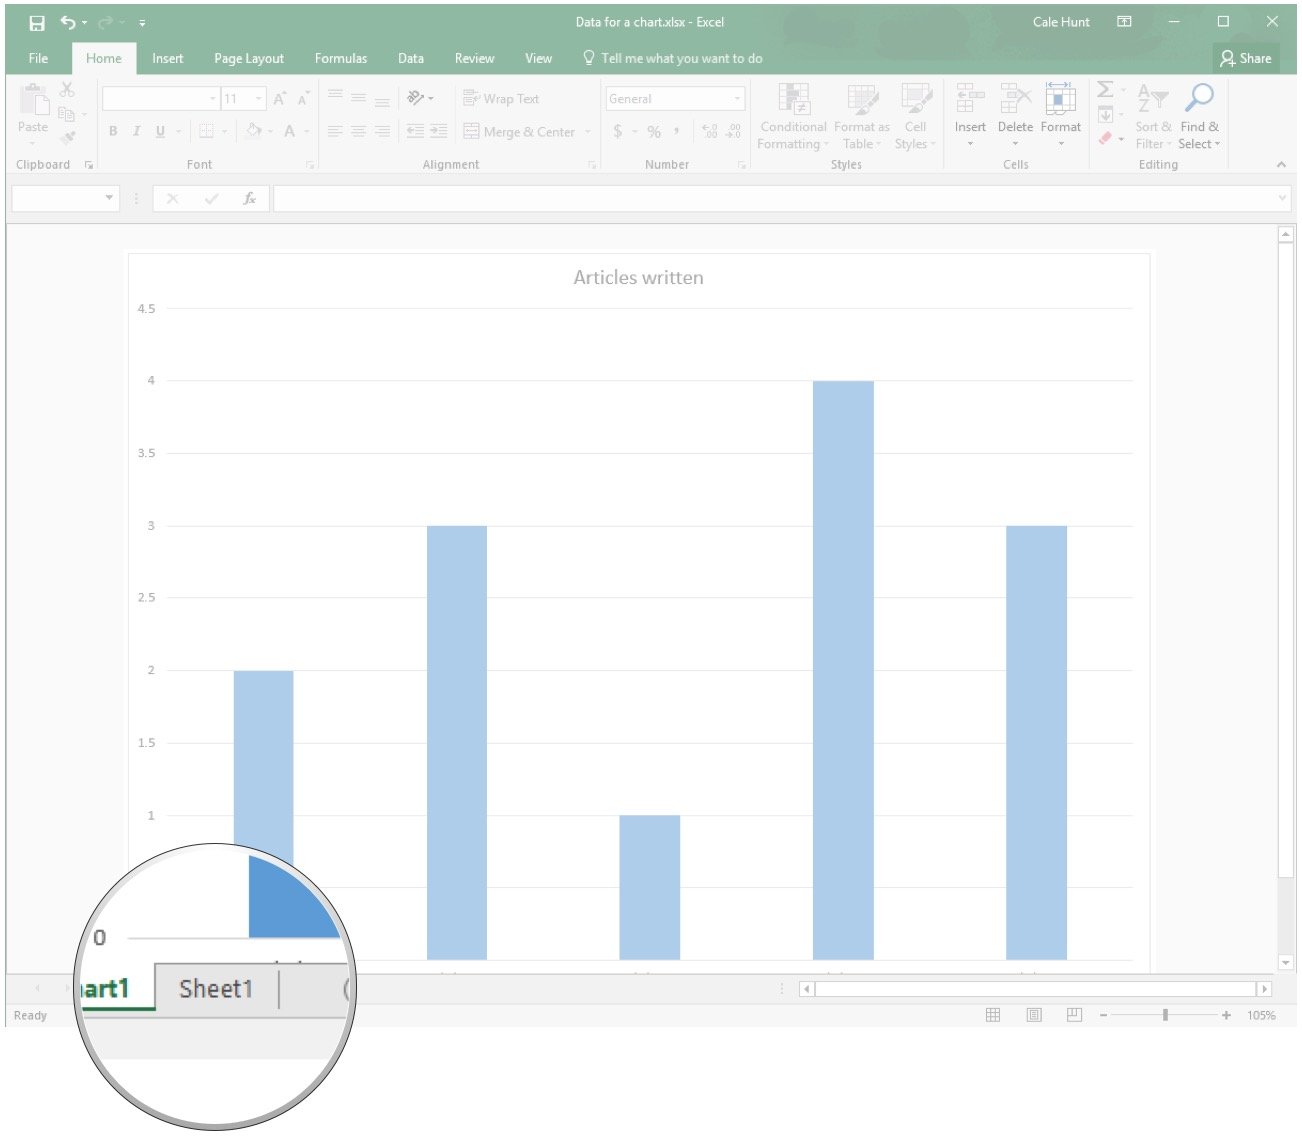
- Click the Sheet 1 tab. It is located near the bottom of the window.
Here's how to delete the chart when you're finished with it:
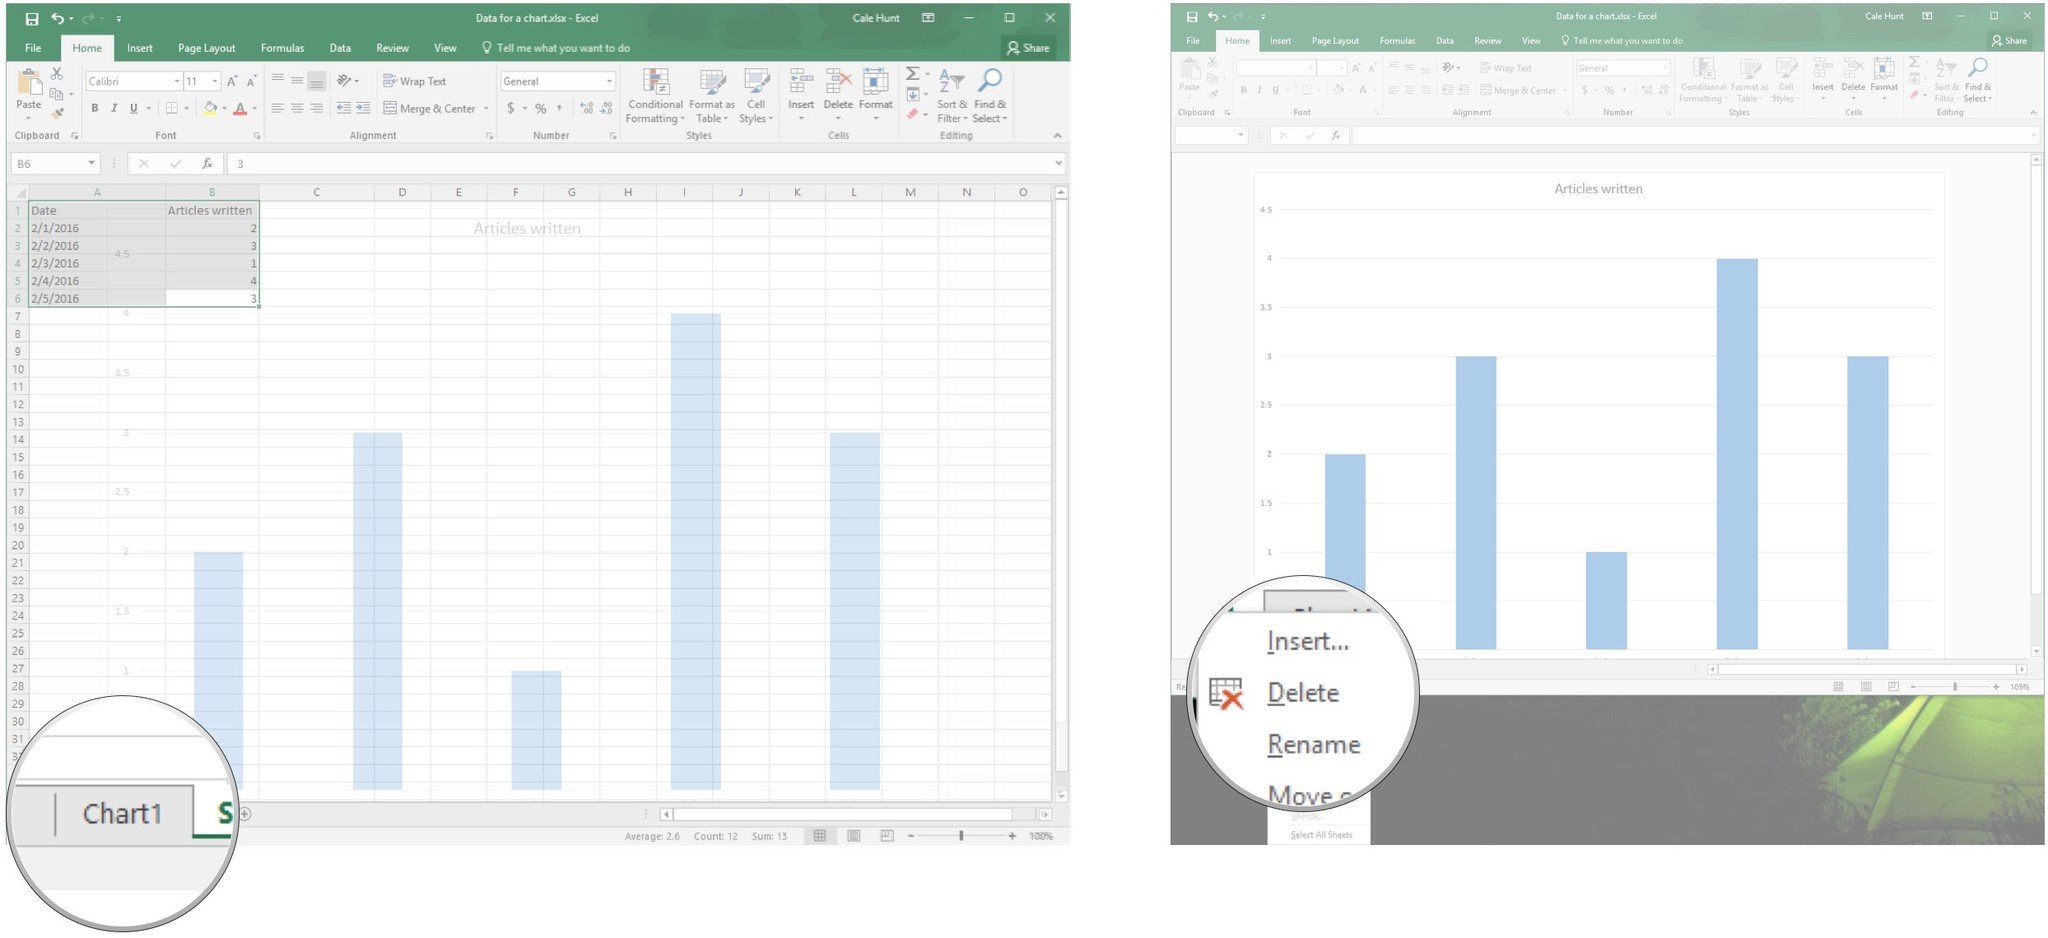
- Right-click the Chart1 tab. It is located near the bottom of the window.
- Click Delete.
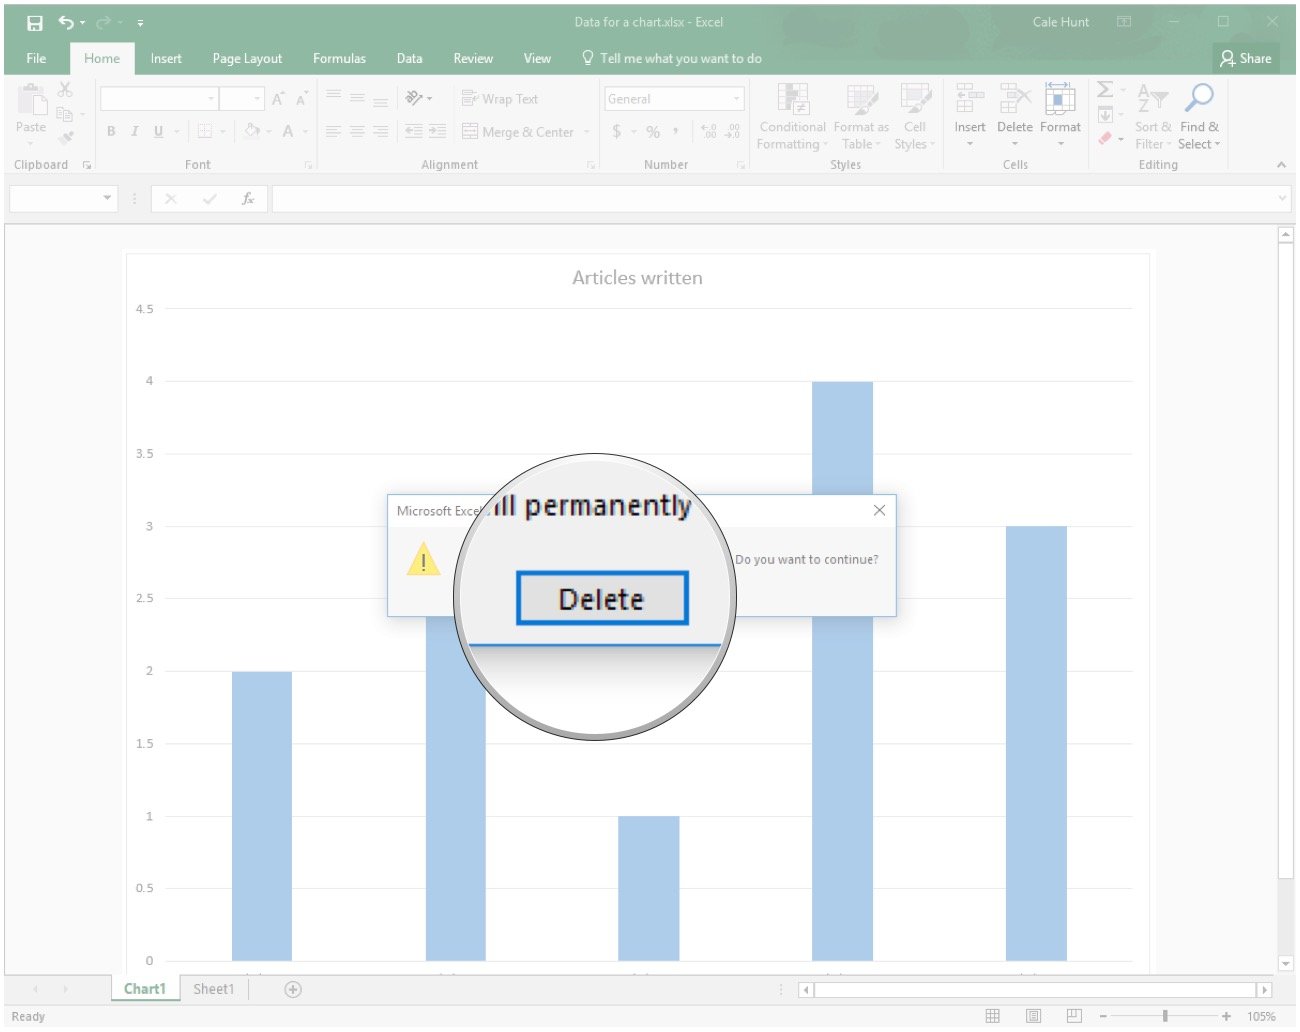
- Click Delete.
Your favorite Office 365 features
What are some less-known features of Office 365 you love to use? Let us know in the comments section below!

Cale Hunt brings to Windows Central more than nine years of experience writing about laptops, PCs, accessories, games, and beyond. If it runs Windows or in some way complements the hardware, there’s a good chance he knows about it, has written about it, or is already busy testing it.

