7 features you need to know and configure on OneDrive for Windows 11
Check out these lesser-known features from OneDrive that can help you boost productivity, organization, privacy, and file recovery.
All the latest news, reviews, and guides for Windows and Xbox diehards.
You are now subscribed
Your newsletter sign-up was successful
On Windows 11, if you use OneDrive, you're probably familiar with its core functionality, syncing files across devices and backing up your important data to the cloud. However, the cloud storage service includes many lesser-known features that can improve productivity, improve privacy, reduce clutter, and make file management easier.
From customizing folder colors and restoring previous file versions to turning off unwanted notifications and AI photo tagging, OneDrive offers more control than most users realize.
In this how-to guide, I'll highlight some of the lesser features that everyone should know how to use in OneDrive for Windows 11.
7 features you probably didn't know about OneDrive
These are some of the features you may not know that can improve your experience in OneDrive.
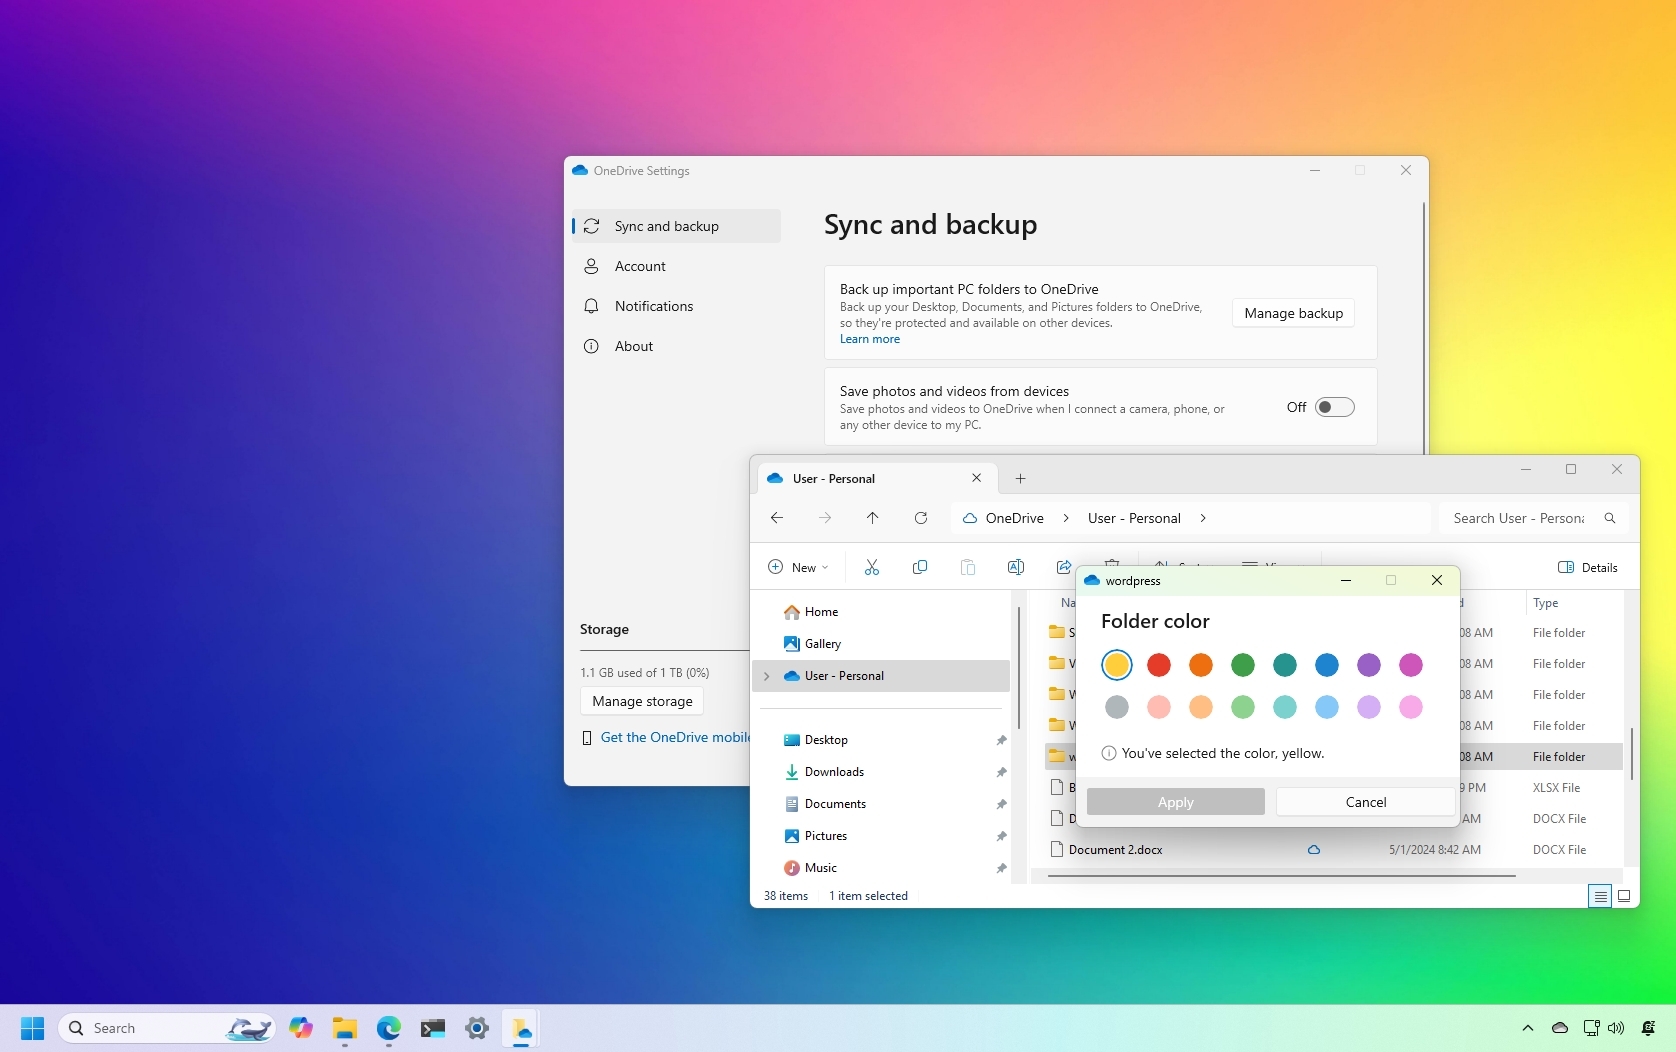
1. Organize OneDrive with custom folder colors
Although the ability to assign a color to a folder is a minor aesthetic detail, it can be beneficial for organization, productivity, and visual clarity, especially for folders with many files.
To set a color for the folder, use these steps:
- Open File Explorer.
- Click on the OneDrive folder from the left pane.
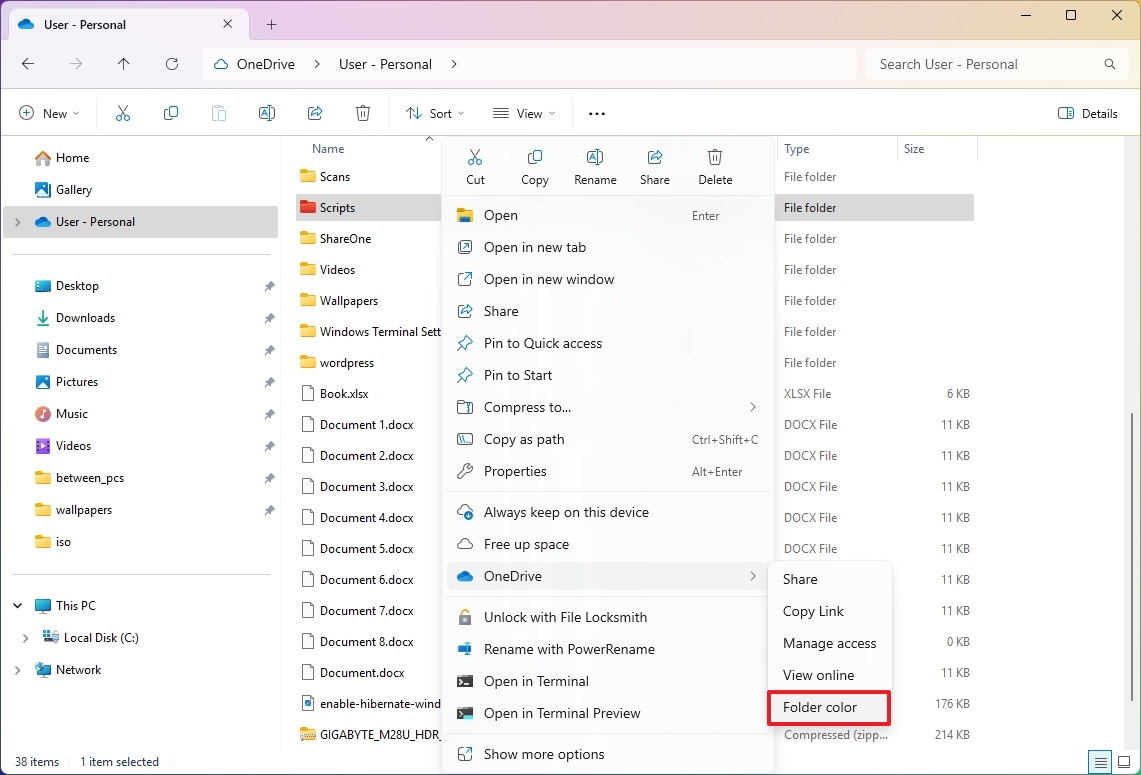
- Right-click the folder you want to colorize.
- Select the OneDrive menu and choose the Folder color option.
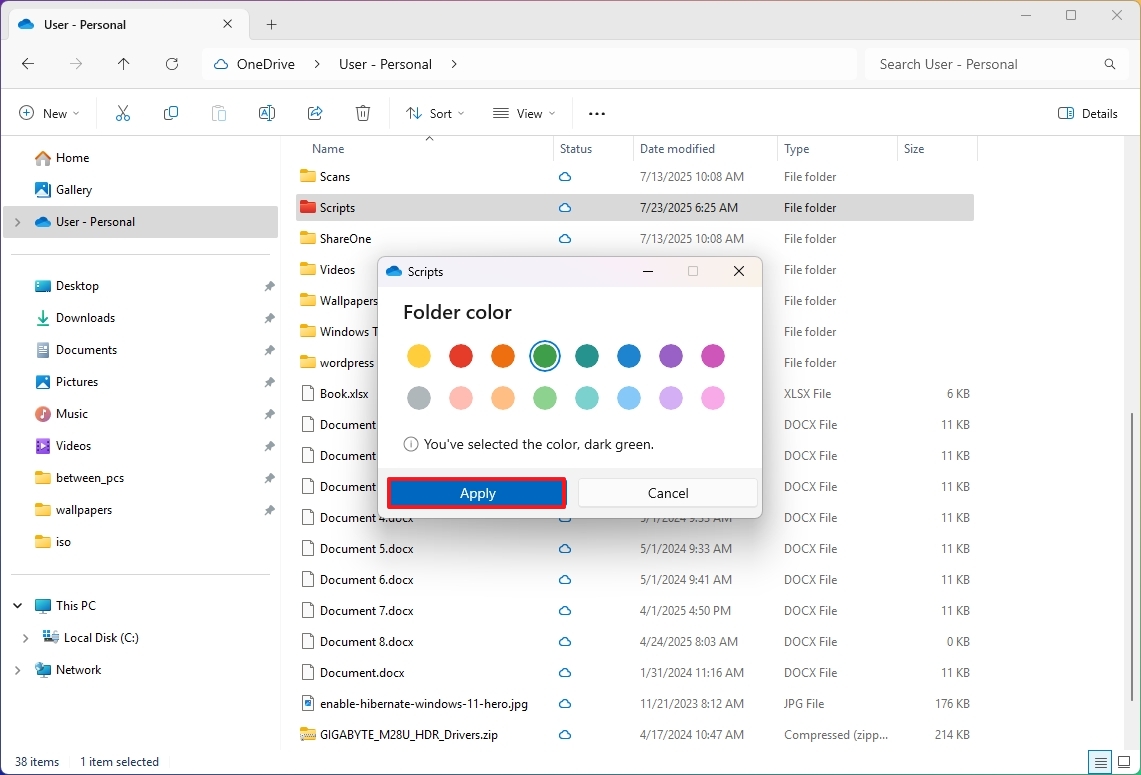
- Select the color for the folder.
- Click the Apply button.
Once you complete the steps, the folder icon will be updated with the color you specified.
All the latest news, reviews, and guides for Windows and Xbox diehards.
The ability to change the folder colors should be available through the web, but in my personal account, I couldn't find the option, and I'm not the only one.
2. Silence “On this Day” reminders
The "On this Day" feature has been designed to show you photos and videos that you may have taken on that specific day in previous years.
Although this feature can bring a touch of nostalgia by resurfacing your digital content from the same calendar date in previous years, the problem is that after a while, you're constantly receiving daily notifications to view this content. The other issue is that even though you may use the Photos app already connected to OneDrive, the notification always opens the contents in the web version of the cloud storage service.
If you have had enough of these notifications, you can easily turn this feature off using these steps:
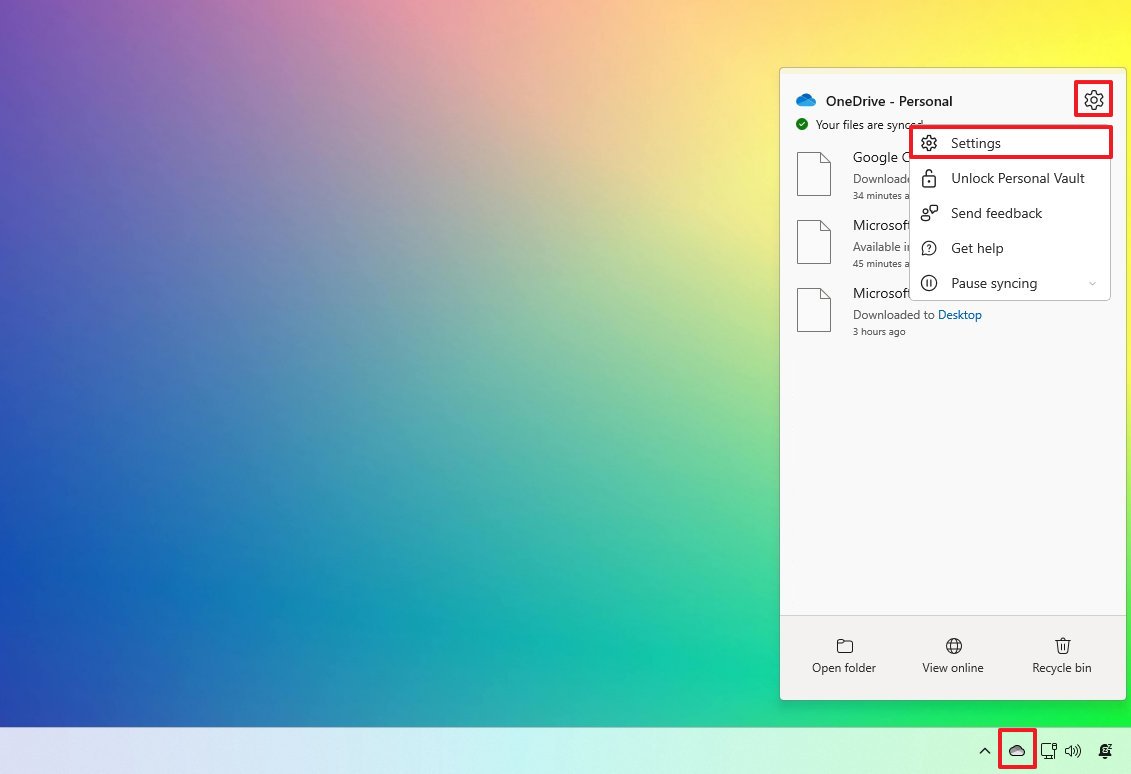
- Click the OneDrive icon in the System Tray.
- Click the Settings button.
- Click the Settings option one more time.
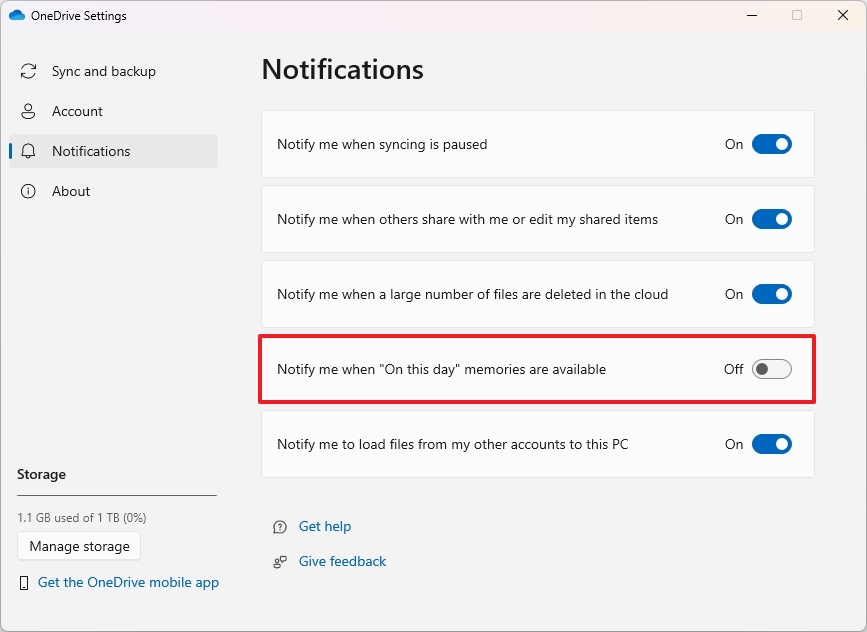
- Click on Notifications.
- Turn off the "Notify me when 'On this day' memories are available" toggle switch.
After you complete the steps, OneDrive will no longer send you notifications for this particular feature.
You can also change this setting from the web, more specifically from the Notifications page.
3. Disable AI-powered photo tagging
OneDrive can use AI to scan and tag pictures and faces in your images to make it easier to find them. However, if you don't like the idea of AI scanning your images, you can always disable these features.
To disable photo tagging in OneDrive, use these steps:
- Open OneDrive (web).
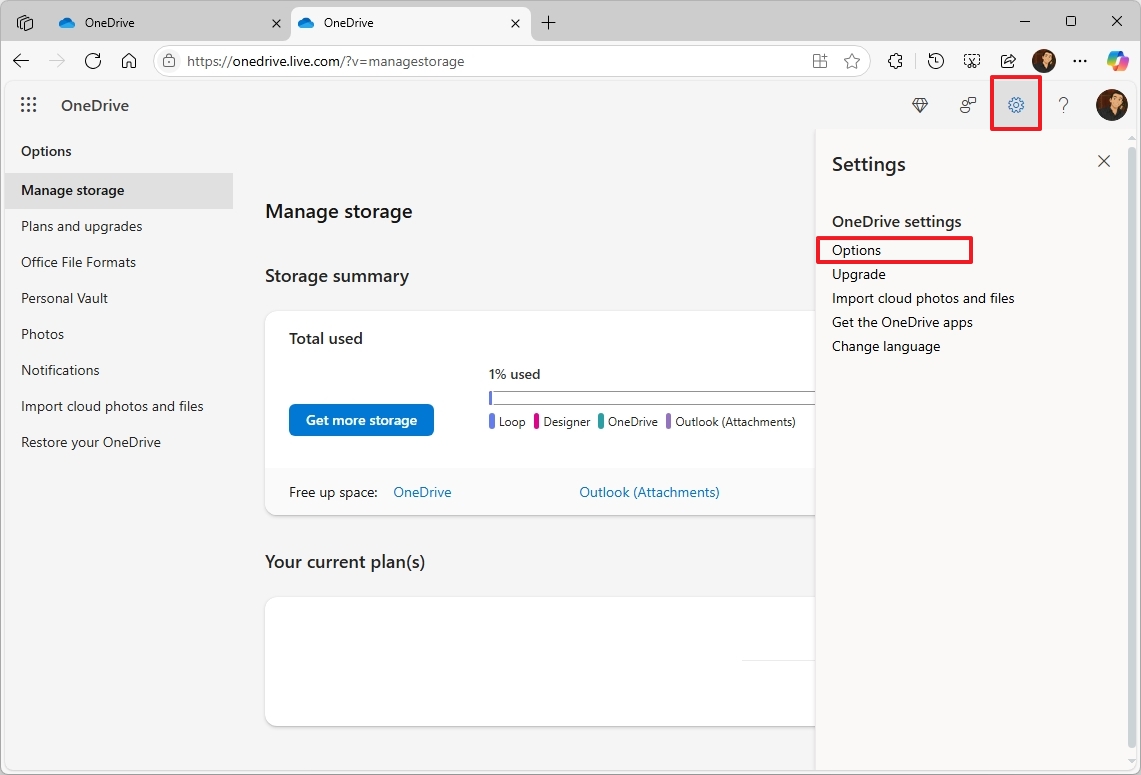
- Click the Settings button on the top-right.
- Click on Options.
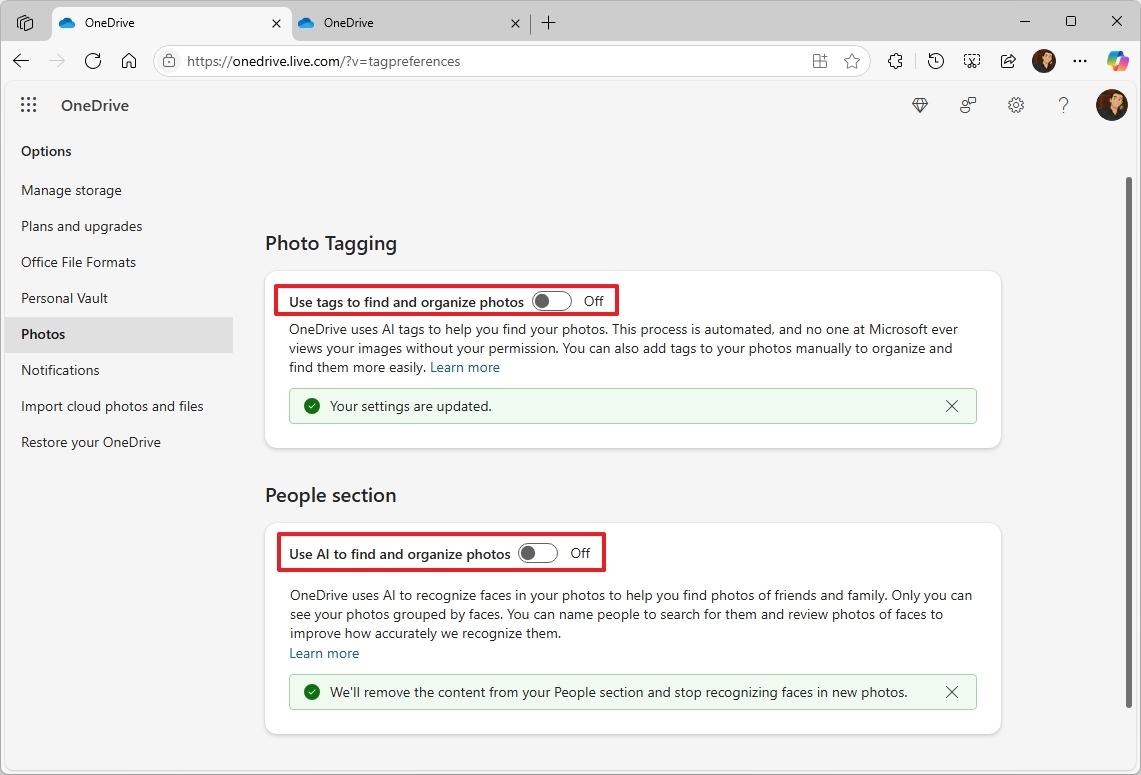
- Click on Photos from the left pane.
- Turn off the "Use tags to find and organize photos" toggle switch to prevent AI from adding related tags to your pictures.
- Turn off the "Use AI to find and organize photos" toggle switch to prevent AI from scanning your images for faces.
Once you complete the steps, OneDrive will stop using AI to tag images and faces on your pictures.
If you turn off this feature, it may also affect the search functionality when searching for a specific object or person from content in the cloud.
4. Import files from Google Drive or Dropbox
If you want to use OneDrive as your only online storage provider, the service offers options to import your files from Google Drive and Dropbox (but not from iCloud).
To import your files from other cloud storage providers, use these steps:
- Open OneDrive (web).
- Click the Settings button on the top-right.
- Click on Options.
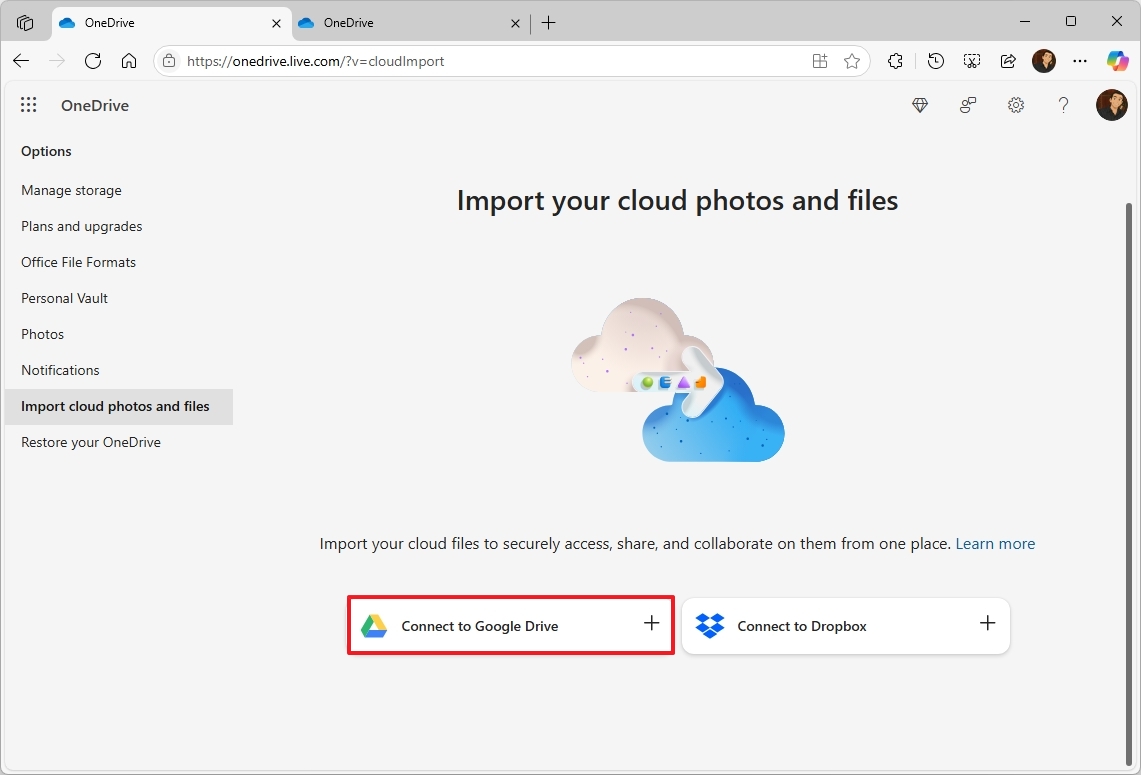
- Click on Import cloud photos and files from the left pane.
- (Option 1) Click the "Connect to Google Drive" option.
- (Option 2) Click the "Connect to Dropbox" option.
- Continue with the on-screen directions to complete the transfer.
This process will require signing in with your other cloud provider and allowing permission for Microsoft 365 to copy your files over OneDrive.
Also, this action will only make a copy of the files. Your original data will remain available in the other storage provider.
5. Use OneDrive's account restore tool
Although you can recover deleted files from the OneDrive Recycle Bin, Microsoft also offers a restore tool that allows you to restore all the changes from a previous point in time.
This option usually comes in handy if something goes wrong in OneDrive, and you have to restore the storage to a previous point in time.
To restore OneDrive to a previous state, use these steps:
- Open OneDrive (web).
- Click the Settings button on the top-right.
- Click on Options.
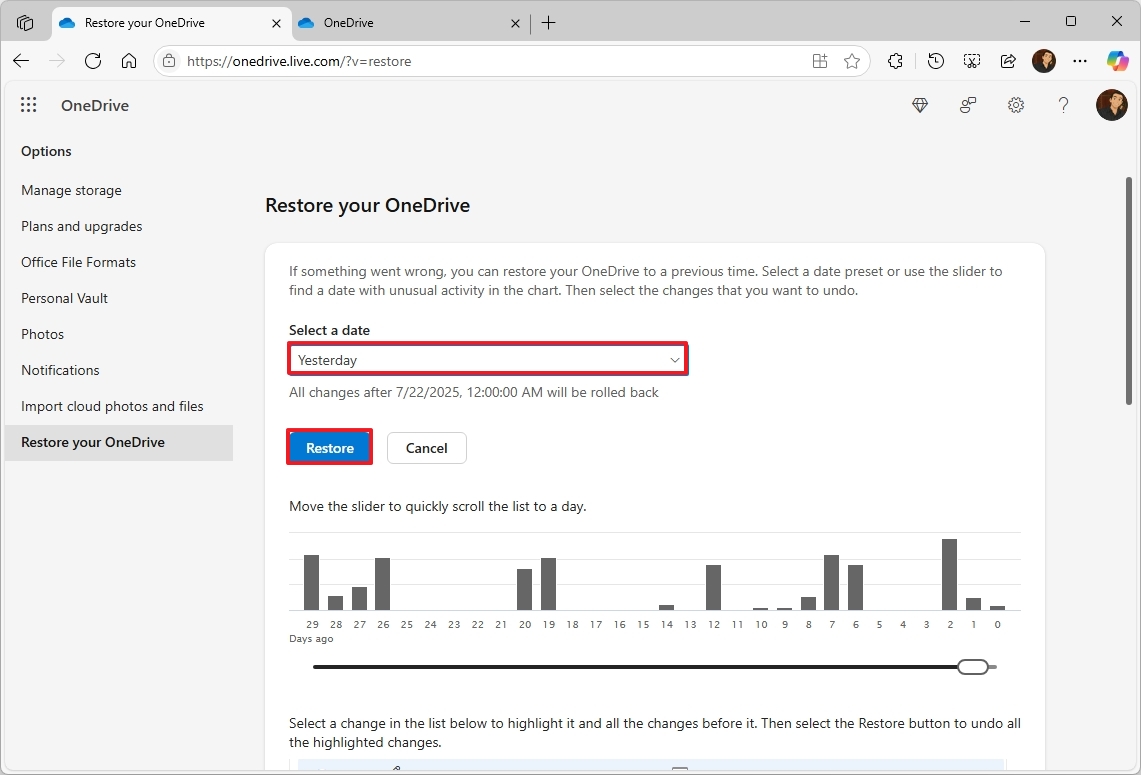
- Click on Restore your OneDrive from the left pane.
- Select the date (such as yesterday, one week ago, three weeks ago, or custom) from the available settings.
- Click the Restore button.
- Continue with the on-screen directions to complete the restoration (if applicable).
Once you complete the steps, the changes will be restored on your OneDrive account.
6. Revert via file version history
OneDrive keeps multiple previous versions of your files, allowing you to revert to an older state.
To access the file history and restore a previous version, use these steps:
- Open File Explorer.
- Click on the OneDrive folder from the left pane.
- Right-click the file you want to restore a previous version.
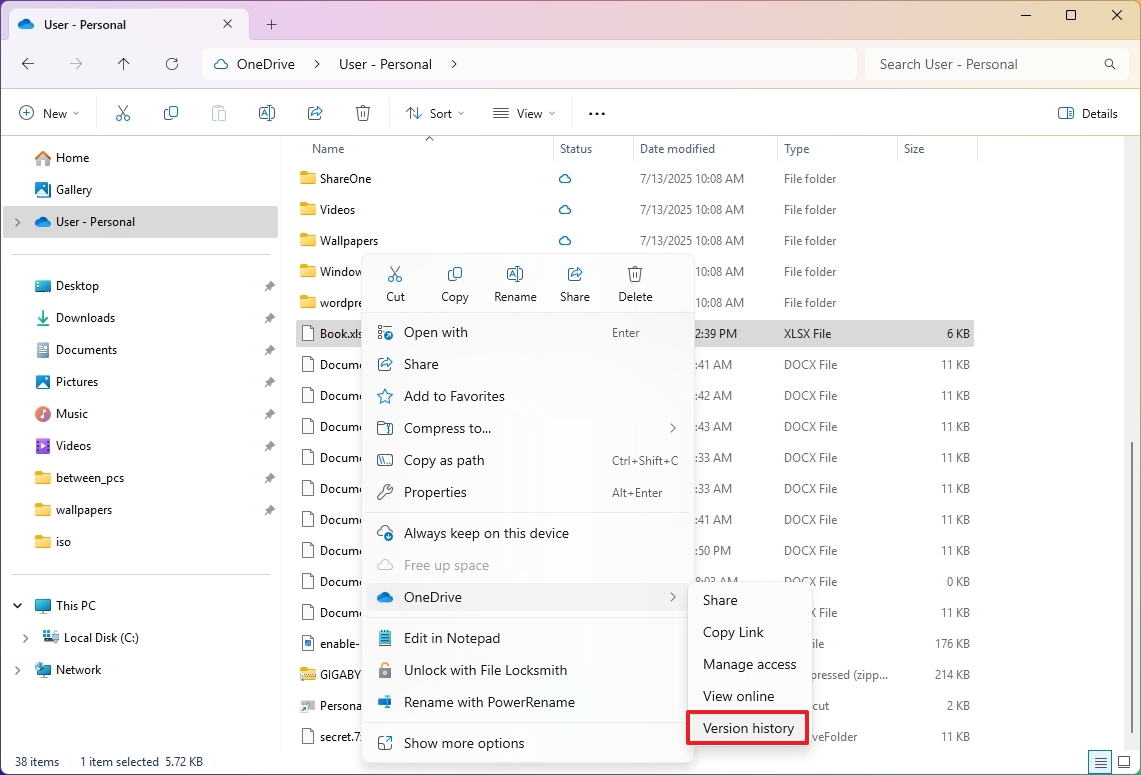
- Select the OneDrive menu and choose the Version history option.
- (Optional) Click the View online option to review the file before restoring.
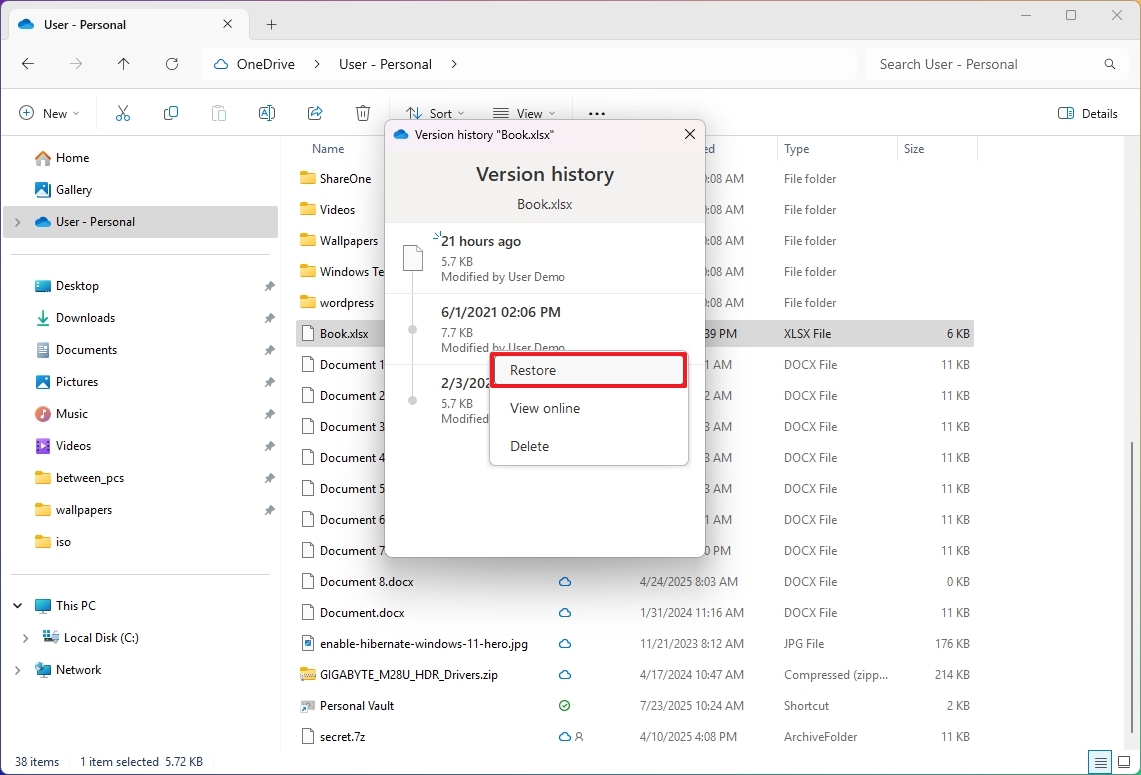
- Click the menu (three dots) button and choose the Restore option for the revision to recover.
After you complete the steps, the selected file will replace the existing one. However, this isn't an issue since you can always store the previous version using the steps.
If you want to compare the files, it's best to make a copy before trying to restore the previous version.
7. Secure sensitive files in Personal Vault
OneDrive Personal Vault is a protected area in your account (such as documents, personal records, pictures, etc.) designed specifically to store sensitive information. The data upload is encrypted and utilizes more robust security, including two-factor authentication, in addition to the standard sign-in process.
If you usually upload important content to cloud storage, you should be using the Vault feature instead of simply dropping files in your main folder.
The Personal Vault feature is available for free, but you can only store up to five files. If you want unlimited uploads, you will have to use a Microsoft 365 subscription.
To get started with the OneDrive Personal Vault, use these steps:
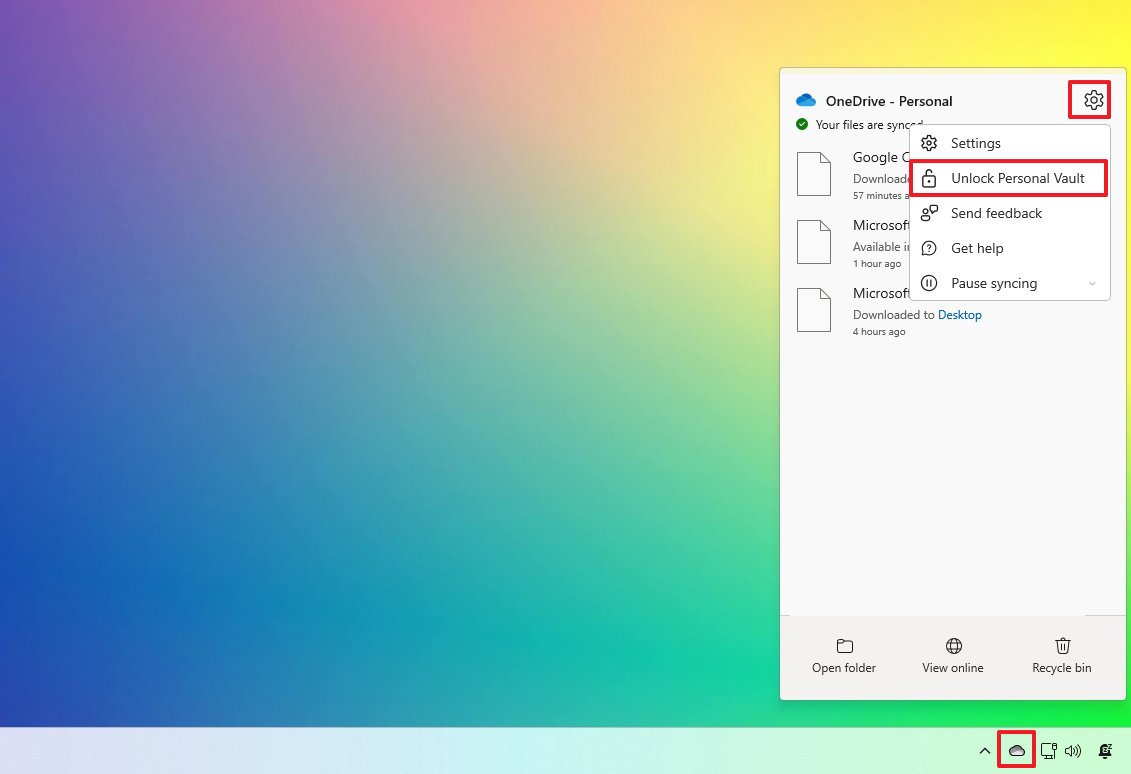
- Click the OneDrive icon in the System Tray.
- Click the Settings button.
- Click the Unlock Personal Vault option.
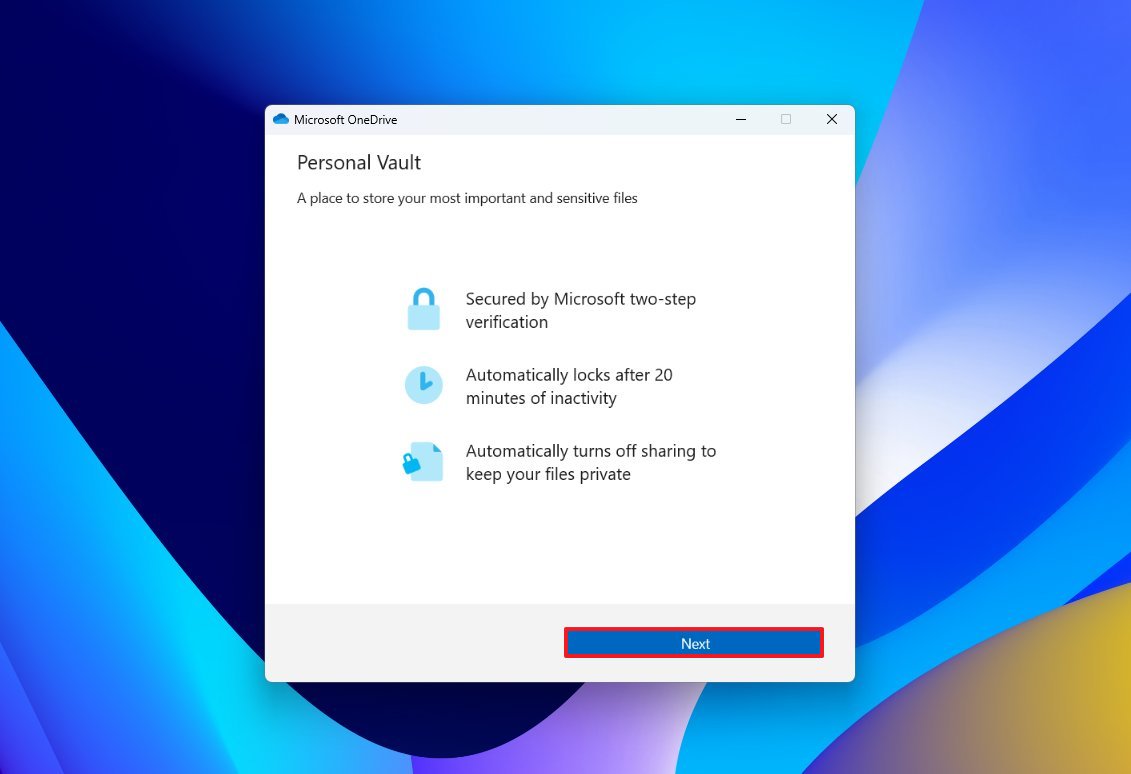
- Click the Next button.
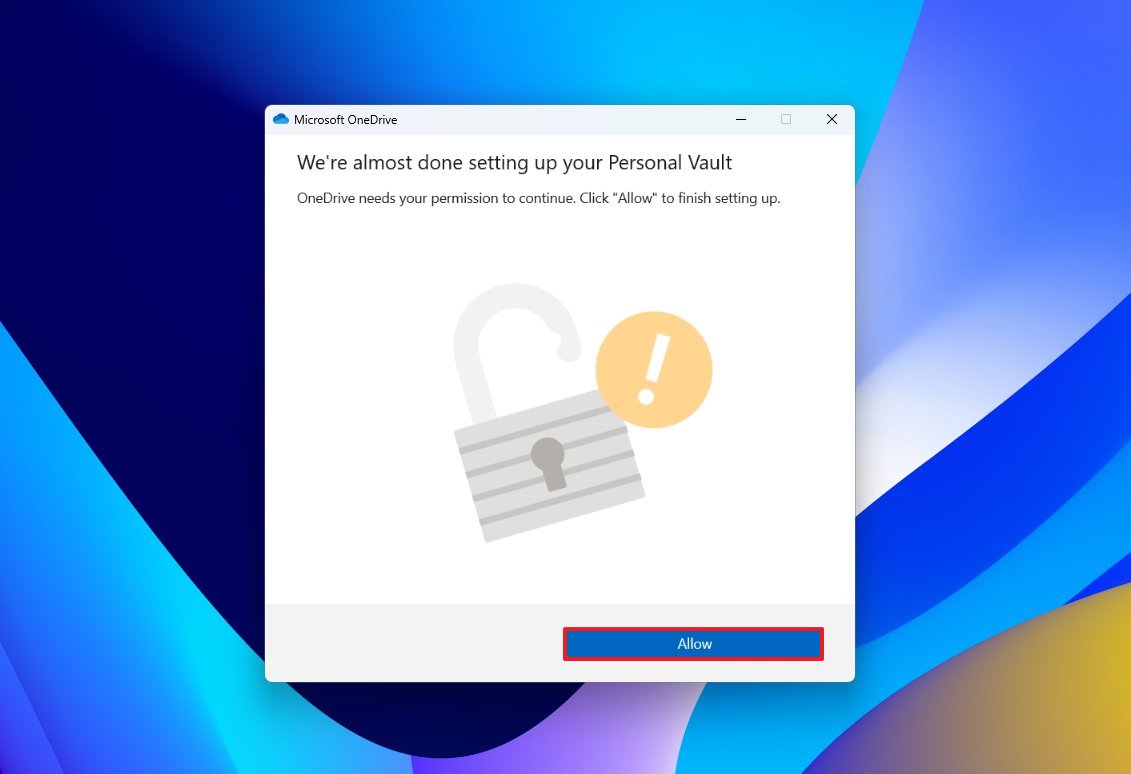
- Click the Allow button.
- Sign in with your Microsoft account.
- Continue with the on-screen directions (if applicable).
Once you complete these steps, you can start uploading and downloading to the secure area of OneDrive.
When the vault is open, it'll lock automatically after 20 minutes of inactivity, but you can change this setting from OneDrive Settings > Accounts page. The "Lock Personal Vault after" option allows you to keep the folder open for up to four hours.
More resources
Explore more in-depth how-to guides, troubleshooting advice, and essential tips to get the most out of Windows 11 and 10. Start browsing here:

Mauro Huculak has been a Windows How-To Expert contributor for WindowsCentral.com for nearly a decade and has over 22 years of combined experience in IT and technical writing. He holds various professional certifications from Microsoft, Cisco, VMware, and CompTIA and has been recognized as a Microsoft MVP for many years.
You must confirm your public display name before commenting
Please logout and then login again, you will then be prompted to enter your display name.
