How to enable PIN complexity on Windows 10
Here are the steps to enable complexity to make your PIN more secure on Windows 10.
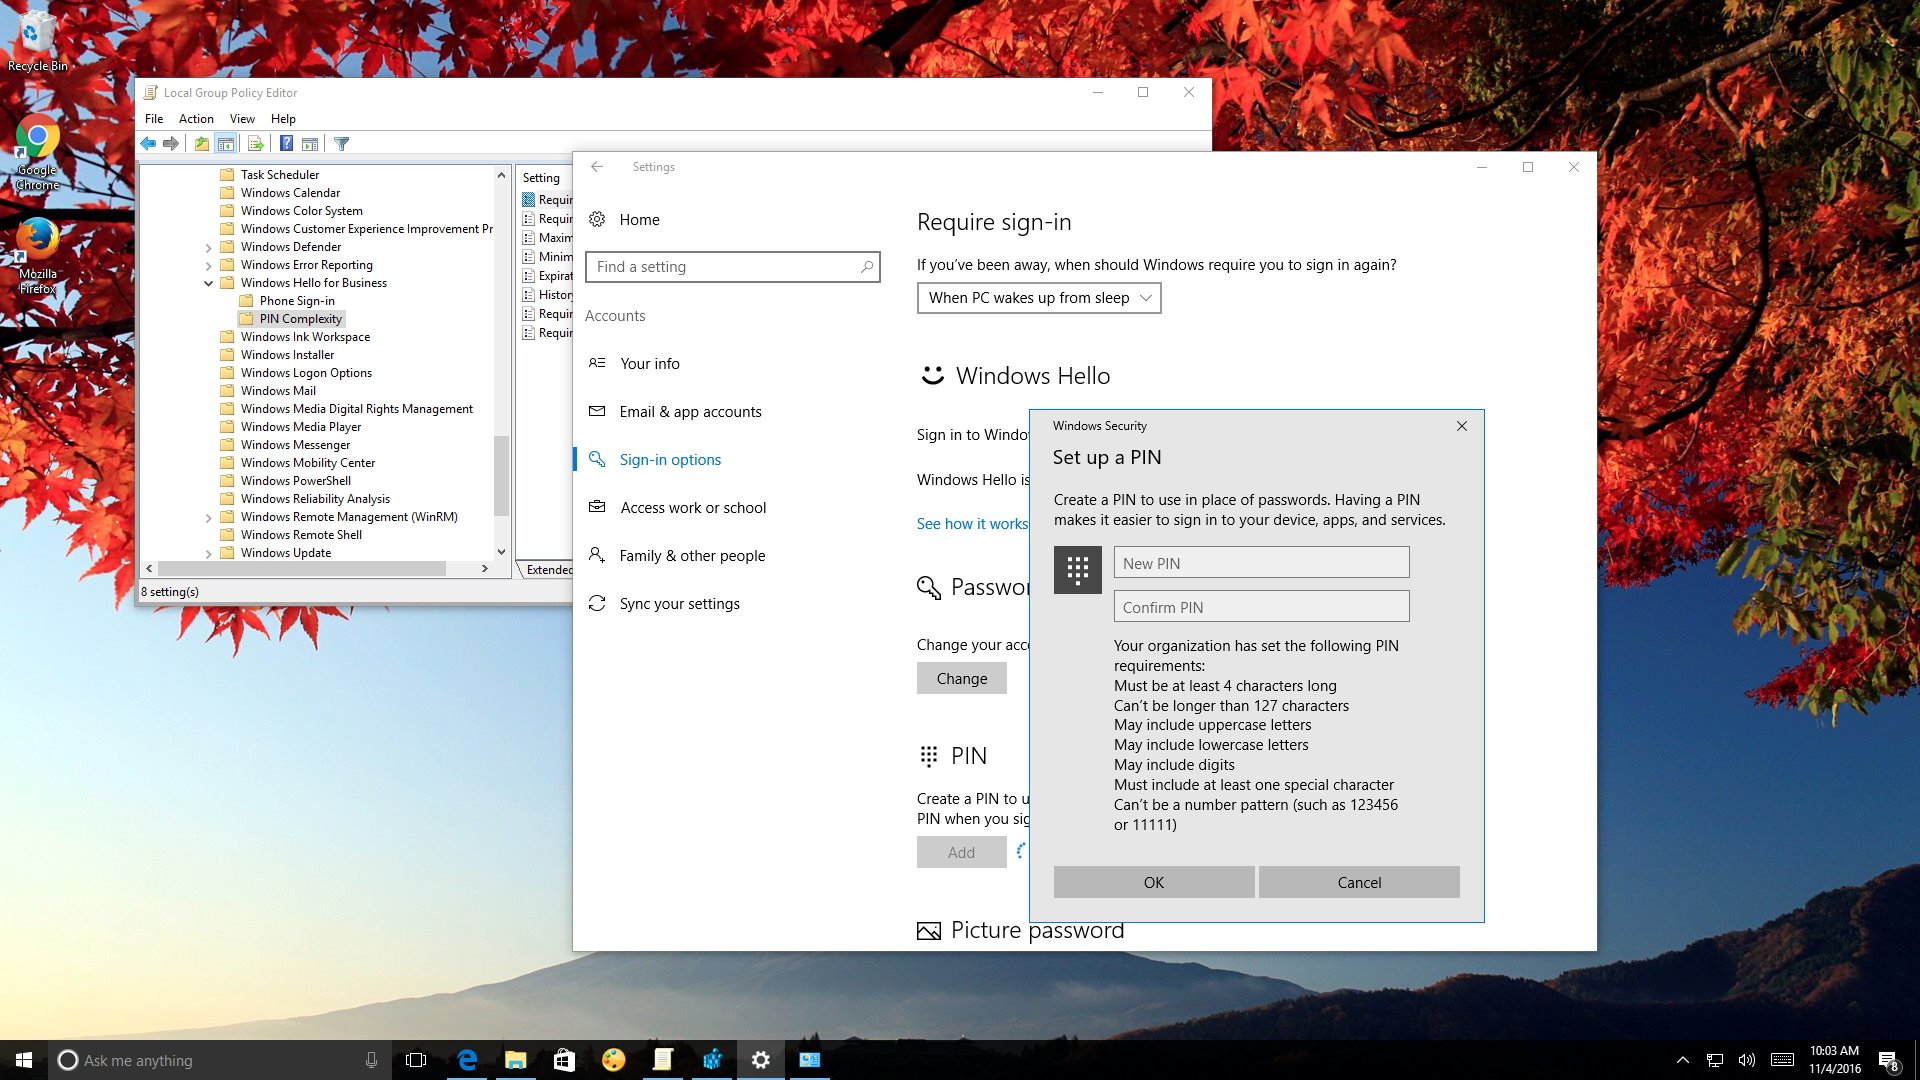
Windows 10 includes multiple options to sign-in to your account, including the ability to sign-in using a PIN. If you have a mobile device, you're probably already familiar with a PIN, which is a secondary form of authentication similar to a password, but with some unique features.
For example, a PIN usually contains only numbers, and it's shorter than a password. In addition, unlike a password, a PIN is only significant to one device, meaning that it doesn't sync across all your devices like when you use a Microsoft account, and it doesn't work over the network.
This is what makes a PIN more secure; if your password is compromised anyone can access your device (or devices) from virtually anywhere. However, using only two pairs of numbers to create a PIN can also make it easier for anyone with physical access to break into your device.
Thankfully, Windows 10 includes a feature that enables you to create a more complex PIN using special characters, letters, uppercase and lowercase to make your account more secure.
In this Windows 10 guide, we'll walk you through the steps to make your PIN more secure by adding complexity to the mix on your computer.
How to configure PIN complexity
On your computer running Windows 10 Pro, you can use the Local Group Policy Editor to quickly set up PIN complexity on your computer, just follow these steps:
- Use the Windows key + R keyboard shortcut to open the Run command.
- Type gpedit.msc and click OK to open the Local Group Policy Editor.
- Browse the following path:
Computer Configuration > Administrative Templates > Windows Components > Windows Hello for Business > PIN Complexity
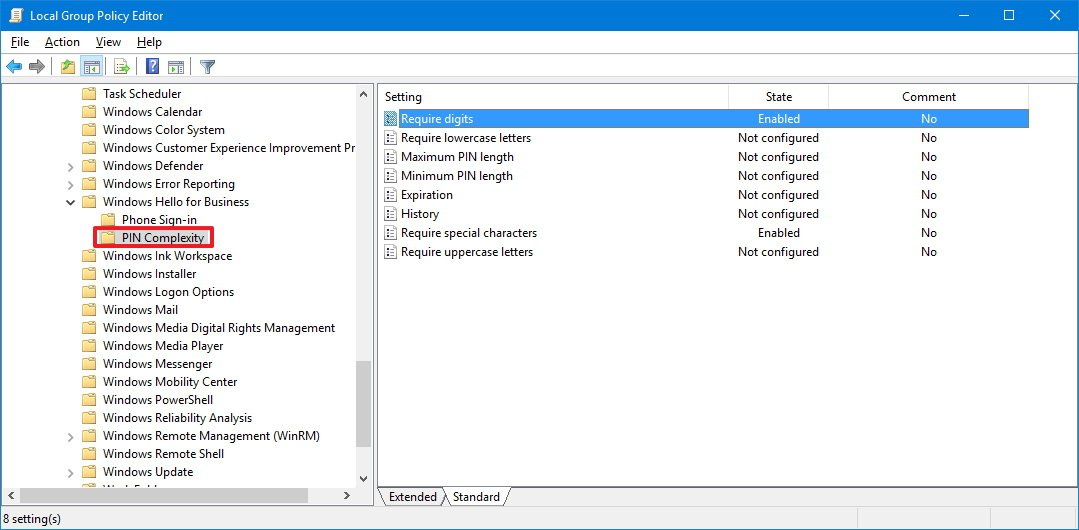
- On the left side, double-click the policy with the setting you want to configure, including:
- Require digits: If you enable or do not configure this policy, the operating system will require to include at least one number while creating a PIN. If you disable this policy, you can use any non-number characters.
- Require lowercase letters: If you enable or do not configure this policy, the operating system will require to include at least one lowercase letter when creating a PIN. If you disable this policy, you won't be allowed to use lowercase letters in your PIN.
- Maximum PIN length: This policy lets you set a maximum number of characters you can use to create a PIN. The maximum limit allowed is 127 characters. The maximum length must be larger than the minimum of 4 or whatever higher number configured for Minimum PIN length policy.
- Minimum PIN length: This policy lets you set the minimum number of characters you can use to create a PIN. The lowest number you can configure is 4. The minimum length can be as large as 127, but less than the Maximum PIN length policy.
- Expiration: Using this policy you can set the number of days before requiring users to change their PIN. You can configure this setting to expire to anything between 1 and 730 days. If you use default 0 the PIN will never expire.
- History: To increase security, you can use this policy to prevent a user from reusing a specified number of unique PINs. You can configure the operating system to remember 0 to 50 PINs, and if you set it to 0, then the History policy won't be applicable.
- Require special characters: You can enable this policy to require at least one special character when creating a PIN. If you disable or do not configure the policy, then you won't be able to use special characters on your PIN. These are the special characters you're allowed to use:! " # $ % & ' ( ) * + , - . / : ; < = > ? @ [ \ ] ^ _ ` { | } ~ .
- Require uppercase letters: If you enable or do not configure this policy, the operating system will require to include at least one uppercase letter when creating a PIN. If you disable this policy, you won't be allowed to use uppercase letters in your PIN.
- On the top-left, make sure to select Enabled or Disabled to configure the policy.
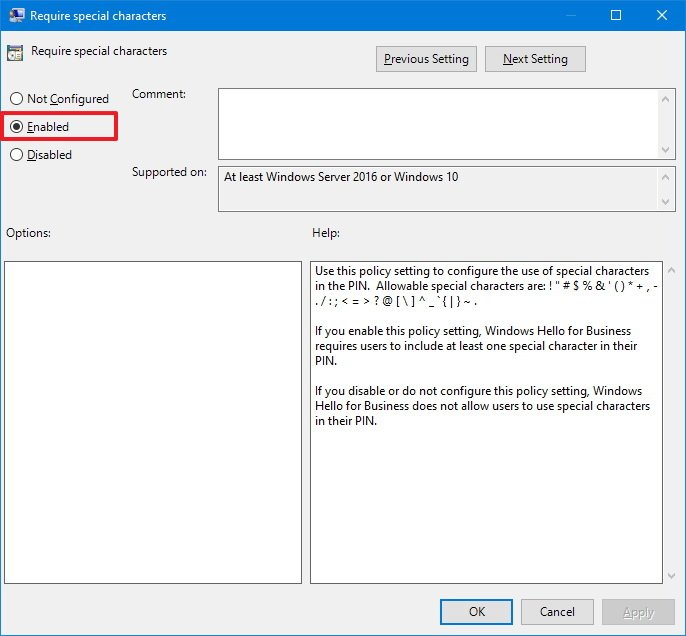
- Change the policy options if applicable.
- Click Apply.
- Click OK to complete the task.
How to create a complex PIN to sign in to Windows 10
Now that you have configured PIN complexity, you'll need to set up a PIN for your computer, which you can do easily with these instructions:
Get the Windows Central Newsletter
All the latest news, reviews, and guides for Windows and Xbox diehards.
- Open Settings.
- Click on Accounts.
- Click on Sign-in options.
- Under PIN, click the Add button.
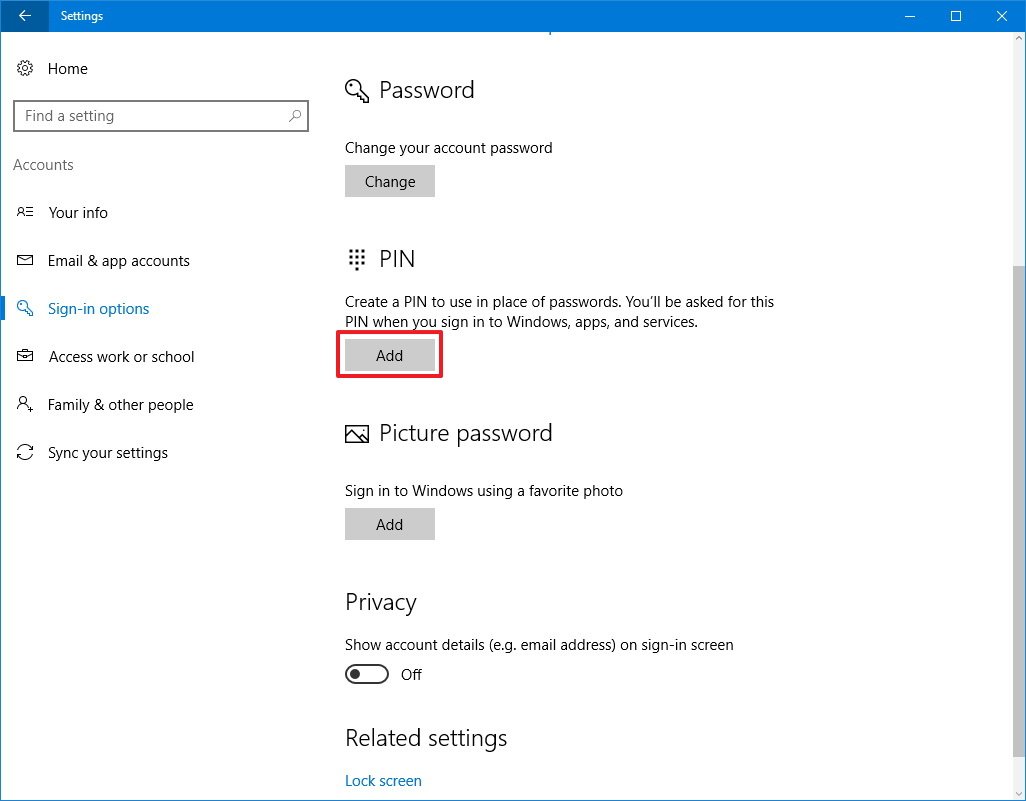
- Enter your current password to verify that you're who you say you are, and click Sign in.
- The Set up a PIN box will appear, click the PIN requirements links to make sure to create a new PIN that meets the policies in place.
- Create your new PIN.
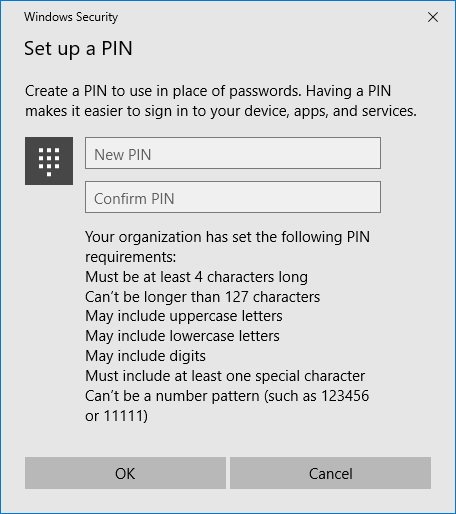
- Click OK to complete the task.
To test that everything is working as expected, lock your device (Windows key + L keyboard shortcut), and try to sign-in entering your new PIN.
Wrapping things up
Adding more complexity makes a PIN harder to crack. Even though a PIN now looks more like a password, it's not about the structure, it's about how it works.
If you use your Microsoft account on multiple devices, you'll be using the same password, which someone can steal and get access to all your devices and your account from virtually anywhere. But win PINs you can create a different code for each device you use and keep using the same Microsoft account; if somebody steals your a PIN they can only use it to physically access that specific device, and with PIN complexity your PIN will be even tougher to crack.
It's worth pointing out that PIN complexity is only available on Windows 10 Pro and Enterprise.
What do you think about PIN complexity on Windows 10? Tell us in the comments below.
More Windows 10 resources
For more help articles, coverage, and answers on Windows 10, you can visit the following resources:
- Windows 10 on Windows Central – All you need to know
- Windows 10 help, tips, and tricks
- Windows 10 forums on Windows Central
Mauro Huculak has been a Windows How-To Expert contributor for WindowsCentral.com for nearly a decade and has over 15 years of experience writing comprehensive guides. He also has an IT background and has achieved different professional certifications from Microsoft, Cisco, VMware, and CompTIA. He has been recognized as a Microsoft MVP for many years.

