


Here's five tips to help you successfully take advantage of the latest version of the classic map creation tool.
Hopping into Forge in Halo 5 can be a daunting experience at first. There are so many different controls, items, options, and everything between to learn and understand, and then on top of that, there's knowing how to build the map from the ground up itself.
It may seem like an incredibly complicated experience, but with these five strategies, your experience will be much smoother. So, without further ado, lets jump right in and learn the basics to becoming a Halo Forge map-maker!
Mastering the controls
The first thing you'll need to do as an inexperienced Forge user is learn the ins and outs of the Forge mode's controls. There is indeed much to learn; activating and deactivating magnets, moving objects around, duplicating them, and rotating things only scrapes the surface of what you'll need to know how to do in Forge.
The first step to learning how to create maps is to learn how to take advantage of the Forge tool itself.
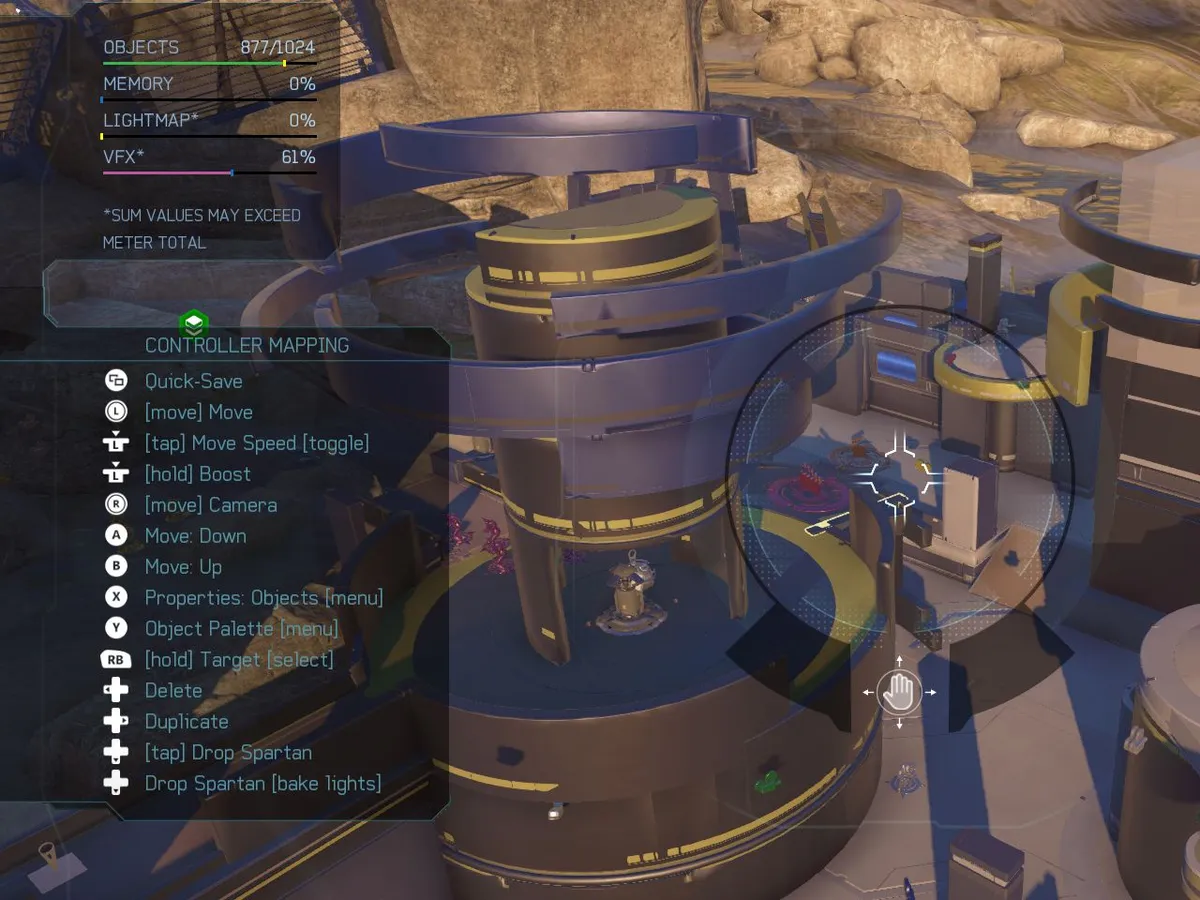
However, 343i knows this, and to help ease you into understanding the controls, they added a legend of which buttons on the controller do what in the top left of your screen while in Forge.
This legend should be used by you as your reference guide as you begin your map-making adventures. Begin to play around with the controls, and get a feel for the way the Forge mode feels.
Personally, I believe that the best method to mastering the control scheme is to create one object and practice manipulating it in all kinds of different ways. Rotating, duplicating, changing its color, etc. By doing this, you can effectively build up muscle memory for the controls without having to worry about overwhelming yourself with multiple objects at once as you start out. Then, once you feel comfortable that you know how to manipulate one object, you can start attaching others to it with magnets to learn how those work, and so on. Gradually learn; don't dive right into the advanced.
Establishing the basic layout
Once you feel comfortable that you have a solid understanding of the Forge controls, the next step in making a map should be to establish a layout.

Take a look at Snowbound from Halo 3, for example. It is a map with a circular pathway design and a symmetrical shape, with an underground route splitting the map down the middle. This is what you would consider the map's general layout. Figuring out the kind of layout you want for your map is a critical step because it dictates everything else in your map's gameplay design.
Once you've established what your layout will be, its best to then build a simple version of the pathways in Forge and look at it in an overhead view. If you're satisfied with it, then you're good to move on to the next step. If not, make adjustments until you feel its just right for what you'll want it to play like.
Creating the basic geometry and adding in spawning

Once you're happy with your basic layout, the next step is to begin creating the geometry in your play space.
After establishing your layout, you'll want to begin designing the basic geometry of your map.
To give some examples, this would mean the bases in Blood Gulch or the middle area in Midship — areas that are involved in the gameplay (players moving around and on it) and where things like weapons, vehicles or power-ups spawn on. For now, you'll want to forego detail; functionality is what's most important. When doing this, what I do is constantly ask myself how this geometry will fit in with the movement mechanics of Halo 5. Some examples of things you want to keep in mind include:
- Can Spartans clamber up onto this geometry?
- Can you sprint or thruster over to other pieces of geometry?
- Will players here be too vulnerable from all angles, or is there sufficient cover?
- Is this area too defensible and will it be unfairly hard to attack?
Having things like this driving what you place on your map will lead to a better, more quality designed map design. By thinking one step ahead, you're likely saving yourself from some adjustment work later.

Once you've got the functional map geometry in place, you'll want to add spawning. These two go hand in hand, for player spawns are dependent on things like sight lines, cover, and distance established by your map's layout and geometry. When making spawns, you'll generally want them to be placed in ways that are in safe enough areas to prevent spawn killing, but not so far away as to make the player travel a long distance before engaging enemies. It's a good idea to place spawn points in cover and together as well so that teammates can respawn together in waves instead of by themselves.
Depending on the game type, your spawns should either be neutral or team-focused. You'll want neutral spawns so that spawn switching (when teams switch the sides of the map they respawn on) is possible in modes like Slayer or Strongholds where rotation around the map is frequent.
For modes like Assault and CTF, team-specific spawns are helpful in ensuring that each team will always spawn by their base or flag stand. Of course, all initial spawns (the points where players load into the match) need to be team-specific, so that everyone on both teams can spawn for the first time.
Creating the map sandbox
With spawning taken care of, next up is designing the sandbox.

The key to good sandbox design is adding weapons and vehicles that suit the size and layout of your map. For example, having a large amount of automatic weapons on a map that encourages long range engagements will lead to poor gameplay. This is why this is important. In addition to this, you also want to ensure that one team does not have more weapons or power-ups on their side of the map than the other team. This would obviously lead to unbalanced gameplay, giving one team an advantage.
Lastly, both the amount of power weapons and vehicles and their respawn times are critical, Having too many power weapons and vehicles results in the power weapons feeling like normal weapons. Too few will create a monotonous atmosphere in which the two teams have nothing to fight over to gain an advantage. Respawn times that are too low will make the power weapons feel like they aren't present enough, and ones that are too high will saturate the map with newly spawned high-tier guns, making everything way too chaotic. Finding a good balance for your map is a major step in making your map play well.
Adding in the details and creating map boundaries

You've reached the last step: adding in the aesthetics and boundaries. Here, you can run wild with ideas on how to make your map visually appealing for players to look at, though I recommend that you try and maintain a theme throughout the map.
This is where you can let your artistic mind run free.
For example, the map in the image above has the theme of a UNSC outpost with Forerunner tech located near a natural area. In general, having a single theme like this will help you decide what to decorate your map with.
Once you've added the details you want and feel satisfied, the last touch is to add map boundaries. This can be achieved through kill boundaries or invisible walls, and shouldn't be too hard to accomplish. Just place either of these types of objects in areas you don't want players to access.
Closing comments
This basic guide is tailored to give you a solid idea on how to construct a map from the ground up. There are numerous details I could go in-depth on; these are just the steps and strategies that I myself went through and learned as I became a Forger. In addition to these, though, remember that above all, patience is critical. As you play test your map to make sure it's as good as it can be, you'll undoubtedly be faced with criticism on your design from other players. Don't be discouraged; taking note of their feedback and editing your map to fix the problems people have with your design will lead to a higher quality map.
Did this guide help you start taking advantage of Halo 5's Forge potential? Let me know in the comments — or, better yet, link me maps that you've constructed! I always love seeing the awesome things Halo's map-making community brings to the table.
If you don't have Halo 5 yet, make sure to pick it up so that you, too, can become a member of the Forge community. And remember that Forge is available for free on Windows 10 PCs.

