How to start protecting your privacy with Ghostery for Microsoft Edge
All the latest news, reviews, and guides for Windows and Xbox diehards.
You are now subscribed
Your newsletter sign-up was successful
Every time you browse the internet, there is an enormous network of trackers watching what you do and connecting it back and forth across cyberspace. These trackers know your browsing habits, they often share that information with interested parties, and they make your browsing experience worse by slowing down web pages and cluttering everything up. Here's why you might want to use Ghostery and how to use Ghostery in Microsoft Edge.
What is Ghostery?
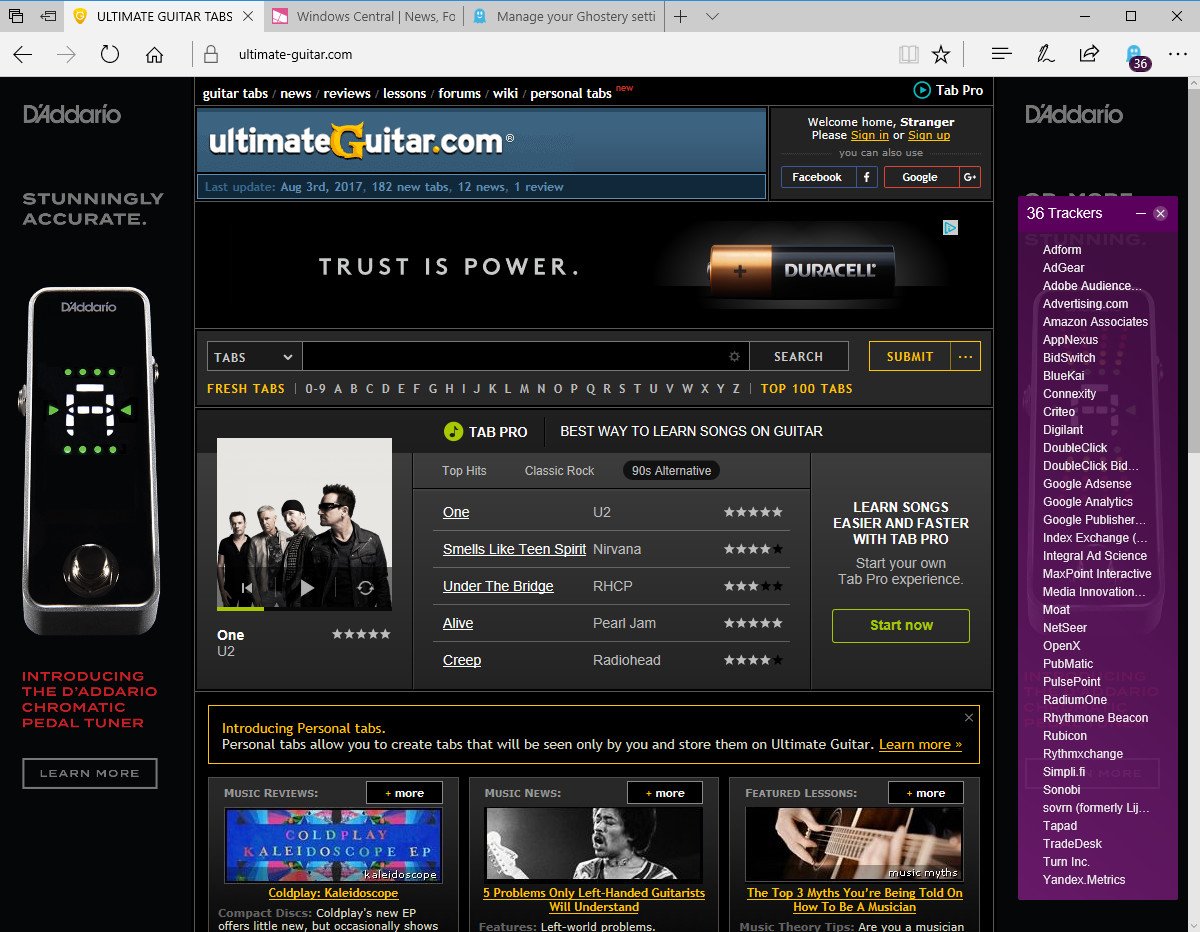
Ghostery is designed to block trackers, effectively speeding up your browsing experience and cutting down on targeted ads. You can see, in real time, how many trackers are attempting to snoop on you, offering up a sometimes frightening look at what's behind the scenes.
You might be thinking that Ghostery is similar to blocking cookies, and you're not wrong. However, Ghostery takes things a step further and doesn't actually let your browser communicate with a specific web server. Every time a request goes out, Ghostery analyzes it and compares it to a huge list of known trackers, and if a match is confirmed, the request is blocked.
How is Ghostery different from an ad blocker?
Whereas many ad blockers have a simple on/off switch when it comes to blocking, Ghostery is a bit different; you get to choose specific things to block. Many people don't mind supporting their favorite websites through ad revenue and affiliate links, and with Ghostery, that doesn't mean you have to completely disable all blocking.
Some of the worst-offending trackers can sneak in while your guard (read ad blocker) is down, but Ghostery does a bang-up job of keeping them at bay. You can even see in real time what's being blocked, and if you recognize a tracker you'd like to let by, you can with just a couple of clicks.
How does Ghostery work?
Each time you load a web page, you'll see a list of trackers populate. Each tracker is analyzed and sorted into one of eight categories.
- Advertising
- Site Analytics
- Customer Interaction
- Social Media
- Essential
- Audio/Video Player
- Adult Advertising
- Comments
It's clear that some trackers are a lot worse than others. Hate those auto-playing video ads? You can block those. Don't use social media and don't need the page to load all those share buttons? Those can be gone too. Don't mind letting some non-nefarious ads through to support a site you love? That can be done as well, all through Ghostery's settings.
All the latest news, reviews, and guides for Windows and Xbox diehards.
Is Ghostery watching what you do?
Ghostery makes it clear that they're collecting data, but they also make it clear that they respect anonymity. Check out the FAQ section on their website for more information about what Ghostery collects and how they keep data anonymous.
What is the Human Web and what data is collected through it?
How to set up Ghostery in Microsoft Edge
Before anything else, we have to get Ghostery working with Edge.
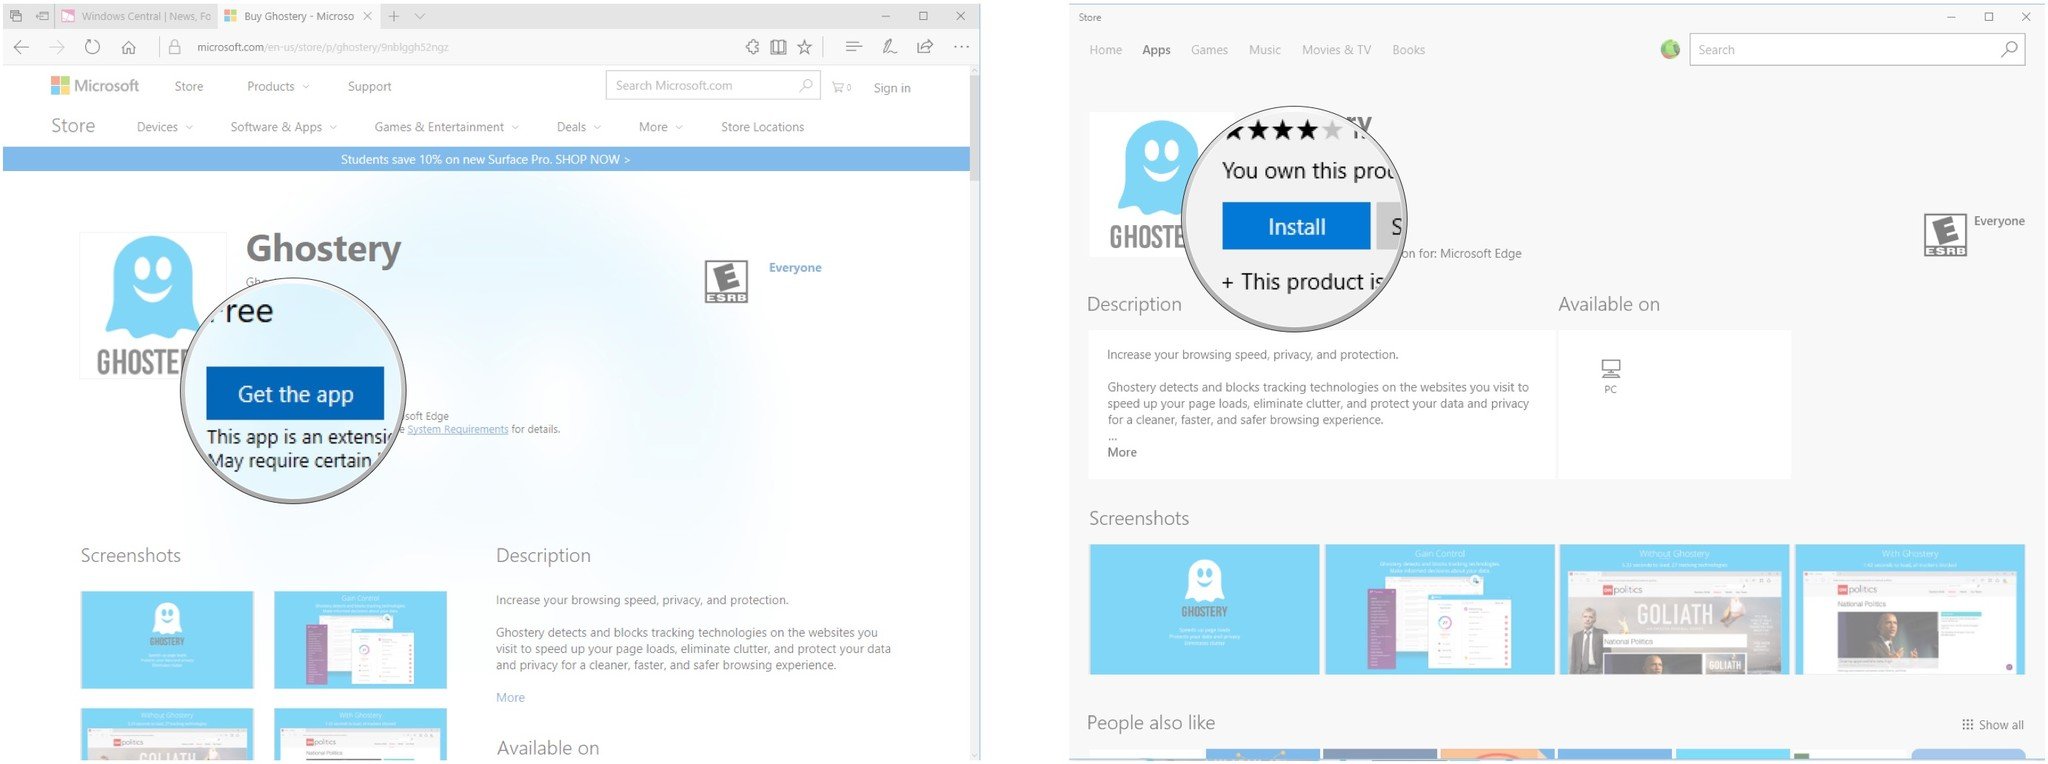
- Navigate to the Ghostery Store page.
- Click Get the app.
- Click Install.
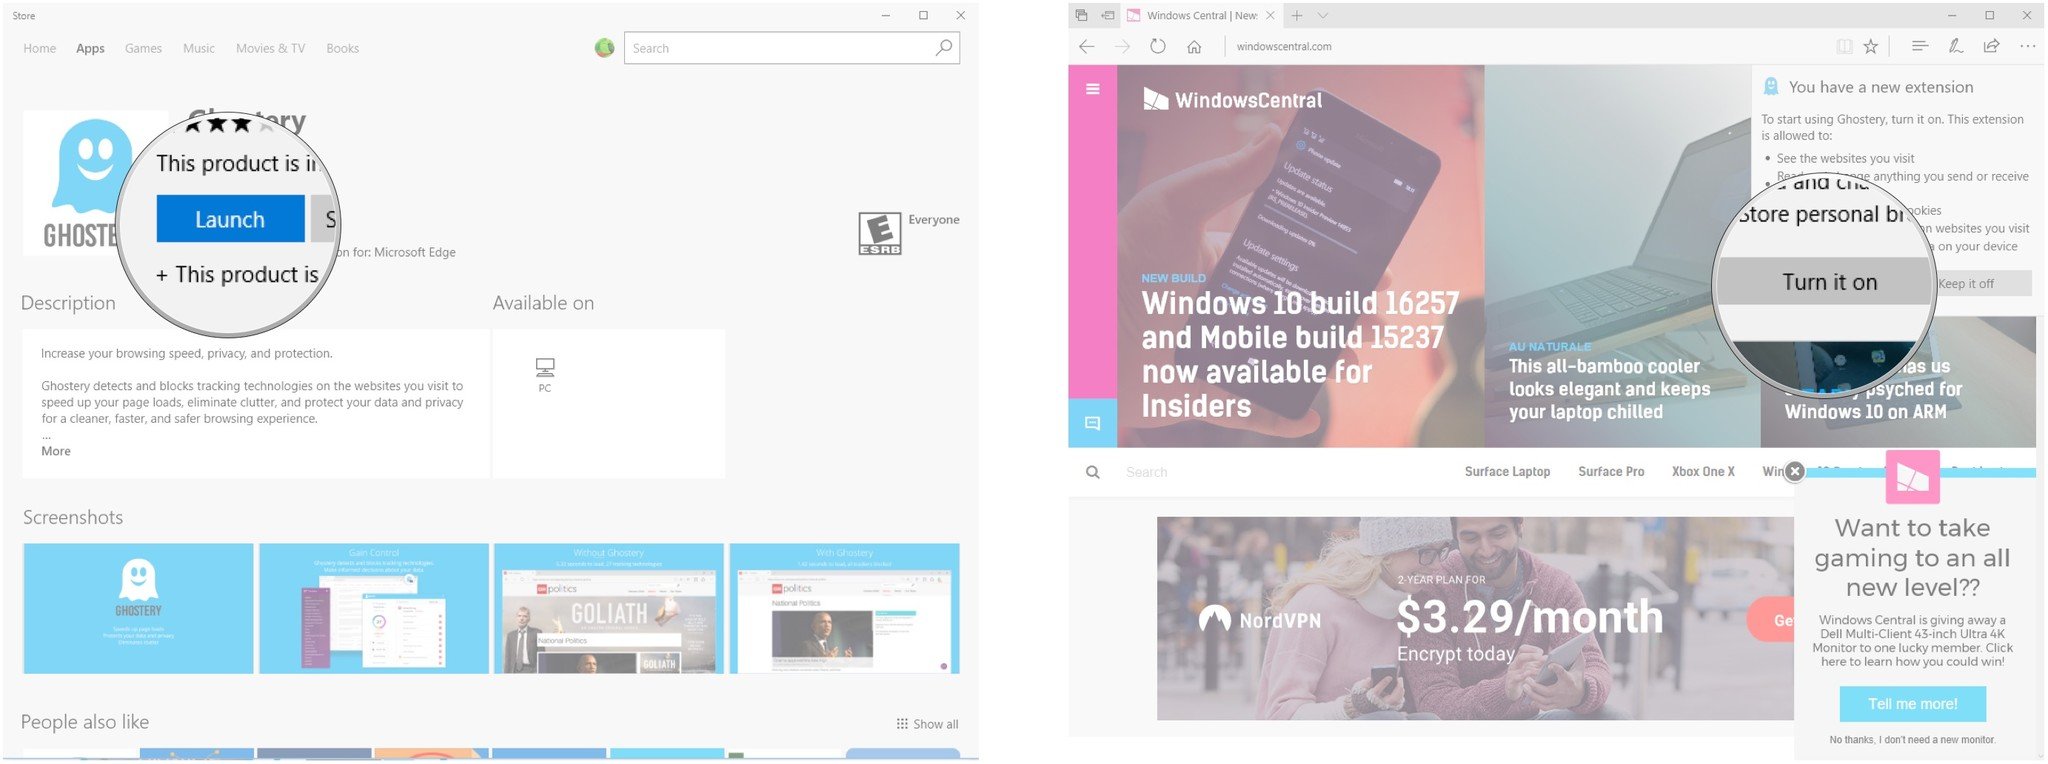
- Click Launch.
- Click Turn it on.
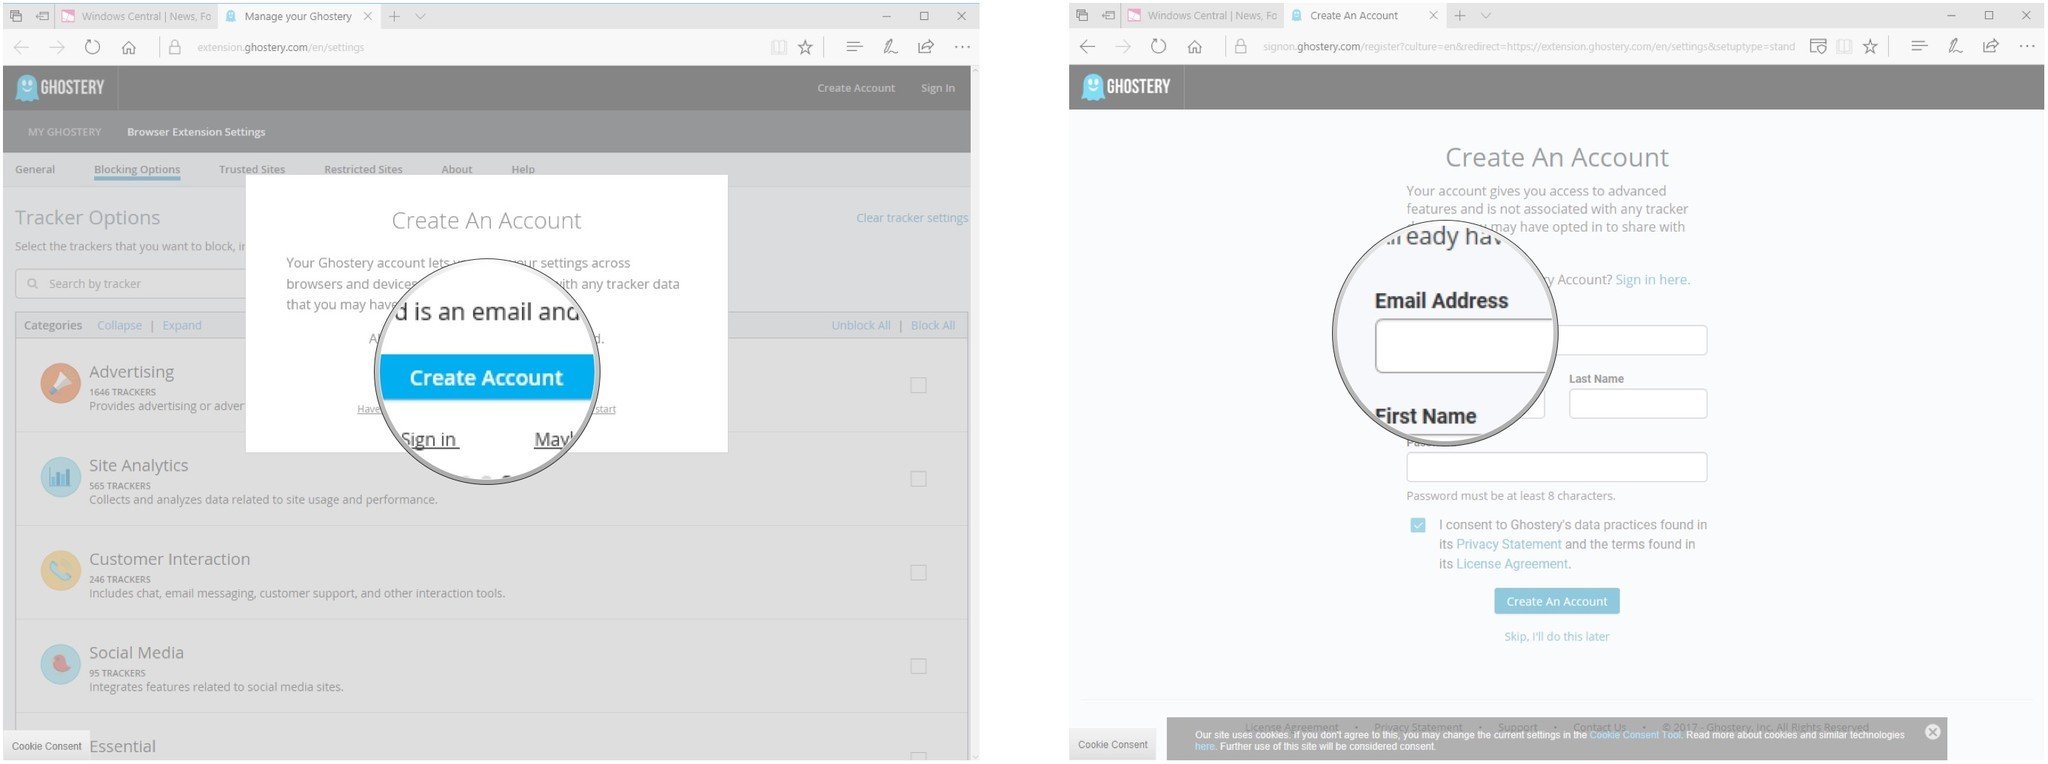
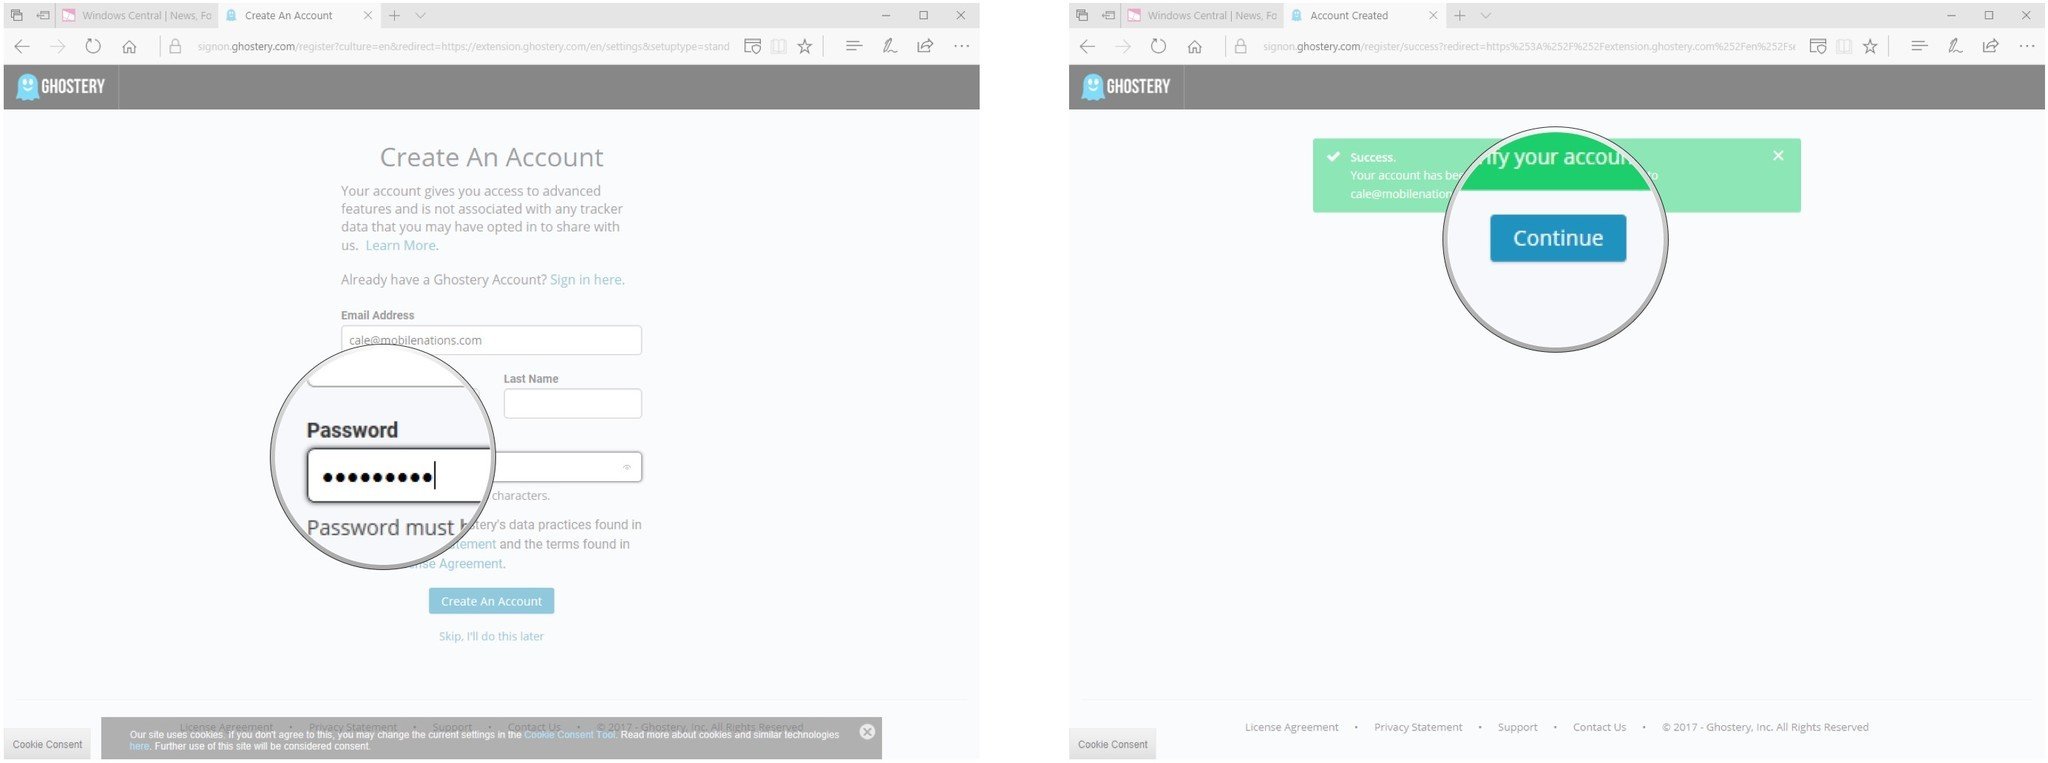
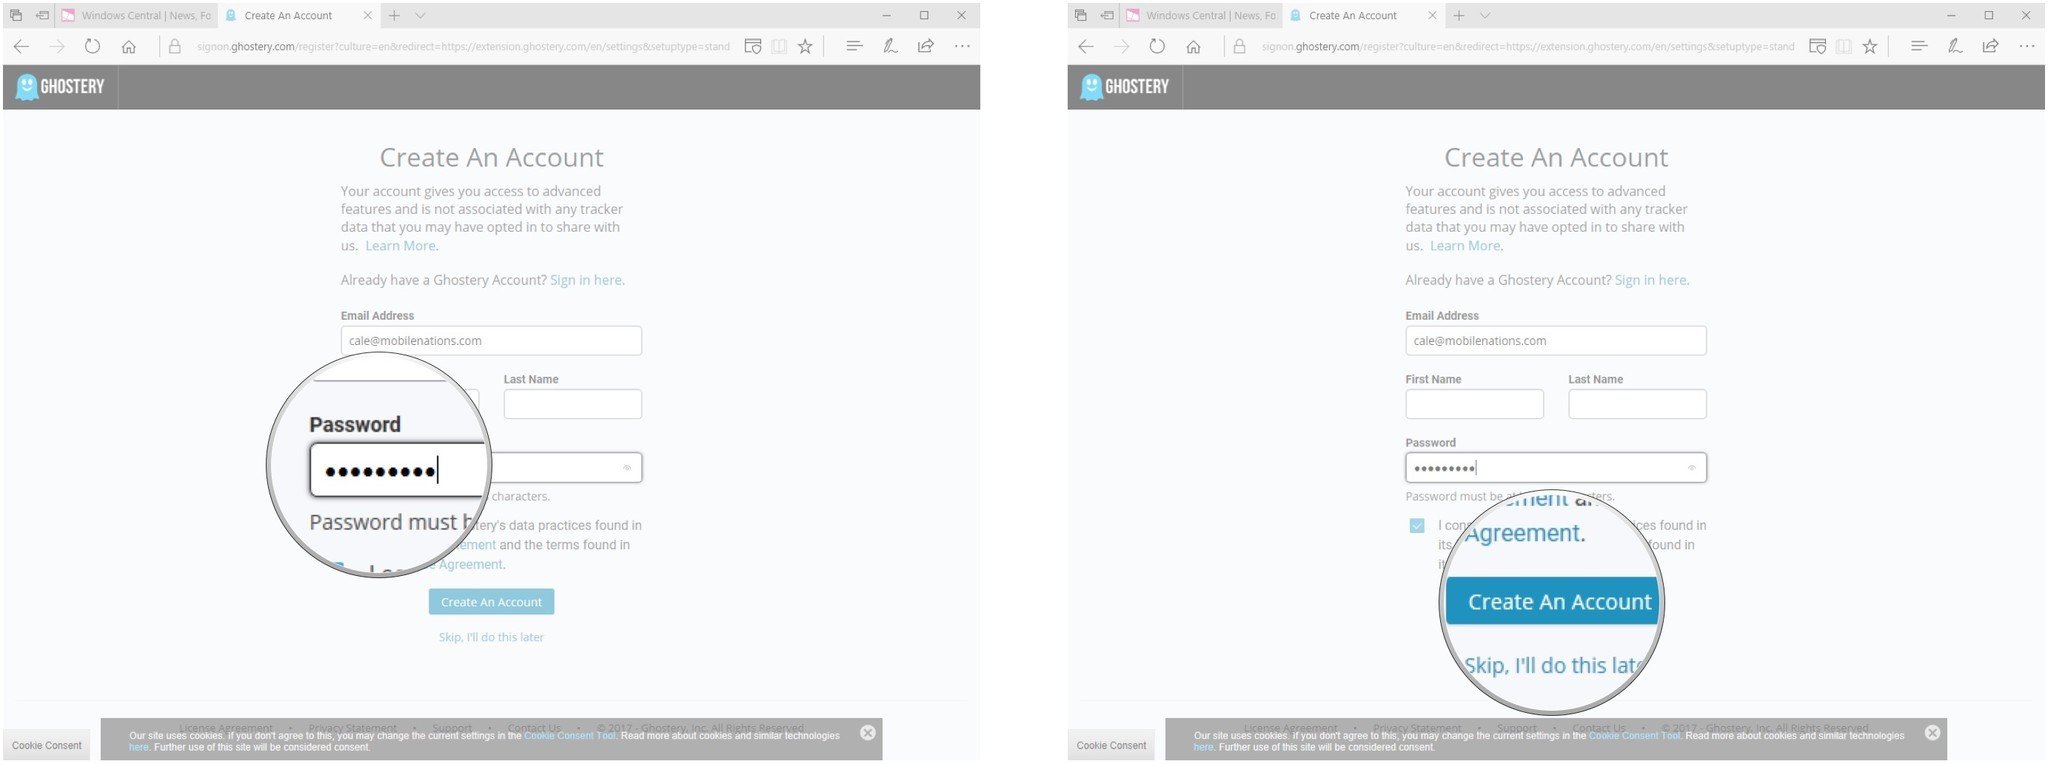
A new web page will open in Edge and you'll be asked whether or not you'd like to share anonymous data with Ghostery. The choice is yours. You'll eventually arrive at the Create An Account window.
Again, the choice is yours whether or not you want to create an account, but if you do, you can sync settings across browsers and devices.
- Click Create Account.
- Type an email address. You can add a first and last name, but they're not mandatory.
- Type a password and hit Enter on your keyboard.
- Click Continue.
An email should appear at the address you used for the Ghostery account. You can use it to verify your account.
How to add a Ghostery button to the Edge address bar
For quick access to Ghostery, you can add a button to the address bar.
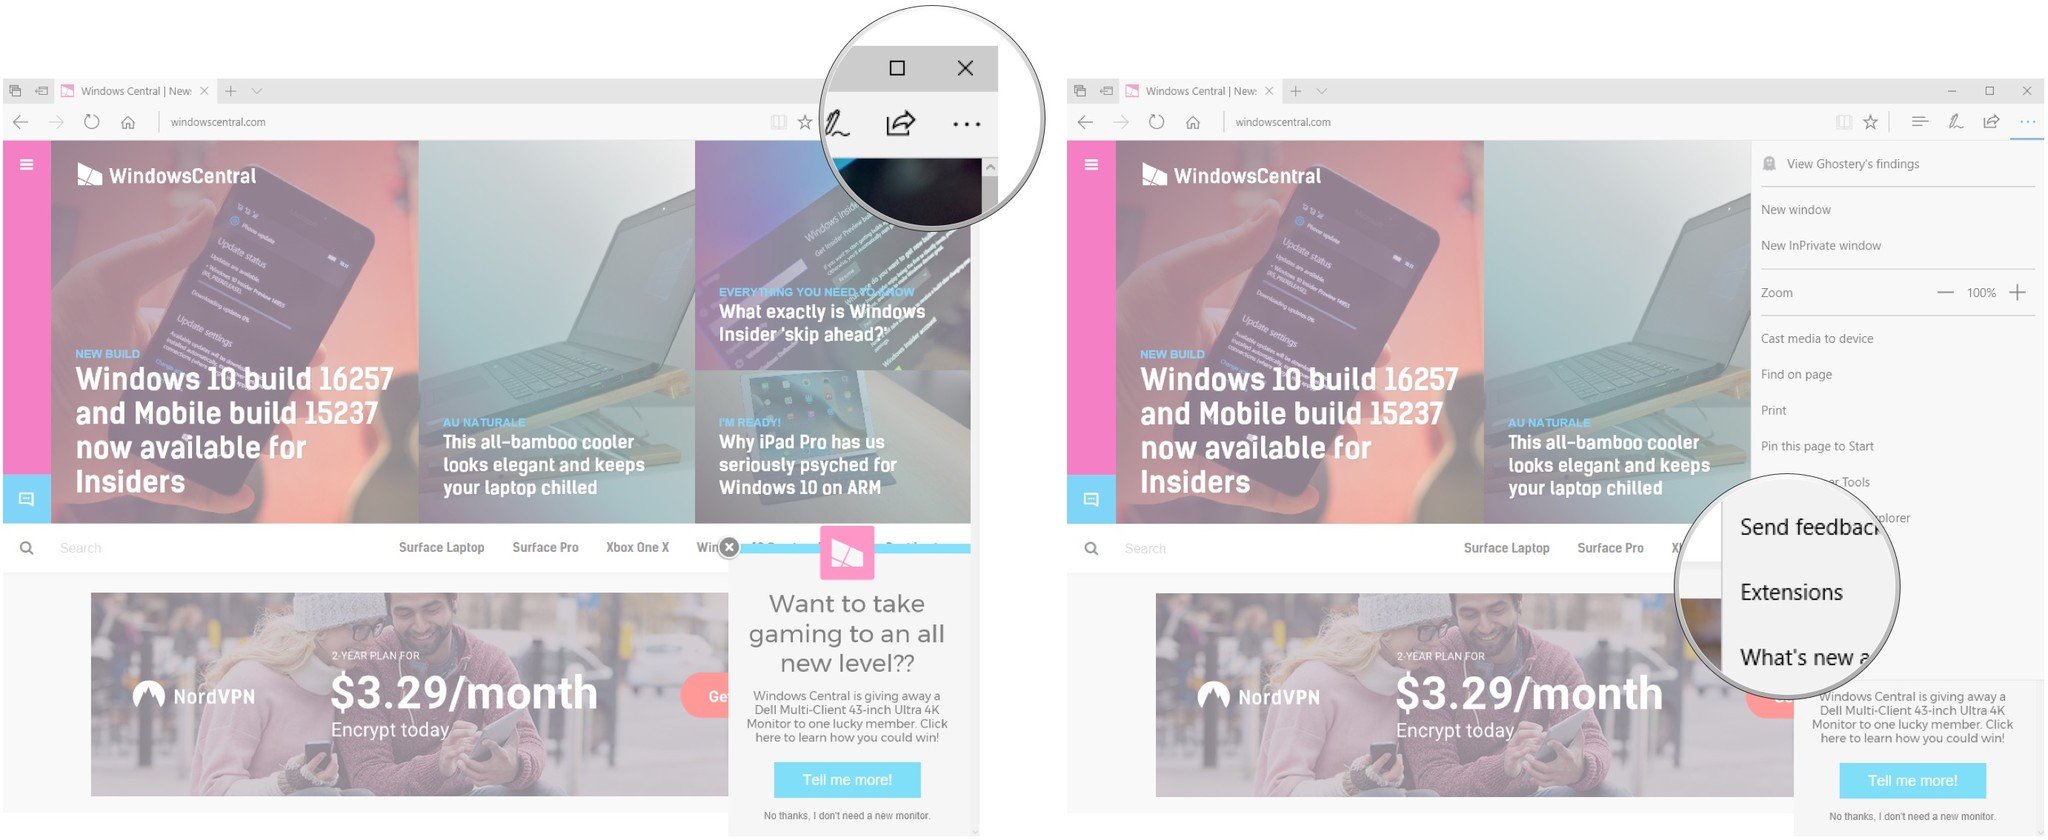
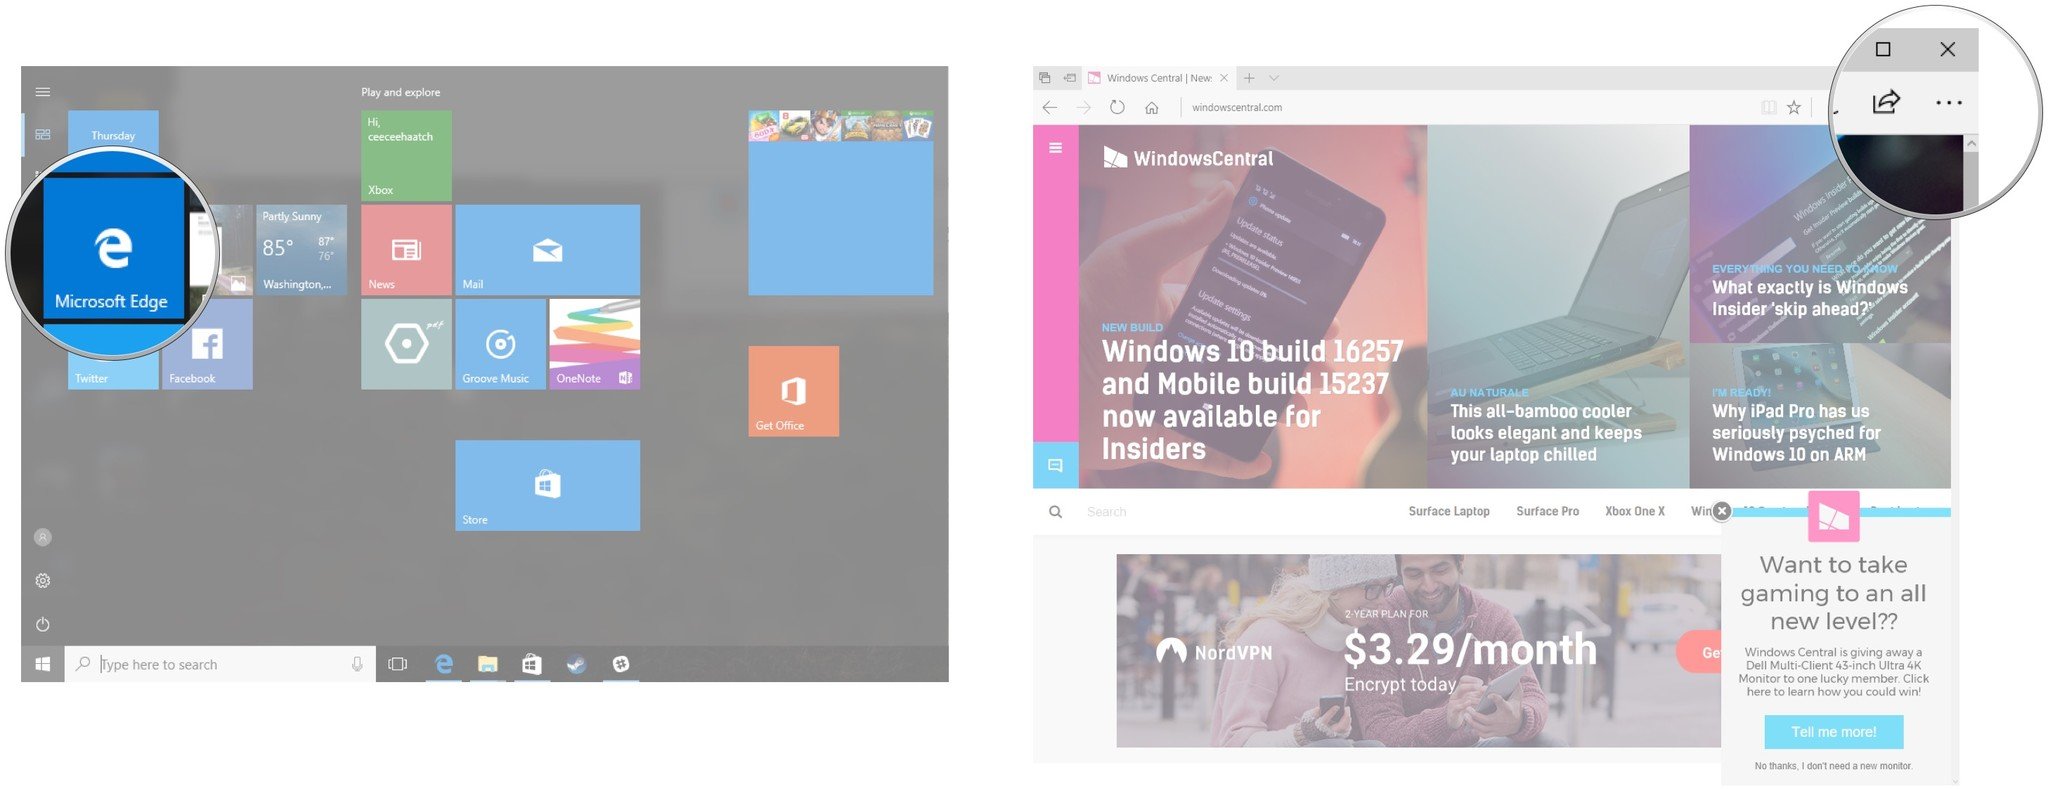
- Launch Edge from your Start menu, desktop, or taskbar.
- Click the Settings and more button near the top-right corner of the window.
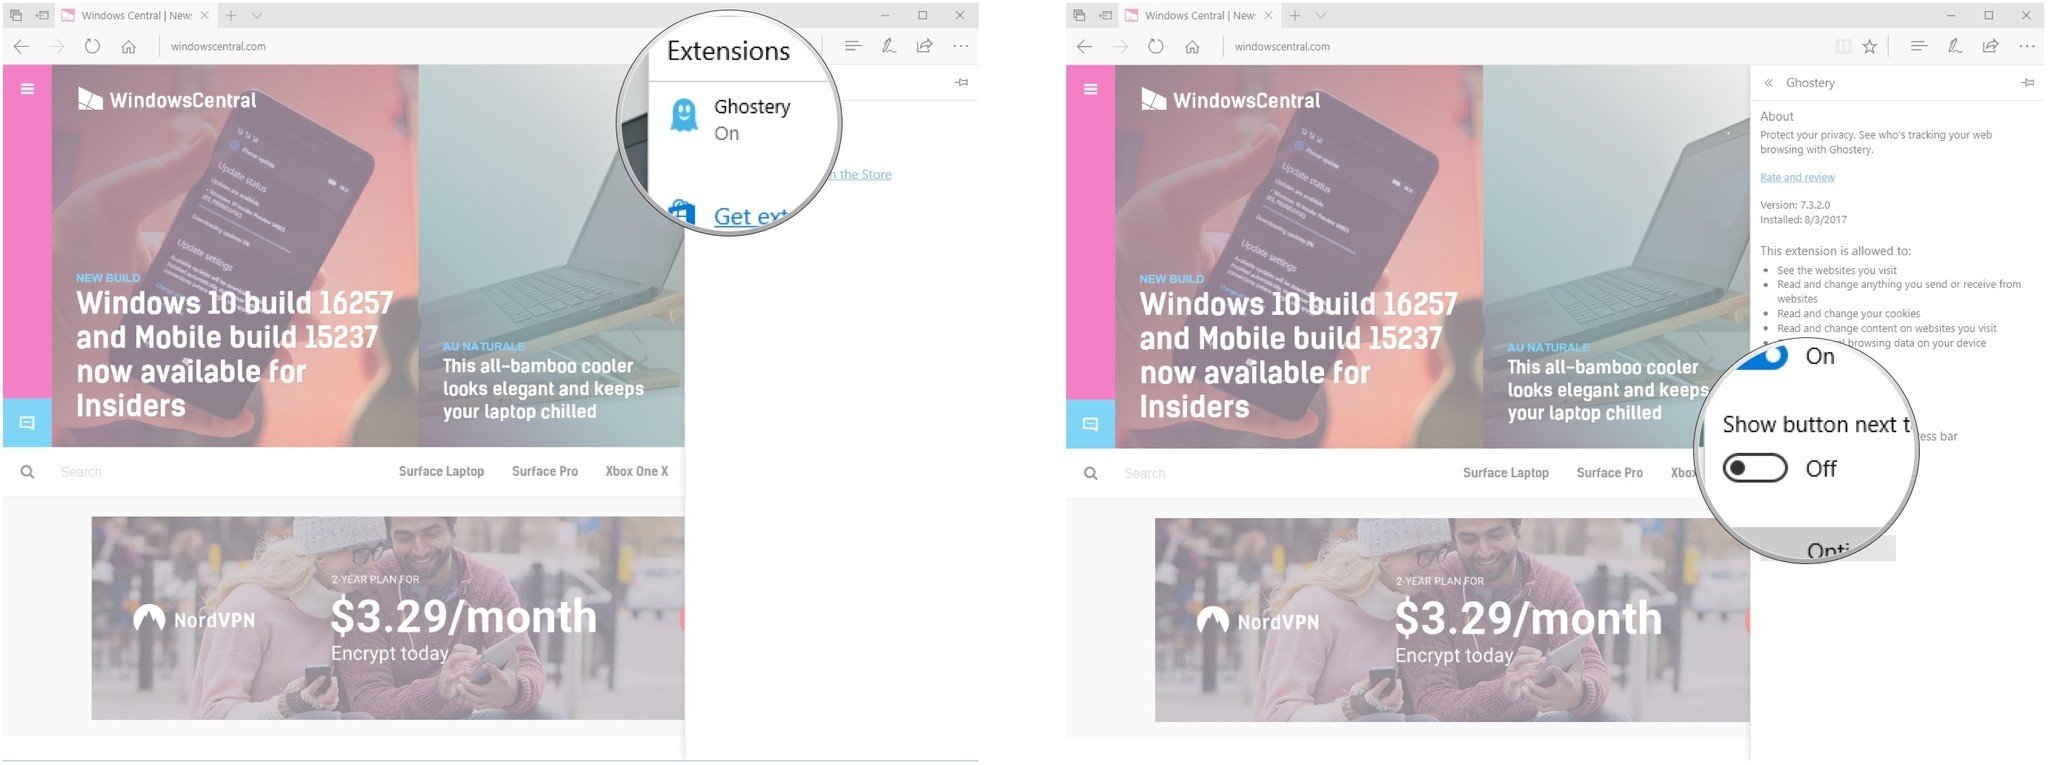
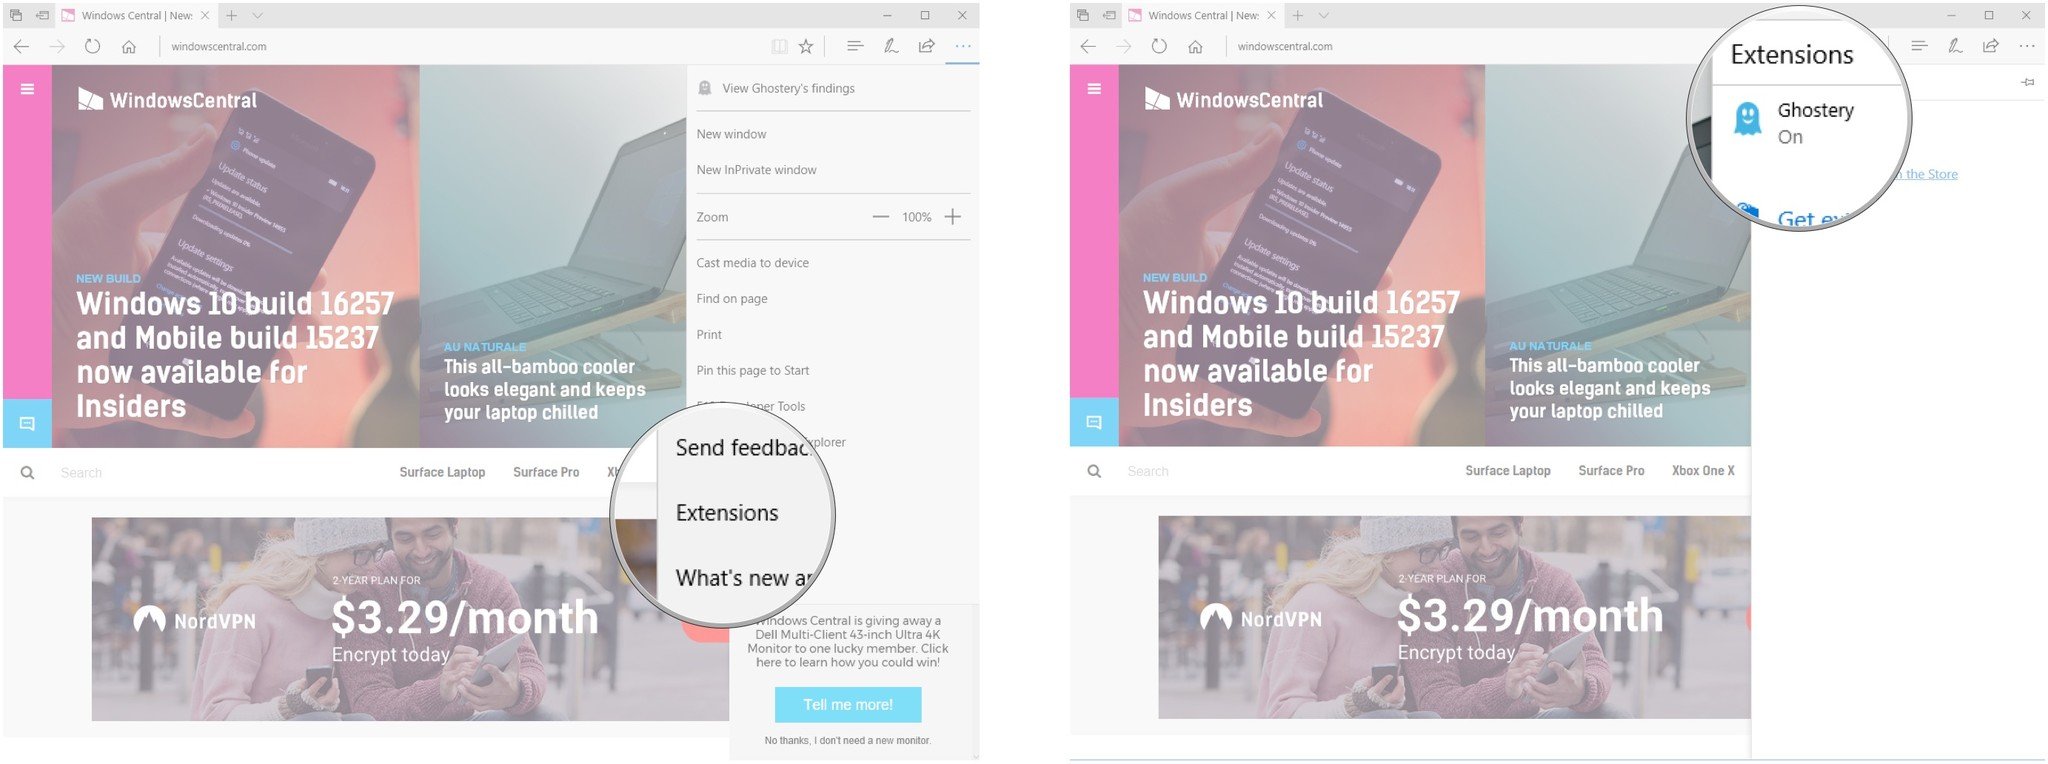
- Click Extensions.
- Click Ghostery.
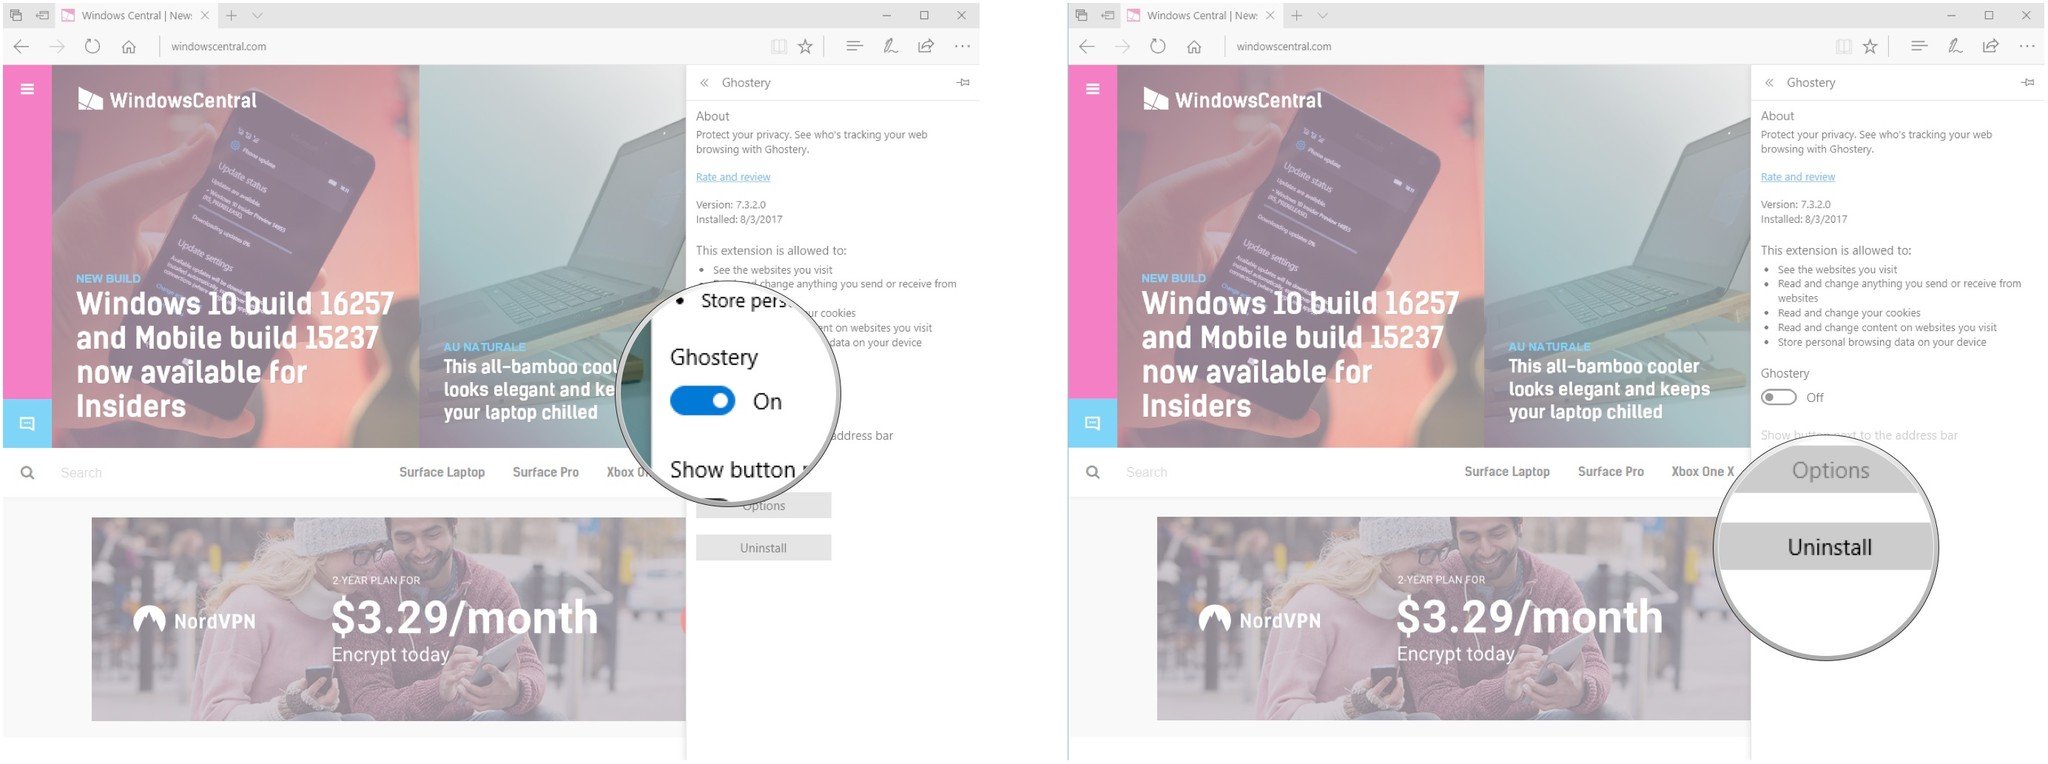
- Click the switch below Show button next to the address bar so that it turns blue (On).
You'll now see a Ghostery button near the top-right corner of the window.
How to manage general Ghostery settings
- Launch Edge from your Start menu, desktop, or taskbar.
- Click the Settings and more button near the top-right corner of the window.
- Click Extensions.
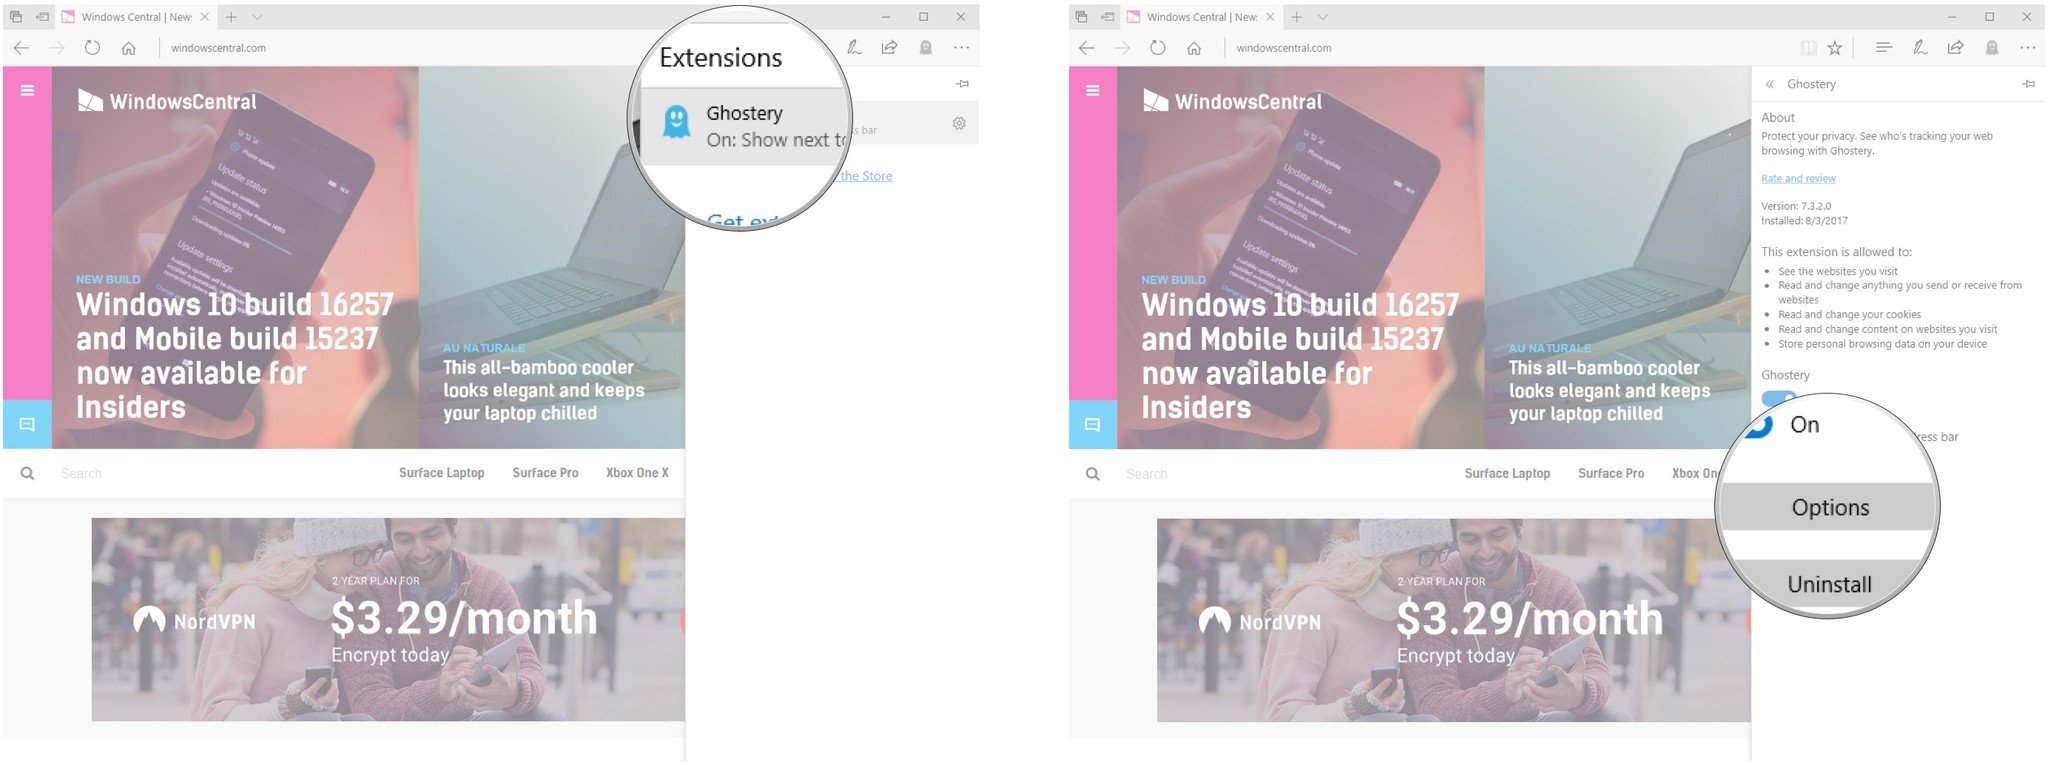
- Click Ghostery.
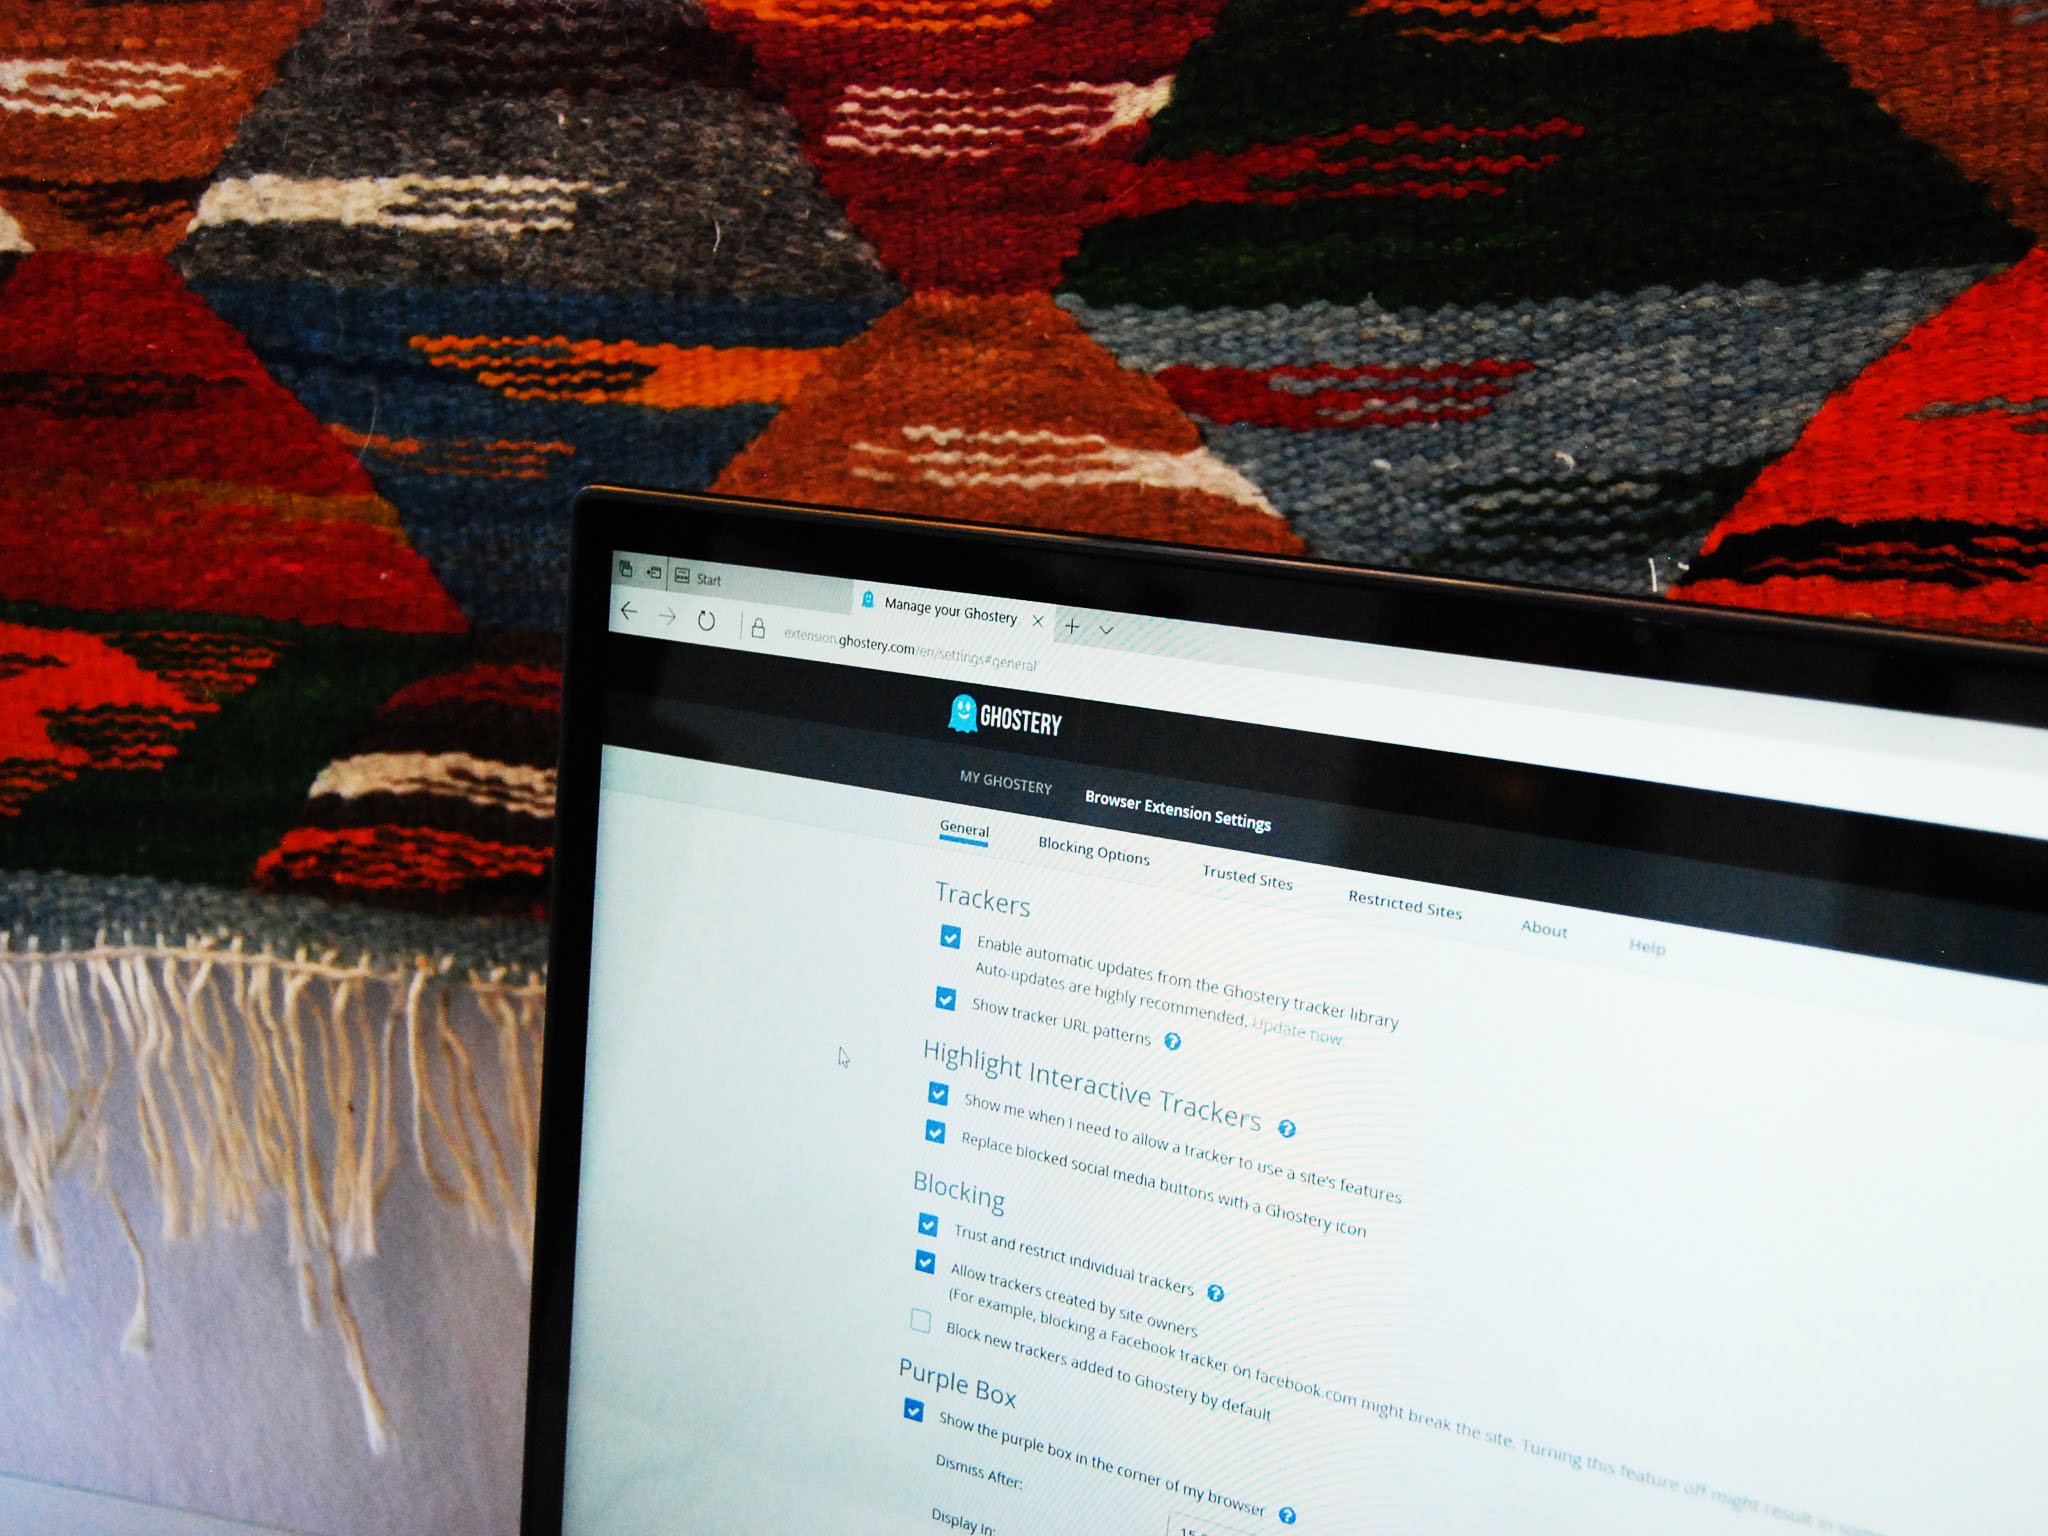
- Click Options. A web page will open, and from here you can manage general settings. By default, they're set up pretty well, but you can make small tweaks as you see fit after using it Ghostery for awhile.
How to whitelist and blacklist websites
Have a website you love and trust? You can add it to a whitelist that won't be subject to the same Ghostery blocking as every other site. You can also add sites to a blacklist where everything will be blocked, no matter your other settings.
- Launch Edge from your Start menu, desktop, or taskbar.
- Click the Settings and more button near the top-right corner of the window.
- Click Extensions.
- Click Ghostery.
- Click Options.
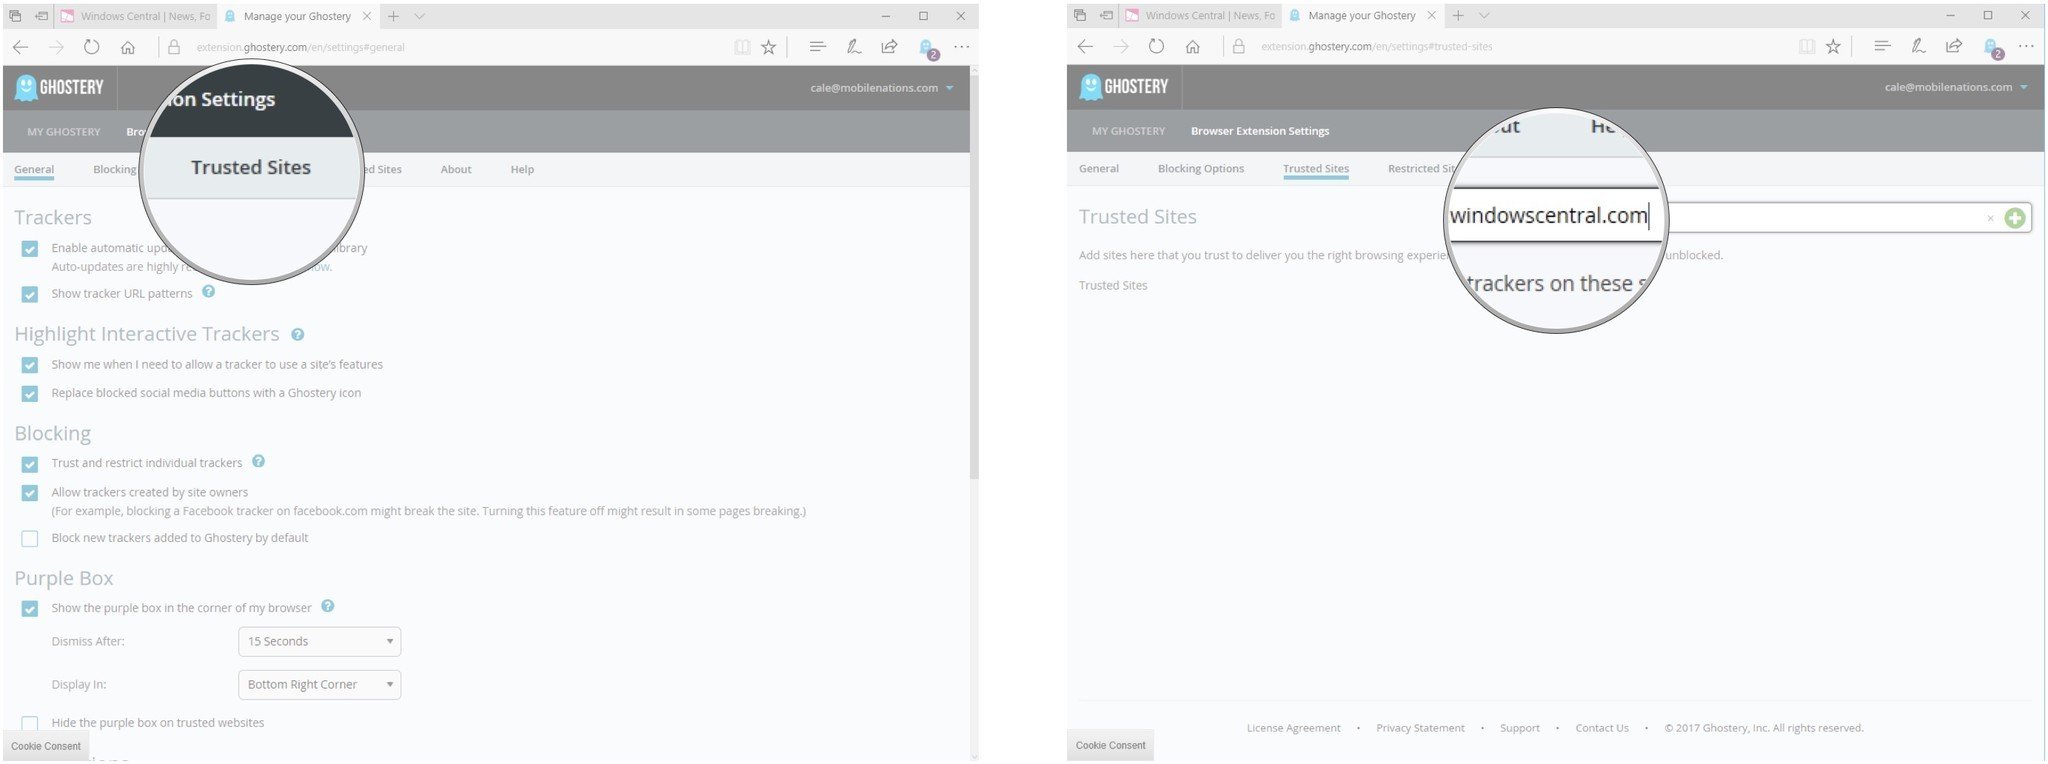
- Click Trusted Sites.
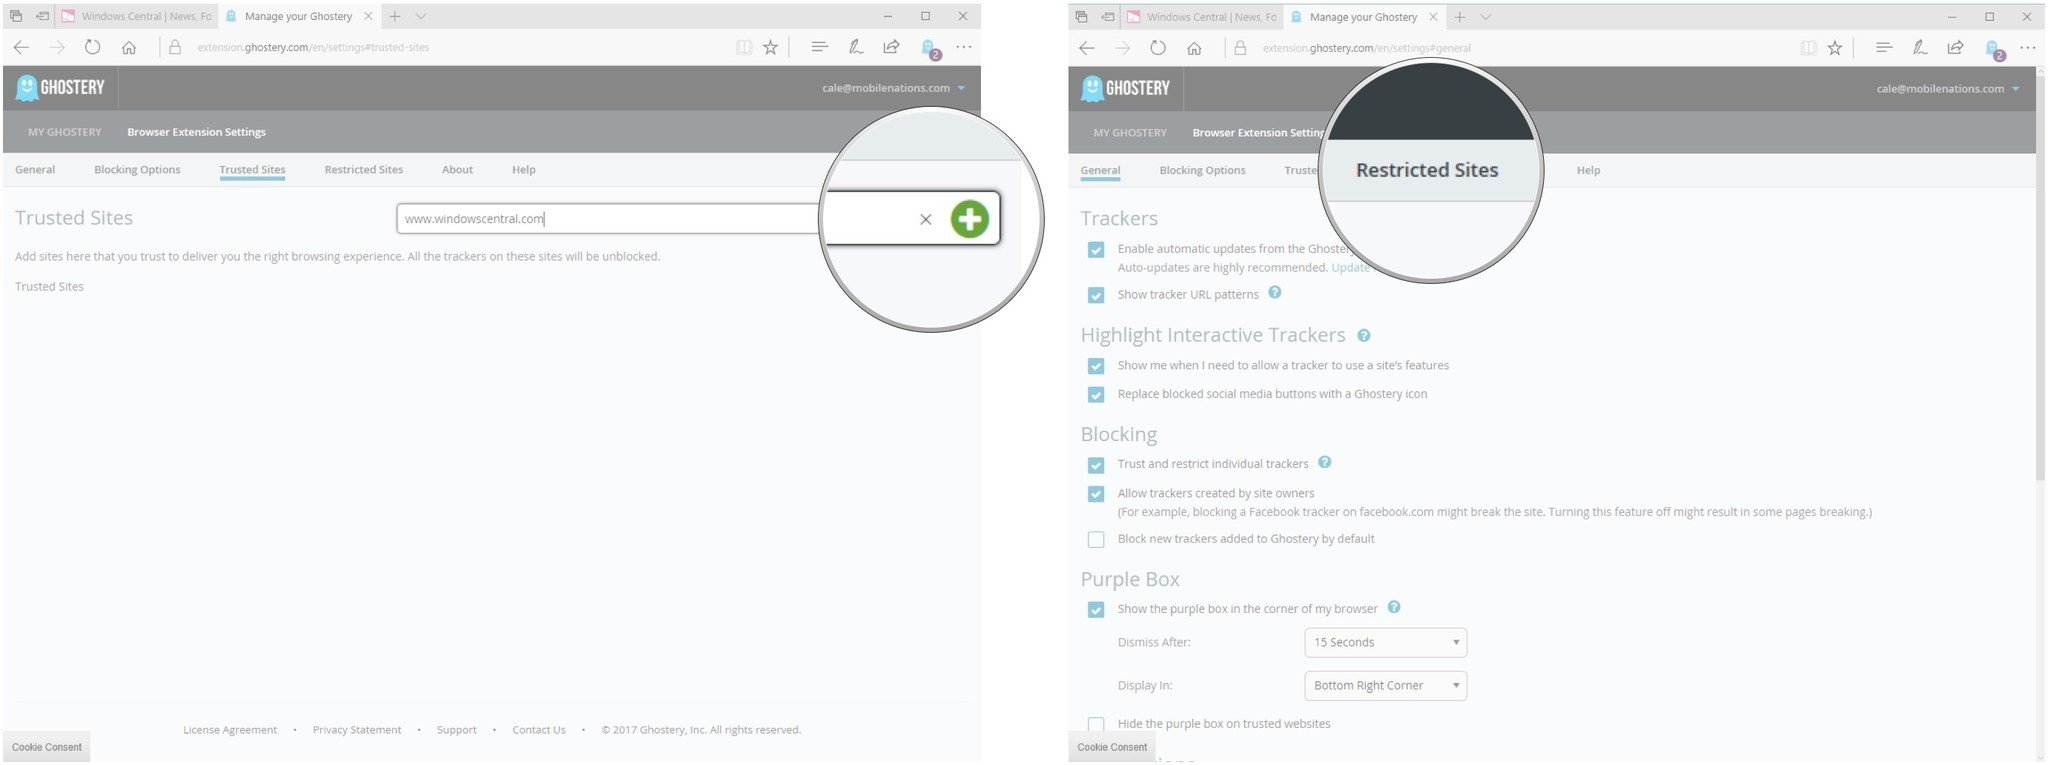
- Type the URL of the website you want to whitelist.
- Click the Add button in the field. It looks like a green plus sign.
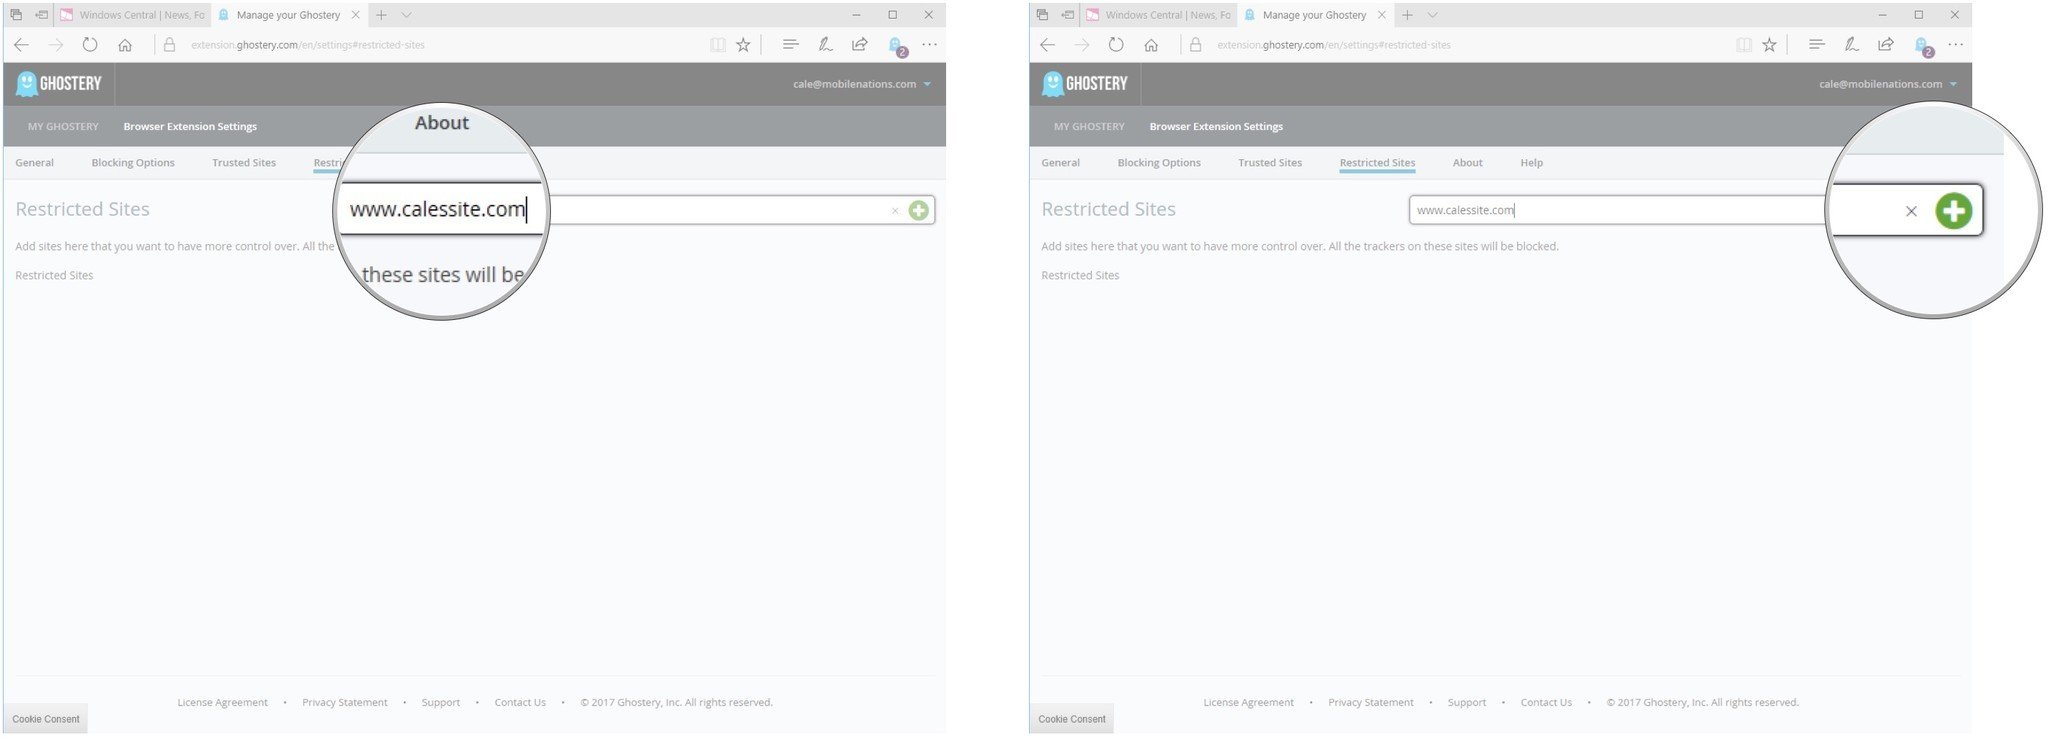
- Click Restricted Sites.
- Type the URL of the website you want to blacklist.
- Click the Add button in the field. It looks like a green plus sign.
How to block entire categories of trackers in Ghostery
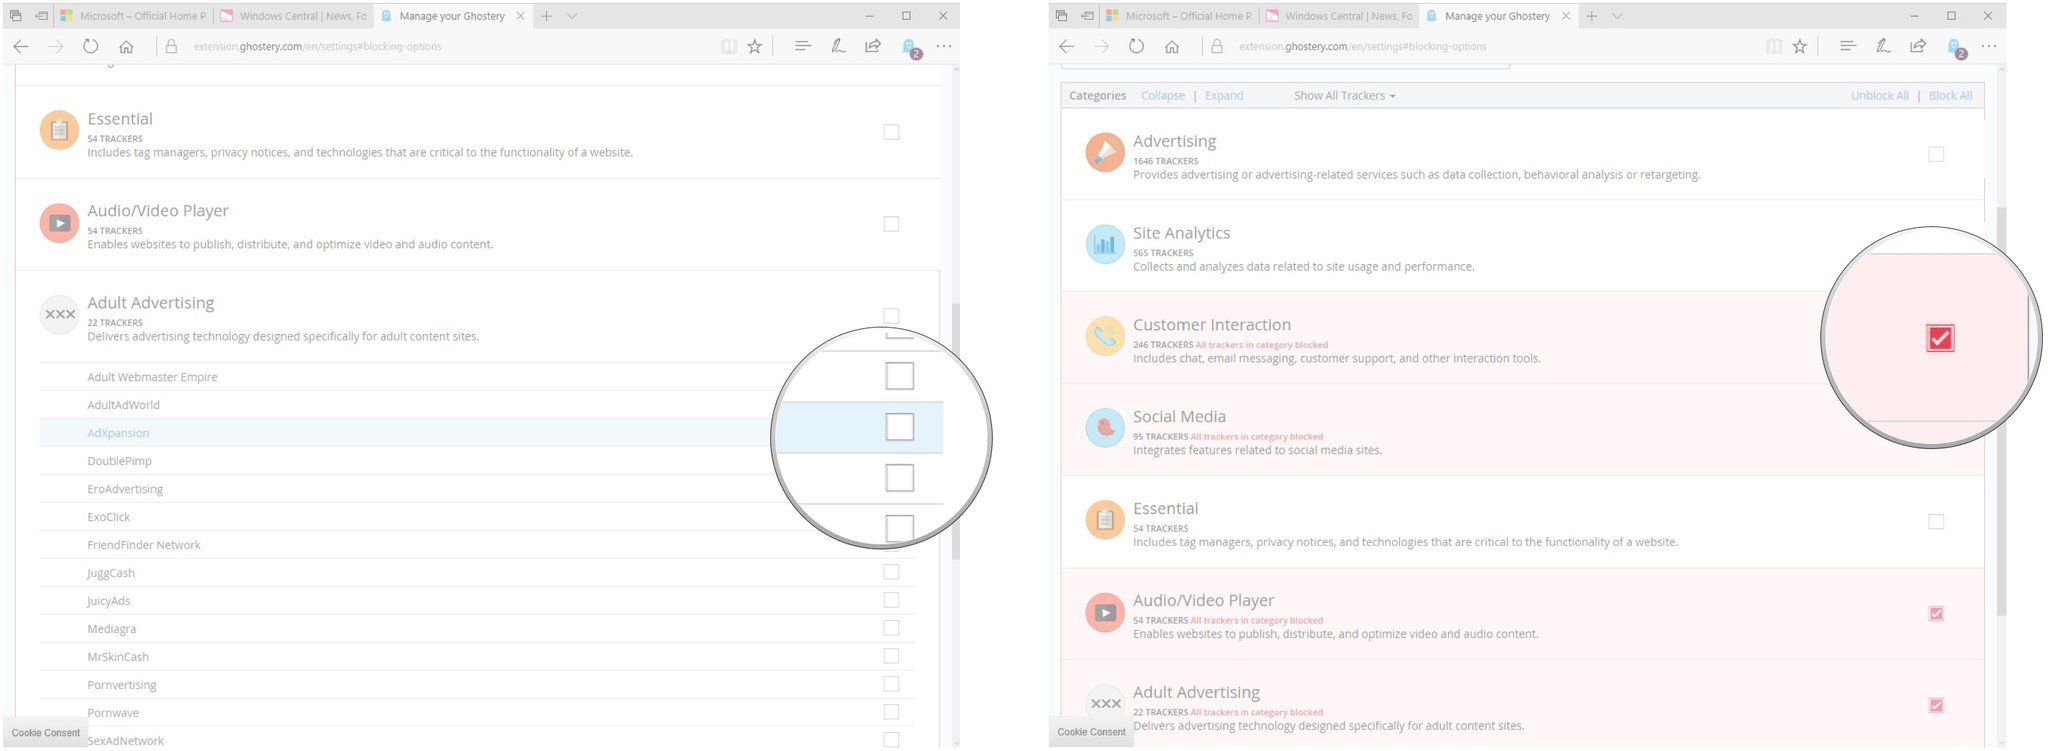
Ghostery divides trackers into eight categories. Each category can be blocked entirely.
- Launch Edge from your Start menu, desktop, or taskbar.
- Click the Settings and more button near the top-right corner of the window.
- Click Extensions.
- Click Ghostery.
- Click Options.
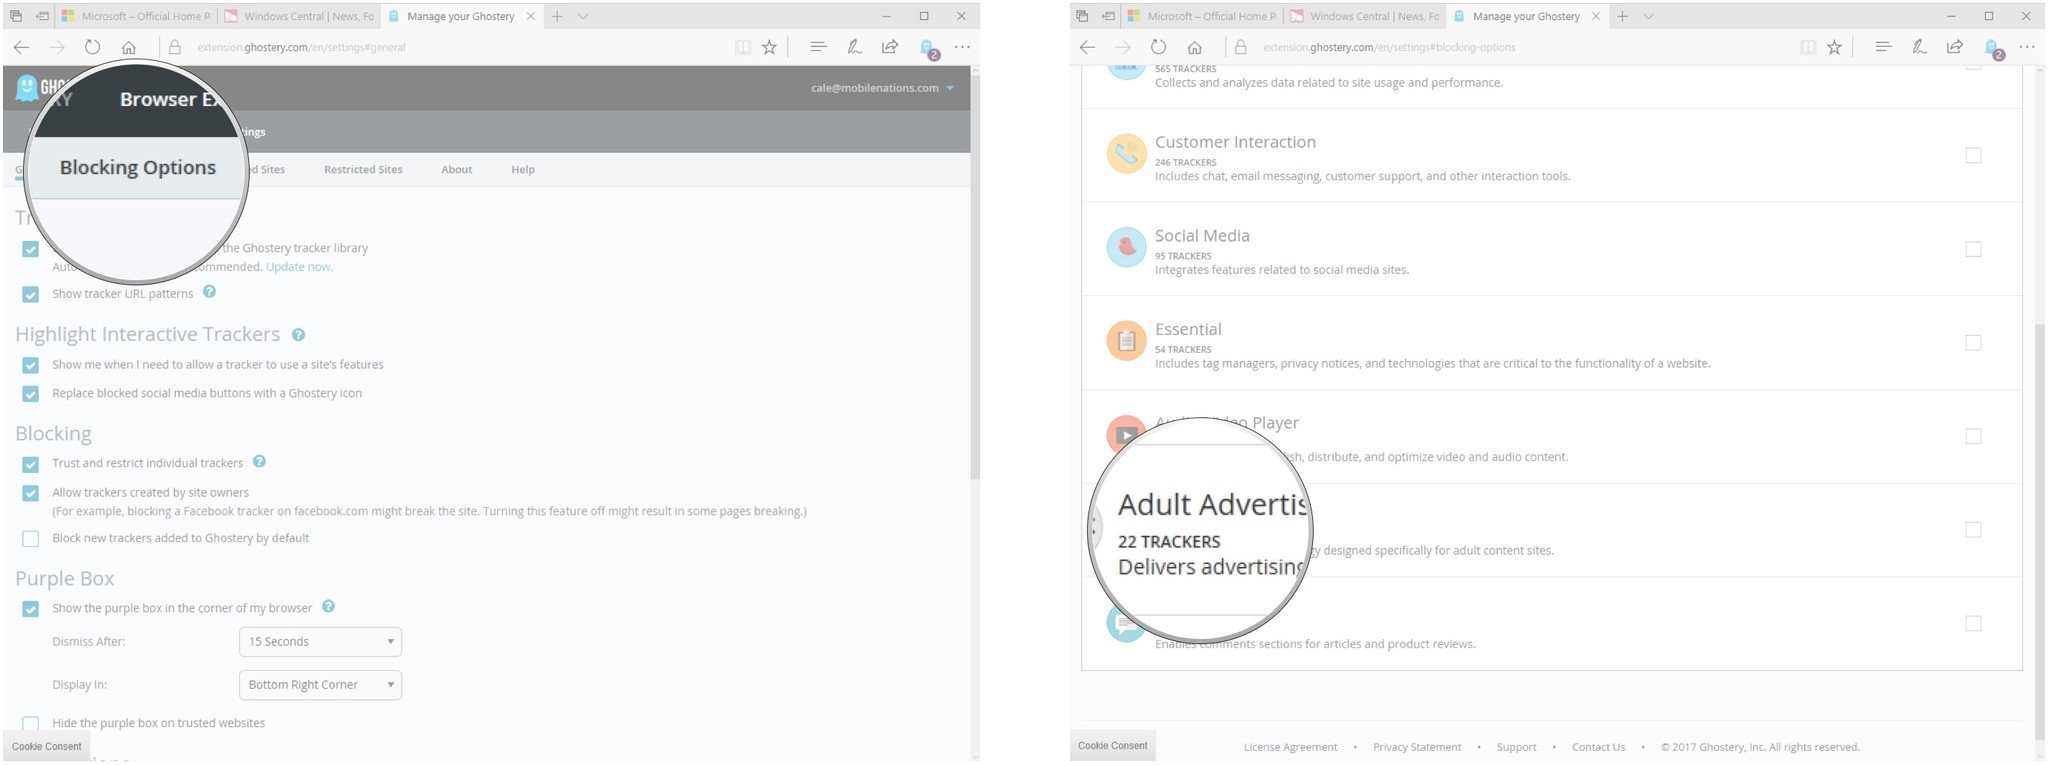
- Click Blocking Options. Here you'll see the eight different categories of trackers.
- Click a category to expand and reveal individual trackers.
- Click the checkbox next to any individual tracker to block it.
- Click the checkbox next to the category head to block all trackers in that category.
Once blocked, no tracker from the category will show up, unless you've added a site to a whitelist.
How to block individual trackers on a web page
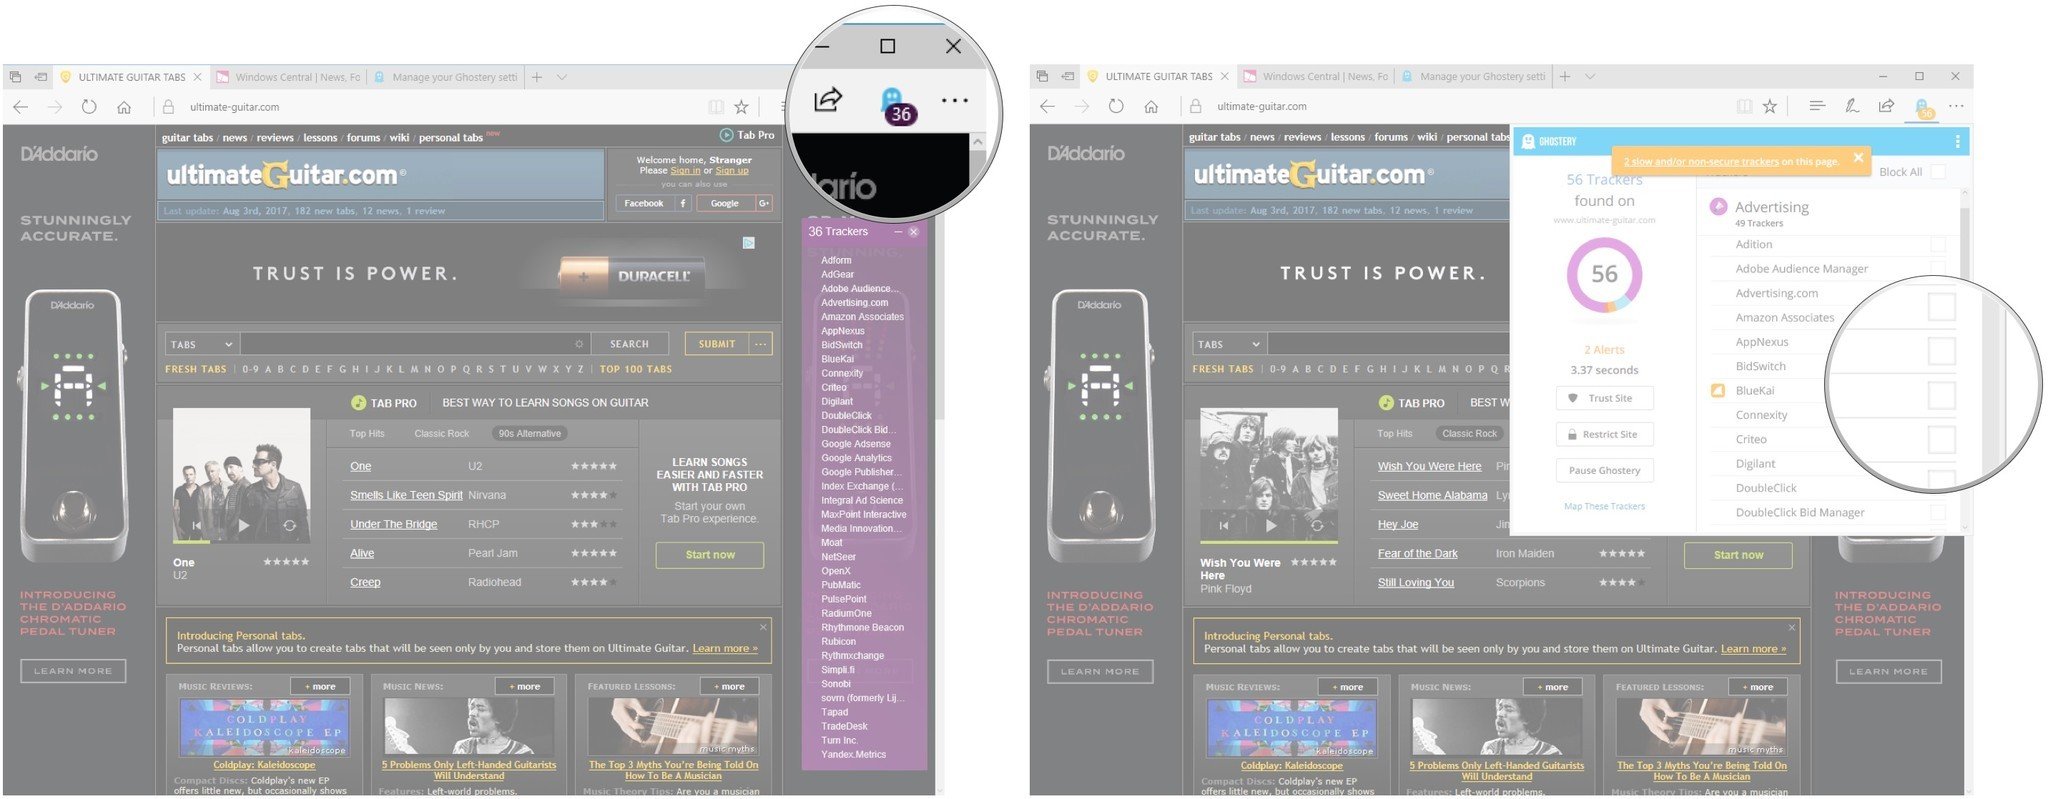
Each time you load a web page, Ghostery will populate a list of trackers in real time. A small overlay will appear in the bottom-right corner of the window to remind you that it's working, but you can get more information by clicking the Ghostery button in Edge's address bar.
Here you'll sometimes see a small, yellow icon next to trackers. These icons denote either a slow tracker that's dragging things down (snail), a non-secure tracker that could be a risk (shark fin), and broken pages that simply aren't working properly (explosion).
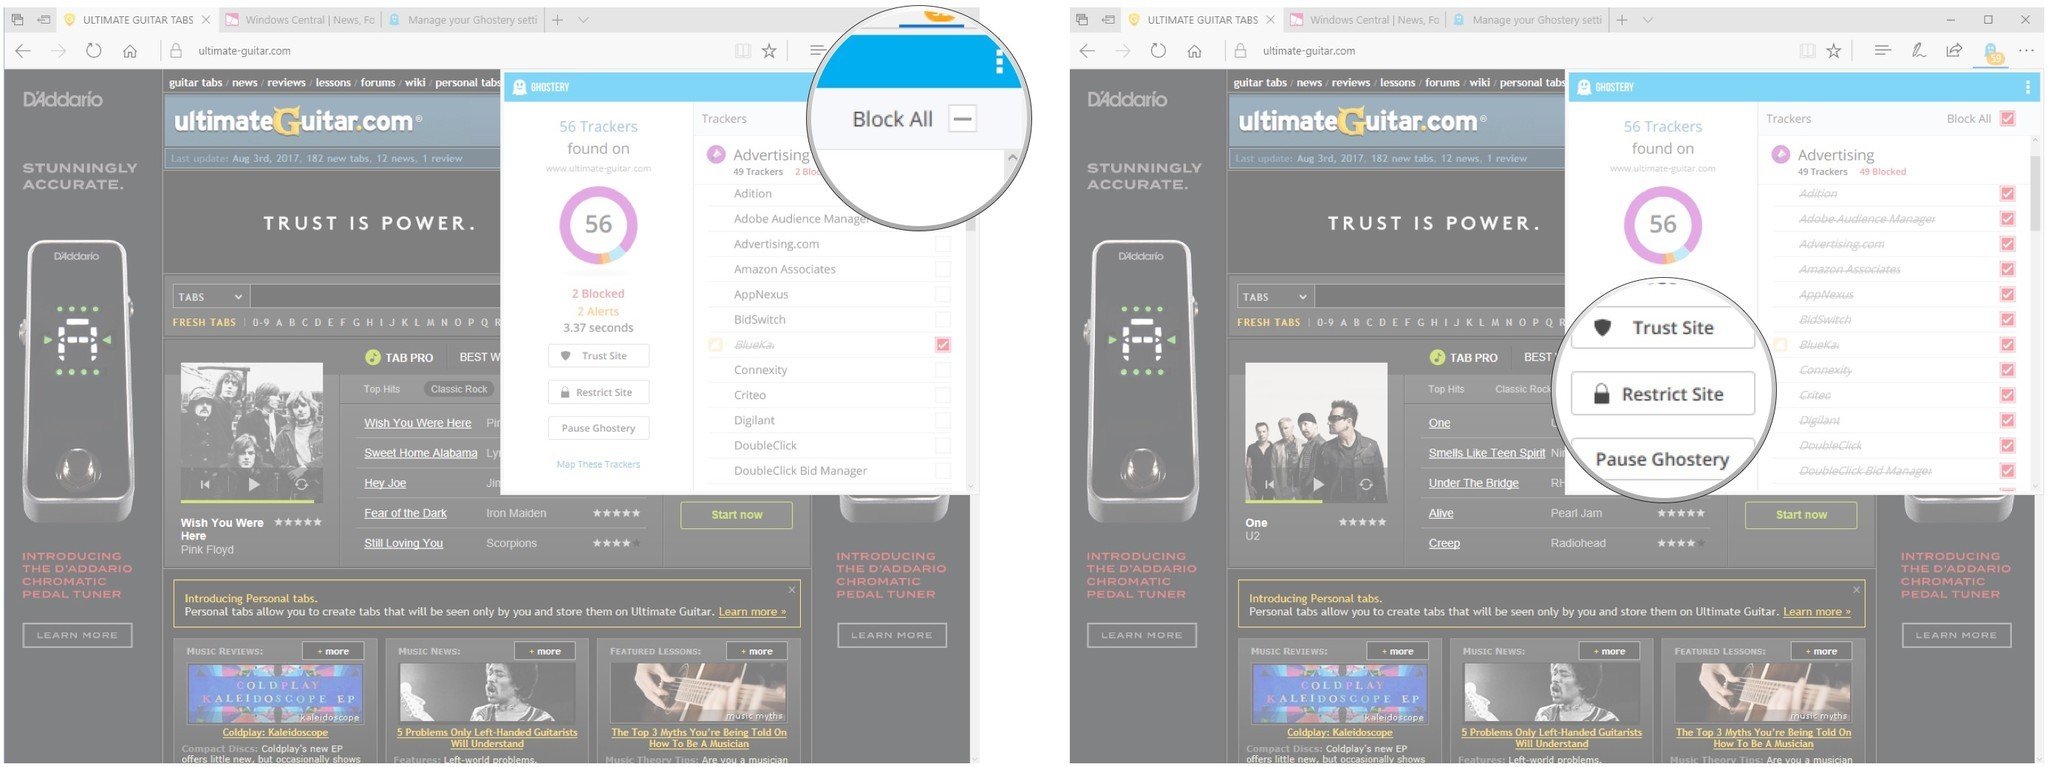
Here's how to block individual trackers on a certain web page. If a site is especially problematic, you can quickly add the site to the blacklist, or you can simply block all trackers.
- Navigate to a web page. You'll see Ghostery populate a list of trackers.
- Click the Ghostery button in the top-right corner of the window.
- Click the checkbox next to any trackers that are causing problems or that you'd simply like to block. In this case, I blocked a tracker that was non-secure and a tracker that was slowing things down.
- Click the checkbox next to Block All to block all trackers on a specific website.
- Click the Restrict Site button to add the site to the blacklist.
How to sync your Ghostery settings across devices
If you've built up a decent amount of Ghostery filtering on, say, your desktop PC, you likely also want that exact same filtering on your laptop. As long as you created an account during initial setup, you can just install Ghostery on your laptop and log in. All the same filtering will be applied.
Didn't create an account? No problem. Using the Edge browser containing all of your filtering settings, follow these steps.
- Launch Edge from your Start menu, desktop, or taskbar.
- Click the Settings and more button near the top-right corner of the window.
- Click Extensions.
- Click Ghostery.
- Click Options.
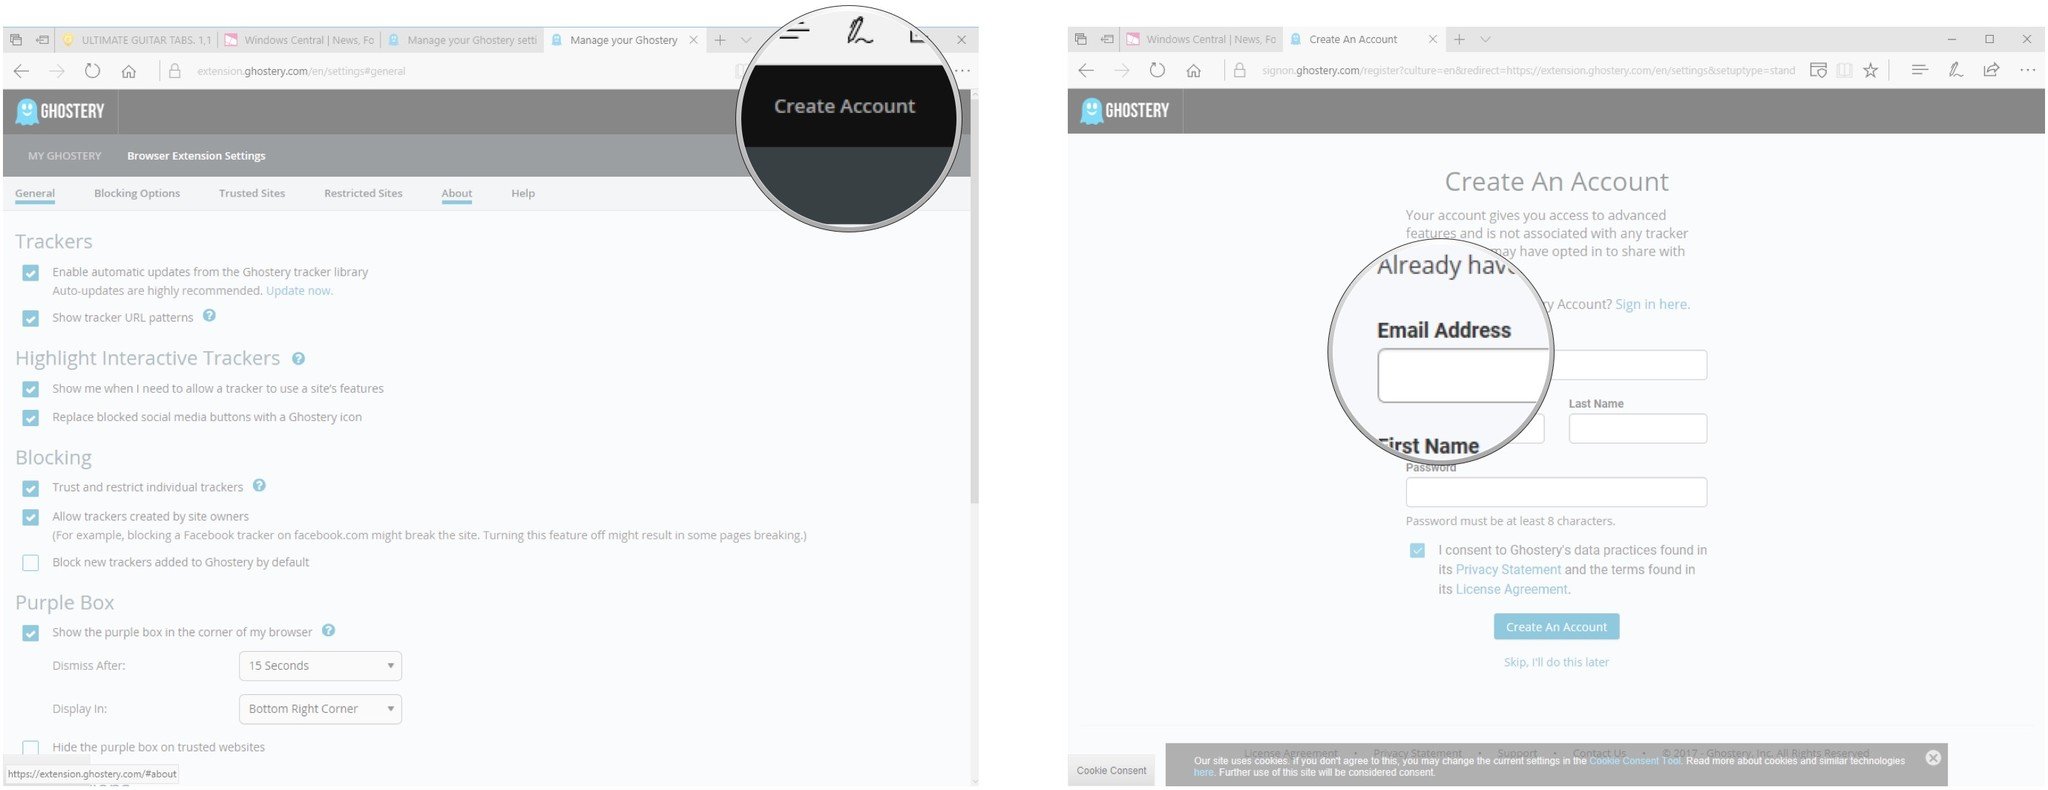
- Click Create Account in the top-right corner of the window.
- Type an email address.
- Type a password.
- Click Create An Account.
You'll receive an email at the address you used, asking you to verify by clicking a button. That's it! You're all set up. Next time you use Edge on another device, just log in with the same credentials during setup.
How to turn off and uninstall Ghostery
Don't want Ghostery anymore? Here's how to turn it off and uninstall it.
- Launch Edge from your Start menu, desktop, or taskbar.
- Click the Settings and more button near the top-right corner of the window.
- Click Extensions.
- Click Ghostery.
- Click the switch below Ghostery. This turns Ghostery off.
- Click Uninstall. This completely removes the Ghostery extension from Edge.
More Edge resources
Be sure to have a look at our Microsoft Edge Ultimate Guide for way more information about the browser.
See our Microsoft Edge Ultimate Guide

Cale Hunt brings to Windows Central more than nine years of experience writing about laptops, PCs, accessories, games, and beyond. If it runs Windows or in some way complements the hardware, there’s a good chance he knows about it, has written about it, or is already busy testing it.
