Halo Infinite High-Value Target locations: How to get all unique weapons
Gotta catch 'em all.
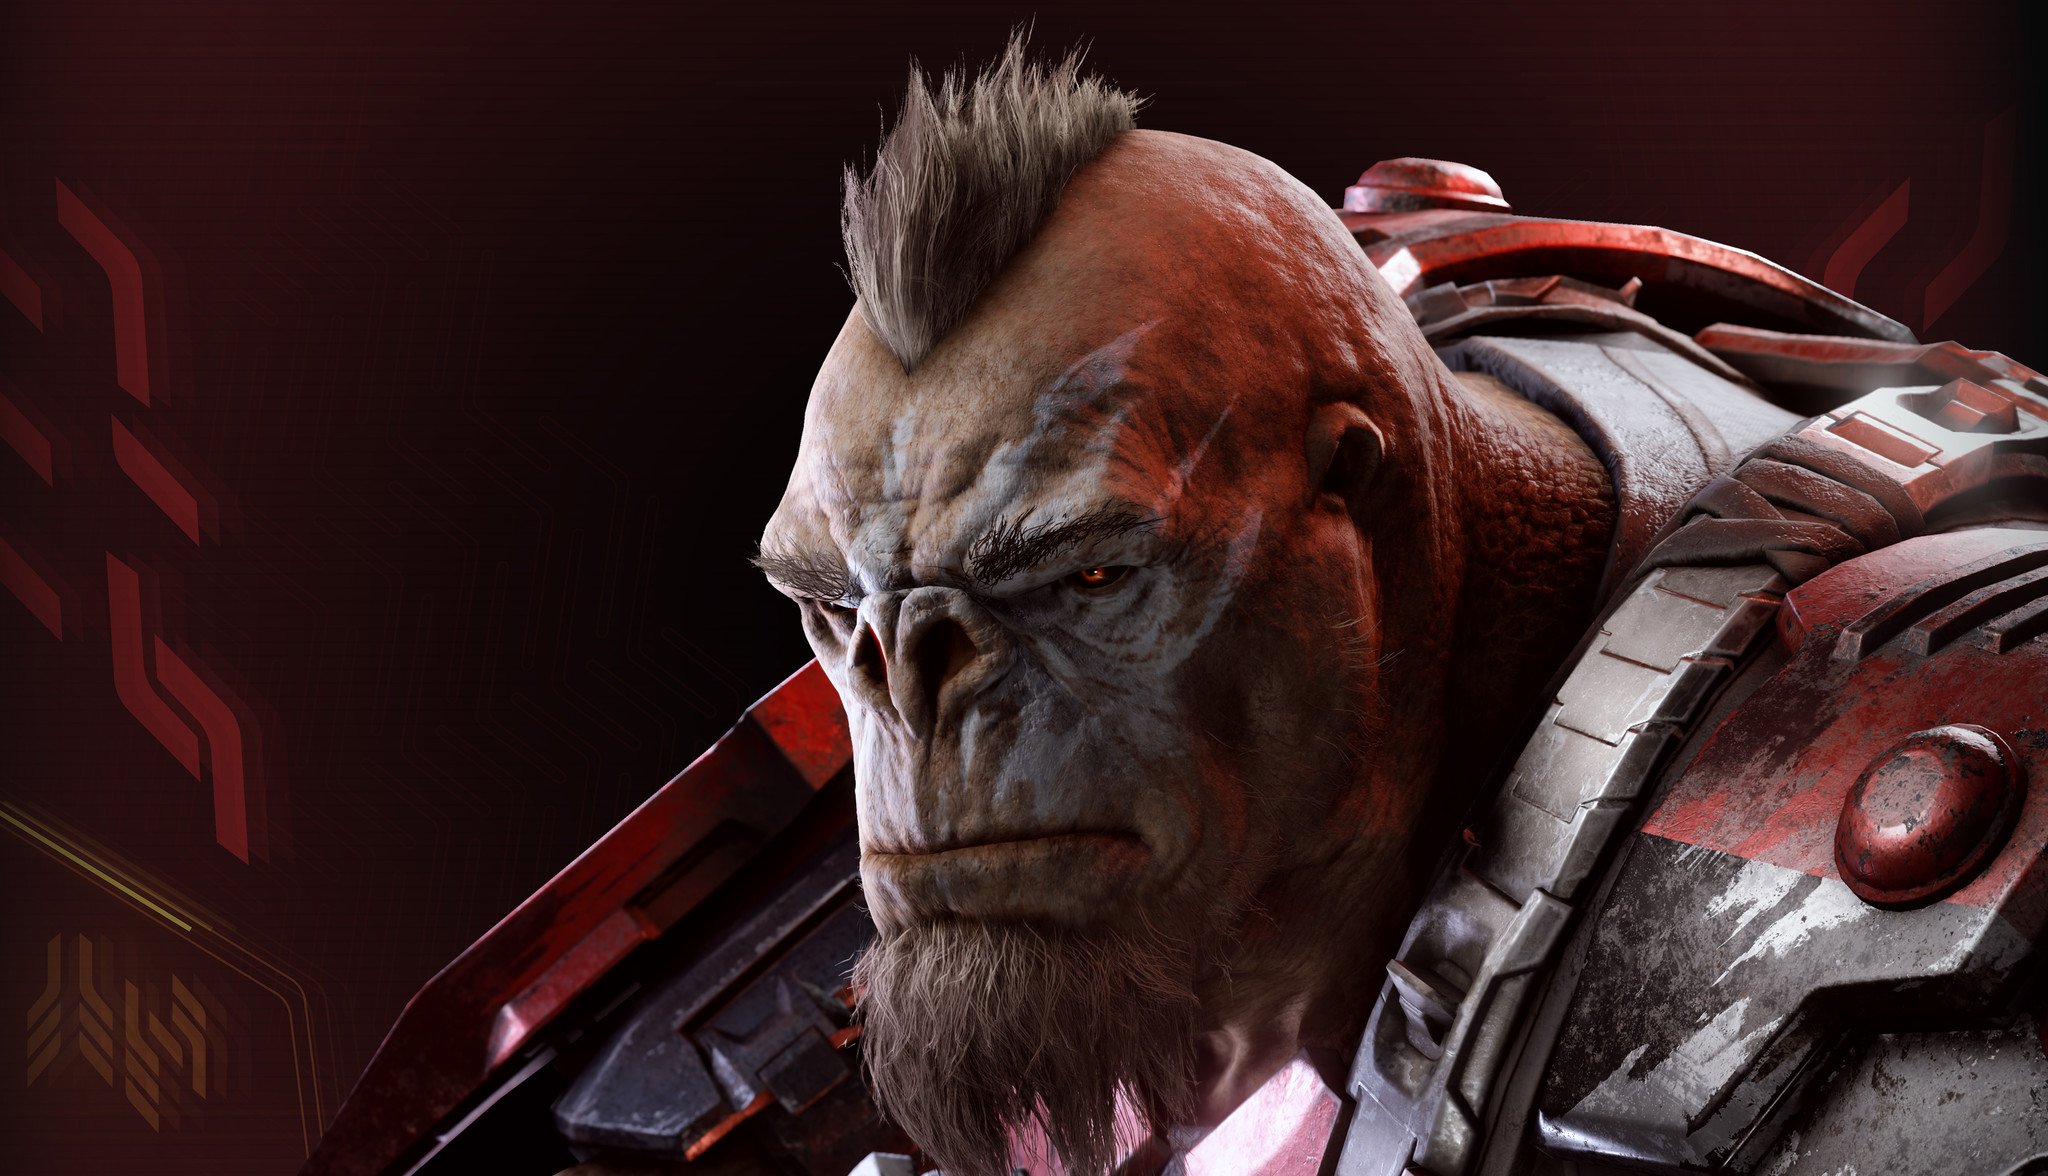
Out of all of the side activities that players can do while exploring Zeta Halo in the Halo Infinite campaign, one of the most rewarding — and dangerous — is hunting down Banished high-value targets that have spread across the surface of the ring. These fearsome warriors lead entire companies of Banished troops and are deadly in one-on-one combat, too, but when you take them down, you'll get access to unique and powerful variants of Halo Infinite's weapons that you can use throughout the rest of the campaign.
Hunting down these targets can take a lot of time, especially if you choose to find them on your own by capturing each of Halo Infinite's FOBs so that their location is revealed on your map. If you'd like to speed up the process and hunt high-value targets down before you've captured a lot of FOBs, this guide will show where you can find all 15 of them. Additionally, we'll go over what challenge you can expect to face from each target as well as what makes their weapons unique.
Halo Infinite Rapidfire Pulse Carbine location: Inka 'Saham
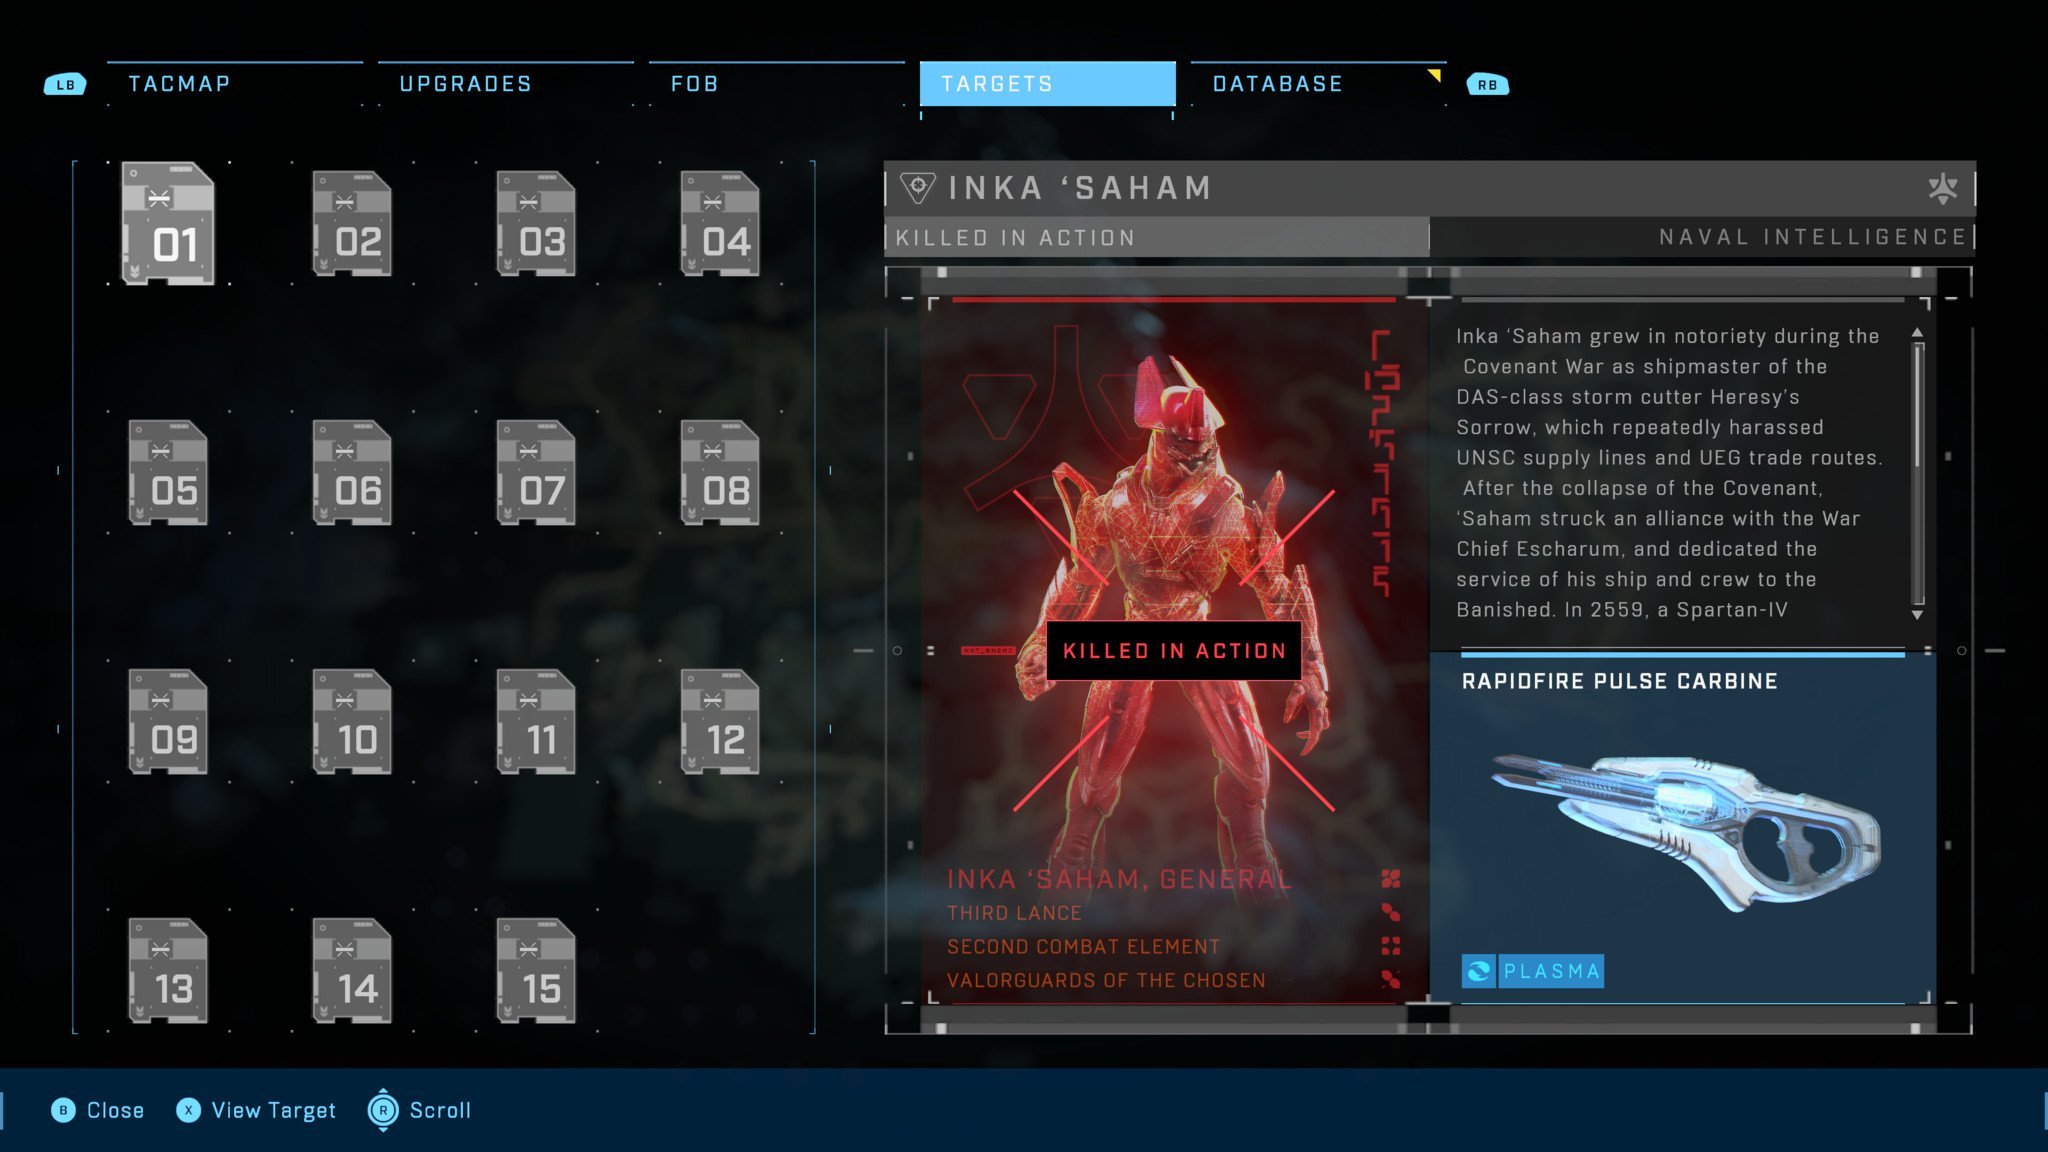
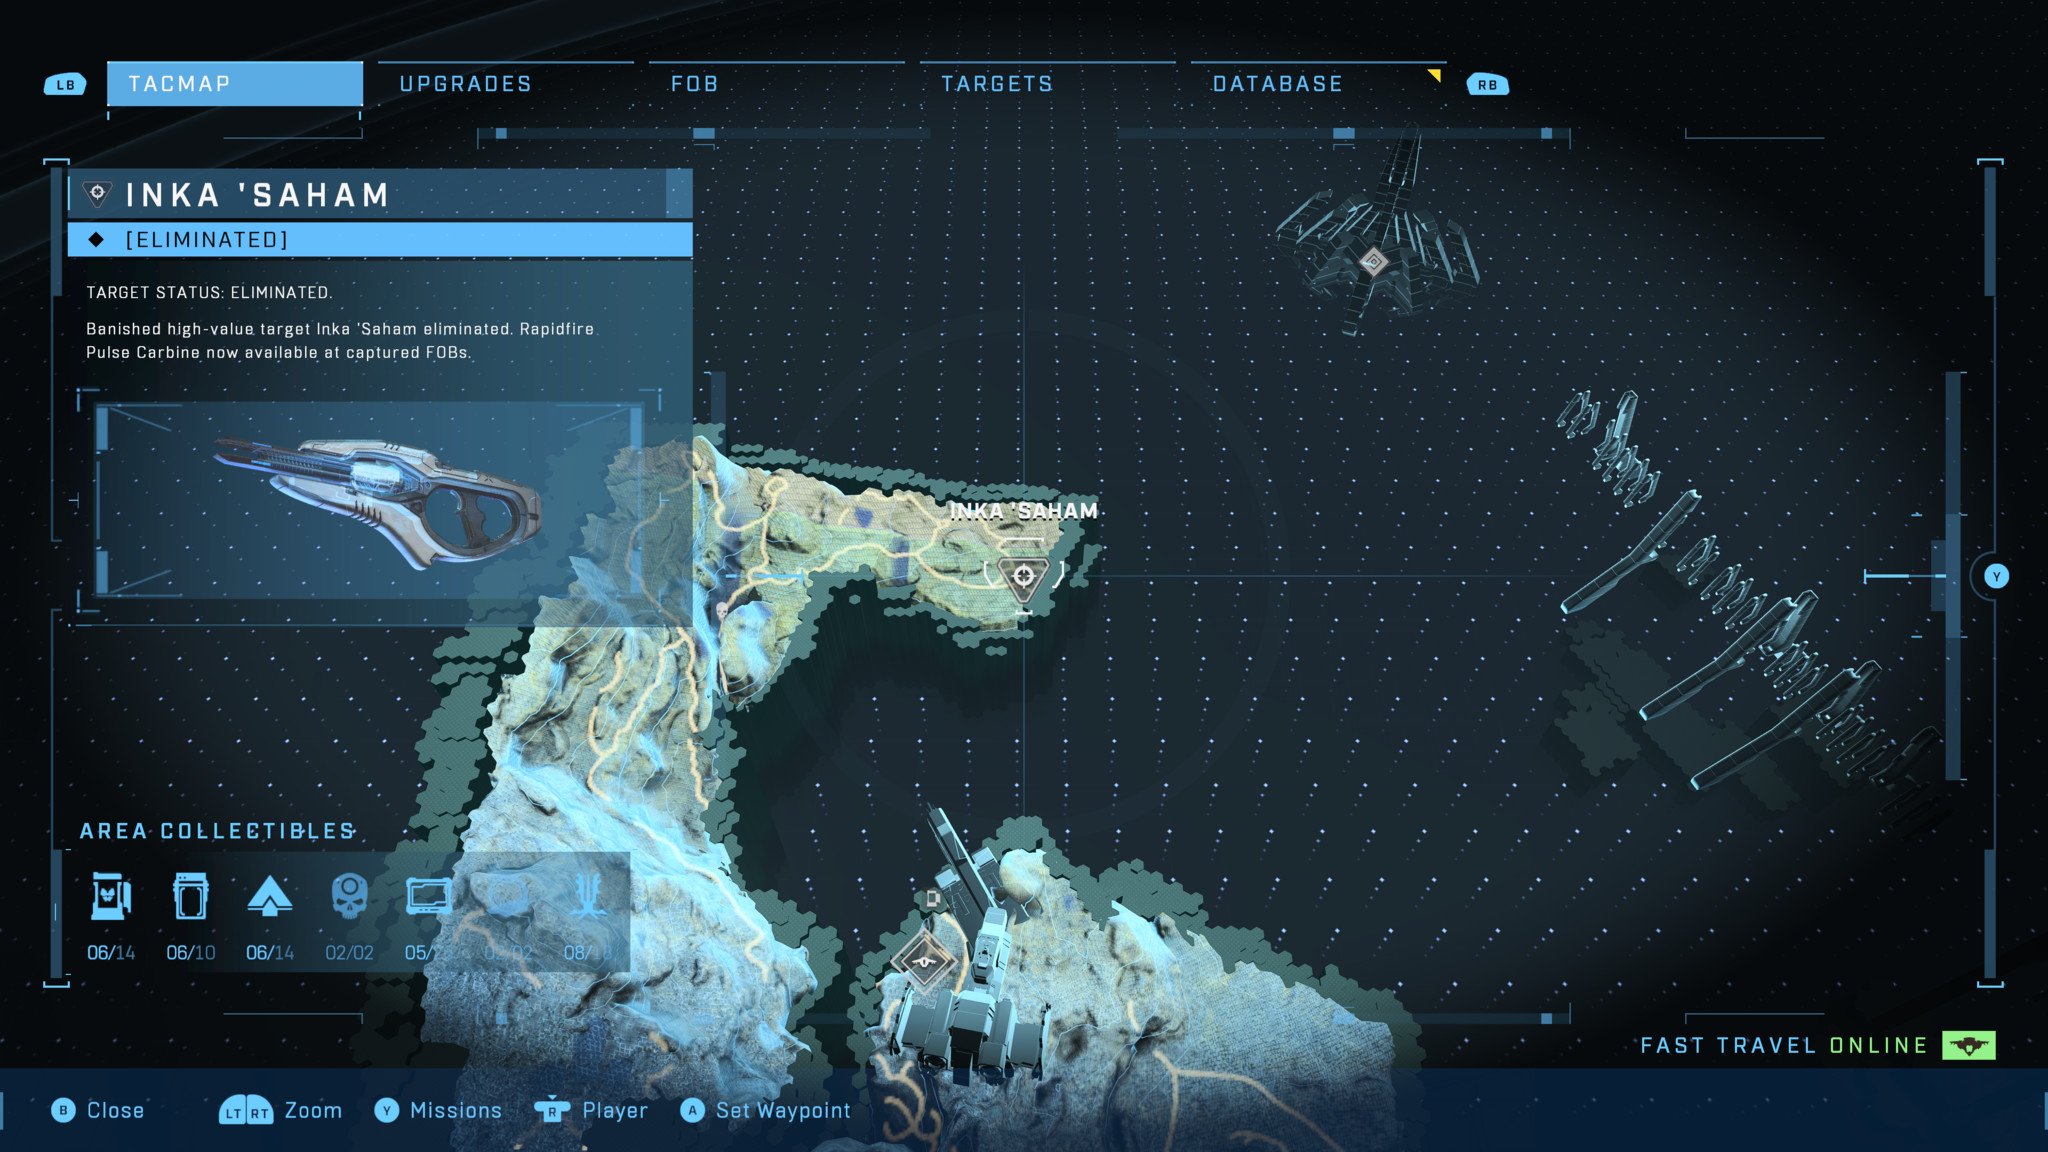
You'll find Inka 'Saham in the northernmost region of the map. As you approach him, he'll hop into a nearby Shade Turret and begin to fire on you while his allies attempt to take you down. Take cover from the heavy damage of his Shade Turret while picking off his guards one at a time until 'Saham is the only threat left. Then use power weapons, grenades, or a vehicle to blow up his Shade Turret, forcing him to exit it.
Article continues belowOn foot, 'Saham will attack you with his Rapidfire Pulse Carbine. Avoid his fire as much as possible while firing back with plasma weapons of your own to take down his shields, then finish the job with a health-shredding kinetic weapon.
The Rapidfire Pulse Carbine dropped by 'Saham fires much faster than a normal Pulse Carbine, allowing you to strip shields and deal damage much quicker.
Halo Infinite Arcane Sentinel Beam location: Thav 'Sebarim
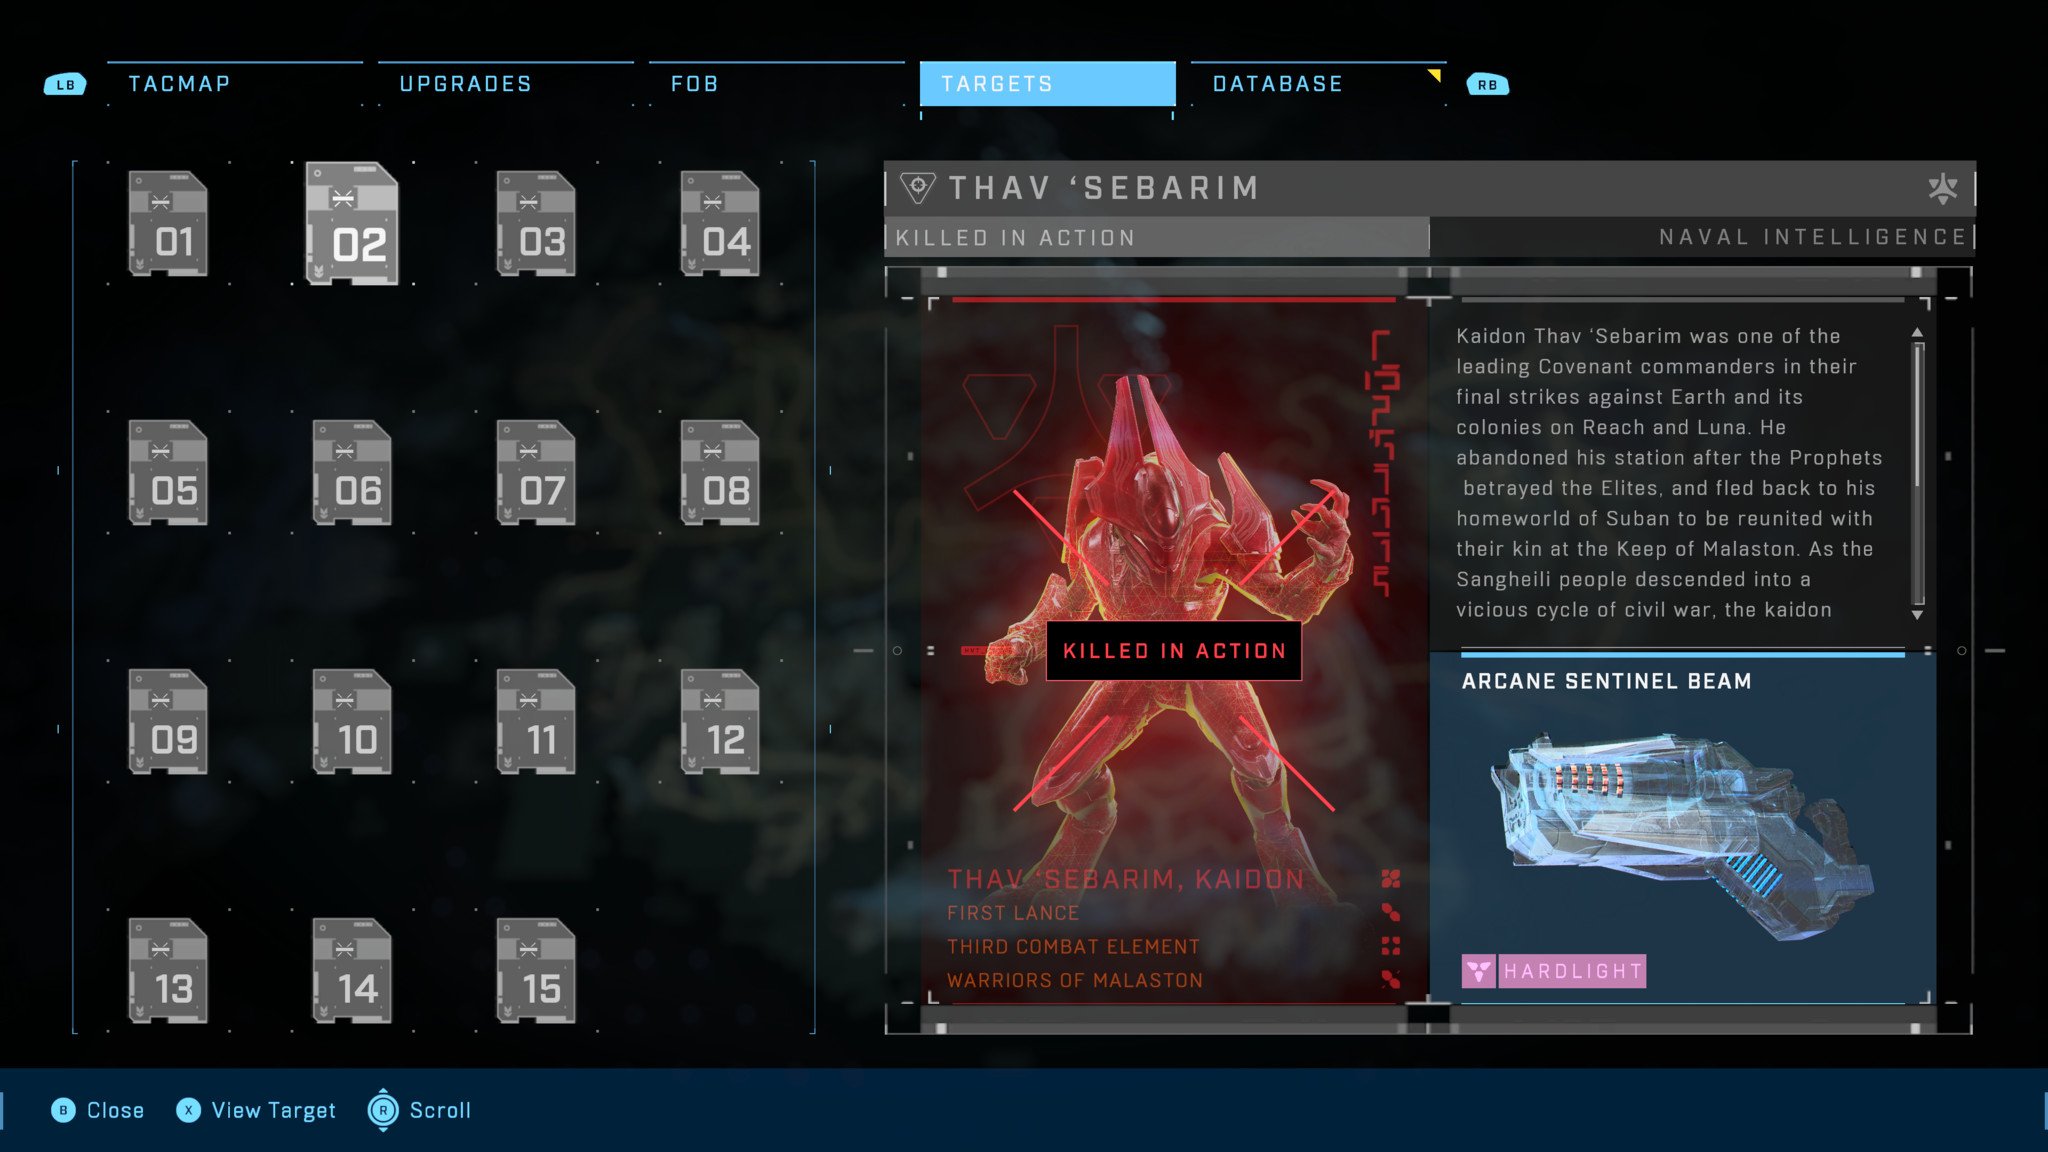
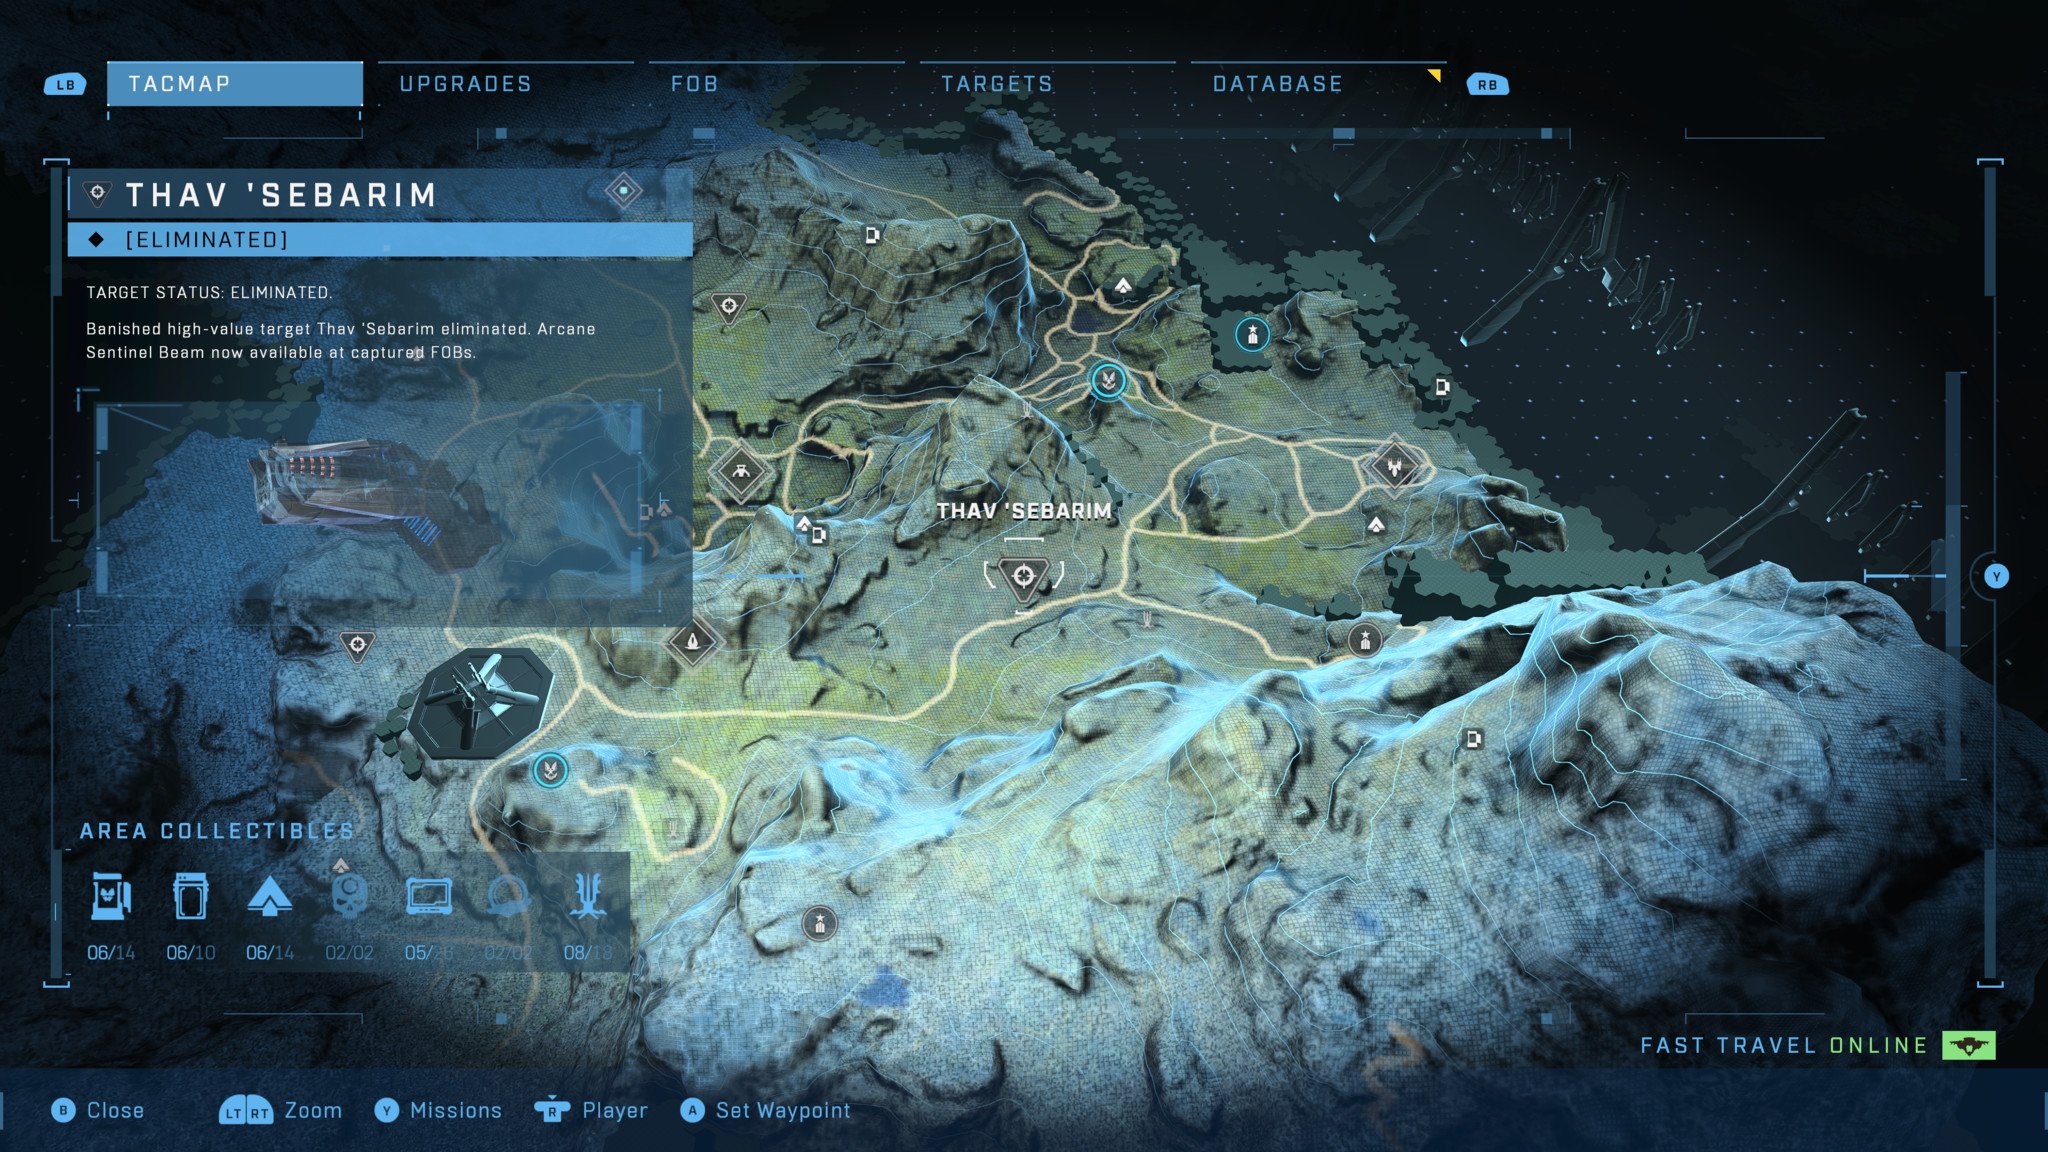
Thav 'Sebarim can be located on the southern edge of the map's northern region, driving a Ghost amongst his troops. An easy way to defeat him is to use the Grappleshot to hijack his Ghost from him, then immediately use its weaponry to gun 'Sebarim down or simply run him over with it. Alternatively, you can also use an effective anti-vehicle weapon like a Skewer or a Hydra to destroy his Ghost, forcing him to get out and fight you on foot. Be careful if you choose this approach, though, as his Arcane Sentinel Beam is deadly.
The Arcane Sentinel Beam dropped by 'Sebarim does significantly more damage and is also more effective against enemy vehicles.
All the latest news, reviews, and guides for Windows and Xbox diehards.
Halo Infinite Duelist Energy Sword location: Okro 'Vagaduun
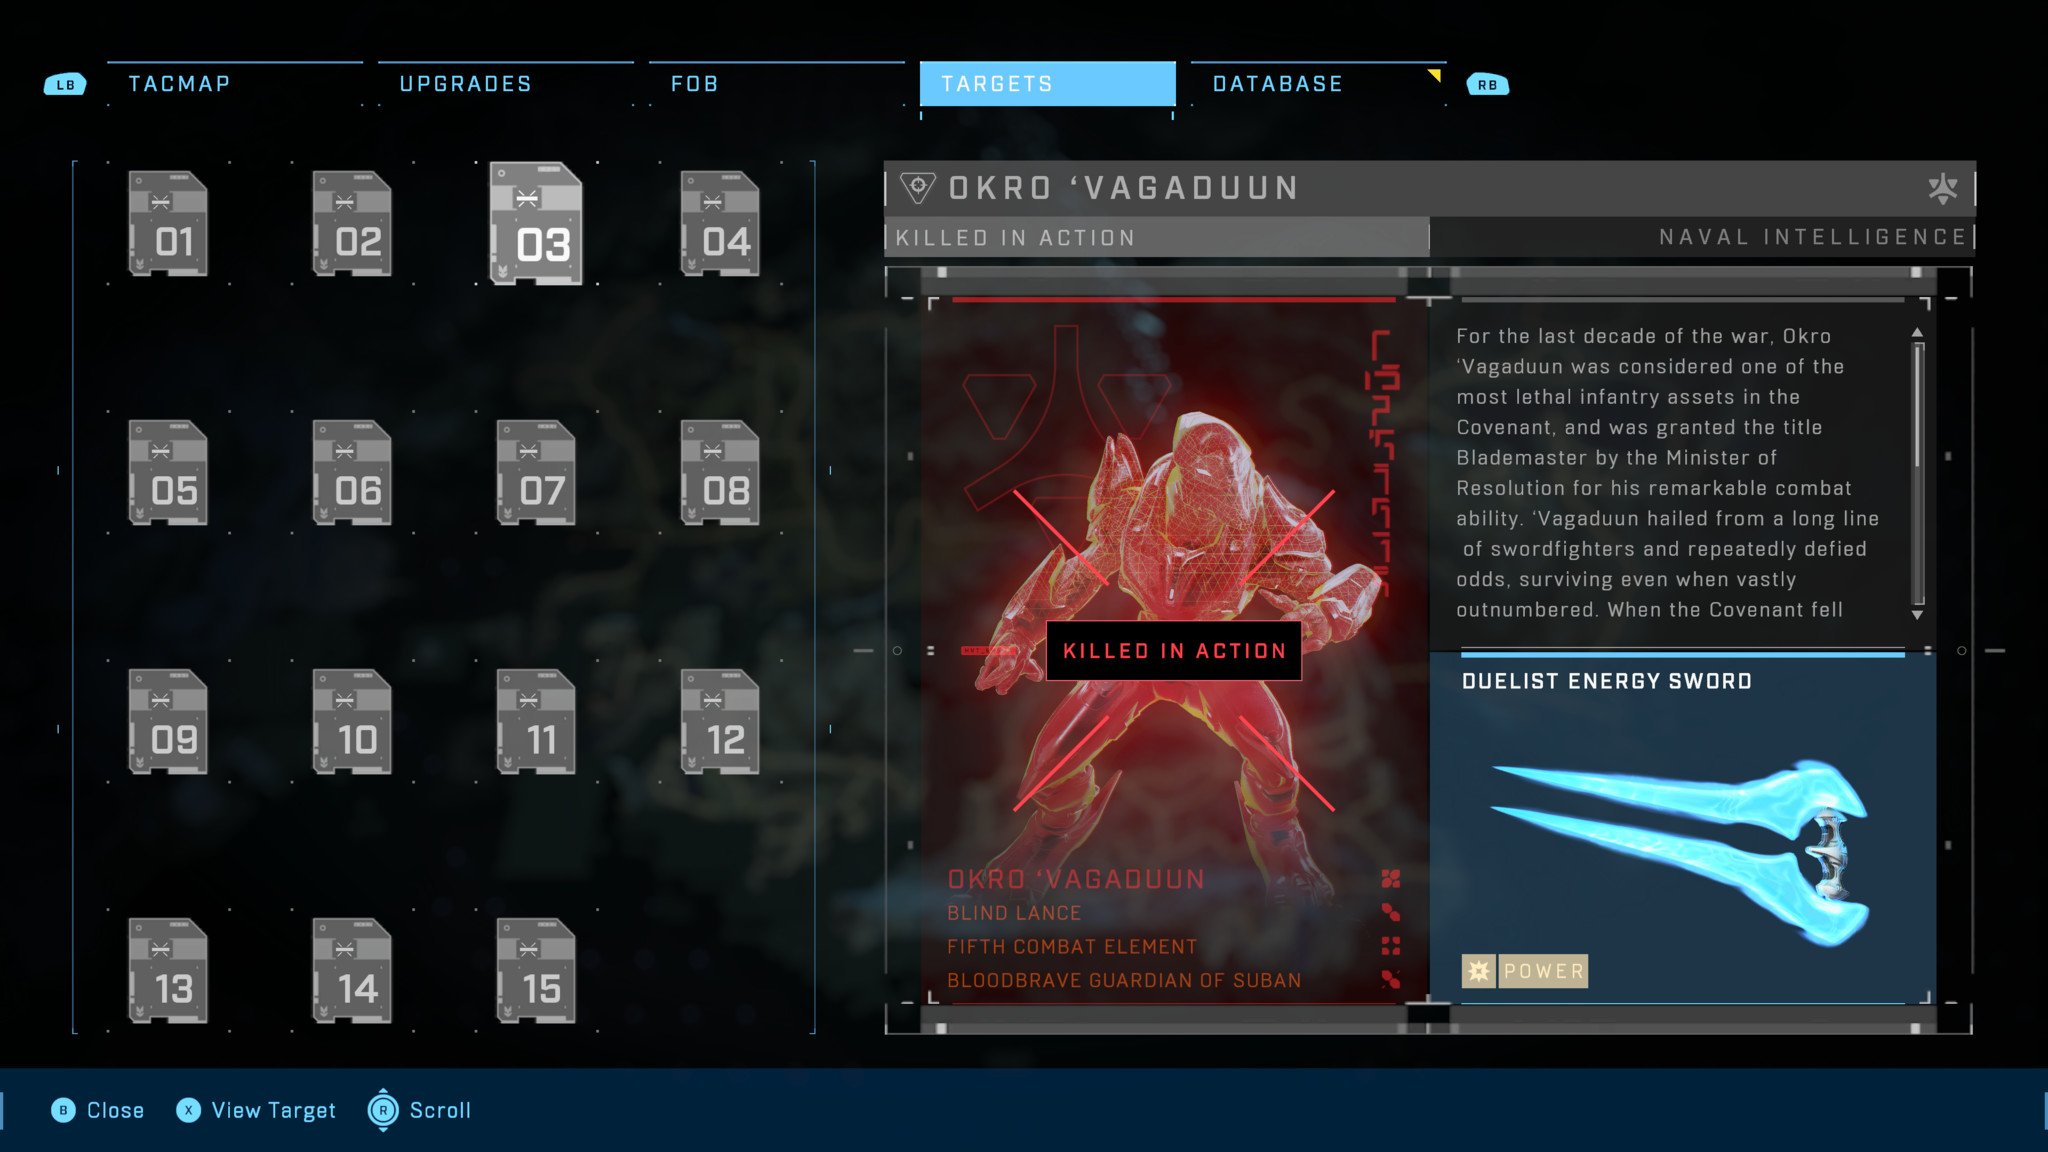
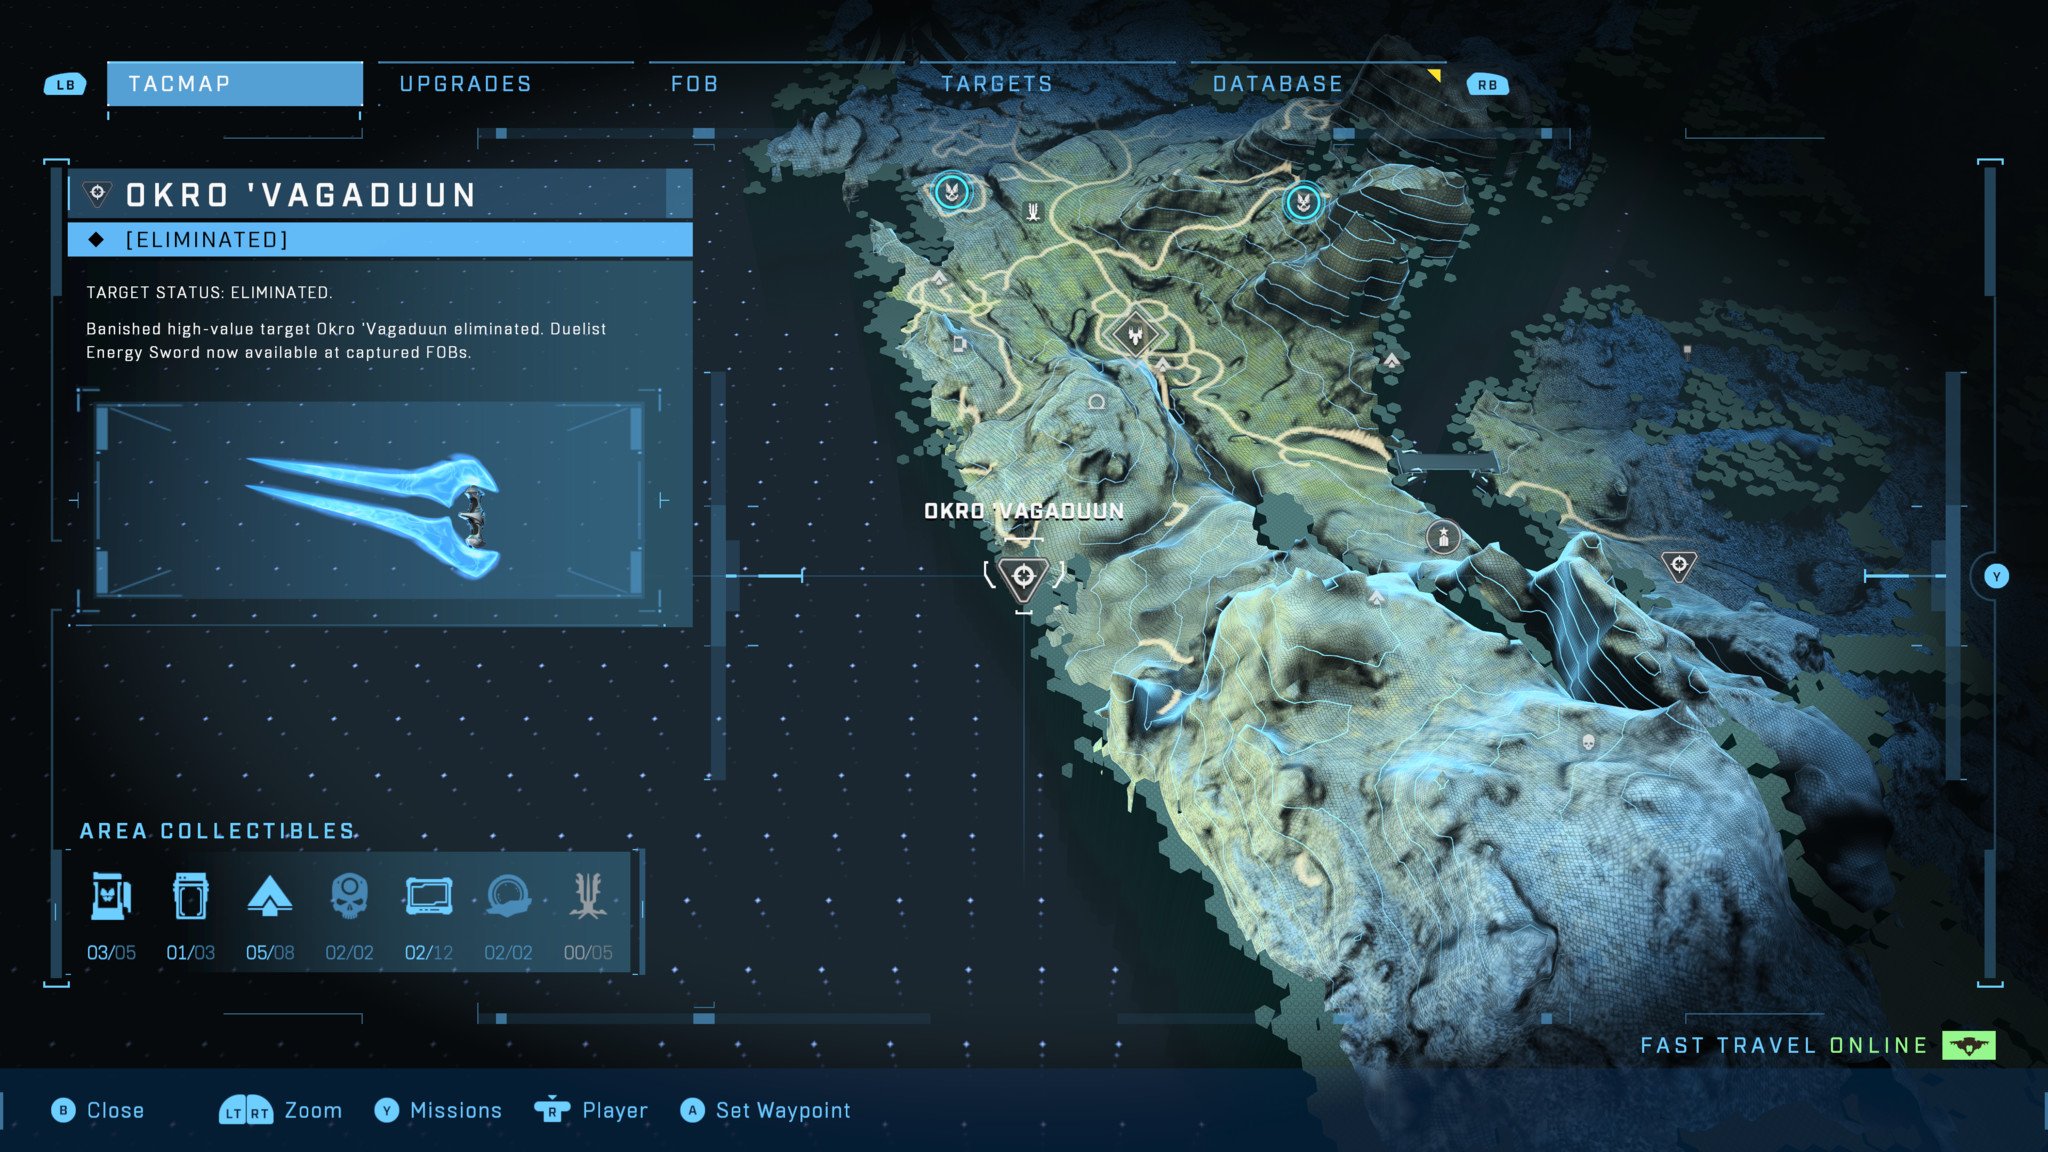
Okro 'Vagaduun can be found alongside the western beaches of the southwestern region of the map. Once he spots you, he'll pull out his Duelist Energy Sword and activate his active camo cloaking, generally opting to let his Brute and Elite comrades distract you while he moves to your flank to deliver a killing blow with his blade. Make sure you stay moving during this fight so that 'Vagaduun can't easily close the distance.
Pick off his troops until he's the only one left, then keep an eye out for the visible shimmer of his active camo. When you see him coming in for an attack, jump, strafe, or Grappleshot away to dodge, then fire at him with a plasma weapon to knock out his shield. Finish him off with a quick headshot from a precision weapon.
The Duelist Energy Sword dropped by 'Vagaduun allows you to move significantly faster and jump higher, making closing the distance with the weapon easy. The range of the lunge is also much higher than standard Energy Swords.
Halo Infinite Calcine Disruptor location: Bipbap
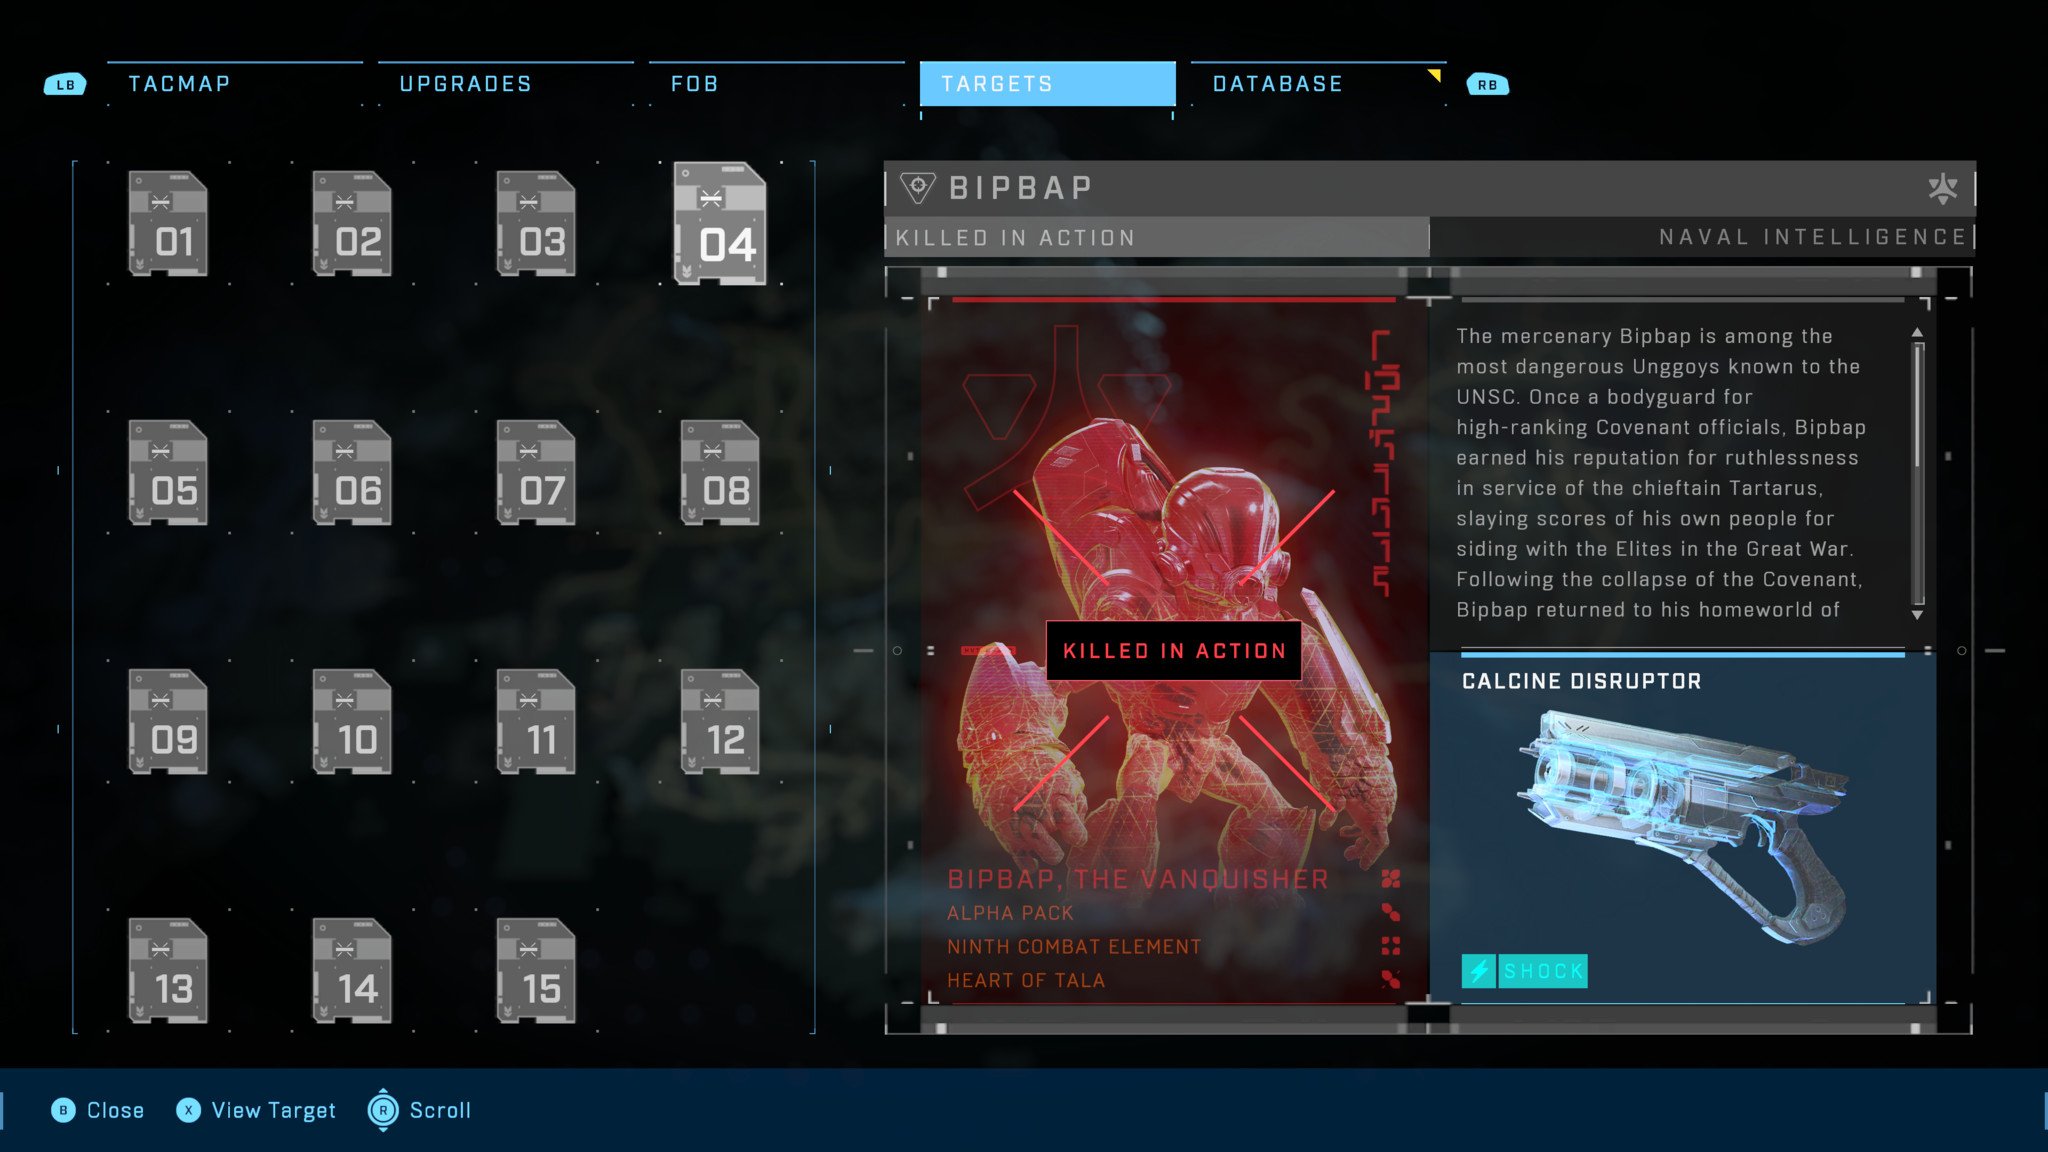
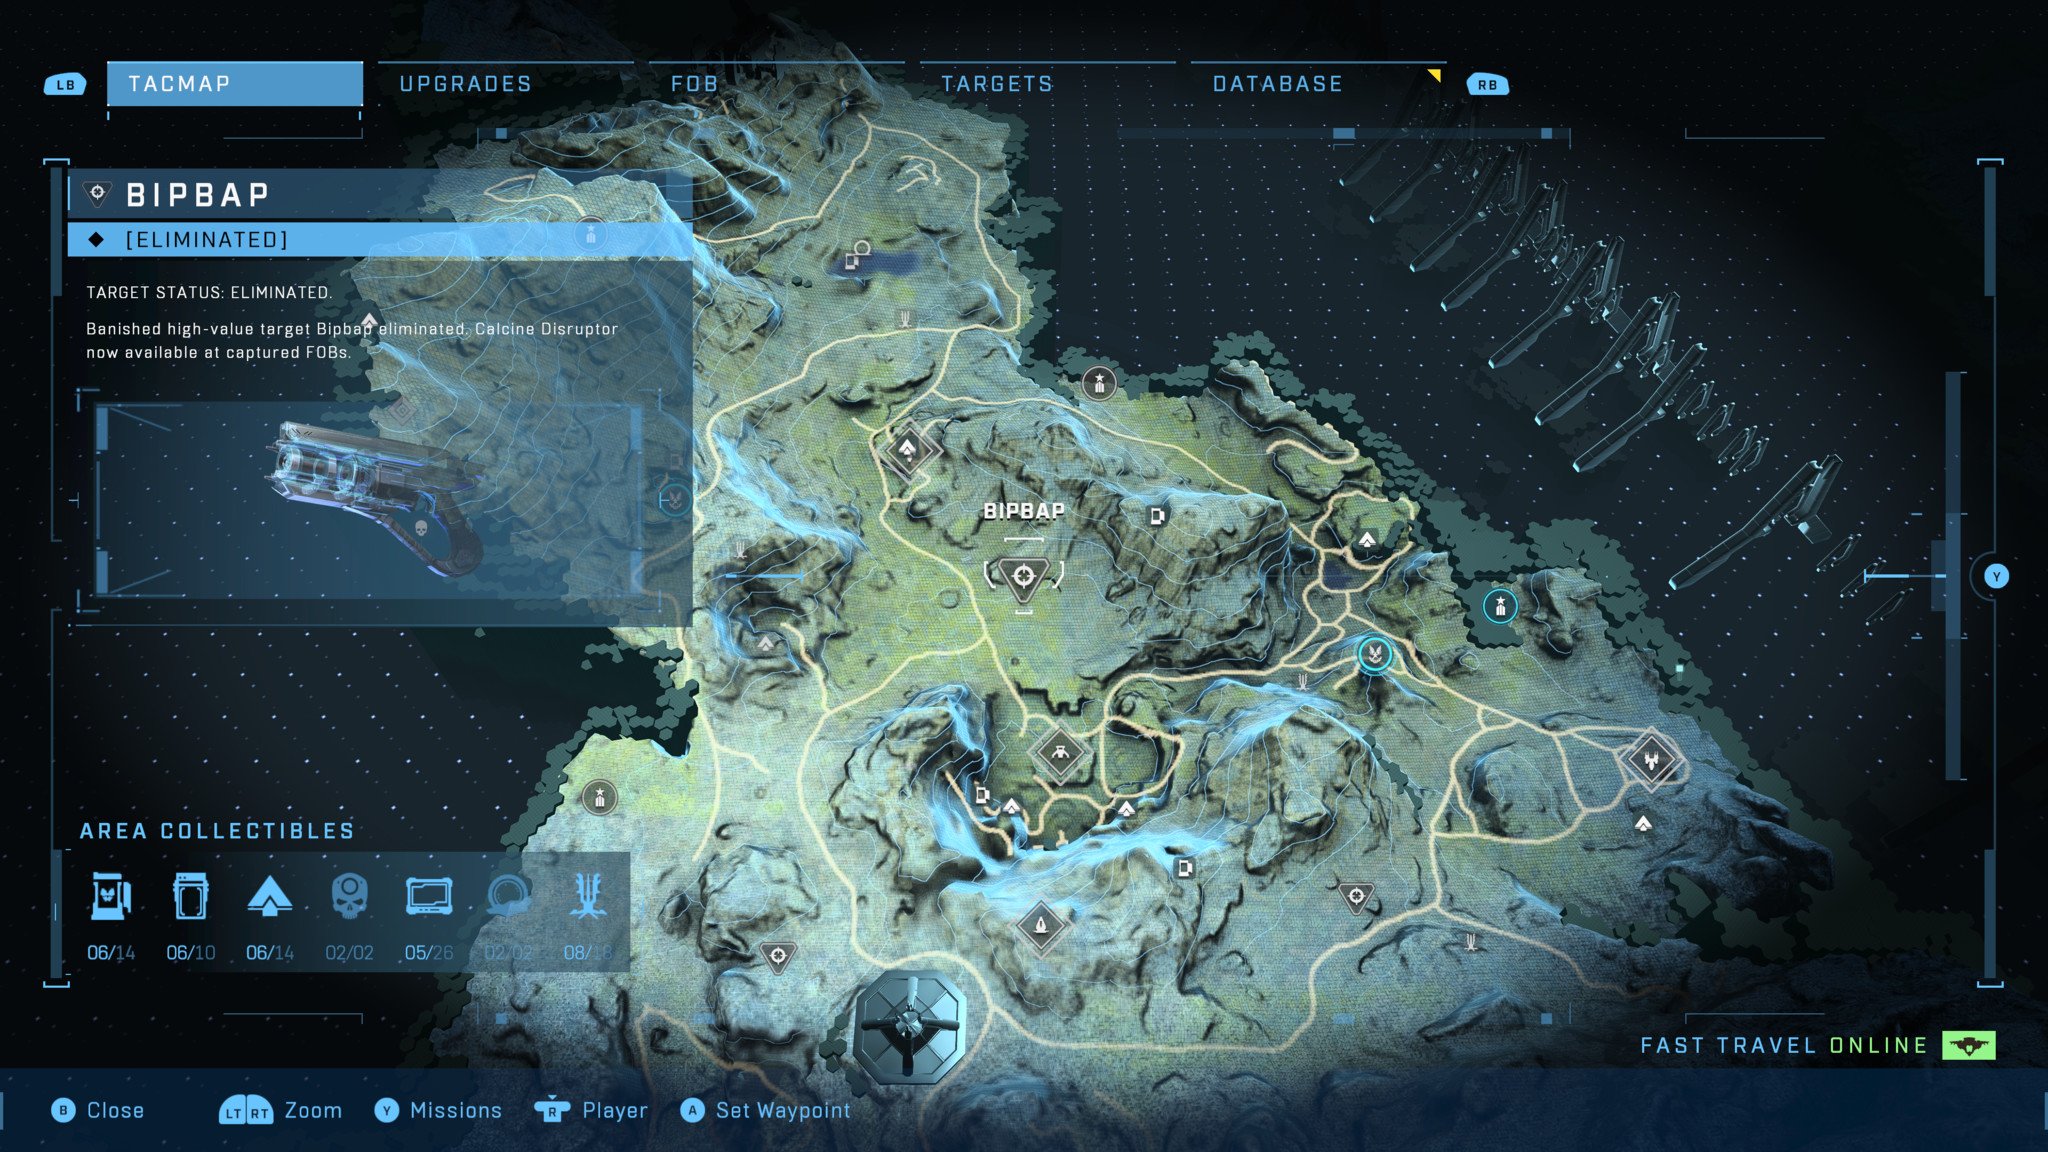
Bipbap can be found in the center of Zeta Halo's northern region relaxing with his Grunt, Jackal, and Brute allies. It's a bad idea to approach him with a vehicle, as he uses a special Calcine Disruptor that can easily EMP it and heavily damage you. Approach his camp on foot instead, clearing it out with precision fire while taking cover from Bipbap's fire. Once everything else is dead, quickly shred Bipbap's shields and health with whatever weapons you prefer. Since he's a Grunt, he doesn't have much health (though he has significantly more than regular Grunts).
The Calcine Disruptor Bipbap drops does more damage and can also be used to create electrical traps on surfaces. These traps will shock enemies that walk onto them, stunning them.
Halo Infinite Unbound Plasma Pistol location: Briglard
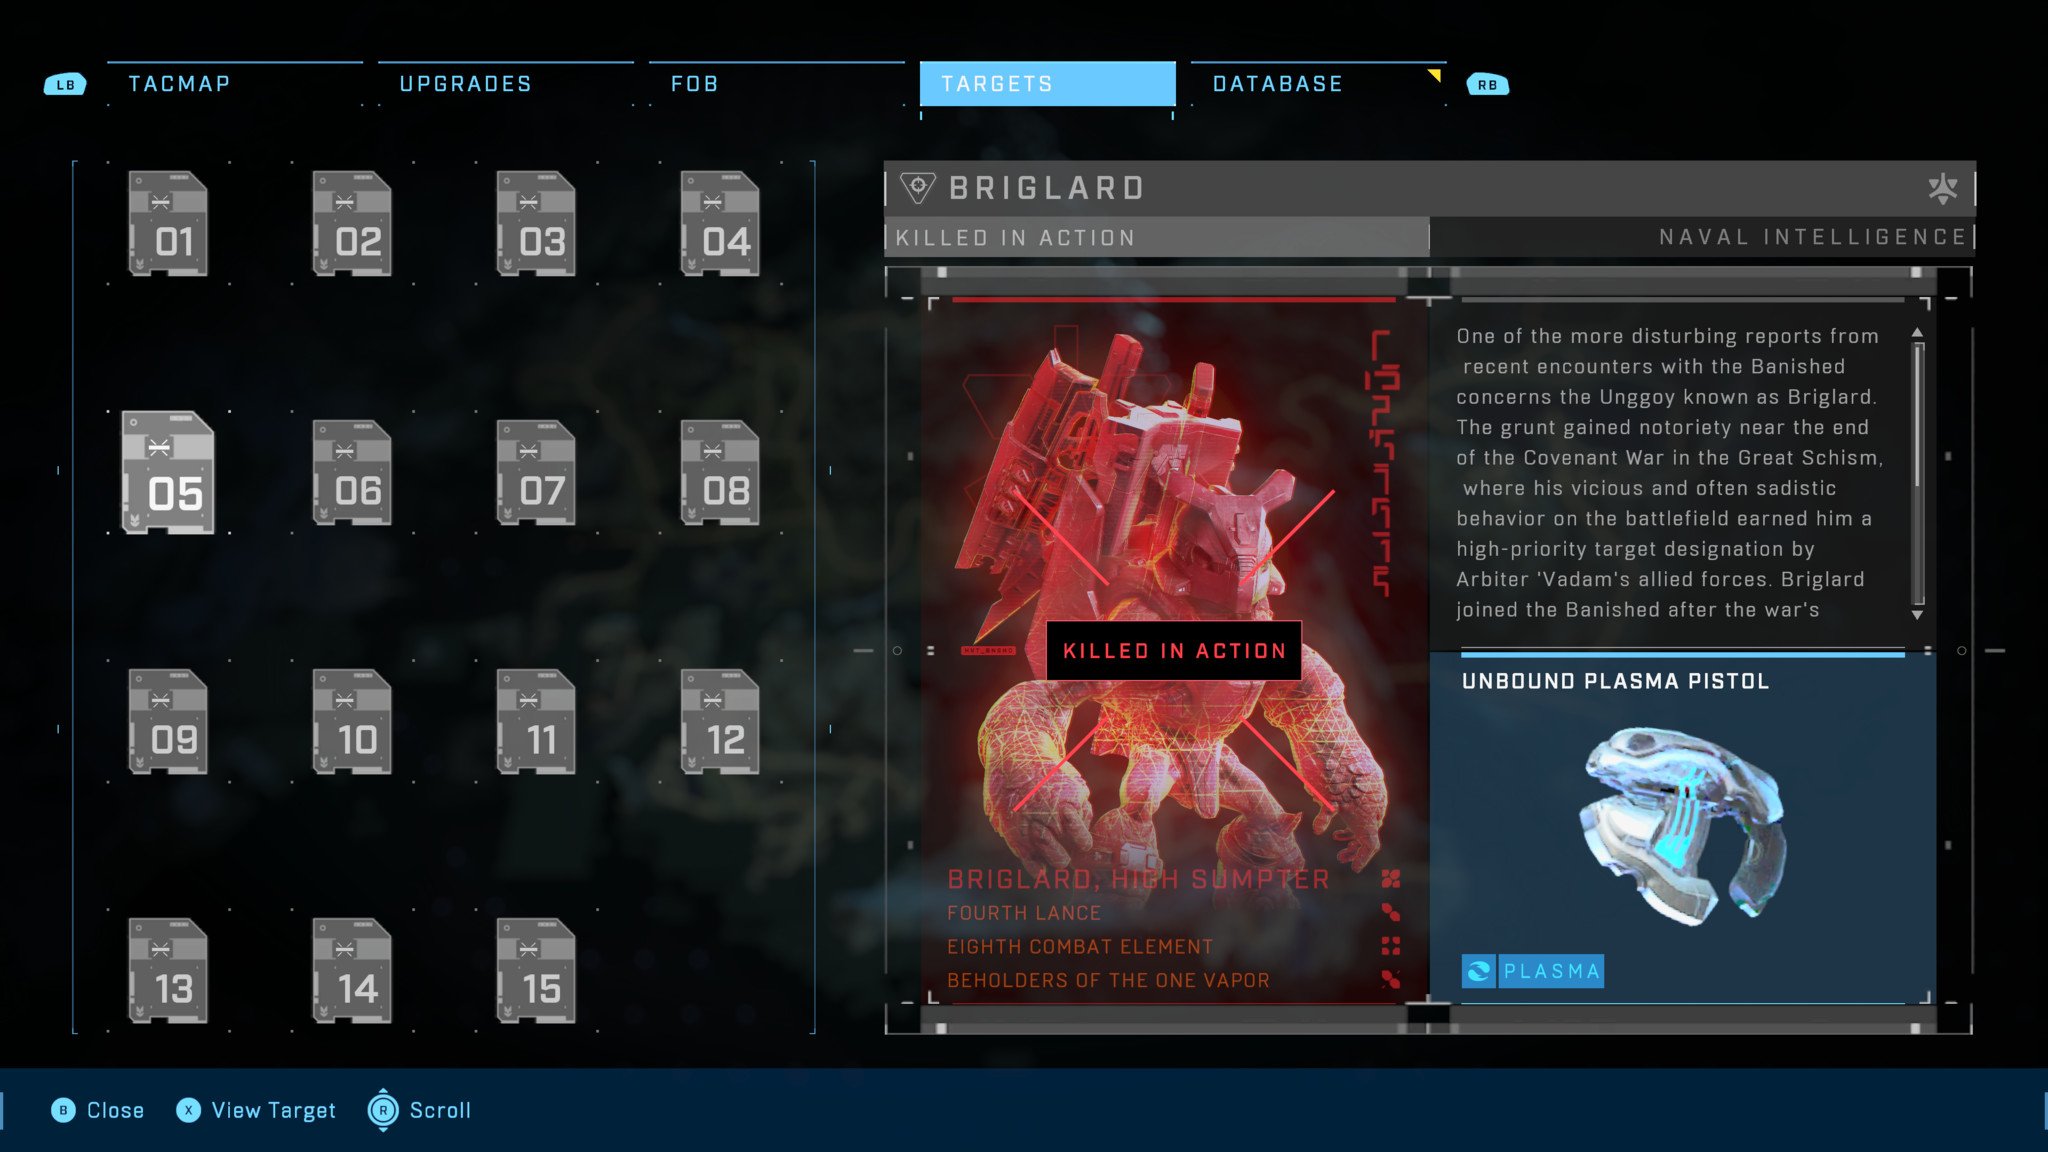
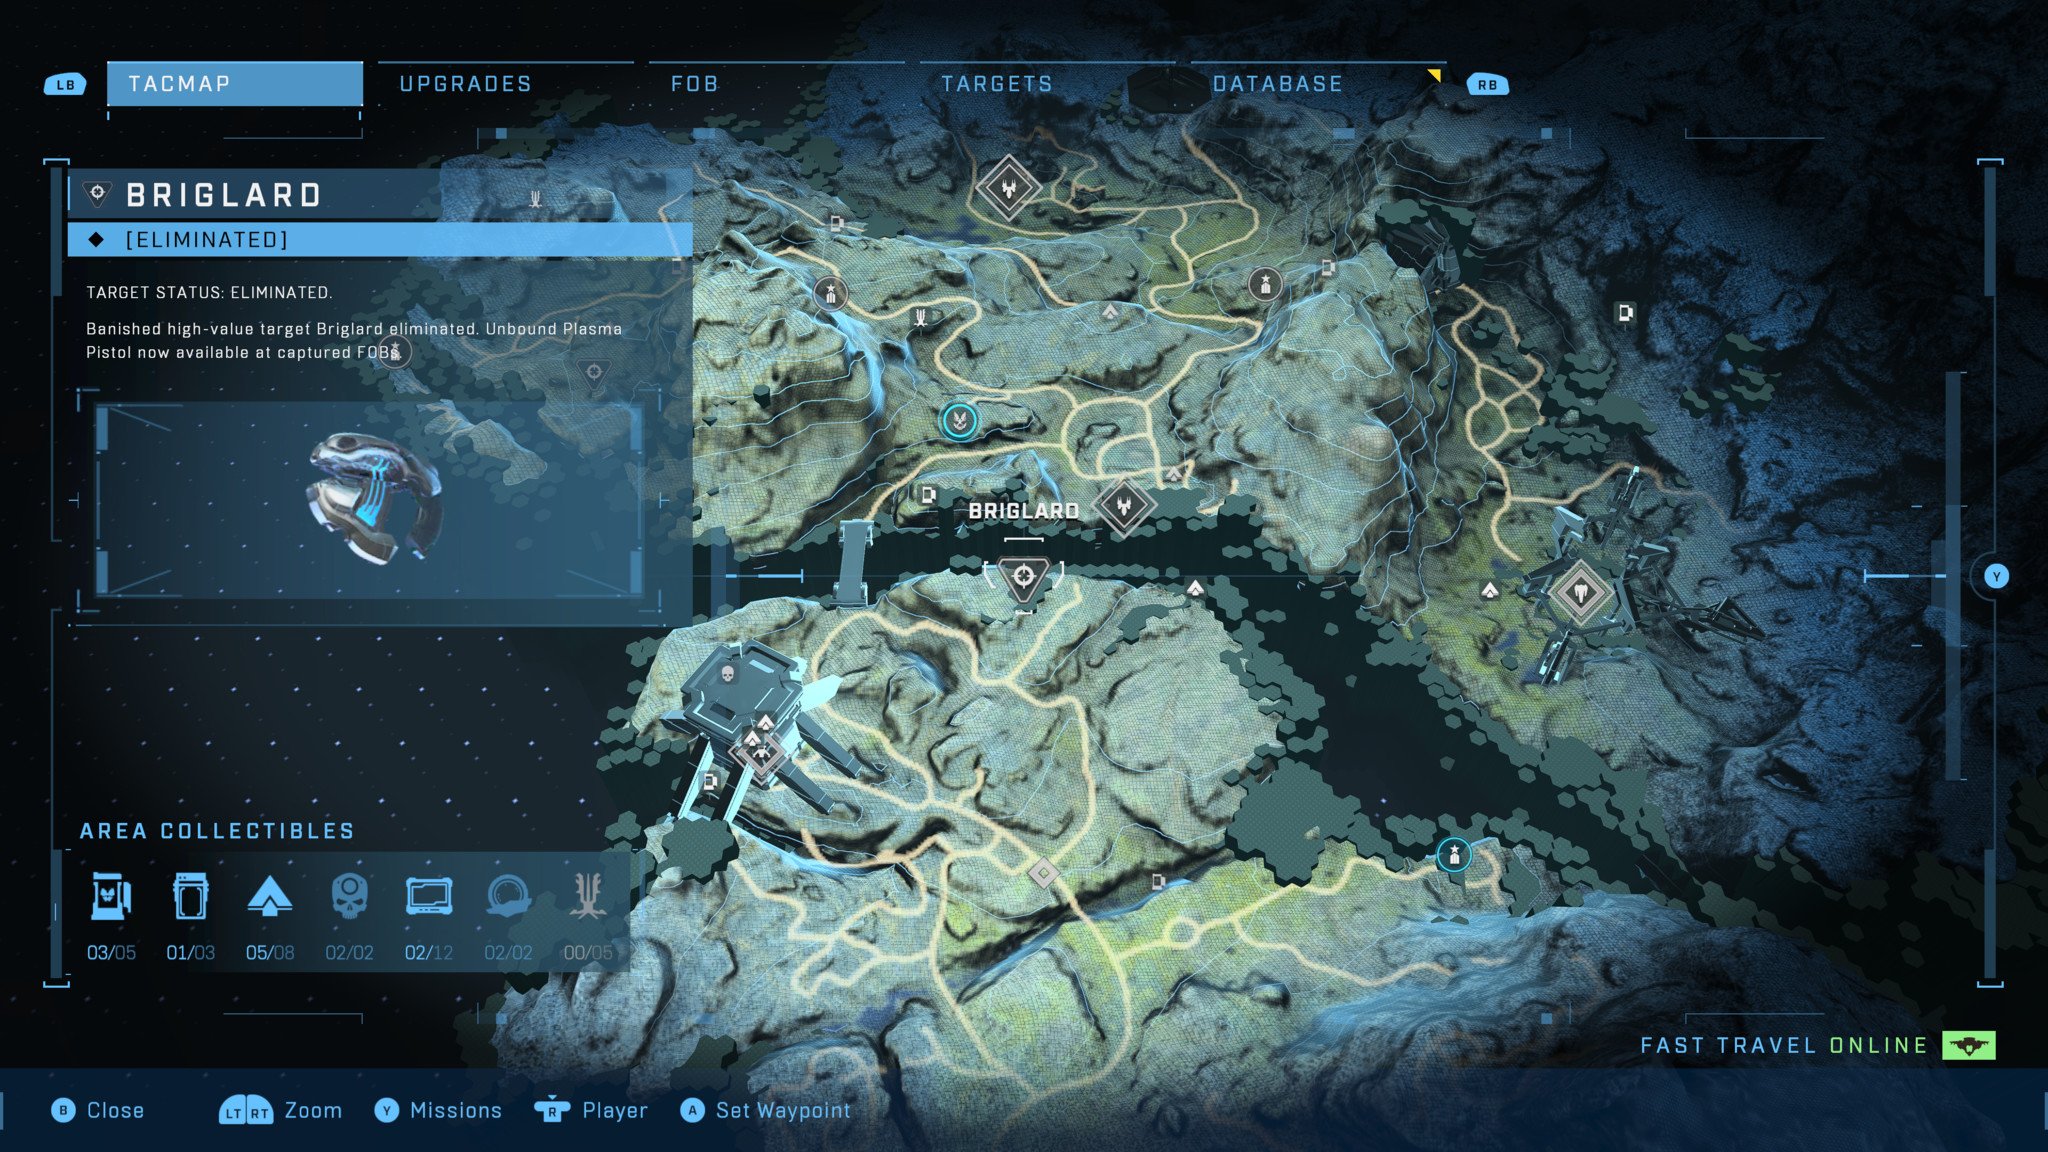
Halo Infinite's second Grunt high-value target is Briglard, who you'll find alongside the northern border of the southwestern region of the map. As a Grunt Mule, Briglard carries several power weapons on his back that his Elite and Brute protectors will likely try to pick up and use against you. Try to kill these enemies first so that you don't have to worry about this, then take care of Briglard himself with your preferred weapons or vehicle.
Briglard drops a special Unbound Plasma Pistol that fires a volley of standard Plasma Pistol rounds instead of a single large round when overcharged.
Halo Infinite Stalker Rifle Ultra location: Barroth
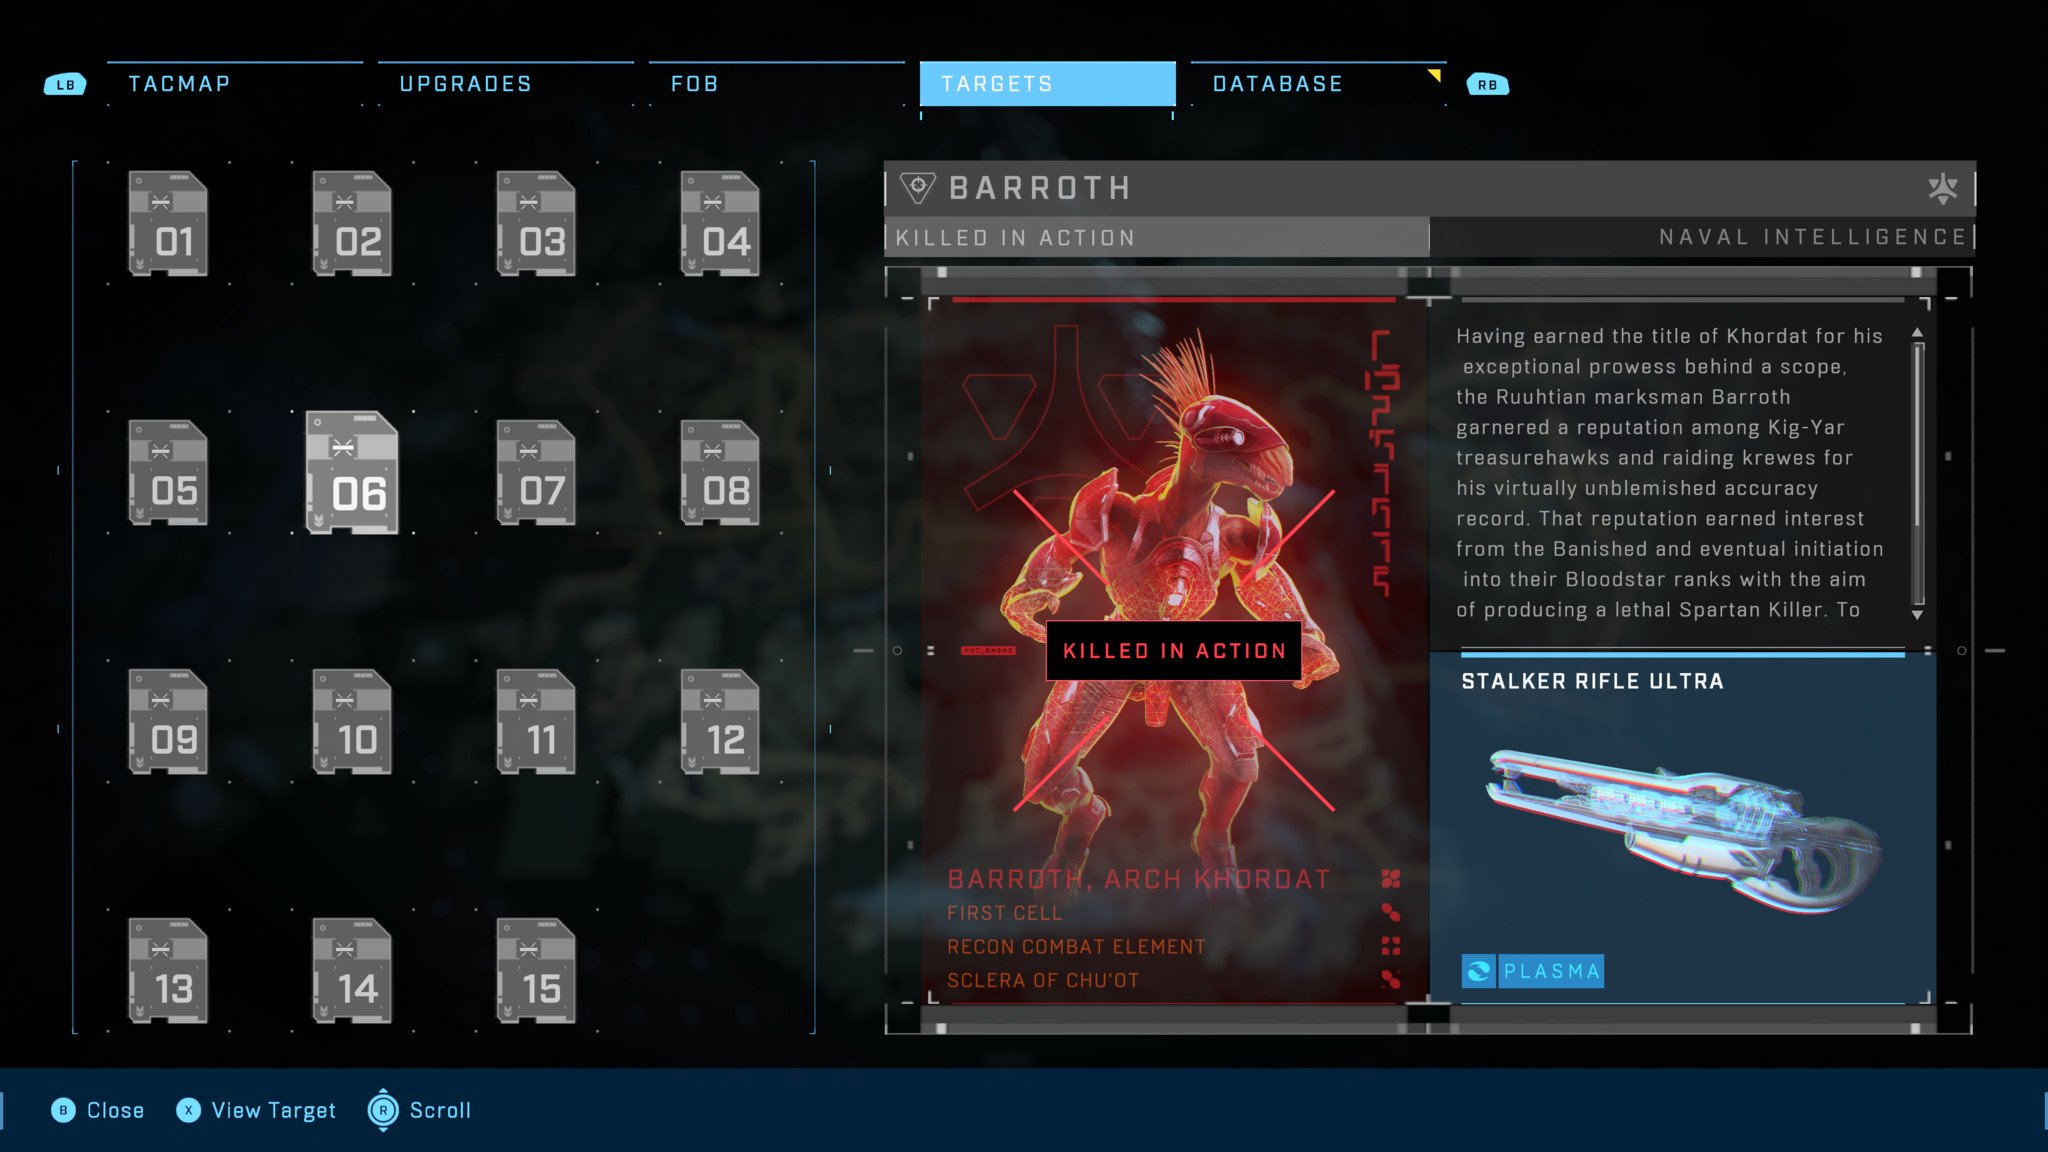
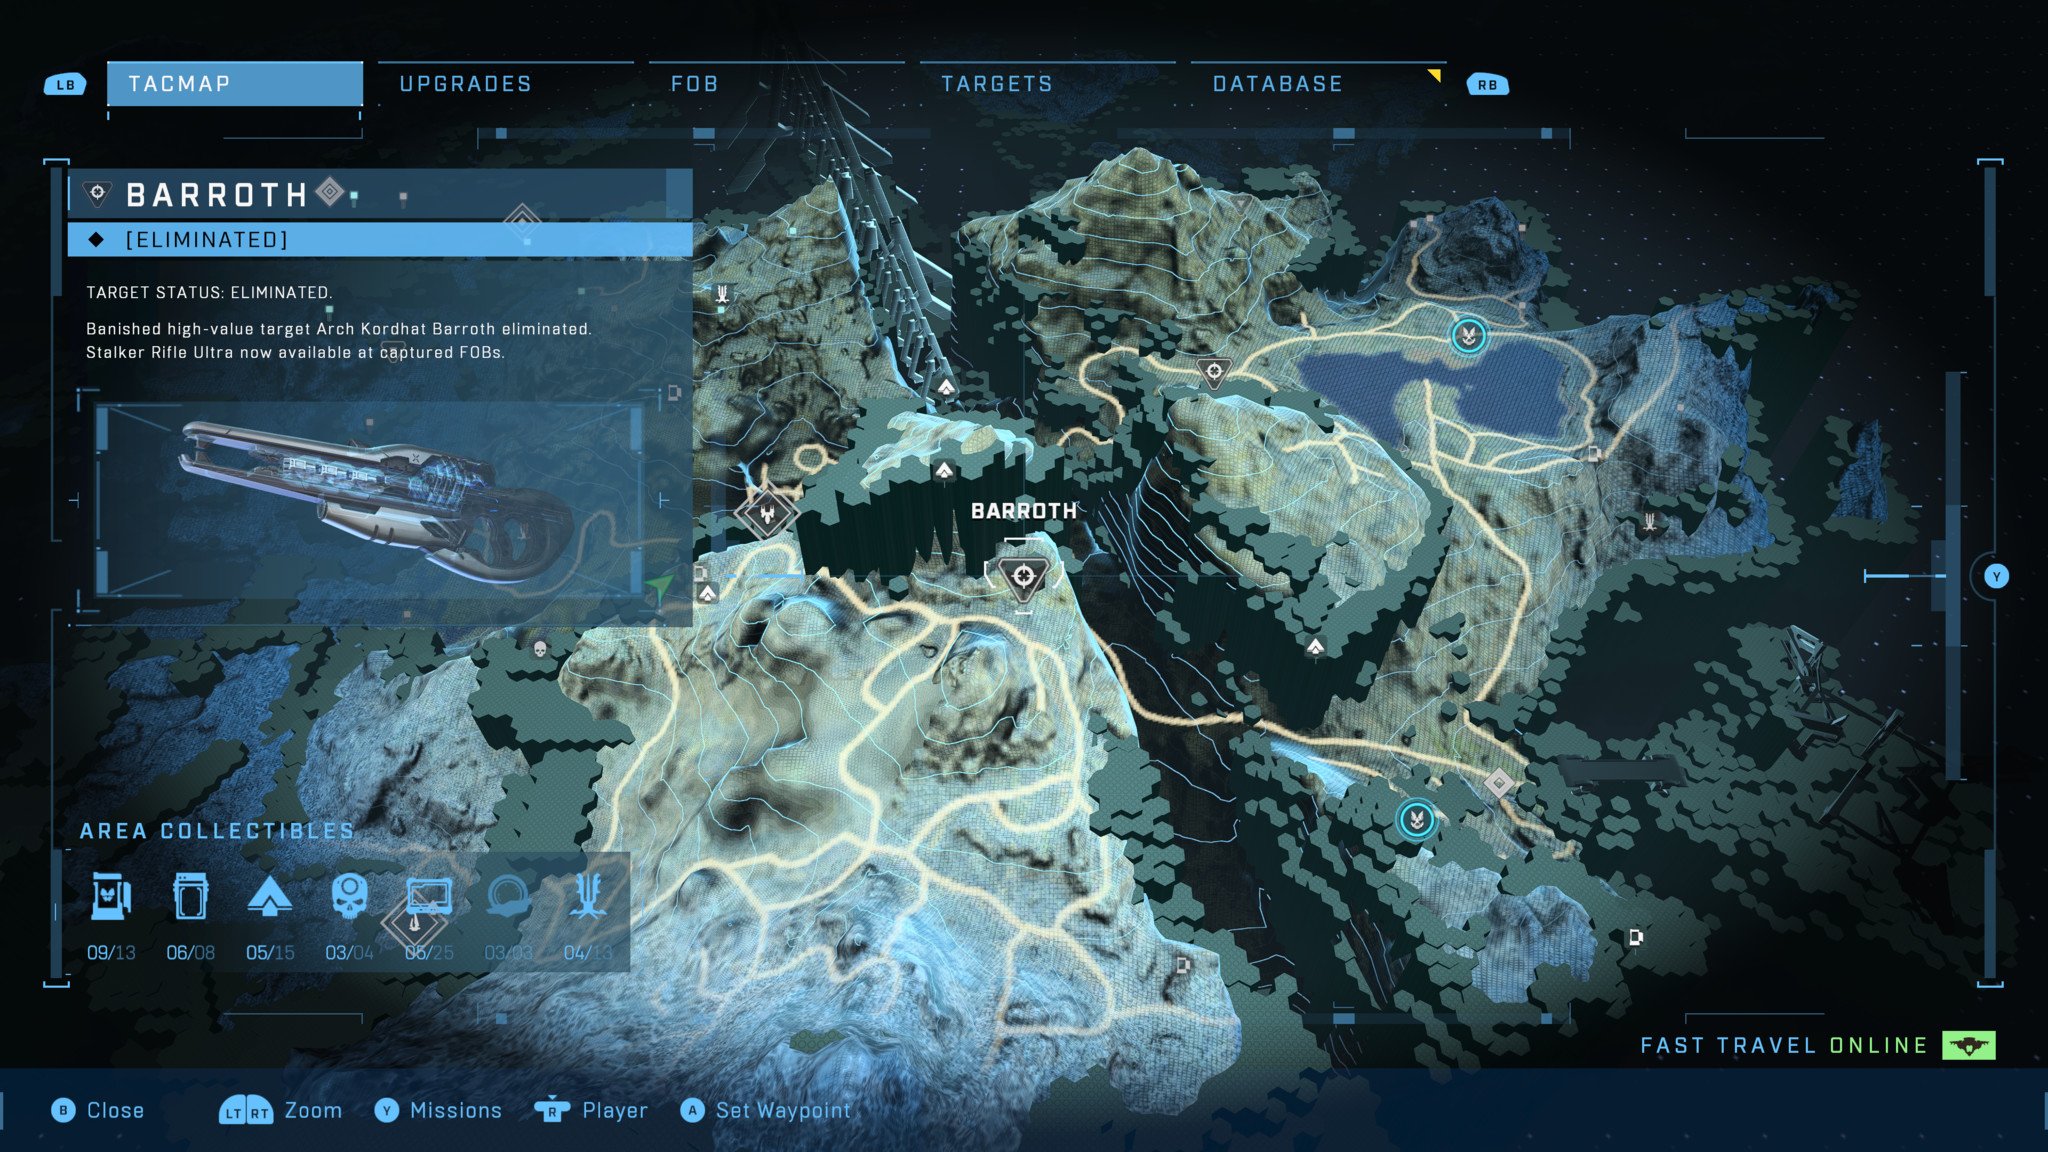
The deadly Jackal sniper Barroth can be found in the mountains near the center of the map's southeastern region, perched atop high ground and supported by several Elites and Brutes. His Stalker Rifle Ultra is deadly, so try and take him out with a long-range weapon of your own before he lines up a shot on you. Then take out the rest of his entourage.
The Stalker Rifle Ultra dropped by Barroth has more ammo capacity and overheats much slower compared to normal Stalker Rifles. but deals slightly less damage.
Halo Infinite M41 Tracker location: Zeretus
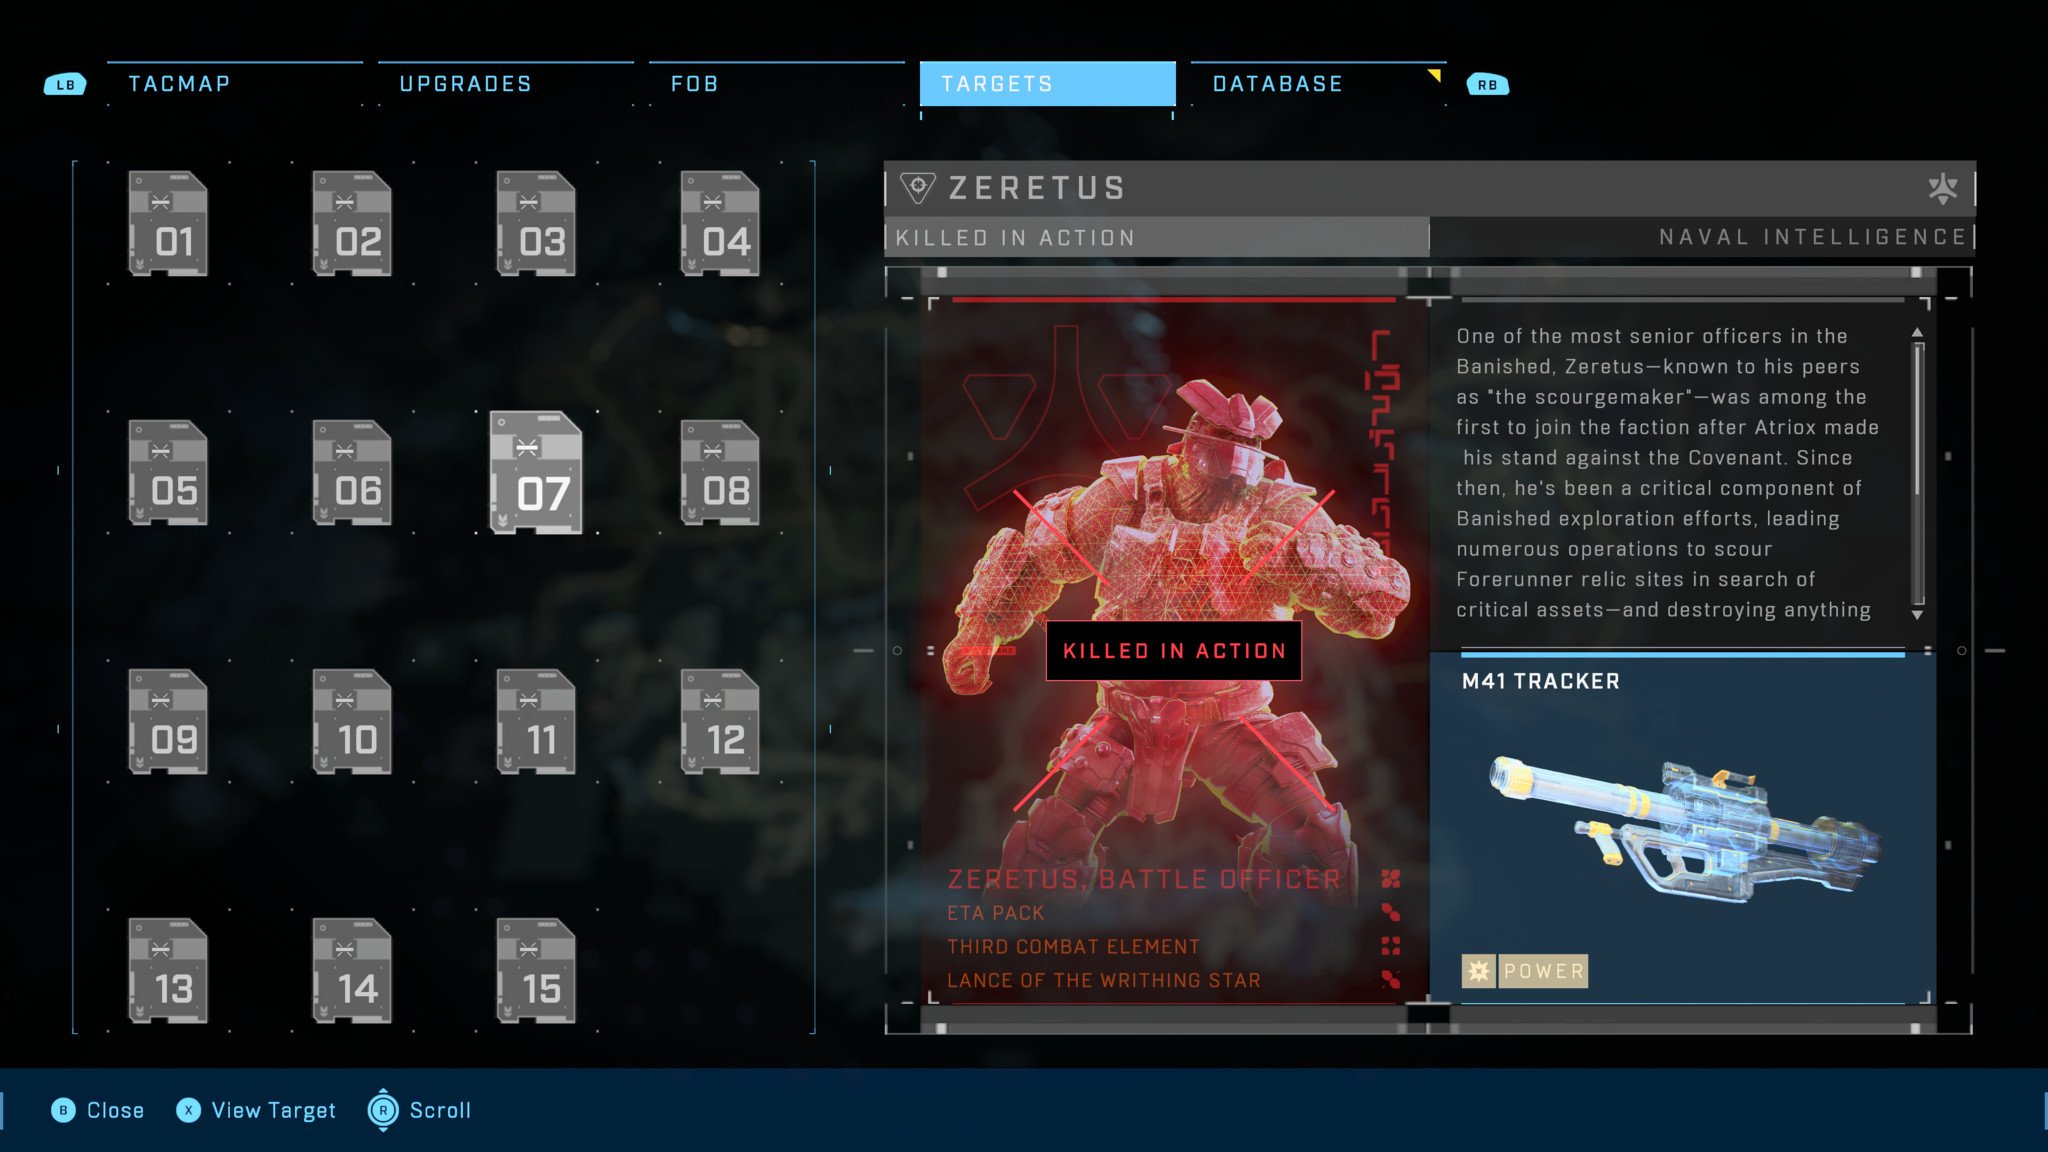
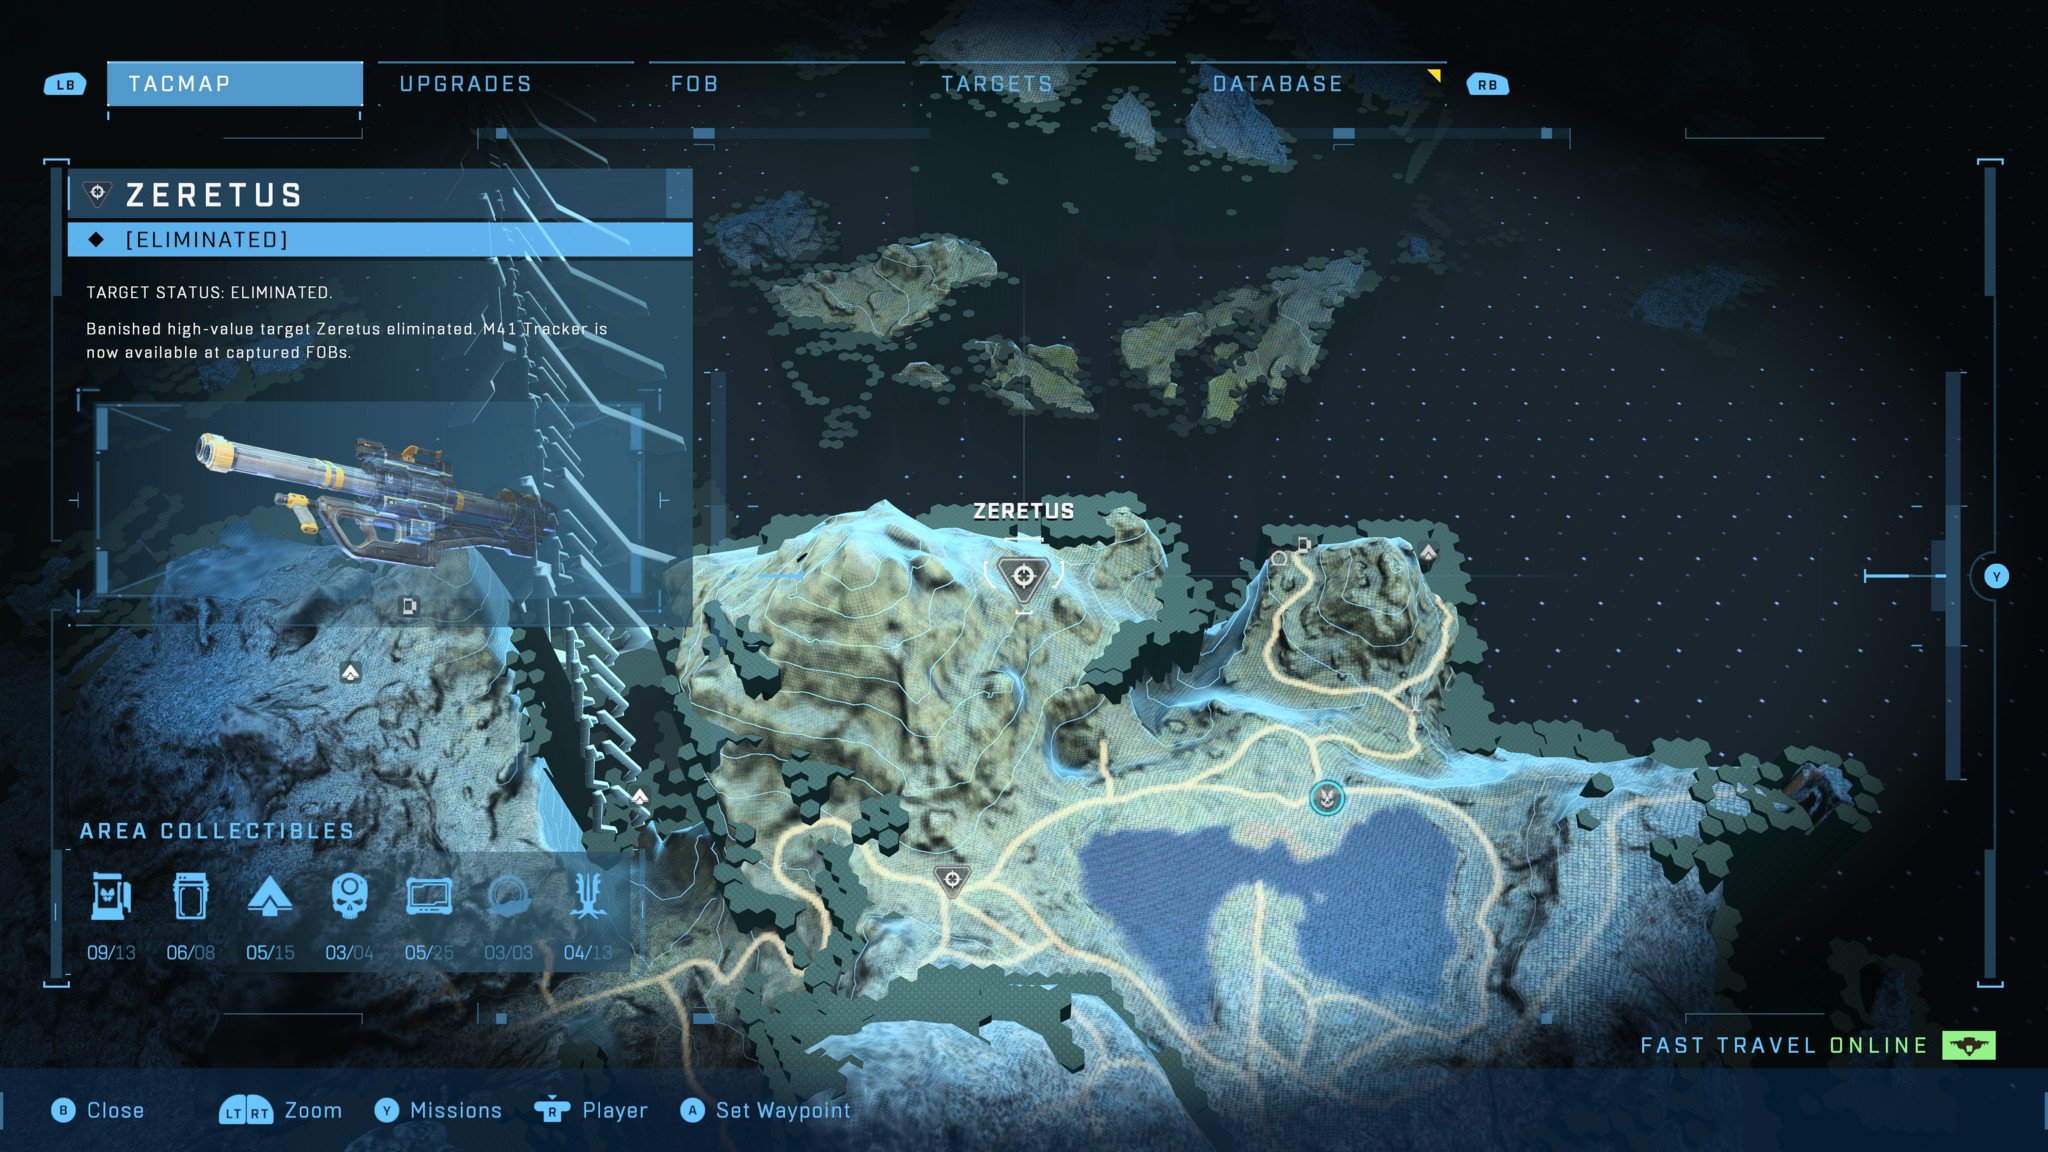
The fearsome Zeretus can be found on top of a large hill near the northeastern corner of the southeastern region of the map leading a pack of Brutes. His M41 Tracker rocket launcher is extremely deadly since the rockets track you, so use the edge of the hill as cover from his explosives while you take out his allies. Once all the other Banished troops are dead, approach Zeretus carefully, making sure that you stay in cover as much as possible and do damage when you can to whittle down his shields and health. Once his health is low, you can get in his face and melee him while strafing to finish the job.
The M41 Tracker Zeretus drops is a special variant of the SPNKr that will lock onto enemy infantry and vehicles, ensuring that your rockets won't miss.
Halo Infinite Riven Mangler location: Balkarus
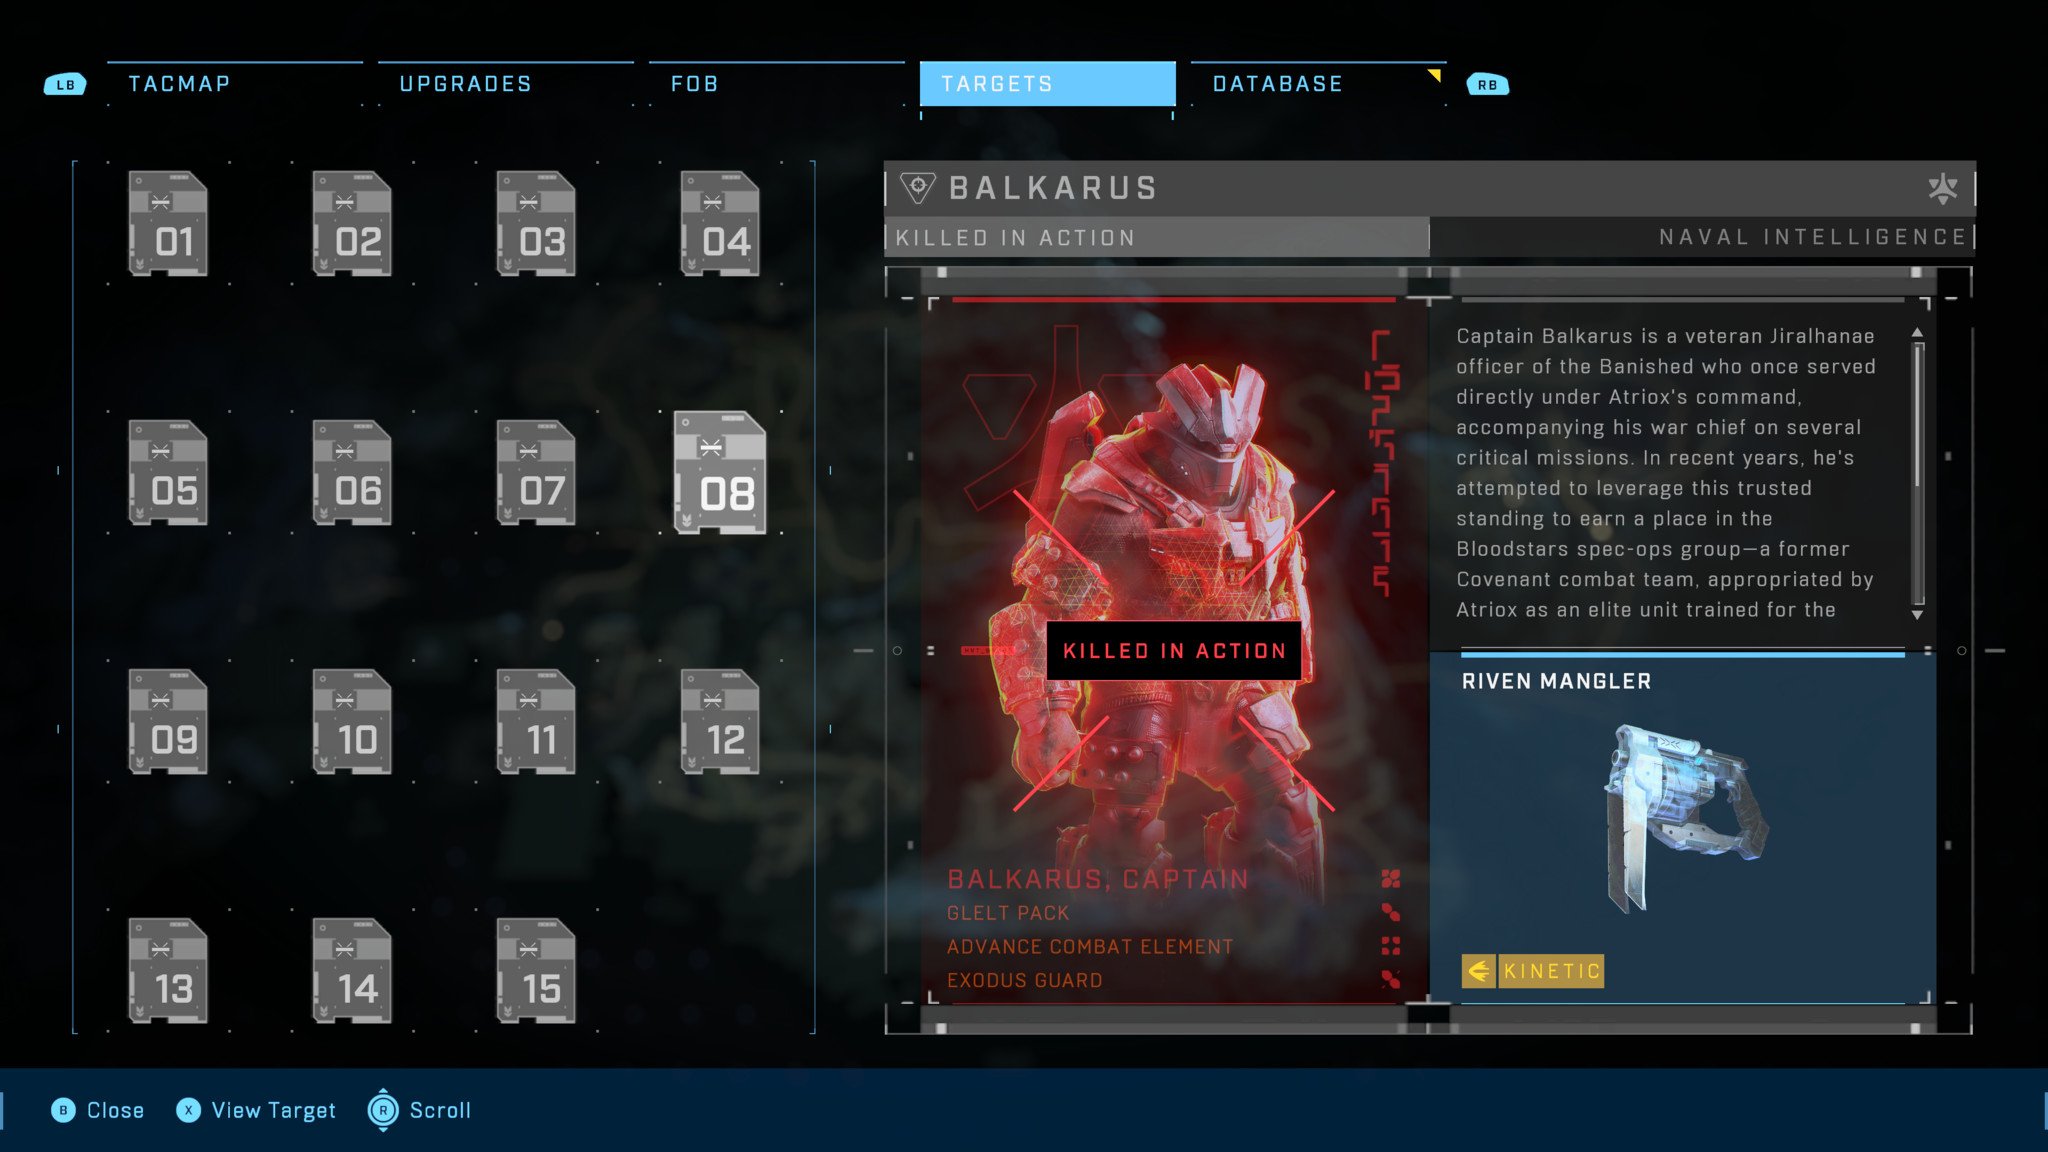
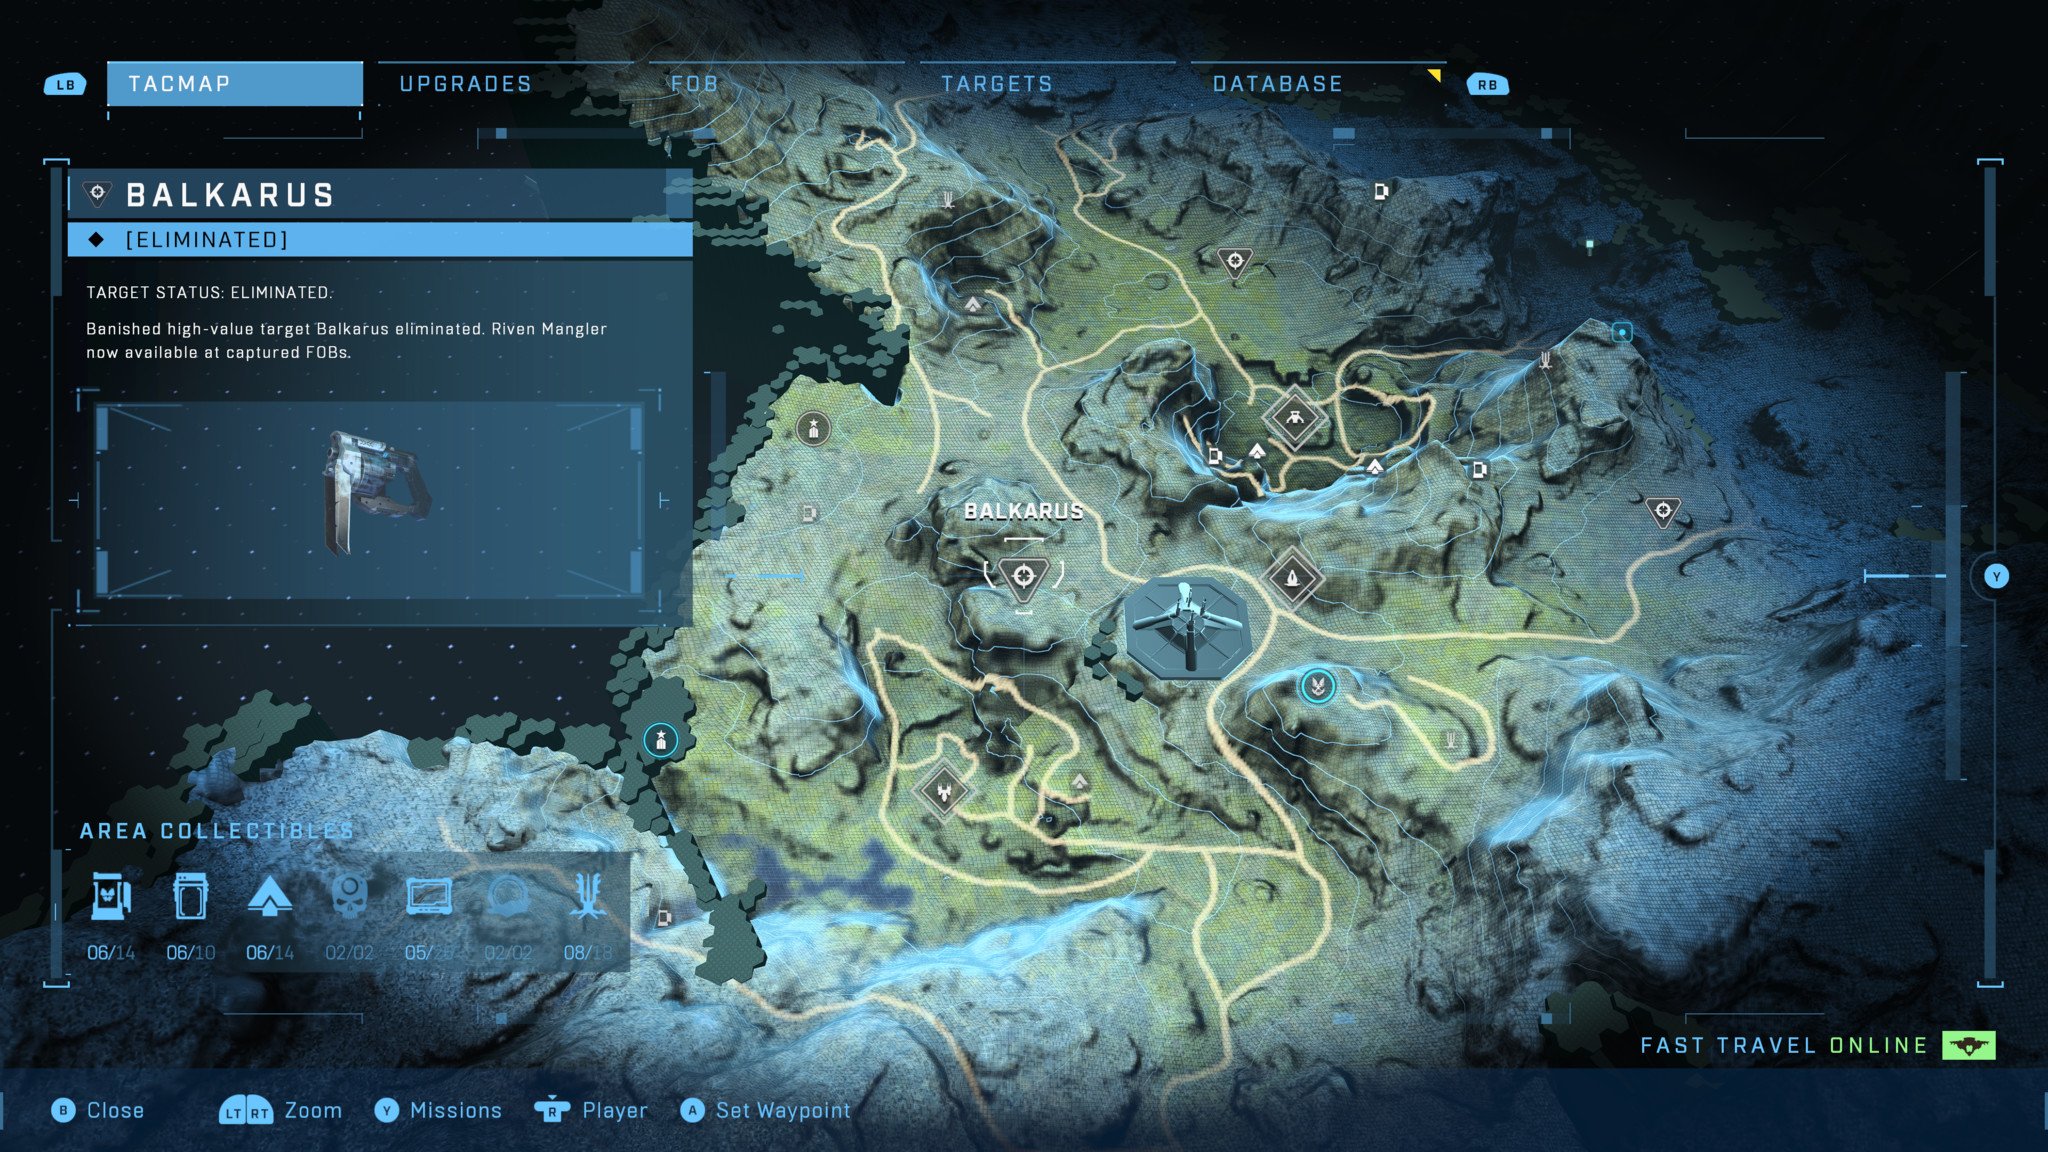
You'll find the Brute Captain Balkarus on the western side of the map's northern region on a large hill, accompanied by a standard company of Elites and Brutes. His Riven Mangler does more damage than usual Manglers, so try to avoid fighting Balkarus himself until his subordinates are taken care of. Note that Balkarus may attempt to use his jetpack to get a firing angle on you, so keep a close eye on his position.
Once Balkarus is on his own, use plasma weapons to take out his shields and then take him out with kinetic weapons like the Assault Rifle and Battle Rifle. Using vehicles with some Marines from a FOB is effective against Balkarus as well since none of his troops have anti-vehicle weapons.
The Riven Mangler Belkarus drops when killed fires three projectiles with each trigger pull, dealing increased damage to enemy targets.
Halo Infinite Rushdown Hammer location: En 'Geddon
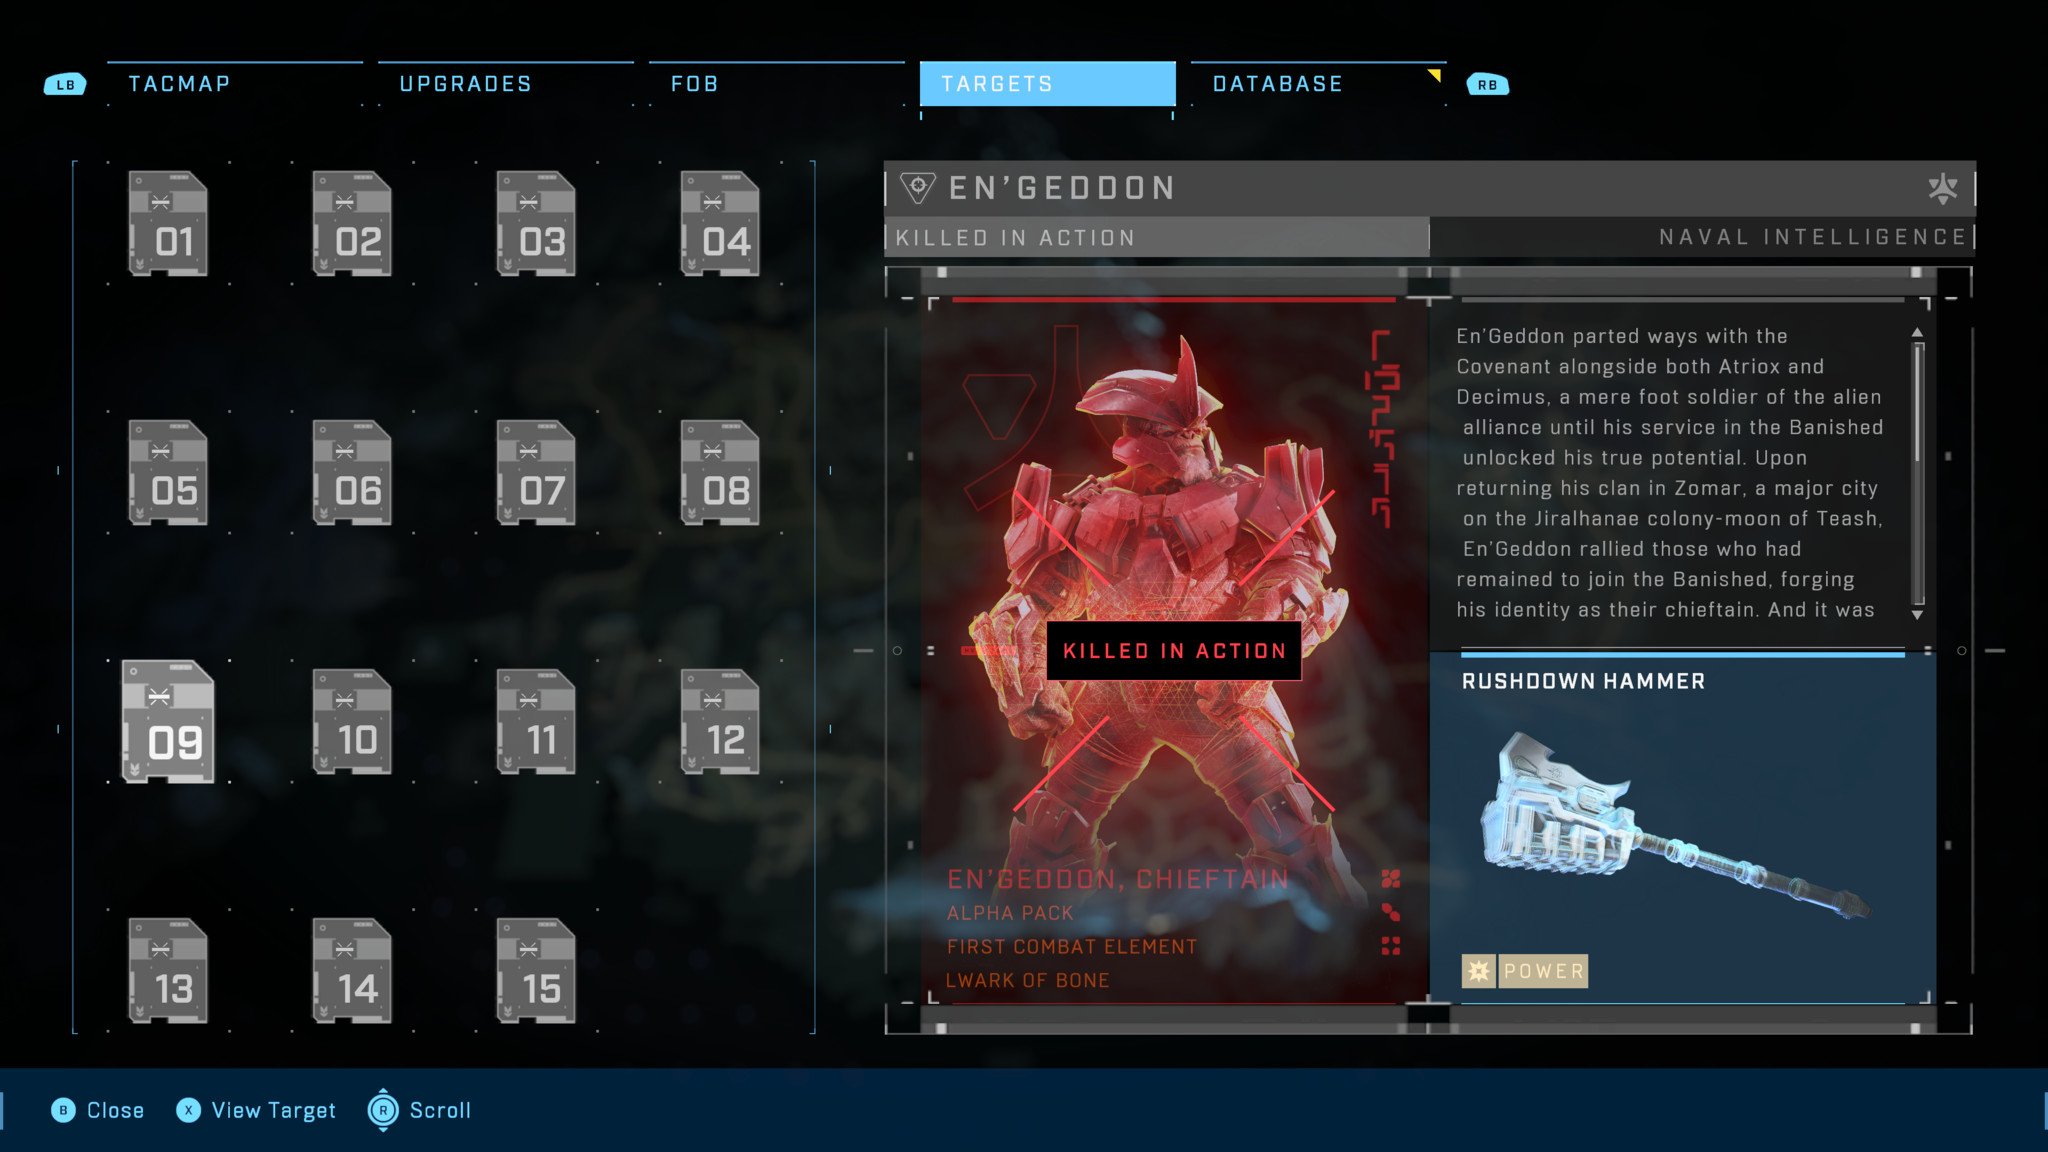
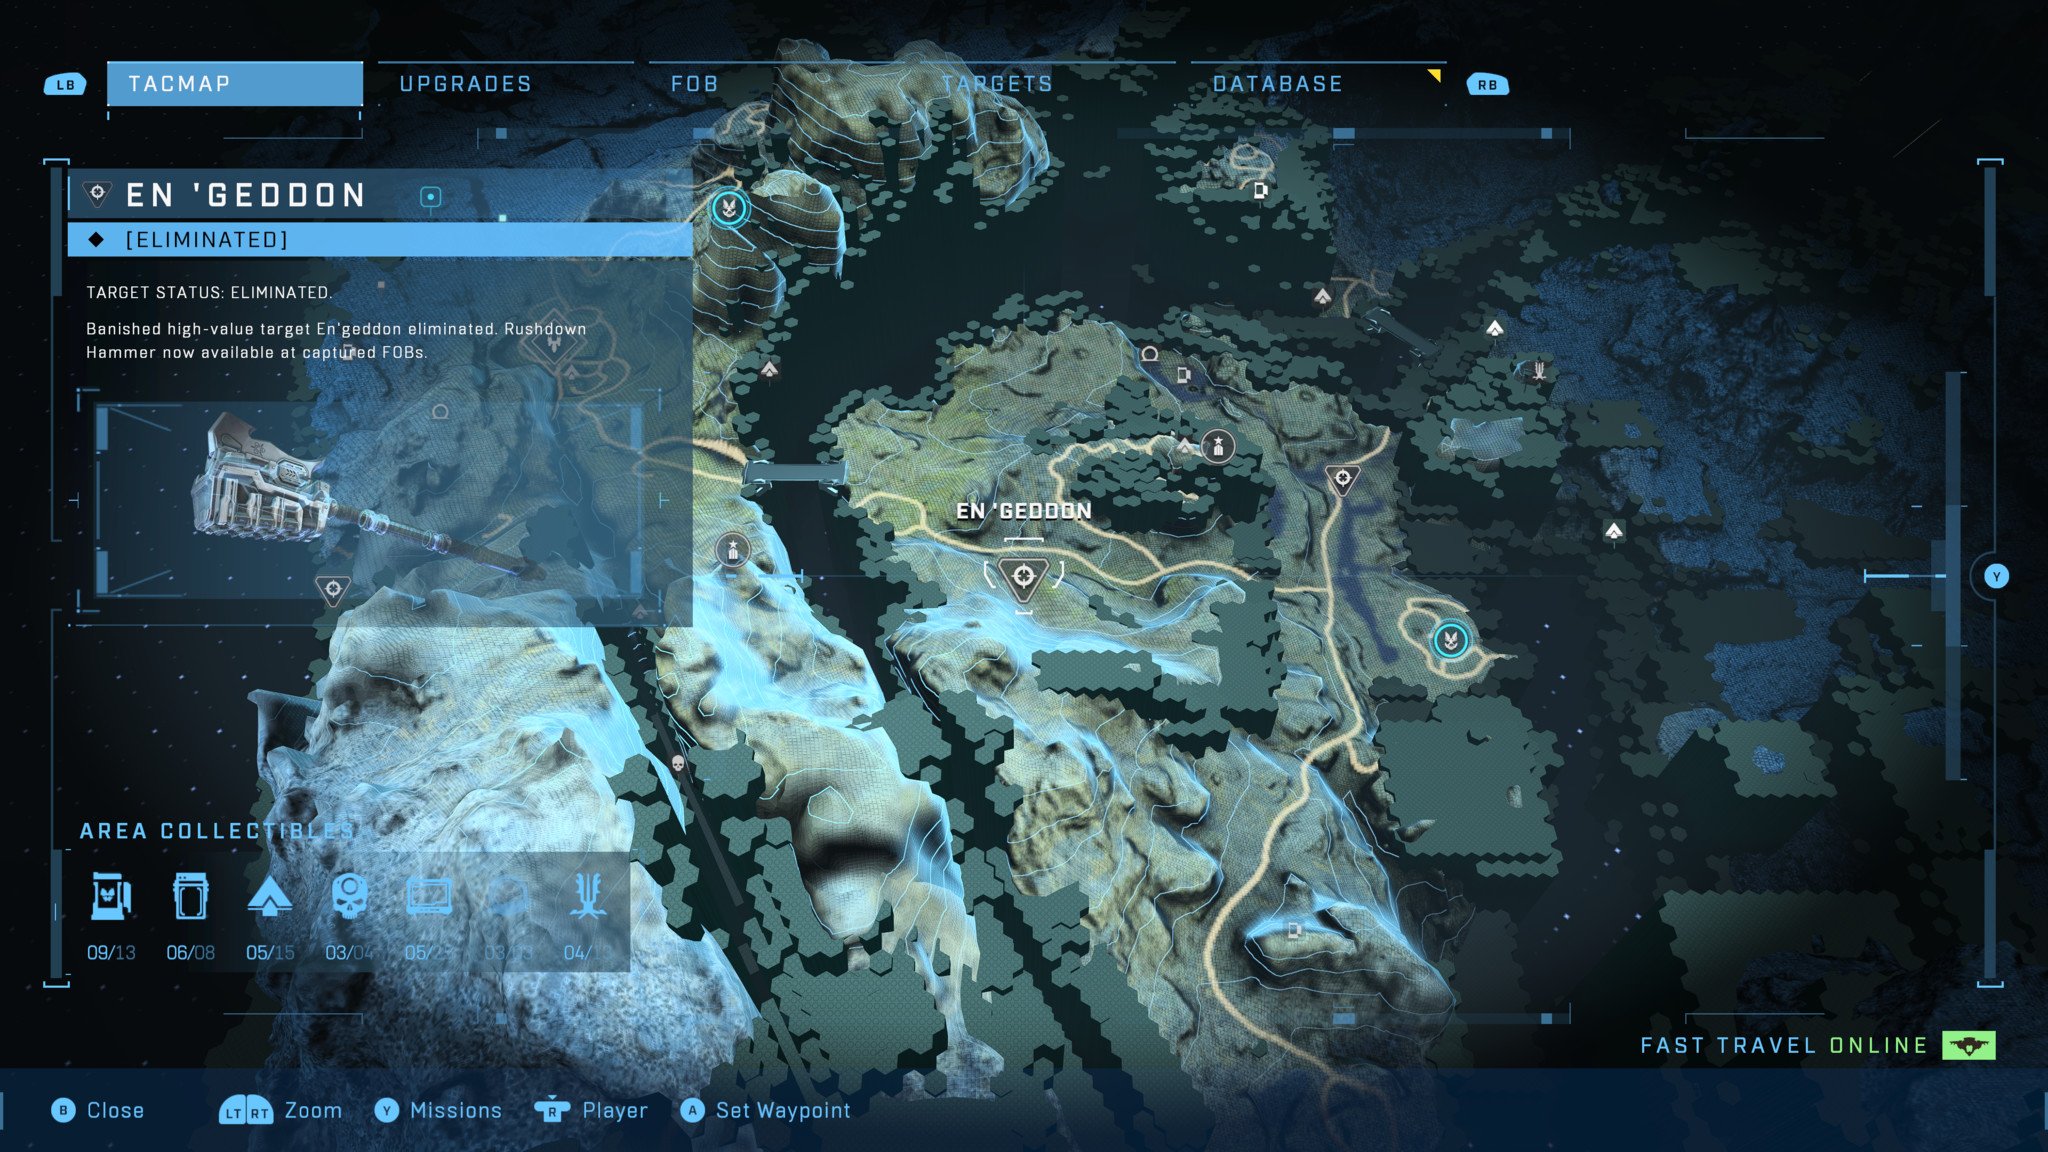
En 'Geddon can be found in the center of the southern region of the map with a group of Brutes. En 'Geddon himself is incredibly dangerous since he will attempt to charge you with his Rushdown Hammer, so focus on him first. As usual, use plasma to strip his shields and then lay into him with kinetic damage. You can also use shock damage to electrocute and stun him as well, giving yourself some extra time to damage him and put distance between yourself and him. If En 'Geddon attempts to strike you, use jumps or the Grappleshot to get out of the way.
The Rushdown Hammer En 'Geddon drops significantly increases your movement speed and improves your jump height like the Duelist Energy Sword does. It also can kill enemies from considerably farther away.
Halo Infinite Volatile Skewer location: Ik 'Novus
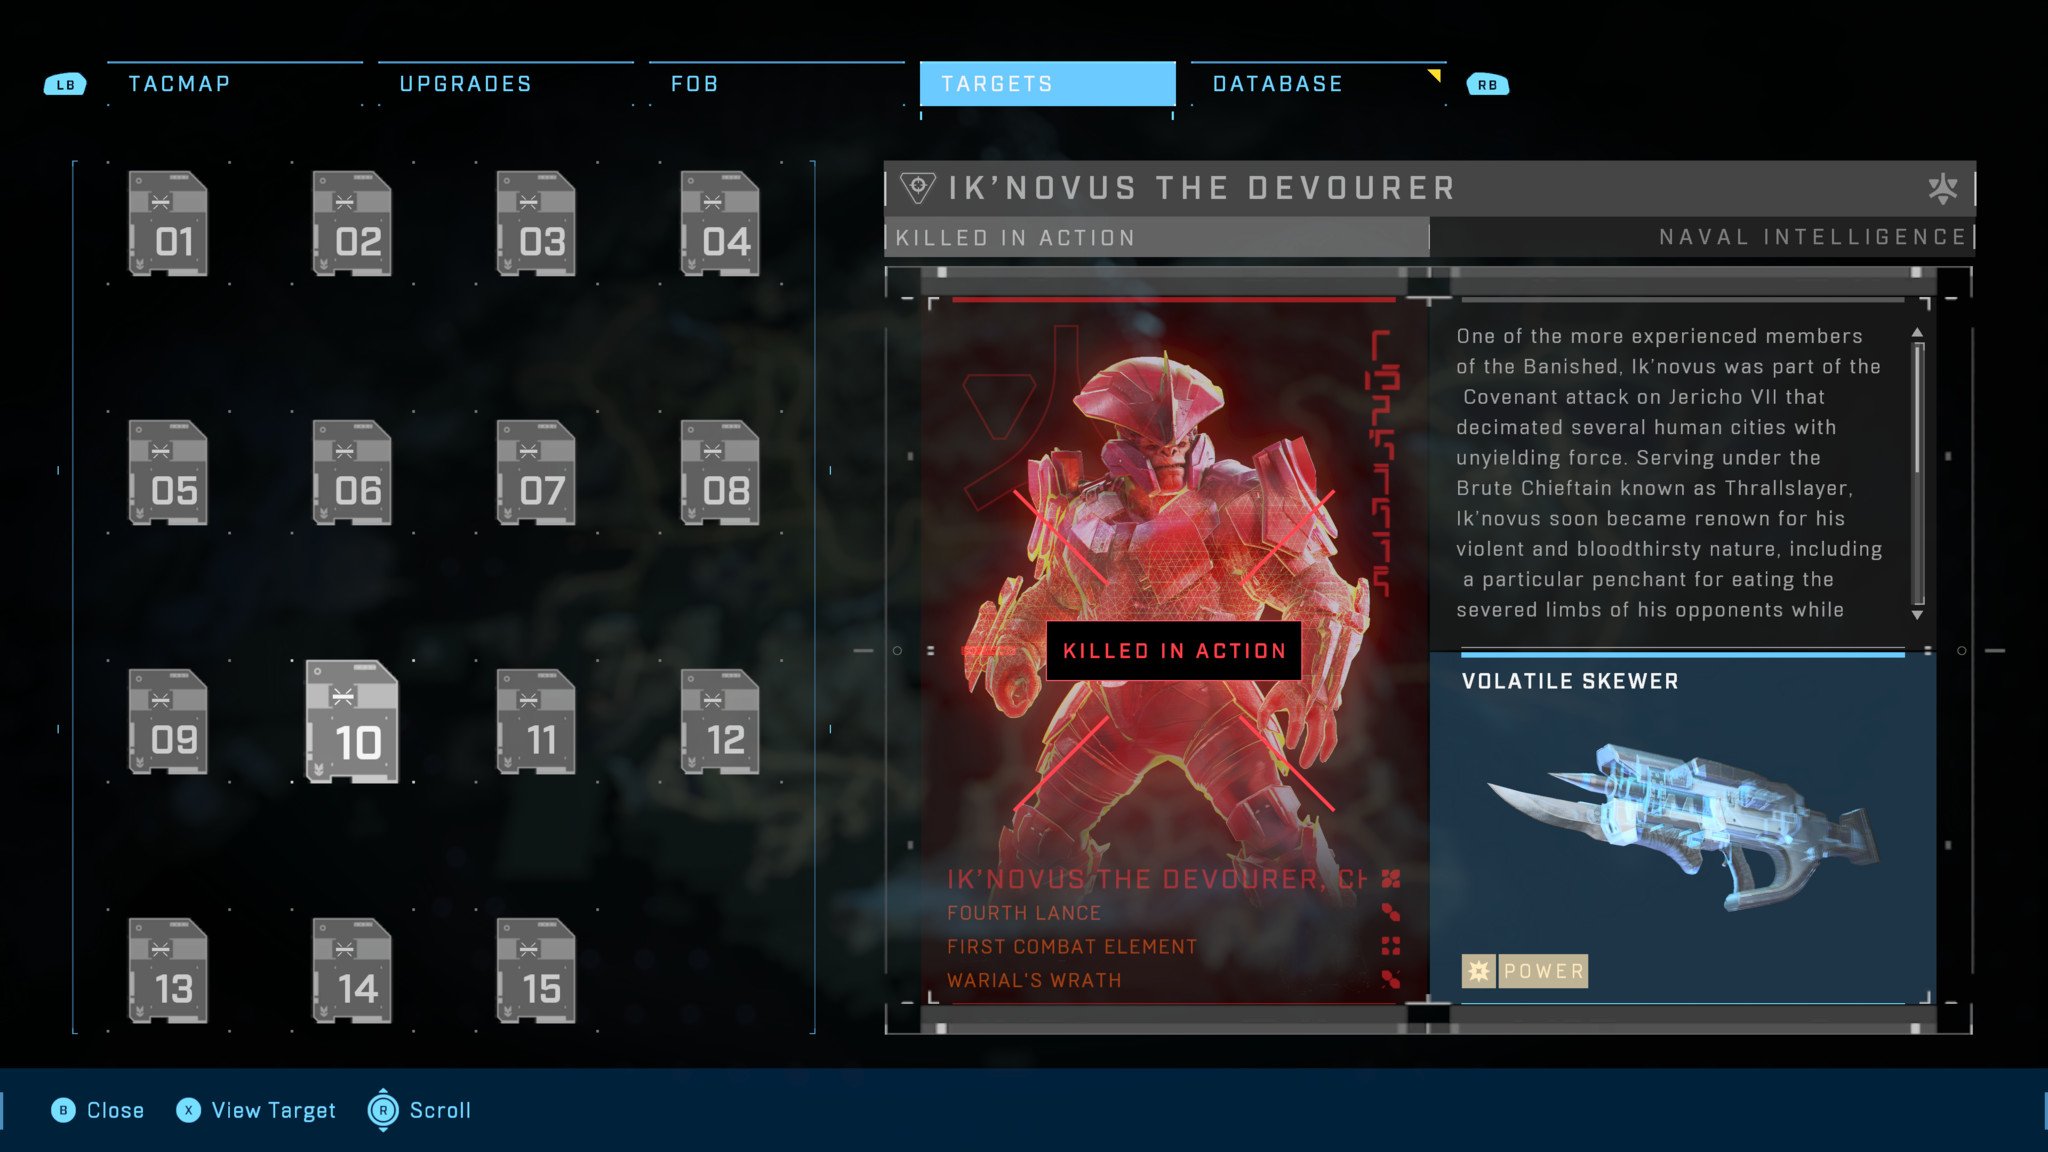
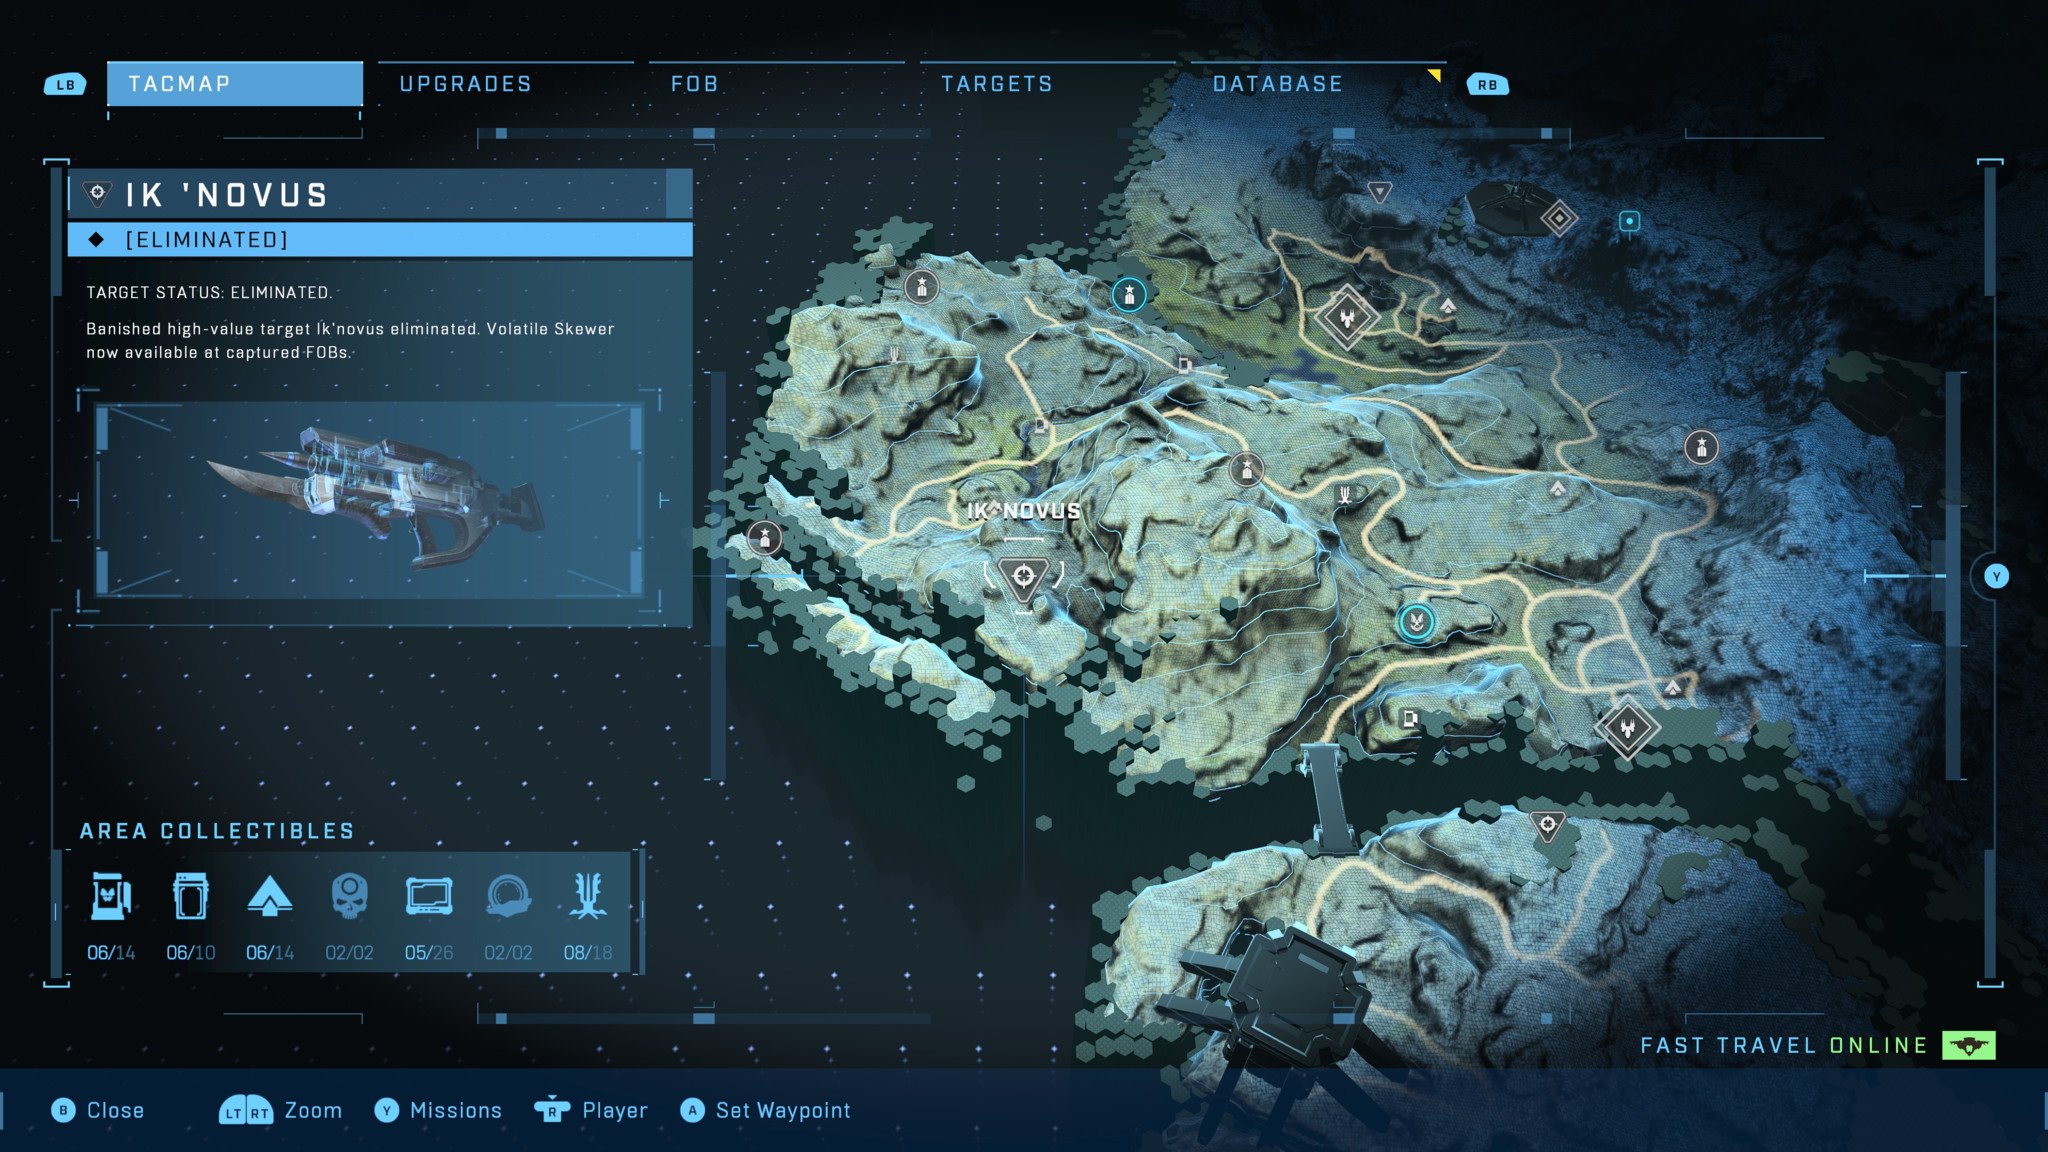
Ik 'Novus is located along the southwestern edge of the map's northern region with a large group of Banished troops. He has a ton of health and shielding and uses a deadly Scrap Cannon, so don't attack Ik 'Novus head on. Instead, pick off his allies and then chip away at his health with your weapons from cover until he falls. Alternatively bringing a heavy vehicle like a Scorpion to the encounter is also a good way to take him down.
When killed, Ik 'Novus drops a Volatile Skewer that adds explosive damage to each round, increasing the weapon's damage.
Halo Infinite Ravager Rebound location: Arthoc
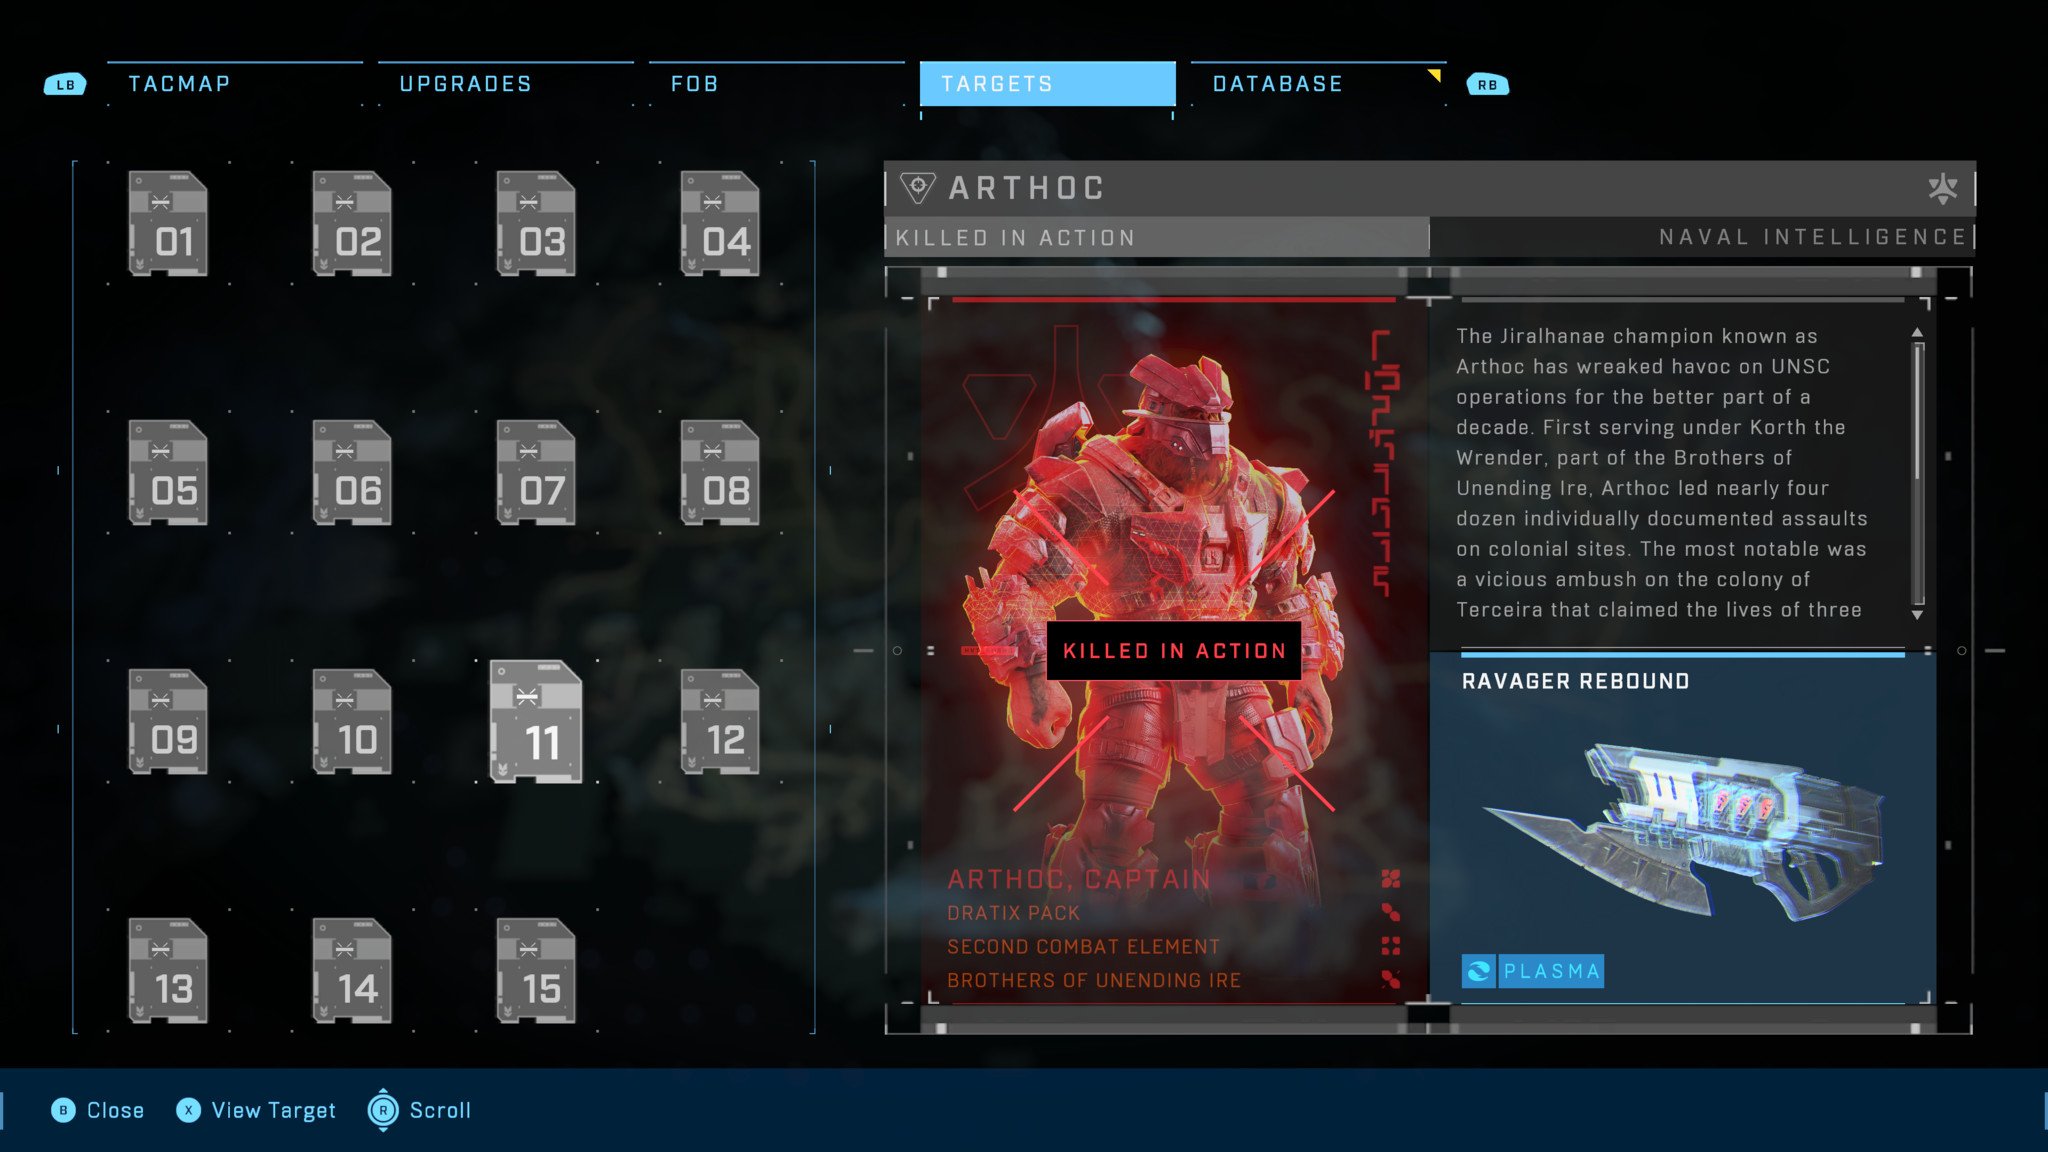
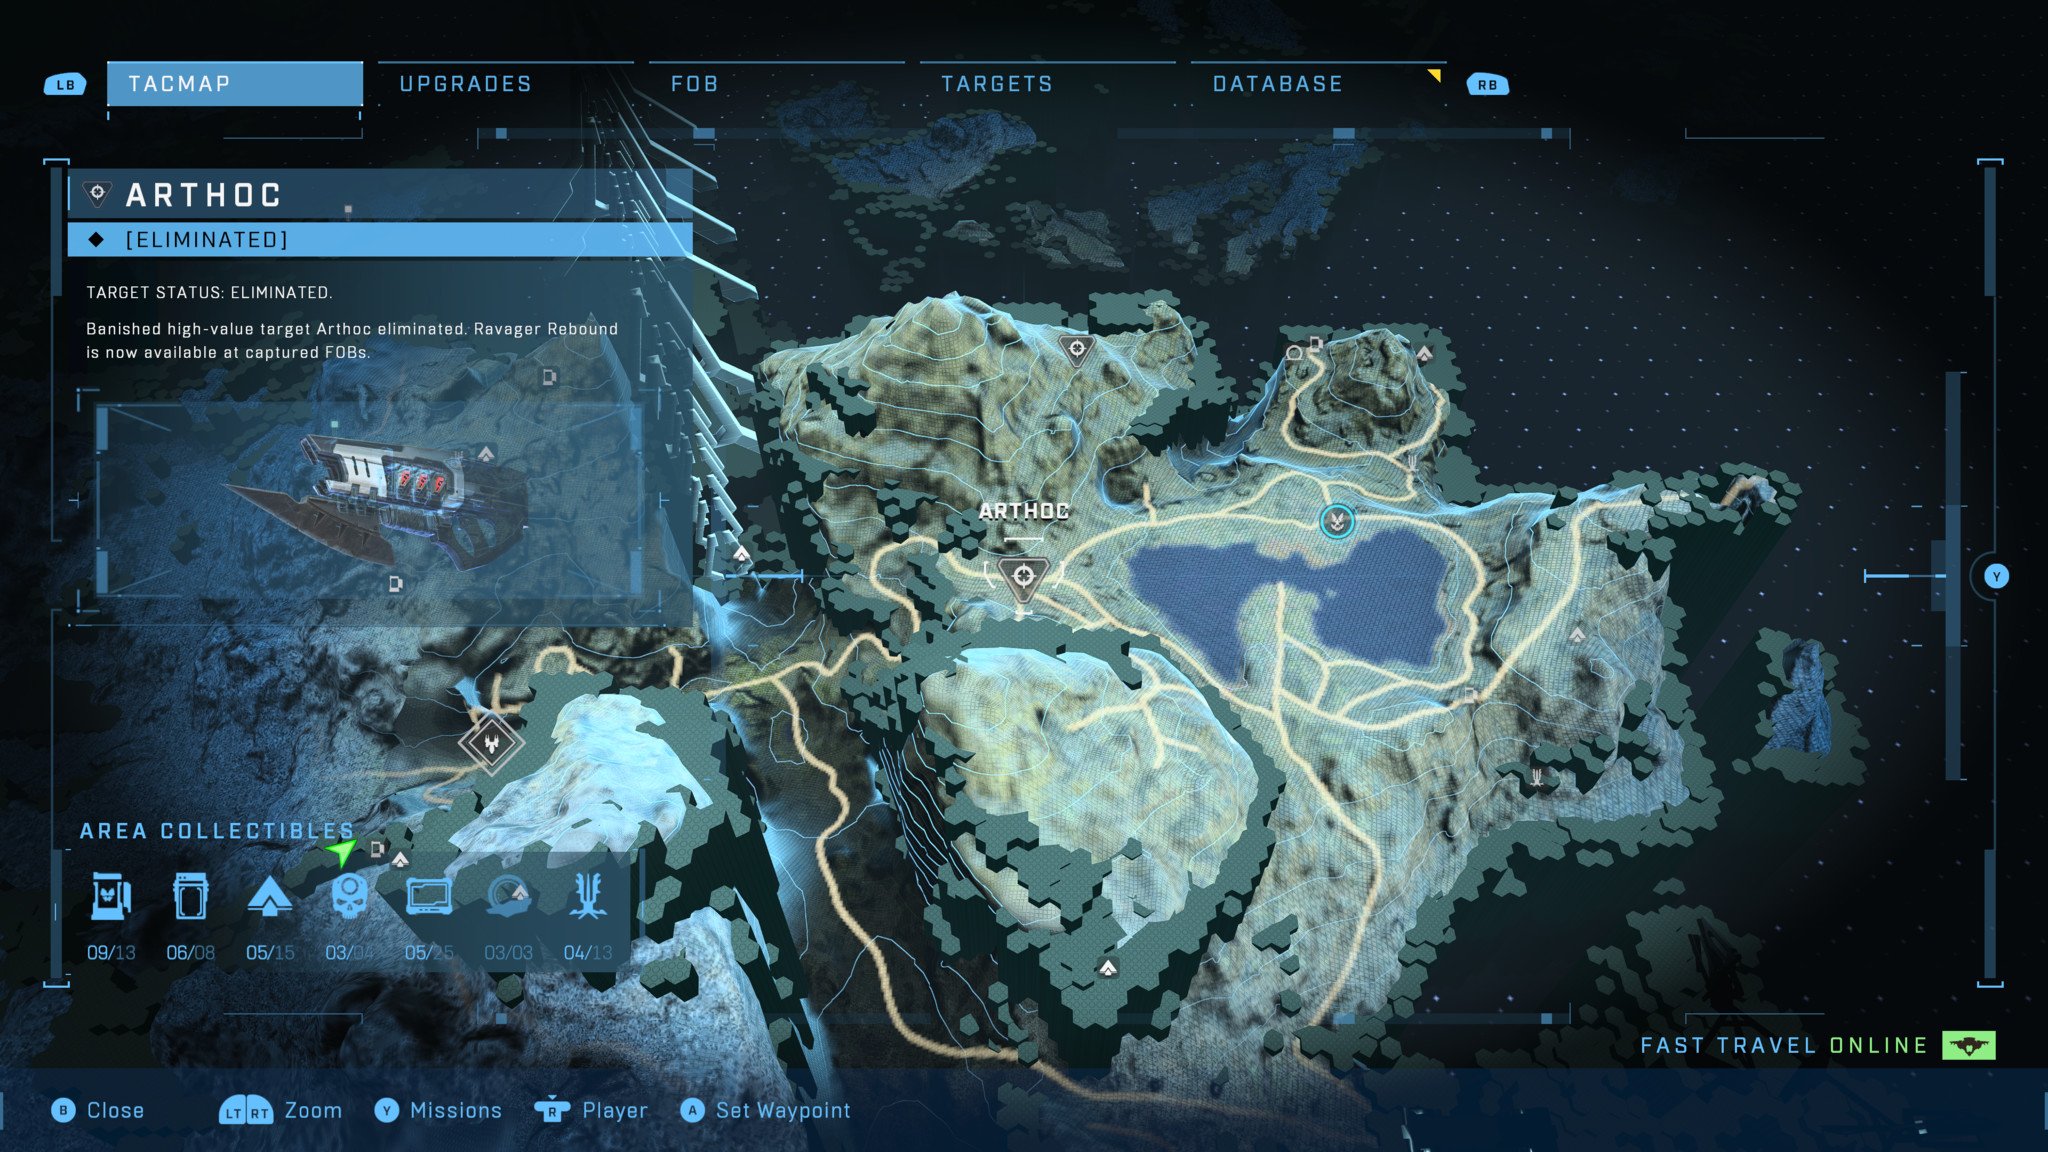
Arthoc can be found near the western border of the southeastern region with a large contingent of Banished soldiers. His Ravager Rebound isn't as deadly as some of the other weapons used by high-value targets, so stripping his shields with plasma fire and then killing him with kinetic damage or power weapons before you kill his allies will work just fine. Vehicles like Warthogs, Scorpions, and Wasps are also effective at taking Arthoc down.
When killed, Arthoc drops the Ravager Rebound, which is a special version of the Ravager that has bouncing globs of plasma.
Halo Infinite Pinpoint Needler location: Writh Kul
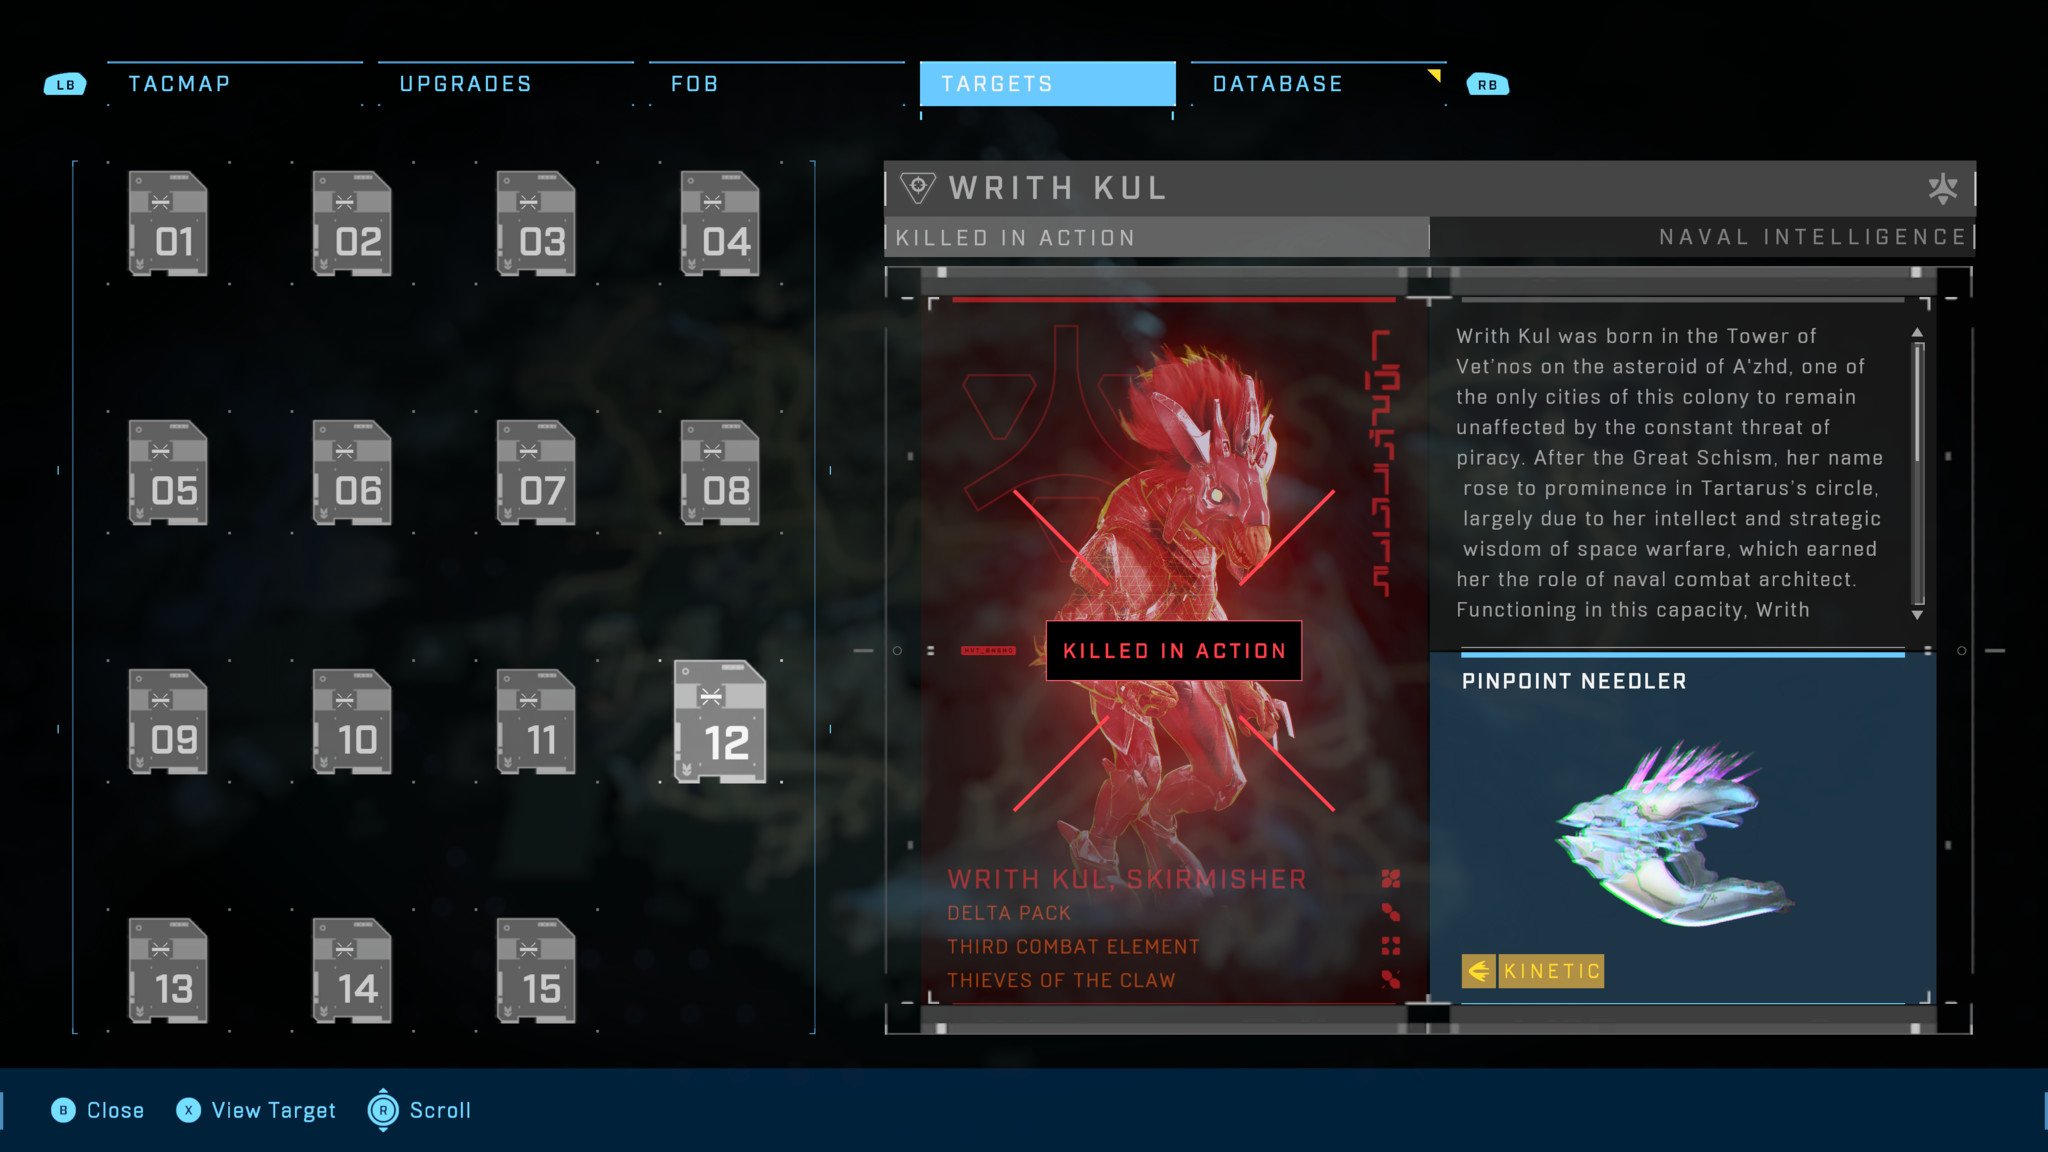
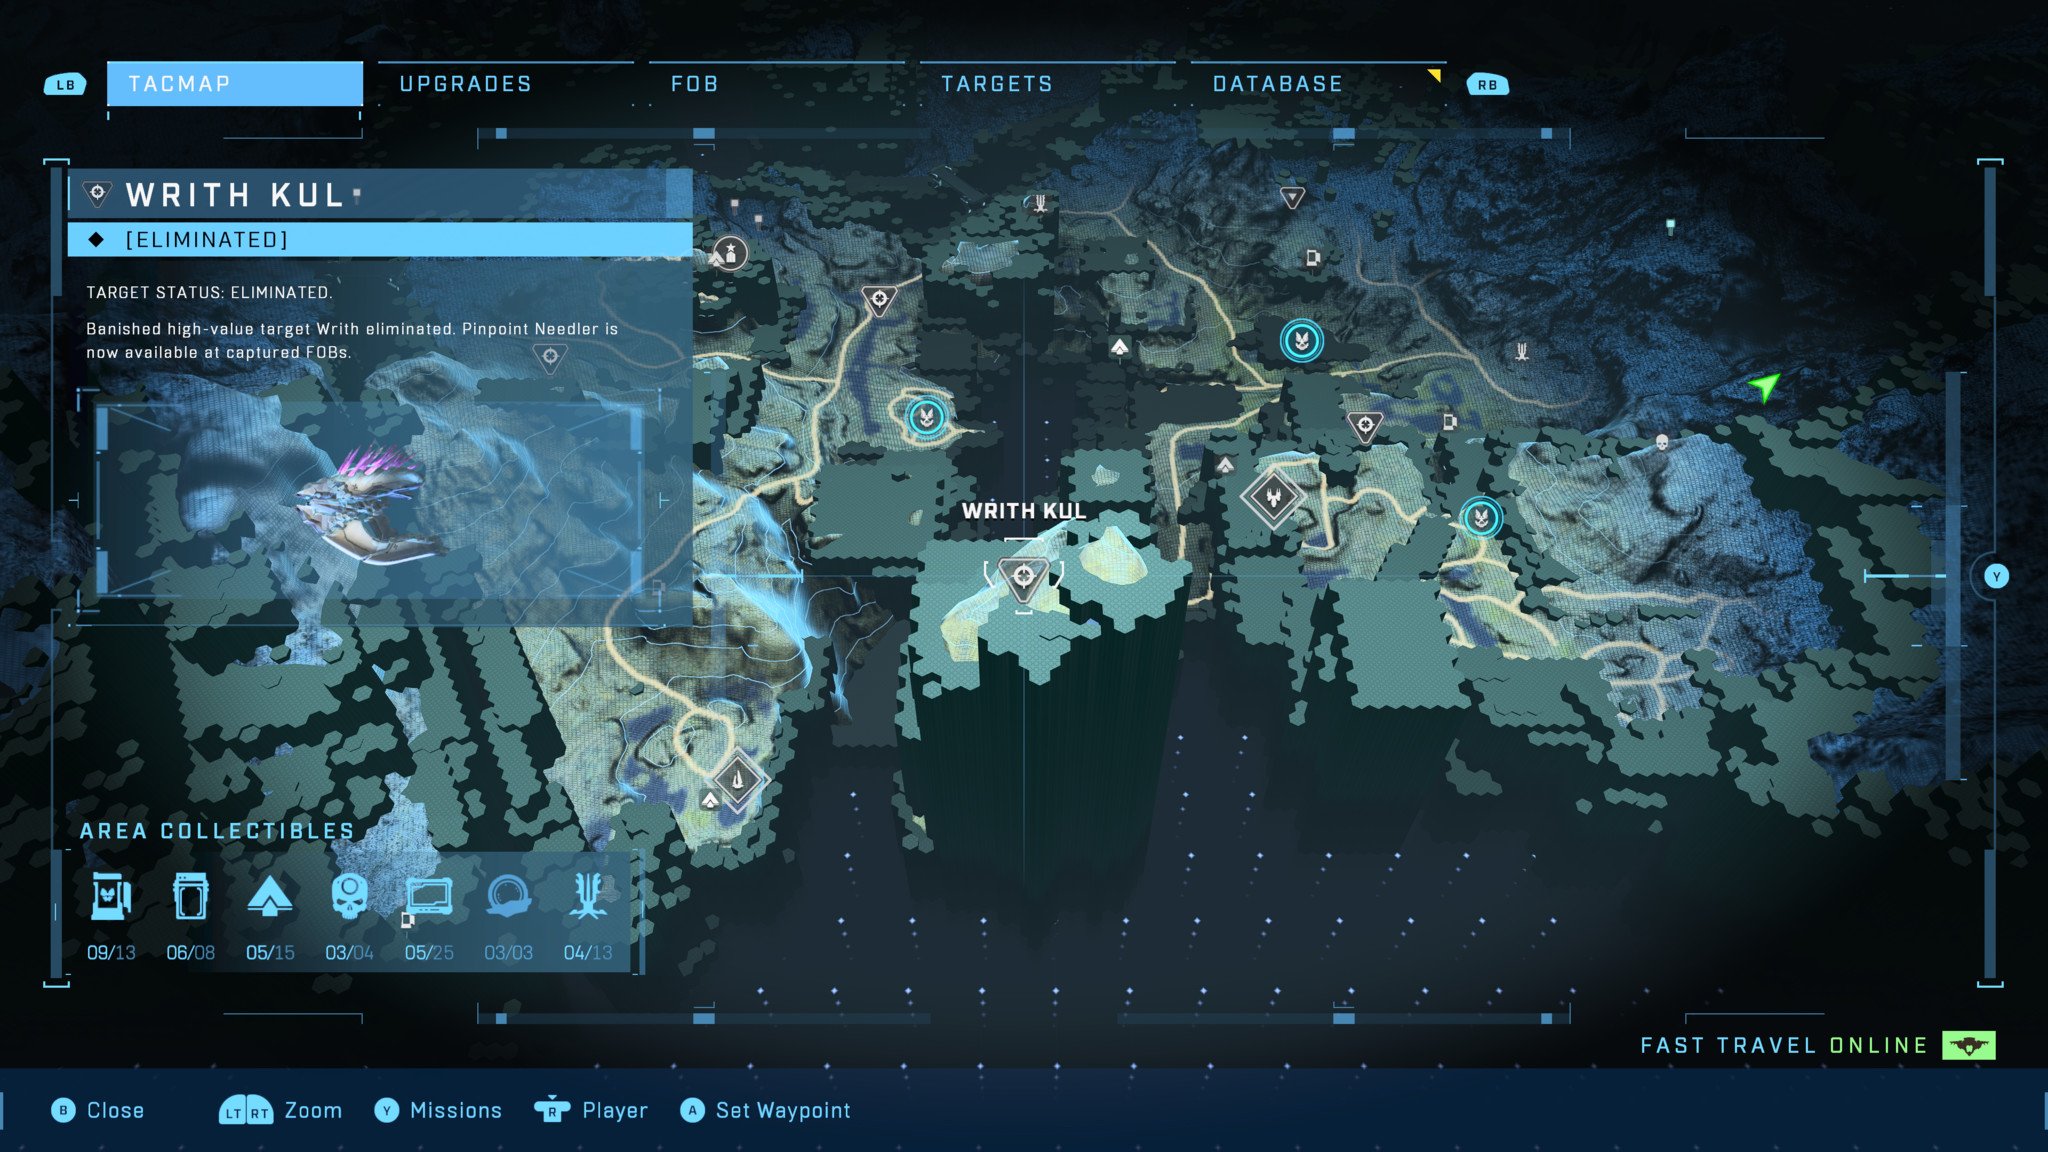
The Skirmisher Writh Kul is located on a large island in the southernmost area of the map, surrounded enemies using effective anti-aircraft weapons like Skewers and Disruptors that can easily EMP aircraft like Wasps or Banshees. Because of this, you'll need to use an aircraft to get to the island itself, but we recommend getting out of it right away and fighting Writh Kul and her allies on foot instead.
Most of her Brute and Grunt troops aren't too great of a threat, but watch out for Writh Kul herself; she uses an extremely deadly Pinpoint Needler that has aggressive tracking. We recommend sticking to cover and taking her out with some well-placed headshots between her Needler volleys.
When killed, Writh Kul drops her Pinpoint Needler. The weapon has significantly more aggressive tracking when compared to normal Needlers, and is also capable of locking onto multiple enemies at once.
Halo Infinite Purging Shock Rifle location: Skimmer Alpha
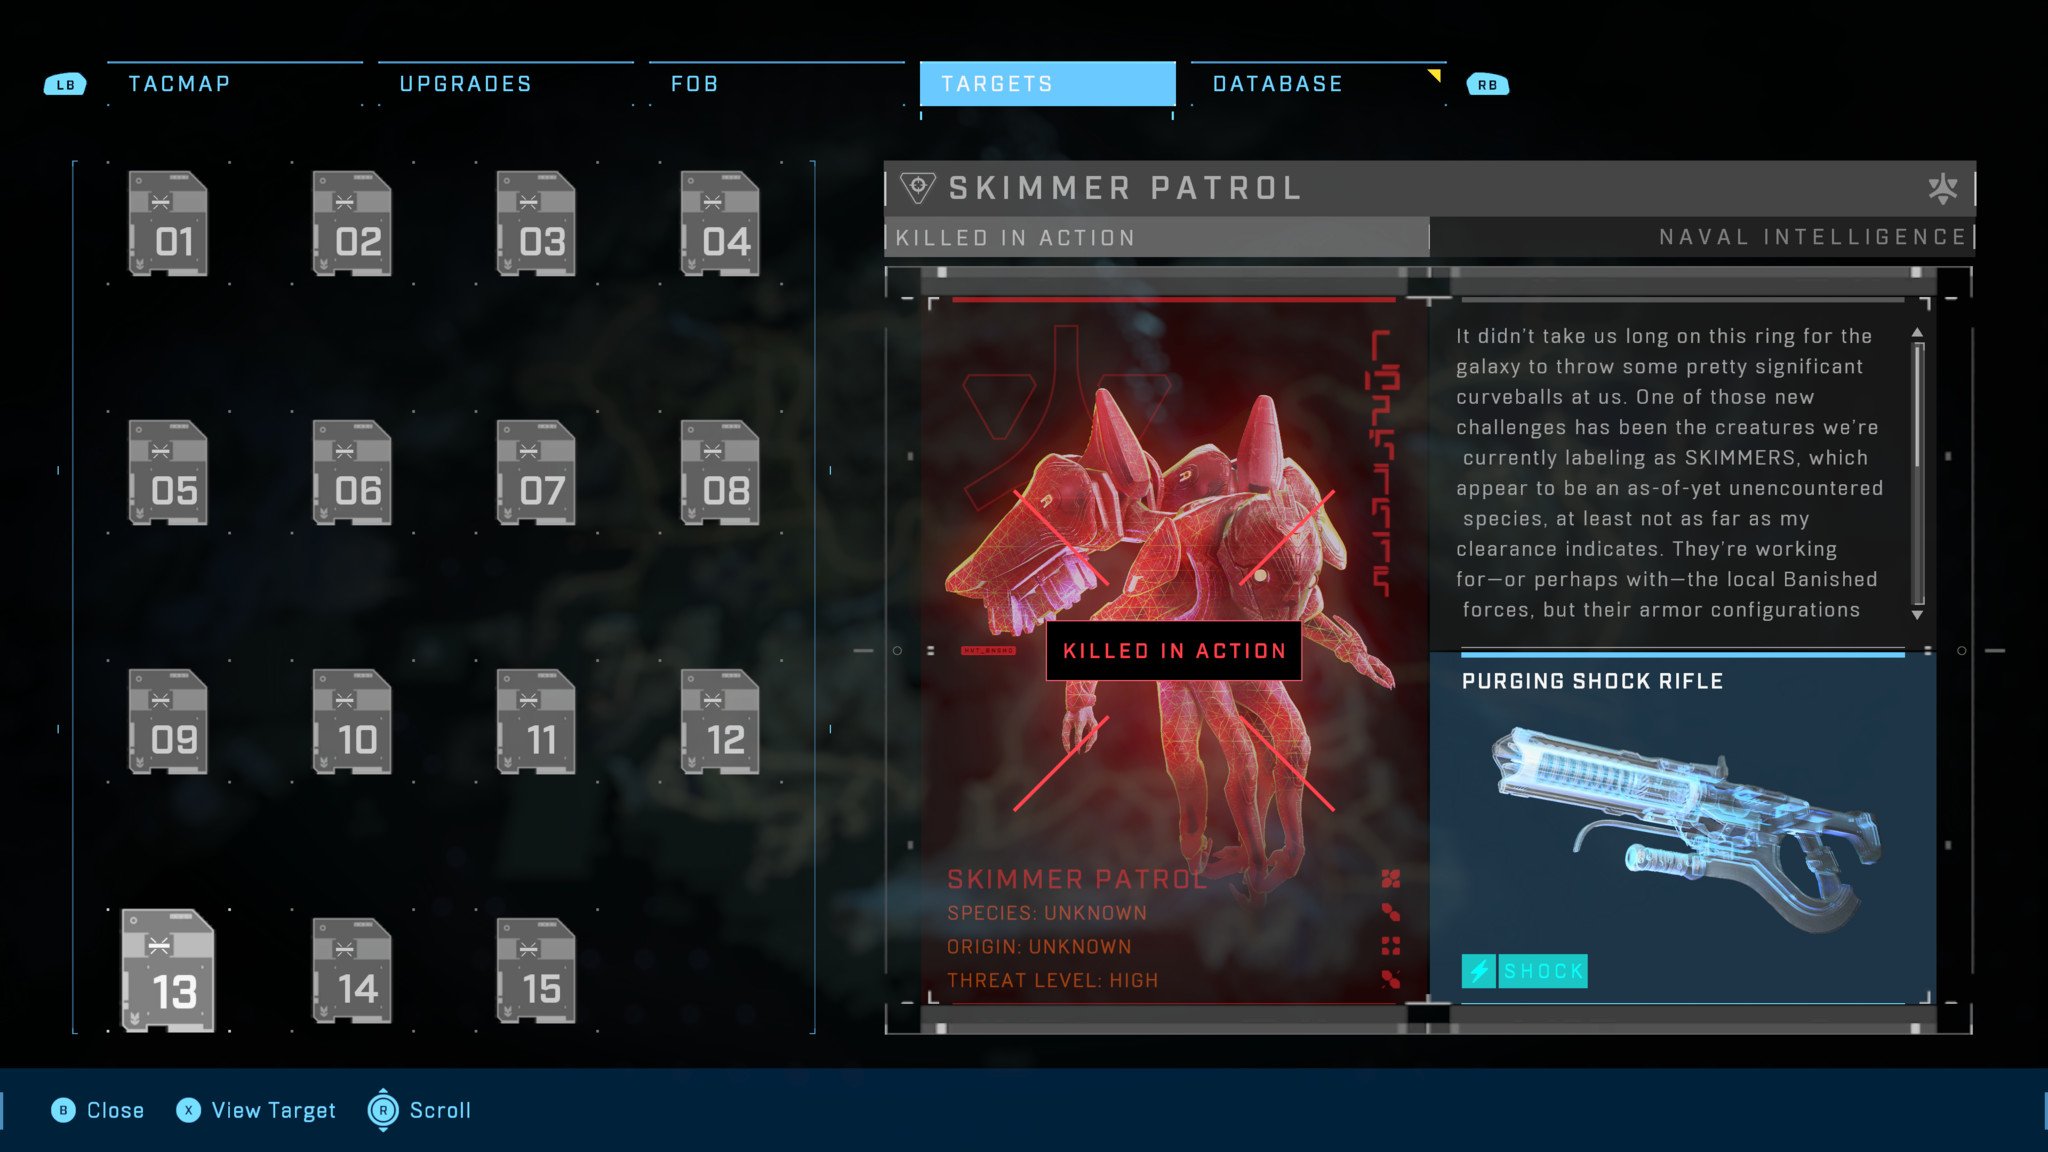
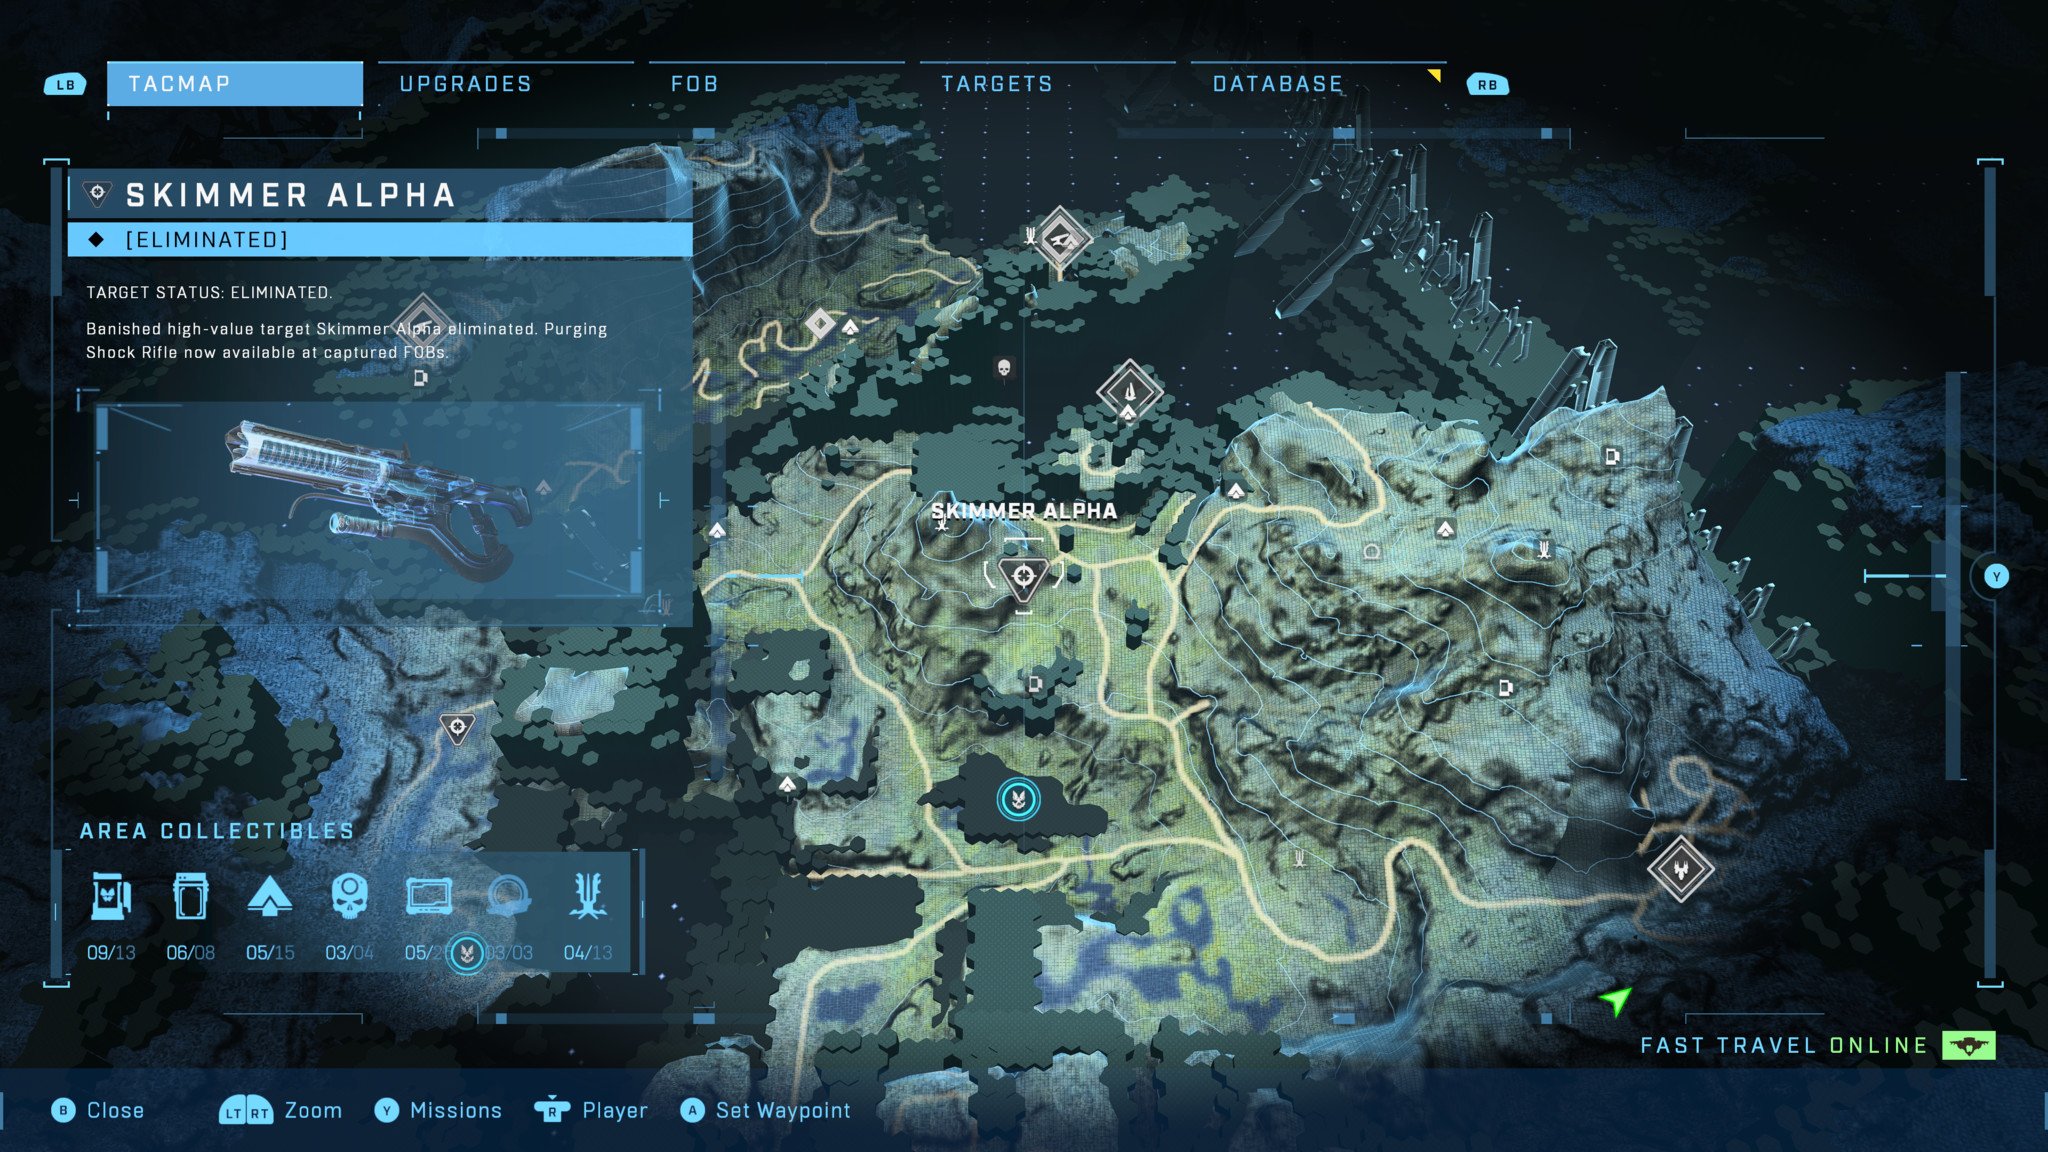
The Skimmer Alpha target can be found along the northern edge of the southern region of the map, surrounded by a large number of regular Skimmers. The Skimmer Alpha has slightly more health than normal Skimmers and wields a special Shock Rifle. The other Skimmers use standard Shock Rifles or Disruptors.
Since Skimmers are relatively weak enemies, this fight shouldn't give you any trouble. Pick each of them off with a precision weapon like the Battle Rifle, then turn your attention to the Skimmer Alpha and finish it off with some well-placed shots or a power weapon.
The Purging Shock Rifle dropped by the Skimmer Alpha can electrocute enemies, and its rounds also do considerably more damage than normal Shock Rifles.
Halo Infinite Backdraft Cindershot location: Myriad
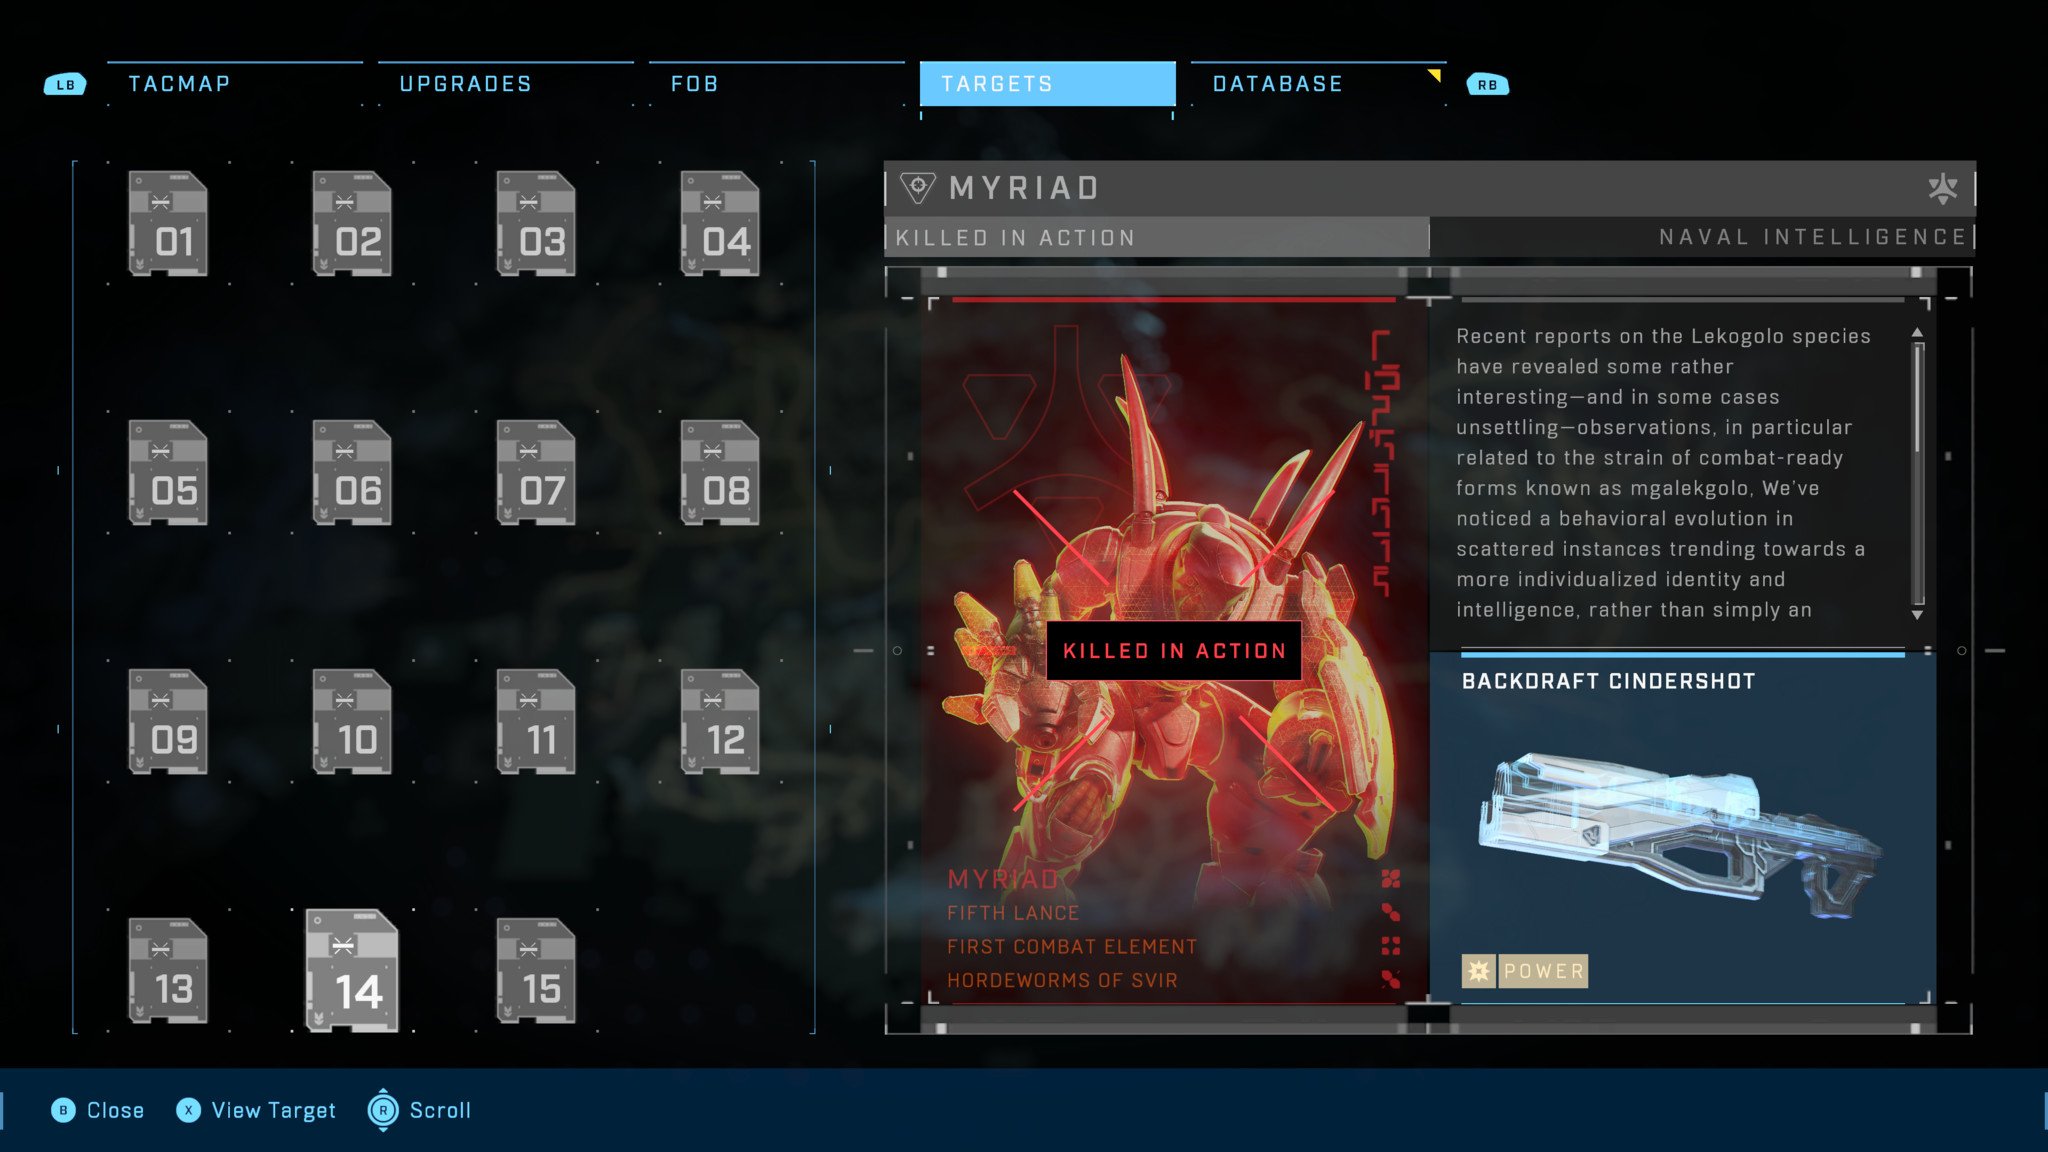
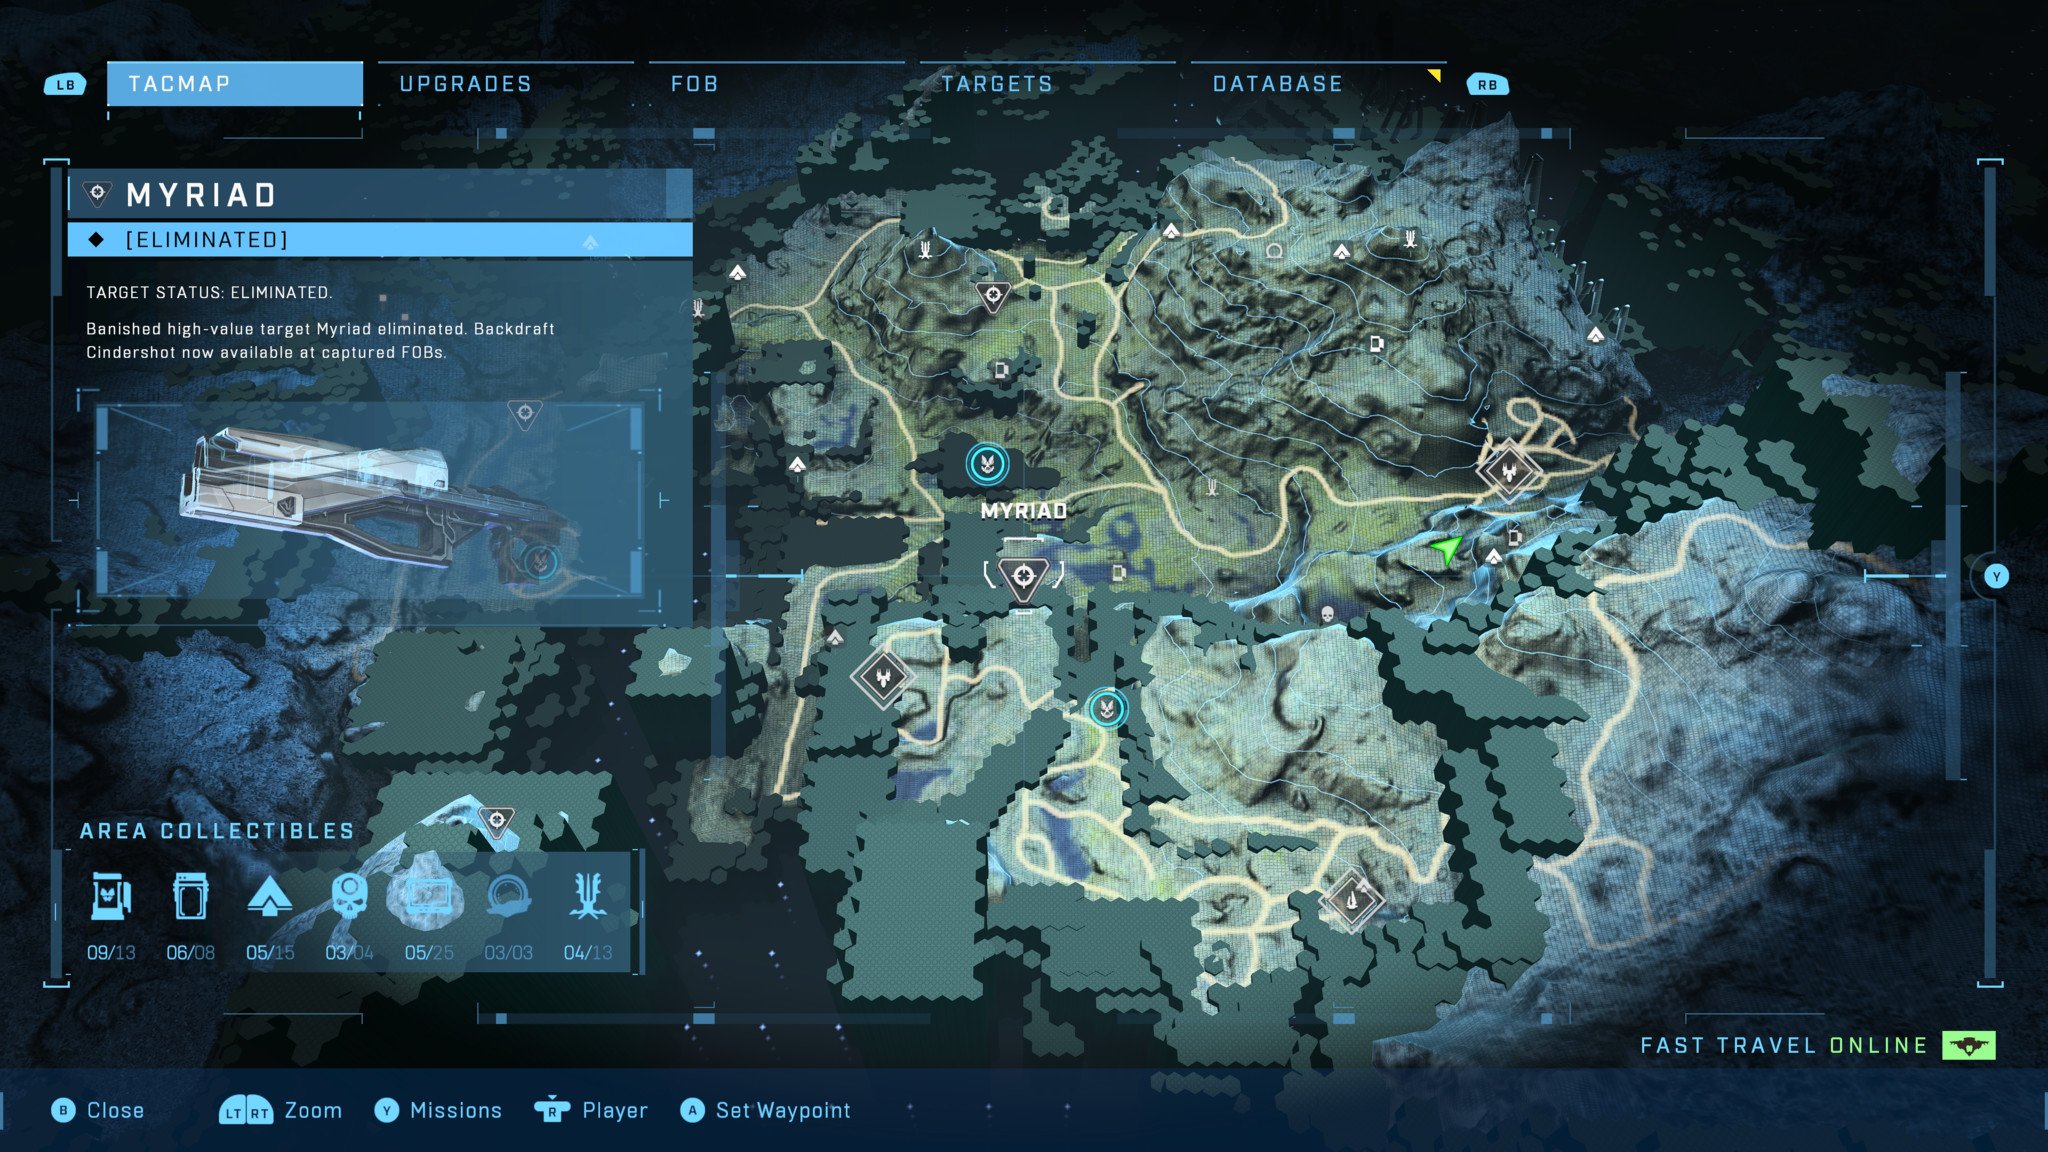
Myriad is a ruthless pair of Hunters found deep in the marshy swamplands found on the western edge of the southern region of the map. Taking them out on foot is very difficult since they have a ton of health and protect themselves from most forms of small arms fire well, but you can make short work of them by bringing a Scorpion tank to the fight and blasting them to pieces. Alternatively, power weapons like the M41 SPNKr, Skewer, and Cindershot also do excellent damage against them.
After killing both Hunters, players will be able to obtain a special Backdraft Cindershot. This version of the weapon fires grenades that explode three times instead of just once, making it significantly more effective.
Halo Infinite Scatterbound Heatwave location: Ordo 'Mal
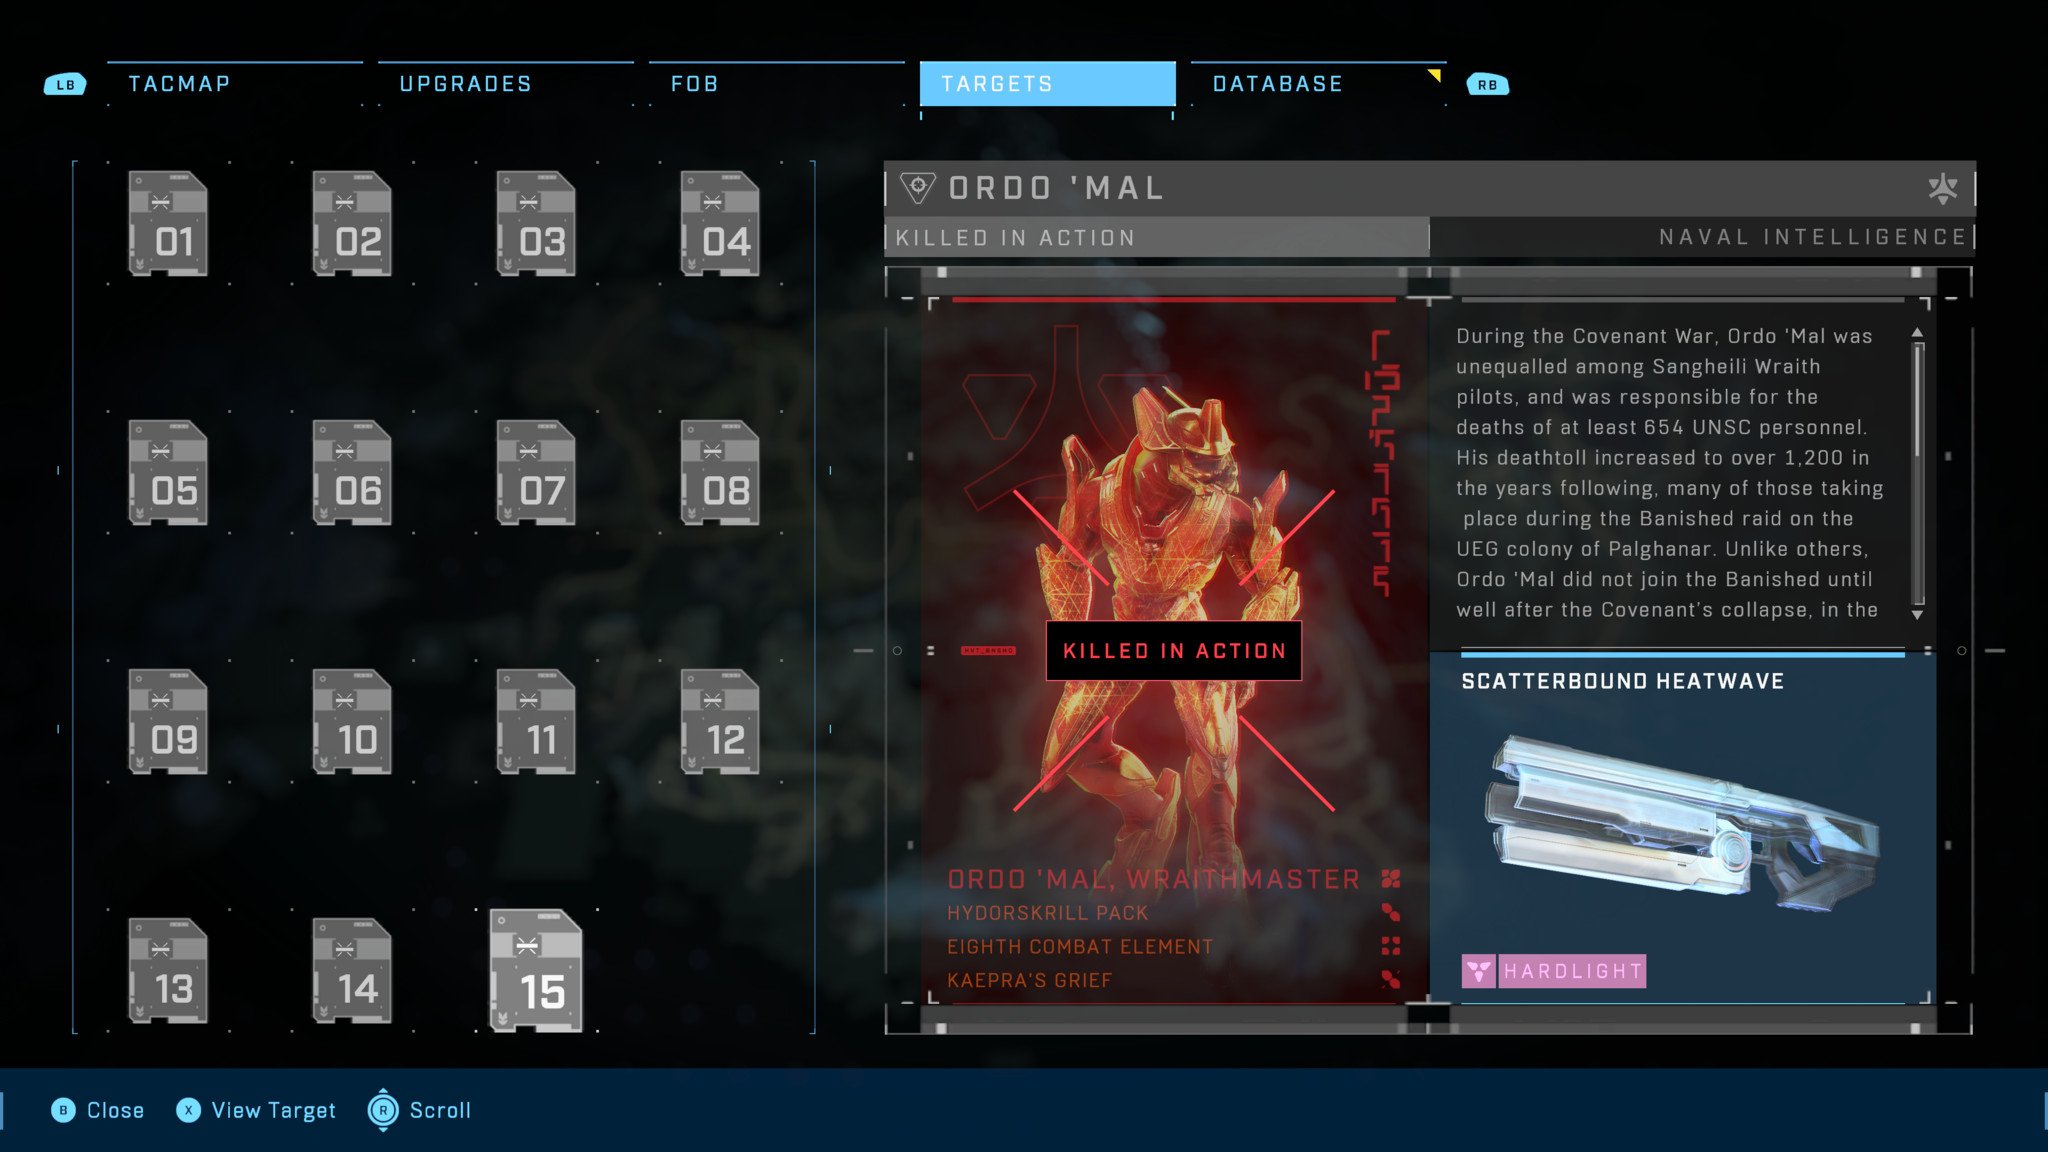
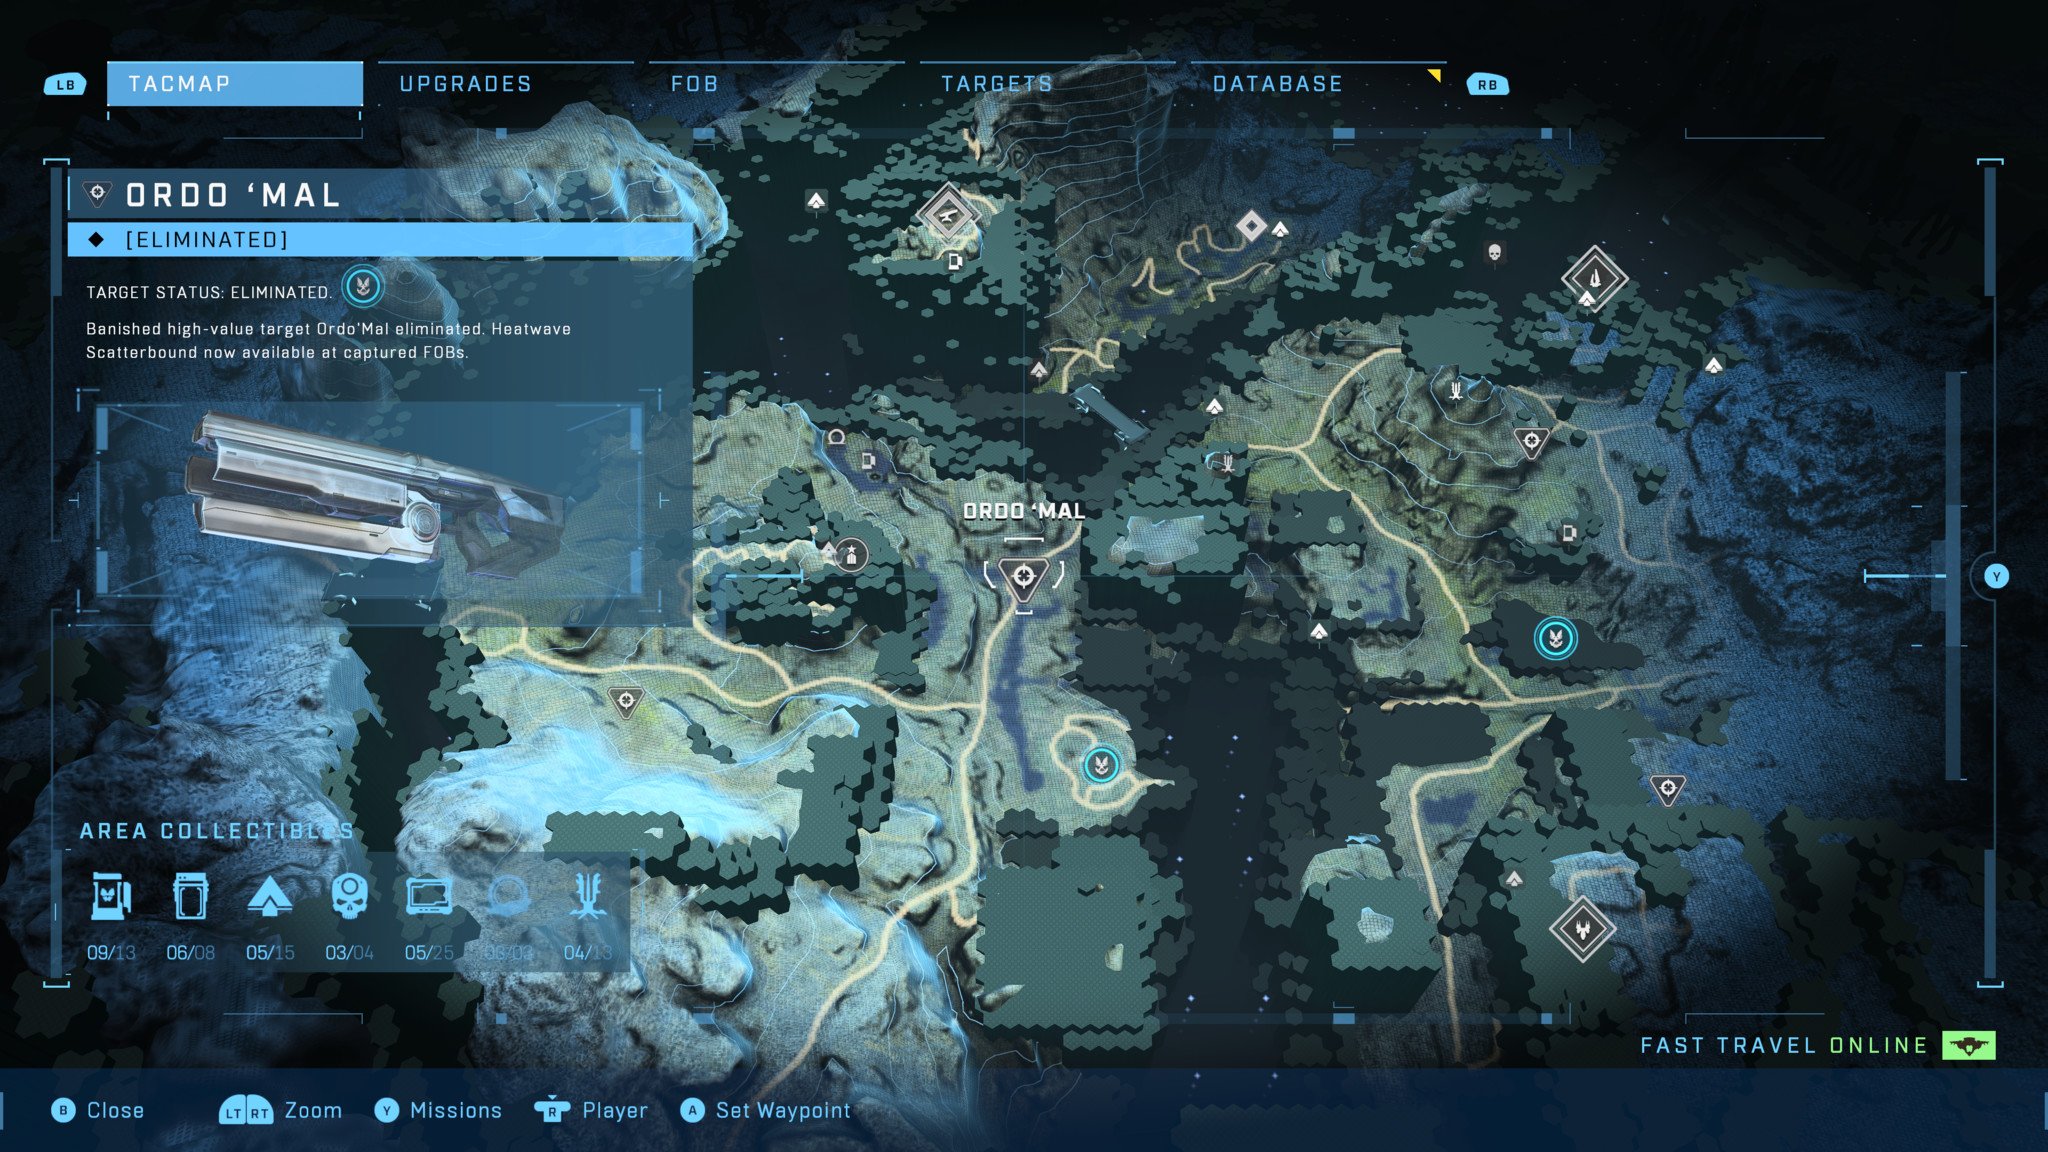
The final Banished high-value target is Ordo 'Mal, who can be found on the eastern edge of the southwestern region by a large river. When approached, he will commandeer a Wraith tank while his troops — many of which are equipped with anti-vehicle weapons like the Skewer — attempt to take you down.
Because his troops have strong anti-vehicle weapons, you should take this fight on foot instead. Take out Ordo 'Mal's troops and use their weapons on his Wraith until it's about to explode, which will prompt him to exit his vehicle. Then take down his shields with a plasma weapon, following that up with some headshots from a kinetic precision weapon to take him down.
Ordo 'Mal drops a Scatterbound Heatwave when killed, which is a unique variant of the Heatwave that fires projectiles that track targets after they ricochet off a surface.
The Halo Infinite campaign is available now for $60 on Xbox Series X, Xbox Series S, Xbox One, and Windows PCs. It's one of the best Xbox shooters ever made, so you should definitely pick it up and give it a shot.

Brendan Lowry is a Windows Central writer and Oakland University graduate with a burning passion for video games, of which he's been an avid fan since childhood. He's been writing for Team WC since the summer of 2017, and you'll find him doing news, editorials, reviews, and general coverage on everything gaming, Xbox, and Windows PC. His favorite game of all time is probably NieR: Automata, though Elden Ring, Fallout: New Vegas, and Team Fortress 2 are in the running, too. When he's not writing or gaming, there's a good chance he's either watching an interesting new movie or TV show or actually going outside for once. Follow him on X (Twitter).

 Windows Central Insider


