How to set multiple clocks on Windows 11
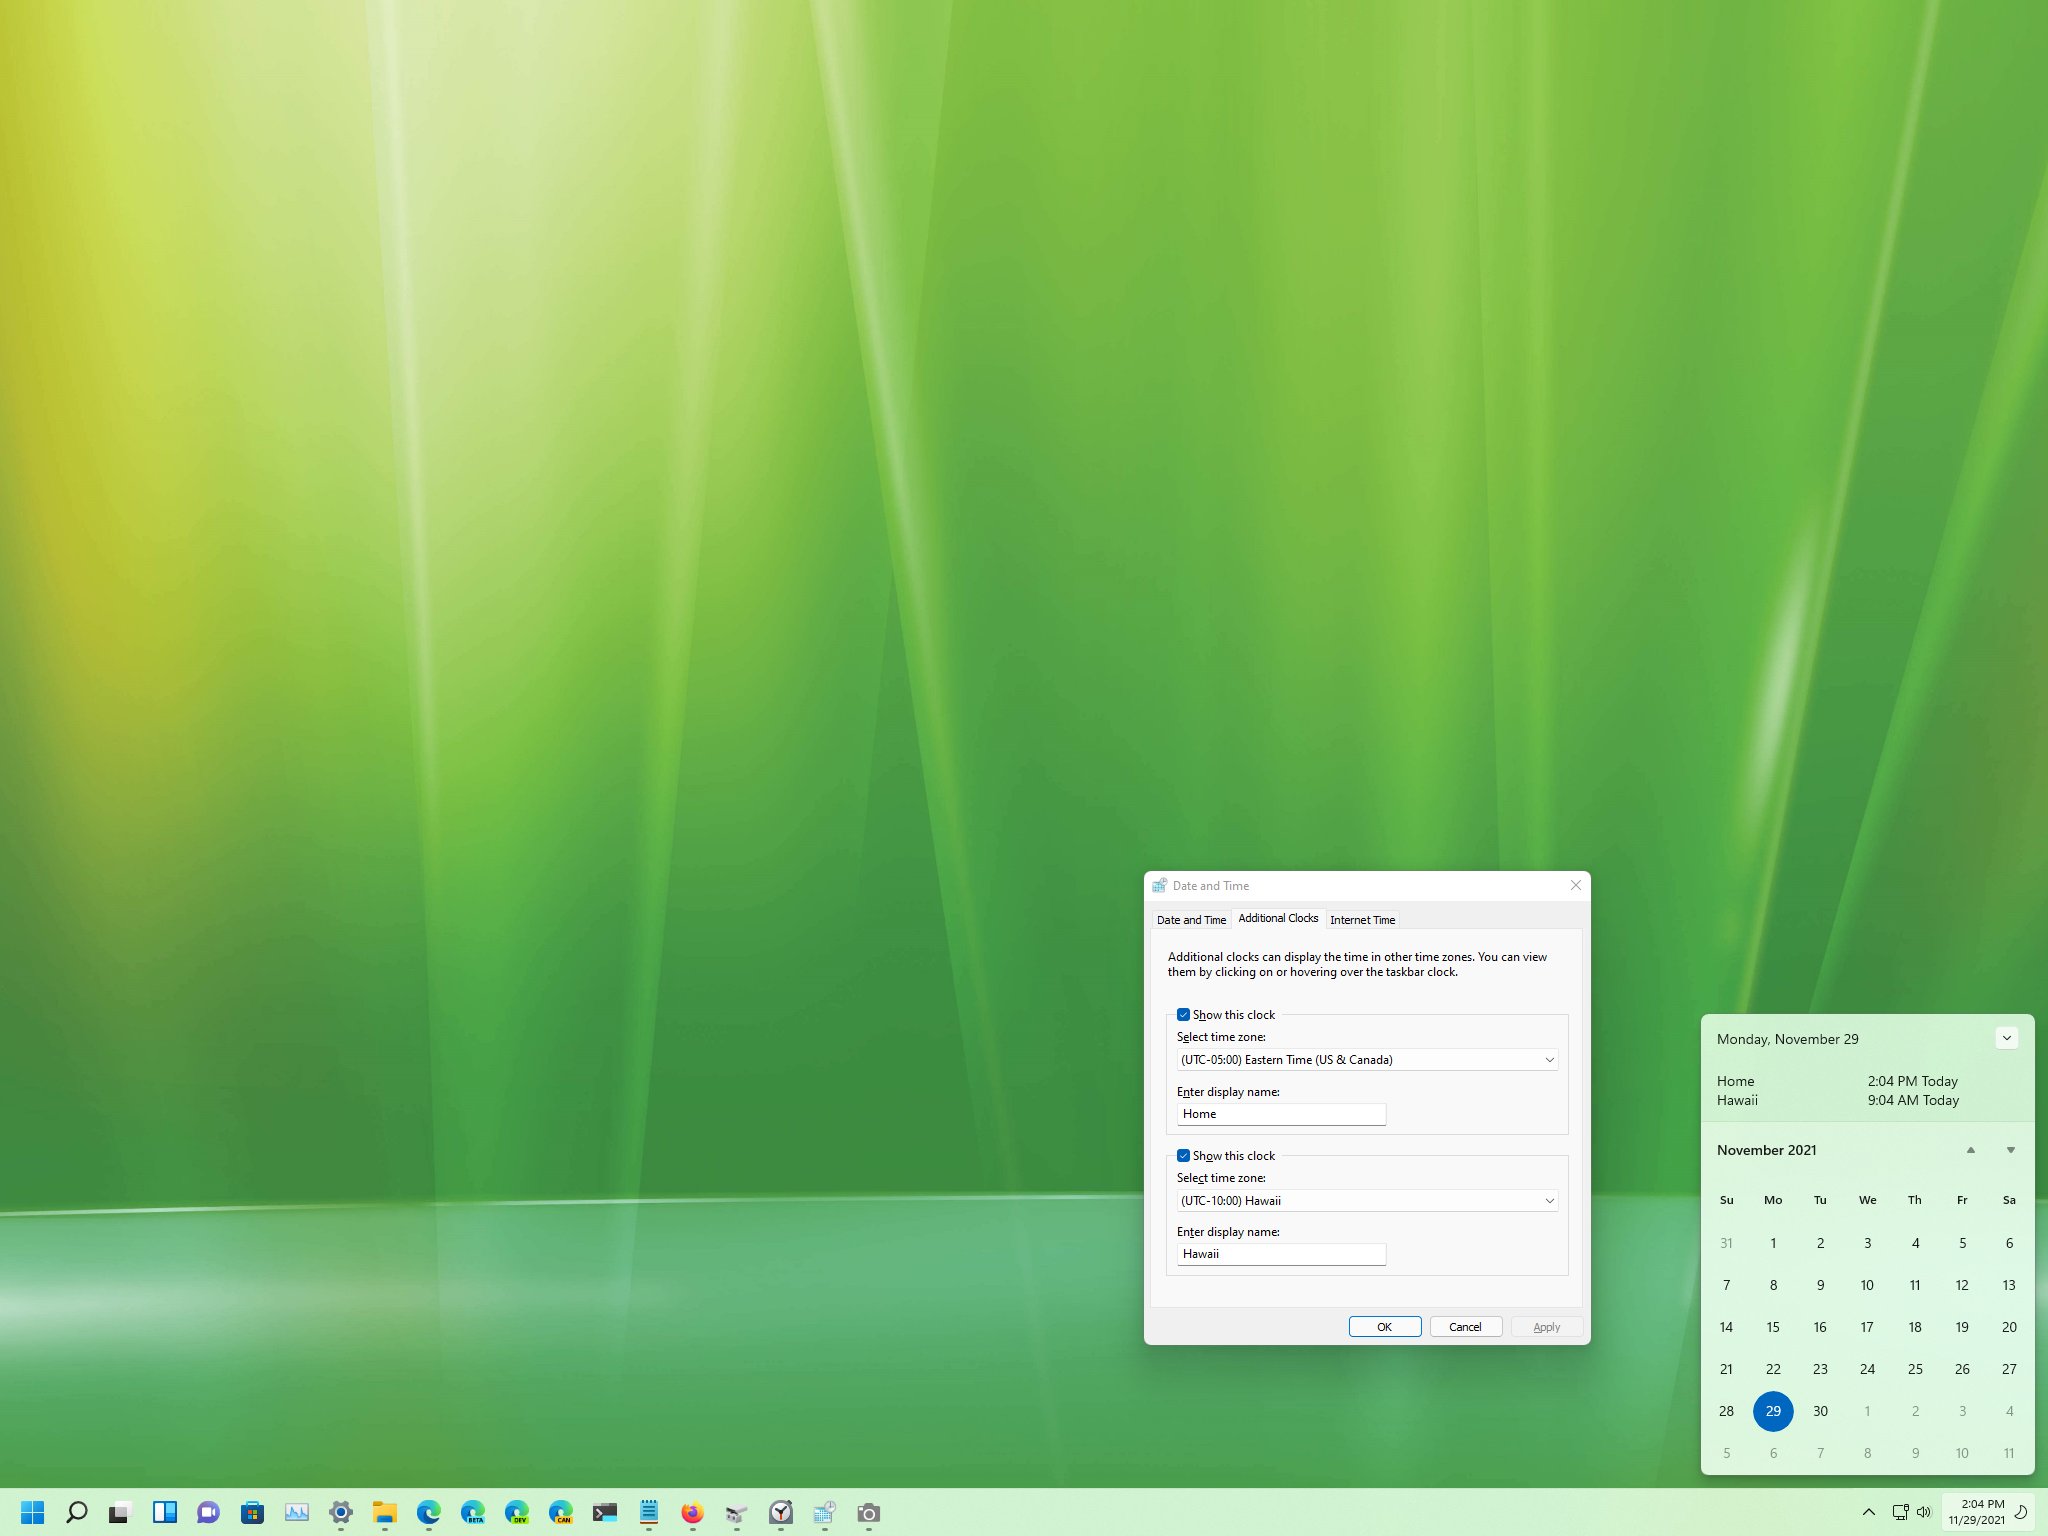
Yes, you can still show multiple clocks from different time zones on Windows 11, and in this guide, we'll show you how.
All the latest news, reviews, and guides for Windows and Xbox diehards.
You are now subscribed
Your newsletter sign-up was successful
On Windows 11, the ability to show multiple clocks in the Taskbar experience can come in handy in many situations, including when working with people located in a different time zone or when you have to connect with family and friends across the world.
Whatever the reason it might be, Windows 11 lets you show up two additional clocks from different time zones in the Notification Center calendar. Also, since the calendar flyout no longer shows the current time, you could use one of the clocks to show the local time in the same interface.
In this Windows 11 guide, we'll show you the steps to add multiple clocks in the Notification Center calendar.
- How to add clock to Notification Center calendar on Windows 11
- How to add multiple time zone clocks on Windows 11
How to add clock to Notification Center calendar on Windows 11
To show the current zone clock in the calendar flyout, use these steps:
- Open Settings.
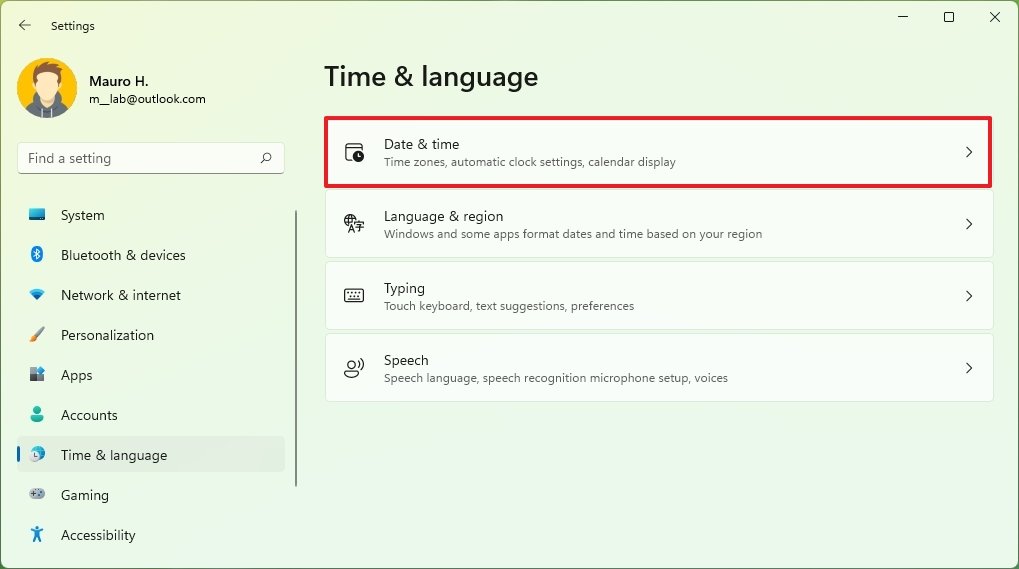
- Click on Time & language.
- Click the Date & time page on the right side.
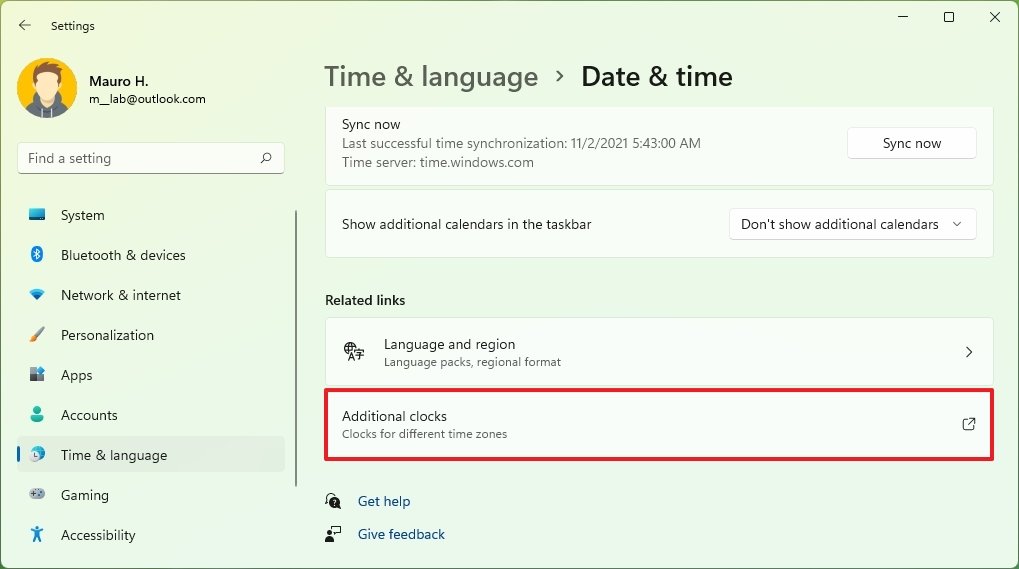
- Under the "Related links" section, click the Additional clocks setting.
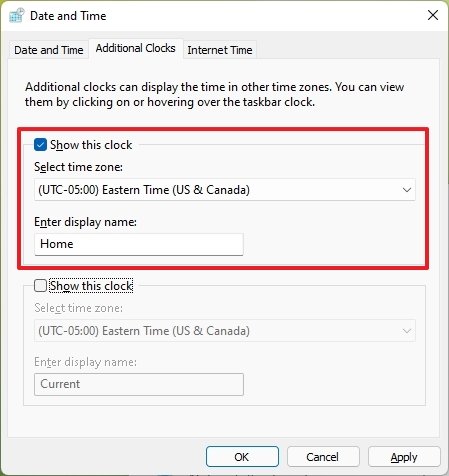
- Click the Show this clock option.
- In the "Enter a display name" settings, confirm the name for the clock — for example, Home.
- Click the Apply button.
- Click the OK button.
Once you complete the steps, the clock will appear in the Notification Center (Windows key + N).
How to add multiple time zone clocks on Windows 11
To add another time zone clock on the Notification Center calendar, use these steps:
- Open Settings.
- Click on Time & language.
- Click the Date & time page on the right side.
- Under the "Related links" section, click the Additional clocks setting.
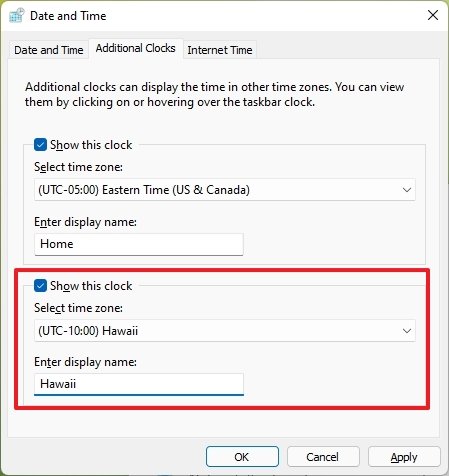
- Click the Show this clock option.
- Use the "Select time zone" drop-down menu, and select the time zone for the clock.
- In the "Enter a display name" settings, confirm the name for the clock — for example, New York.
- Click the Apply button.
- Click the OK button.
After you complete the steps, the second clock will appear in the calendar flyout.
All the latest news, reviews, and guides for Windows and Xbox diehards.
More Windows resources
For more helpful articles, coverage, and answers to common questions about Windows 10 and Windows 11, visit the following resources:
- Windows 11 on Windows Central — All you need to know
- Windows 11 help, tips, and tricks
- Windows 10 on Windows Central — All you need to know

Mauro Huculak has been a Windows How-To Expert contributor for WindowsCentral.com for nearly a decade and has over 22 years of combined experience in IT and technical writing. He holds various professional certifications from Microsoft, Cisco, VMware, and CompTIA and has been recognized as a Microsoft MVP for many years.
