How to automate your desktop layout with PowerToys Workspaces on Windows 11 and create a one-click app layout
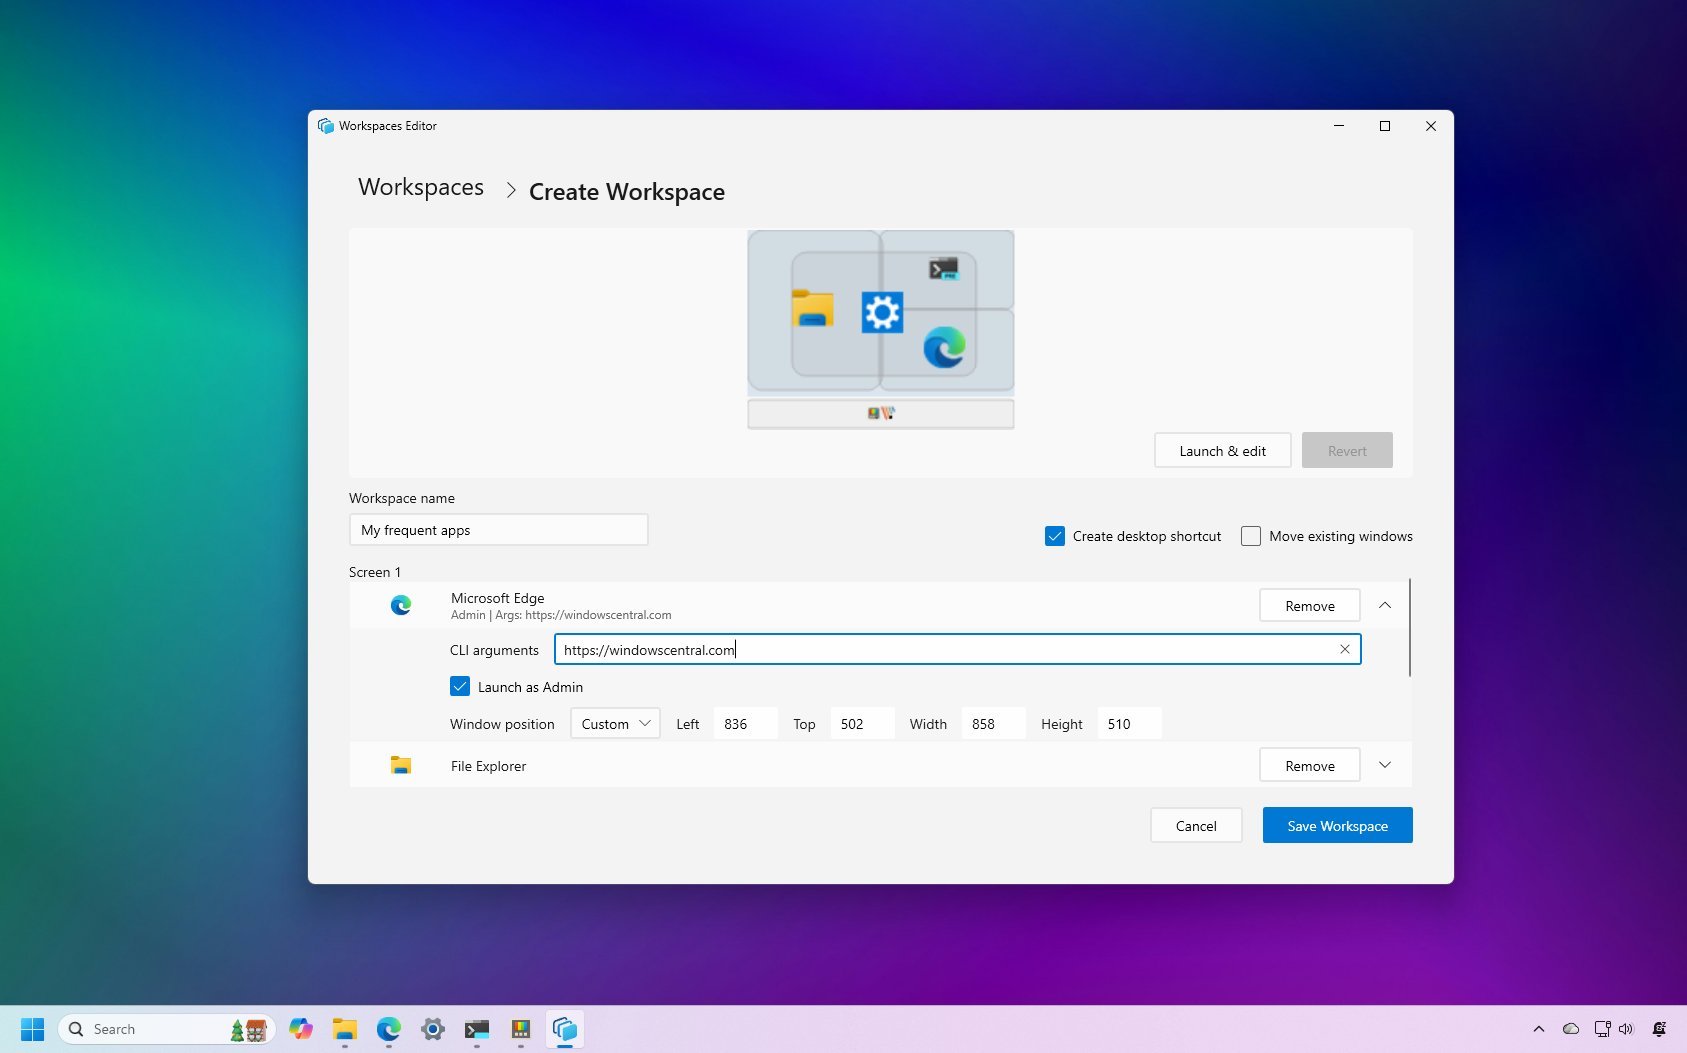
Automate how your apps open and arrange themselves on Windows 11 with PowerToys Workspaces.
All the latest news, reviews, and guides for Windows and Xbox diehards.
You are now subscribed
Your newsletter sign-up was successful
If you rely on the same group of apps to start your day or move between tasks on Windows 11, PowerToys Workspaces can automate the entire setup. The feature streamlines your environment by launching and arranging your frequently used apps exactly the way you want.
Workspaces is a feature designed for users who want a faster and more consistent desktop experience. Instead of opening the same programs every morning or constantly shuffling windows into place, you can trigger a complete layout with a single click. You decide which apps open, how they open, and where they appear on the screen, creating a repeatable workspace you can use for any activity.
If you typically work with only one or two apps, the advantage may be subtle. For multitaskers or anyone using structured workflows, Workspaces can save time, reduce clutter, and maintain a predictable desktop. In this how-to guide, I'll teach you how to set up and customize a workspace with your frequently used applications.
How to install PowerToys on Windows 11
If you don't already have PowerToys installed on the computer, use these steps:
- Open Start.
- Search for Command Prompt, right-click the top result, and select the Run as administrator option.
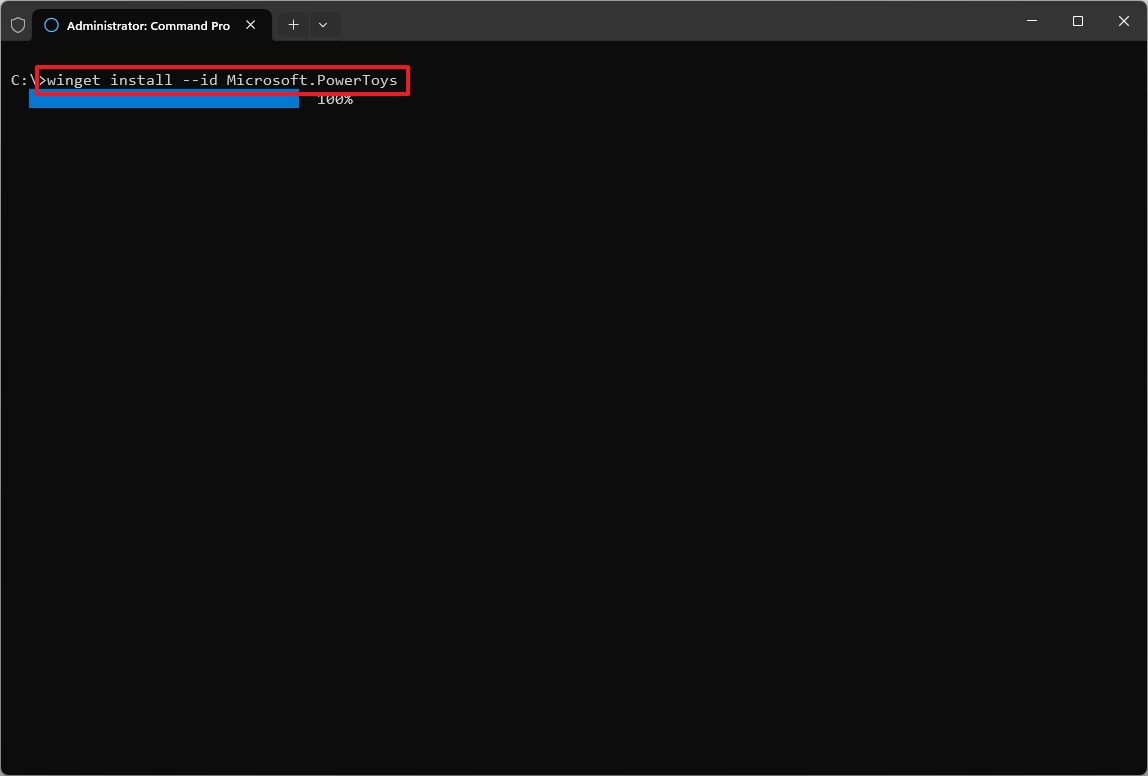
- (Option 1) Type the following command to install the latest preview of PowerToys and press Enter: winget install --id Microsoft.PowerToys
- (Option 2) Type the following command to install the stable version of PowerToys from the Microsoft Store and press Enter: winget -s msstore powertoys
After you complete the steps, you can proceed to create a workspace to launch and arrange apps automatically.
How to create a workspace with PowerToys
To create a workspace with PowerToys, use these steps:
- Open PowerToys.
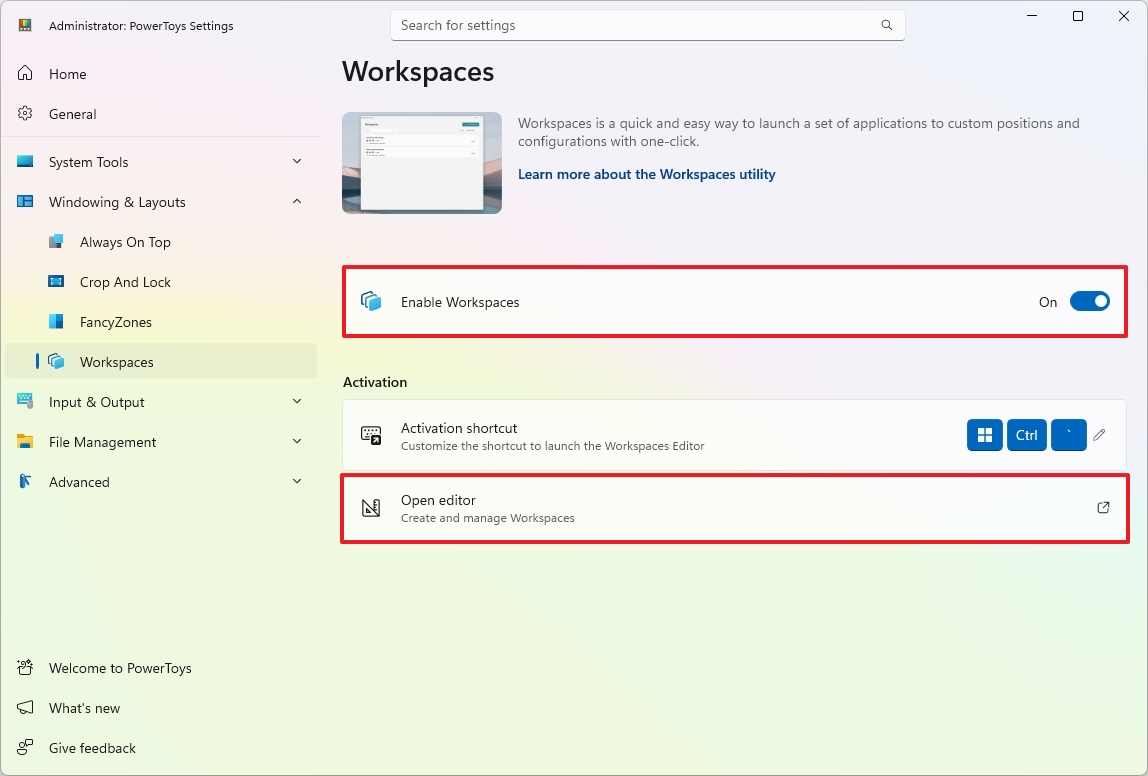
- Click on Windowing & Layouts.
- Click on Workspaces.
- Turn on the Enable Workspaces toggle switch.
- Click the Open editor option.
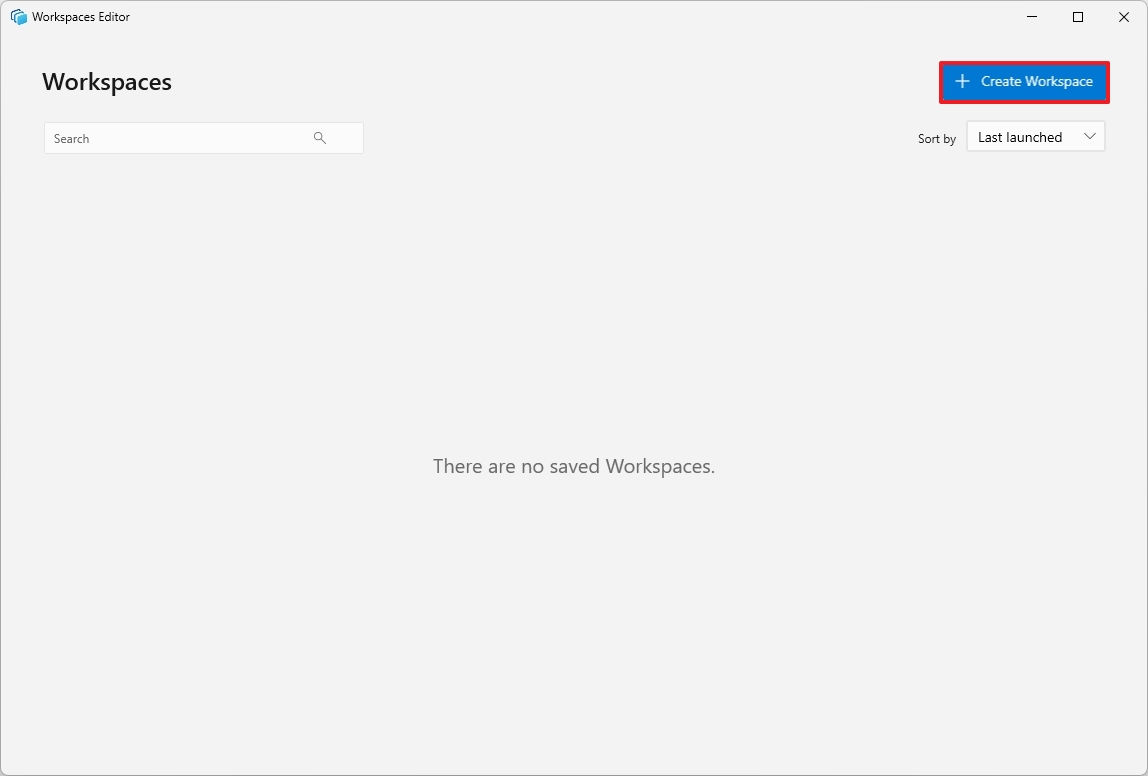
- Click the Create Workspace button.
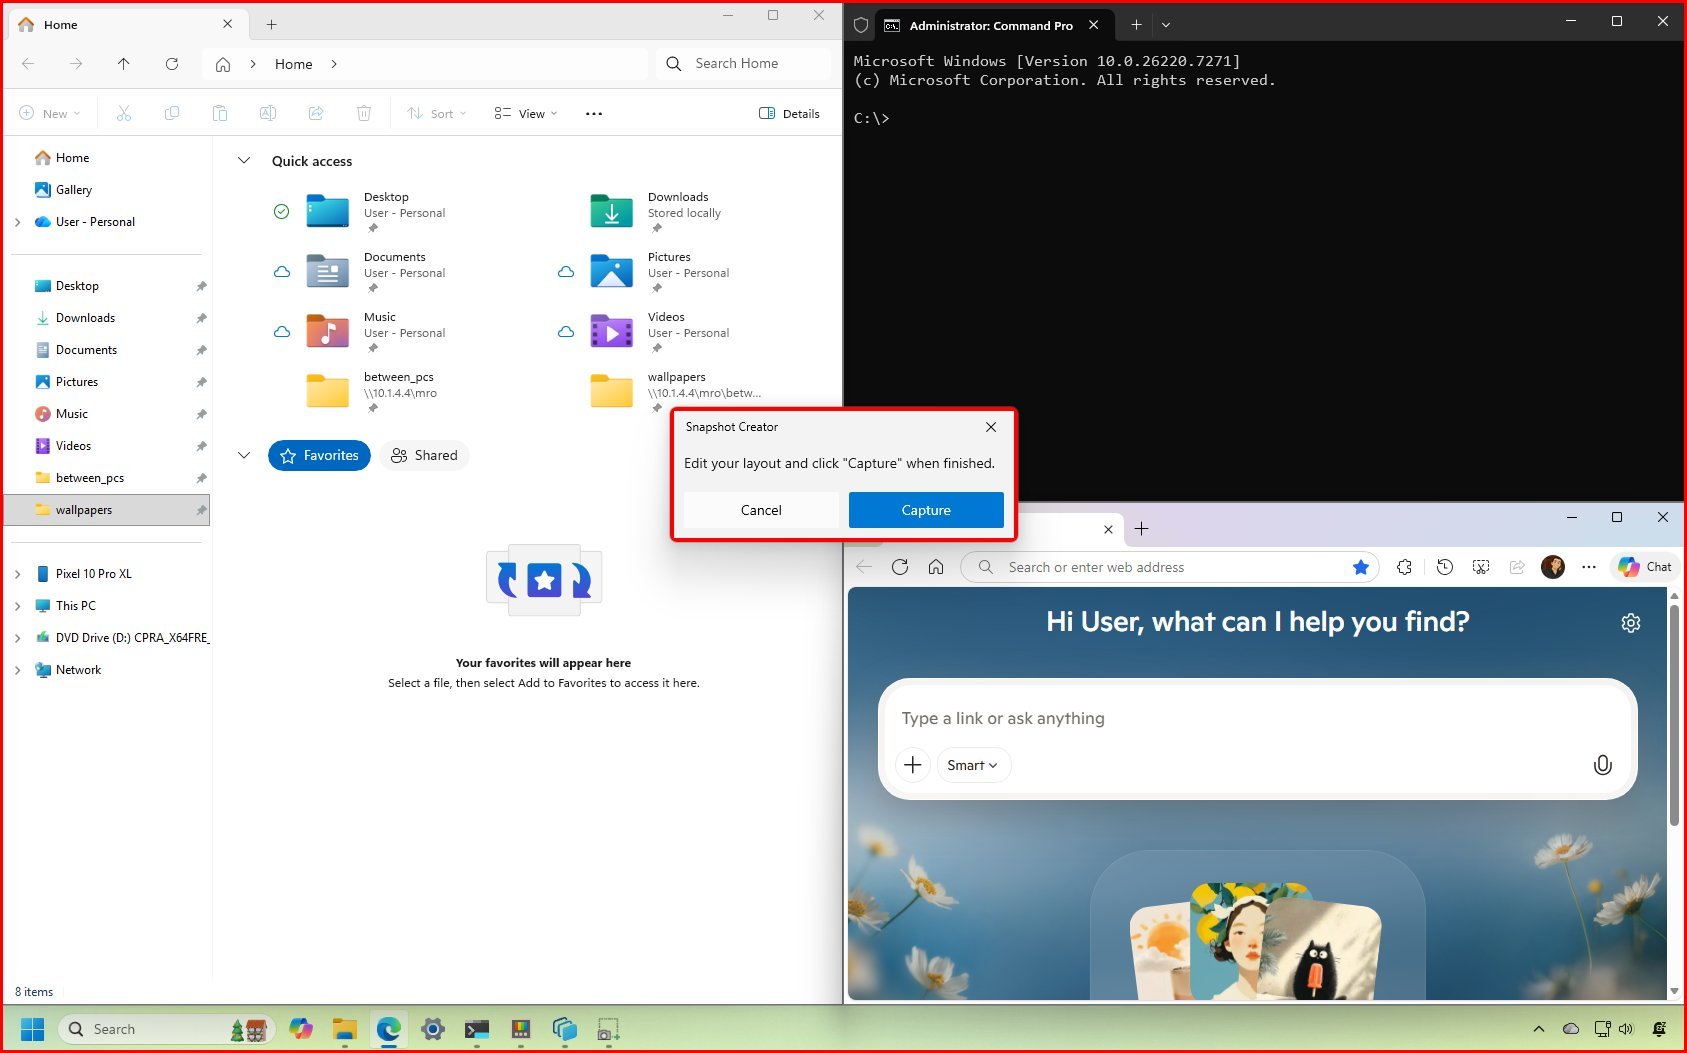
- Open the applications and rearrange them so that the system remembers them.
- Click the Capture button.
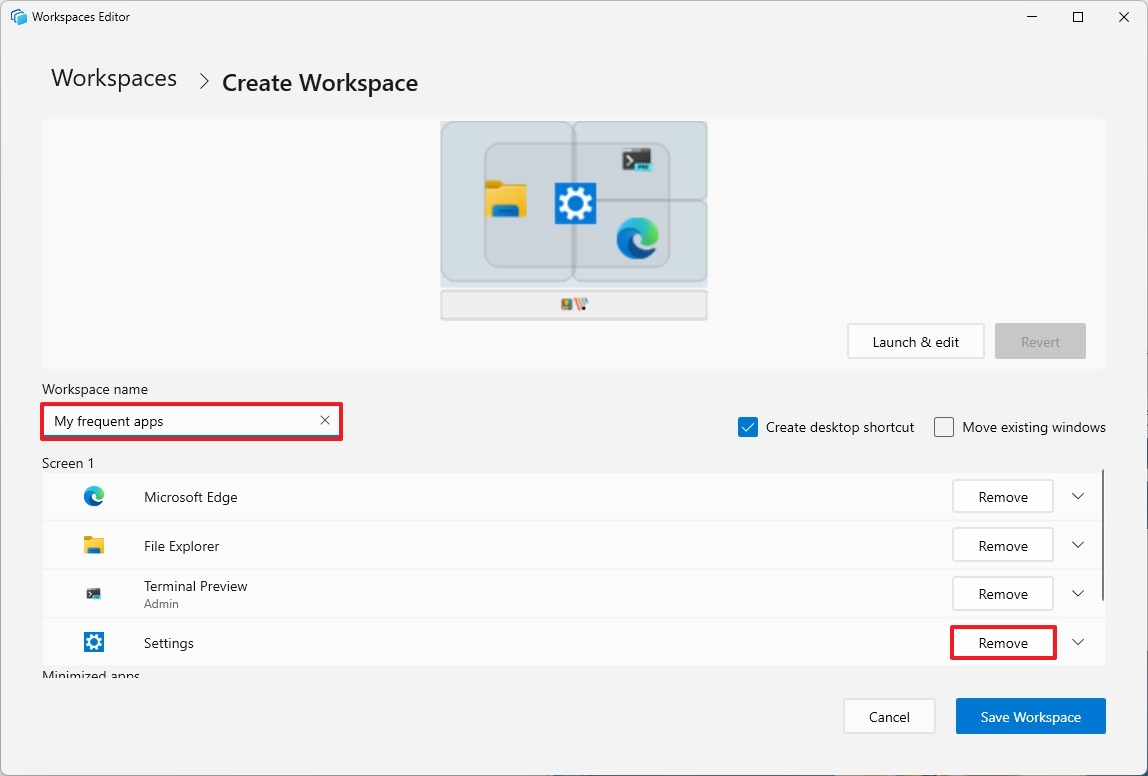
- Click the Remove button to dismiss apps you want the system to remember (if applicable).
- Confirm a name for the layout in the "Workspace name" option.
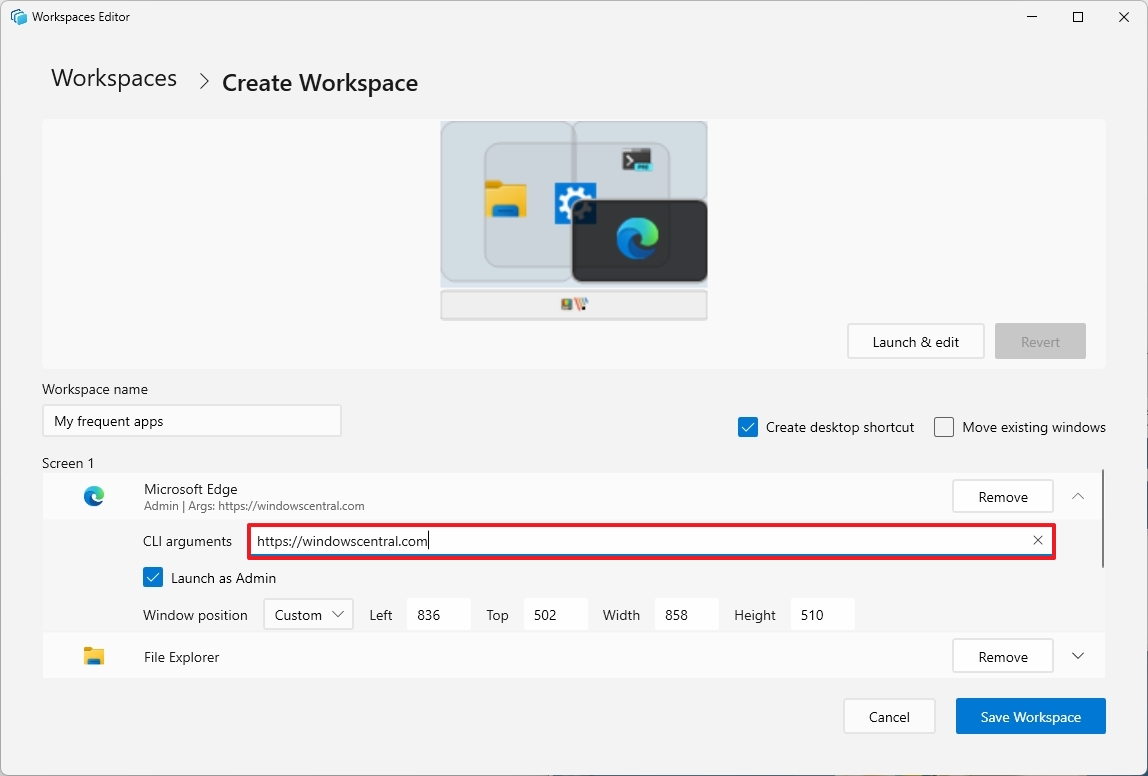
- (Optional) Click on an app to reveal its customization settings.
- Configure the arguments you want with the application.
- Quick tip: You can also set the app to launch as an administrator, and it's even possible to set a custom screen position.
- (Optional) Check the Create desktop shortcut option to launch a specific workspace using a shortcut.
Once you complete the steps, you launch a specific workspace with all the applications by clicking the "Launch" button from the "Workspace Editor" or using the desktop shortcut.
You can always repeat the steps outlined above to create as many workspaces as you need.
Although this should launch and rearrange a one-click action, I have noticed that some applications (such as File Explorer) may not arrange correctly.
Also, if you have an application running as an administrator (such as Windows Terminal), you'll need to launch PowerToys as an administrator for the feature to detect and record the application.
More resources
Explore more in-depth how-to guides, troubleshooting advice, and essential tips to get the most out of Windows 11 and 10. Start browsing here:
- Windows 11 on Windows Central — All you need to know
- Windows 10 on Windows Central — All you need to know

Follow Windows Central on Google News to keep our latest news, insights, and features at the top of your feeds!

Mauro Huculak has been a Windows How-To Expert contributor for WindowsCentral.com for nearly a decade and has over 22 years of combined experience in IT and technical writing. He holds various professional certifications from Microsoft, Cisco, VMware, and CompTIA and has been recognized as a Microsoft MVP for many years.
You must confirm your public display name before commenting
Please logout and then login again, you will then be prompted to enter your display name.
