


While the HTC Vive is arguably one of the best virtual reality experiences to date, anyone who owns one will admit they're not perfect. With the headset launching earlier this year alongside the SteamVR platform, there are still a number of small hitches that users face on a daily basis.
HTC Vive: The Ultimate Guide – tips, tricks, fixes and more!
While there are hundreds of known errors that can be encountered, a number of them can be fixed with some relatively simple tweaks. We've brought together some of the most common issues that can affect today's HTC Vive users and the fixes to complement them.

- My HTC Vive headset isn't detected or is unresponsive
- My HTC Vive controllers aren't connecting
- My HTC Vive base stations aren't syncing
- I'm experiencing tracking issues with my HTC Vive
- I'm having issues with SteamVR
- Here's what all of the HTC Vive's LED states mean
- I can't hear any audio through my headphones
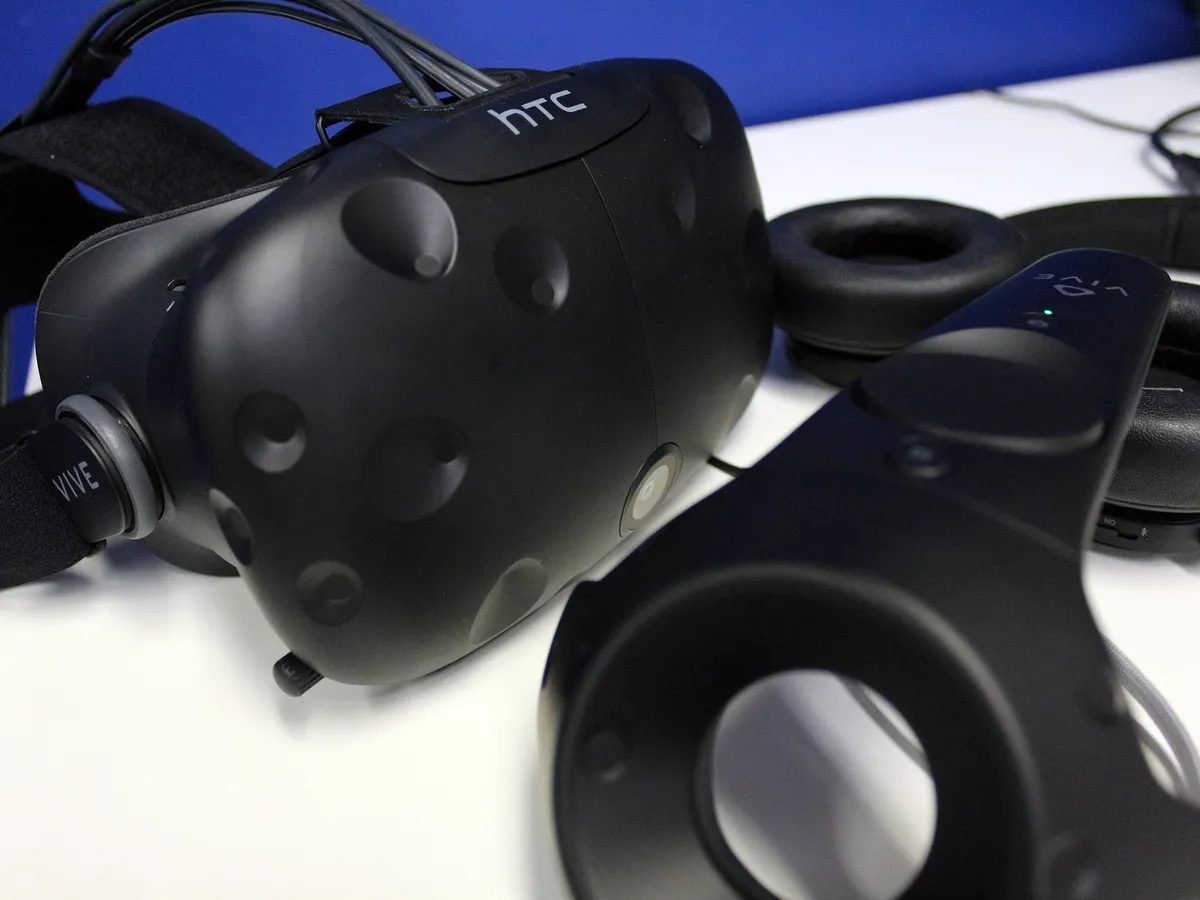
My HTC Vive headset isn't detected or is unresponsive
One of the HTC Vive's most common issues occurs when the headset fails to establish a connection with either your PC or base stations. This can often arise due to an issue with your cabling configuration or a headset software error. Here are the most common fixes for the issue.
Read more: How to fix an undetected or unresponsive HTC Vive headset

Due to the modular design of the HTC Vive, a majority of the headset's components can be easily disconnected and switched out. This is massively helpful if any of the hardware is damaged, but adds another level of complication to the system's assembly. If a reboot doesn't help, there may be an issue with your hardware setup.
- Check the connections between the HTC Vive and your PC. Look out for cables that might have become dislodged from the link box or the top of the headset.
- Make sure your cabling matches the configuration outlined in the setup manual. With multiple HDMI cables and USB connectors, make sure cables have been plugged into the correct side of the link box.
- Ensure power is being provided to your link box by your power outlet. Look out for a green status indicator on the left side of the headset, to indicate that it's receiving power and ready for use.
- Alternate between multiple USB ports on your PC, to make sure data is being correctly transferred between the devices. If you're using a USB 3.0/USB 3.1 port, HTC recommends switching to a USB 2.0 port due to some widespread chipset issues.

If your HTC Vive is still unresponsive, a reboot through SteamVR often kicks the headset back into action. This can also be used to reset the headset after freezing.
- Right-click on the image of the headset, on the SteamVR desktop application.
- Select Reboot Vive headset on the contextual menu that appears.
Restarting SteamVR, or your PC entirely is a great way to reset all of the HTC Vive's components to their start-up state.
- Open the drop down menu on the SteamVR desktop application.
- Select Quit.
- Open SteamVR.
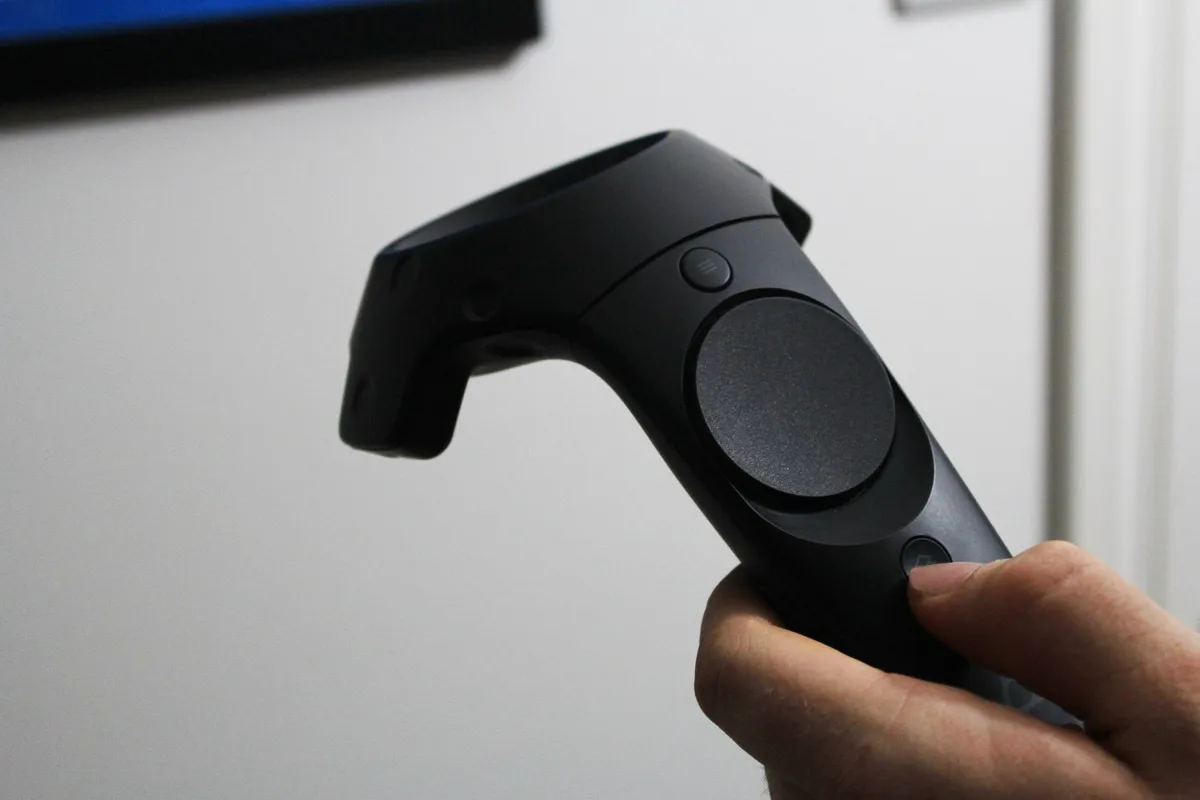
My HTC Vive controllers aren't connecting
The HTC Vive's controllers are paired directly to receivers in the headset itself. With the ability to connect more controllers than the original two that ship with the device, they're not permanently tied to a certain headset. As a result of this, the controllers are known to lose their connection with the headset and have to be re-paired to function correctly.
Read more: How to fix HTC Vive controllers that aren't connecting
When low on charge, the HTC Vive controllers will lose their ability to consistently connect to the headset. If your controller's LEDs fail to light up or are blinking red, it's likely they're in need of a recharge.
- Plug your HTC Vive controllers into the supplied wall adapters, via the micro-USB port on the bottom of the controller body.
- The LEDs on the controllers should turn orange, to indicate they're currently charging. After fully charging, the LED will turn white.
If your controller's LEDs are blue, this indicates they're attempting to pair with the headset. If they are stuck in this state, they need to re-paired using the simple steps below.
- Open the drop down menu on the SteamVR desktop application.
- Go to Device > Pair Controller from the menu that opens.
- Hold down the App and System buttons until the device chimes. The controller's LED will flash blue, to indicate it's currently in pairing mode.
While it's a rare occurrence, HTC Vive controllers have been known to become unresponsive and fail to connect to the headset. If you see a daunting red light on your controller, you've likely been hit with the issue. Luckily, HTC has provided a simple way to reset your controllers in the event of a meltdown.
- Hold down the Trigger, Menu Button, Trackpad click, and Grip buttons simultaneously on the unresponsive controller.
- While keeping the above buttons held down, connect the controller to a PC, via a micro USB cord.
- Wait for 5 seconds.
- Release the buttons.
- Unplug the micro USB cord.
My HTC Vive base stations aren't syncing
Setting up the HTC Vive's base stations can be a tedious process, to ensure they consistently communicate. Here are some common fixes to sync issues with the HTC Vive.
Read more: How to fix sync issues with the HTC Vive base stations

Before diving deeper into base station issues, first ensure they've been correctly installed. According to HTC, the following guidelines should be applied to provide the best tracking.
- Both base stations should be positioned above head height (ideally above 6.5 feet).
- The two stations should be no further than 16 feet apart.
- Base stations should be angled between 30 degrees and 45 degrees downward.
The HTC Vive base stations operate on various channels, which the hardware uses to determine the sync method. Each base station's channel can be changed by using a button on the back of the device.
- If using wireless optical sync between the two stations, one should be on channel B and the other on channel C.
- If using the sync cable between the two stations, one should be set to channel A, and the other to channel B.
Each base station also contains a spinning motor, which is used to emit infra-red light. This usually isn't noticeable but can cause a base station to vibrate if not securely mounted. If the base station is unable to stabilize, the station's LED will stay blue.
The best way to fix this is by securely mounting your base stations to the wall, using the mounting kits provided in the box by HTC. If you're not fond of drilling holes in your wall, however, we've prepared a guide to help you find the equipment you need.
I'm experiencing tracking issues with my HTC Vive
If you've correctly set up your base stations using the guidelines above, it's still possible to experience tracking issues. Between your surrounding environment and overlooked hardware hitches, the base stations still have their inconsistencies. Here's how to get the best tracking results out of your HTC Vive.
Read more: How to solve tracking issues with the HTC Vive

- Ensure that both base stations are able to consistently see one another. Even though the stations may be tracking, objects such as ceiling fans may obstruct the view between the two.
- Keep the HTC Vive headset and controllers in constant view of the base stations. This rarely needs attention, but can cause tracking issues if obstructed by objects in the room.
- Using the Room Setup tool, recalibrate the room-scale mapping to only encompass areas visible to the base stations.
- The HTC Vive's camera has also been known to cause issues with the headset's tracking. Due to this, the camera is disabled by default and has to be manually enabled from within SteamVR. For more information on camera optimization, make sure to take a look at our HTC Vive camera guide.
I'm having issues with SteamVR
SteamVR, the software which accompanies the HTC Vive out of the box, can also experience its fair share of issues. Between the HTC Vive hardware and the SteamVR platform itself, miscellaneous errors can be hard to track down. To quickly define a problem with SteamVR, we recommend taking a look at our list of SteamVR error code definitions.
Read more: Here's a breakdown of common SteamVR error codes

If the SteamVR application won't start at all, then you'll be looking at a deeper issue with some more complex fixes. While issues can be caused by simple software conflicts or privilege issues, a complete re-installation of SteamVR may be required. We've taken a deeper dive into SteamVR start-up issues and the most common fixes to these problems.
Read more: How to fix startup issues with SteamVR
Here's what all of the HTC Vive's LED states mean
With all of the HTC Vive's main components bearing LEDs, they can become a crucial part of any troubleshooting process. Here's a breakdown of every LED state across the core HTC Vive devices.
Read more: Here's what all of the HTC Vive's LED states mean

Each of the HTC Vive's controllers is kitted out with a LED indicator, which is located below the home button. These indicators help massively when diagnosing connectivity and pairing issues.
- Green: Your HTC Vive controller is ready for use.
- Blue: Your HTC Vive controller is currently in pairing mode and searching for a headset.
- Blinking blue: This indicates the controller is in 'Pairing Mode'. This is used to pair to a headset and can be activated by pressing the 'App' and 'System' buttons simultaneously.
- Blinking red: This state indicates the controller has a low battery.
- Orange: This color is only shown while charging the controllers. After fully charging, the controller LED will change to white.
- Off: The controller LED will be off when your controller isn't powered on.
The left-hand side of the HTC Vive headset also bears a LED to indicate its current state. This can be a quick way to diagnose a problem or find a fix to a more complex issue.
- Green: Your HTC Vive is ready for use.
- Dim Green: Your HTC Vive is ready for use, but your headset has timed out into standby mode. To wake up your headset, move your headset within view of the base stations or start a VR application.
- Red/Blinking Red: This state is entered due to a physical hardware error or driver error.
- Off: The LED for your HTC Vive will be off when no power is being supplied to the headset.
If your HTC Vive's base stations are failing to track your accessories, try to identify the state of your base stations. Each base station has a LED at the top of the glass front panel.
- Green: Your HTC Vive base stations are synced and ready for use.
- Dim Green: This indicates your base station has gone into standby mode after a period of inactivity. To force the base station out of standby mode, unplug the power source and reconnect.
- Blue: A blue LED indicates that the base station is vibrating and stabilizing. When stuck this state, make sure to check your base stations are securely fixed in place.
- Purple: This state is entered when the two base stations are unable to see one another consistently. Check the room for obstructions or moving objects (such as ceiling fans).
- Off: The base station LEDs turn off when no power is supplied. f stuck in this state, check all cabling between your base stations and the power outlet.
I can't hear any audio through my headphones
As an external device with its own dedicated audio output, the HTC Vive can spark its own audio issues. Thankfully a majority of audio technicalities are caused by audio preferences within Windows. Sometimes the HTC Vive won't be automatically selected as your default audio device, which prevents audio from playing through the 3.5mm jack. Here's how to set the HTC Vive as your default audio device in Windows:
Read more: How to fix audio issues with the HTC Vive
- Open the Windows Sound application
- Find a device named HTC-VIVE-X, where X is a number.
- Right-click on the device and select Set as Default Device.
If you still experience issues after the steps above, make sure to check the wiring that supplies the audio. At times, this has been known to disconnect from the headset or the link box. Here's how to make sure your hardware is correctly configured:
- Slide the compartment open that houses all the wires connected to the HTC Vive. This can be found at the top of the headset where the HTC logo is located.
- Make sure the 3.5mm audio cable is securely connected at the top of the headset.
- Check all the cables connected to the link box for any loose connections.
**Updated February 2018: Refreshed our troubleshooting guide with the latest HTC Vive issues and fixes.

