

For some reason, Microsoft doesn't seem to like plain old traditional "straight" quotes, or quotes without any curves or contours. Instead, it apparently prefers the more stylized, curved "smart" quotes.
The problem? Smart quotes don't seem all that intelligent when they mess up the formatting in certain files or on web pages. So it can be a good idea to change the default smart-quote setting in Microsoft Office apps to the straight versions. Thankfully, Microsoft makes that fairly simple in Word, Outlook and PowerPoint — at least once you learn the proper processes.
Note: These steps are specific to the apps in Microsoft Office 2016 for Windows.
- How to change smart or curly quotes to straight quotes in Microsoft Word
- How to change smart or curly quotes to straight quotes in Microsoft Outlook
- How to change smart or curly quotes to straight quotes in Microsoft PowerPoint
How to change smart or curly quotes to straight quotes in Microsoft Word
- Click the File tab in the top-left corner of the Word screen.
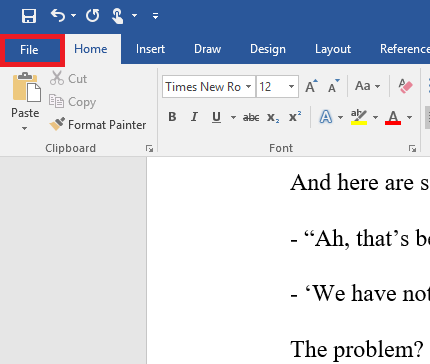
- Click Options at the very bottom of the vertical list of choices along the left side of the display.
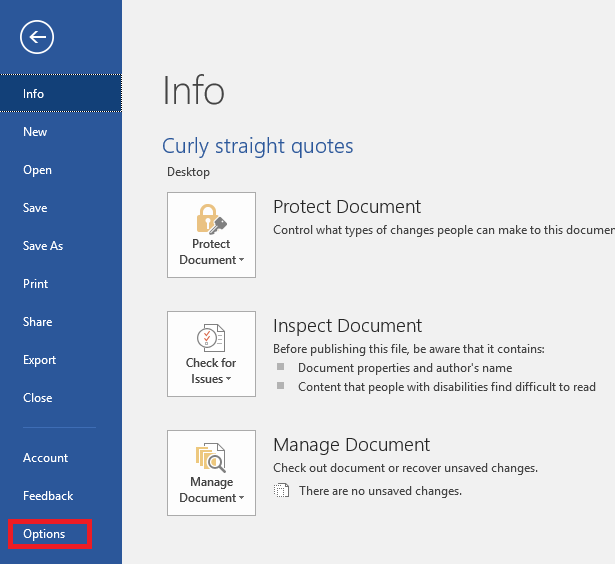
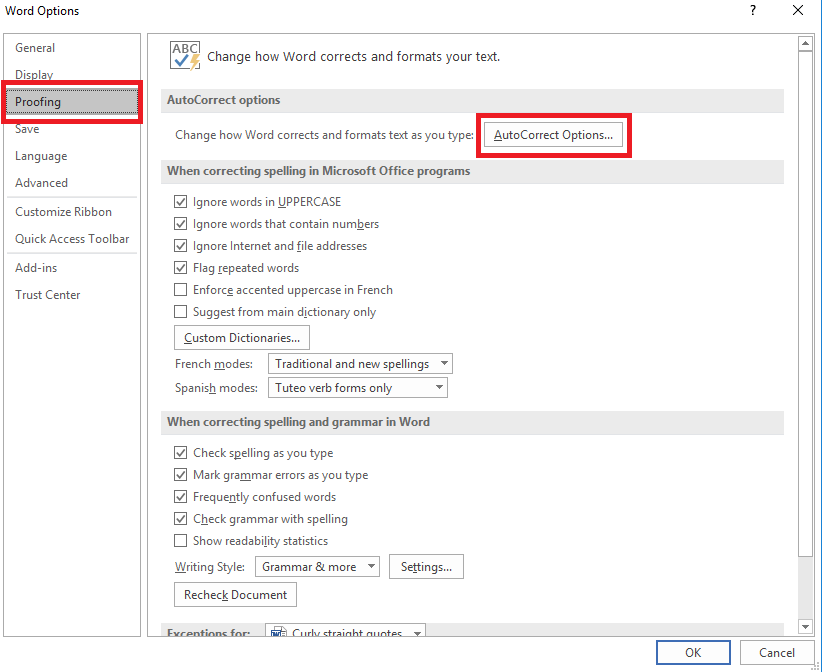
- In the Word Options box that appears, click the Proofing tab.
- Click the AutoCorrect Options box.
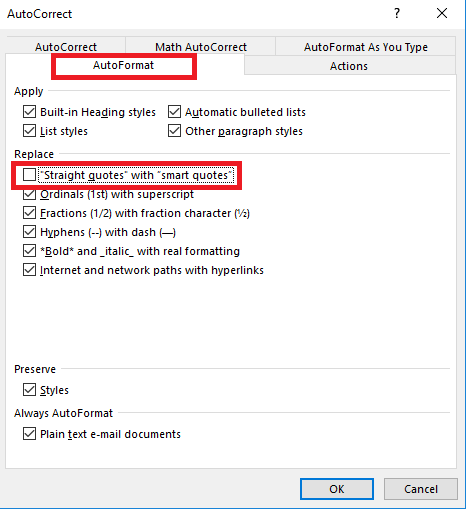
- Click the AutoFormat tab.
- Under the Replace section heading, uncheck the box next to "Straight quotes" with "smart quotes".
- Click the AutoFormat As You Type tab.
- Under the Replace as you type section, uncheck the box next to "Straight quotes" with "smart quotes".
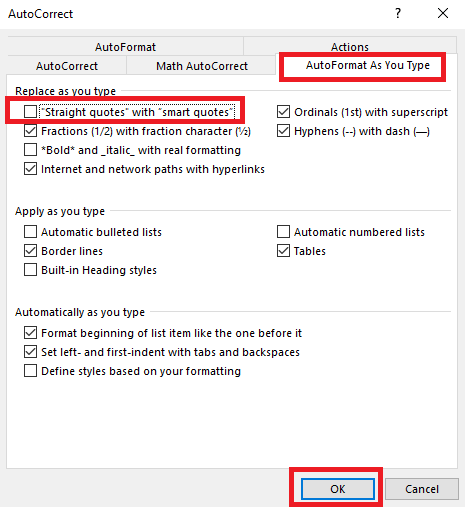
- Click OK.
- Click OK again on the Word Options box to save all changes
How to change smart or curly quotes to straight quotes in Microsoft Outlook
- Click the File tab in the top-left corner of the Outlook screen.
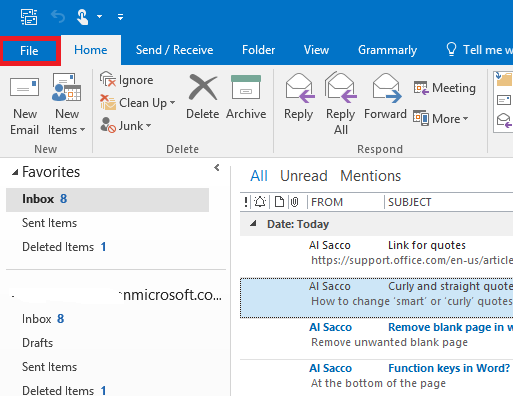
- Click Options at the bottom of the vertical list of choices along the left side of the display.
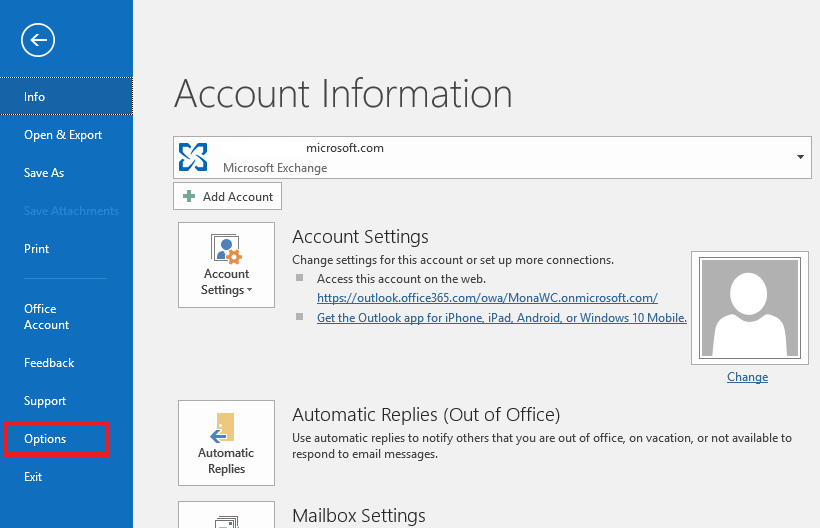
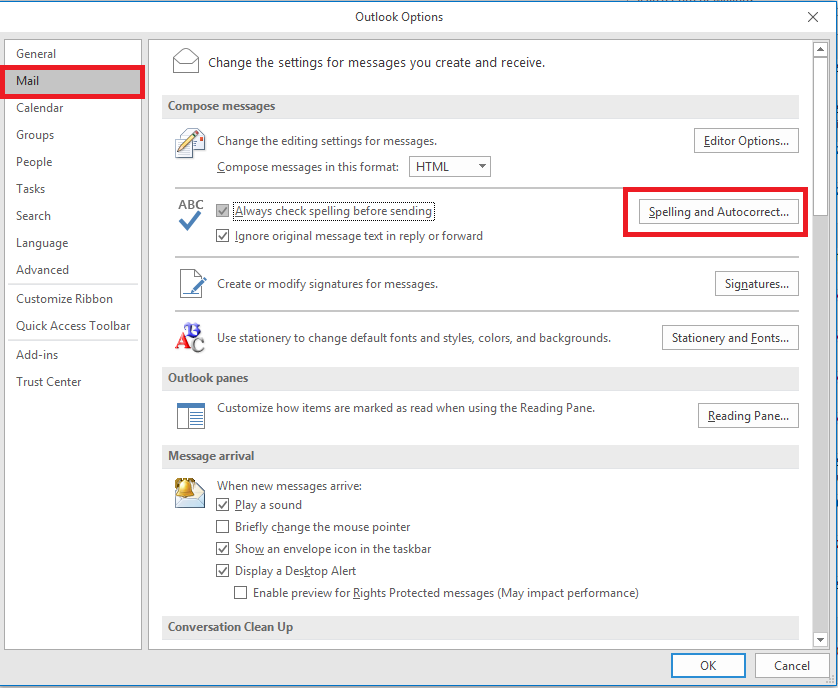
- In the Outlook Options box that appears, click the Mail tab.
- Click Spelling and AutoCorrect.
- In the Editor Options box, make sure the Proofing tab is selected (it is by default) and click AutoCorrect Options.
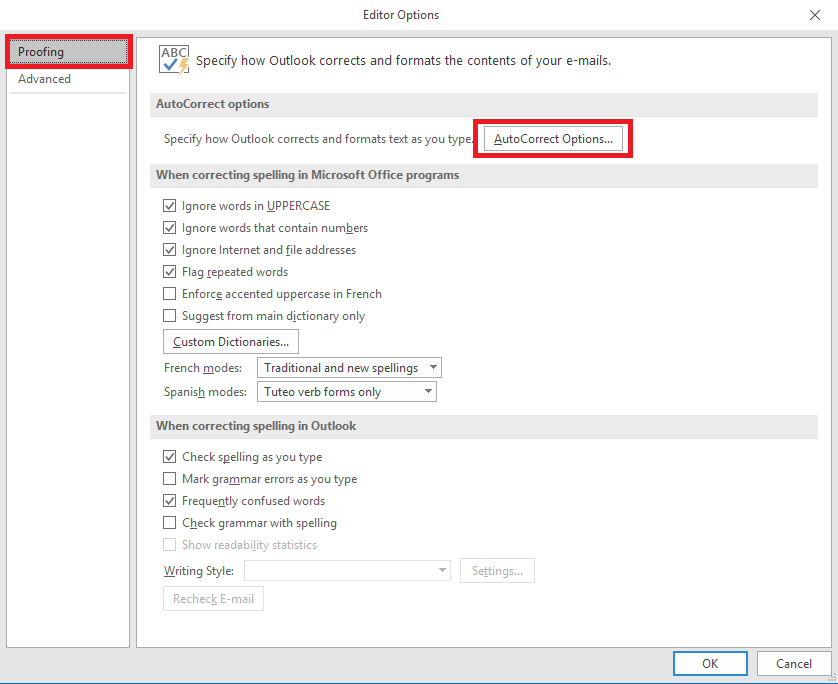
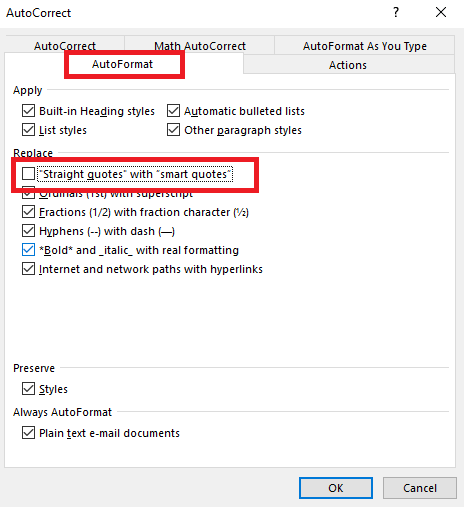
- Click the AutoFormat tab.
- Under the Replace heading, uncheck the box next to "Straight quotes" with "smart quotes."
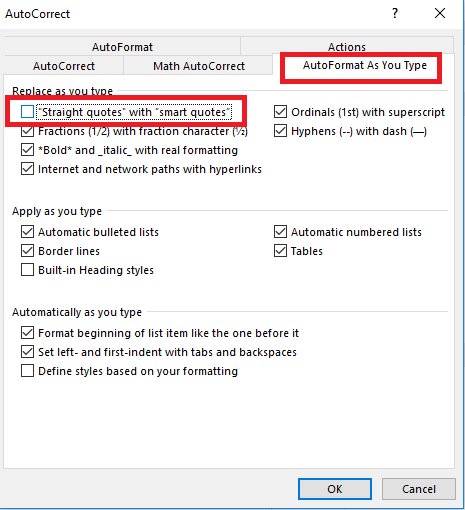
- Click the AutoFormat As You Type tab.
- Under the Replace as you type section, uncheck the box next to "Straight quotes" with "smart quotes."
- Click OK.
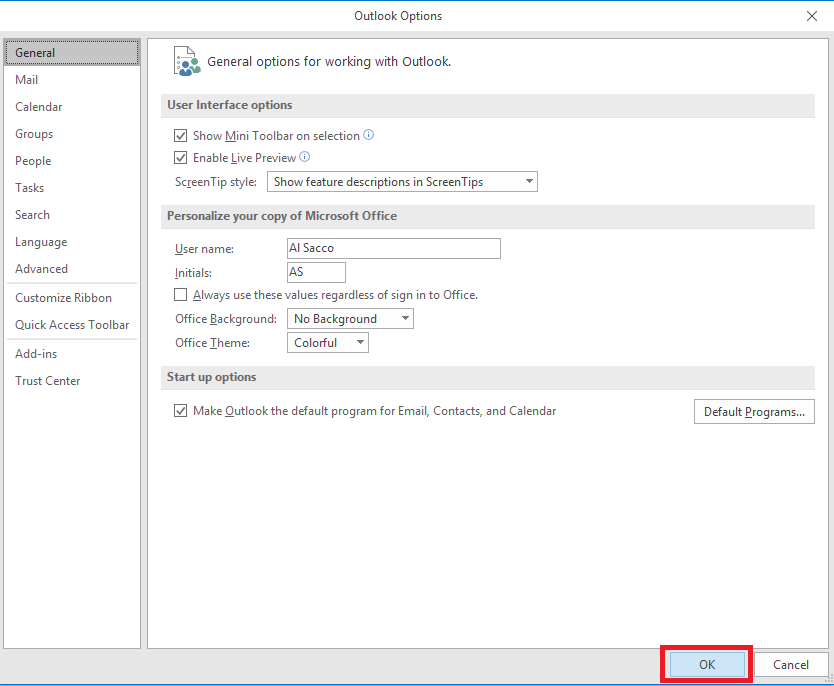
- Finally, click OK one more time on the Editor Options box to confirm your changes.
How to change smart or curly quotes to straight quotes in Microsoft PowerPoint
- Click the File tab in the top-left corner of the PowerPoint screen.
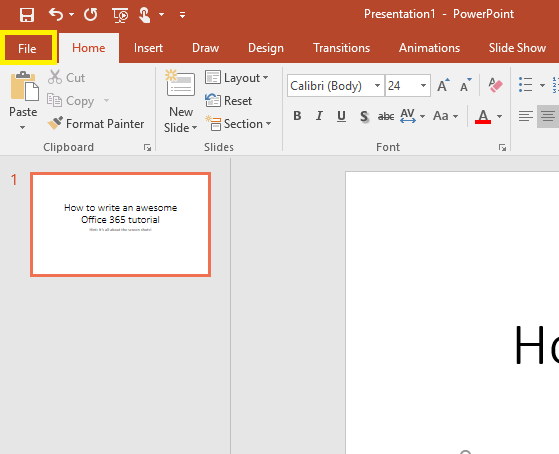
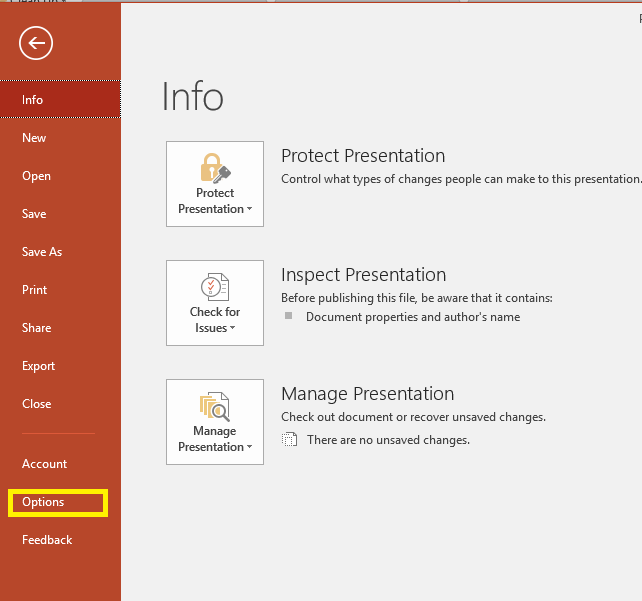
- Click Options at the bottom of the vertical list of choices along the left side of the display.
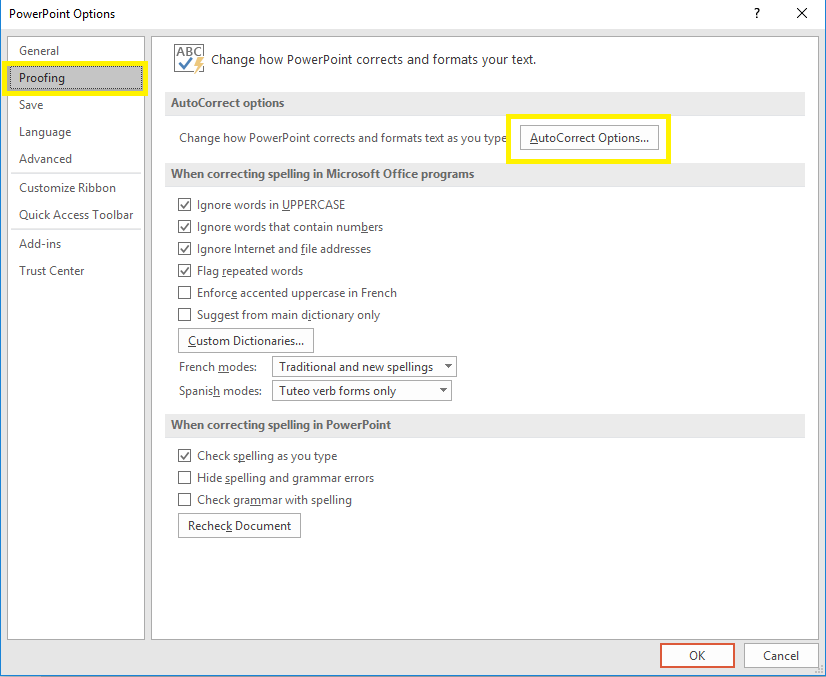
- In the PowerPoint Options box that appears, click the Proofing tab.
- Click AutoCorrect Options….
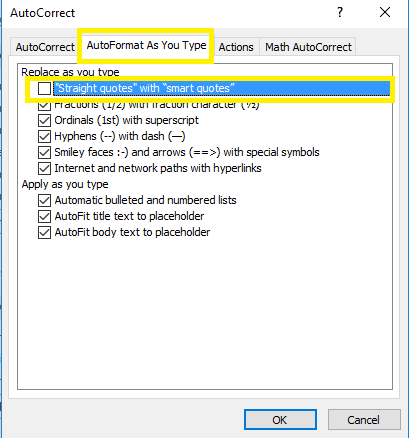
- Select the AutoFormat As You Type tab.
- Under the Replace as you type section, uncheck the box next to "Straight quotes" with "smart quotes".
- Click OK.
- Finally, click OK one more time on the PowerPoint Options box to confirm the changes.
If you ever want to re-enable smart quotes in the future, in Word, Outlook or PowerPoint, just repeat these steps and then re-check the appropriate boxes for "Straight quotes" with "smart quotes".
For more Office 365 help, how-tos and tutorials, visit our Office 101 page:
Microsoft Office 101: Help, how-tos and tutorials
All the latest news, reviews, and guides for Windows and Xbox diehards.

Al Sacco is the Former Content Director of Future PLC's Mobile Technology Vertical, which included AndroidCentral.com, iMore.com and WindowsCentral.com. He is a veteran reporter, writer, reviewer and editor who has professionally covered and evaluated IT and mobile technology, and countless associated gadgets and accessories, for more than a decade. You can keep up with Al on Twitter and Instagram.
