How to add another Sonos speaker using the Sonos Controller on Windows PC
Adding additional players to your Sonos system on Windows has never been easier!
All the latest news, reviews, and guides for Windows and Xbox diehards.
You are now subscribed
Your newsletter sign-up was successful
You've bought a shiny new Sonos player or SUB to add to your existing Sonos setup. How awesome for you! The process is pretty much the same as when you initially set it up, except that you don't have to go through setting up your music library again.
Here's how to connect additional players to your Sonos system:
How to add another Sonos speaker using the Sonos Controller on Windows PC
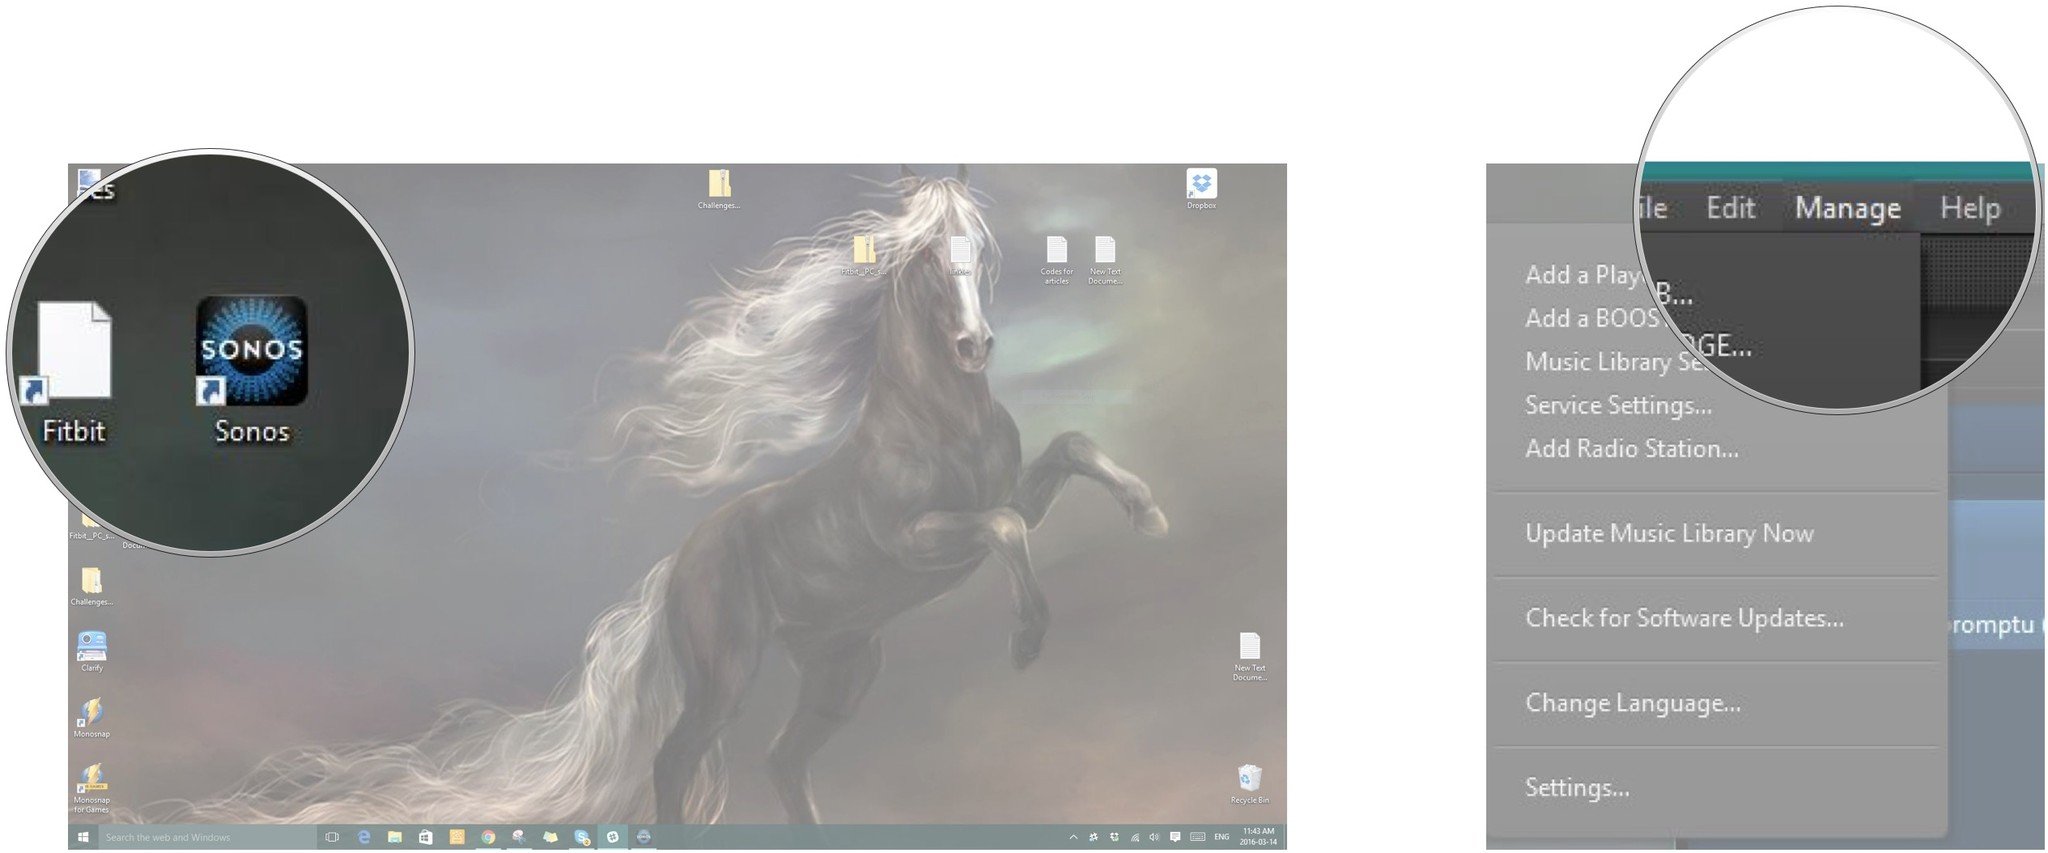
- Launch the Sonos app from your Home screen or the Start menu.
- Click Manage from the top menu bar.
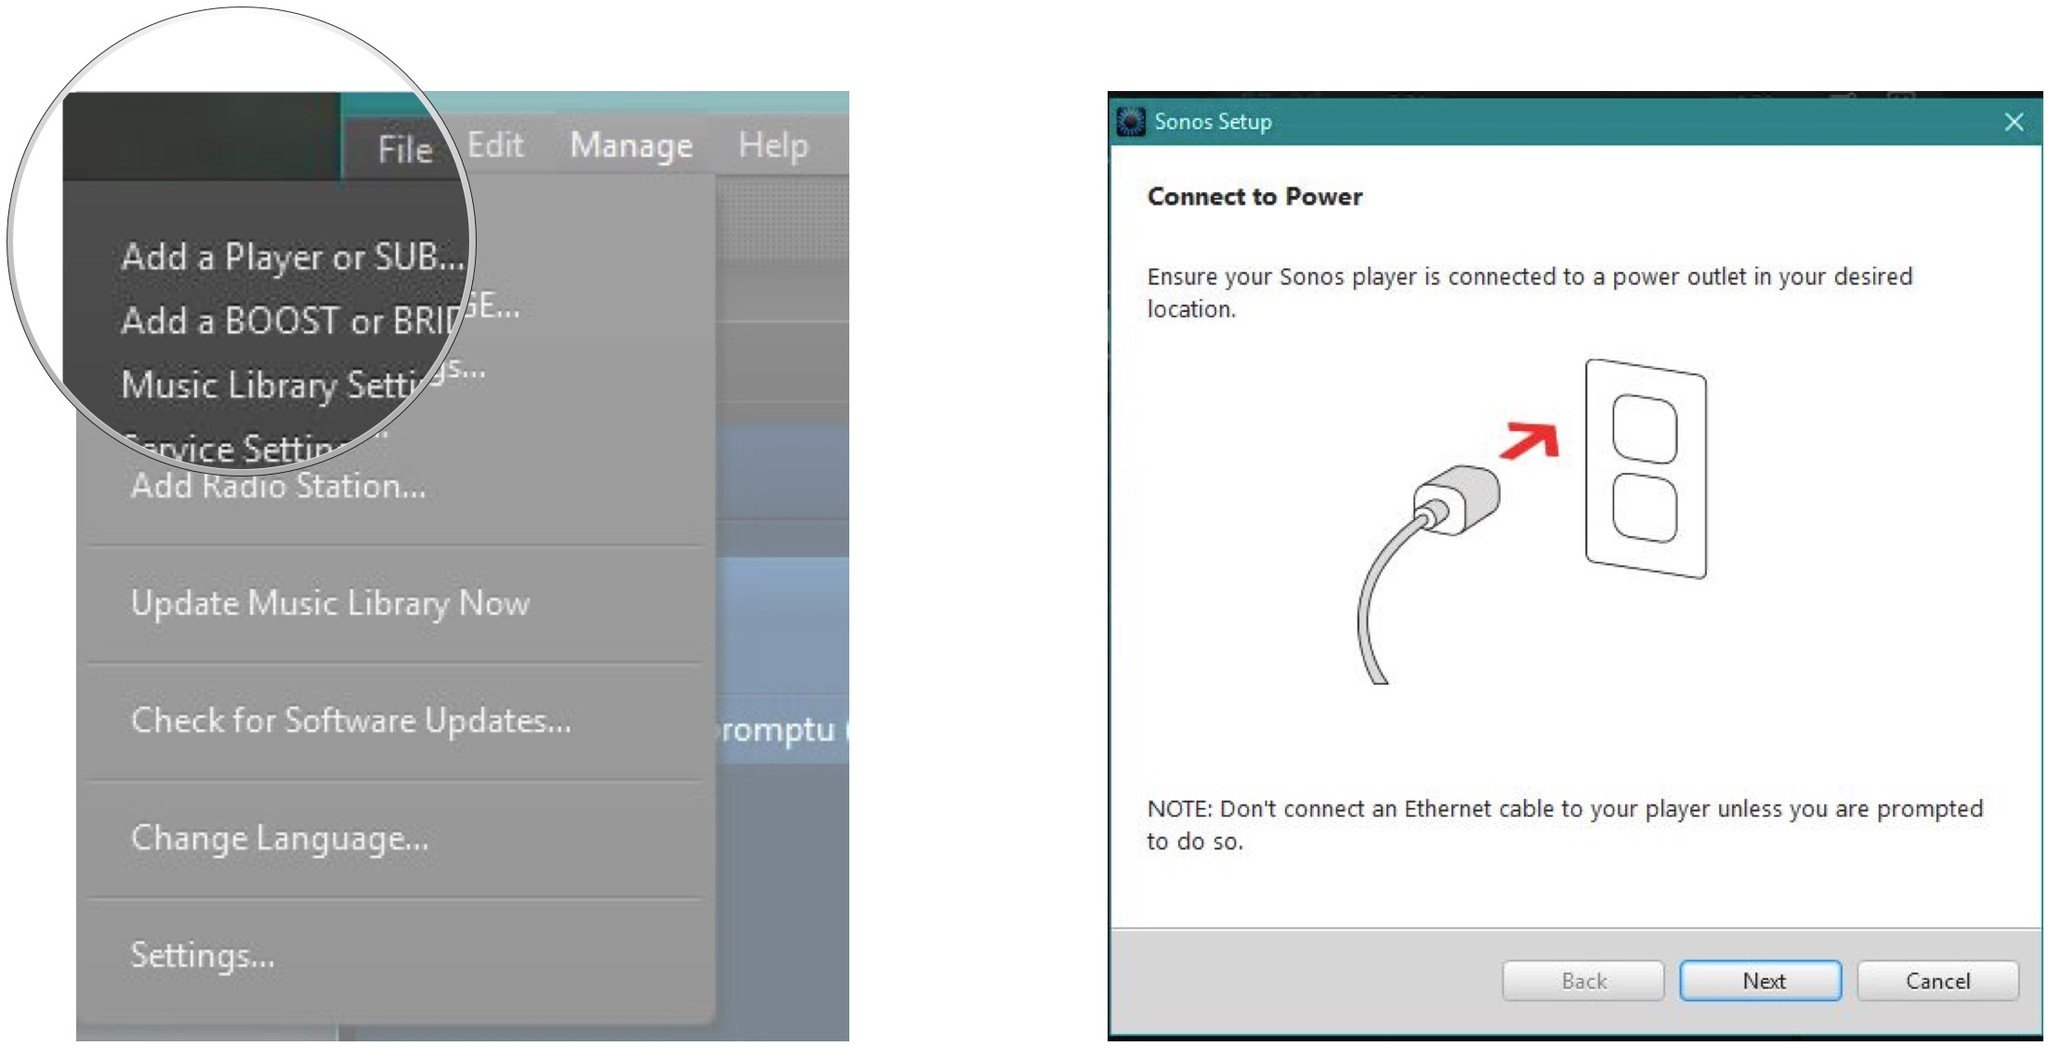
- Click Add a player or SUB….
- Follow the on-screen instructions through the setup process.
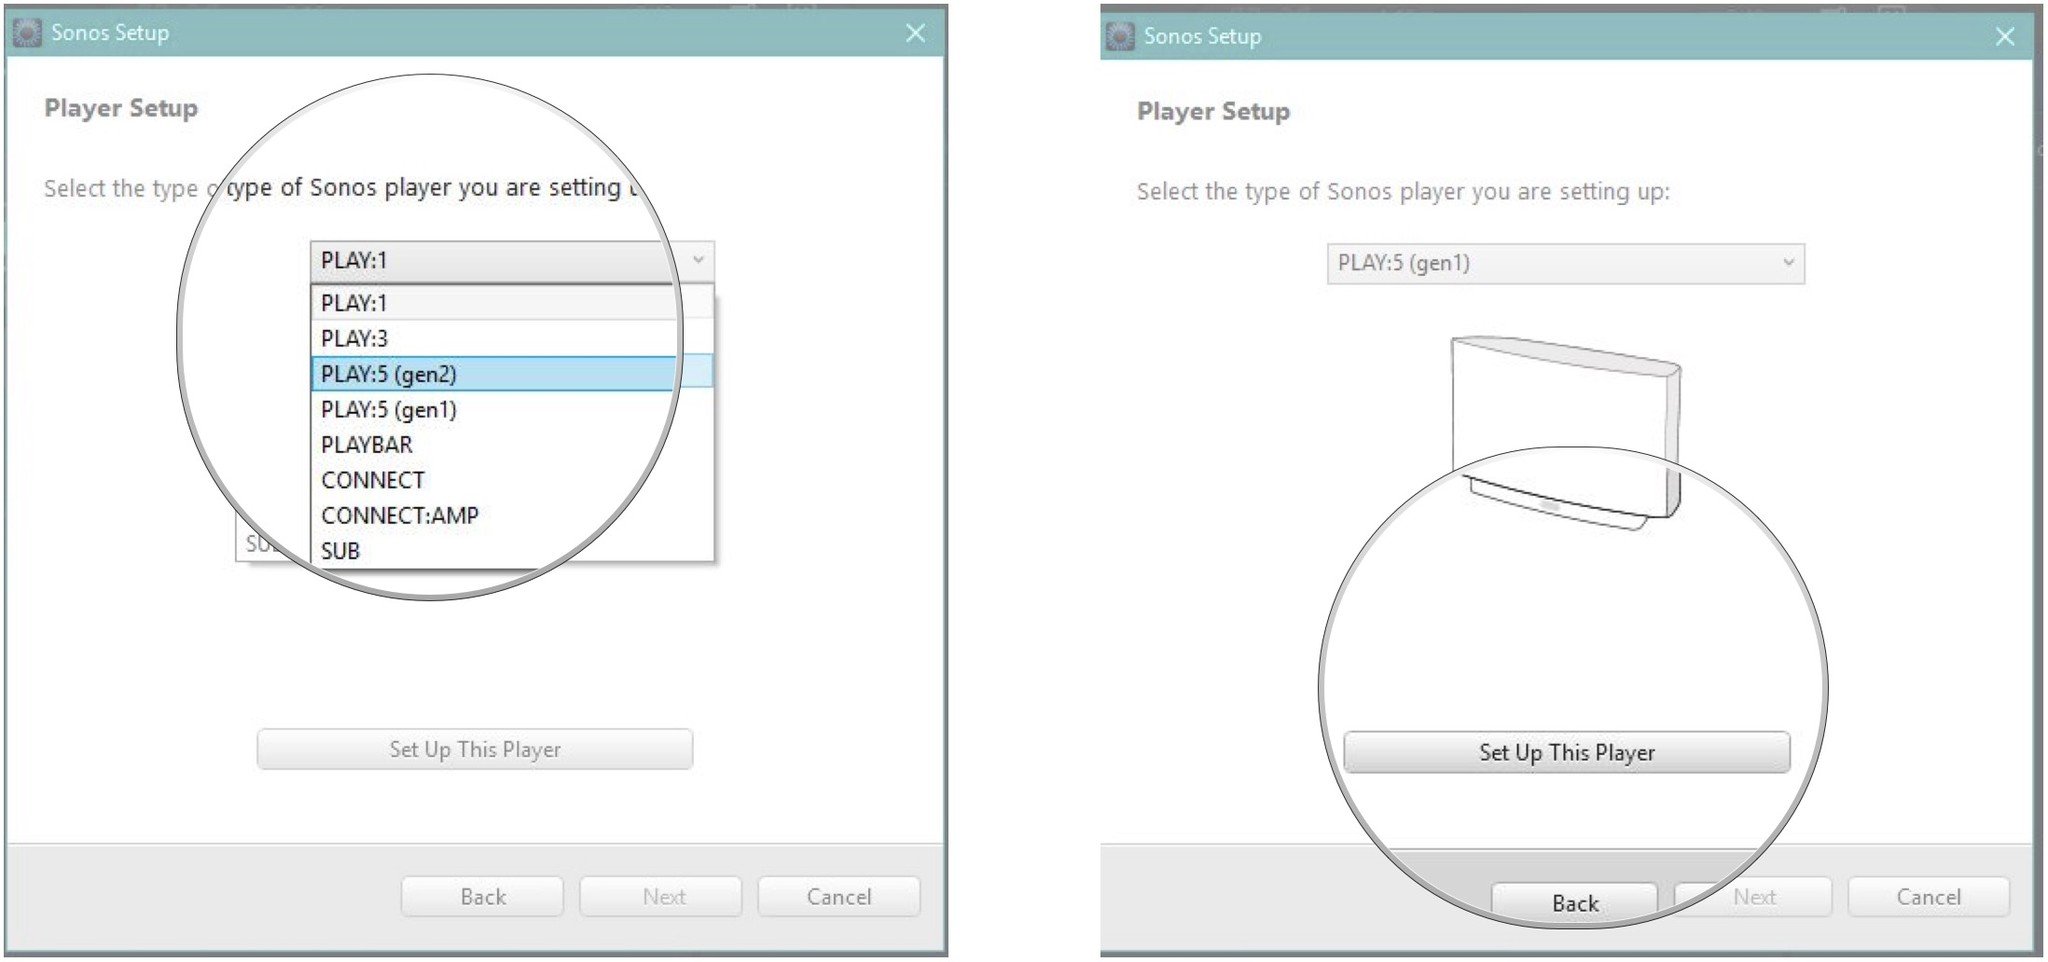
- Click on the model of player you're setting up from the drop-down list.
- Click the Set Up This Player button.
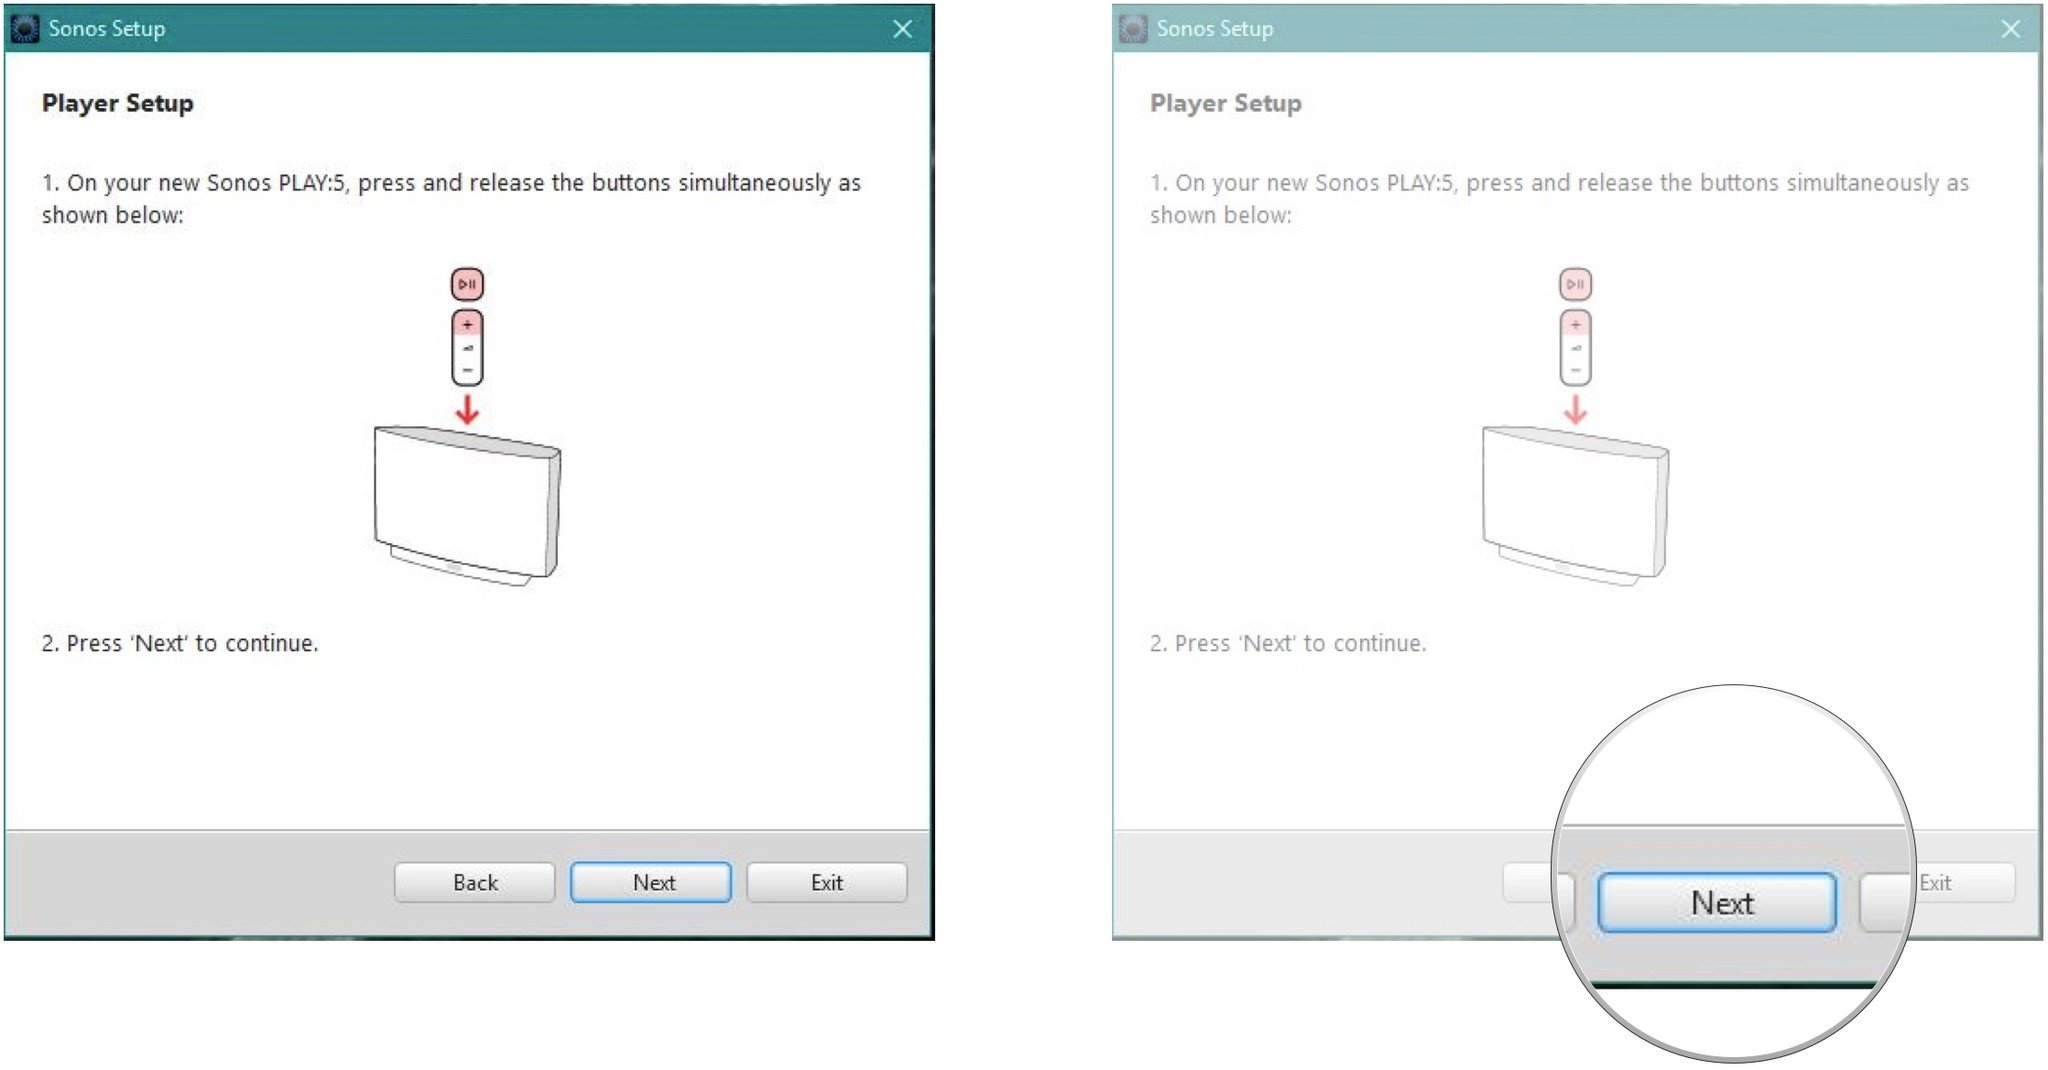
- Follow the on-screen instructions to complete the player setup.
- Click Next at the bottom of the dialog box to advance to the next part of setup.
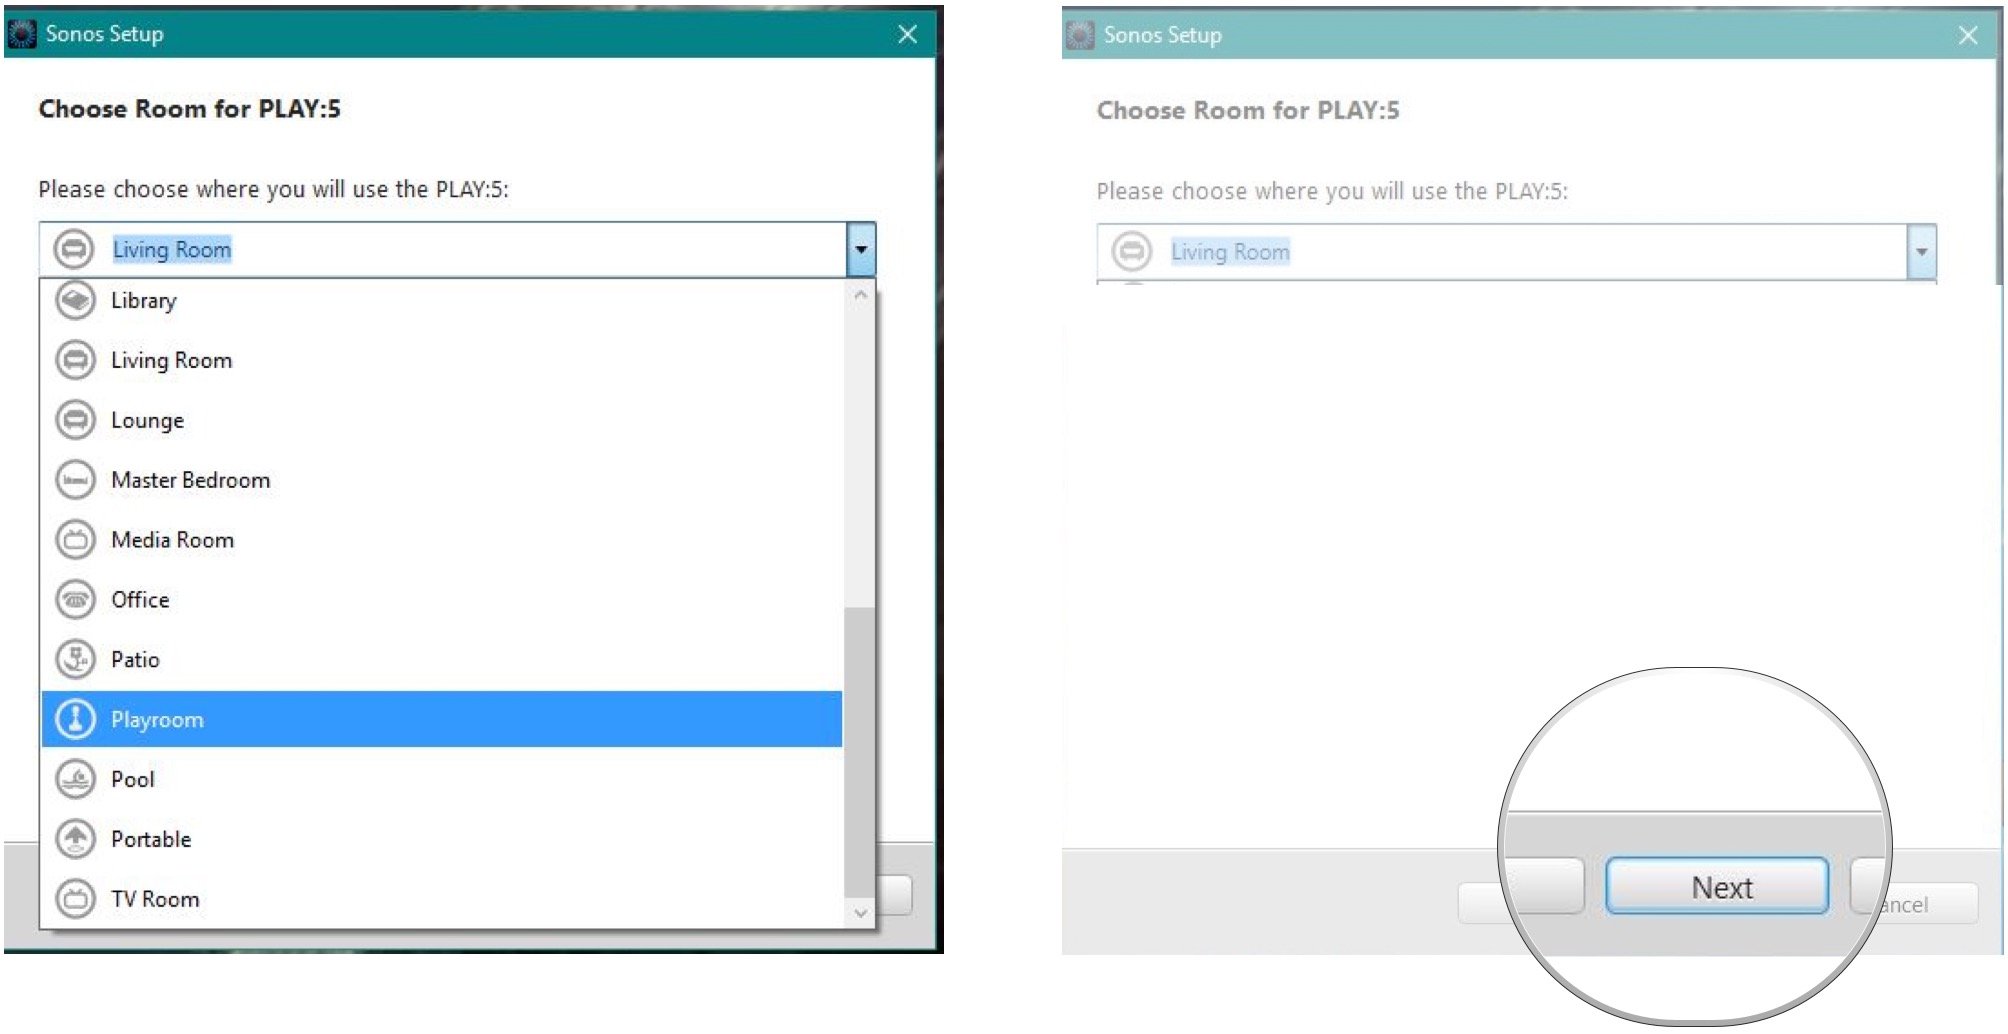
- Click on the room where your Sonos will live, from the drop-down menu.
- Click Next at the bottom of the room selection window.
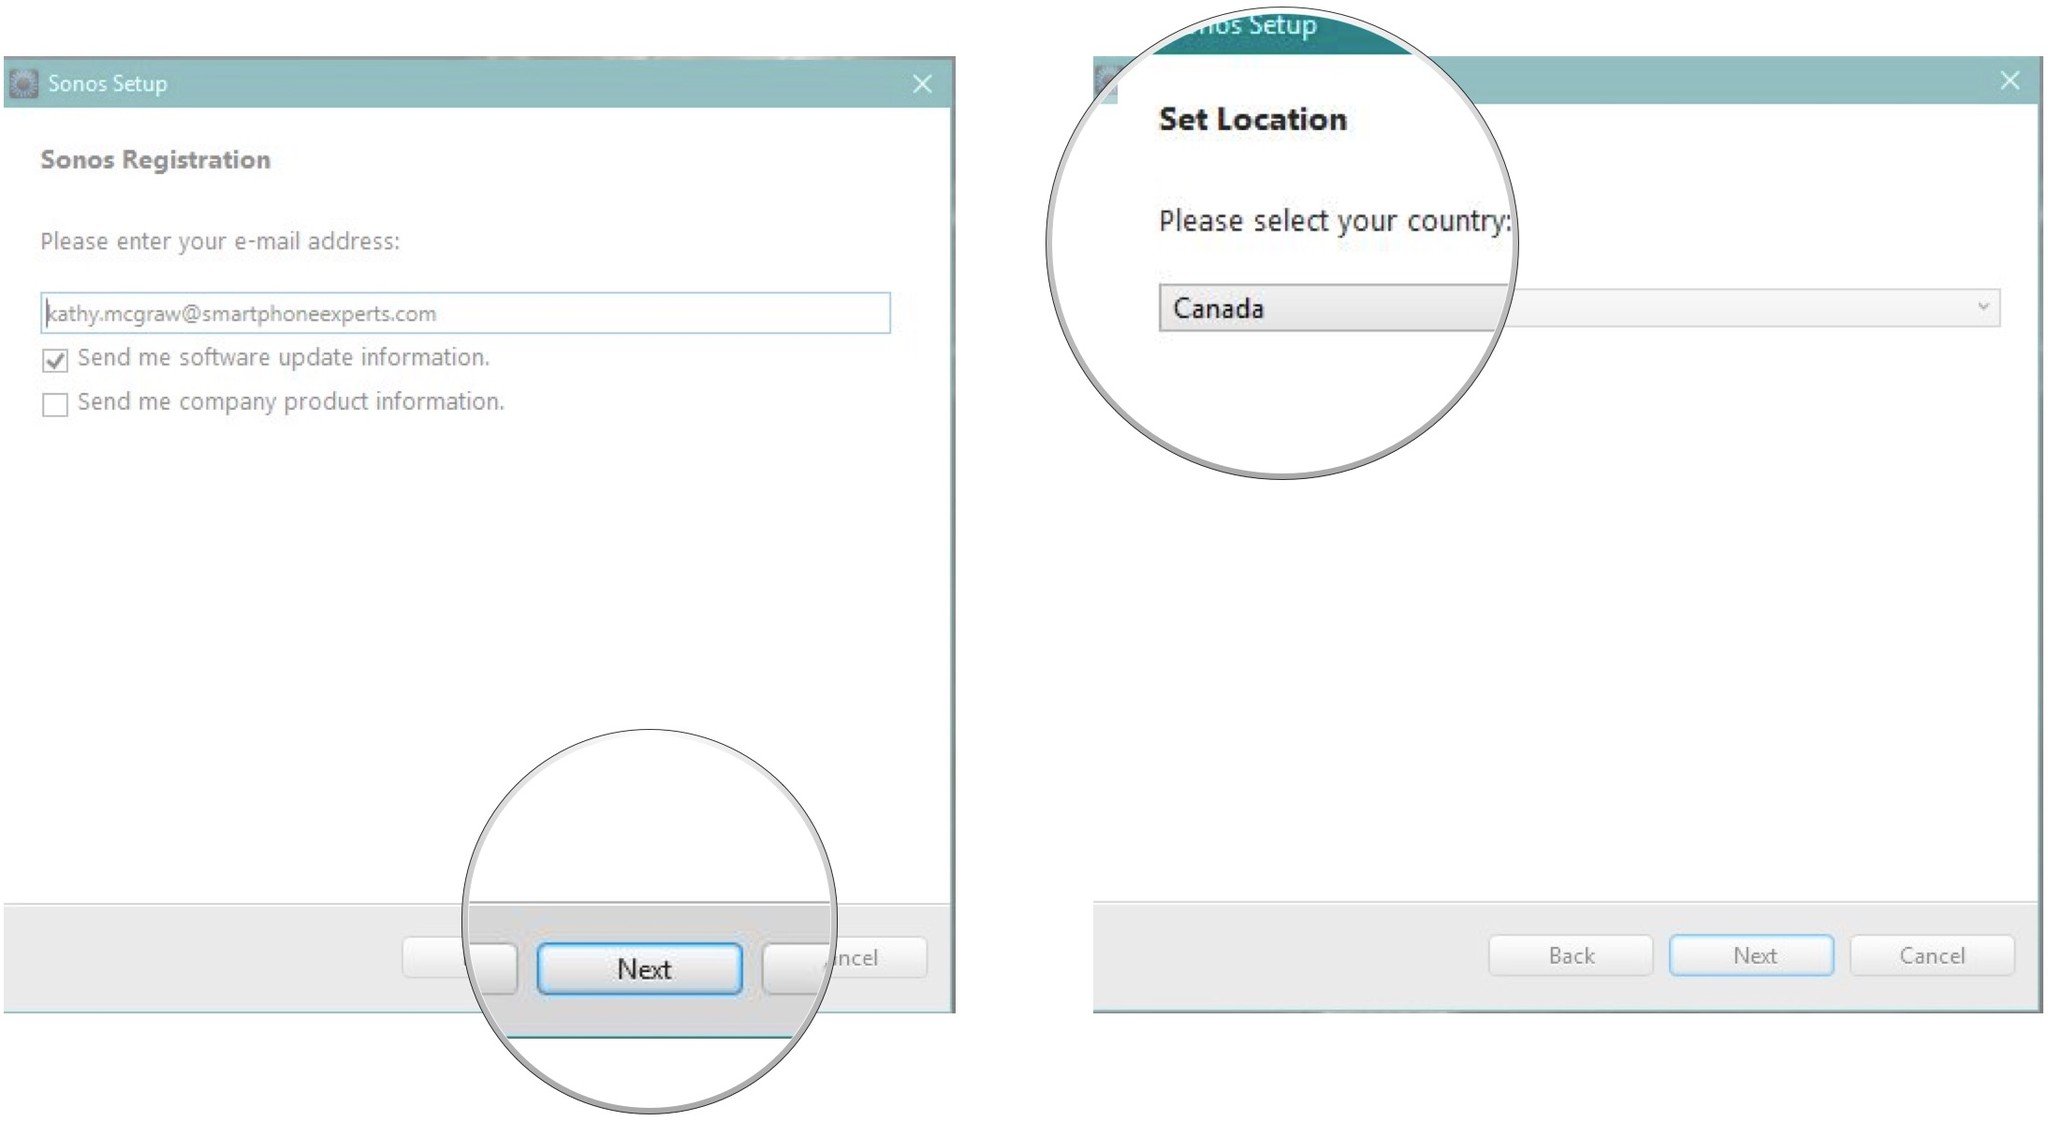
- Click Next on the Sonos Registration window.
- Type your email address in the email address box.
- Click Next.
- Click your country/region to select it from the drop-down menu.
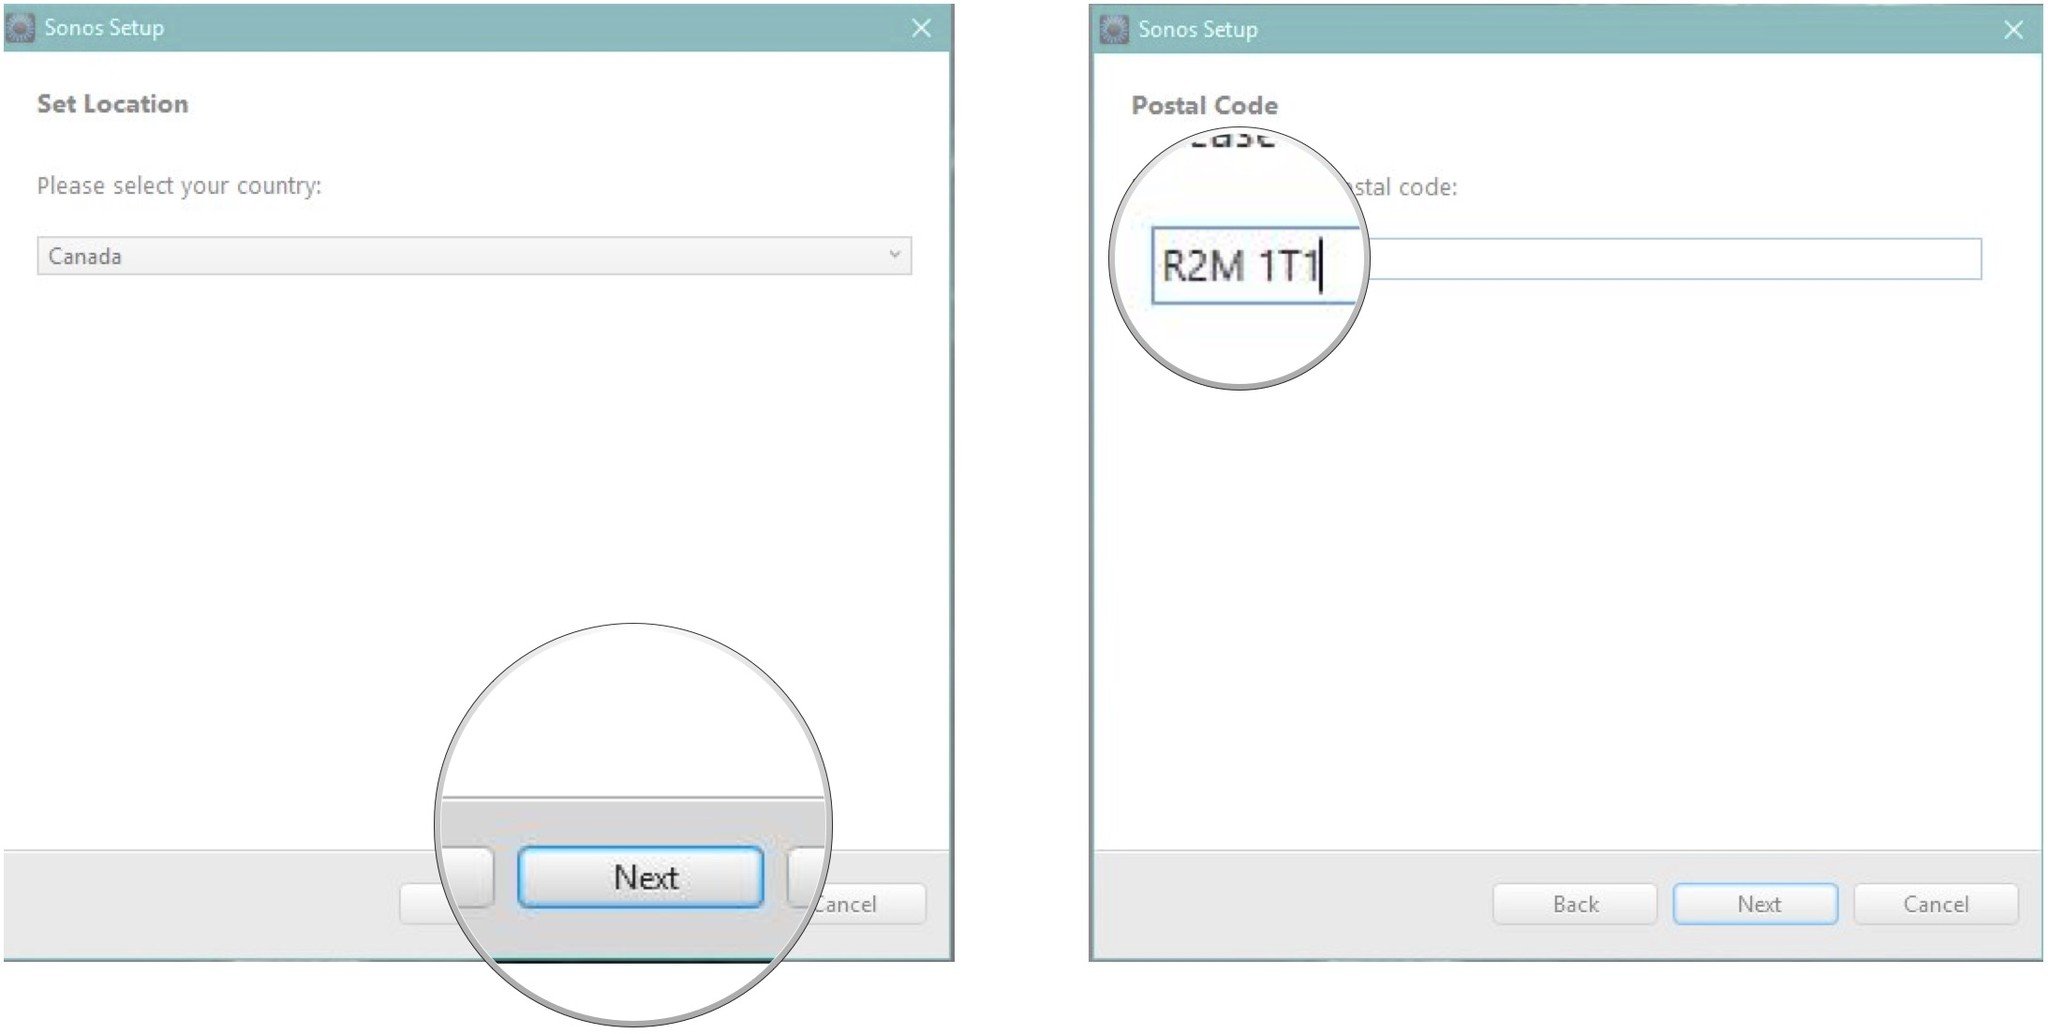
- Click Next.
- Type your Zip/Postal code in the box.
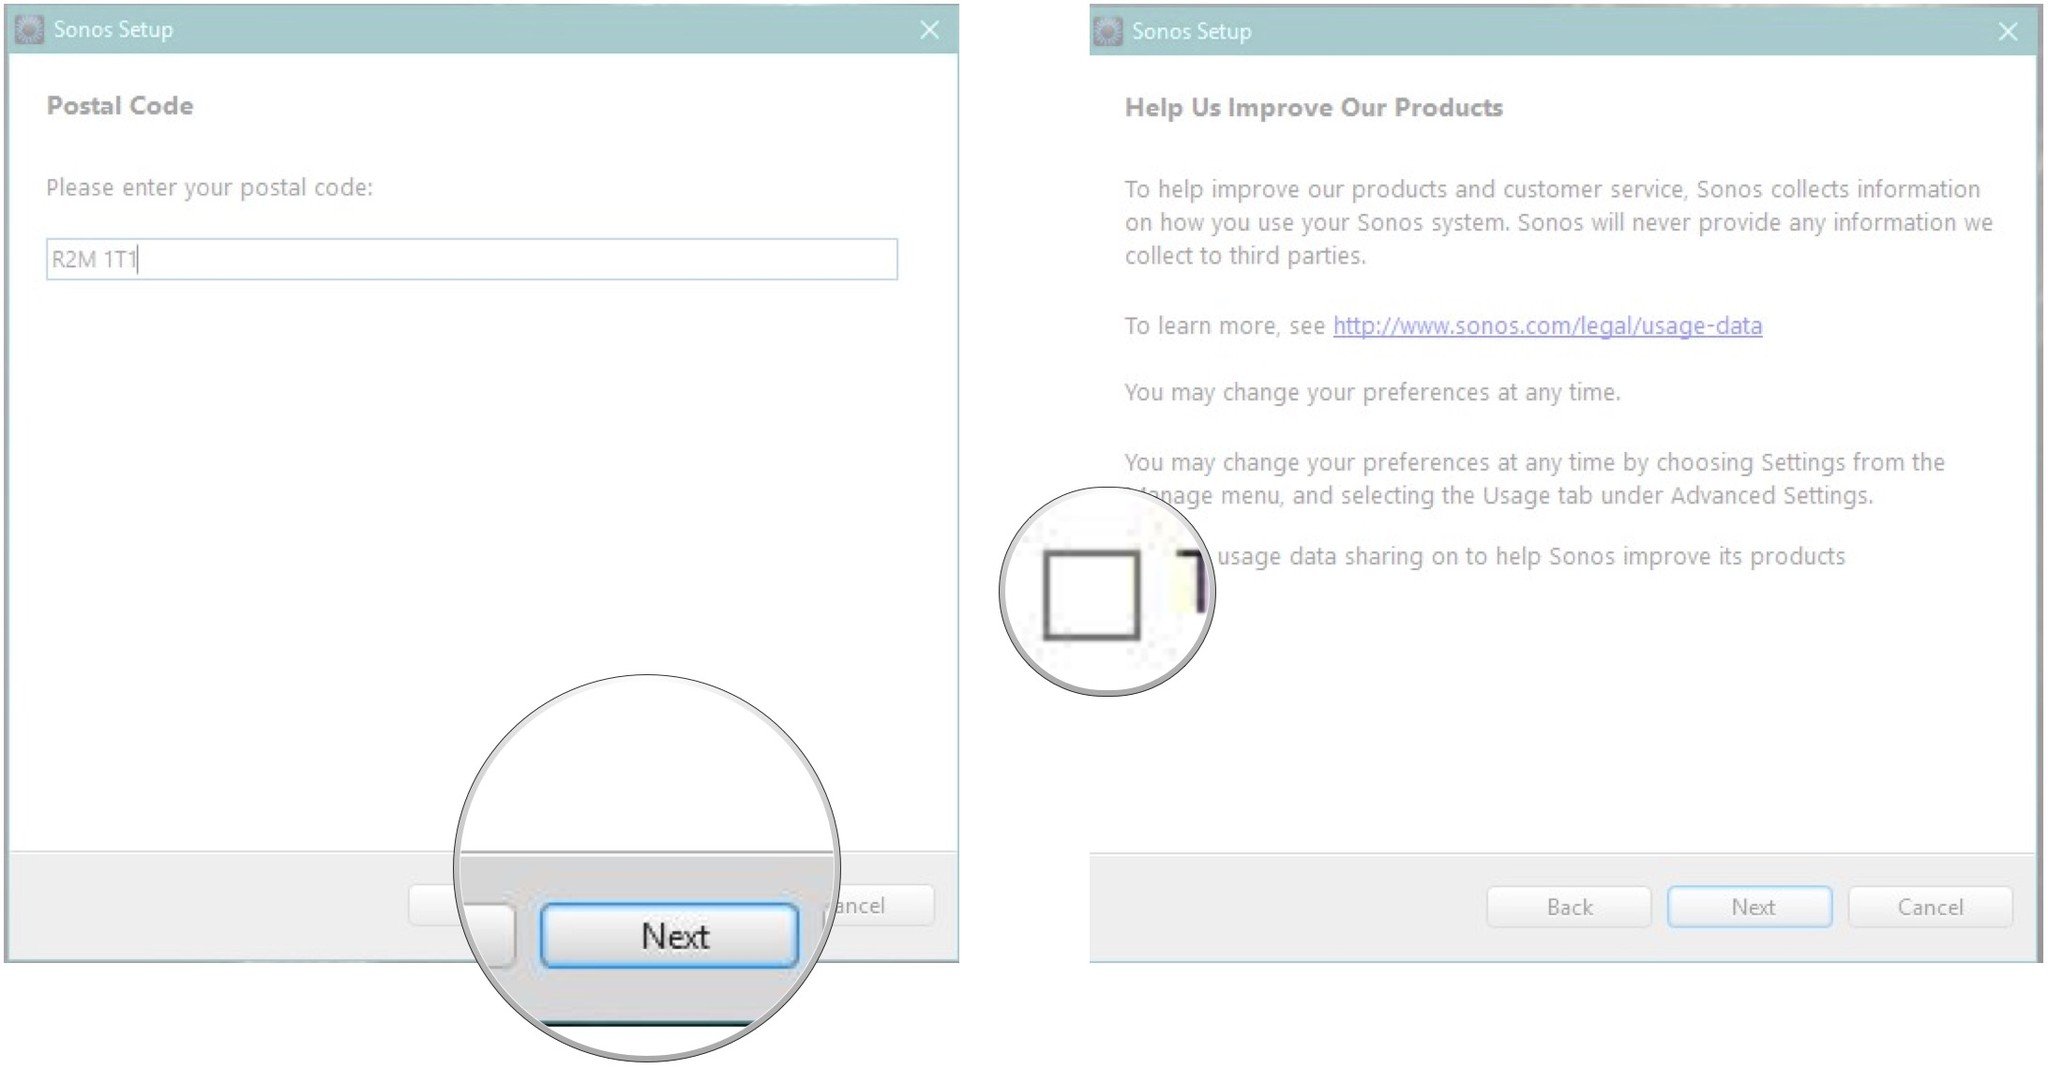
- Click Next.
- Click the checkbox if you want to share usage data with Sonos. Otherwise, leave it blank.
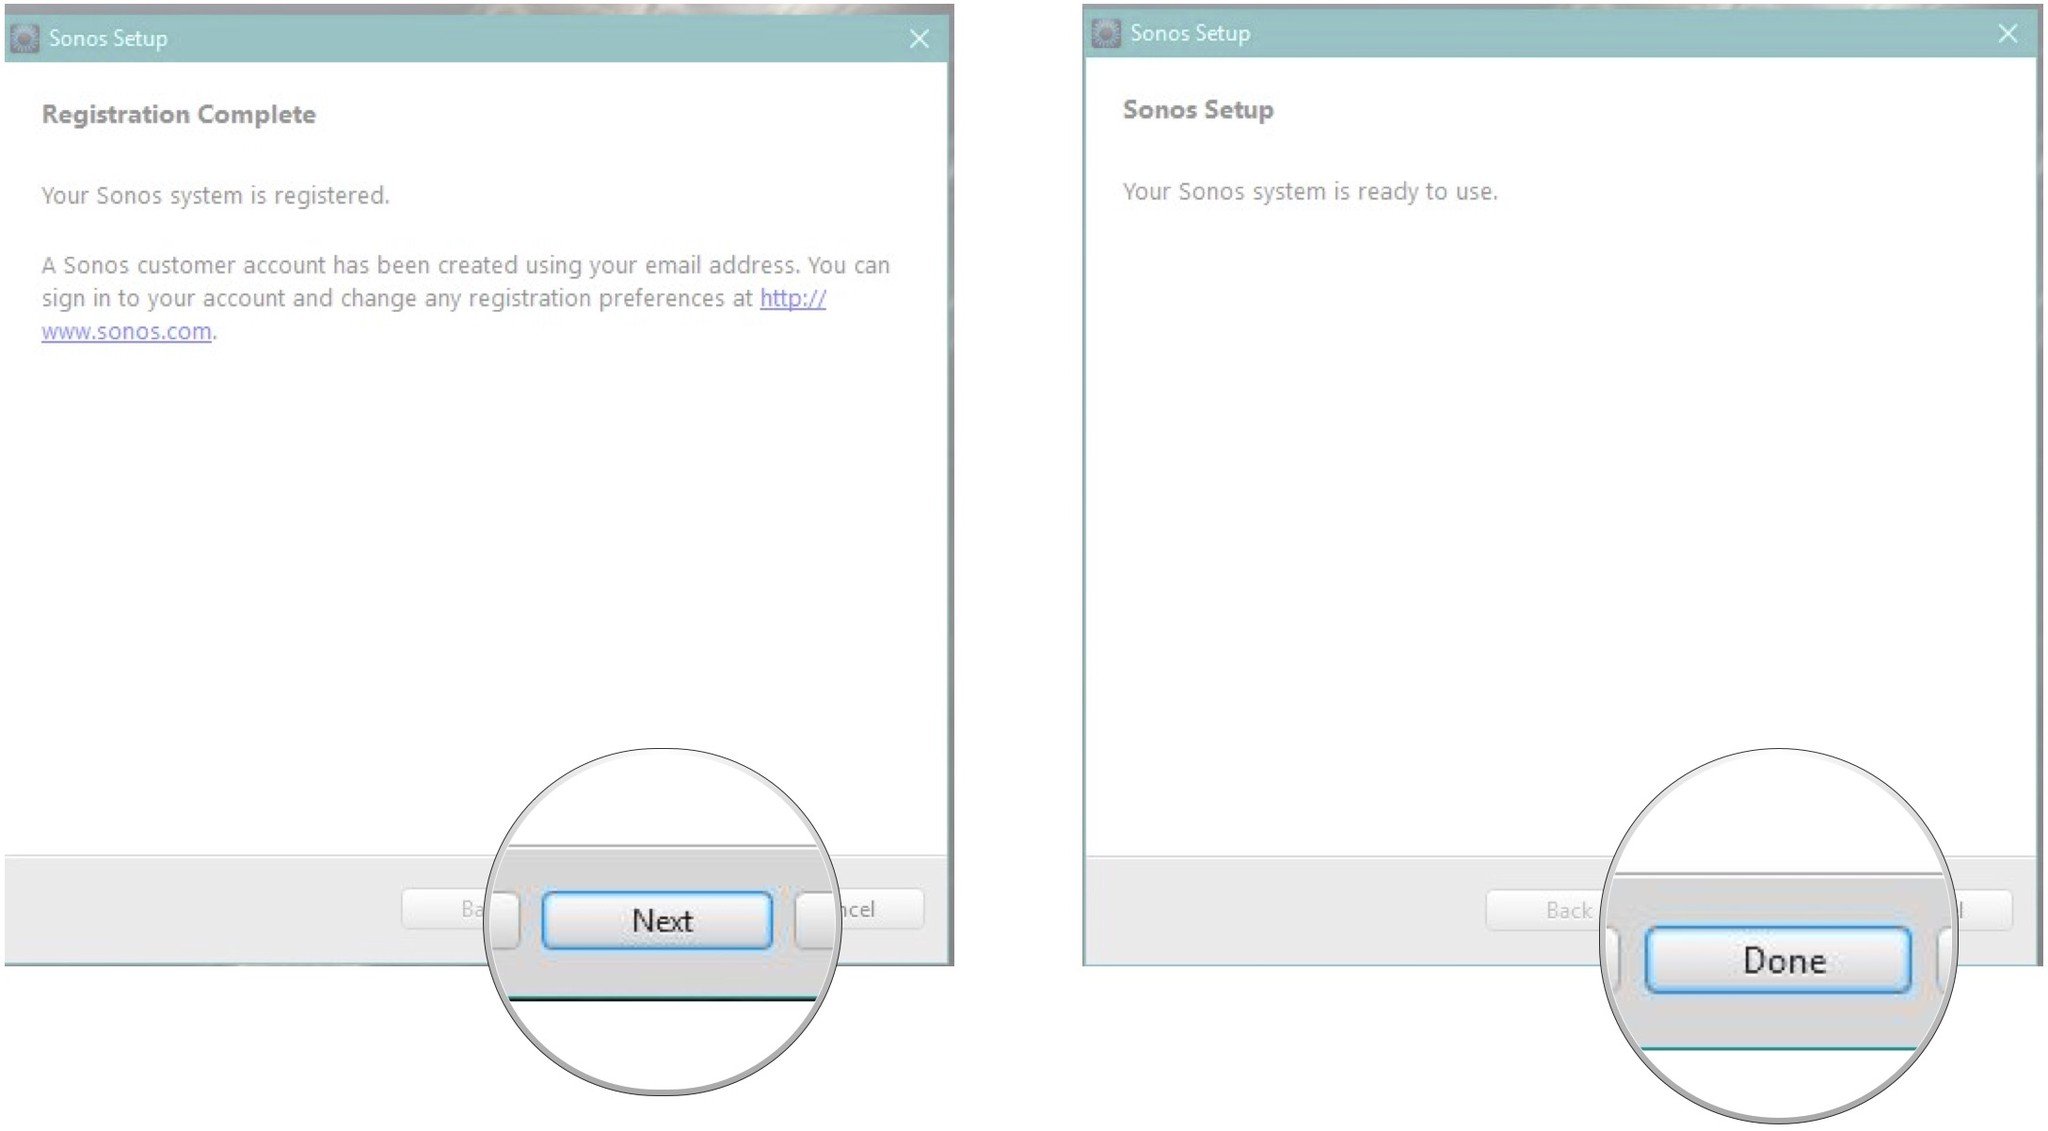
- Click Next to complete the registration process.
- Click Done to complete the setup process.
That's it! Your new Sonos player is ready for you to stream music through. Whether you placed it in the bathroom or in the bedroom, your Sonos player will fill the room with exquisite sound for your enjoyment!
All the latest news, reviews, and guides for Windows and Xbox diehards.

Kathy is a Former Contributor for Windows Central.
