How to restore TrustedInstaller as owner for system files on Windows 10
Did you change ownership of a system file? Use this guide to restore the original TrustedInstaller built-in user account as the rightful owner of the file on Windows 10.
All the latest news, reviews, and guides for Windows and Xbox diehards.
You are now subscribed
Your newsletter sign-up was successful
If you're like most tech-savvy users, you don't settle for default configurations. You're always looking for ways to customize your system to improve productivity or to make your PC more unique.
Sometimes, to customize the operating system, in this case Windows 10, you need to modify some system files. When you need to do this, it often requires taking full control of certain files, which involves removing the special built-in "TrustedInstaller" user account as the owner of the file and granting your account full access.
However, later on, you may want to restore the original permission settings to the system file, but there is not an option to do that on Windows 10. In addition, if this isn't something you do every day, you'll probably forget what the original settings were.
In this Windows 10 guide, we'll walk you through the steps to restore ownership of system files to the TrustedInstaller built-in user account.
How to restore TrustedInstaller ownership to system files
- Open File Explorer.
- Browse to the system file you previously changed ownership.
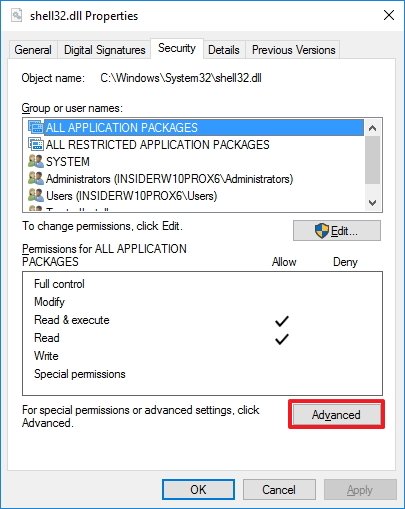
- Right-click the file, and select Properties.
- Click on the Security tab.
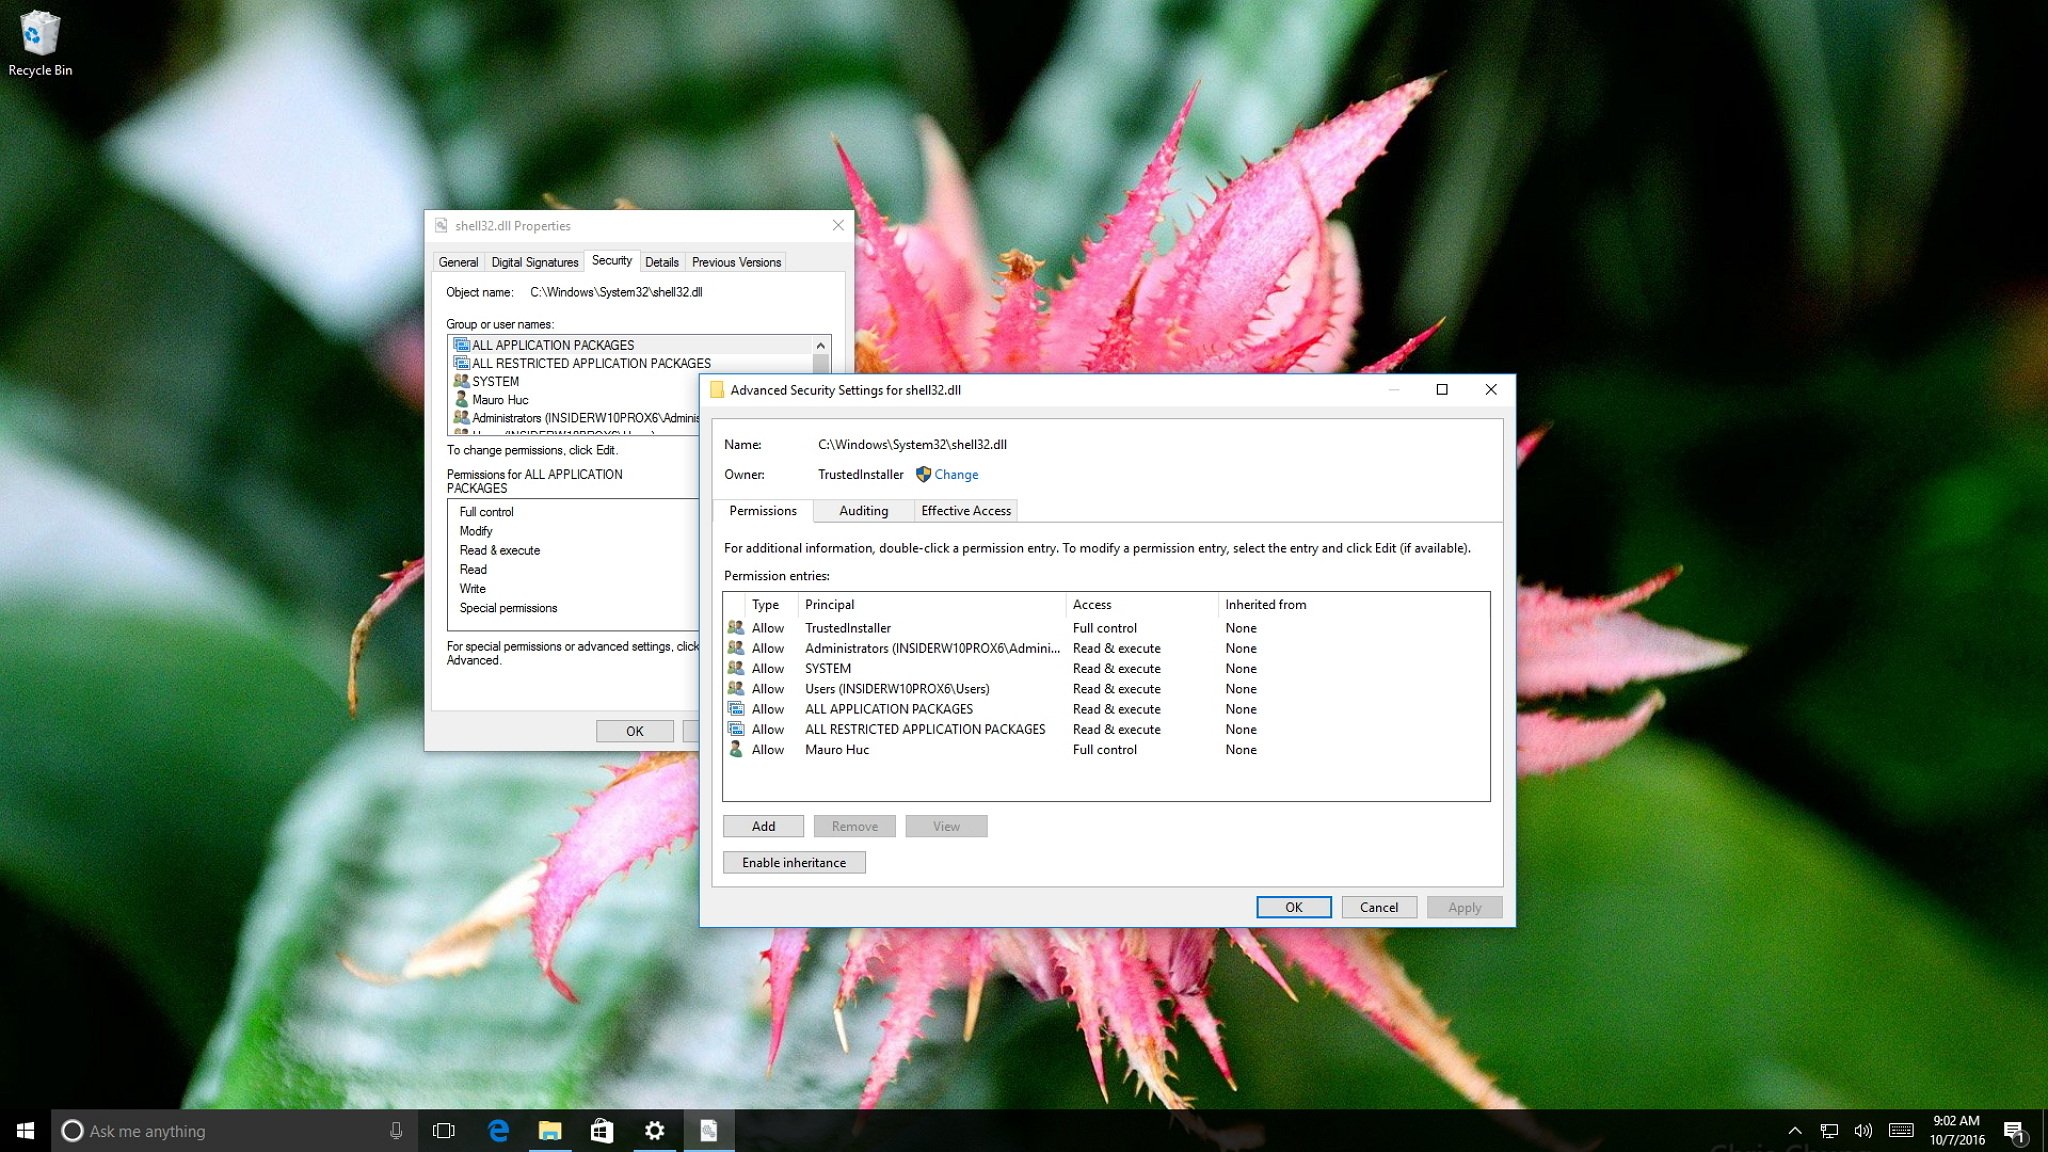
- Click the Advanced button.
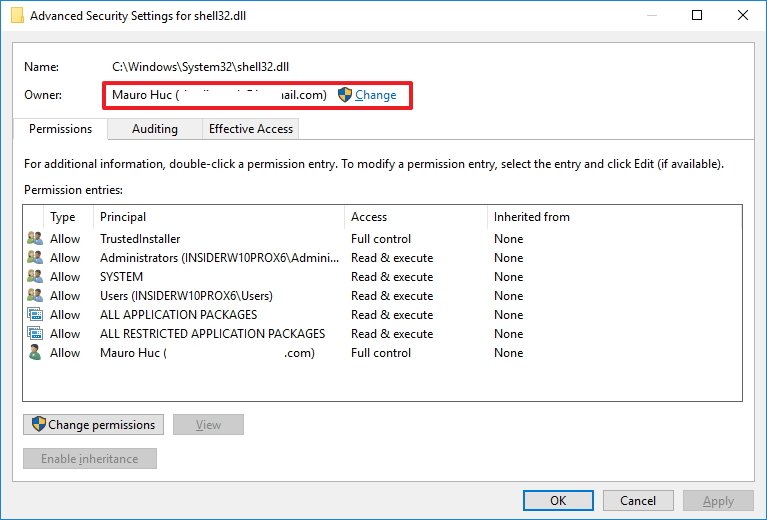
- On the "Advanced Security Settings" page, click the Change link on Owner.
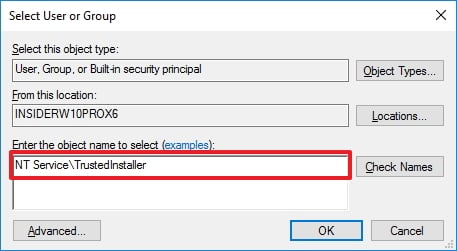
- On the "Select User or Group" page, type the following to add the TrustedInstaller account and click Check Names:
NT Service\TrustedInstaller - Click OK.
- Click Apply.
- Click OK again to complete the task.
These steps now restored the ownership of the file to the built-in TrustedInstaller.
Keep in mind that this works for system files as well as for system folders. Also, don't forget to check the "Replace owner on the subcontainers and objects" and "Replace all child object permission entries with inheritable permission entries from this object" options, if you previously changed these settings on system folders.
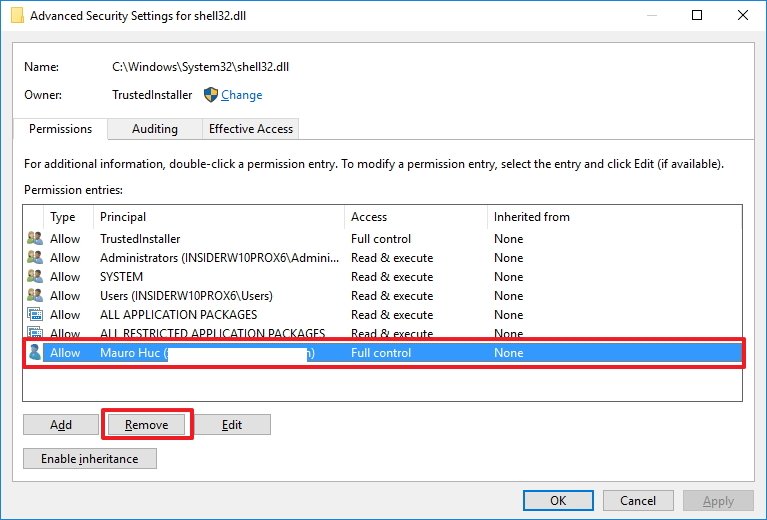
Finally, if you granted yourself full control to the system file, you may also want to remove these settings as well, and to do that you can use the following steps:
All the latest news, reviews, and guides for Windows and Xbox diehards.
- Right-click the system file, and select Properties.
- Click on the Security tab.
- Click the Advanced button.
- On the "Advanced Security Settings" page select your account.
- Click Remove.
- Click Apply.
- Click OK to complete the task.
More Windows 10 resources
For more help articles, coverage, and answers on Windows 10, you can visit the following resources:
- Windows 10 on Windows Central – All you need to know
- Windows 10 help, tips, and tricks
- Windows 10 forums on Windows Central

Mauro Huculak has been a Windows How-To Expert contributor for WindowsCentral.com for nearly a decade and has over 22 years of combined experience in IT and technical writing. He holds various professional certifications from Microsoft, Cisco, VMware, and CompTIA and has been recognized as a Microsoft MVP for many years.
