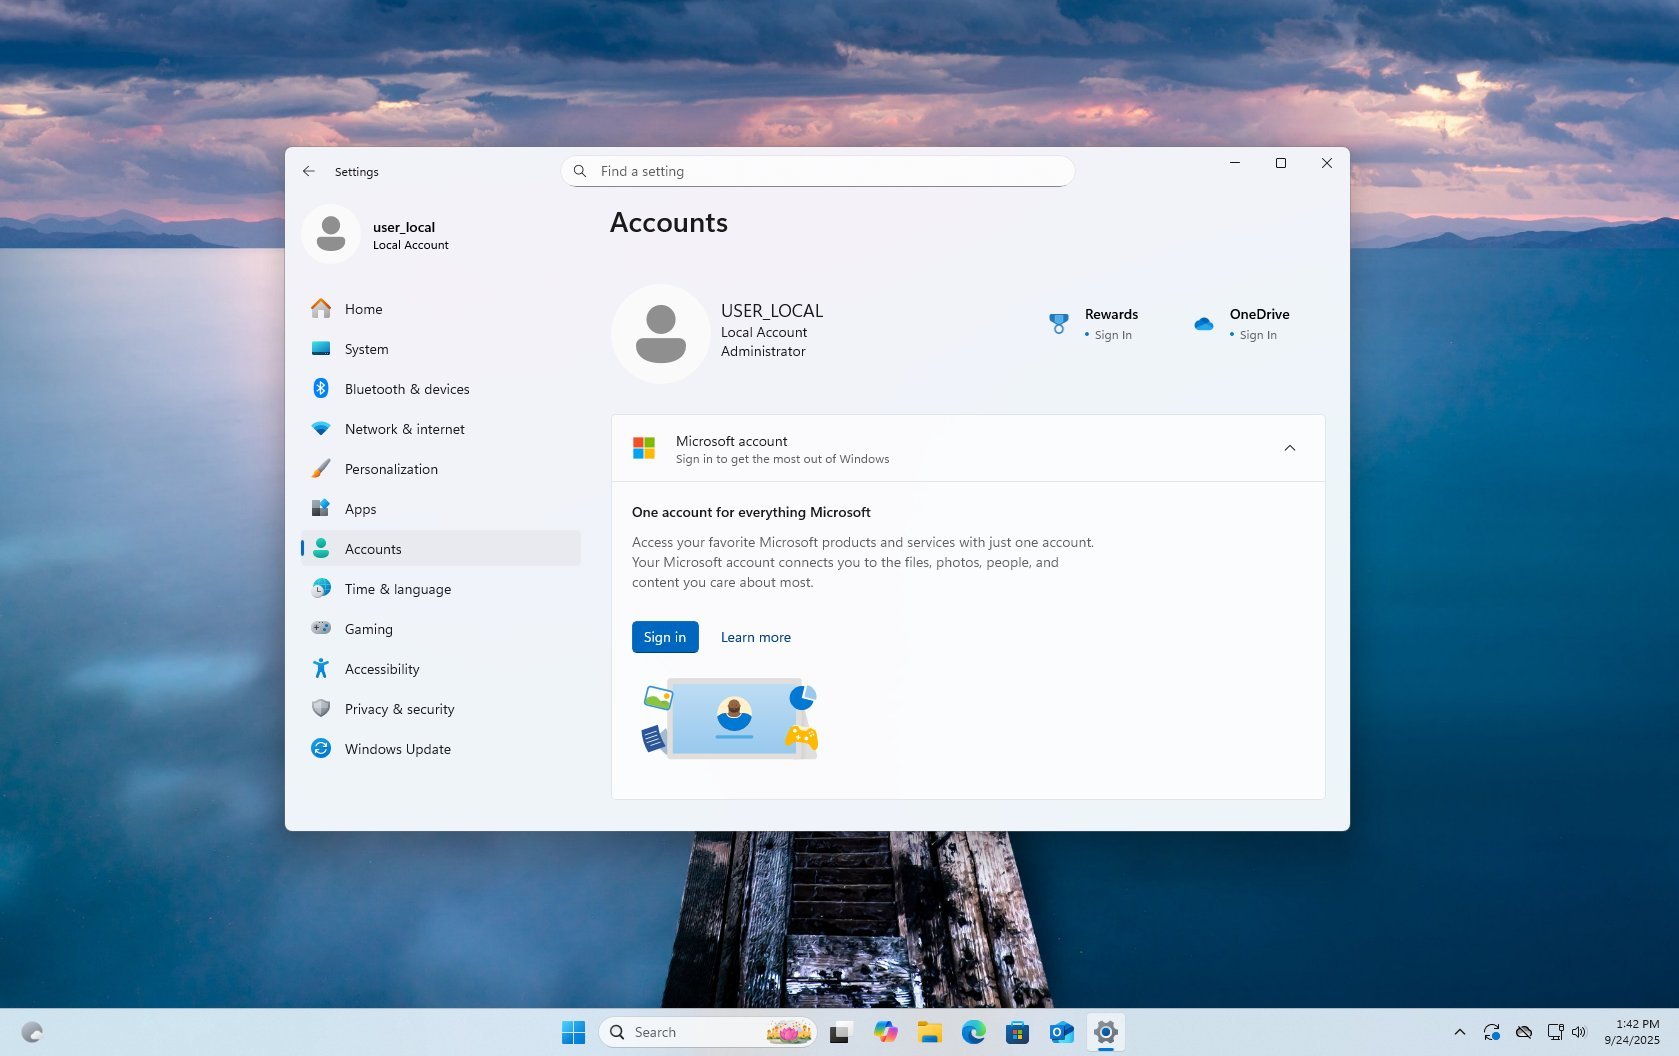
How to set up Windows 11 without a Microsoft account
If you don't like having a Microsoft account on Windows 11, here's how to get around the problem.
All the latest news, reviews, and guides for Windows and Xbox diehards.
You are now subscribed
Your newsletter sign-up was successful
You can set up Windows 11 without a Microsoft account by using Shift + F10 during setup to access the Command Prompt, and typing oobe\bypassnro or start ms-cxh:localonly if the first option doesn’t work. For Windows 11 Pro, you can select “Set up for work or school" and use “Domain join instead” without actually needing a domain.
Yes, it's currently difficult to avoid using a Microsoft account, but you can still install Windows 11 with a local account using those methods. In this guide, I'll show you how it works, step-by-step.
During setup, the system strongly pushes you toward using a Microsoft account. This approach has benefits, such as seamless OneDrive and Microsoft 365 integration, automatic syncing across devices, and enhanced security features.
However, many users prefer the simplicity and privacy of a local account. In earlier versions, the operating system allowed users to skip the Microsoft account requirement. But, this option has since been stripped out from both the Home and Pro editions. For a while, users could trick the setup by entering a fake email address to trigger local account creation, but Microsoft eventually blocked that workaround too.
Even so, several methods remain to bypass these restrictions and set up Windows 11 with a local account on both editions of the operating system.
In this how-to guide, I'll explain the different ways to set up a new installation of Windows 11 without a Microsoft account, whether you're reinstalling the operating system or upgrading from Windows 10 before the end of life.
Warning: This process will delete everything on the computer. As a result, it's a good idea to back up your Windows 11 computer.
All the latest news, reviews, and guides for Windows and Xbox diehards.
These instructions have been updated to ensure accuracy and reflect changes to the process in the operating system. These methods have been tested up to Windows 11 build 26200, which corresponds to version 25H2.
How to install Windows 11 without a Microsoft account with Command Prompt
If you want to use Windows 11 without a Microsoft account, you must proceed with the traditional setup and use one of the available solutions in the out-of-box experience (OOBE).
To start a fresh installation of Windows 11, use these steps:
- Start the PC with Windows 11 USB flash drive.
- Quick note: You can use these clean installation instructions for Windows 11 if you cannot start the computer from the USB bootable drive.
- On the prompt, press any key to boot from the device.
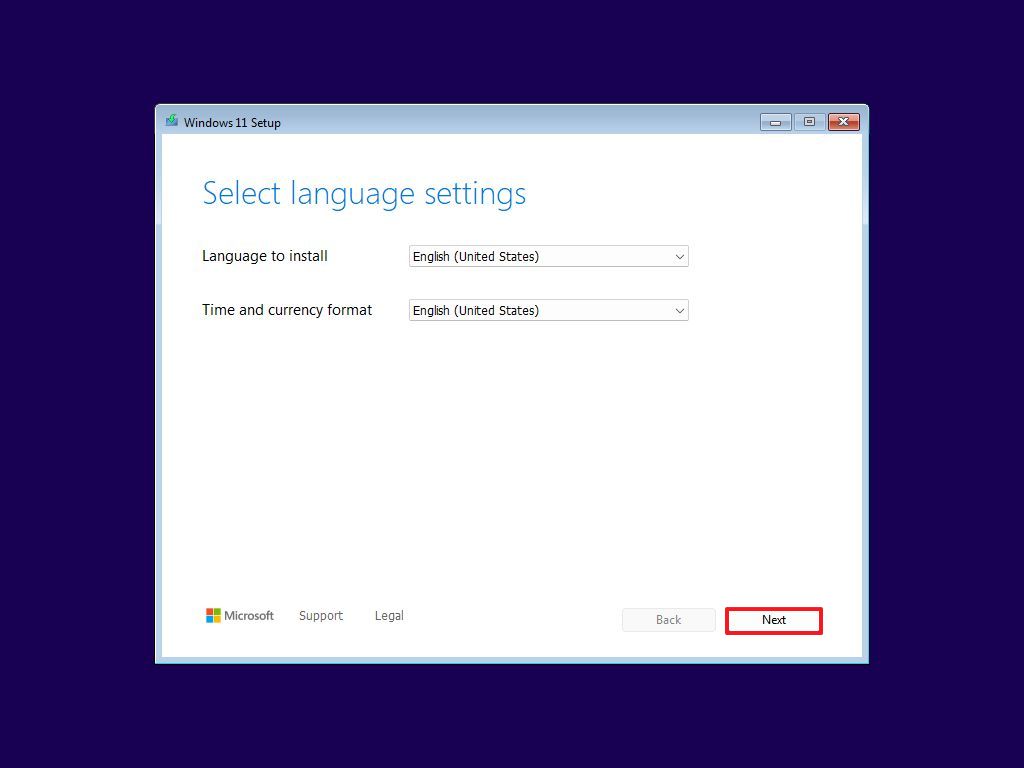
- Click the Next button in the "Windows Setup" interface.
- Quick tip: If your language, time and currency, and keyboard are different from the default selections, select the correct settings before continuing.
- Click the Next button again.
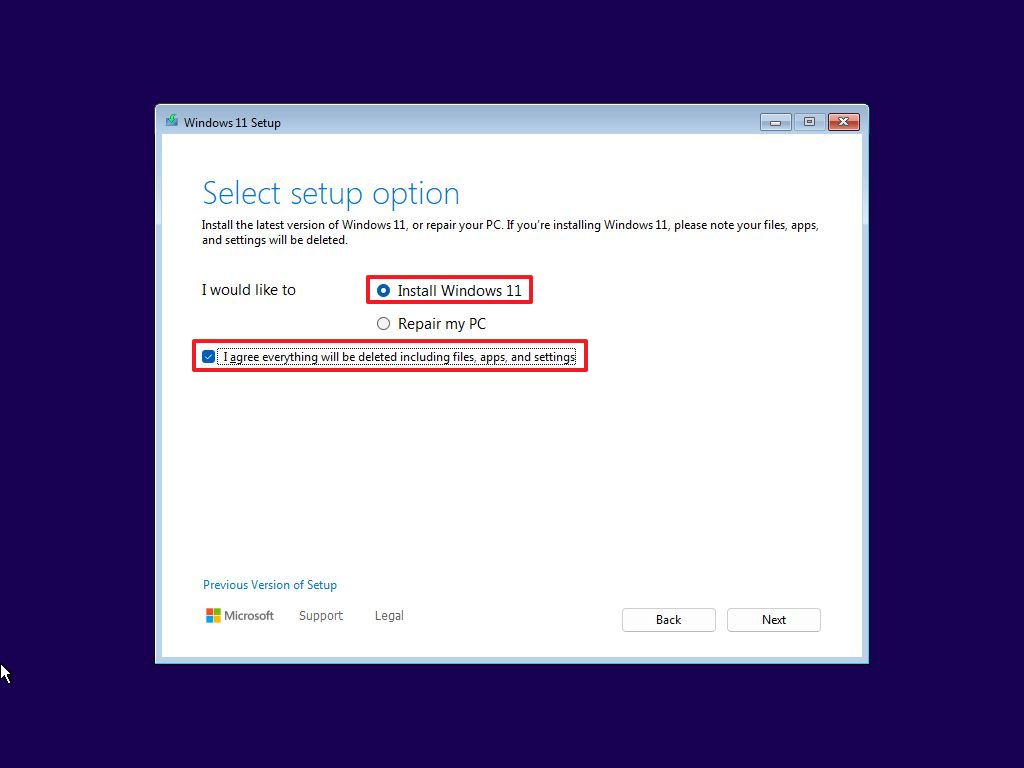
- Select the "Install Windows 11" button.
- Check the agree option.
- Click the Next button.
- If this is a reinstallation, click the "I don't have a product key" option to continue. Otherwise, enter the product key if this is your first time installing the operating system.
- Quick tip: You can always complete the installation and then activate the setup using the Settings app.
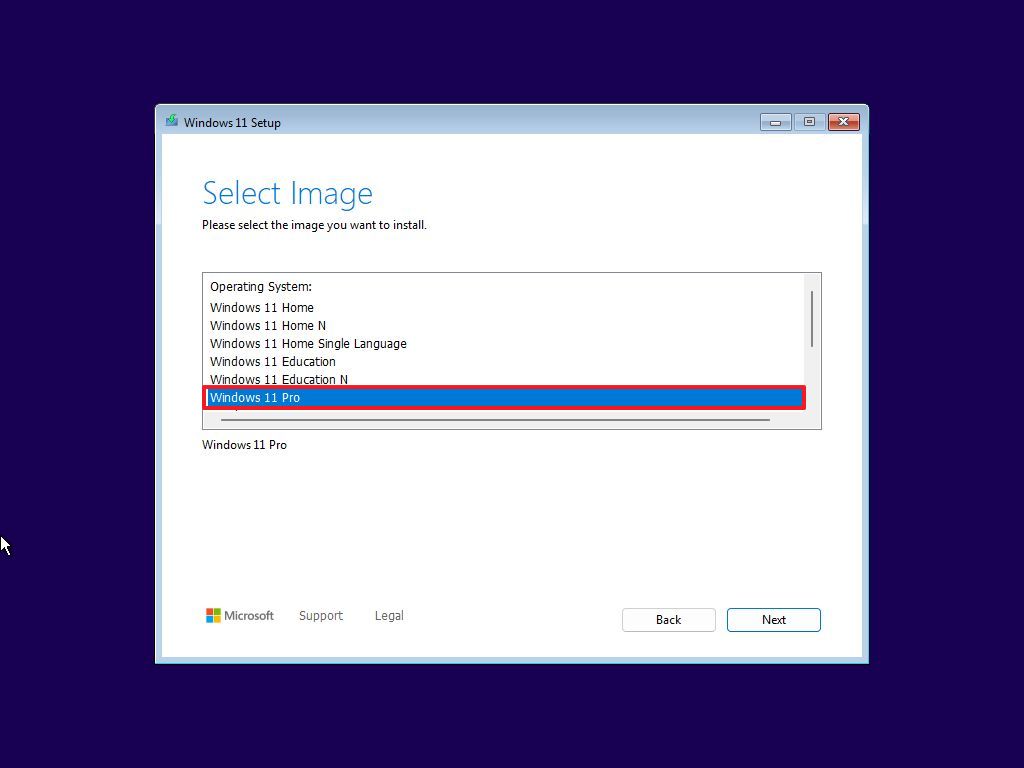
- Select the edition of Windows 11 (If applicable).
- Click the Next button.
- Select the "Accept" button to continue.
- Select the partition with the current installation (usually "Drive 0"), and click the Delete button.
- Quick tip: If "Drive 0" has multiple partitions, you must select and delete each partition to allow the setup to use the entire hard drive for the new setup. The setup will create the required partitions automatically during the process. It's also not necessary to delete the partitions on secondary drives.
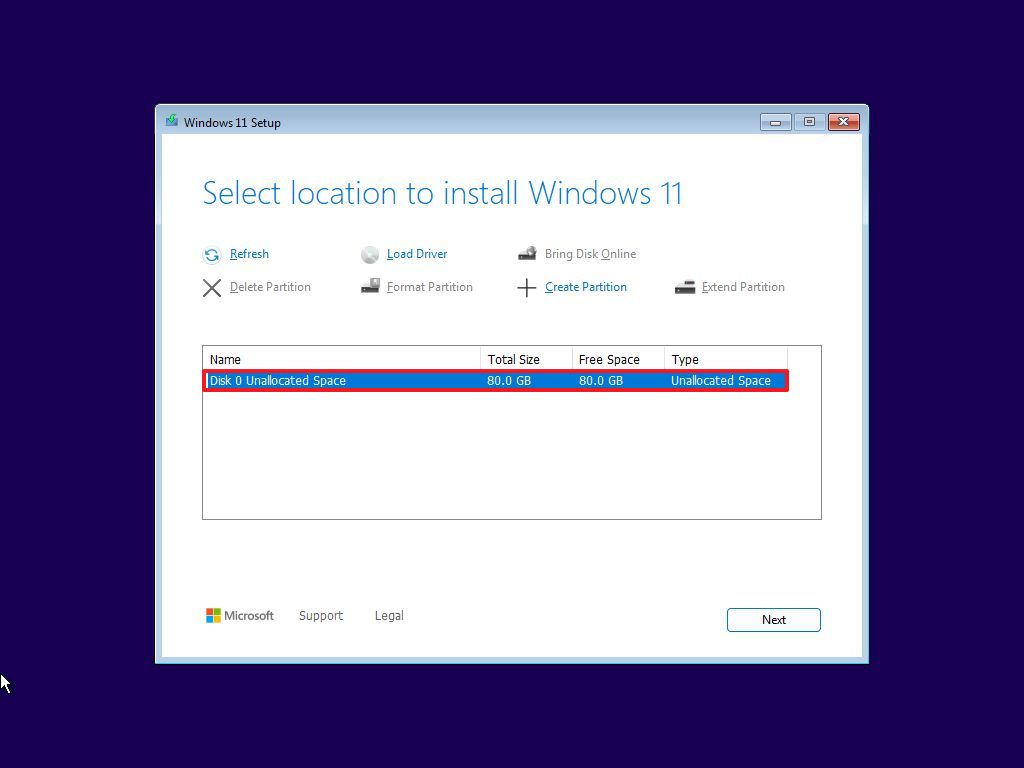
- Select the empty drive (Drive 0 Unallocated Space) to proceed with the installation.
- Click the Next button.
- Click the Install button.
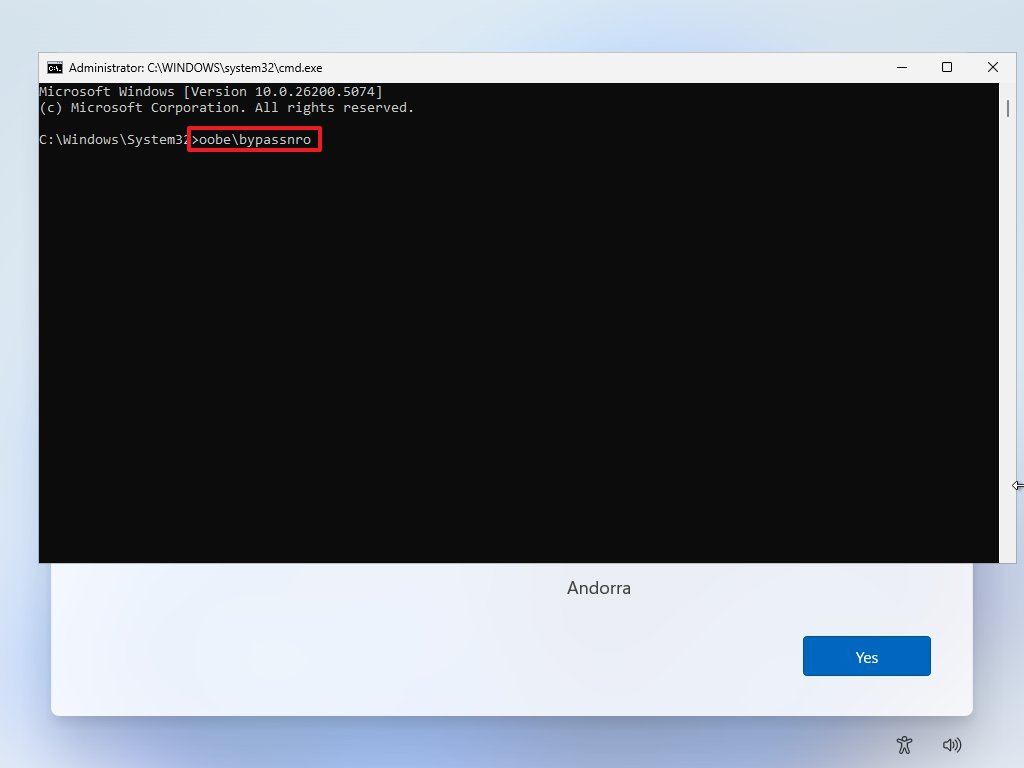
- Use the "Shift + F10" keyboard shortcut to open Command Prompt on the first page of the initial setup.
- Type the following command to disable the internet connection requirement to set up Windows 11 and press Enter: oobe\bypassnro
- Quick note: The command doesn't have any spaces. Also, the computer will restart at this moment.
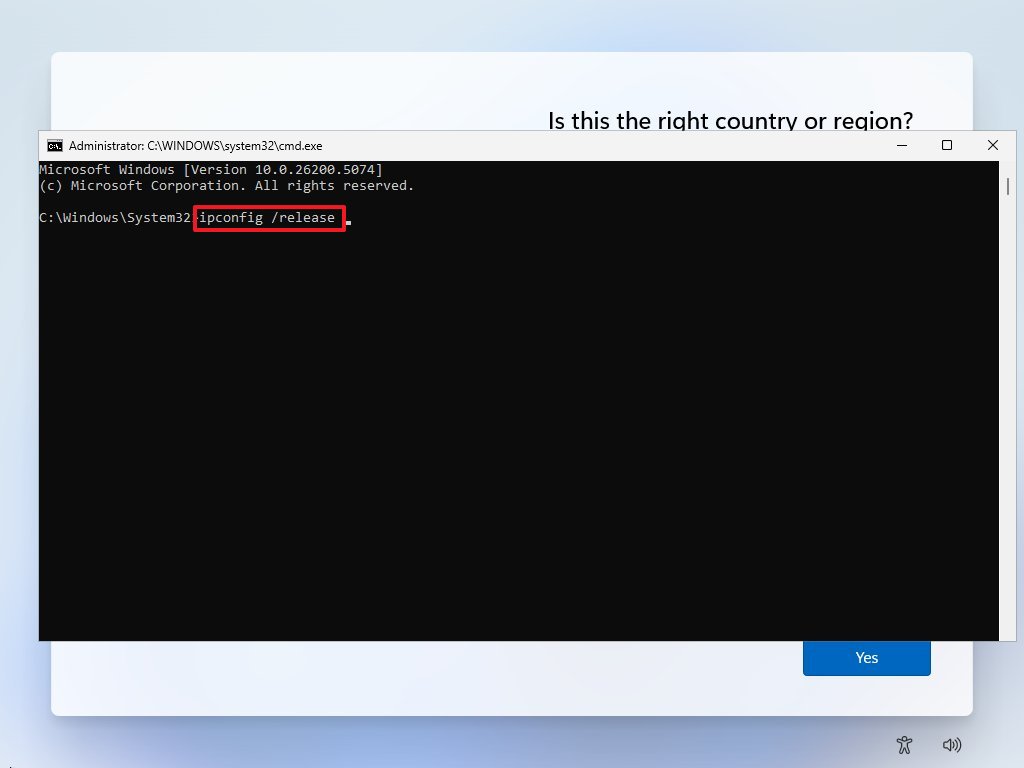
- Use the "Shift + F10" keyboard shortcut to open Command Prompt on the Windows 11 setup.
- Type the following command to drop the network connection and press Enter: ipconfig /release
- Type the following command to close the Command Prompt and press Enter: exit
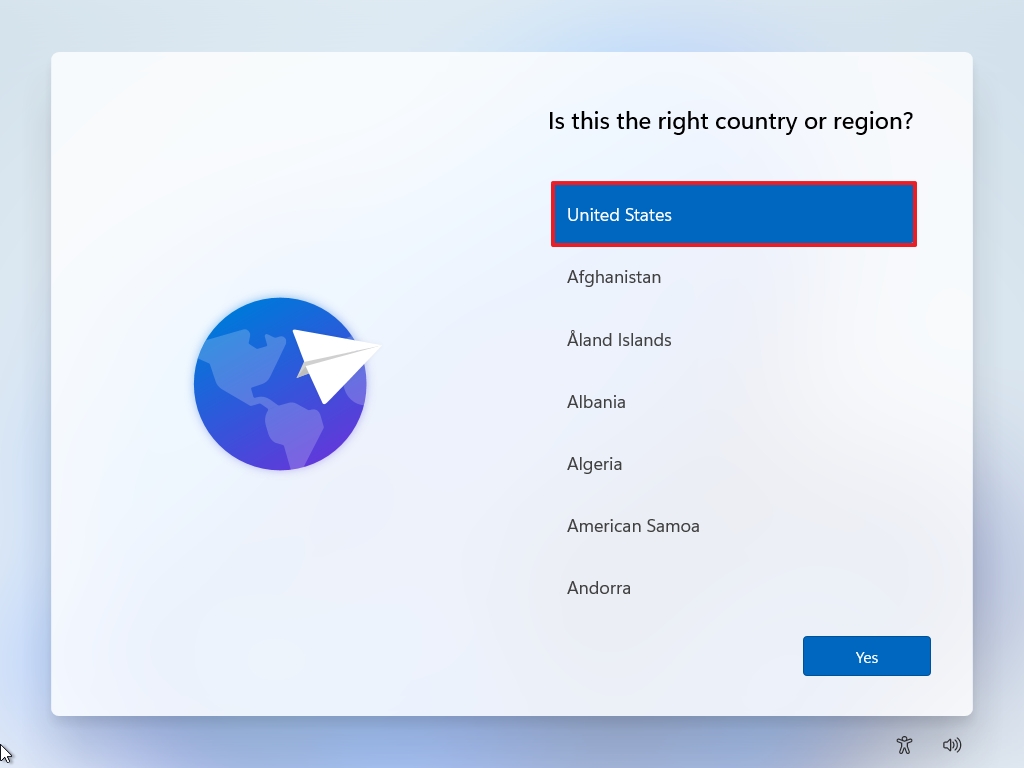
- Select your region to set up the device.
- Click the Next button.
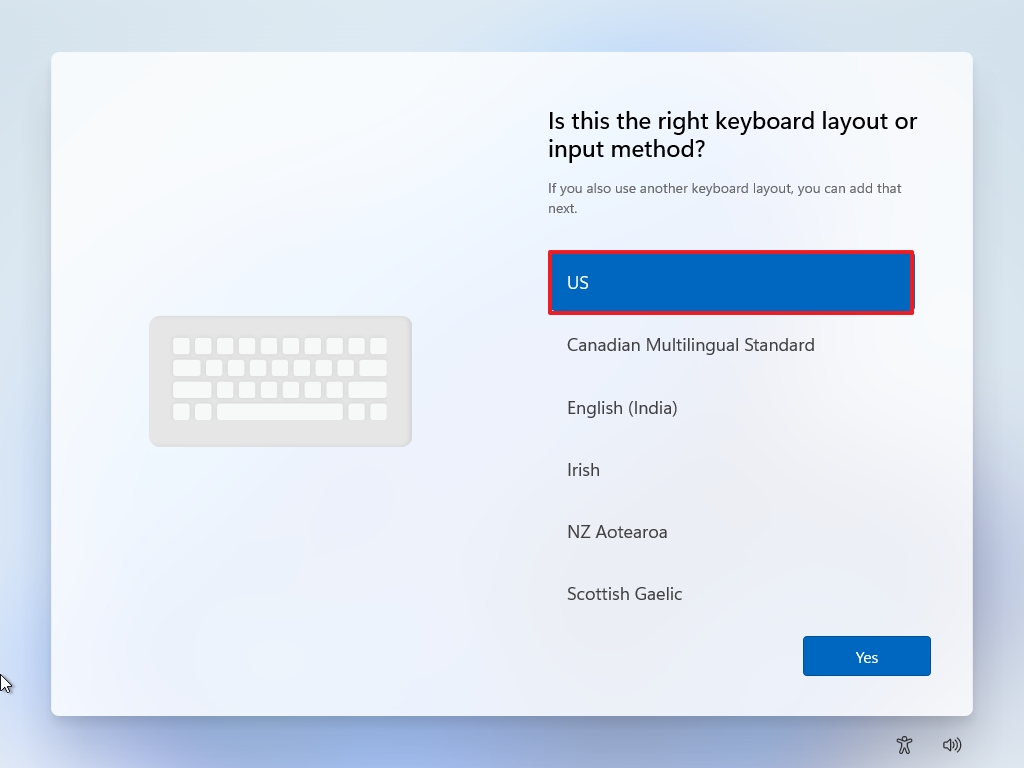
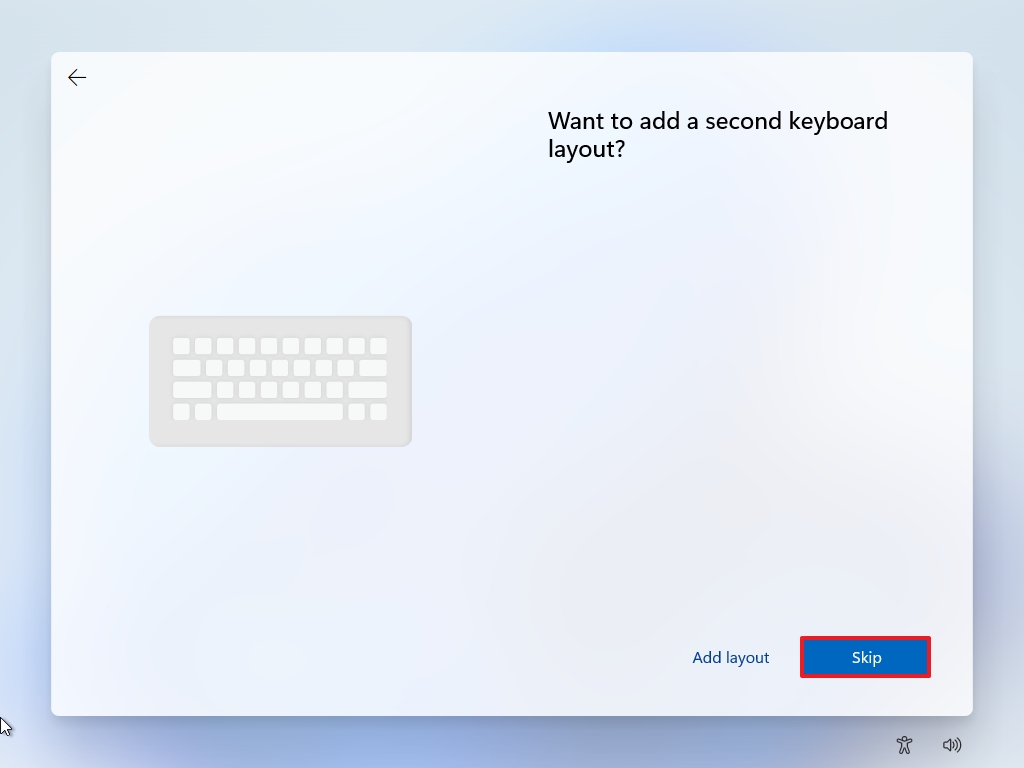
- Select your keyboard layout setting.
- Click the Yes button.
- Click the Skip button.
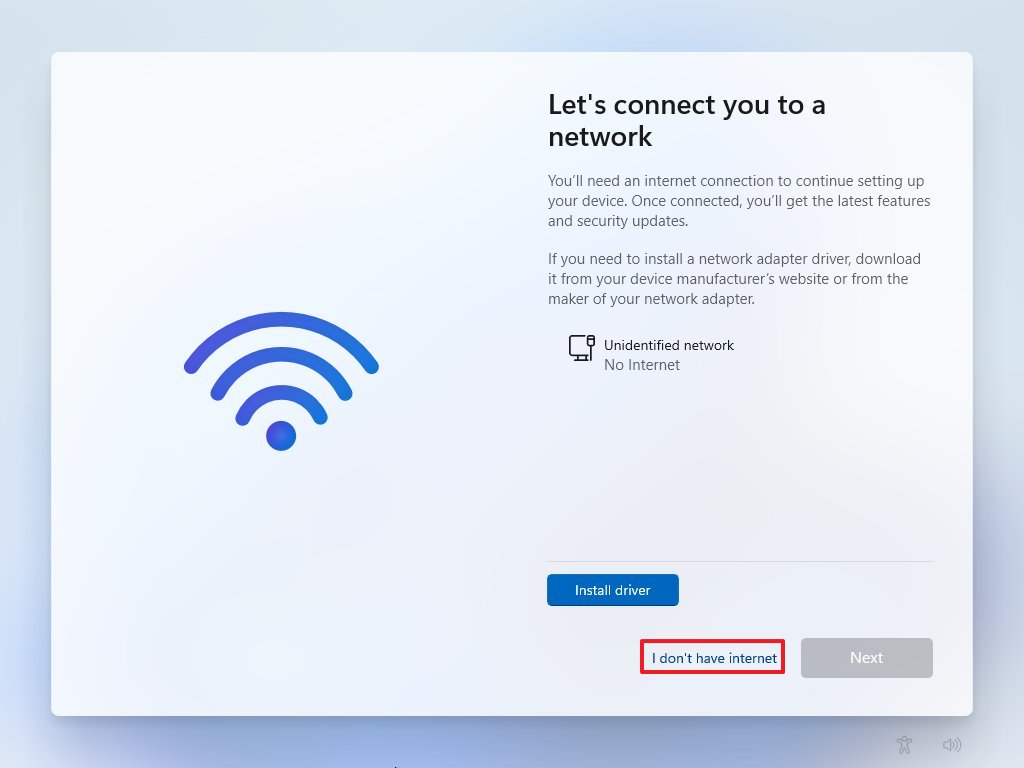
- Click the "I don't have internet" option.
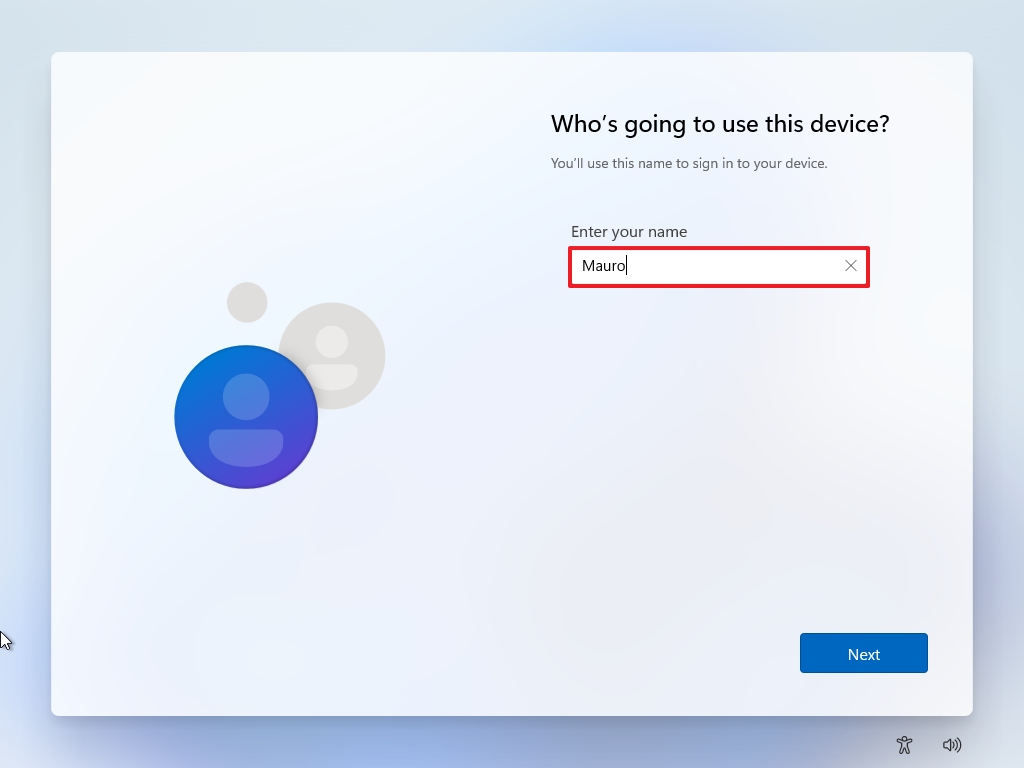
- Confirm the account name for Windows 11.
- Click the Next button.
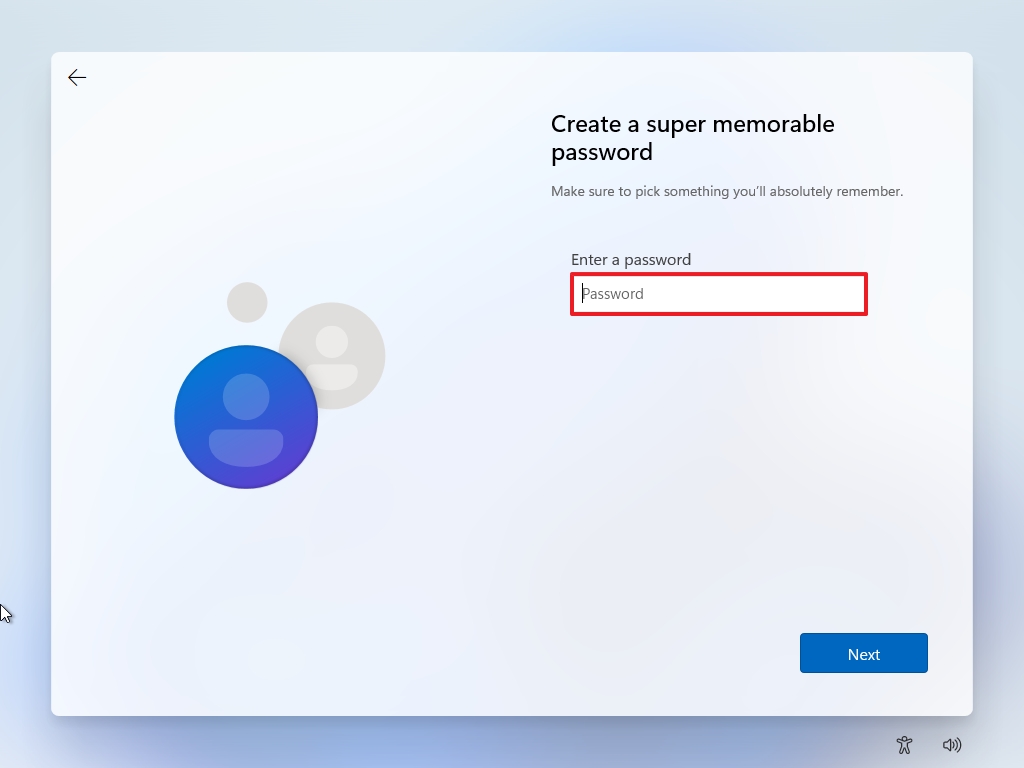
- Create the account password.
- Click the Next button.
- Confirm the account password.
- Click the Next button.
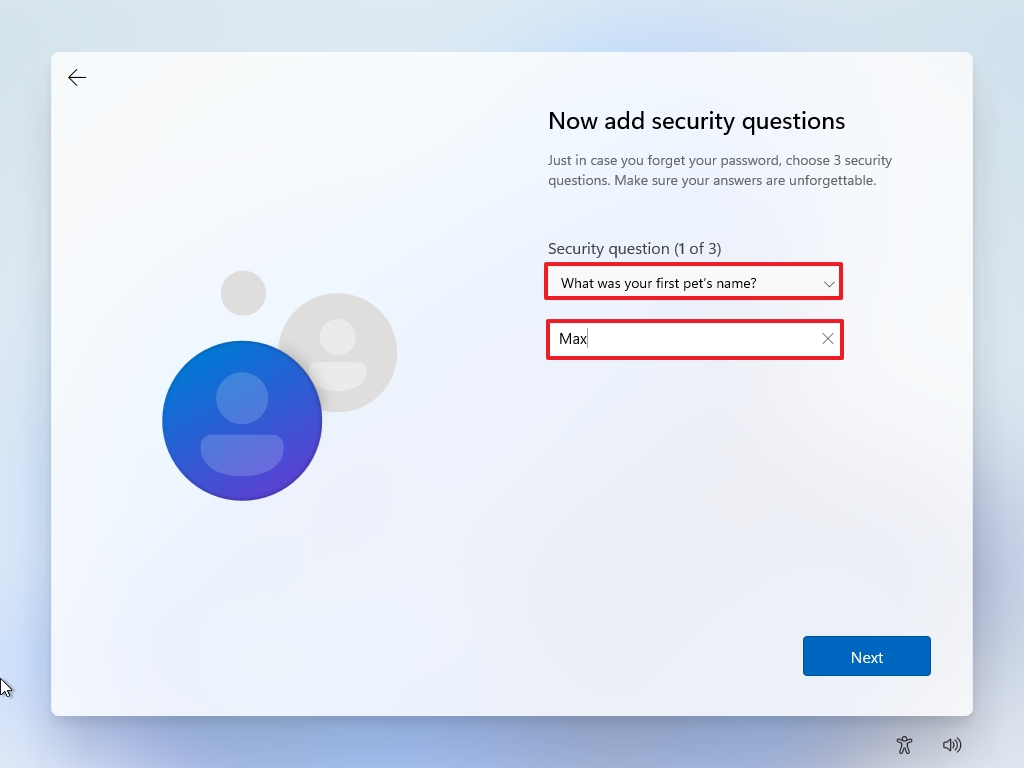
- Configure the three security questions in case you have to reset the password.
Quick tip: If you click the "Next" button without setting a password, the computer will sign in automatically, and you won't have to complete the security questions. However, I do have to warn you that setting up a computer without a password is a security risk. If you do this, proceed at your own risk.
- Click the Next button.
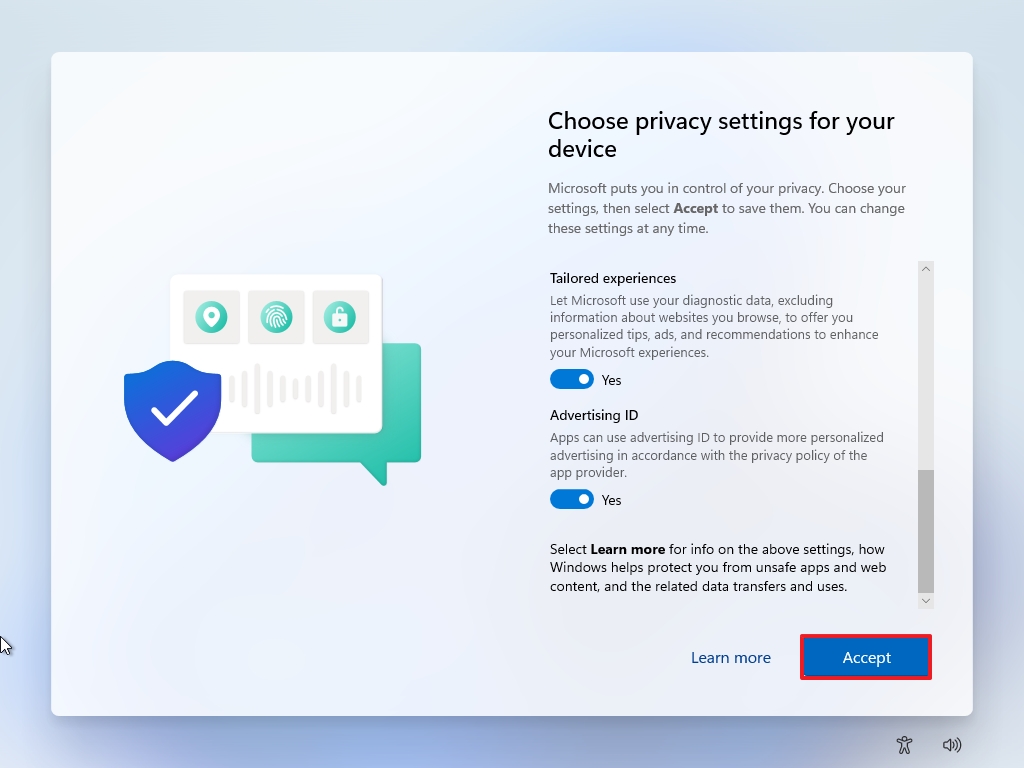
- Choose your privacy settings.
- Click the Next button.
- Click the Next button again.
- Click the Accept button.
Once you complete the steps, you will be able to set up Windows 11 without a Microsoft account. Since you're not using an online account, you won't have to go through the annoying promotional offers to purchase the different services that Microsoft offers.
How to install Windows 11 without a Microsoft account with Rufus
To modify the Windows 11 setup to skip the Microsoft account automatically using Rufus, use these steps:
- Open the Rufus download website.
- Click the download button for the latest version.
- Save the file to your computer.
- Right-click the tool executable and choose the Open option.
- Connect an 8 GB USB flash drive.
- Quick note: The contents in the flash drive will be deleted.
- Choose the USB flash drive from the "Device" setting.
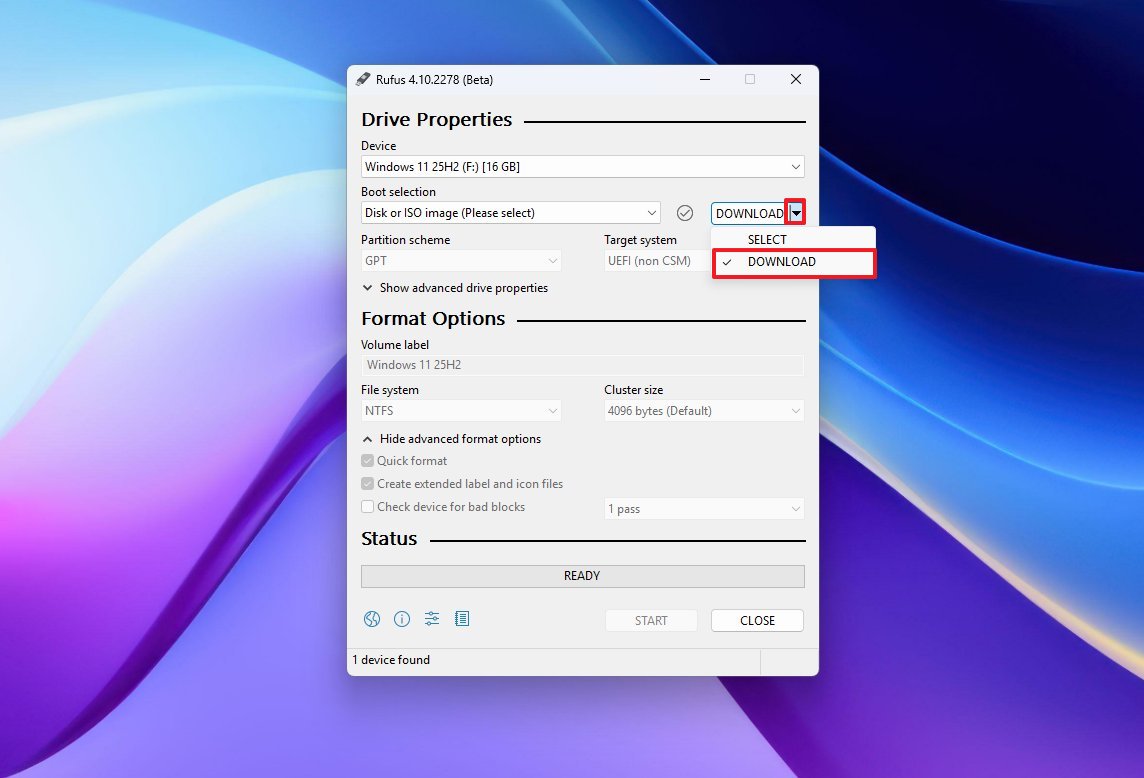
- Click the down-arrow button and choose the Download option.
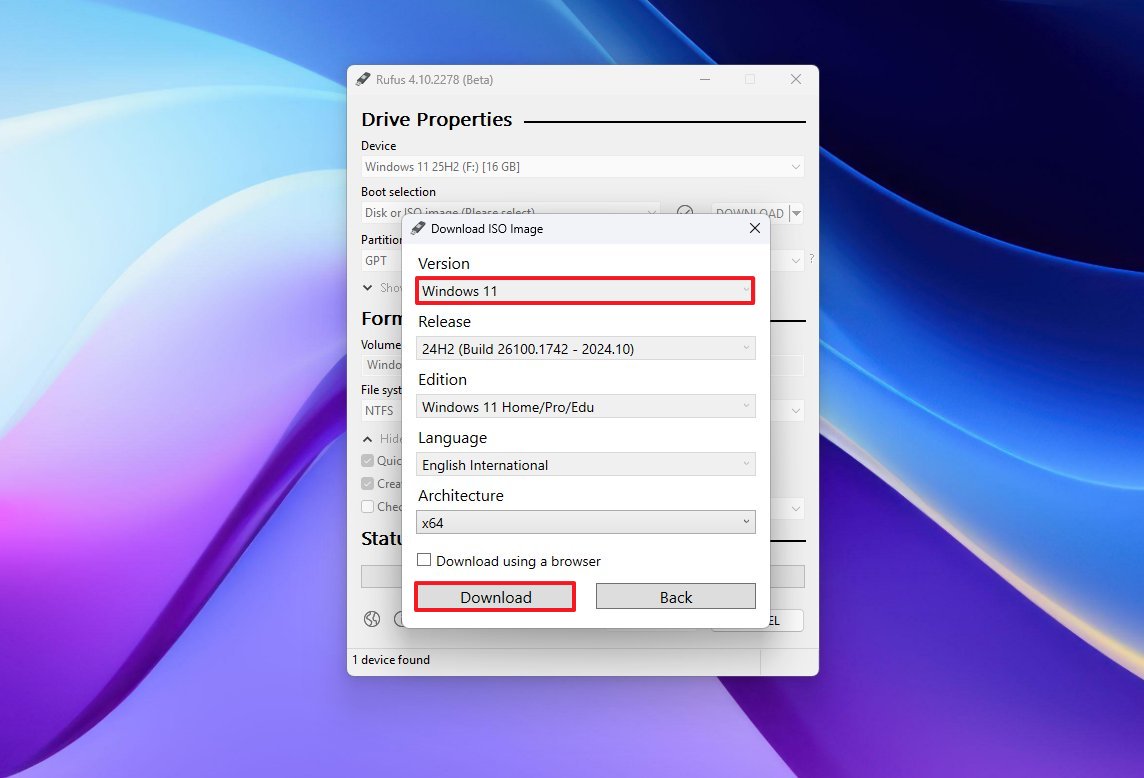
- Click the Download button.
- Choose the Windows 11 option.
- Click the Continue button.
- Select the latest release of the operating system.
- Click the Continue button.
- Select the Windows 11 Home/Pro/Edu edition.
- Click the Continue button.
- Select the installation language.
- Click the Continue button.
- Select the x64 architecture option.
- Click the Download button.
- Choose the location to store the ISO file.
- Click the Save button.
- Continue with the default setting selections.
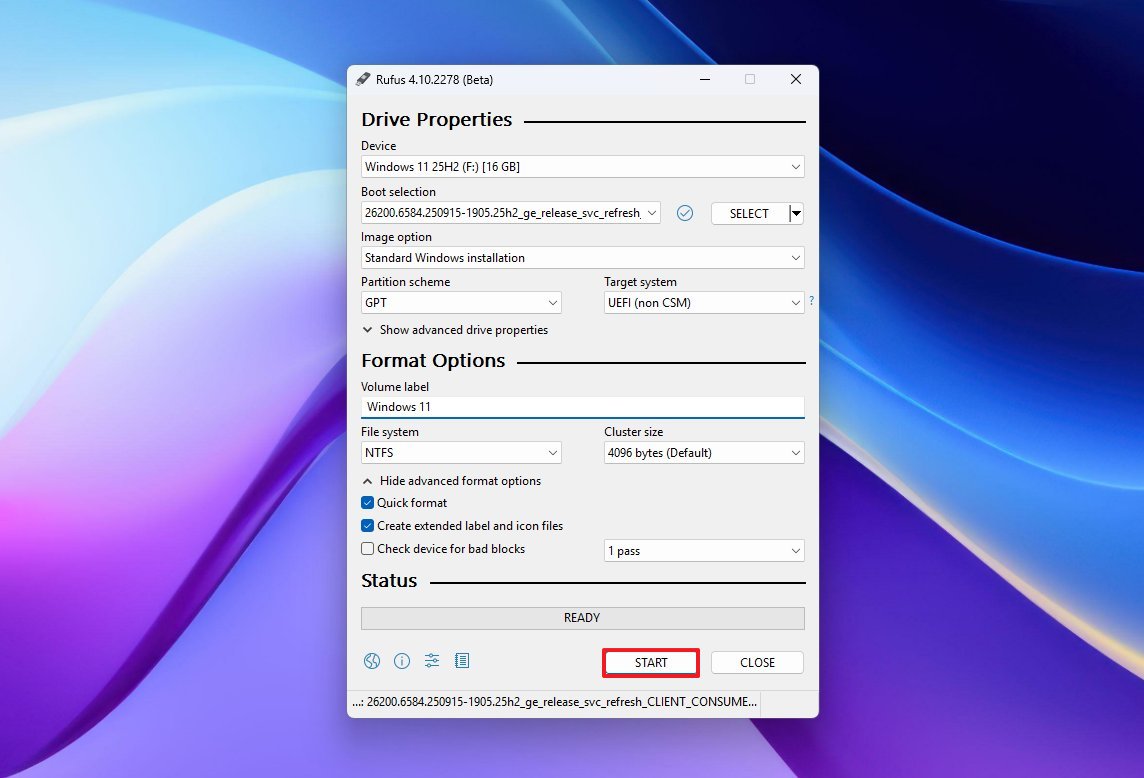
- Click the Start button.
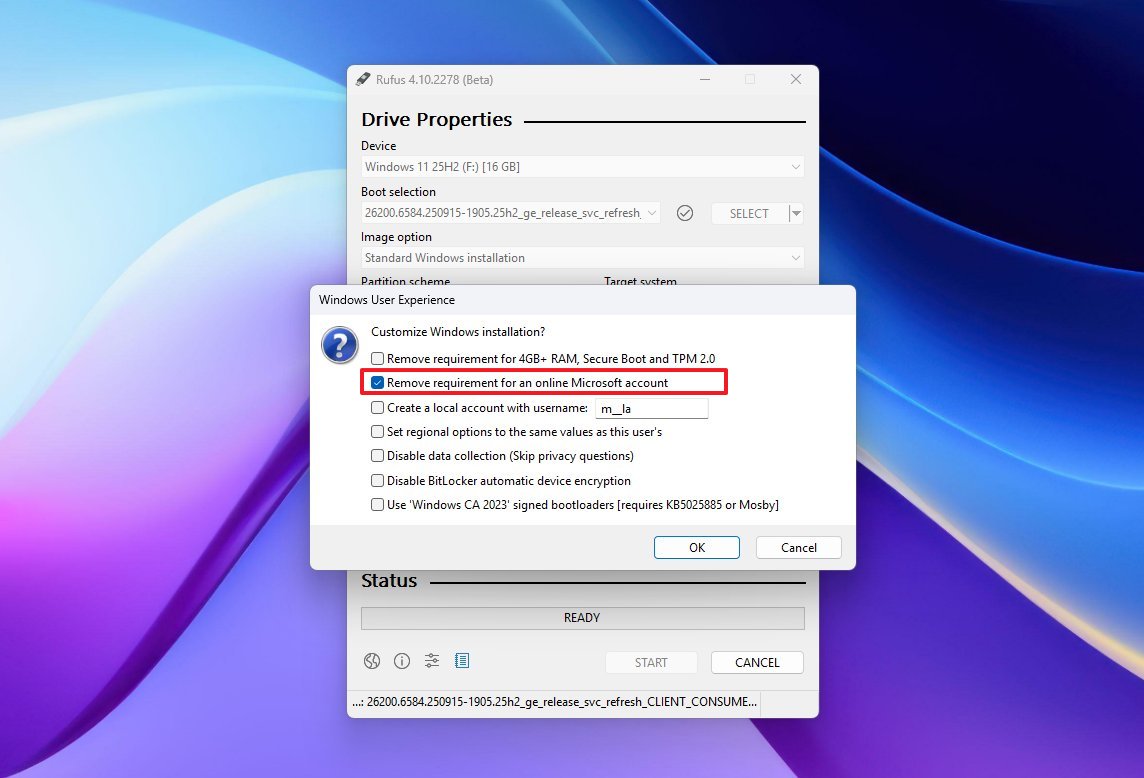
- Clear the default setting selections.
- Check the "Remove requirement for an online Microsoft account" option.
- Quick tip: You can also check the "Create a local account with username" option an specifying the name of the account to allow the setup to create an account automatically. After the installation, you will have to create a password for the account from the "Sign-in options" page.
- Click the OK button.
- Click the OK button again.
- Restart the computer with the newly created USB flash drive with the setup modified.
- Continue with the Next button.
- Click the Next button again.
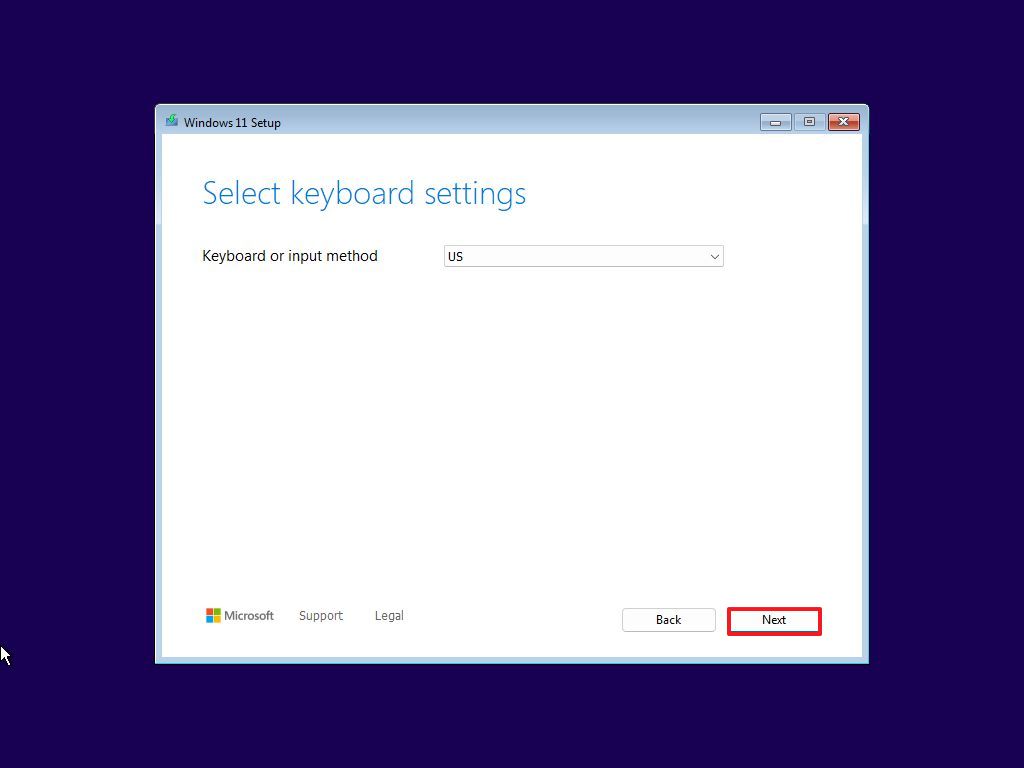
- Click the Next button again.
- Select the "Install Windows 11" button.
- Check the agree option.
- Click the Next button.
- If this is a reinstallation, click the "I don't have a product key" option to continue. Otherwise, enter the product key if this is your first time installing the operating system.
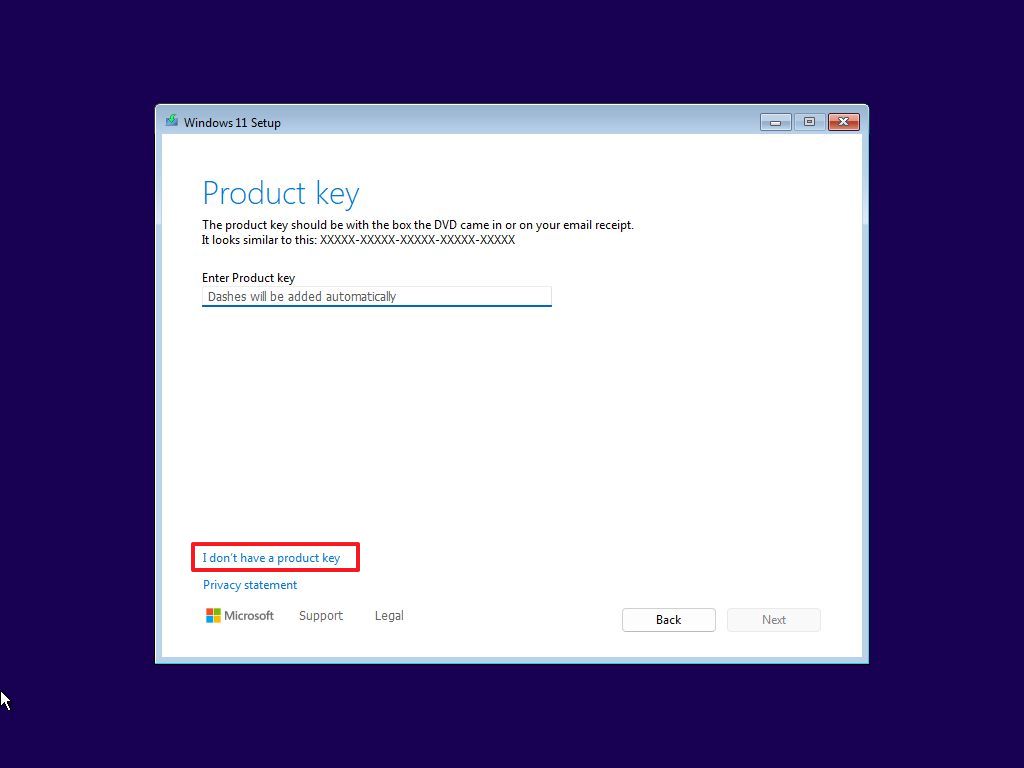
- Quick tip: You can always complete the installation and activate it using the Settings app.
- Select the edition of Windows 11 (If applicable).
- Click the Next button.
- Select the "Accept" button to continue.
- Select the partition with the current installation (usually "Drive 0"), and click the Delete button.
- Select the empty drive (Drive 0 Unallocated Space) to proceed with the installation.
- Click the Next button.
- Click the Install button.
- Choose your region setting.
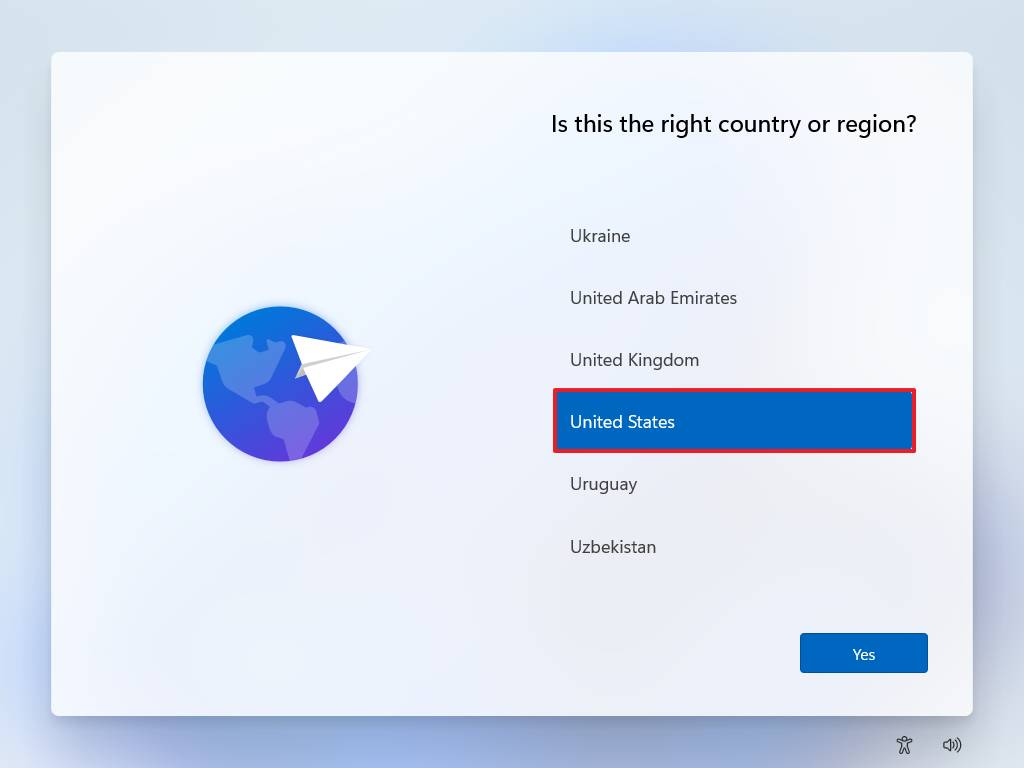
- Click the Yes button.
- Choose your keyboard layout.
- Click the Yes button.
- Click the Skip button.
- Continue with the local account creation by choosing a username.
- Click the Next button.
- Create a password for the account.
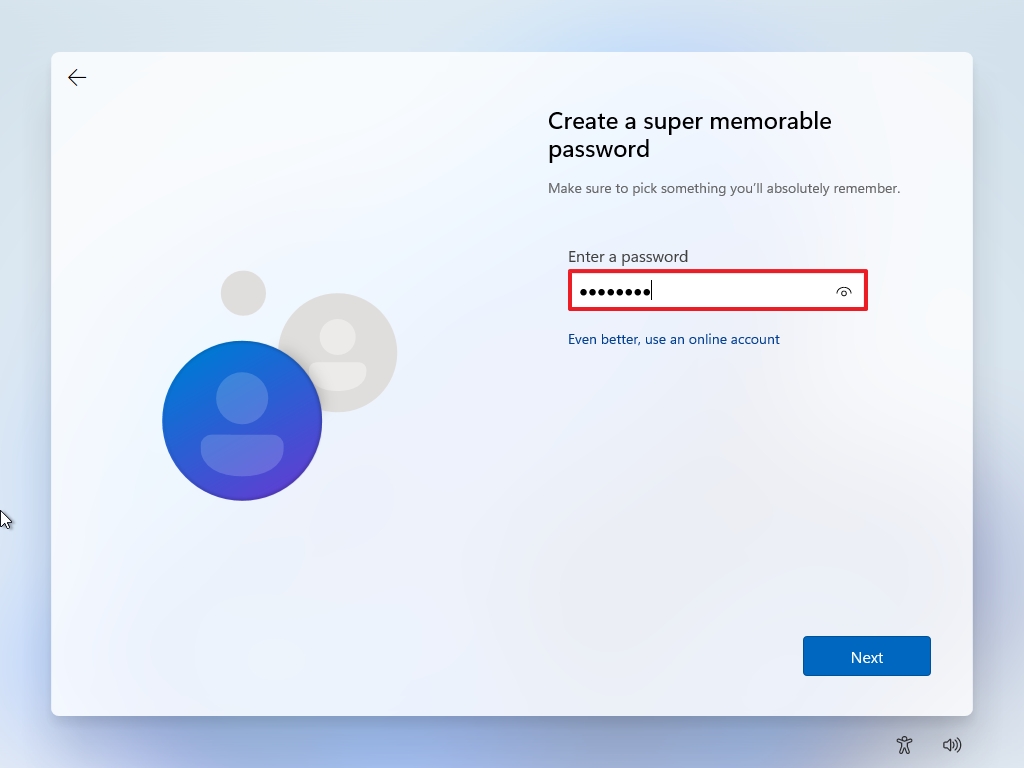
- Click the Next button.
- Confirm the password for the account.
- Click the Next button.
- Complete the security questions.
- Click the Next button.
- Select your privacy settings.
- Click the Next button.
- Click the Next button again.
- Click the Accept button.
After completing the steps, you can use the computer with a local account.
More resources
For more helpful articles, coverage, and answers to common questions about Windows 10 and Windows 11, visit the following resources:

Mauro Huculak has been a Windows How-To Expert contributor for WindowsCentral.com for nearly a decade and has over 22 years of combined experience in IT and technical writing. He holds various professional certifications from Microsoft, Cisco, VMware, and CompTIA and has been recognized as a Microsoft MVP for many years.
You must confirm your public display name before commenting
Please logout and then login again, you will then be prompted to enter your display name.
