3 easy ways to customize Windows Terminal to look incredible in PowerShell and WSL
You could just spend the day looking at the default settings and color schemes, but that's boring. Here are some ways to customize that are so simple, even I can do it.
All the latest news, reviews, and guides for Windows and Xbox diehards.
You are now subscribed
Your newsletter sign-up was successful
Before I go any further, I want to start by saying I am not a software engineer or a developer of anything. The furthest from it. But I'm a hobbyist who spends more time than I probably should inside a terminal.
Not only is it useful to learn some skills and be comfortable in the terminal, but I find it strangely relaxing, free from distractions. And, of course, as someone who enjoys Linux, it's always handy to be familiar with a terminal.
By default, they're mostly pretty bland to look at. But it doesn't have to be that way. If you're going to spend a good amount of time in the terminal, why wouldn't you want it to look visually appealing and even add a little more functionality?
Specifically looking at Windows Terminal here, be it for PowerShell or WSL, here are three simple ways to spruce up your command line experience that even newcomers can use with ease.
1. Starship prompt
Starting with the prompt, I always use Starship. Why? Because it looks good, it's easily customizable, and it's cross-shell, which means I can use it on whatever I'm tinkering with this month.
That includes PowerShell, and one of the major reasons I enjoy using it is that I can apply the exact same configuration to both PowerShell and every WSL distro I'm using. A note, though; you need to have a NerdFont installed for Starship to function properly.
The installation process is simple on either PowerShell or WSL. For PowerShell, you can install it using the Windows Package Manager, on WSL, from a variety of package managers, or by entering the below into the terminal:
All the latest news, reviews, and guides for Windows and Xbox diehards.
curl -sS https://starship.rs/install.sh | shThe Starship installer will give you your next steps to apply it to your shell, but they, too, can be found in the documentation. It involves adding a command to your shell's profile in order to load it up.
If that's Bash for WSL, you simply add this line to your .bashrc file at the bottom:
eval "$(starship init bash)"For PowerShell, add this to your profile:
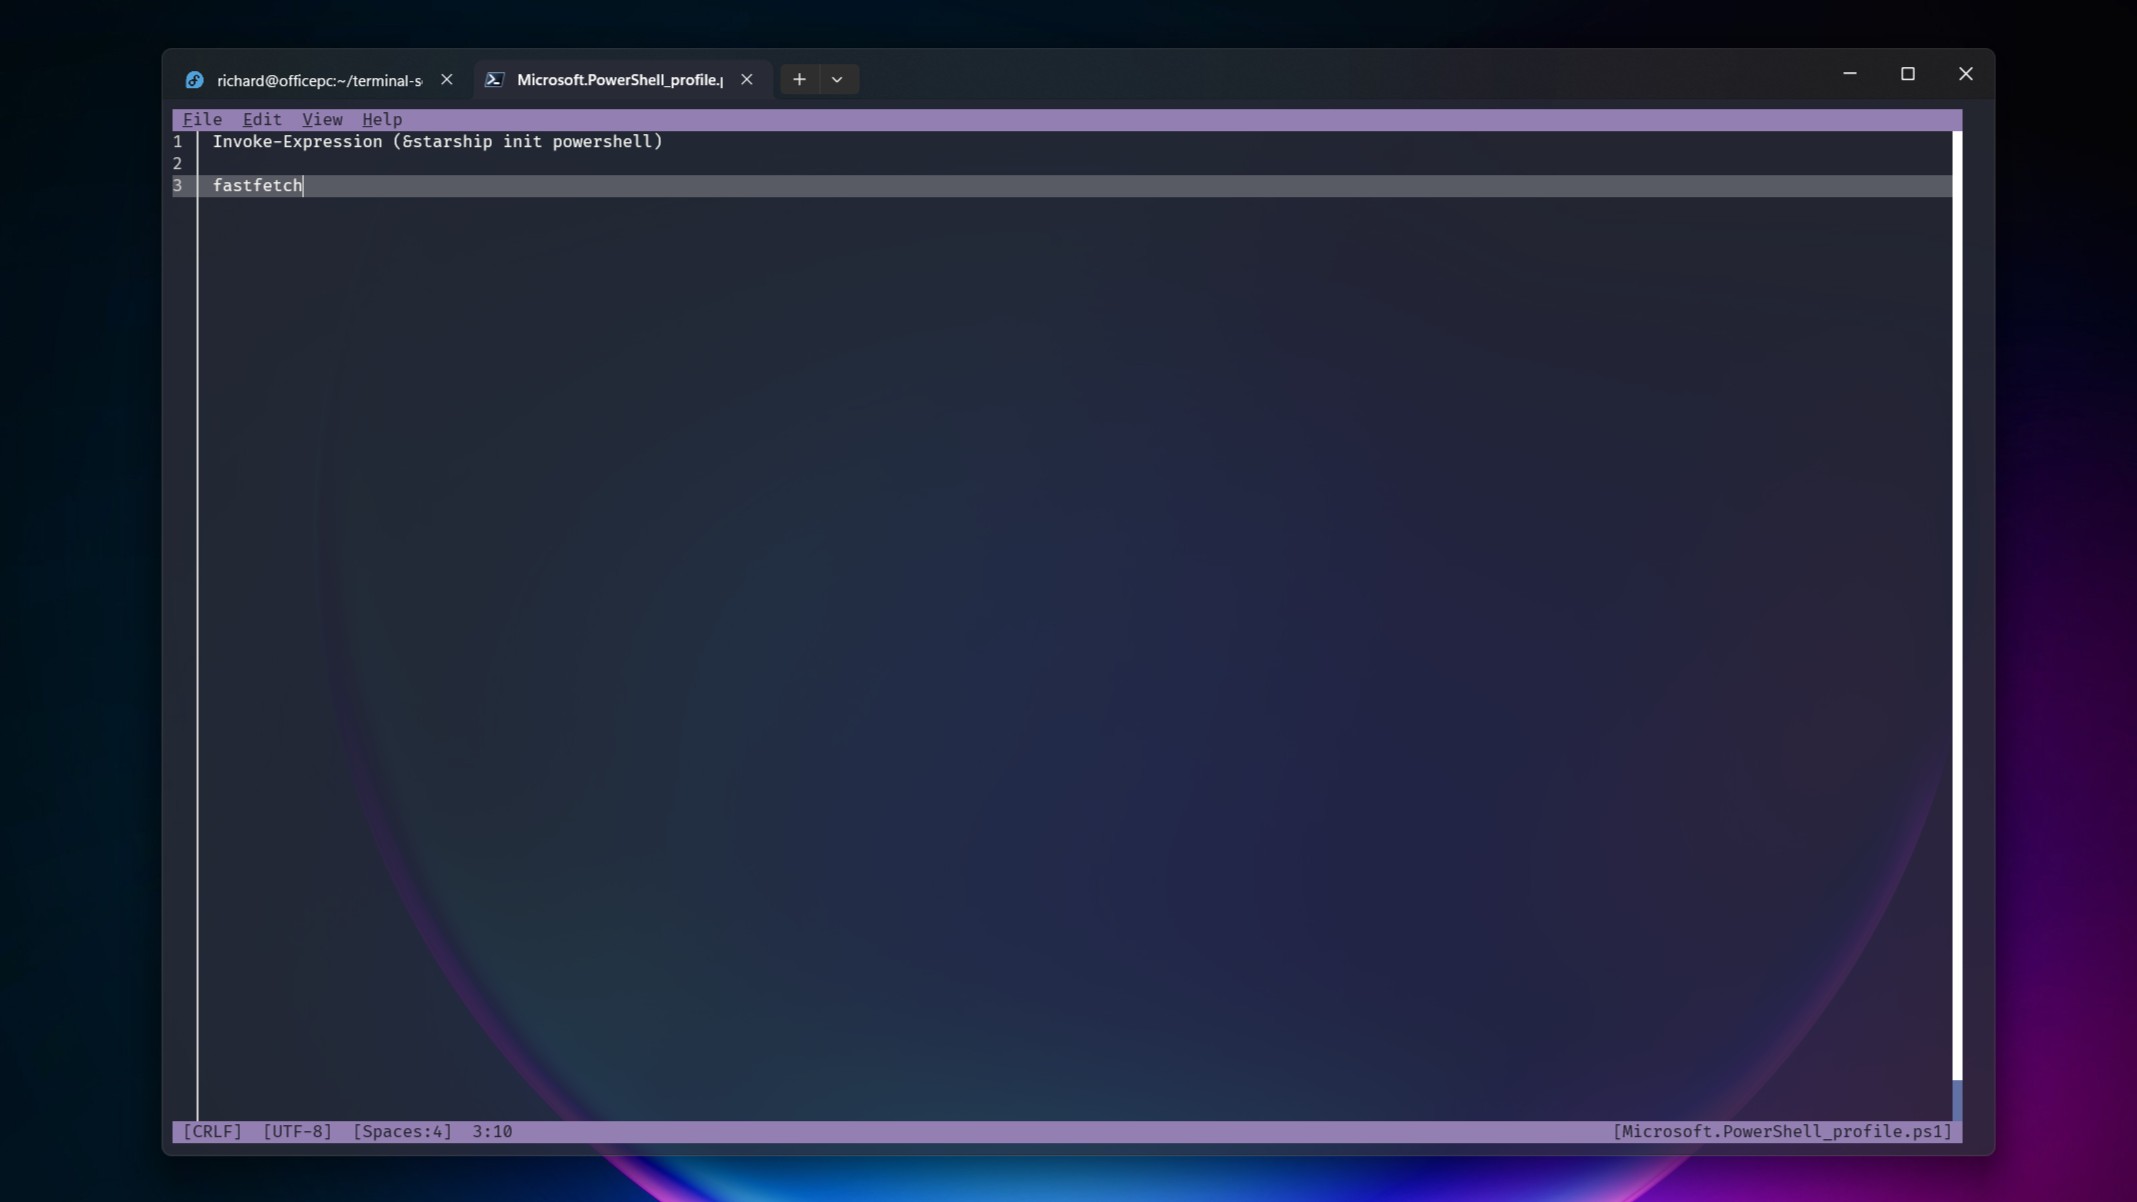
Invoke-Expression (&starship init powershell)I'll touch on the PowerShell profile a little at the foot of this post if you're unsure of what it is or where to find it.
Customization is done via a config file, which you will need to make. Whether in PowerShell or WSL, you can use this command:
mkdir -p ~/.config && touch ~/.config/starship.tomlThis will create a blank config file in the .config directory. Linux will have this directory already, but for PowerShell on Windows 11, it will be created for you in your User directory.
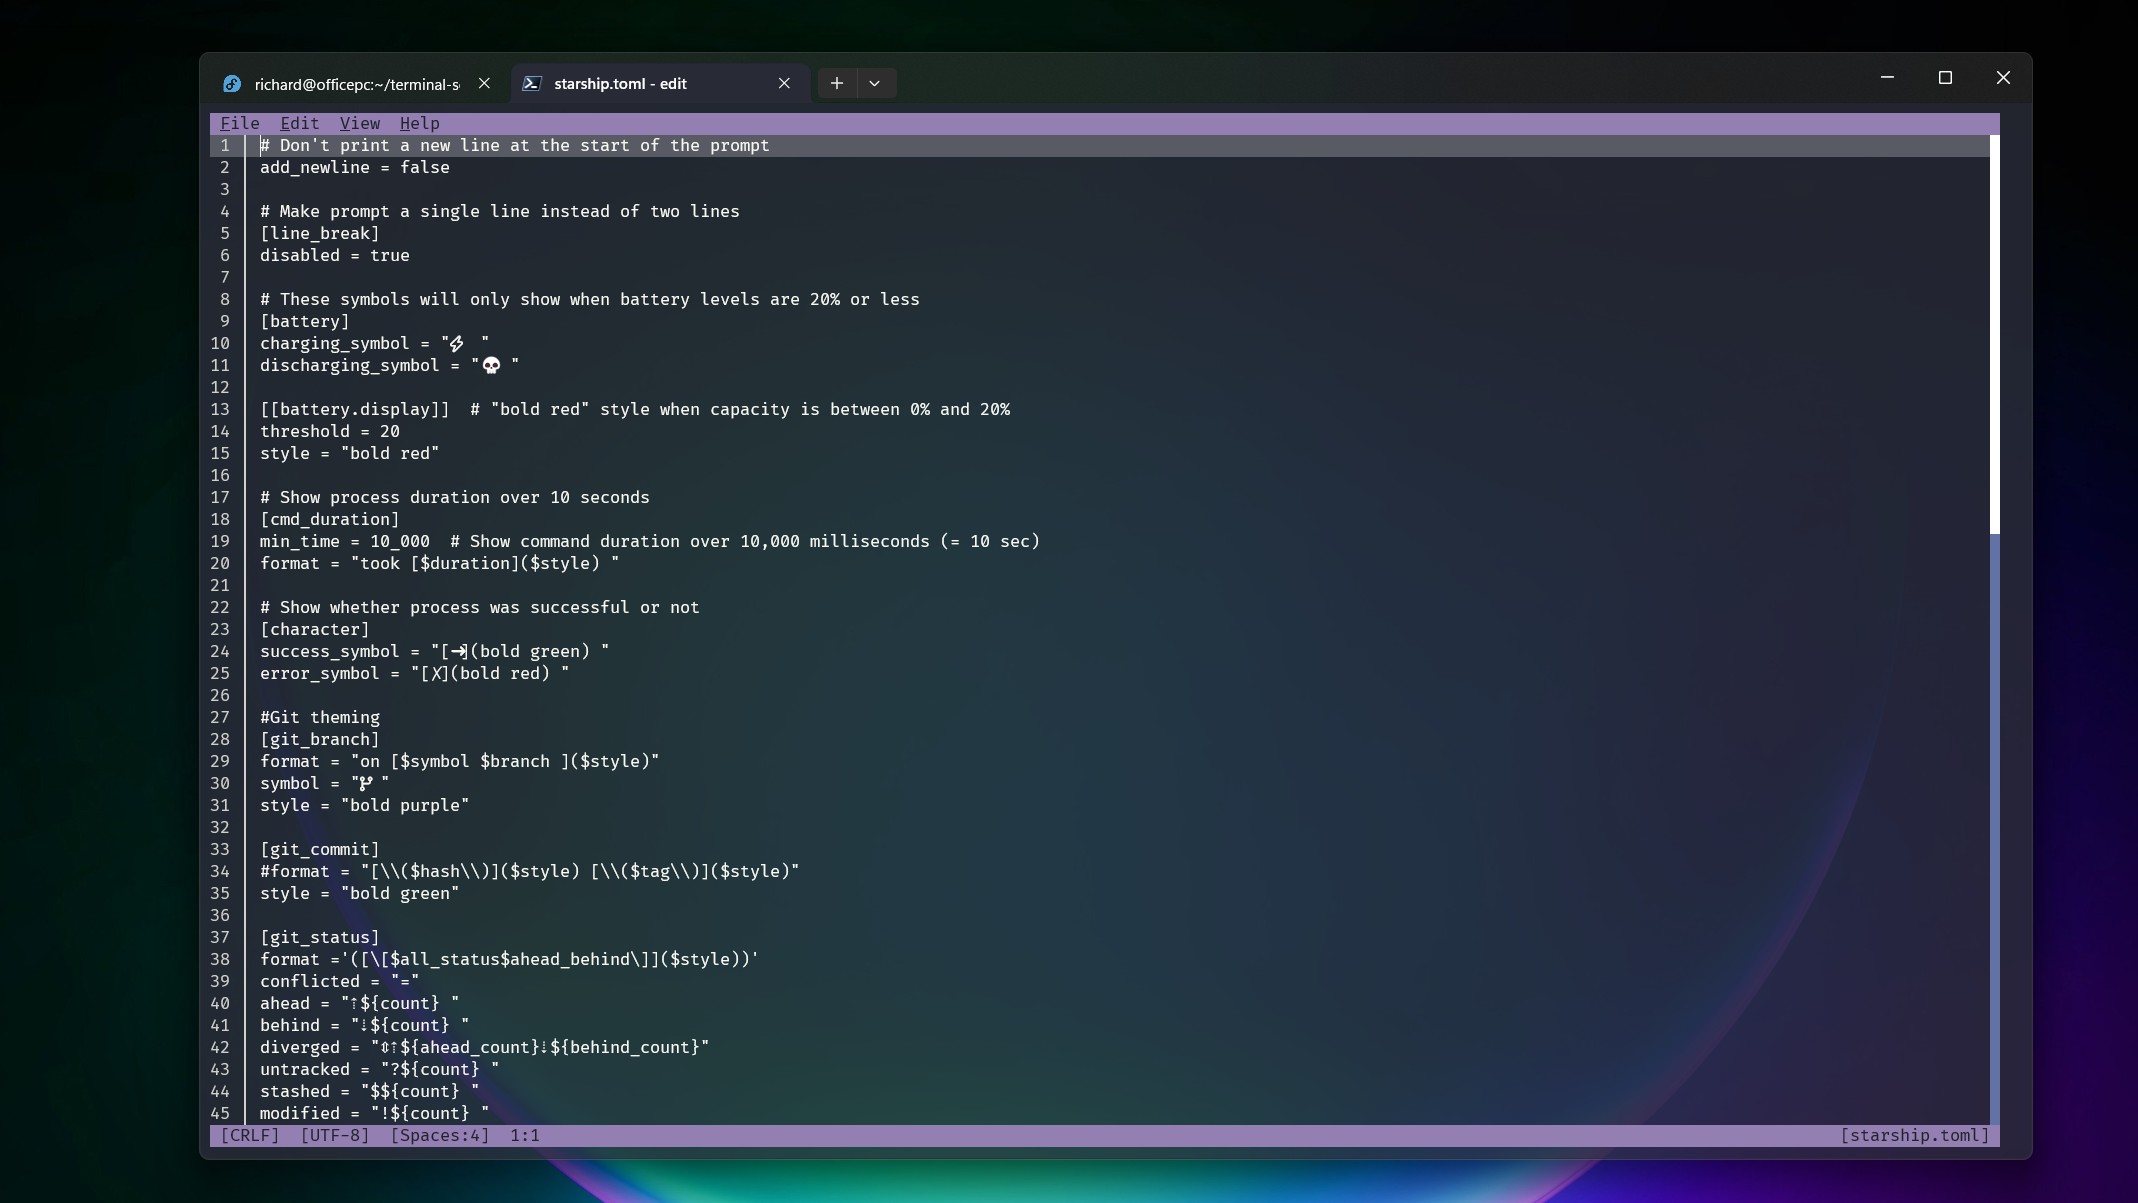
But where do you begin? Just jump into some of the templates in the Starship documentation, or get out there on GitHub. There are plenty of examples out there that, alongside the documentation, will quickly have you up to speed.
TOML is what you'll be writing it in, but it's nothing crazy or complicated.
You'll find my own Starship config file here. It's not fancy, but I like it. It adds features like Git integration for branches, status and commits, returns Starship to a single-line prompt, and shows battery information for when I'm on a laptop. It's basic, but it'll get you started.
2. Fastfetch
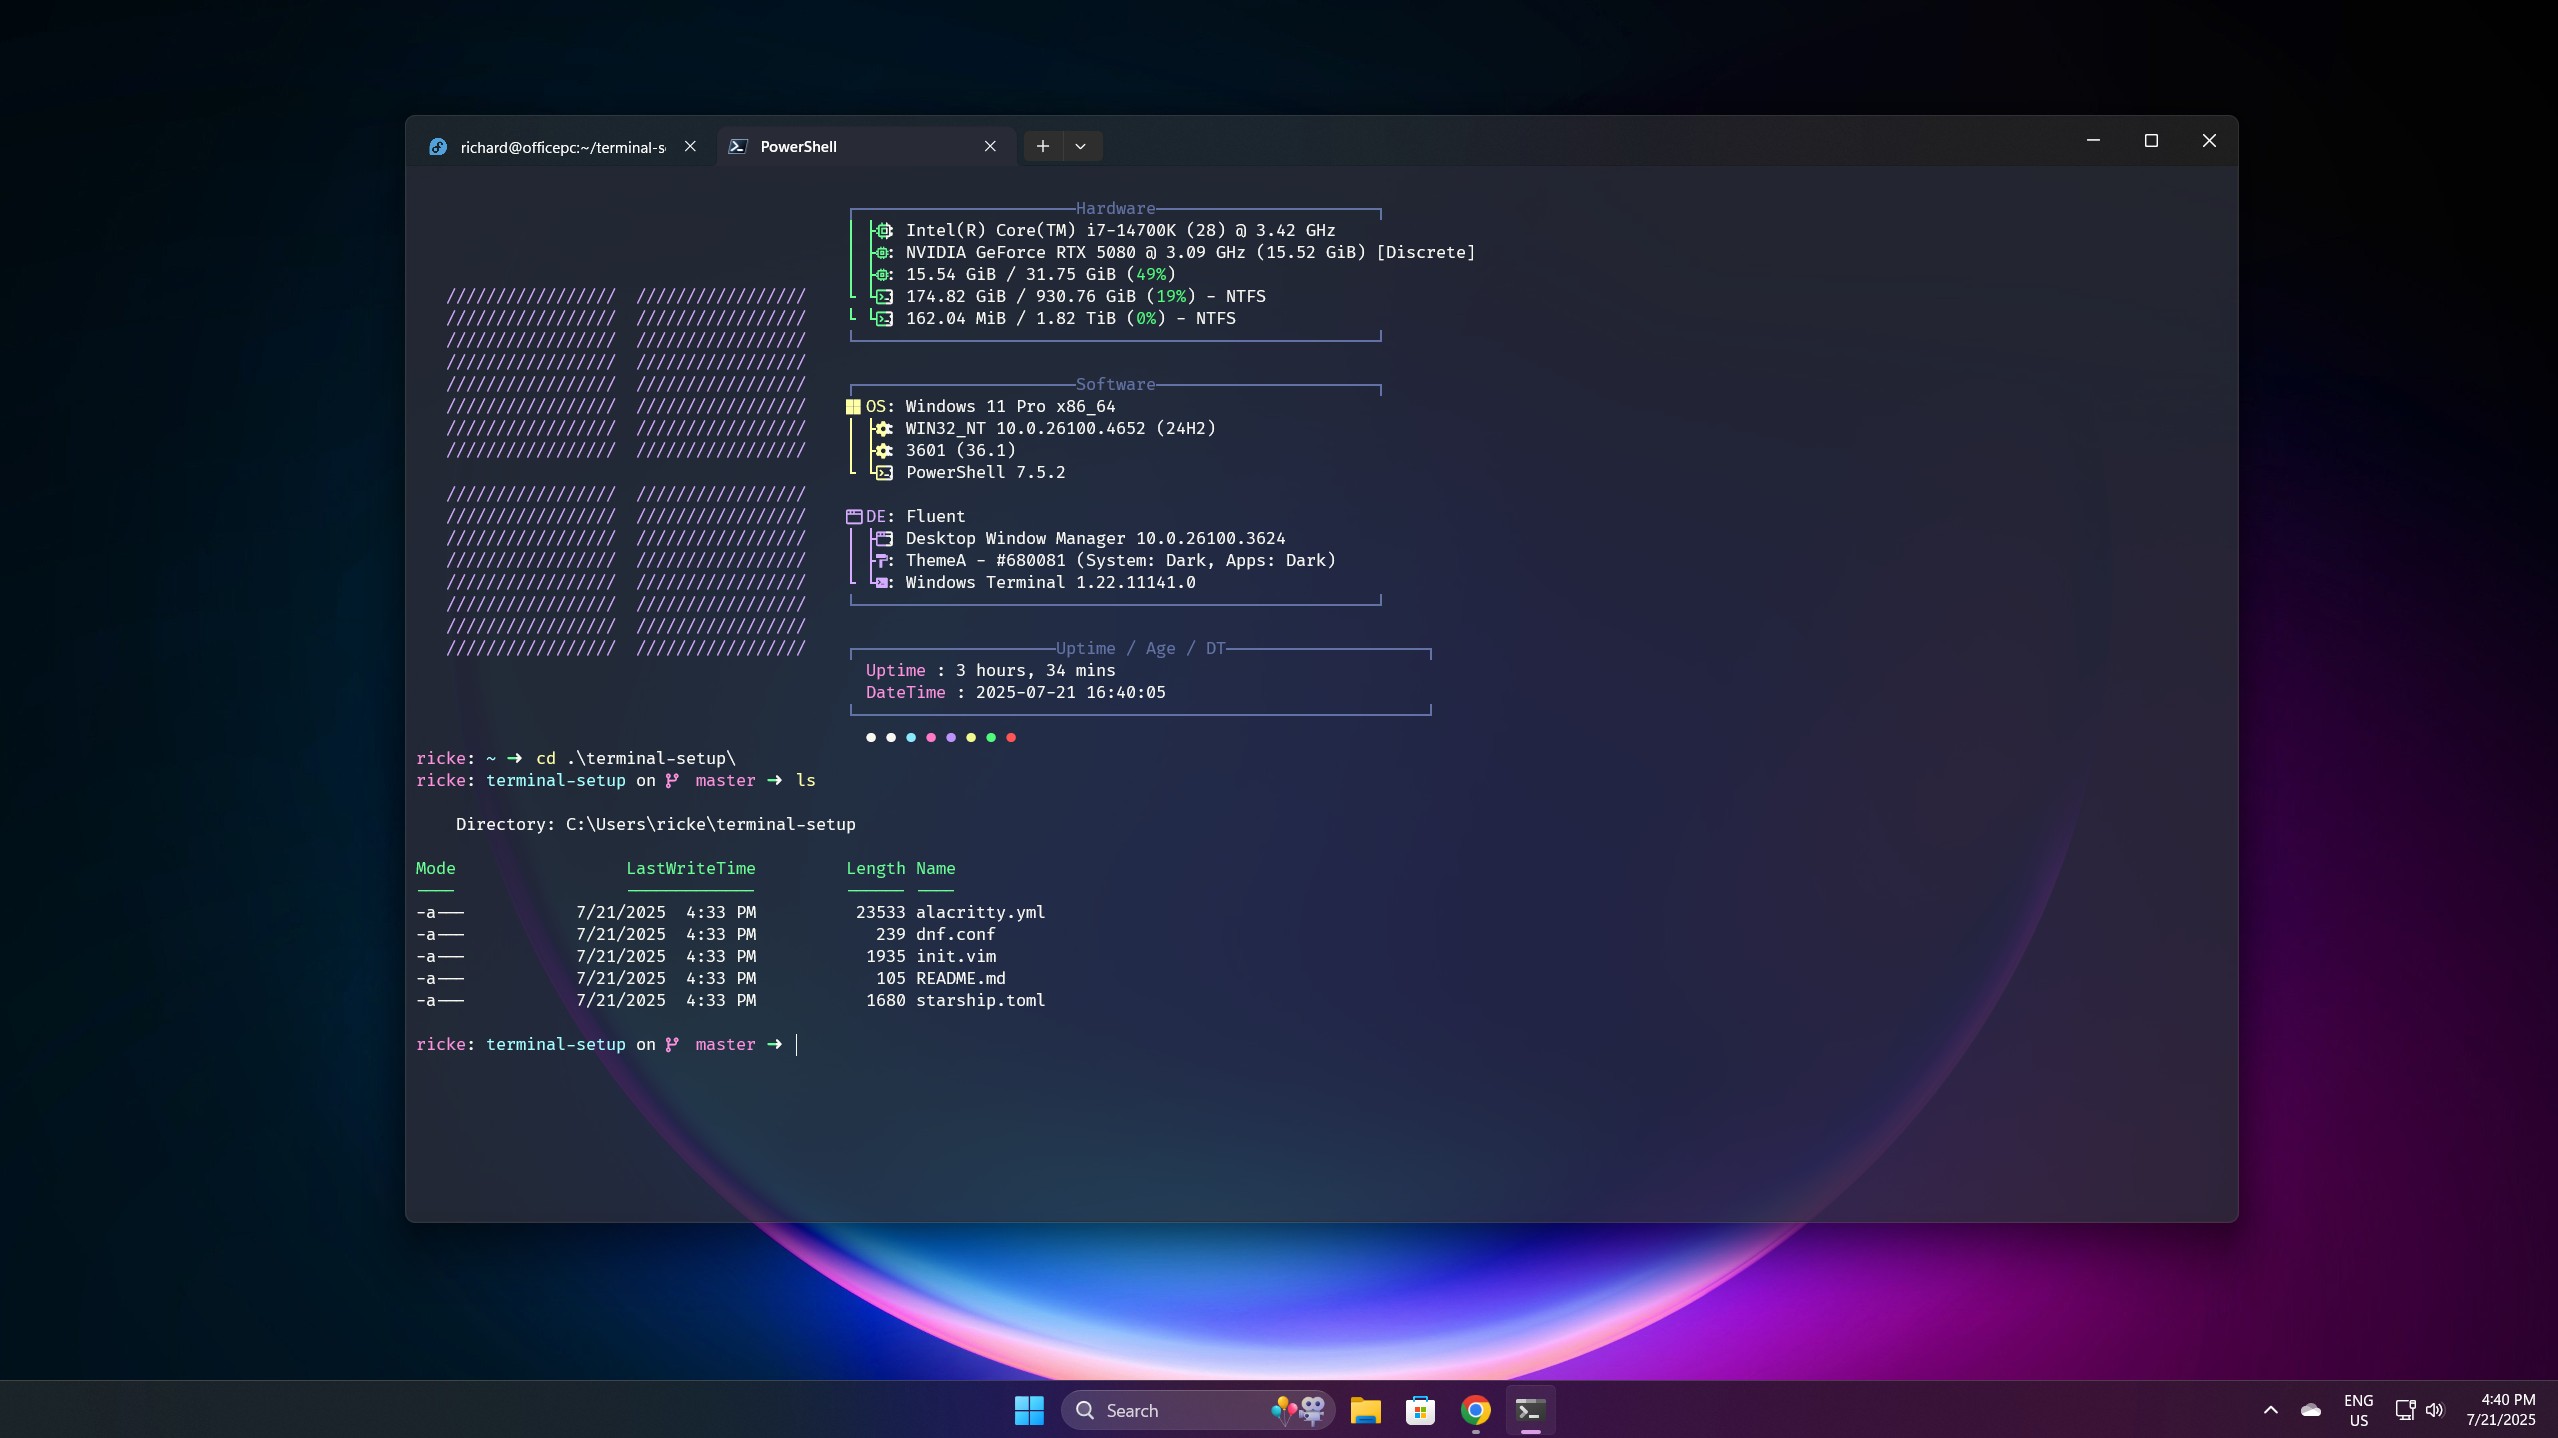
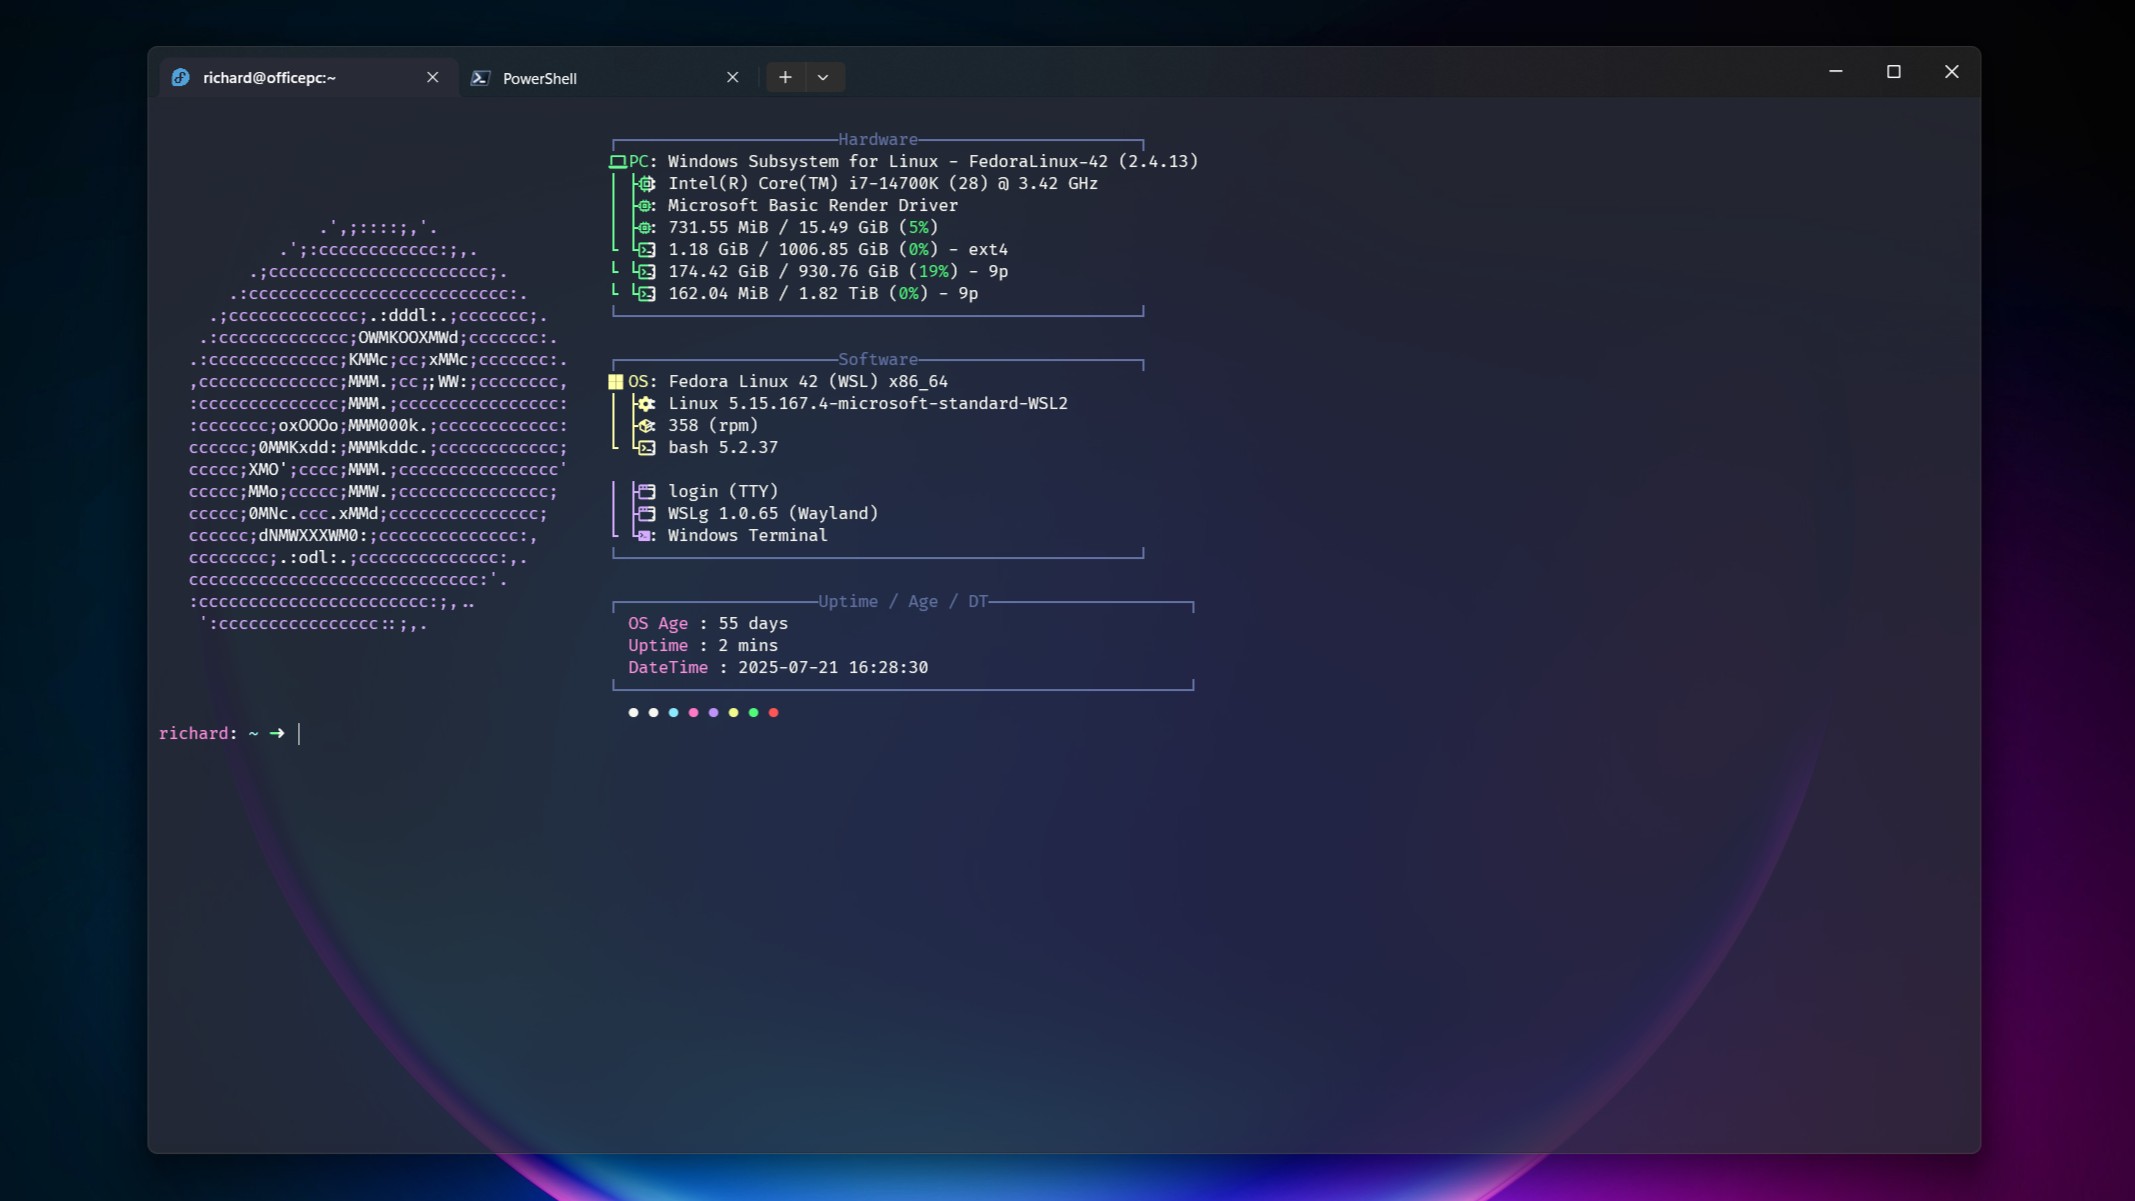
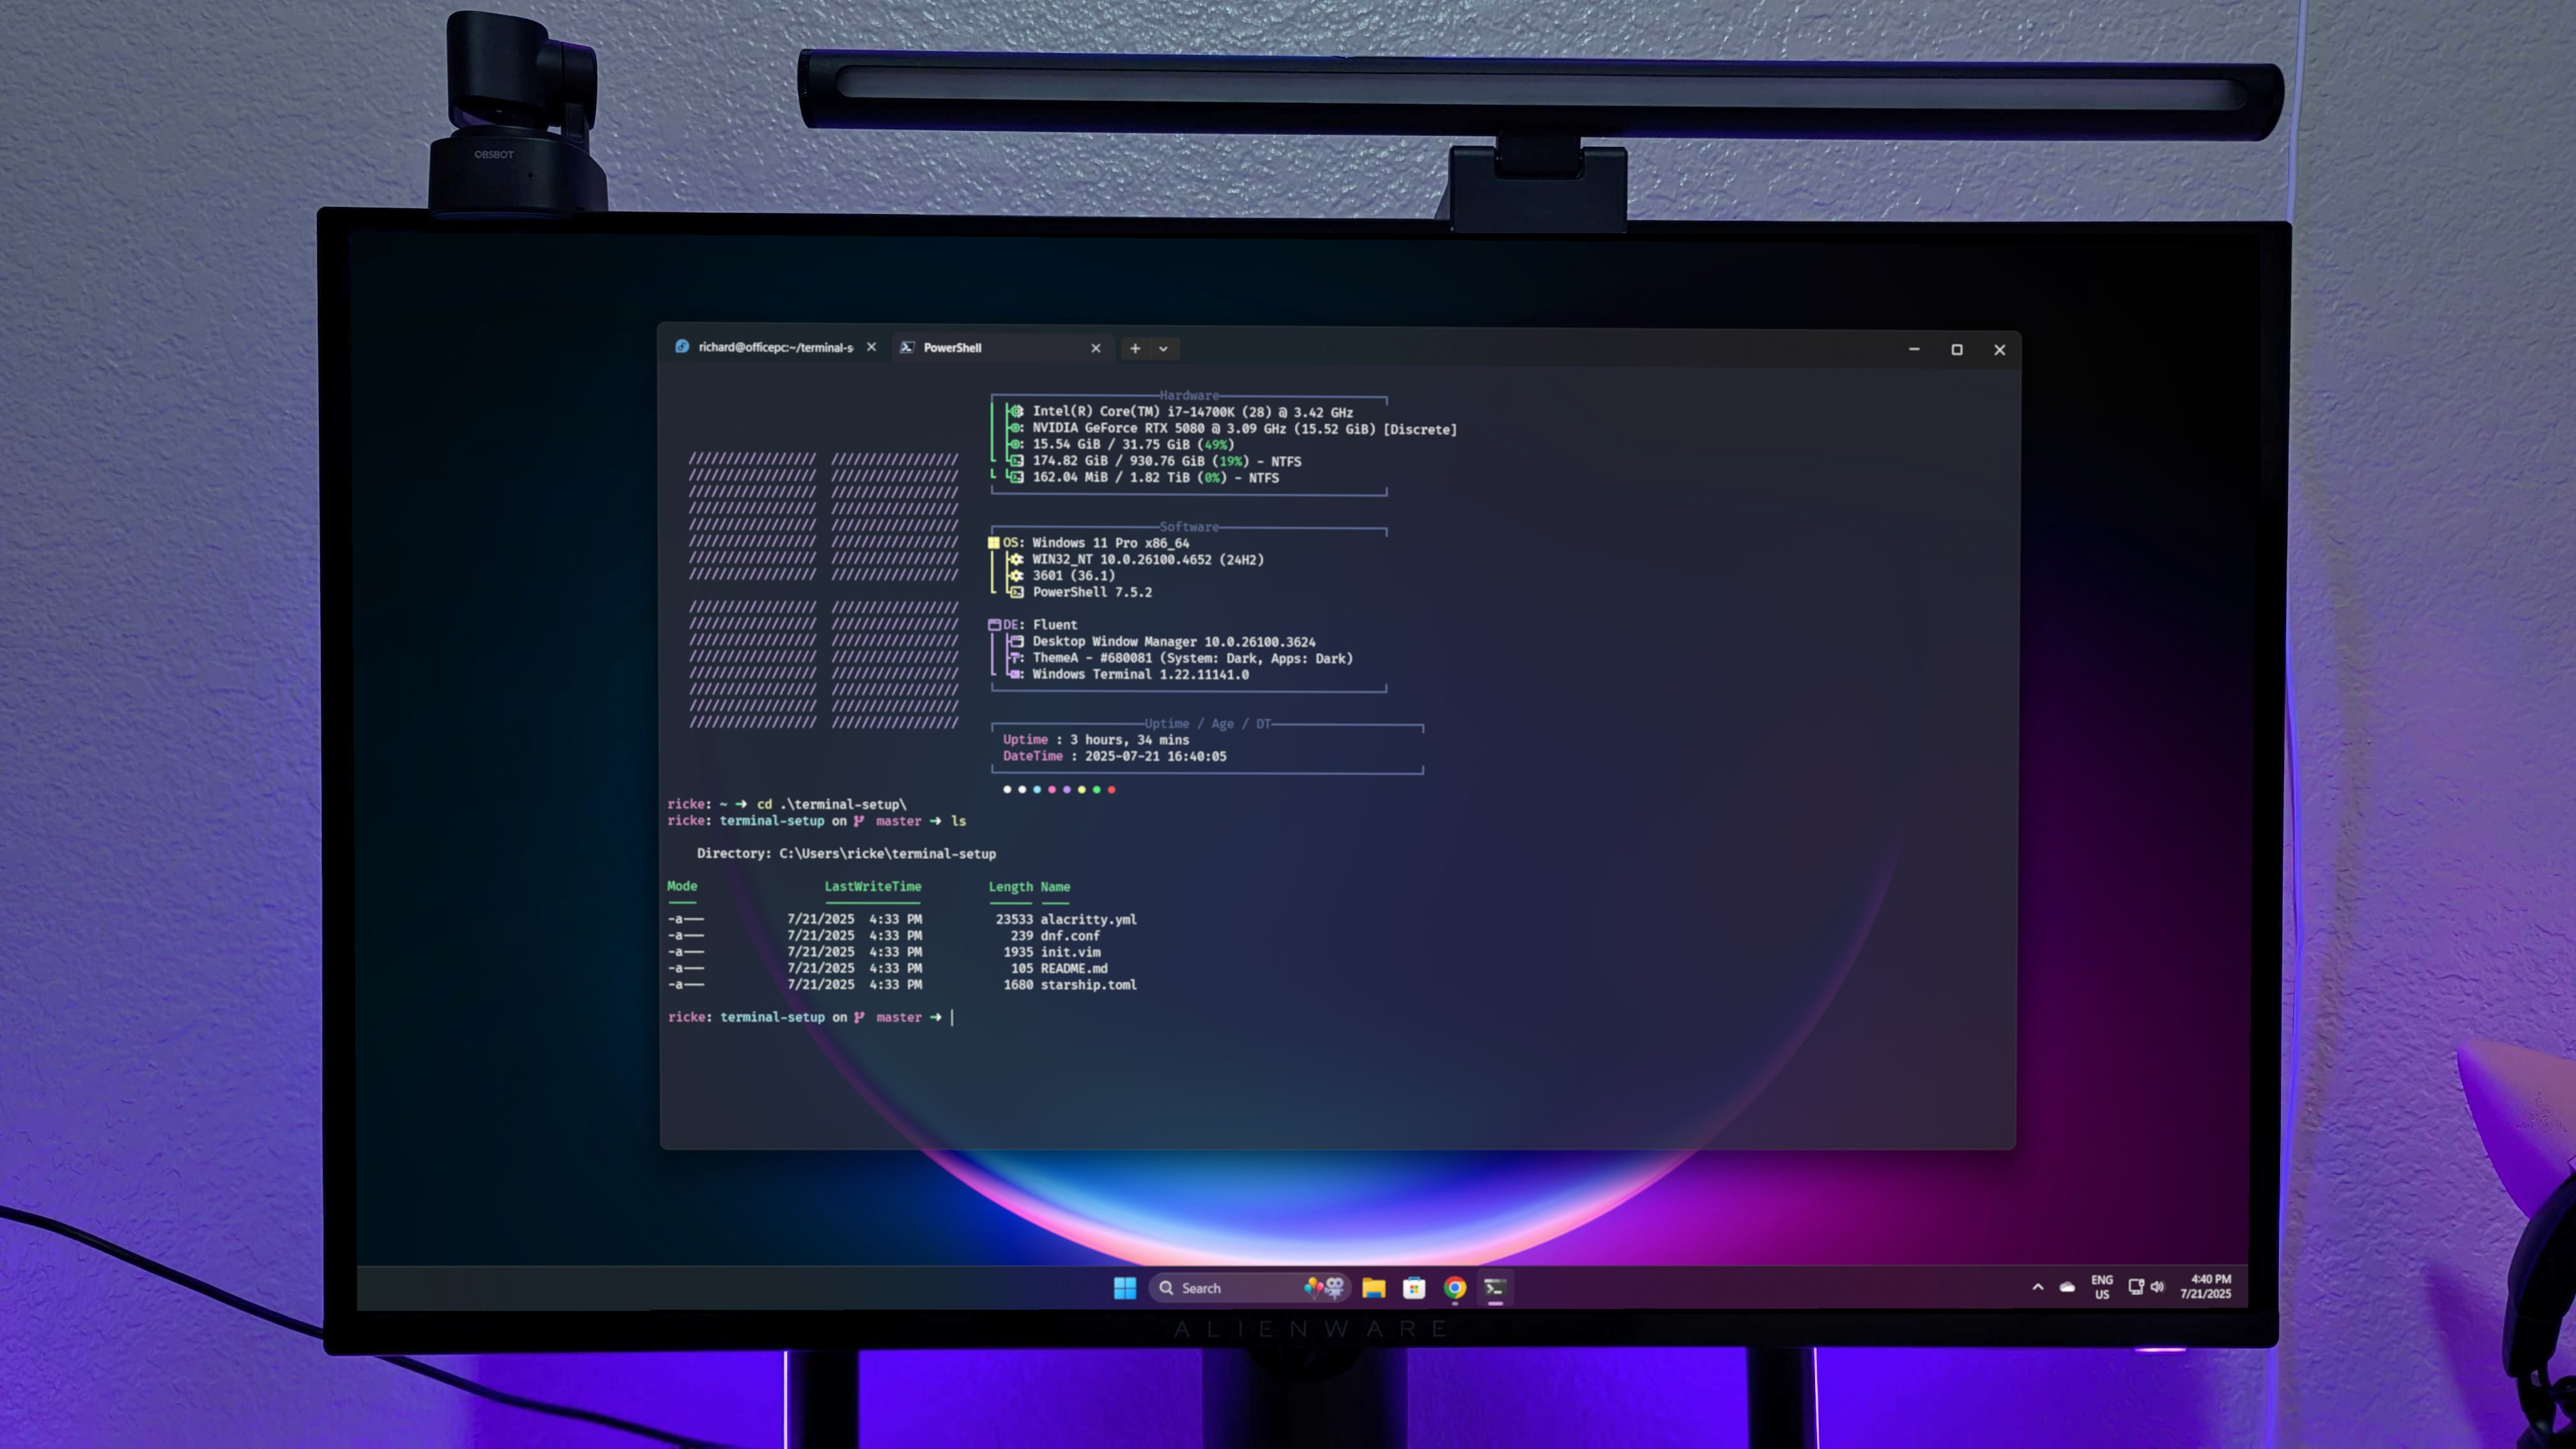
Is it really a terminal without system information loading up when you first open it? That's where Fastfetch comes in. It's a newer, and still supported, take on Neofetch, which was old, clunky, and now discontinued.
The best part? Like Starship, it supports both Windows and Linux, so you can use it in PowerShell and WSL with the same configuration for a consistent experience.
Installing is easy, through the various Linux package managers, and the likes of winget, Chocolatey, and Scoop on Windows 11. Check the GitHub Repo for the full instructions.
Customization isn't something I've dived into much myself, but the template in the images above is simply one I found via Reddit.
First, create a config file using this command:
fastfetch --gen-configIt'll go into your .config folder inside the Fastfetch directory. Same for both PowerShell and WSL.
From here on out, either trawl sources such as GitHub for templates other folks have made, or dive into the wiki and get poking around! I can't necessarily tell you why I, or others, just have to have this in our terminal windows, but it feels empty, naked, even, without it.
Fastfetch also supports custom images, not just ASCII art, so you can really go to town on it.
3. Windows Terminal customizations
When you're on Windows 11, there's a good chance you're using Windows Terminal. I mean, why wouldn't you? It's superb.
To add a little extra spice, you can make a bunch of customizations to Windows Terminal. In my case, all I've done is add the Dracula Theme, tweak the font size and line spacing a little, add some transparency, and one little touch specific to PowerShell.
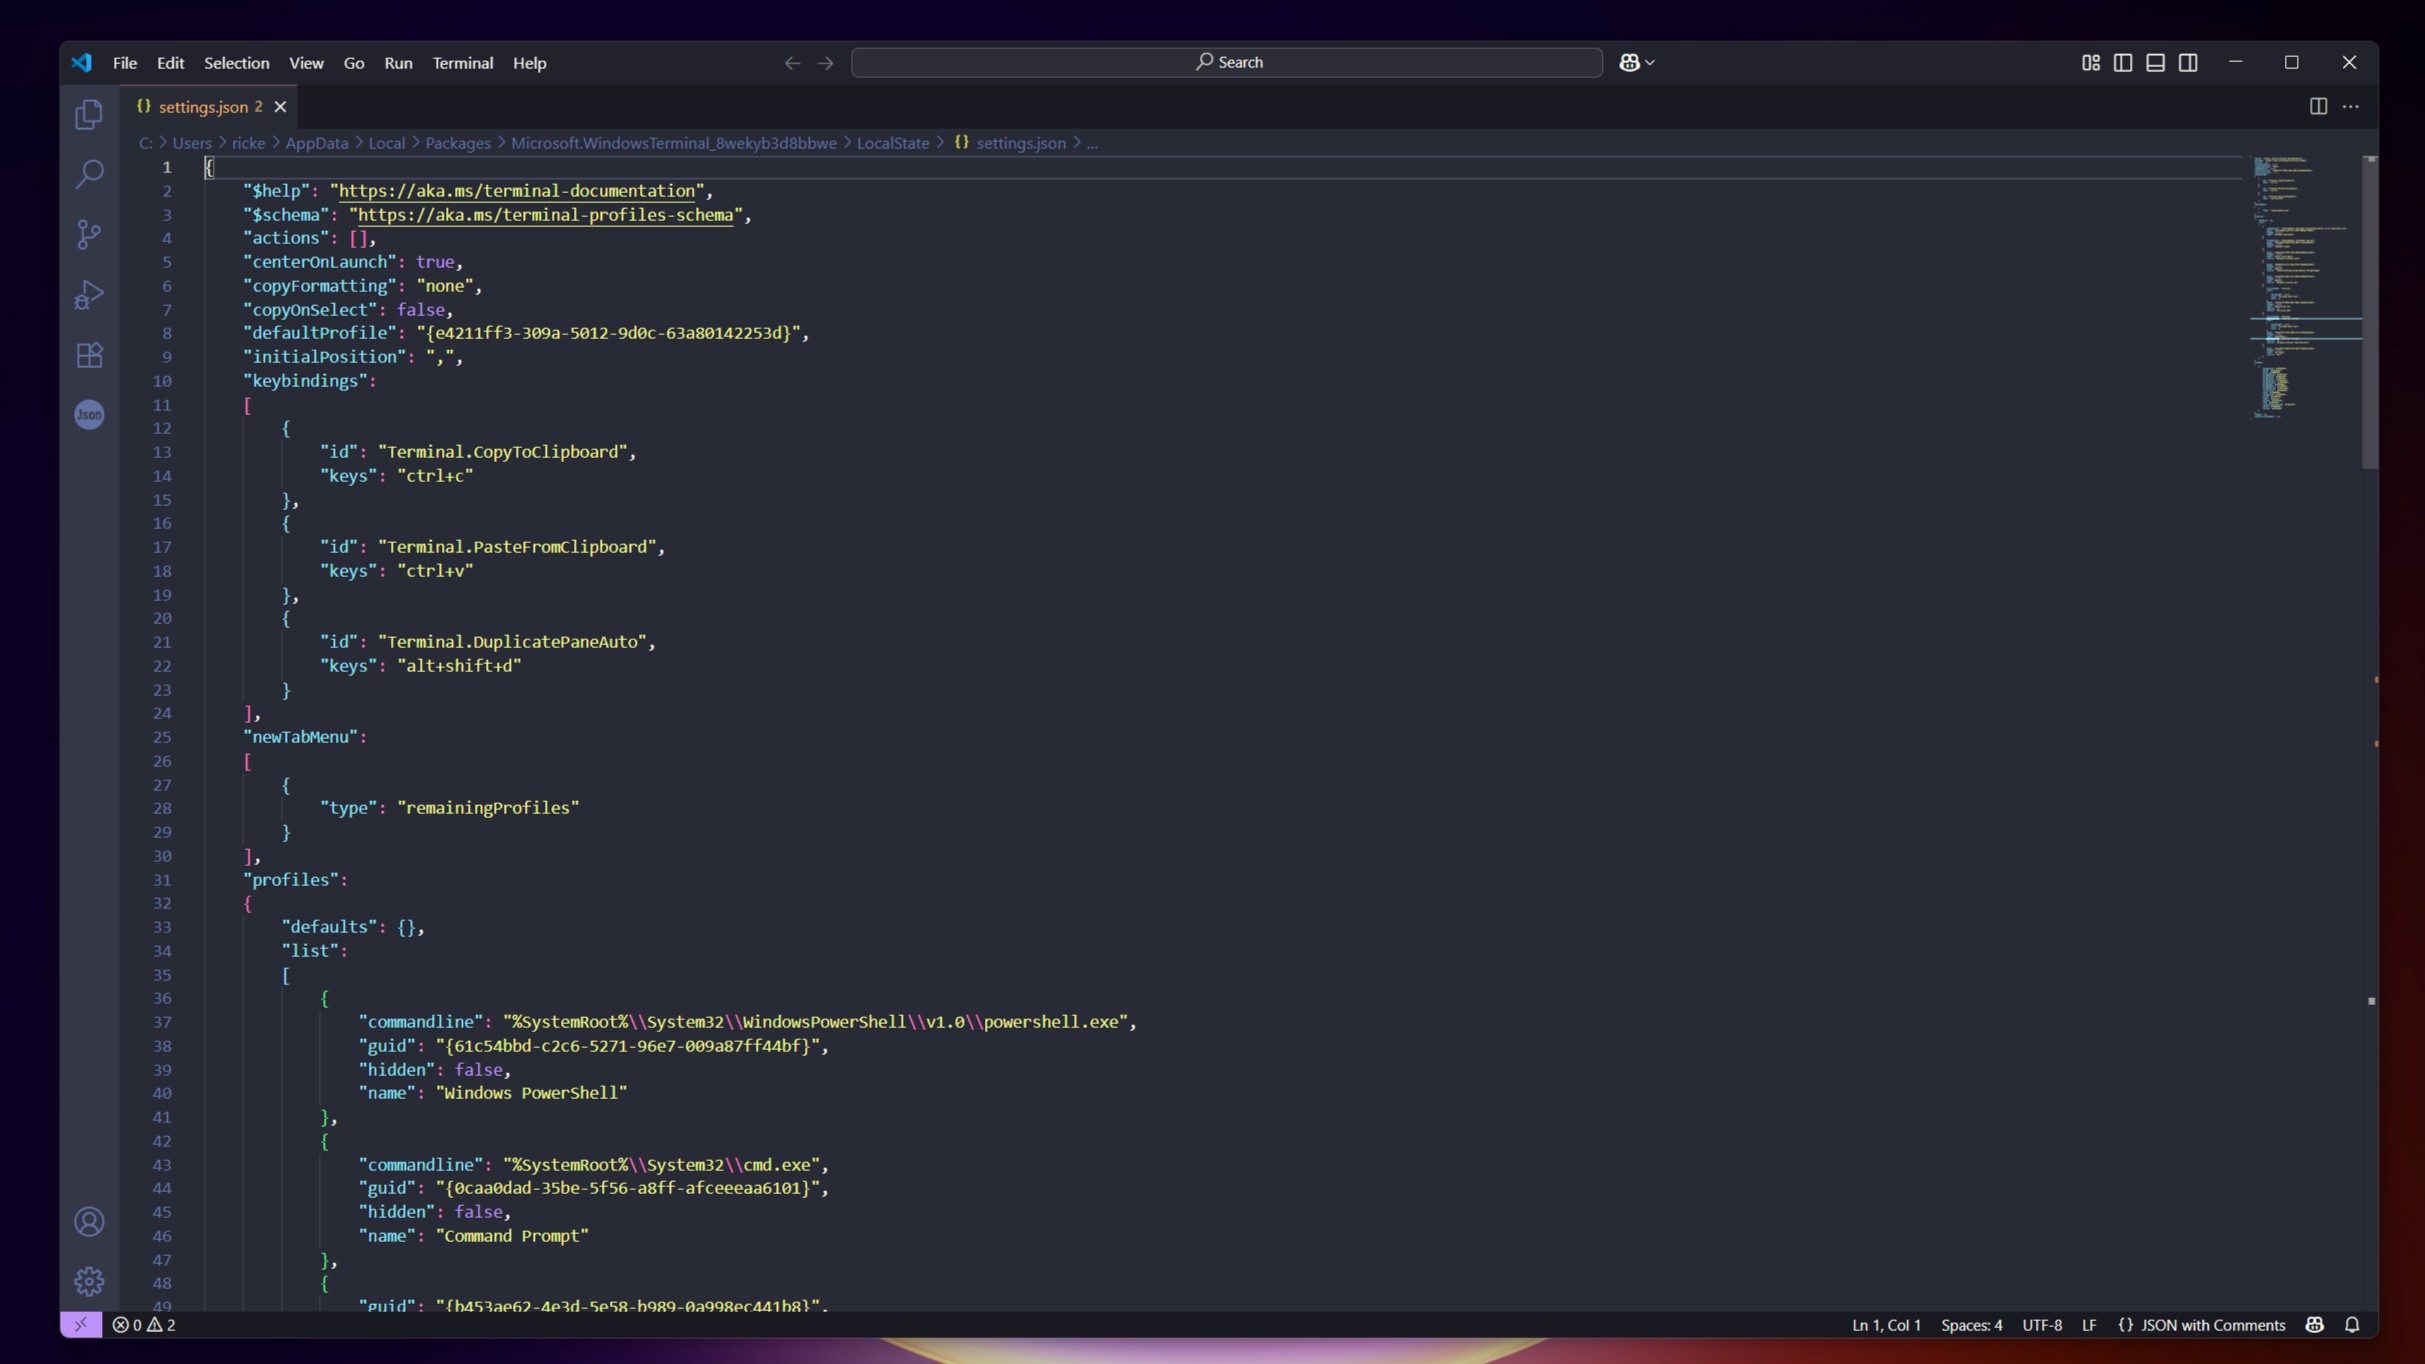
You can play around with the settings inside the app using the GUI, or if you prefer to get in the weeds, edit the JSON file. If you want to add custom themes, you'll need to go in here, in any case.
The other reason to go in there is to make that little line at the top of your PowerShell window telling you the latest version number go away. It was really bugging me, then it turns out, you just add a single line to the JSON file.
Put this into the PowerShell block, right after the "name" line:
"commandline": "pwsh.exe -nologo",Now you'll have a clean prompt, and if you're using Fastfetch, you won't have a line of text above it.
But, in combination with the other two tools listed here, a few little finishing touches to Windows Terminal can go a long way.
A note on PowerShell profiles
Admittedly, I'm not exactly a PowerShell wizard, and I had to find this out for myself so it might be useful. Out of the gate, PowerShell will tell you where your profile lives, but it doesn't exist.
I mean, it is made by Microsoft, what can we expect?
To apply Starship and Fastfetch at boot, you'll need to add them to your PowerShell profile. First, you need to make one. Enter this command into PowerShell.
if (!(Test-Path -Path $PROFILE)) {
  New-Item -ItemType File -Path $PROFILE -Force
}
This will create a PowerShell directory inside your User Documents folder, and inside it will be a blank PowerShell Profile.
When it's created, you can enter the commands above for Fastfetch and Starship, save, then reload PowerShell, and you'll be off to the races.
You can, of course, do much more with your PowerShell profile, but for the purposes of what we're doing here, two lines are enough.
And that's all there is to having a clean, but attractive experience across both PowerShell and your WSL distros!

Richard Devine is the Managing Editor at Windows Central with over a decade of experience. A former Project Manager and long-term tech addict, he joined Mobile Nations in 2011 and has been found in the past on Android Central as well as Windows Central. Currently, you'll find him steering the site's coverage of all manner of PC hardware and reviews. Find him on Mastodon at mstdn.social/@richdevine
You must confirm your public display name before commenting
Please logout and then login again, you will then be prompted to enter your display name.
