How to check account type on Windows 11
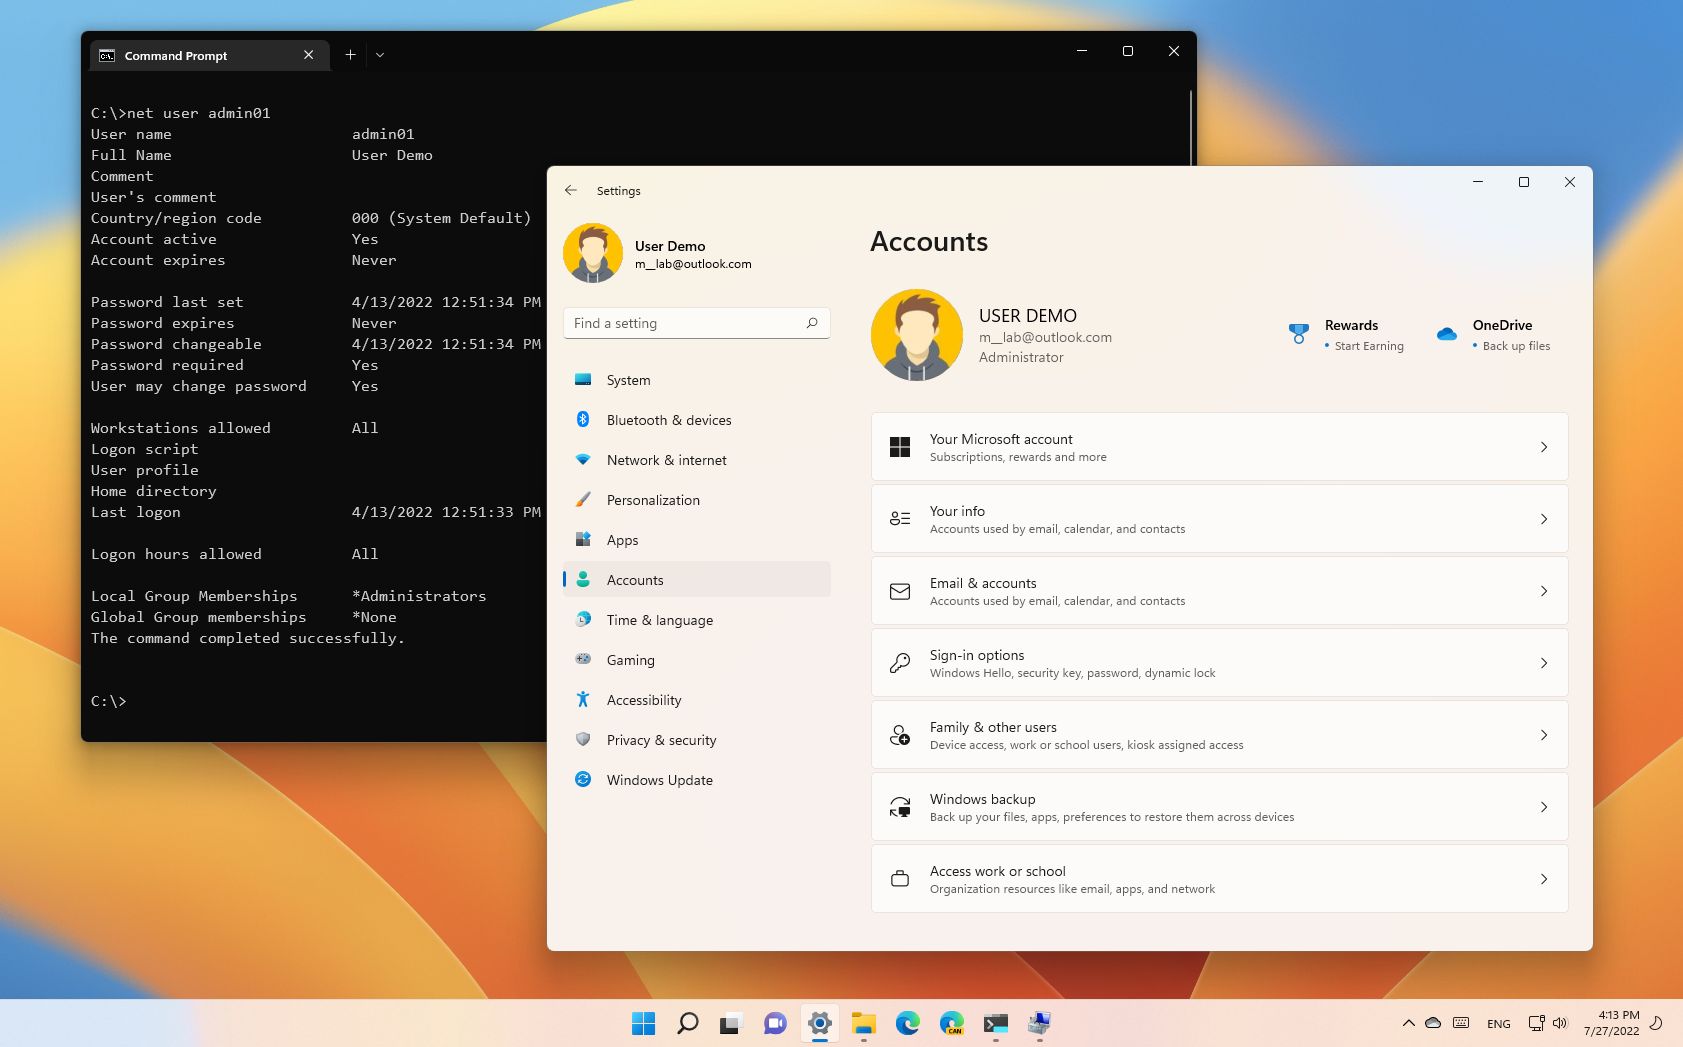
If you need to find out your account type, here are four ways to determine this info on Windows 11.
All the latest news, reviews, and guides for Windows and Xbox diehards.
You are now subscribed
Your newsletter sign-up was successful
Windows 11 allows you to create accounts with different levels of privileges that will determine how much access a user has to perform tasks on the computer, and in this guide, we'll show you how.
Typically, the system allows you to create two types of accounts, including the Administrator and Standard User. The Administrator account provides users complete control of the device, meaning they can install apps, change system settings, and run elevated tasks that affect all users.
On the other hand, the Standard User account is the more restrictive type. This account type only allows users to work with apps, change local settings, and they can't run elevated tasks (without permission).
This guide will walk you through the steps to confirm the type of account you and everyone else are using on Windows 11.
How to check account type with Settings
The easiest way to check whether an account has administrative or limited rights on Windows 11 is to use the Settings app.
Current account
To determine your account type on Windows 11, use these steps:
All the latest news, reviews, and guides for Windows and Xbox diehards.
- Open Settings.
- Click on Accounts.
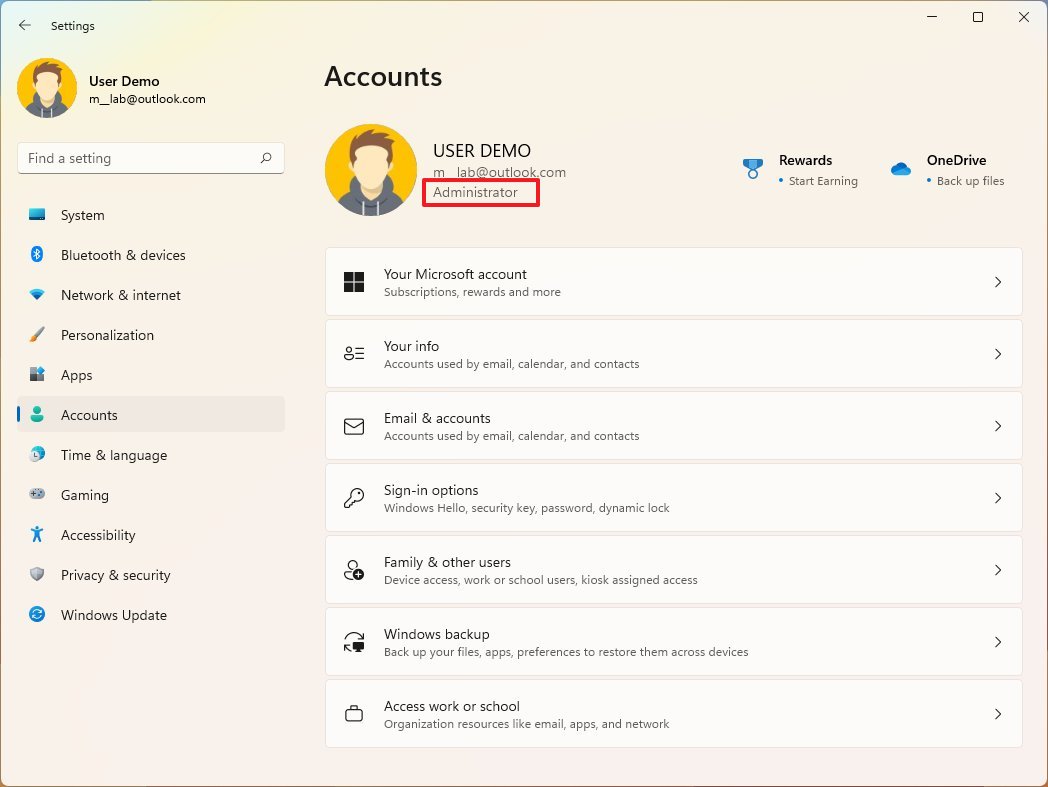
- Confirm the account type under the username.
Once you complete the steps, the settings page will show the type of access you have on the computer. Usually, the first account you create while setting up a new device or installation on Windows 11 is an Administrator account.
All accounts
To confirm the account type for all the users on the computer, use these steps:
- Open Settings.
- Click on Accounts.
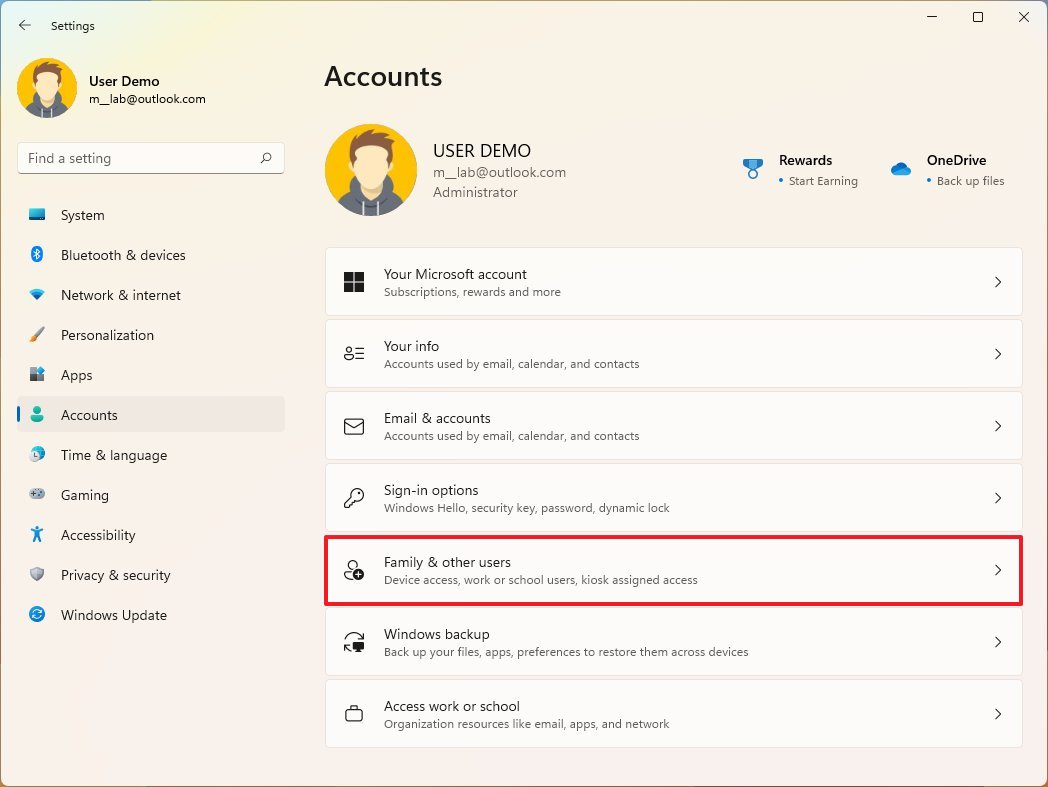
- Click the "Family & other users" page from the right side.
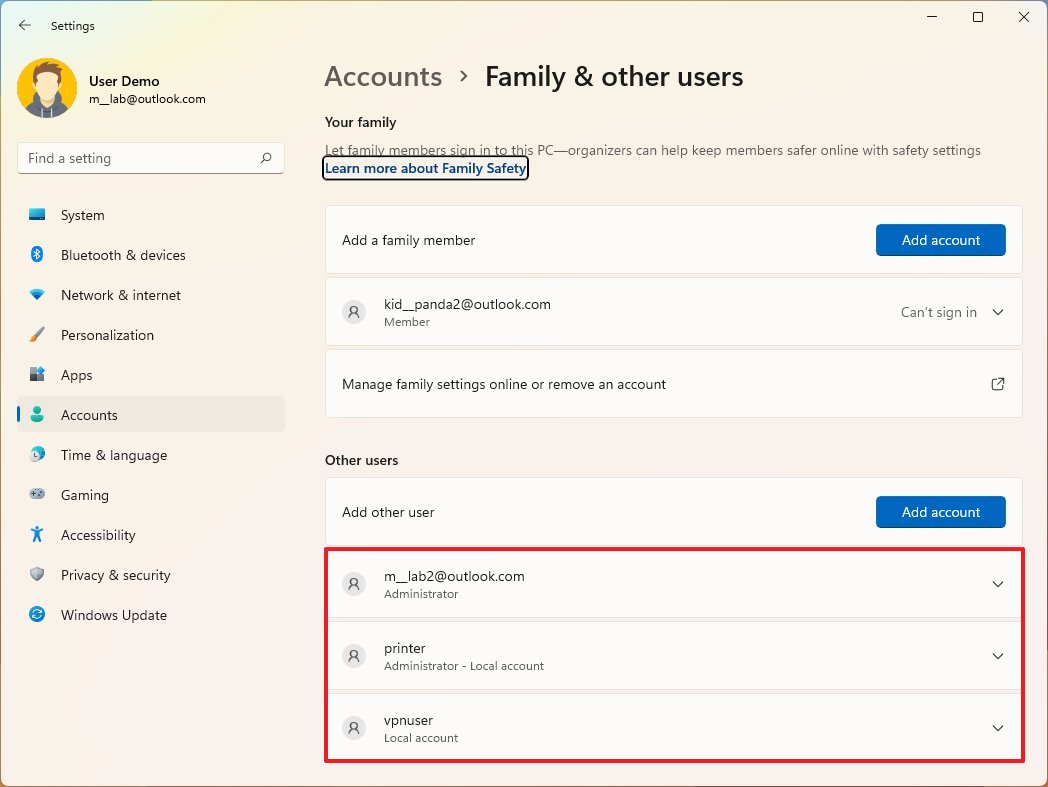
- Under the "Other users" section, if only the email address is shown, it's a "Standard user" account created using a Microsoft account. If the email address and "Administrator" are shown, it's an admin account created with a Microsoft account.
- If under the username it reads "Local account" (only), this is a "Standard user" account type. If it reads "Administrator," it's a local "Administrator" account.
After you complete the steps, you will know the account type of every account configured on Windows 11.
If you added a new family member through the "Your family" settings, the account is "Standard user."
How to check account type with Control Panel
It's also possible to use Control Panel to check the type of account for every user profile on the device.
Current account
To check your account type through Control Panel, use these steps:
- Open Control Panel.
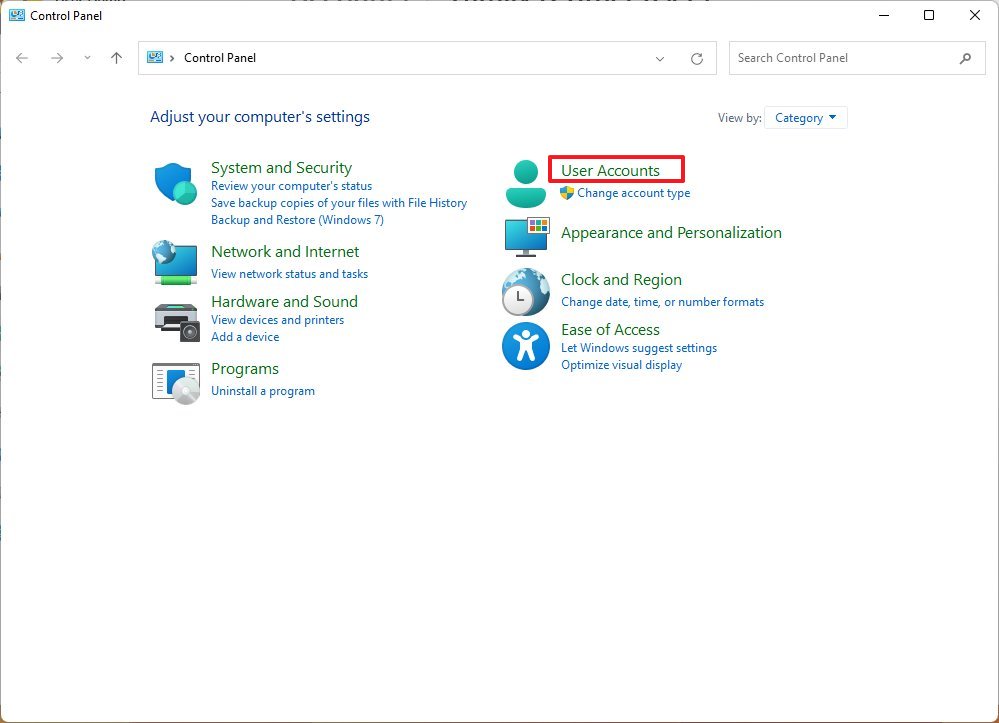
- Click on User Accounts.
- Click on User Accounts again.
- Confirm the account type under the username.
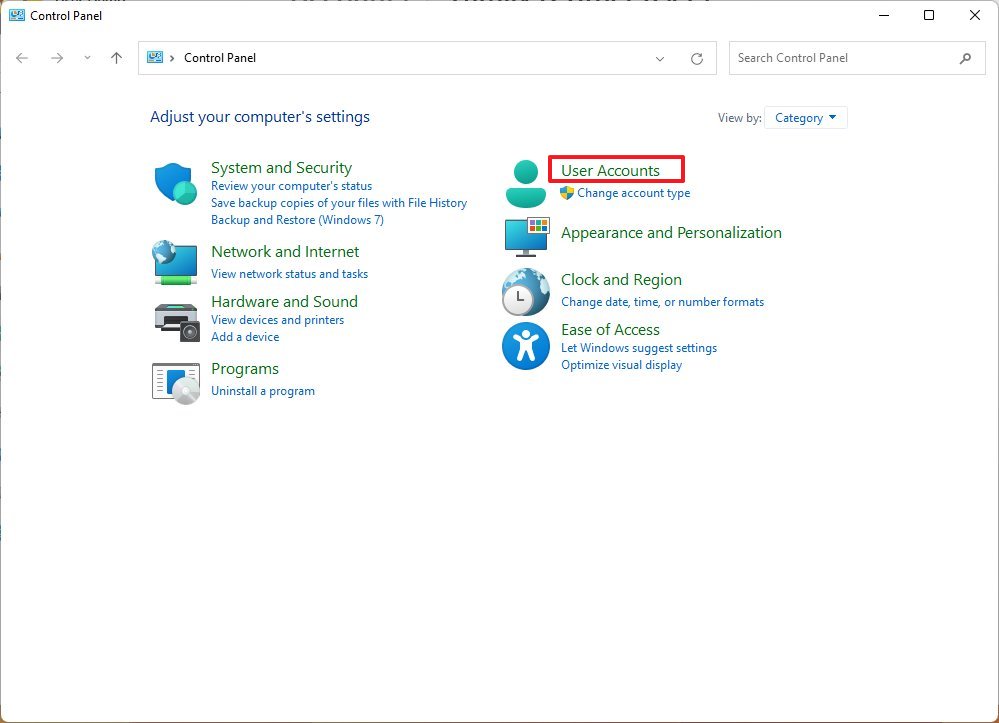
Once you complete the steps, you'll know whether the account is Standard User or Administrator.
All accounts
To determine the account type of every user configured on the device, use these steps:
- Open Control Panel.
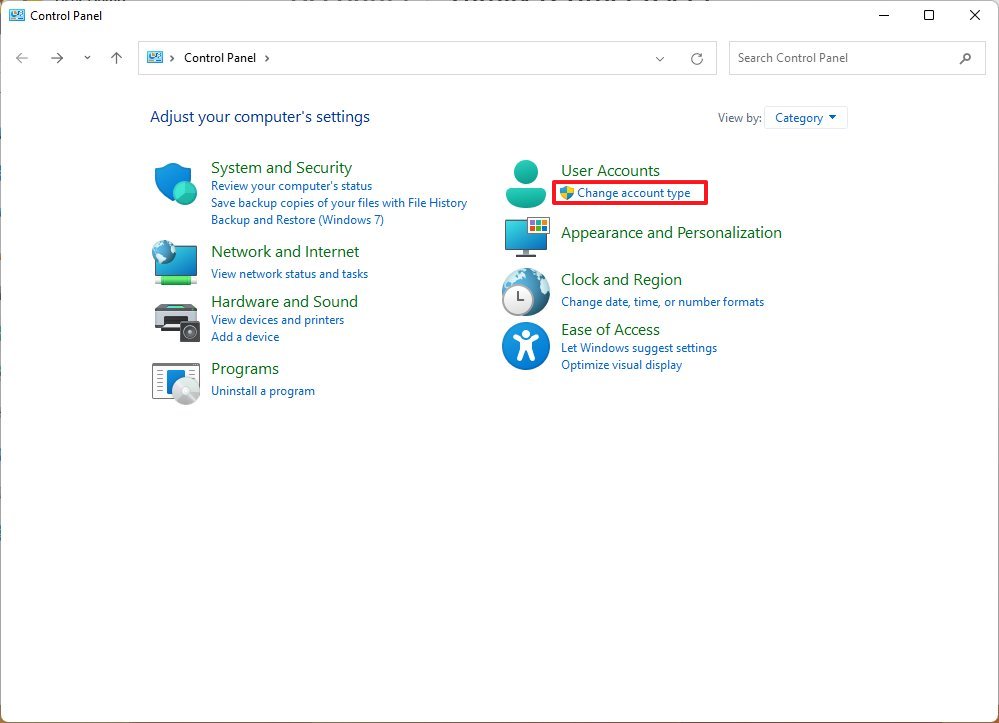
- Under "User Accounts," click the "Change account type" option.
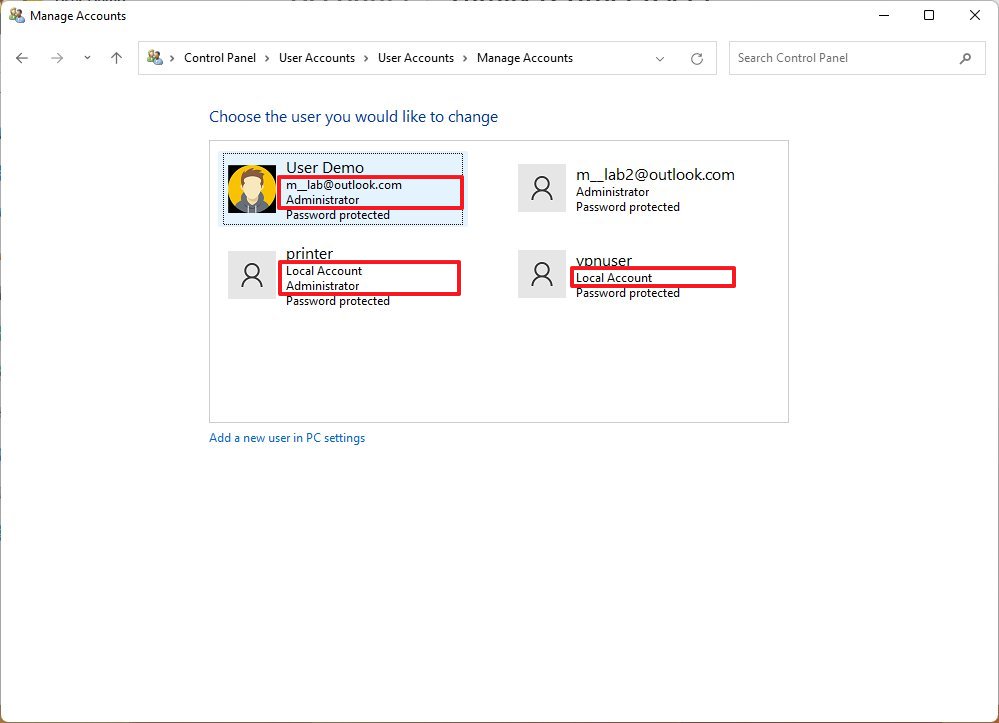
- If only the email address is shown, it's a "Standard user" account created using a Microsoft account. If the email address and "Administrator" are shown, it's an admin account created with a Microsoft account.
- If under the username it reads "Local account" (only), this is a "Standard user" account type. If it reads "Administrator," it's a local Administrator account.
After you complete the steps, Control Panel will reveal the account type of all the users.
Legacy User Accounts settings
Alternatively, you can also use the legacy User Accounts settings to find out whether the account is admin or not quickly.
To confirm whether an account is an Administrator or Standard User using User Accounts (netplwiz), use these steps:
- Open Start.
- Type the following command and press Enter: netplwiz
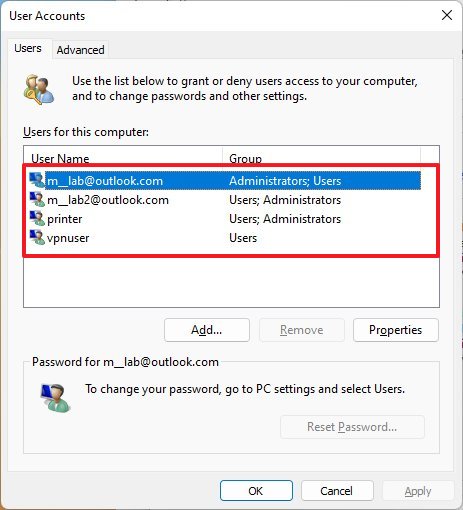
- If the "Group" column reads Administrator (and Users), the account is Administrator. If the "Group" column only reads Users, the account is a Standard user account type.
Once you complete these steps, you'll be able to see the account type for all the users configured on your device.
How to check account type with Computer Management
To check your account type with Computer Management on Windows 11, use these steps:
- Open Start.
- Search for Computer Management and select the top result to open the app.
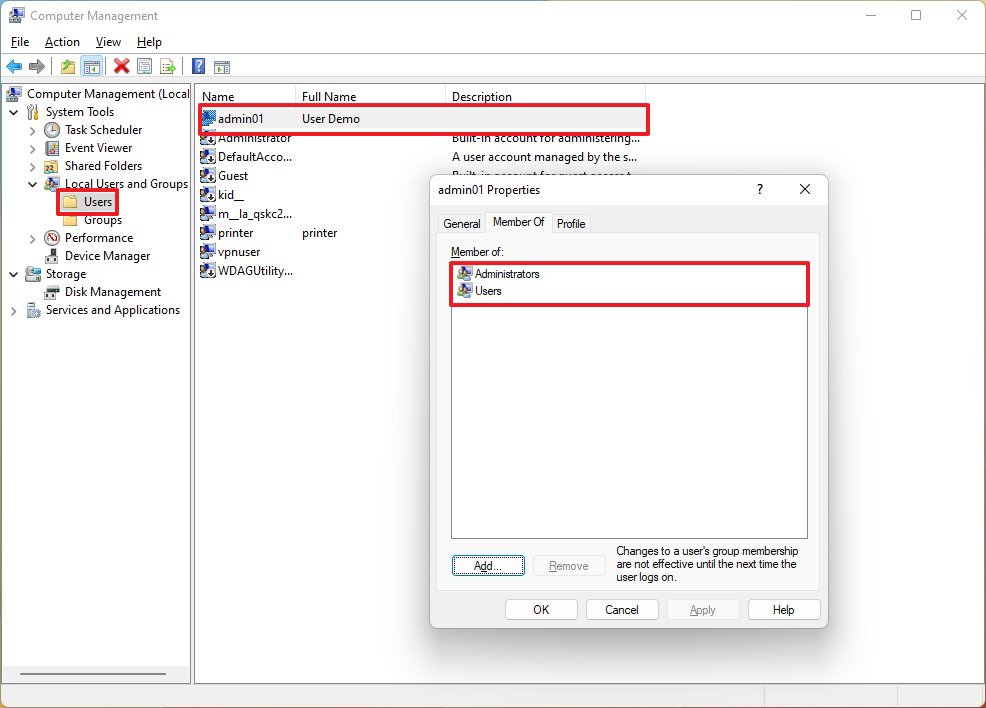
- Navigate to the following path: Computer Management > System Tools > Local Users and Groups > Users.
- Right-click the account to determine its type and select the Properties option.
- Click the Member Of tab.
- If the "Member of" section reads Administrator (and Users), the account is Administrator. If the section only reads Users, the account is a Standard user account type.
After you complete the steps, Computer Management will reveal the account type for the user.
How to check account type with Command Prompt
To confirm whether the user is an Administrator or Standard with Command Prompt, use these steps:
- Open Start.
- Search for Command Prompt, right-click the top result, and select the Run as administrator option.
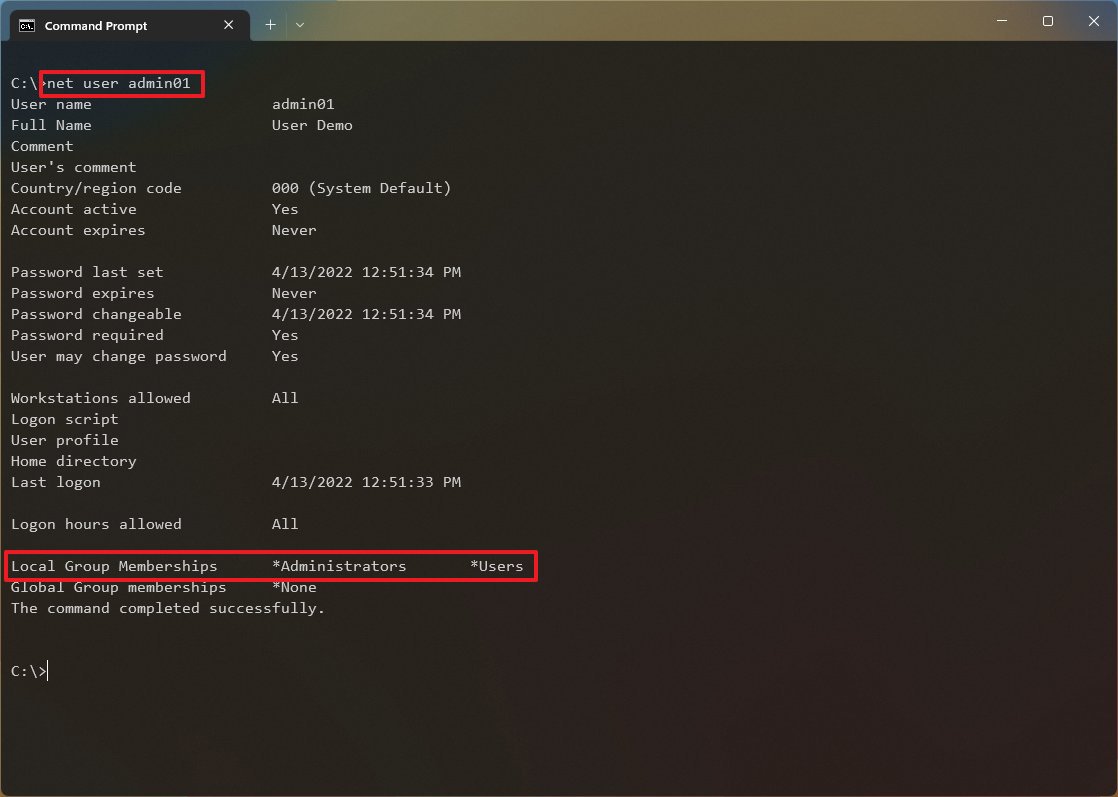
- Type the following command to determine the account type for a particular user and press Enter: net user ACCOUNT-NAME
In the command, change the ACCOUNT-NAME to the actual name of the account.
- Under the "Local Group Memberships" section, confirm the user account type. If the section reads Administrator (and Users), the account is Administrator. If the section only reads Users, the account is a Standard User account type.
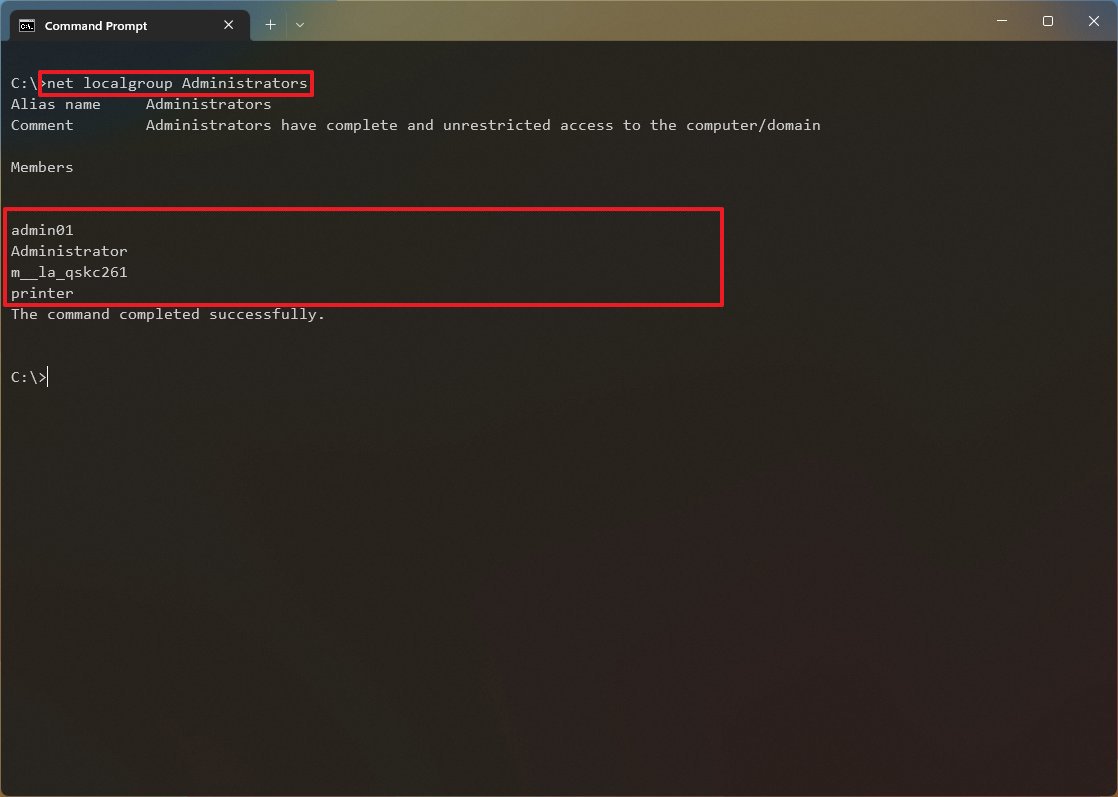
- (Optional) Type the following command to determine all the Administrator accounts on your computer and press Enter: net localgroup Administrators
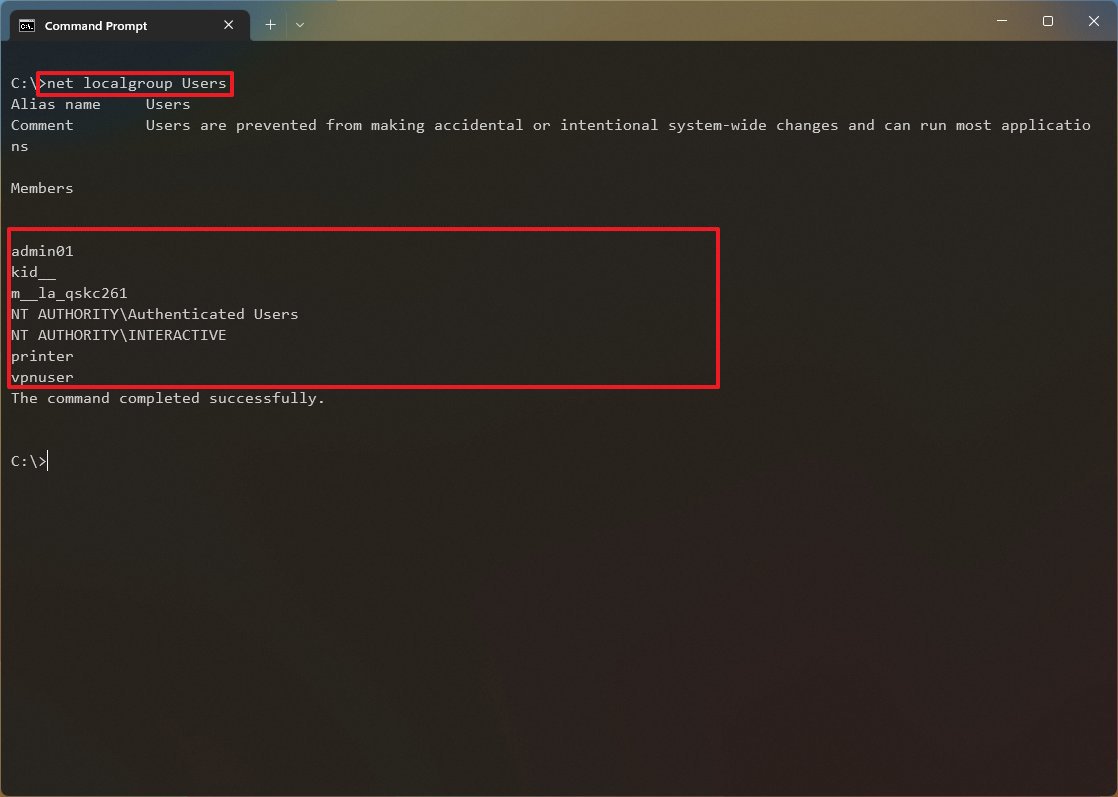
- (Optional) Type the following command to determine all the Standard User accounts on your computer and press Enter: net localgroup Users
- Quick note: The only caveat about this command is that it lists all the accounts in the "Users" group, including those in the "Administrators" groups since these users are part of both groups.
Once you complete the steps, Command Prompt will allow you to determine the Windows 11 account type.
More resources
For more helpful articles, coverage, and answers to common questions about Windows 10 and Windows 11, visit the following resources:

Mauro Huculak has been a Windows How-To Expert contributor for WindowsCentral.com for nearly a decade and has over 22 years of combined experience in IT and technical writing. He holds various professional certifications from Microsoft, Cisco, VMware, and CompTIA and has been recognized as a Microsoft MVP for many years.
