How to create a dual-boot setup on Windows 11
Here's everything you need to know to create a dual-boot setup on Windows 11.
All the latest news, reviews, and guides for Windows and Xbox diehards.
You are now subscribed
Your newsletter sign-up was successful
On Windows 11, you can create a dual-boot setup to run two or more operating systems independently. This solution comes in handy to run older releases (such as Windows 10, 8.1, or 7), allowing you to use applications that are incompatible with the current version. You can install previews of newer versions of Windows 11 to test new features without affecting your existing installation. Or you can install operating systems from other platforms, such as Linux.
Although you can also use virtualization, a dual-boot system will have full access to the hardware for better performance and experience.
In the ideal scenario, you could use another computer to run a different operating system. However, a dual-boot setup is a viable solution to run Windows 11 alongside Insider preview builds for the Dev, Beta, Release Preview Channels, or another version.
This guide will walk you through the steps to configure a dual-boot system on Windows 11.
How to dual-boot on Windows 11
The process of setting up a dual-boot system involves a few steps to make sure that everything goes smoothly and configures correctly. The first thing you need to do is to create a backup in case something happens and you need to roll back. Then you need to prepare the system and create a USB bootable media. Then you have to go through the Windows installation process and configure the boot manager.
Create temporary backup
The backup is not a requirement, but it's a good idea since you will modify the current installation.
All the latest news, reviews, and guides for Windows and Xbox diehards.
To create a temporary backup of Windows 11, use these steps:
- Open Start
- Search for Control Panel and click the top result to open the app.
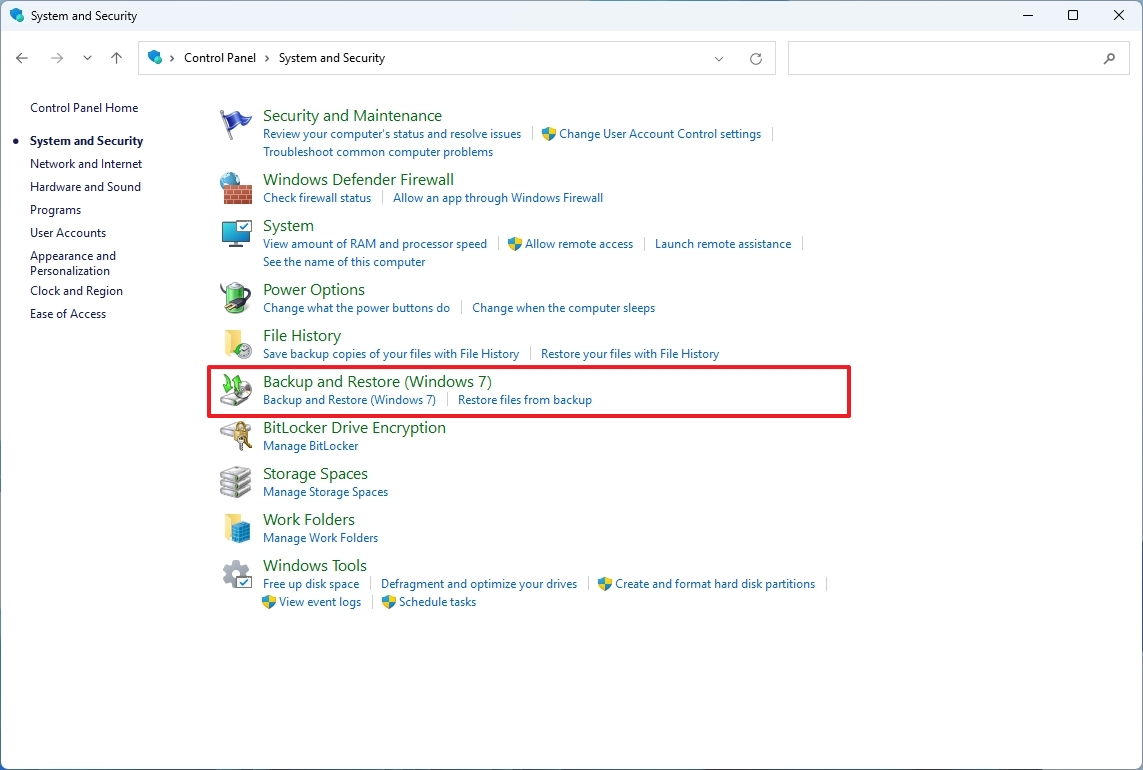
- Click on System and Security.
- Click on Backup and Restore.
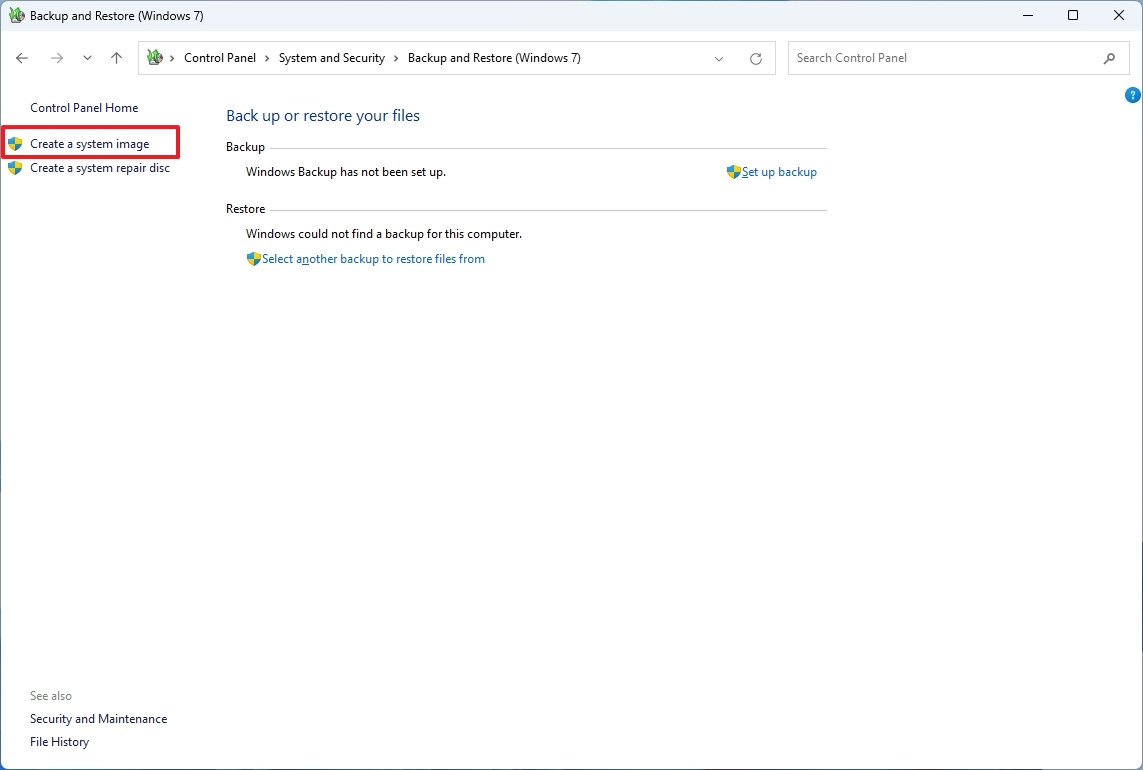
- Click the Create a system image option from the left pane.
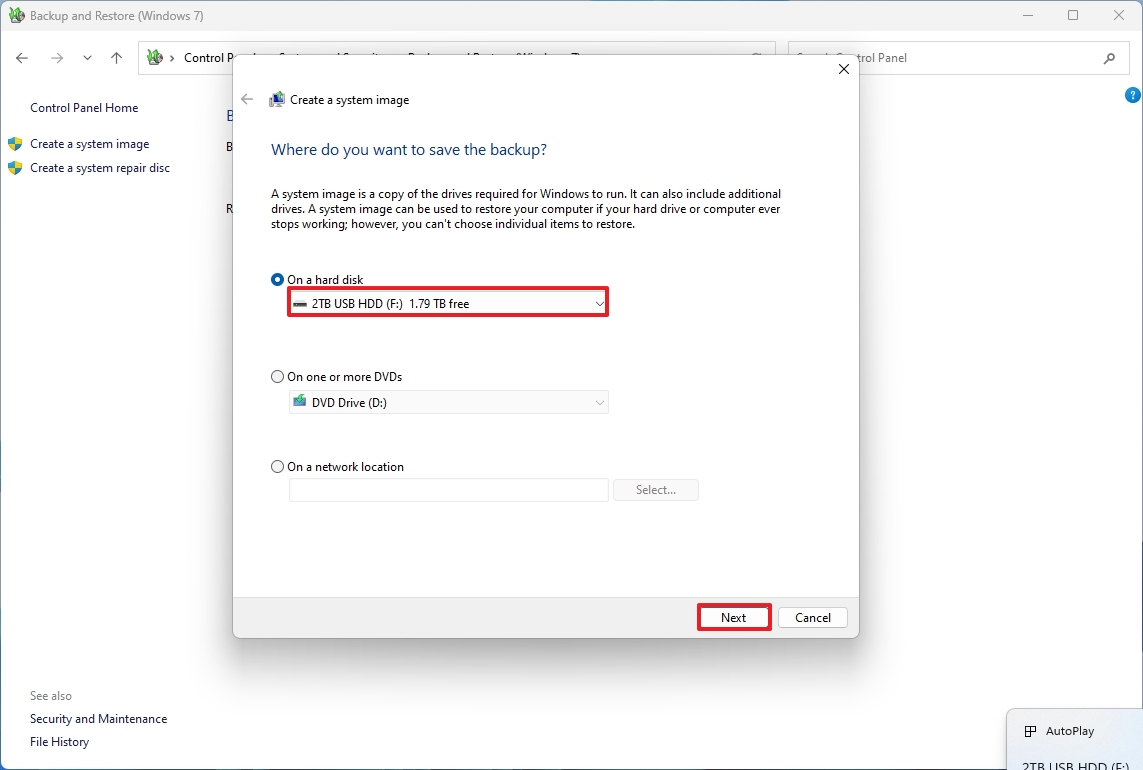
- Select the drive to save the full backup.
- Click the Next button.
- Select additional drives to include the in backup (if applicable).
- Click the Start backup button.
- Click the No button.
- Click the Close button.
Once you complete the steps, a backup of the current state of the computer will be created.
You can also refer to these instructions if you need to recover your computer from backup.
Create installation media
You can create a dual-boot setup with virtually any operating system (excluding macOS), such as a previous version of Windows or any Linux distribution. In this guide, we're choosing to set up a second installation of Windows 11 available through the Dev Channel, which allows you to test upcoming features without compromising your current installation and files.
Download ISO file
To download the latest preview of Windows 11, use these steps:
- Open the Windows Insider Preview Downloads page.
- Sign in with your Microsoft account.
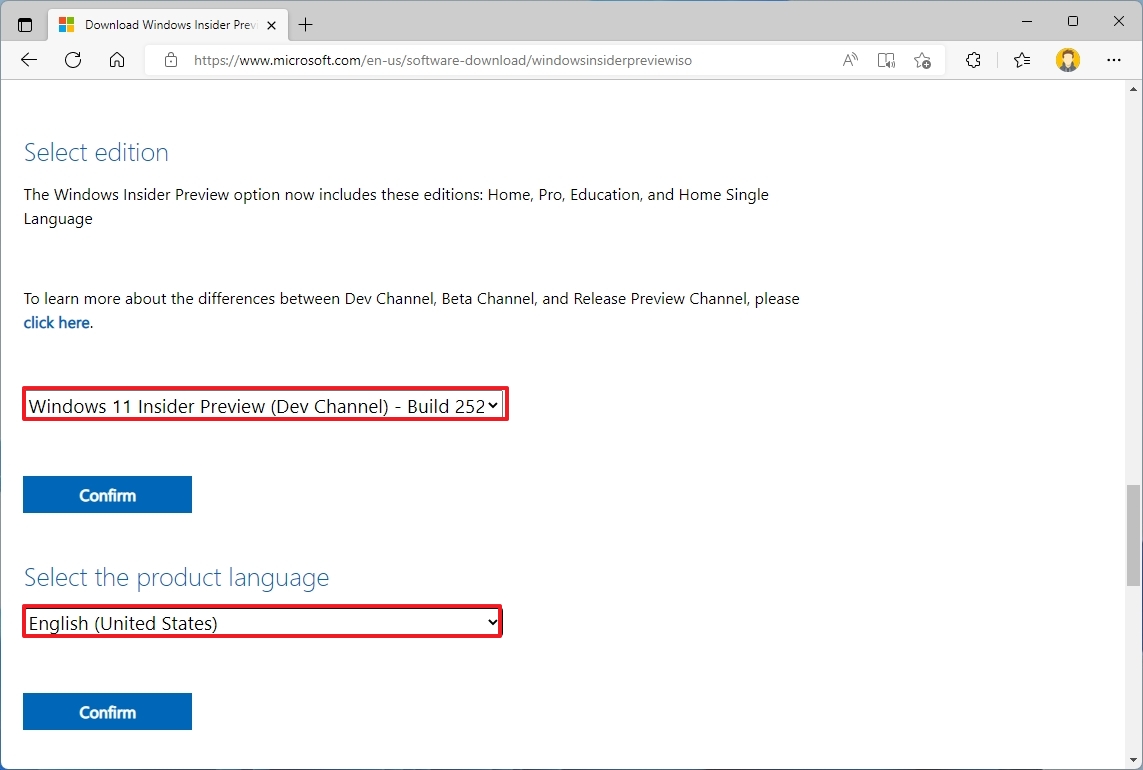
- Select the edition of Windows 11 in the Dev Channel.
- Click the Confirm button.
- Select the installation language.
- Click the Confirm button.
- Click the 64-bit Download button.
After you complete the steps, you can proceed to create the installation media with Rufus.
Create bootable media
To create a bootable media of Windows 11, connect a USB flash drive with at least 8GB of storage, and use these steps:
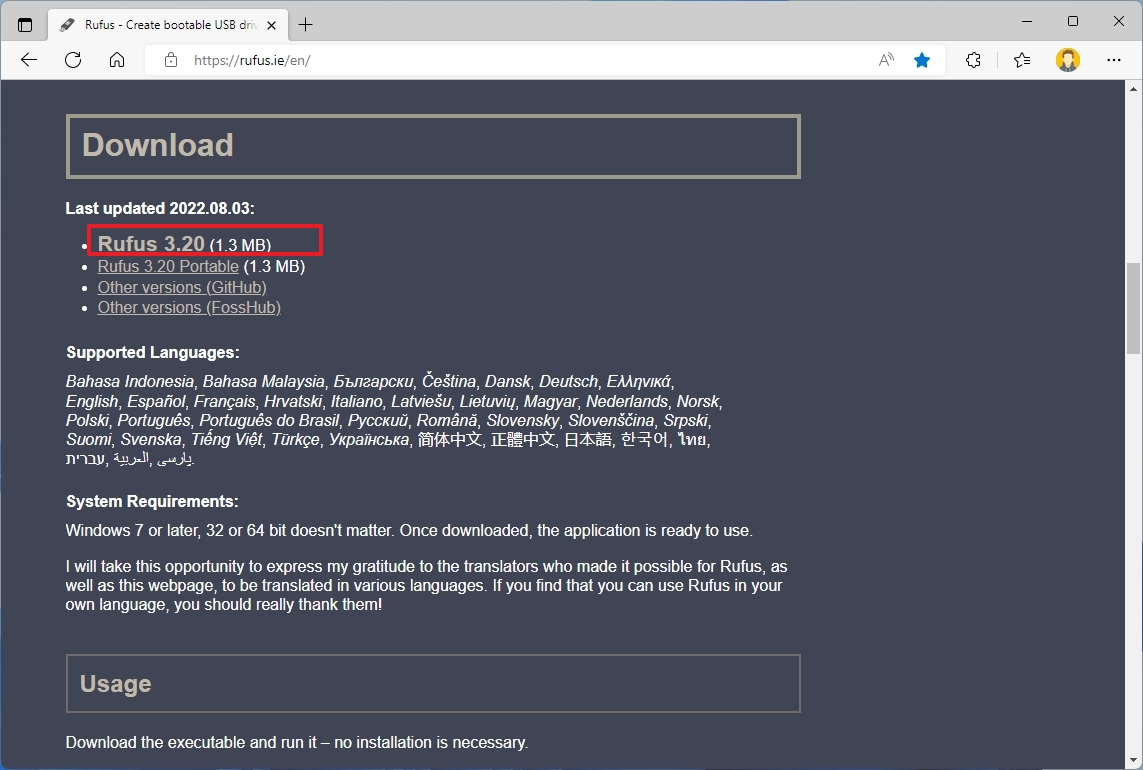
- Open the Rufus download page.
- Under the "Download" section, click the link to save the latest release on your device.
- Double-click the Rufus-x.xx.exe file to launch the tool.
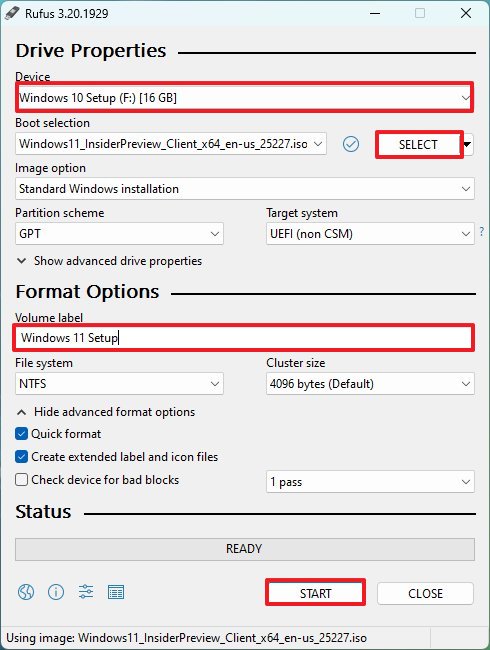
- Under the "Device" section, select the flash drive to create the USB media.
- Click the Select button.
- Select the Windows ISO file.
- Click the Open button.
- (Optional) Under the "Volume label" section, confirm a name for the USB flash drive.
- Click the Start button.
- Click the OK button.
Once you complete the steps, the USB installation media will be created.
Shrink partition for new setup
It's impossible to set up a dual-boot system in the same partition on the current installation of Windows. As a result, you must shrink the existing partition to create unallocated space to configure the installation. However, if you have a second hard drive, you can keep the partition layout the same and use the other drive for the installation.
To shrink the system partition on Windows 11, use these steps:
- Open Start.
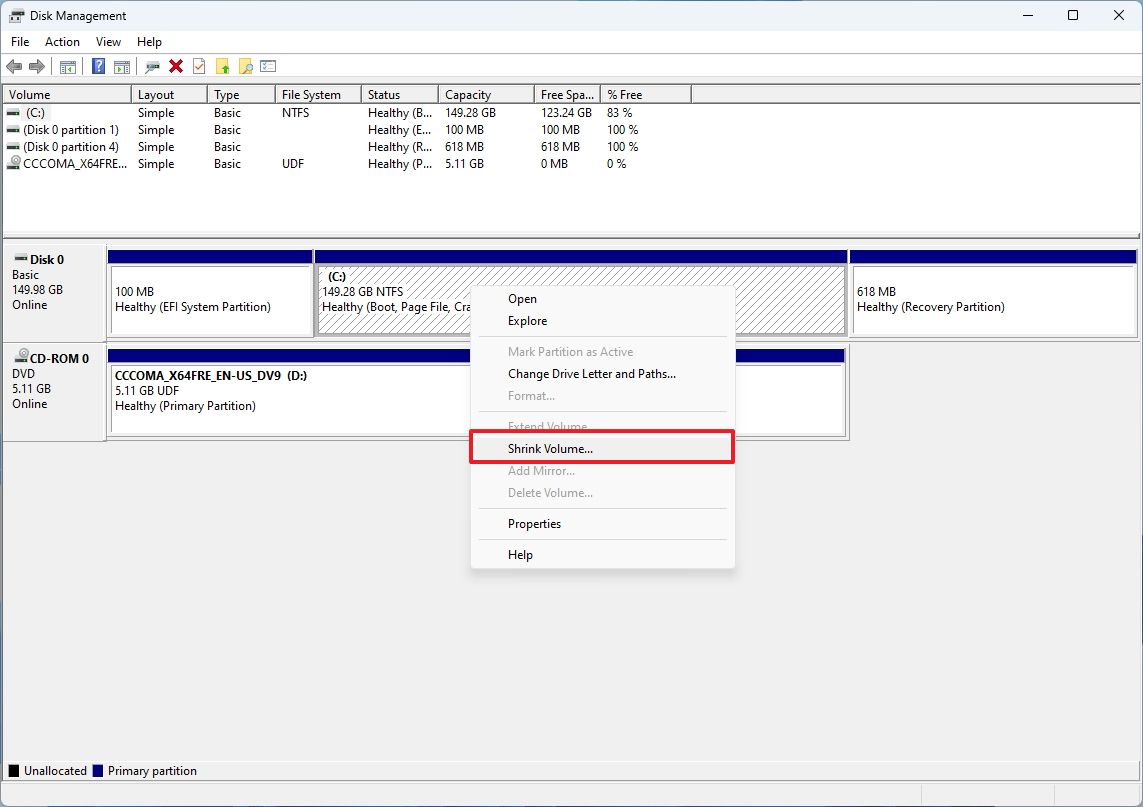
- Search for "Create and format hard disk" and select the top result to open the Disk Management app.
- Right-click the partition and select the Shrink Volume option.
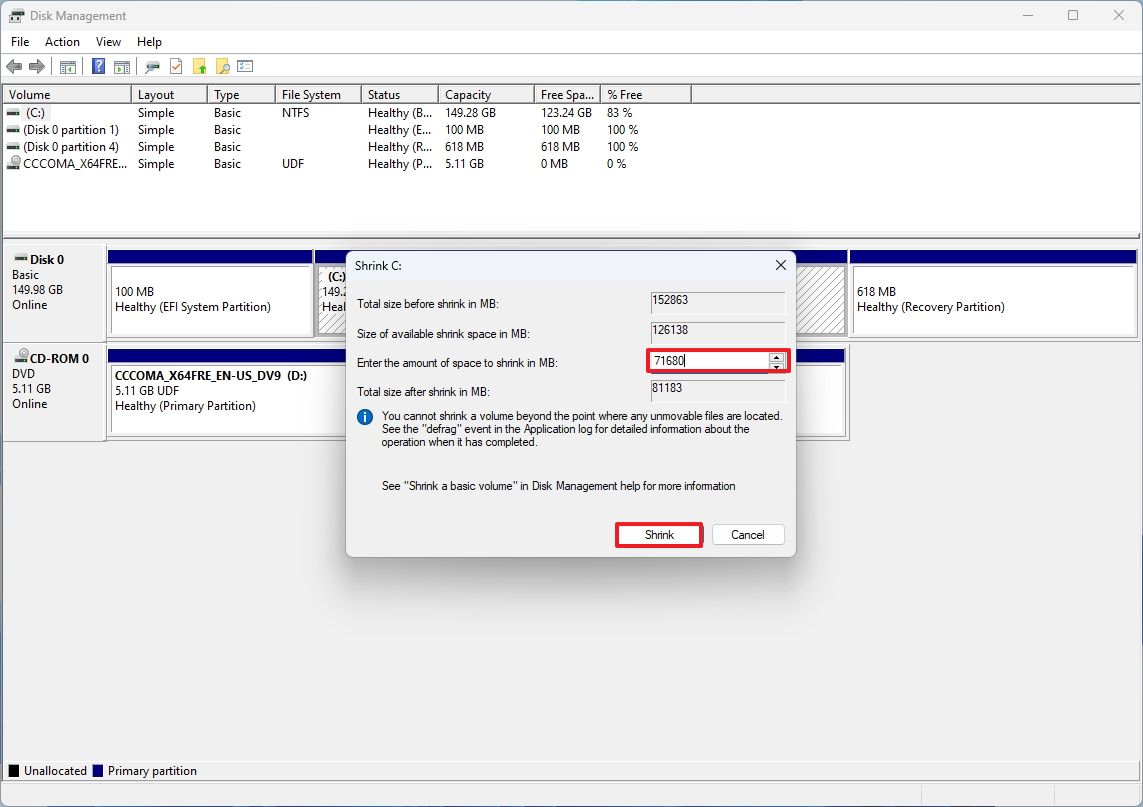
- Confirm the amount to shrink.
- Quick note: Windows 11 requires at least 64GB of space. We're selecting 71680MB for this guide, which translates to 70GB of space.
- Click the Shrink button.
After you complete the steps, the partition of the current setup will be reduced by the number of megabytes you specified.
Change boot order
Before installing the Windows 11 Insider Preview build on your computer using a dual-boot setup, you must make sure you can boot from the USB flash drive.
To change the boot order on Windows 11, use these steps:
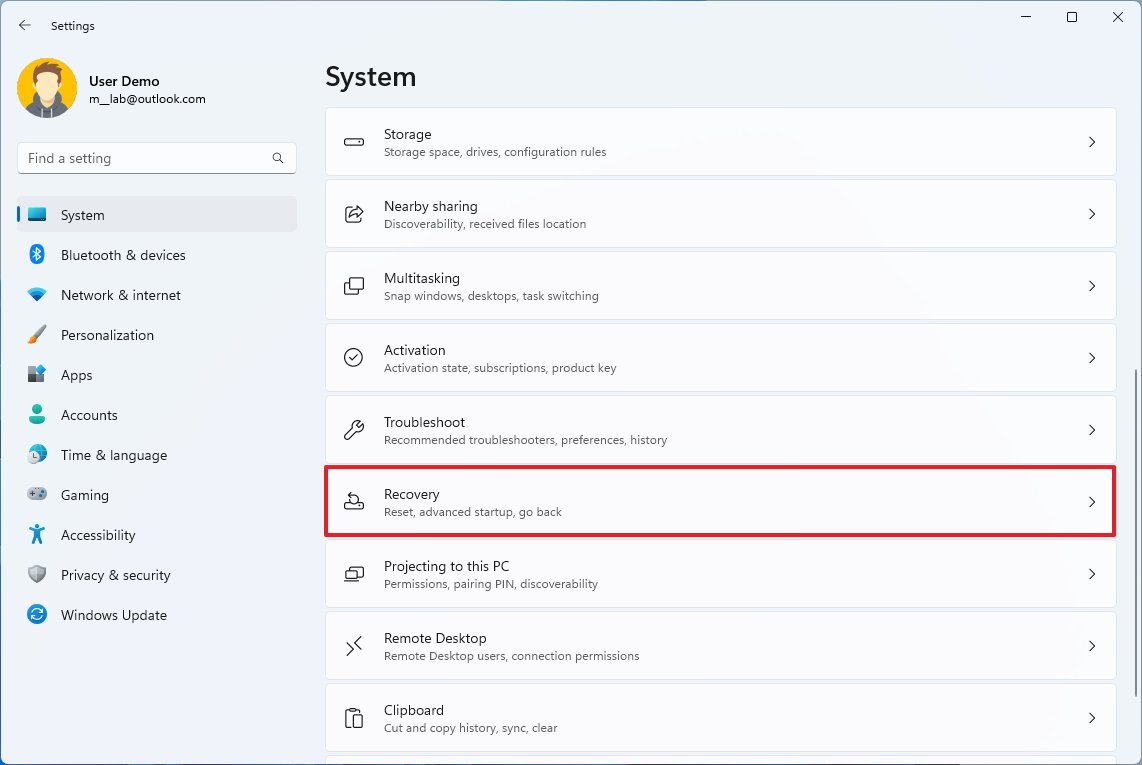
- Open Settings.
- Click on System.
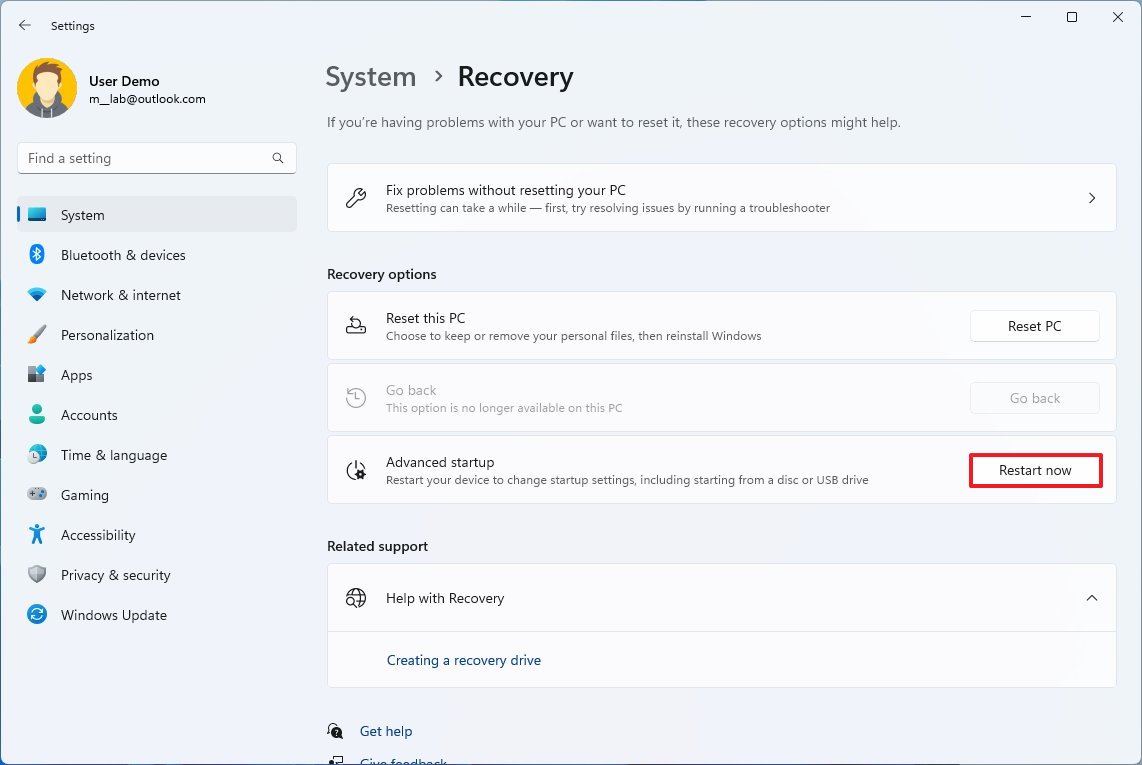
- Click the Recovery page on the right side.
- Under the "Recovery options" sections, click the Restart now button in the "Advanced startup" setting.
- Click the Restart now button again.
- Click on Troubleshoot.
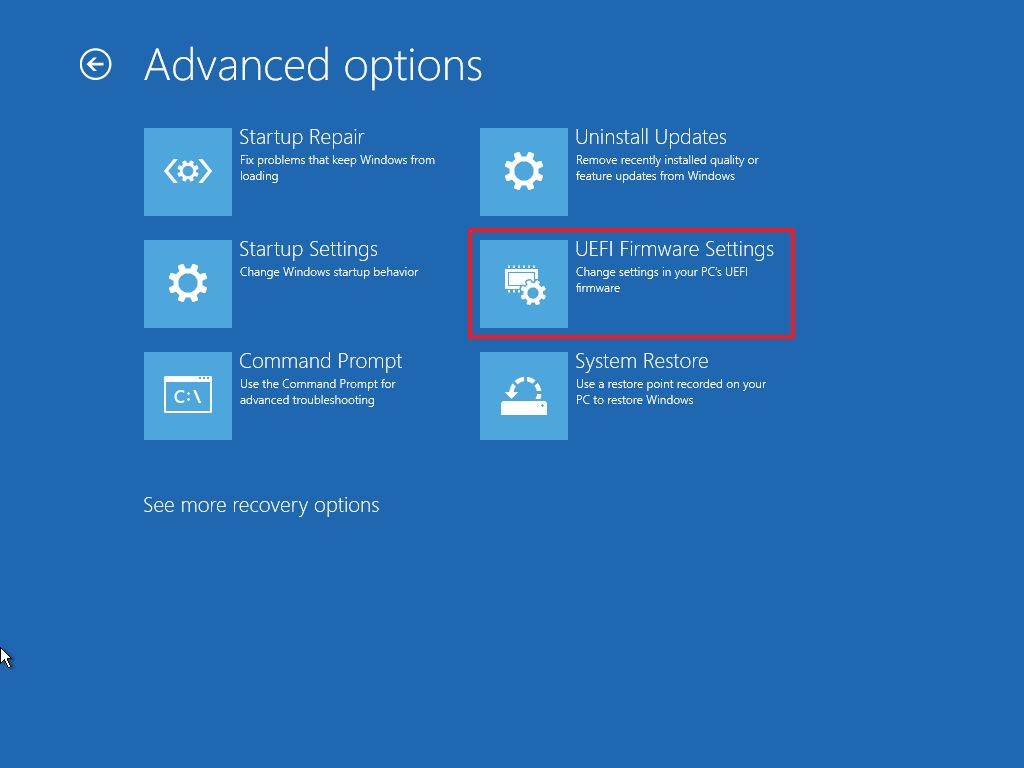
- Click on Advanced options.
- Click the UEFI Firmware Settings option.
- Click the Restart button.
- Open the boot settings page.
- Select the option to start the computer from the USB bootable media.
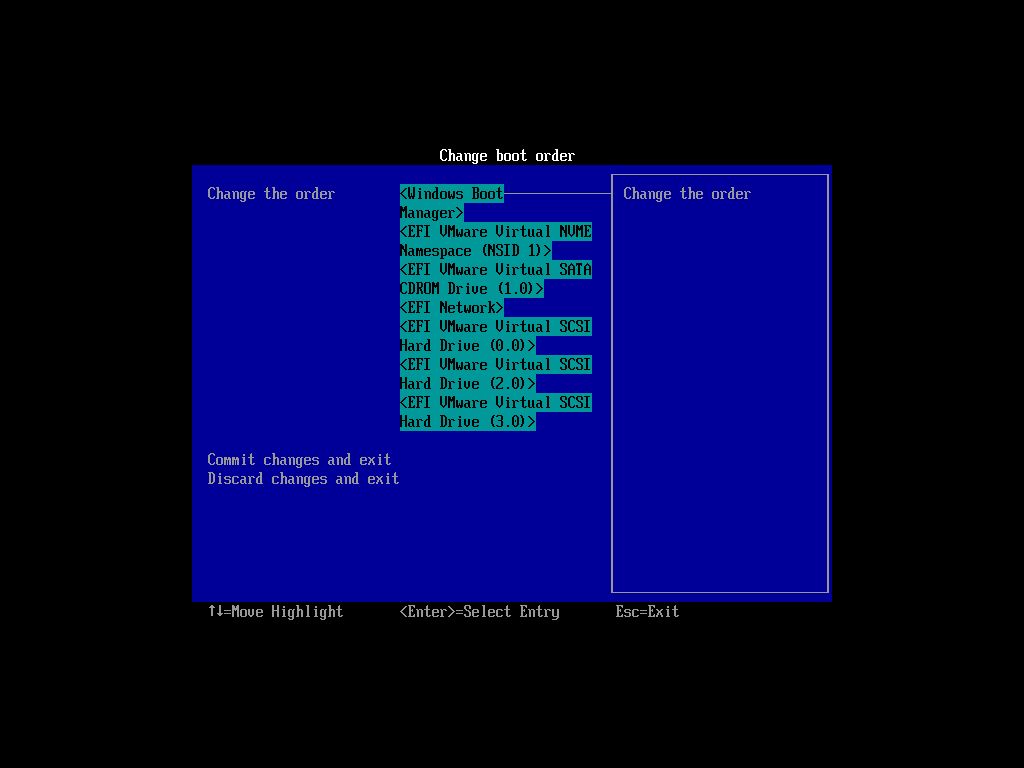
- Save the changes. (Usually, pressing F10.)
Once you complete the steps, the computer should be able to start from the Windows 11 USB boot media.
If you plan to install an operating system other than Windows, you may need to disable fast startup and BitLocker (if applicable). Otherwise, you may run into issues.
Clean install of Windows 11
To create a dual-boot system with another Windows installation, use these steps:
- Connect the bootable USB flash drive.
- Power on the computer.
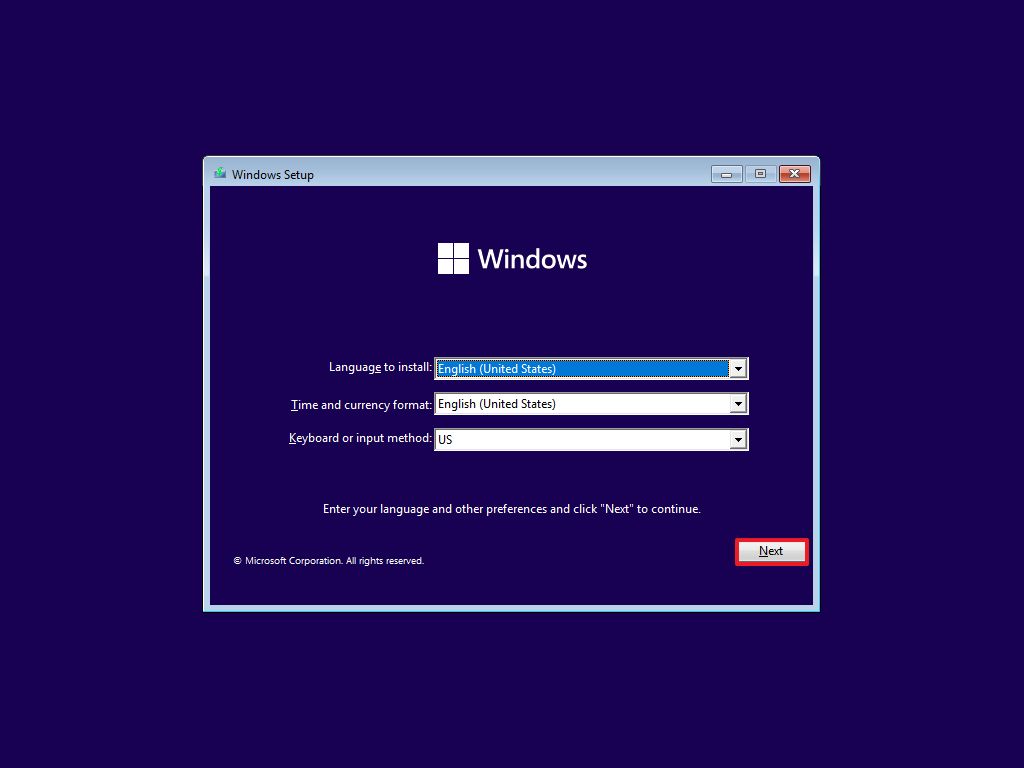
- Press any key to boot to the Windows Setup wizard.
- Select language and keyboard settings, and click the Next button.
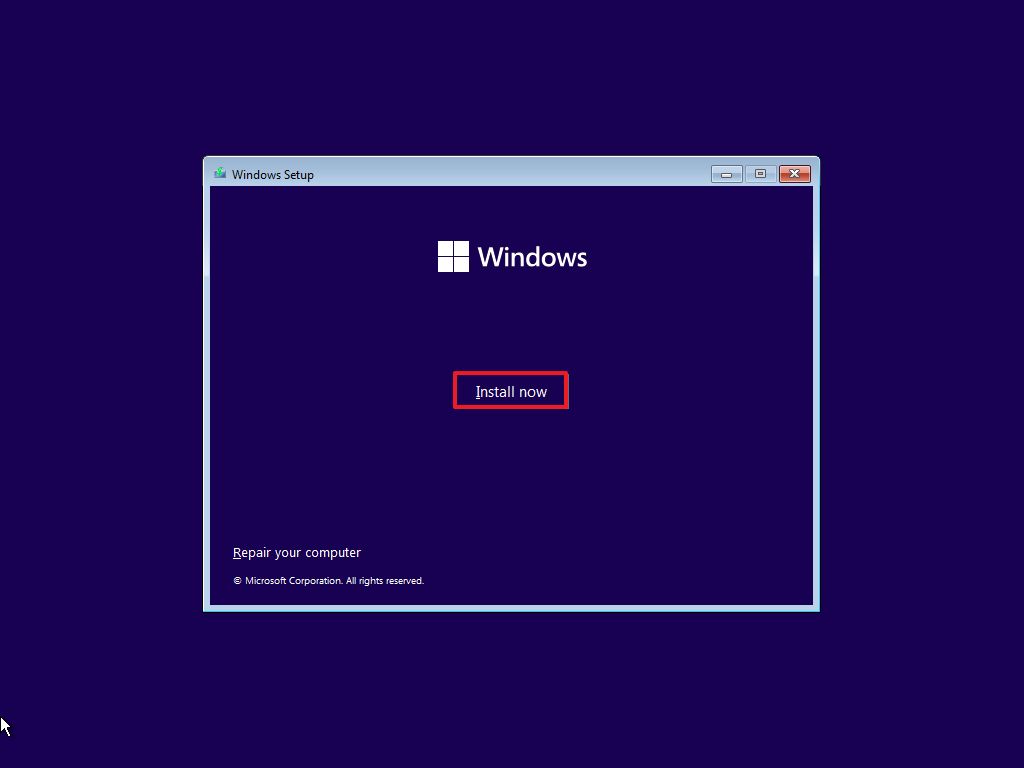
- Click the Install Now button.
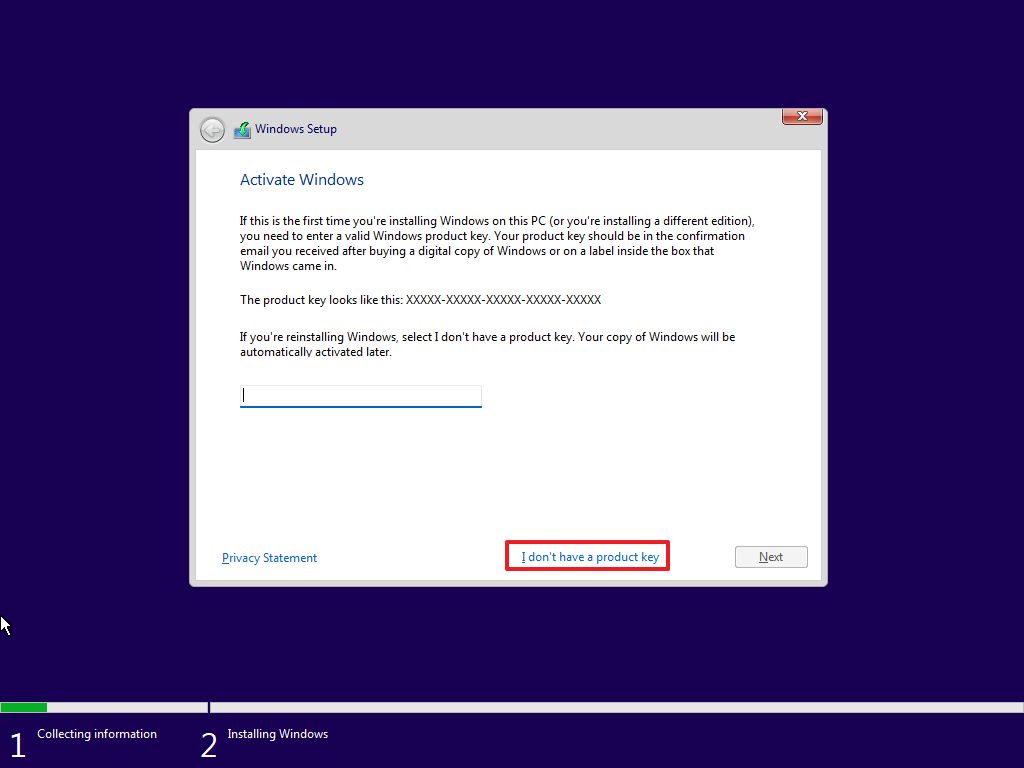
- Confirm the product key that activates the version of Windows. Or click the "I don't have a product key" to skip the activation temporarily.
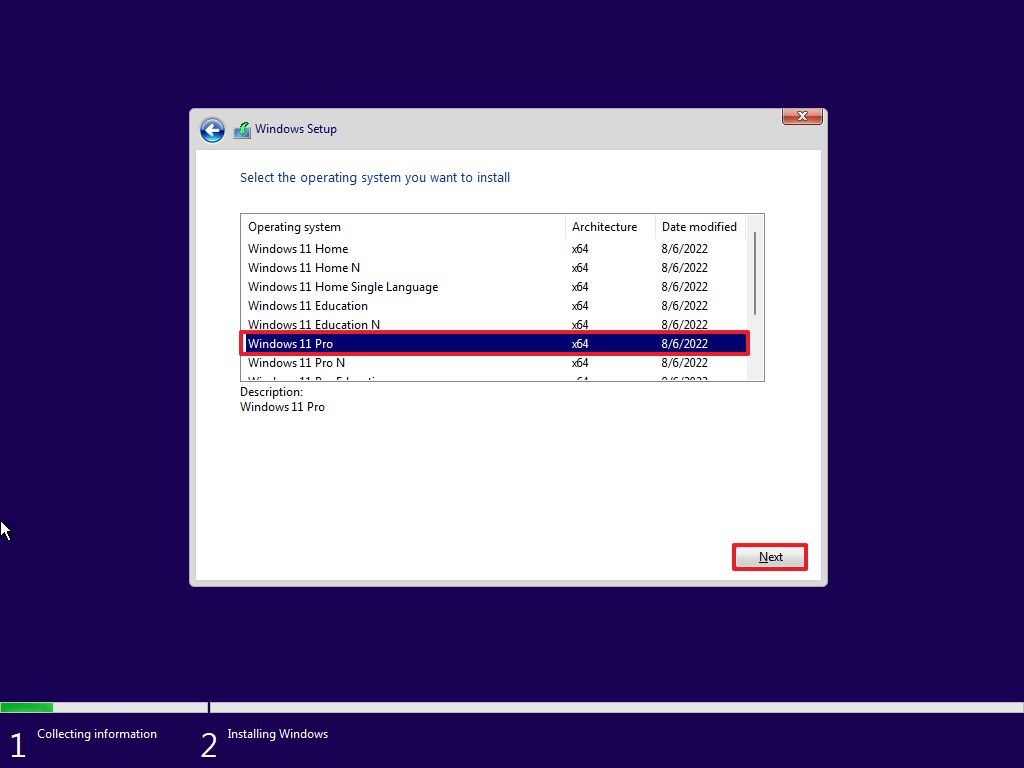
- Choose the edition of Windows to install that matches the product key activation.
- Click the Next button.
- Accept the licensing terms.
- Click the Next button.
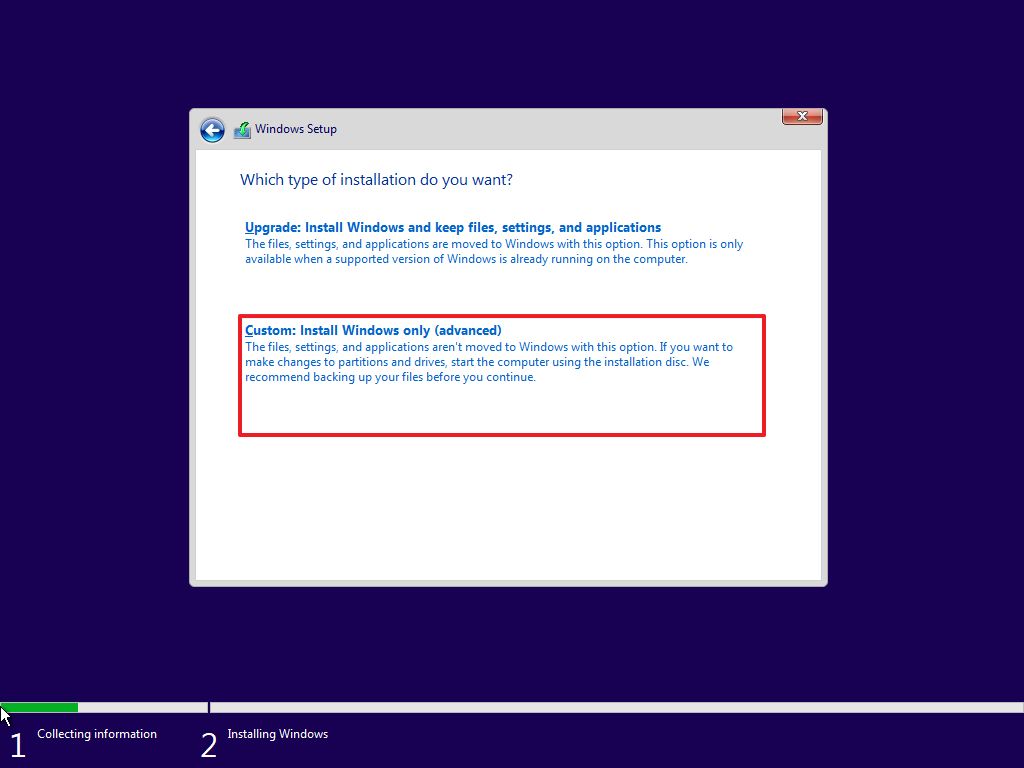
- Select the "Custom: Install Windows only (advanced)" option.
- Choose the shrunk "Unallocated Space" on the drive.
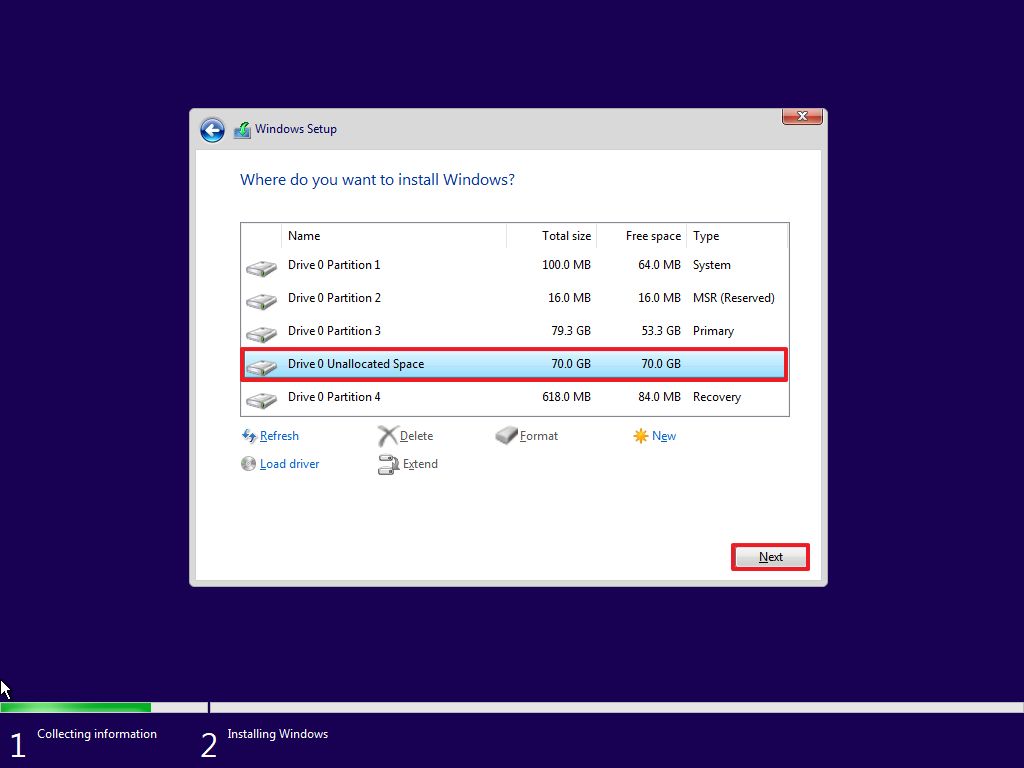
- Warning: It's crucial to select the correct space. Otherwise, you could end up erasing the other installation or the storage you use for files.
- Click the Next button.
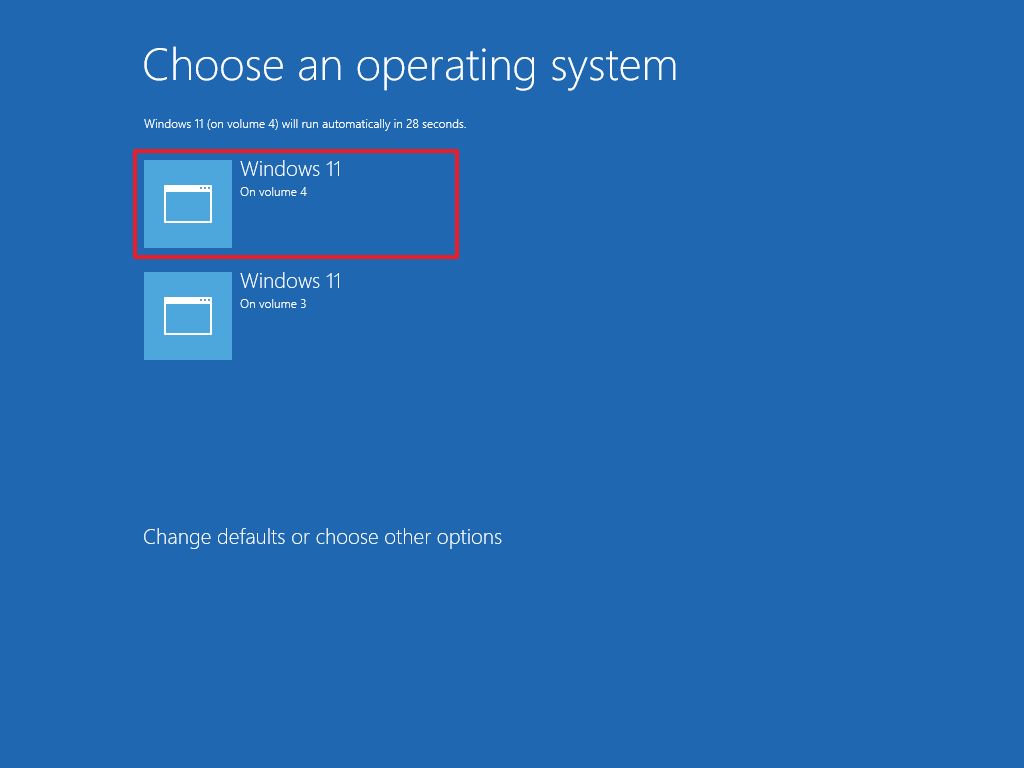
- After the first reboot, select the first instance of the operating system to continue the installation.
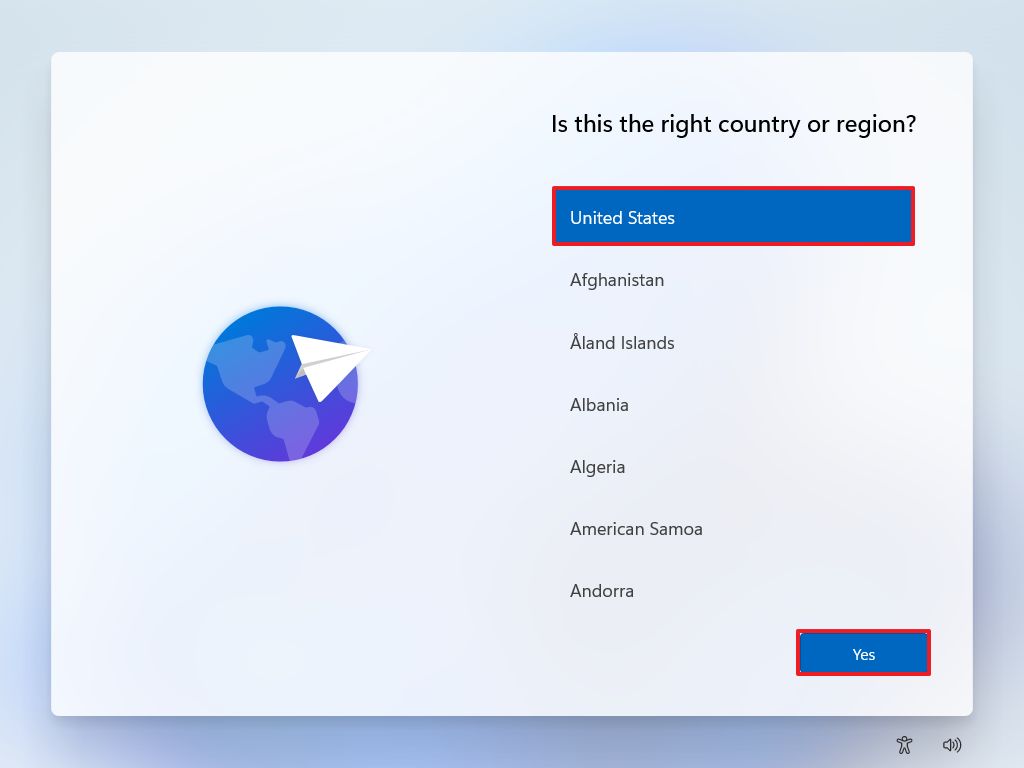
- Select your language.
- Click the Yes button.
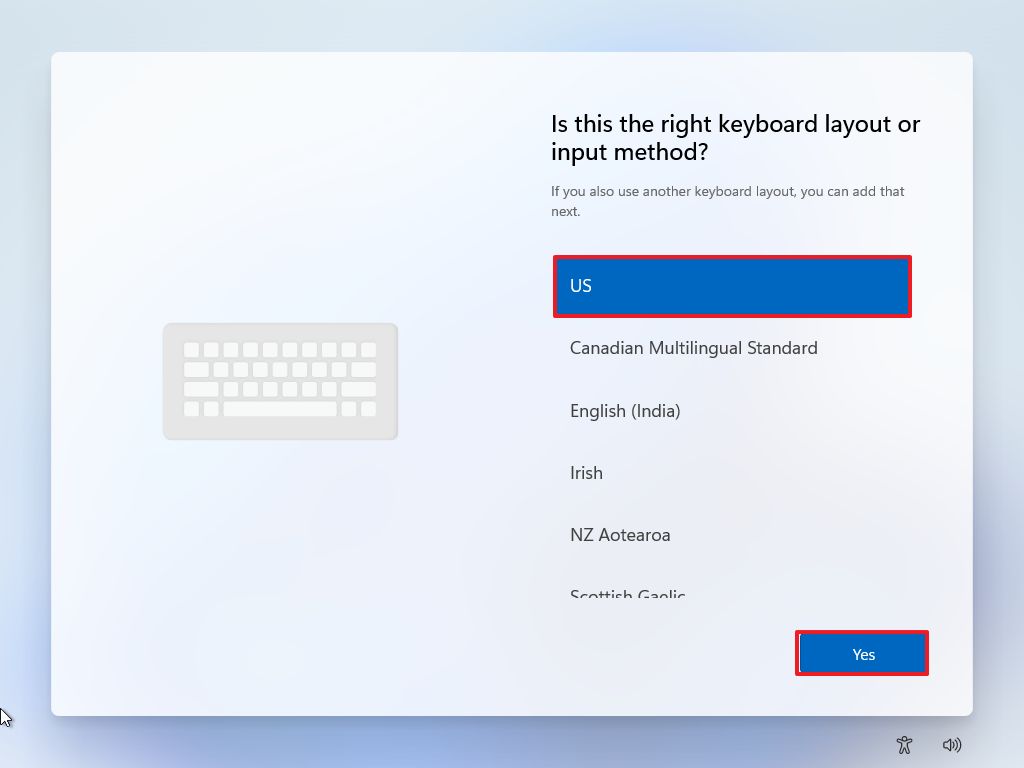
- Select the keyboard layout.
- Click the Yes button.
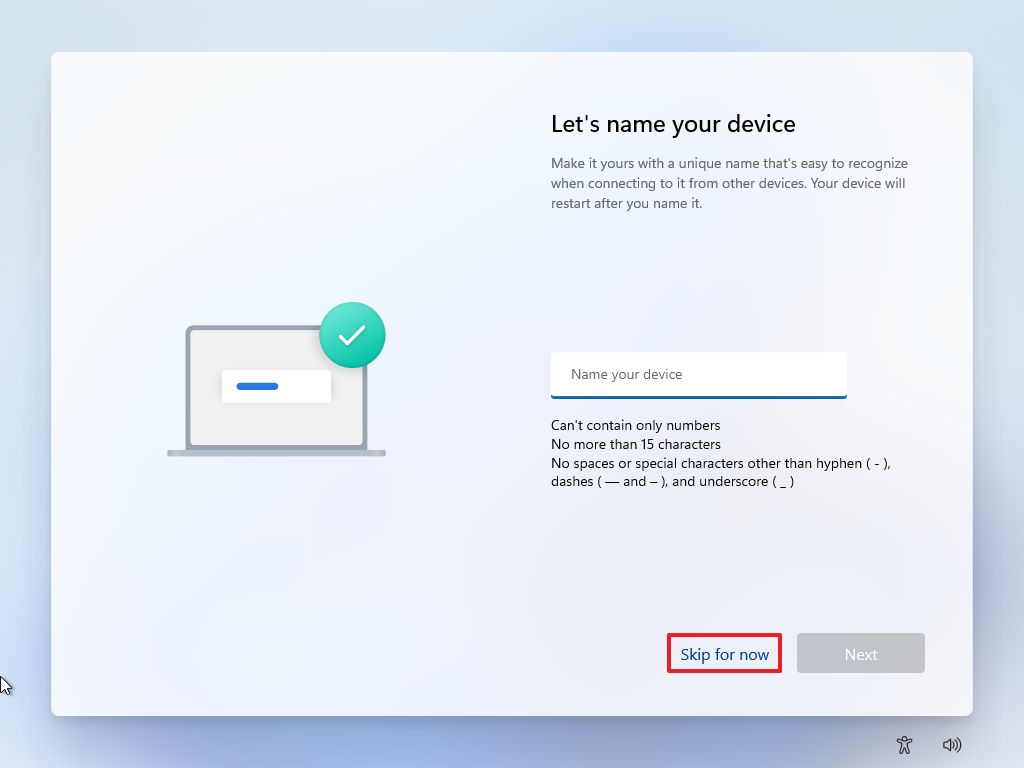
- Click the Skip button.
- Click the Skip for now option.
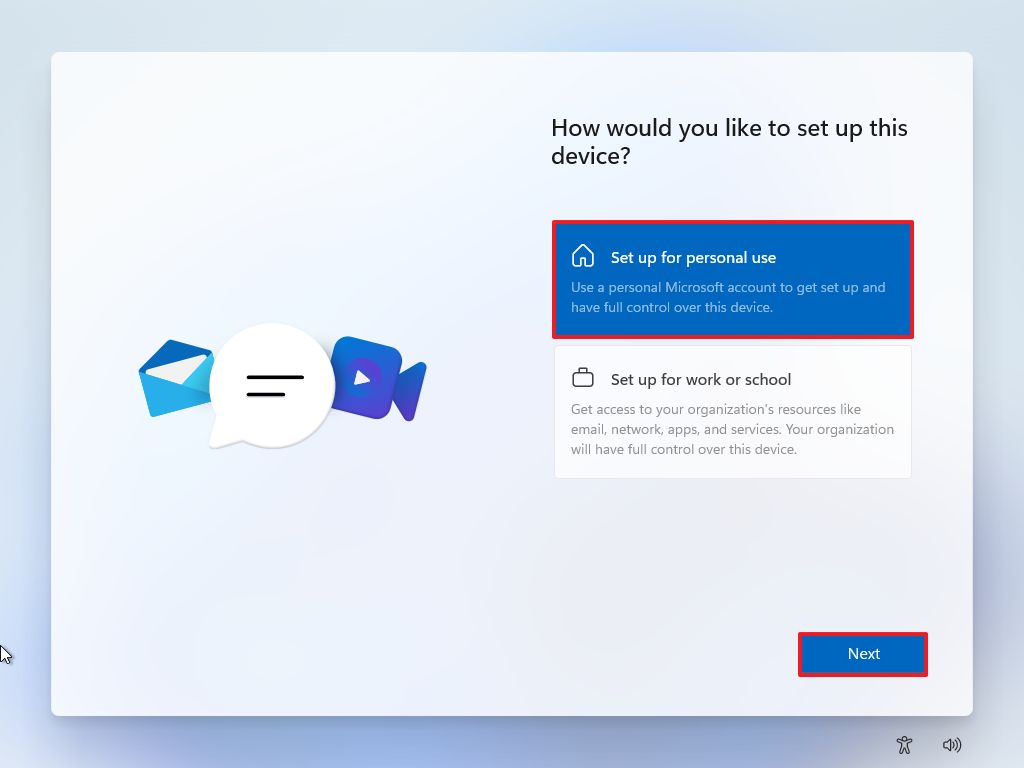
- Select the "Set up for personal use" option (if applicable).
- Click the Next button.
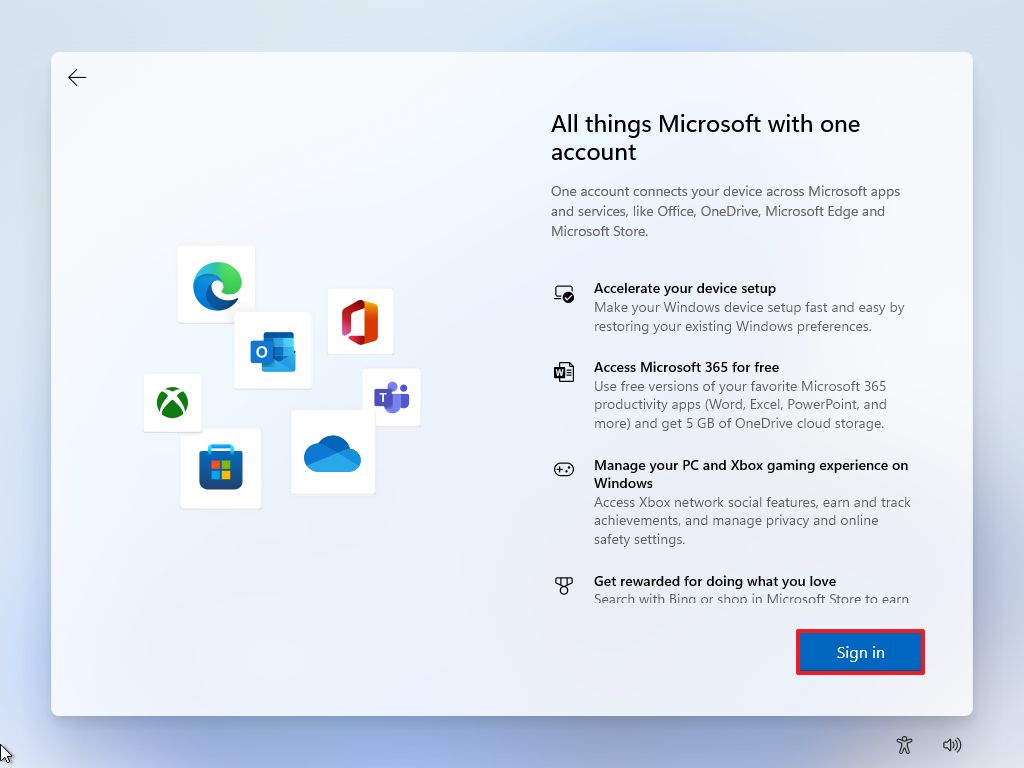
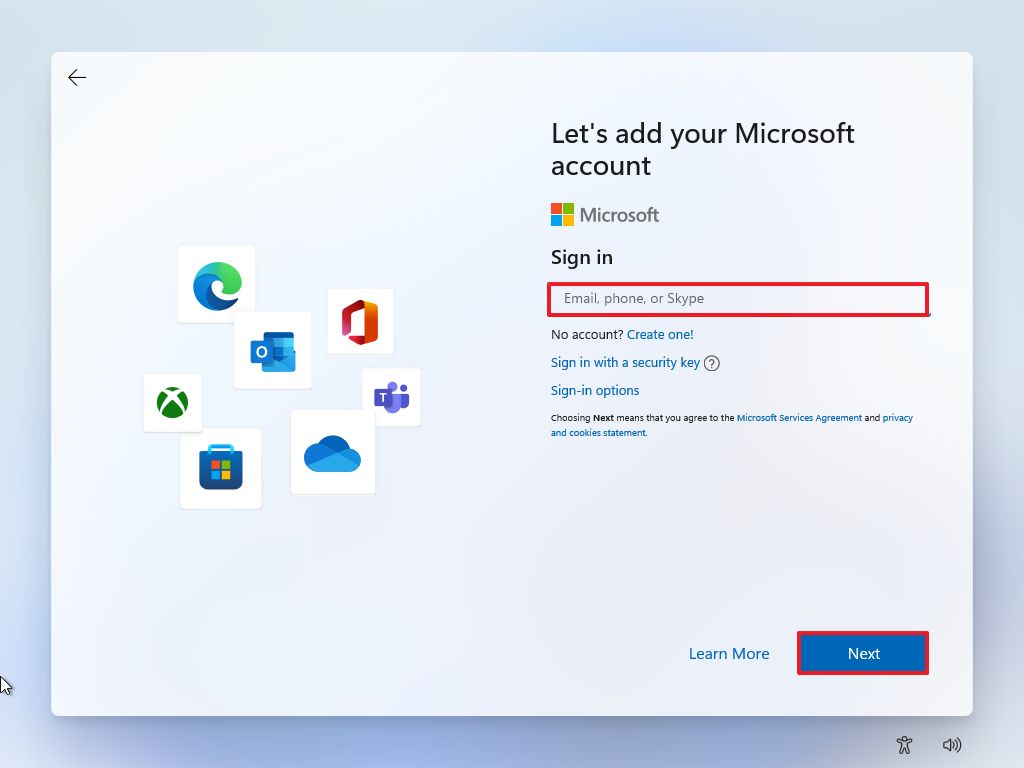
- Click the Sign in button.
- Confirm your Microsoft account credentials.
- Click the Next button.
- Click on "View more options."
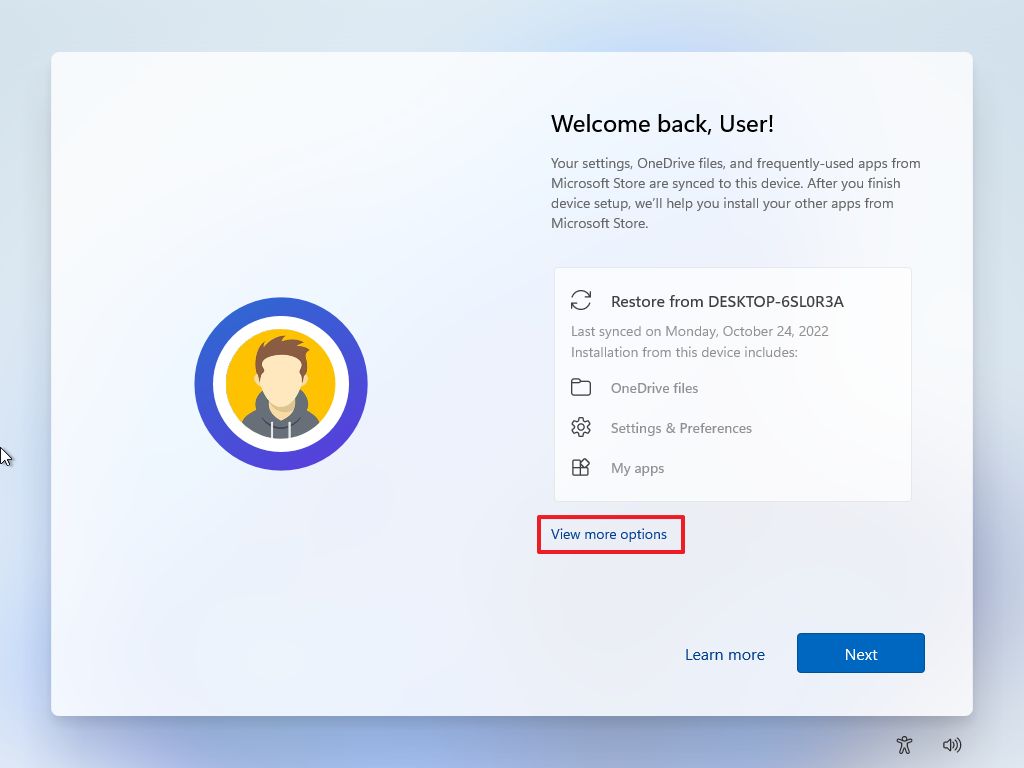
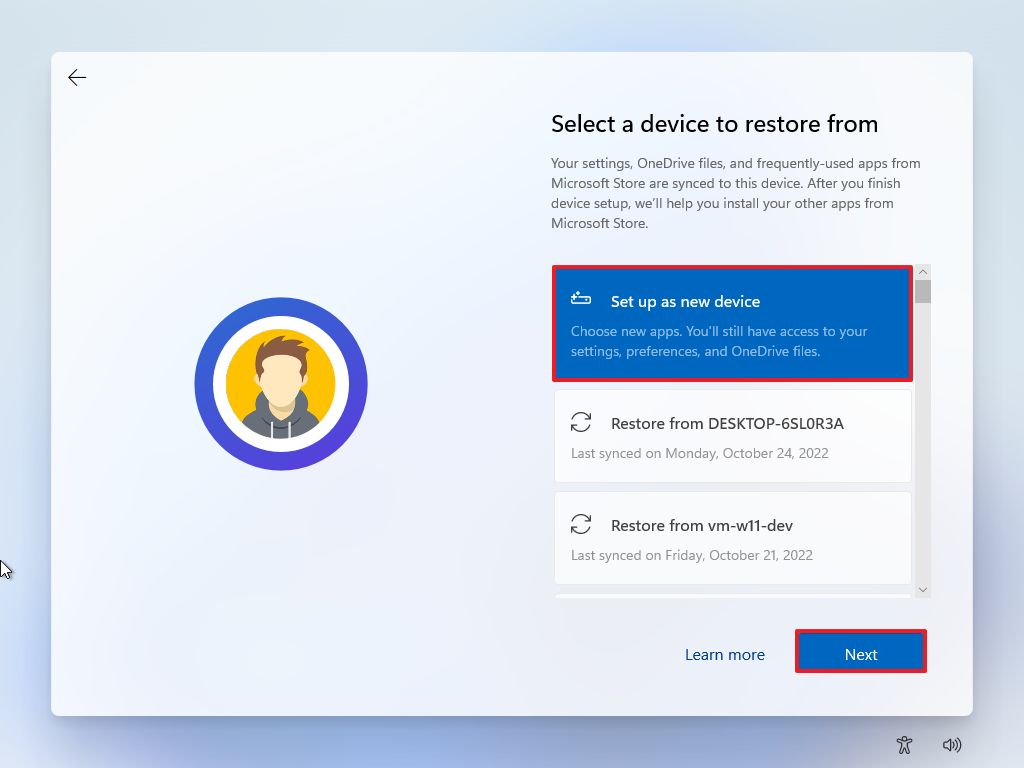
- Choose the "Set up as new device" option.
- Click the Next button.
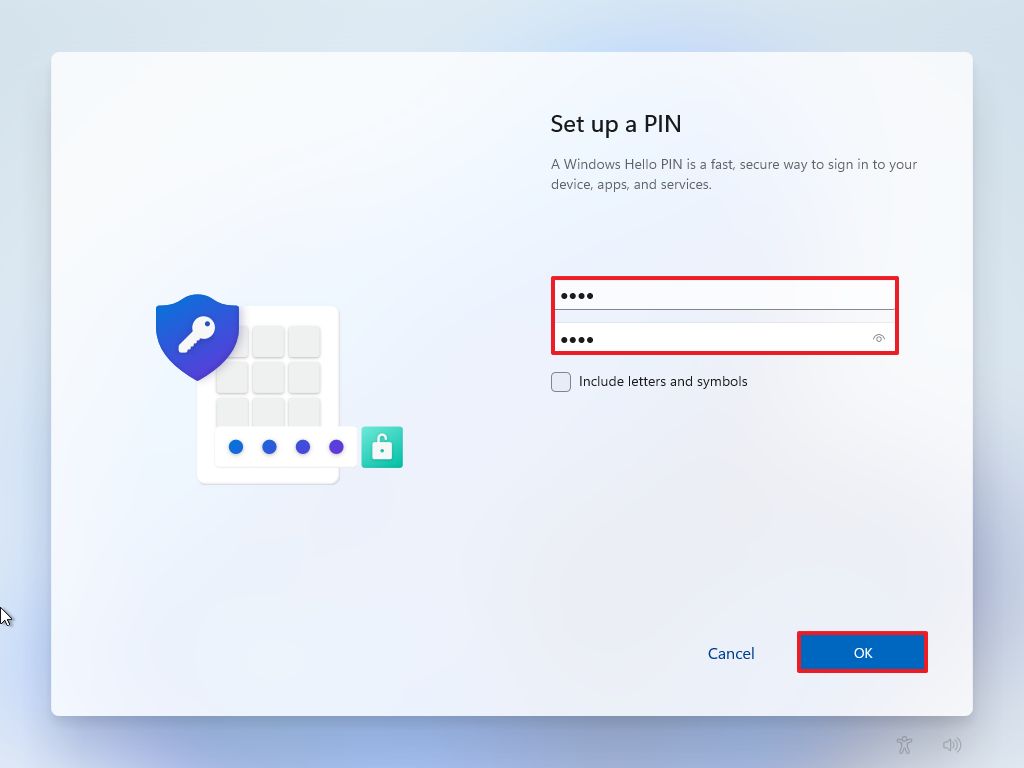
- Click the Create PIN button.
- Configure the PIN.
- Click the OK button.
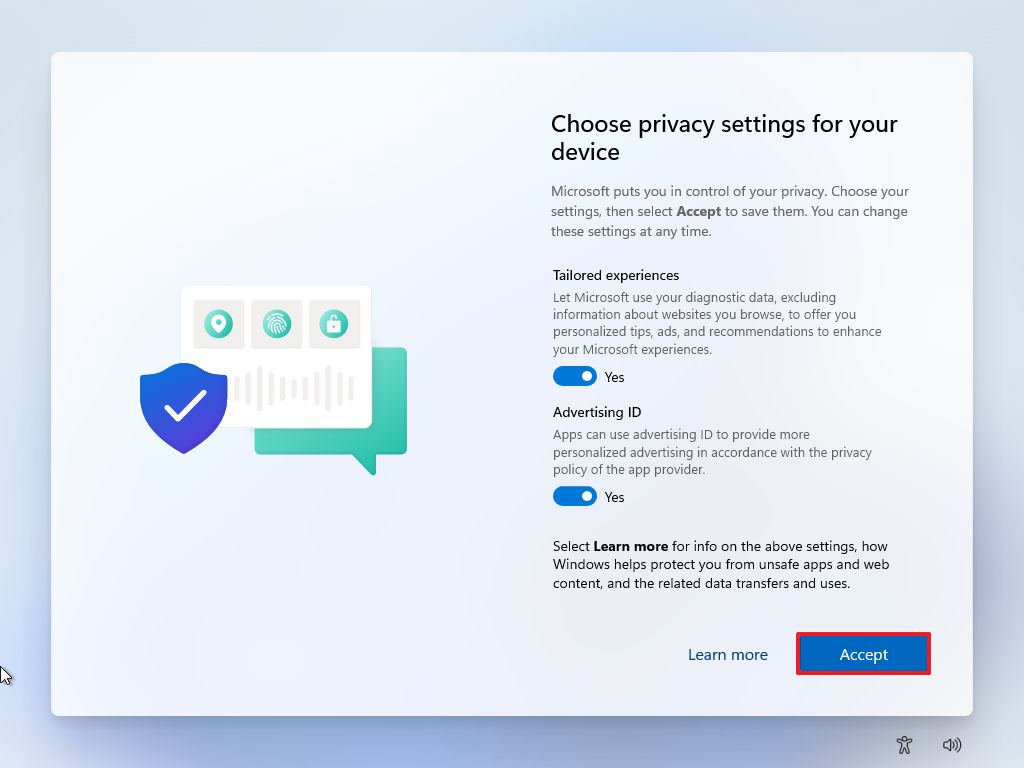
- Choose your privacy settings.
- Click the Next button.
- Click the Next button again.
- Click the Accept button.
- Click the Skip button for the experience customization feature.
- Click the Skip button again for the Android feature.
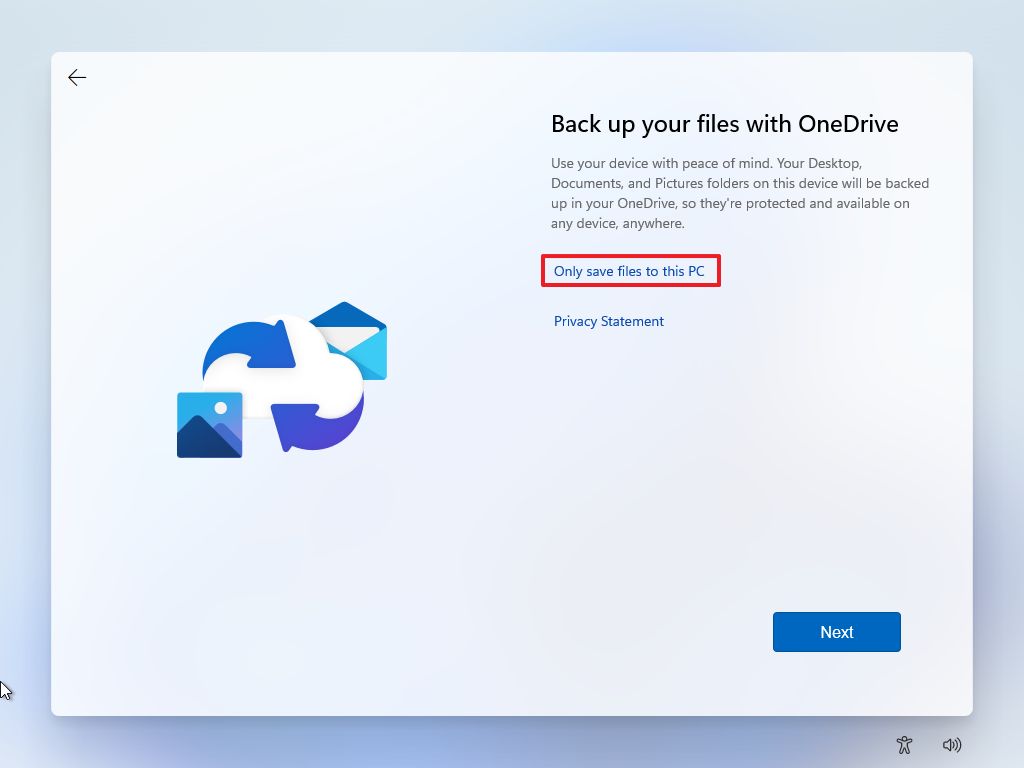
- Click the "Only save files to this PC" option to skip the OneDrive file backup.
- Click the Decline button to skip the Microsoft 365 offer.
- Click the Skip for now button to skip the Game Pass offer.
Once you complete the steps, the new setup of Windows will be completed.
Activate new installation
After the installation, the setup will automatically activate if you provide a product key during the installation. Otherwise, you will need to activate manually.
To check and activate Windows 11, use these steps:
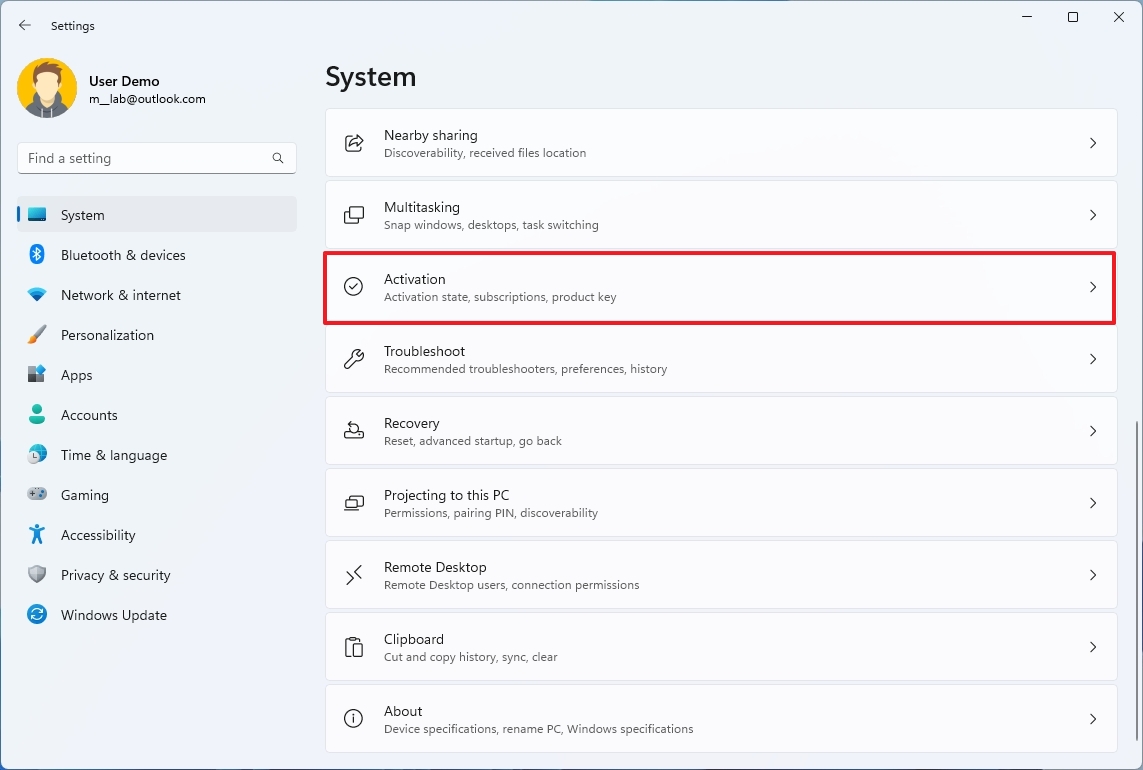
- Open Settings.
- Click on System.
- Click the Activation page on the right side.
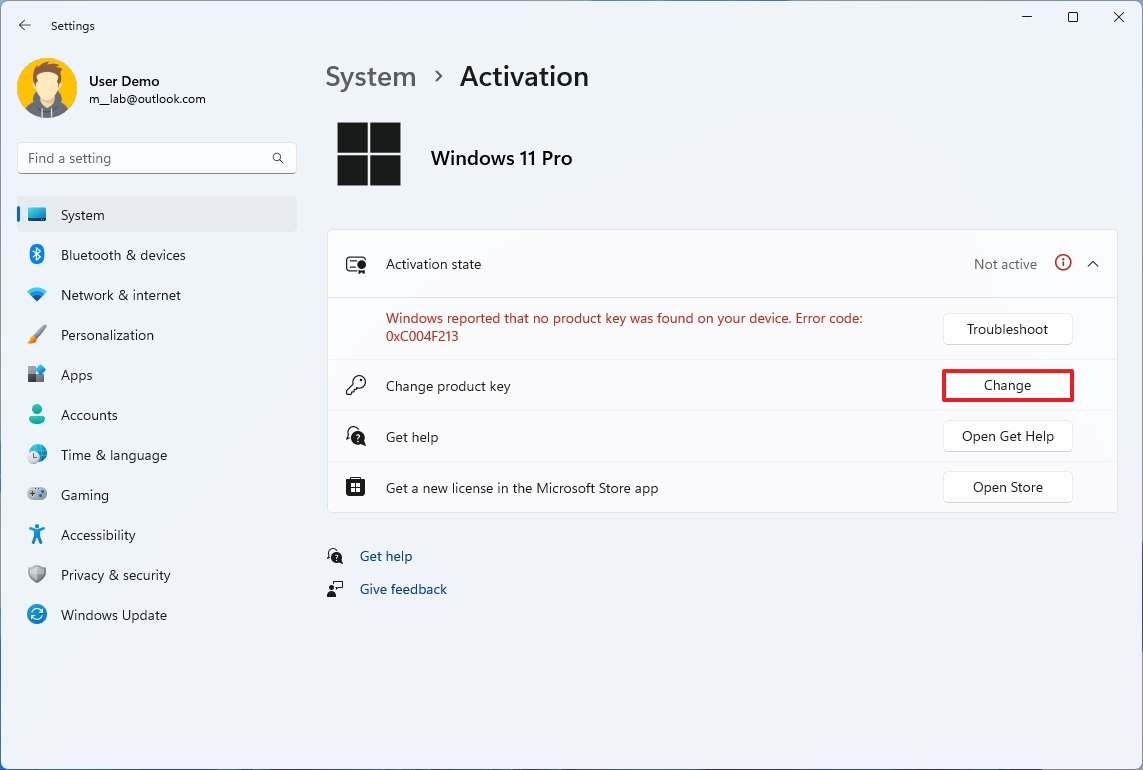
- Click the Change button in the "Change product key" setting.
- Confirm the product key that activates the new setup.
- Click the Next button.
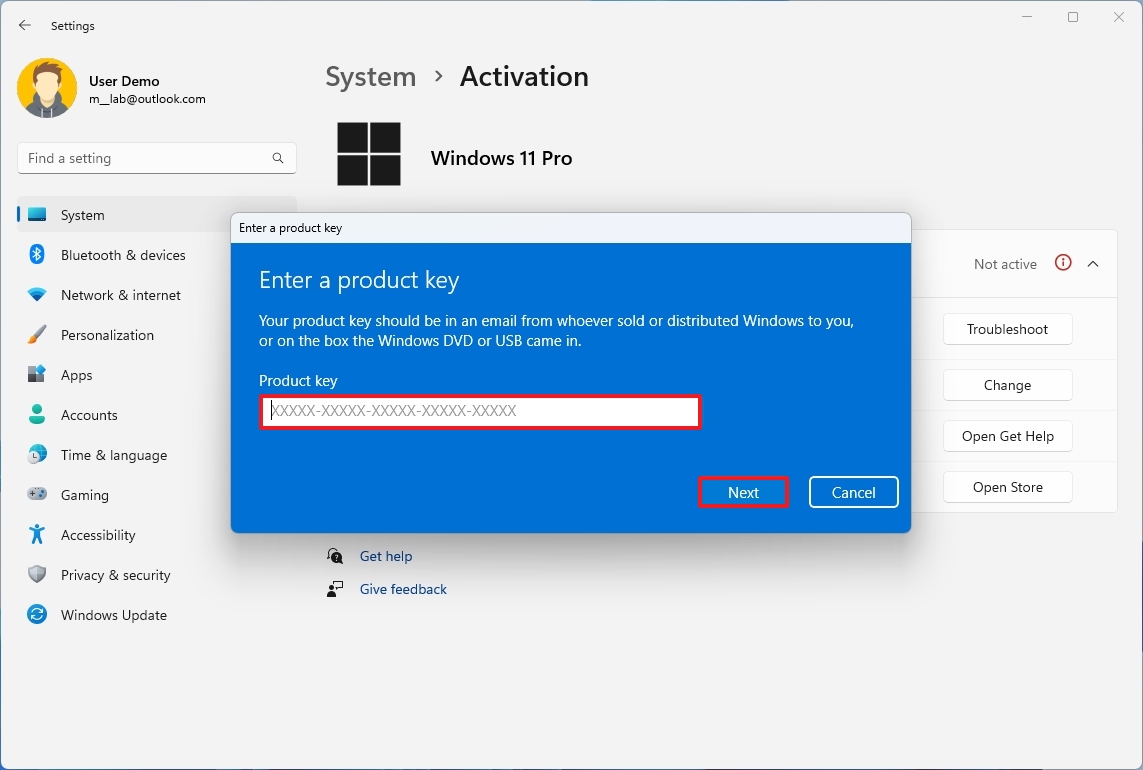
After you complete the steps, the new installation will activate automatically.
Windows Insider Program enrollment
If you use a publicly available ISO file with the preview of Windows, the device will enroll in the Insider program automatically. Otherwise, you will need to enroll manually.
To enroll in the Windows Insider Program, use these steps:
- Open Settings.
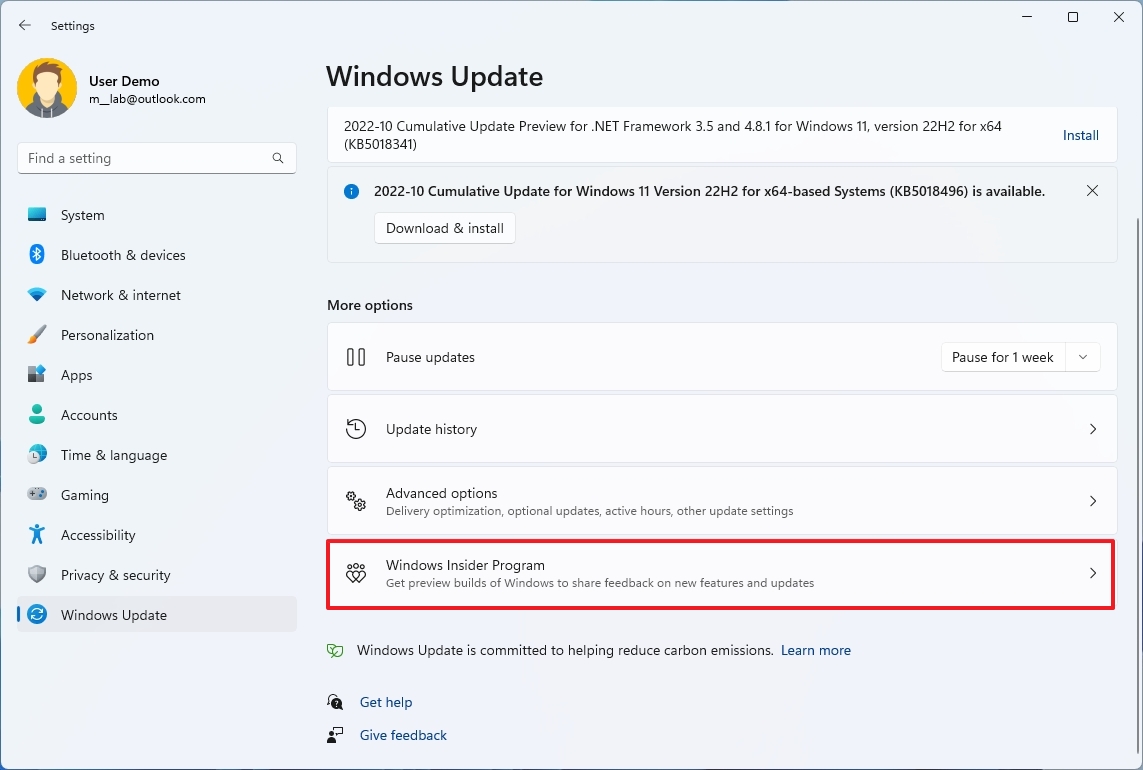
- Click on Windows Update.
- Click the Windows Insider Program page on the right side.
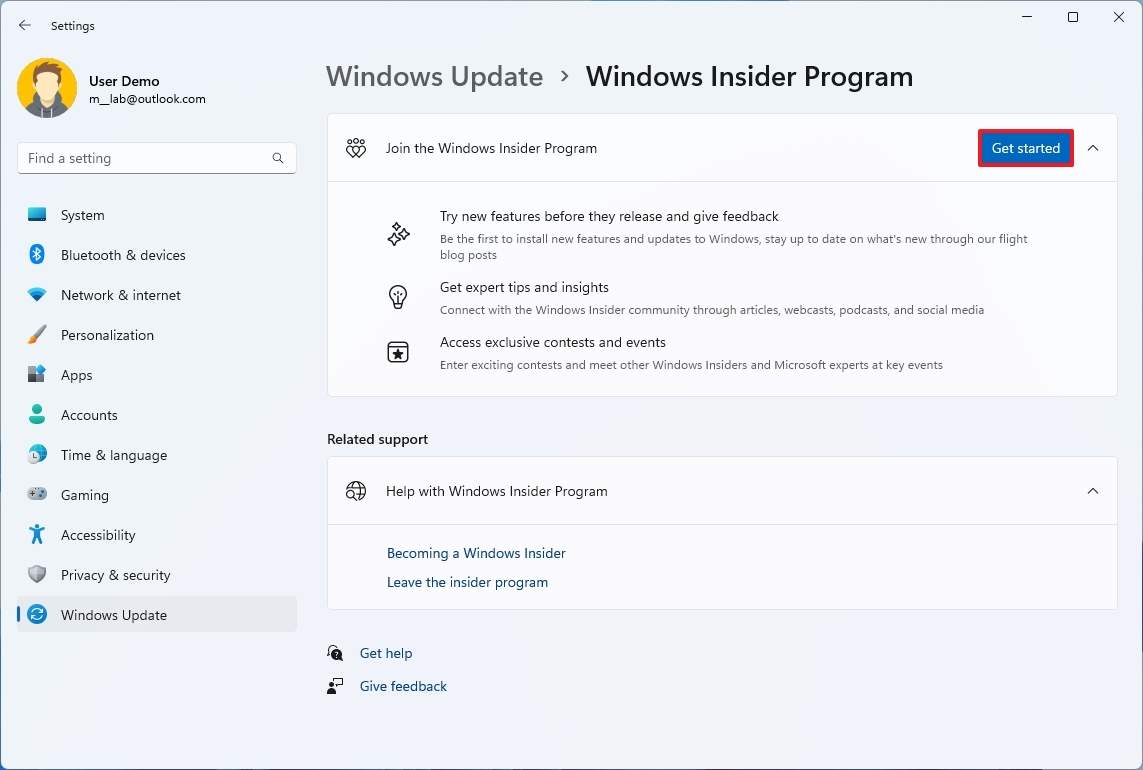
- Click the Get started button.
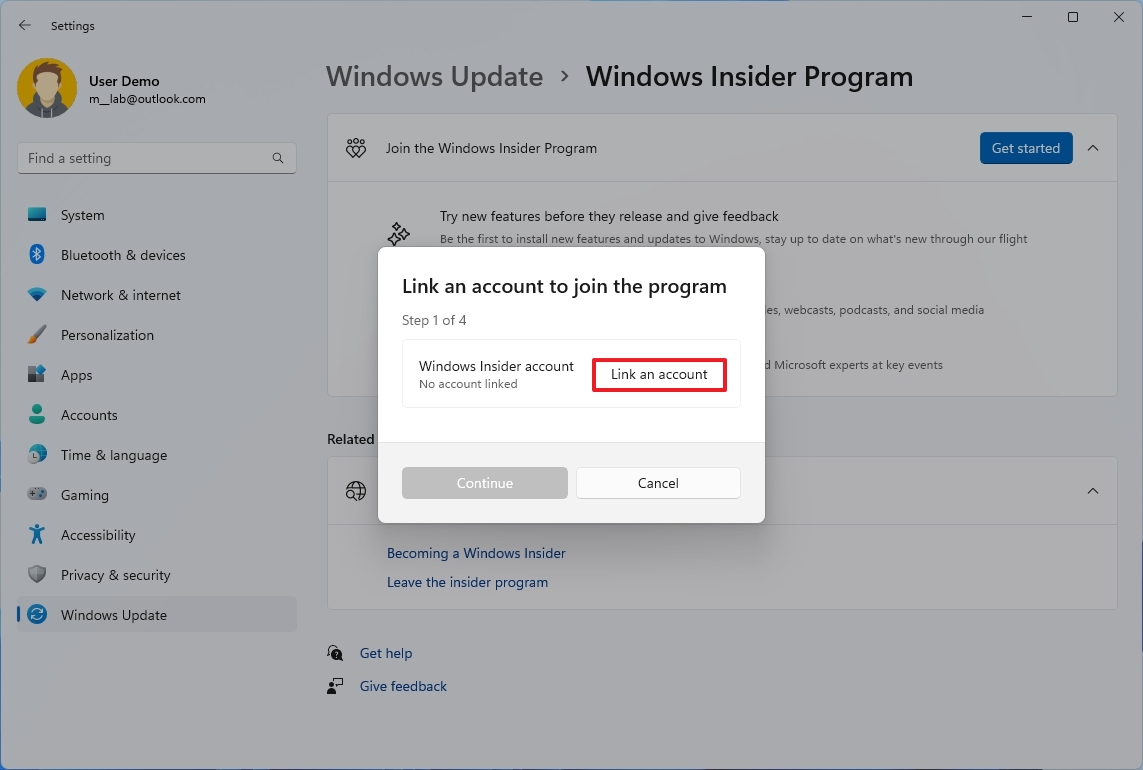
- Click the "Link an account" button.
- Select your account.
- Click the Continue button.
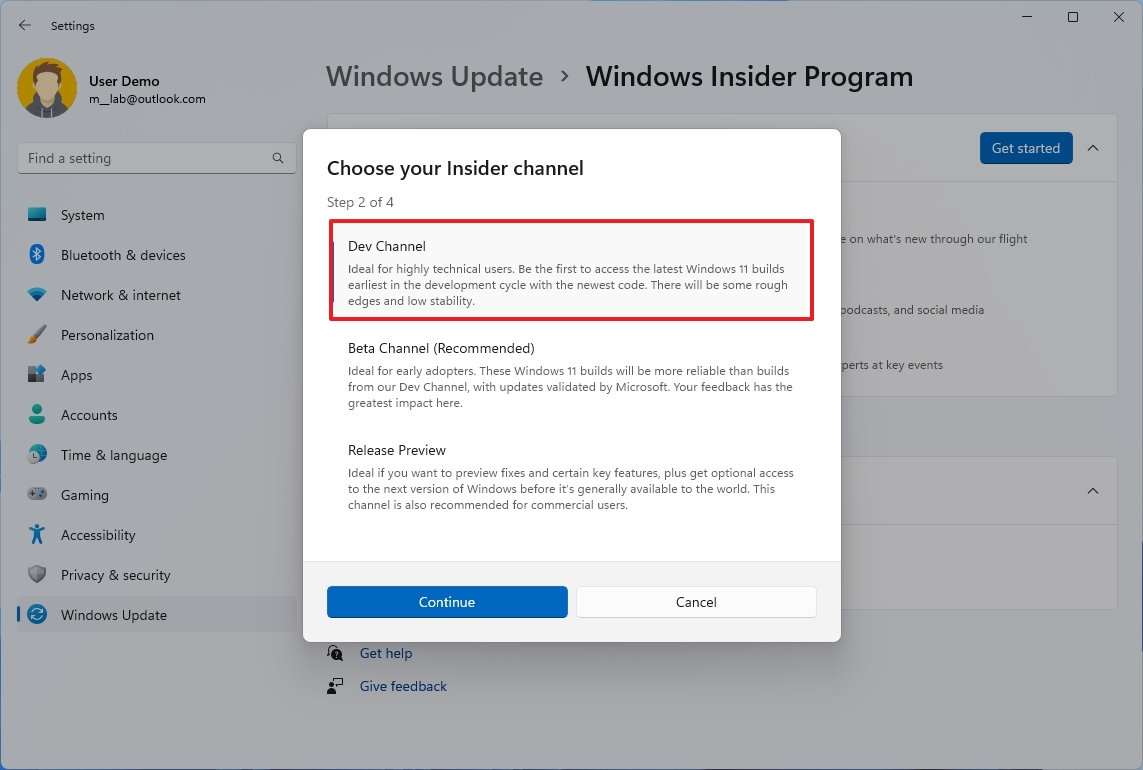
- Select the Insider channel, for example, the Dev Channel.
- Click the Continue button.
- Click the Continue button again.
- Click the Restart button.
Once you complete the steps, when a new preview is available in the Dev Channel, it will download and install automatically.
You can always check manually on Settings > Windows Update and click the Check for updates button.
Customize boot manager
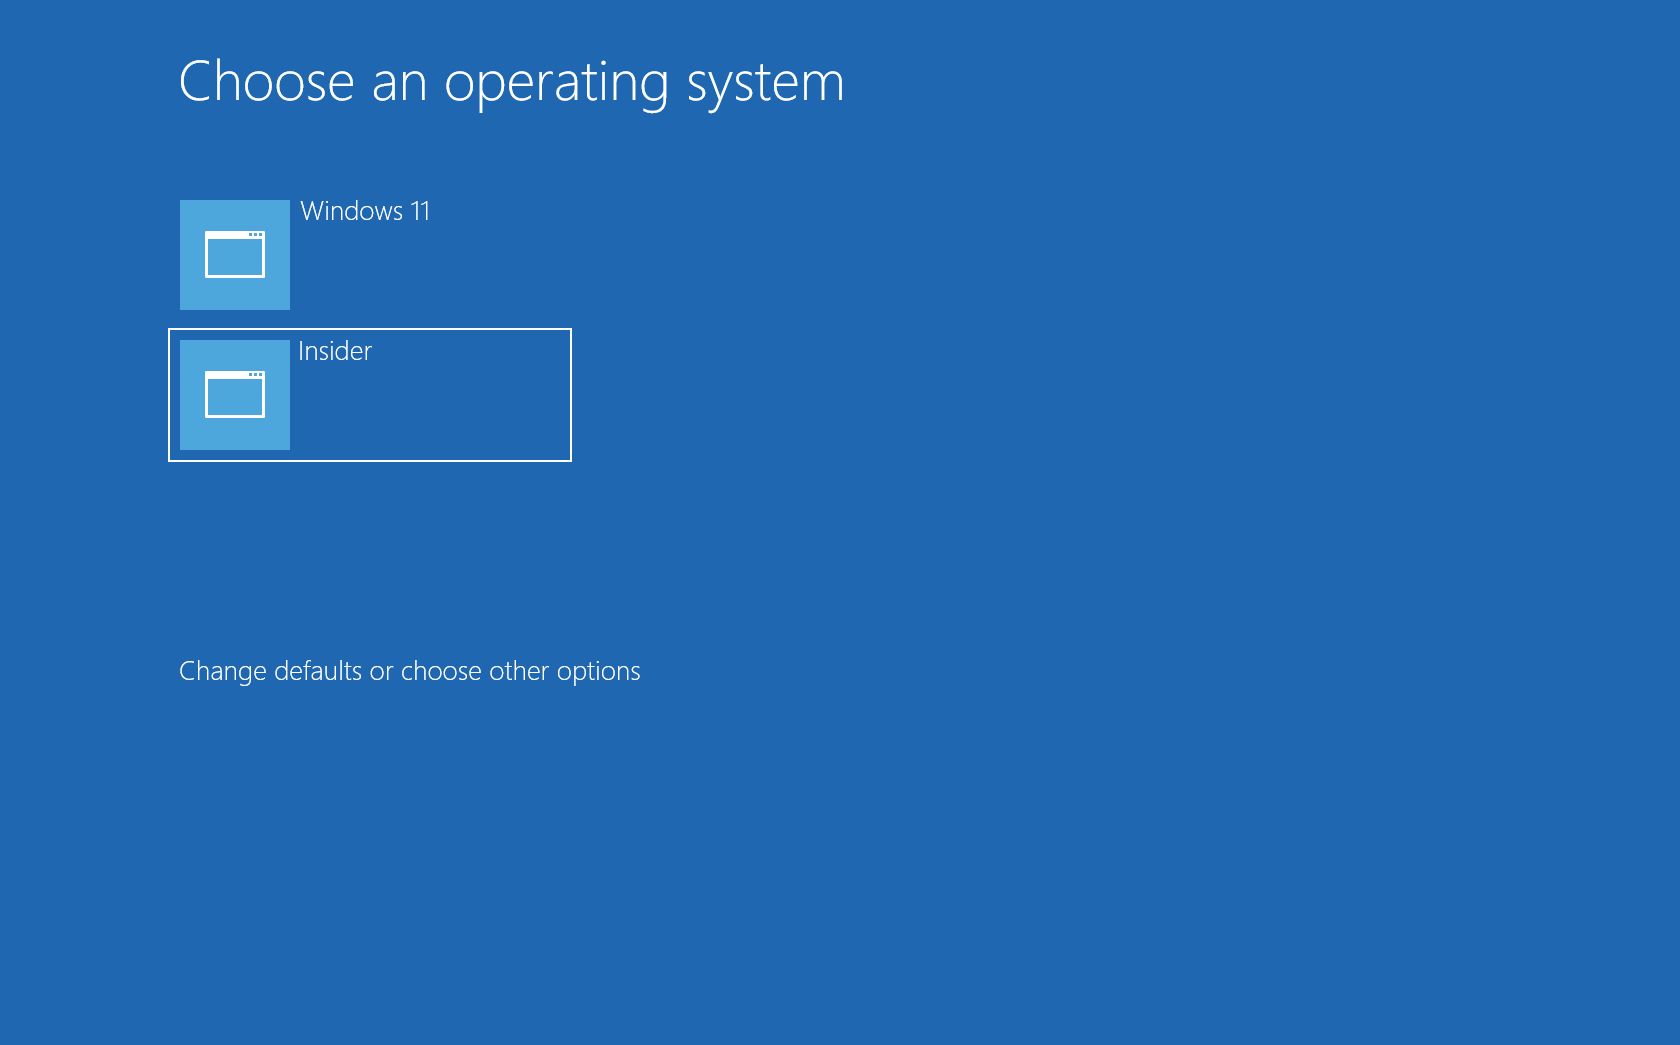
The boot manager will configure automatically during the second installation process. However, you can always customize the settings. For example, you can change the name of the option during startup, so they are clear to identify. You can select which of the installation is the default, and you can change the default timeout, so you don't have to wait half a minute to auto-select the option to start the operating system.
Change setup name
To change the installation name in the boot manager, use these steps:
- Open Start.
- Search for Command Prompt, right-click the top result, and select the Run as administrator option.
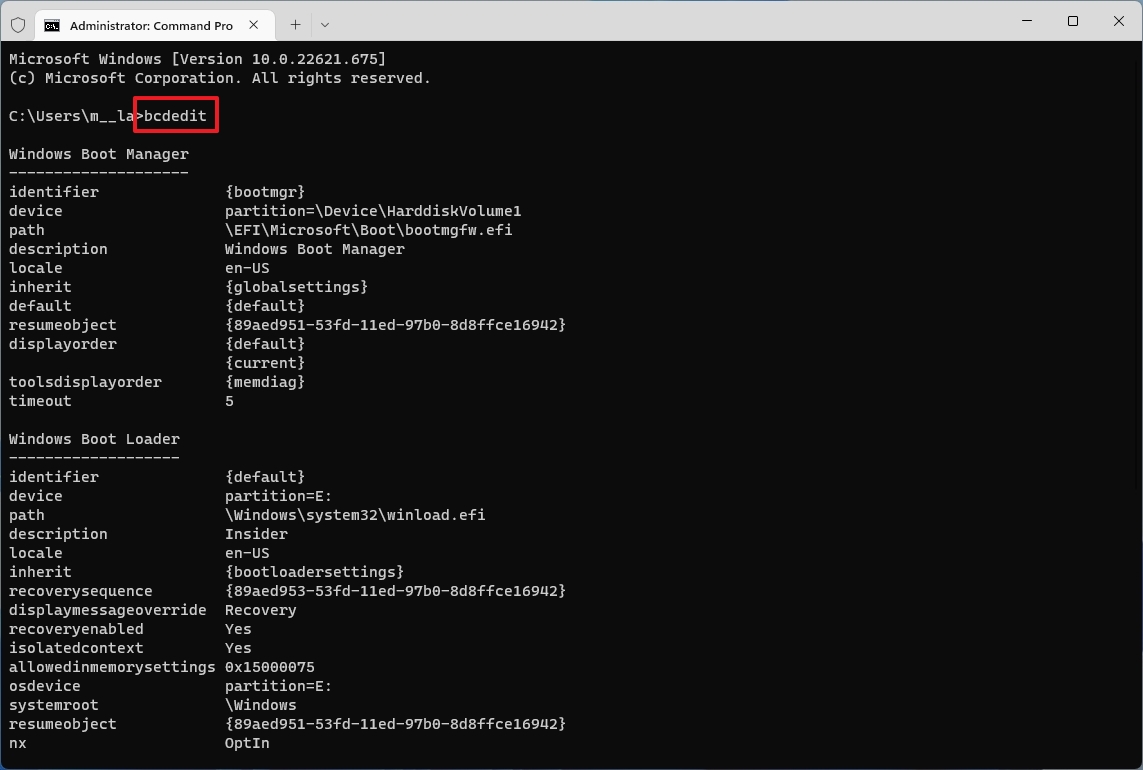
- Type the following command to identify the setup information for each operating system and press Enter: bcdedit
- Confirm the new installation entry.
- Quick note: If you haven't modified the default settings, the "Identifier" should read "{default}."
- Select and right-click the "Identifier" value.
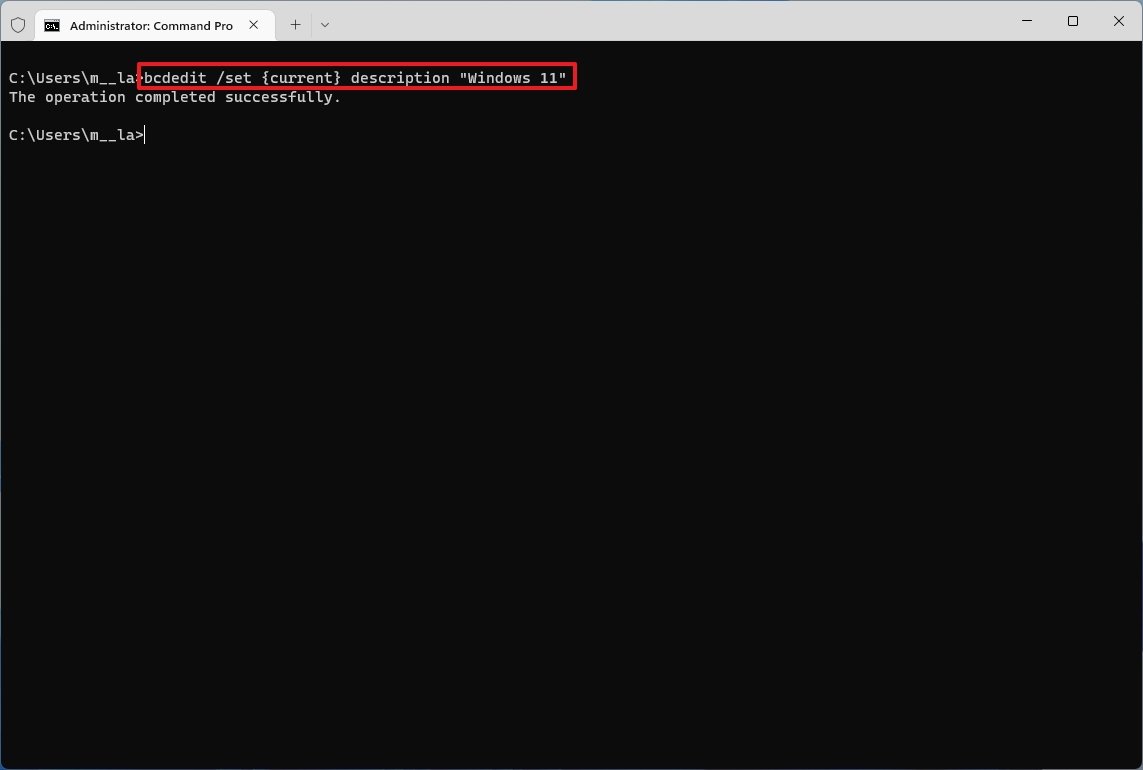
- Type the following command to change the installation identifier in the boot manager and press Enter: bcdedit /set {current} description "NAME"
For example, this command sets the name to "Insider": bcdedit /set {current} description "Windows 11"
After you complete the steps, the boot manager will list the operating systems with the names you specified.
If you're logged on in the original installation, the identifier will read "default" for the second installation and "current" for the first setup. If you're logged on in the second installation, the identifier will read "current" for the second installation and a long unique GUID value for the first installation. If you want to make things less confusing, it's best to perform the changes from the original setup.
Change default boot
To specify which installation the boot manager will start if you don't choose an option, use these steps:
- Open Start.
- Search for Command Prompt, right-click the top result, and select the Run as administrator option.
- Type the following command to identify the setup information for each operating system and press Enter: bcdedit
- Confirm the identifier for the installation you want to make the default.
- Select and right-click the "identifier" number.
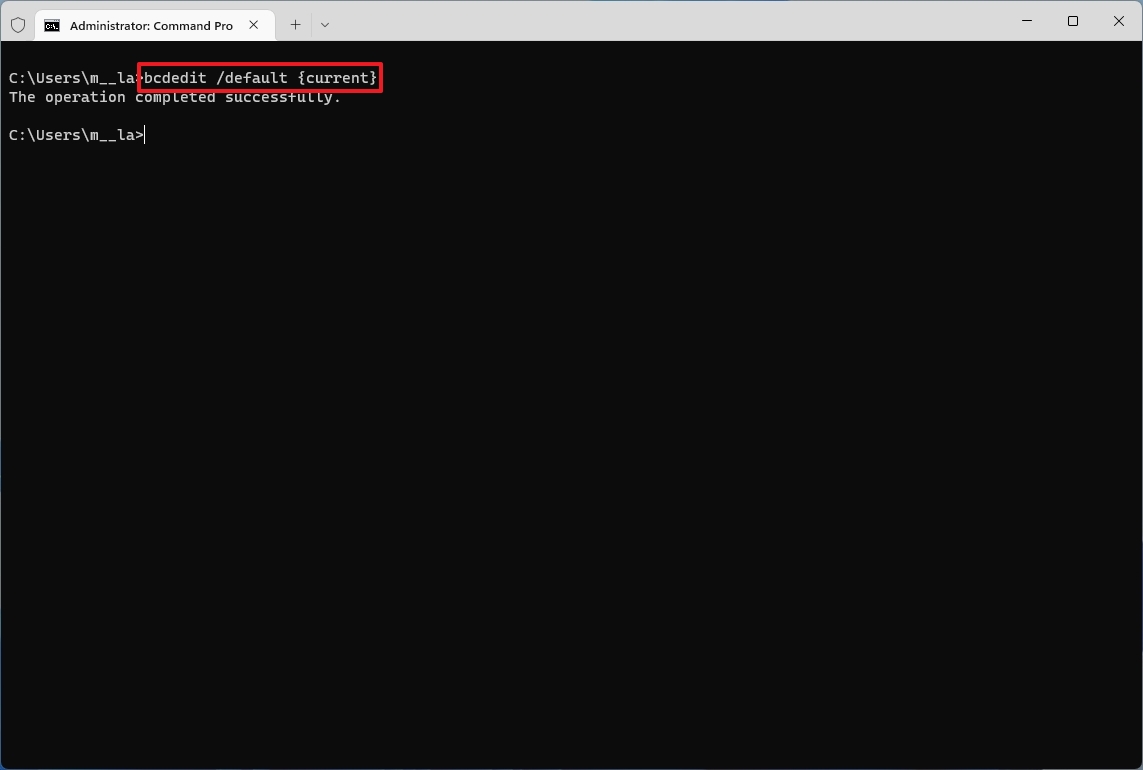
- Type the following command to change the default installation in the boot manager and press Enter: bcdedit /default {identifier}
For example, this command sets the default to the original installation: bcdedit /default {current}
Once you complete the steps, the new default will be added to the list.
Change timeout setting
To change the amount of time the boot manager waits before starting the default operating system, use these steps:
- Open Start.
- Search for Command Prompt, right-click the top result, and select the Run as administrator option.
- Type the following command to lower or increase the timeout setting and press Enter: bcdedit /timeout 5
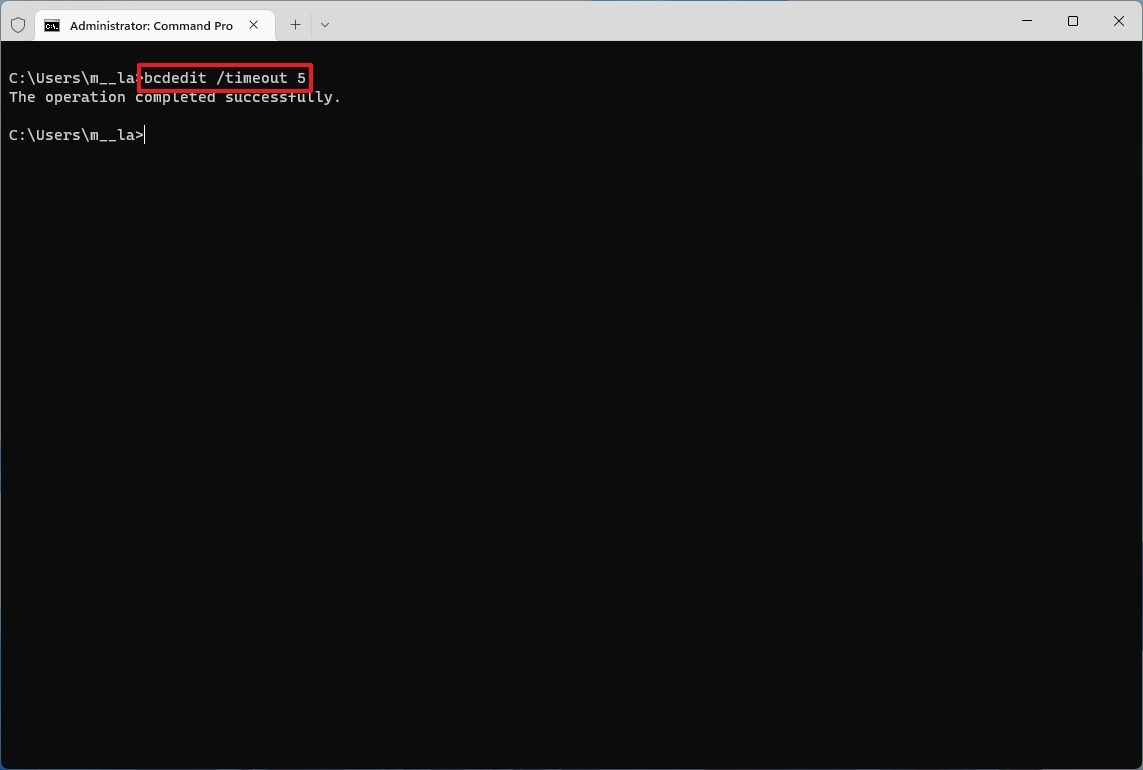
In the command, change "5" to the number of seconds you want to use.
After you complete the steps, if you don't choose an installation within five seconds, the boot manager will start the default option automatically.
More resources
For more helpful articles, coverage, and answers to common questions about Windows 10 and Windows 11, visit the following resources:

Mauro Huculak has been a Windows How-To Expert contributor for WindowsCentral.com for nearly a decade and has over 22 years of combined experience in IT and technical writing. He holds various professional certifications from Microsoft, Cisco, VMware, and CompTIA and has been recognized as a Microsoft MVP for many years.
