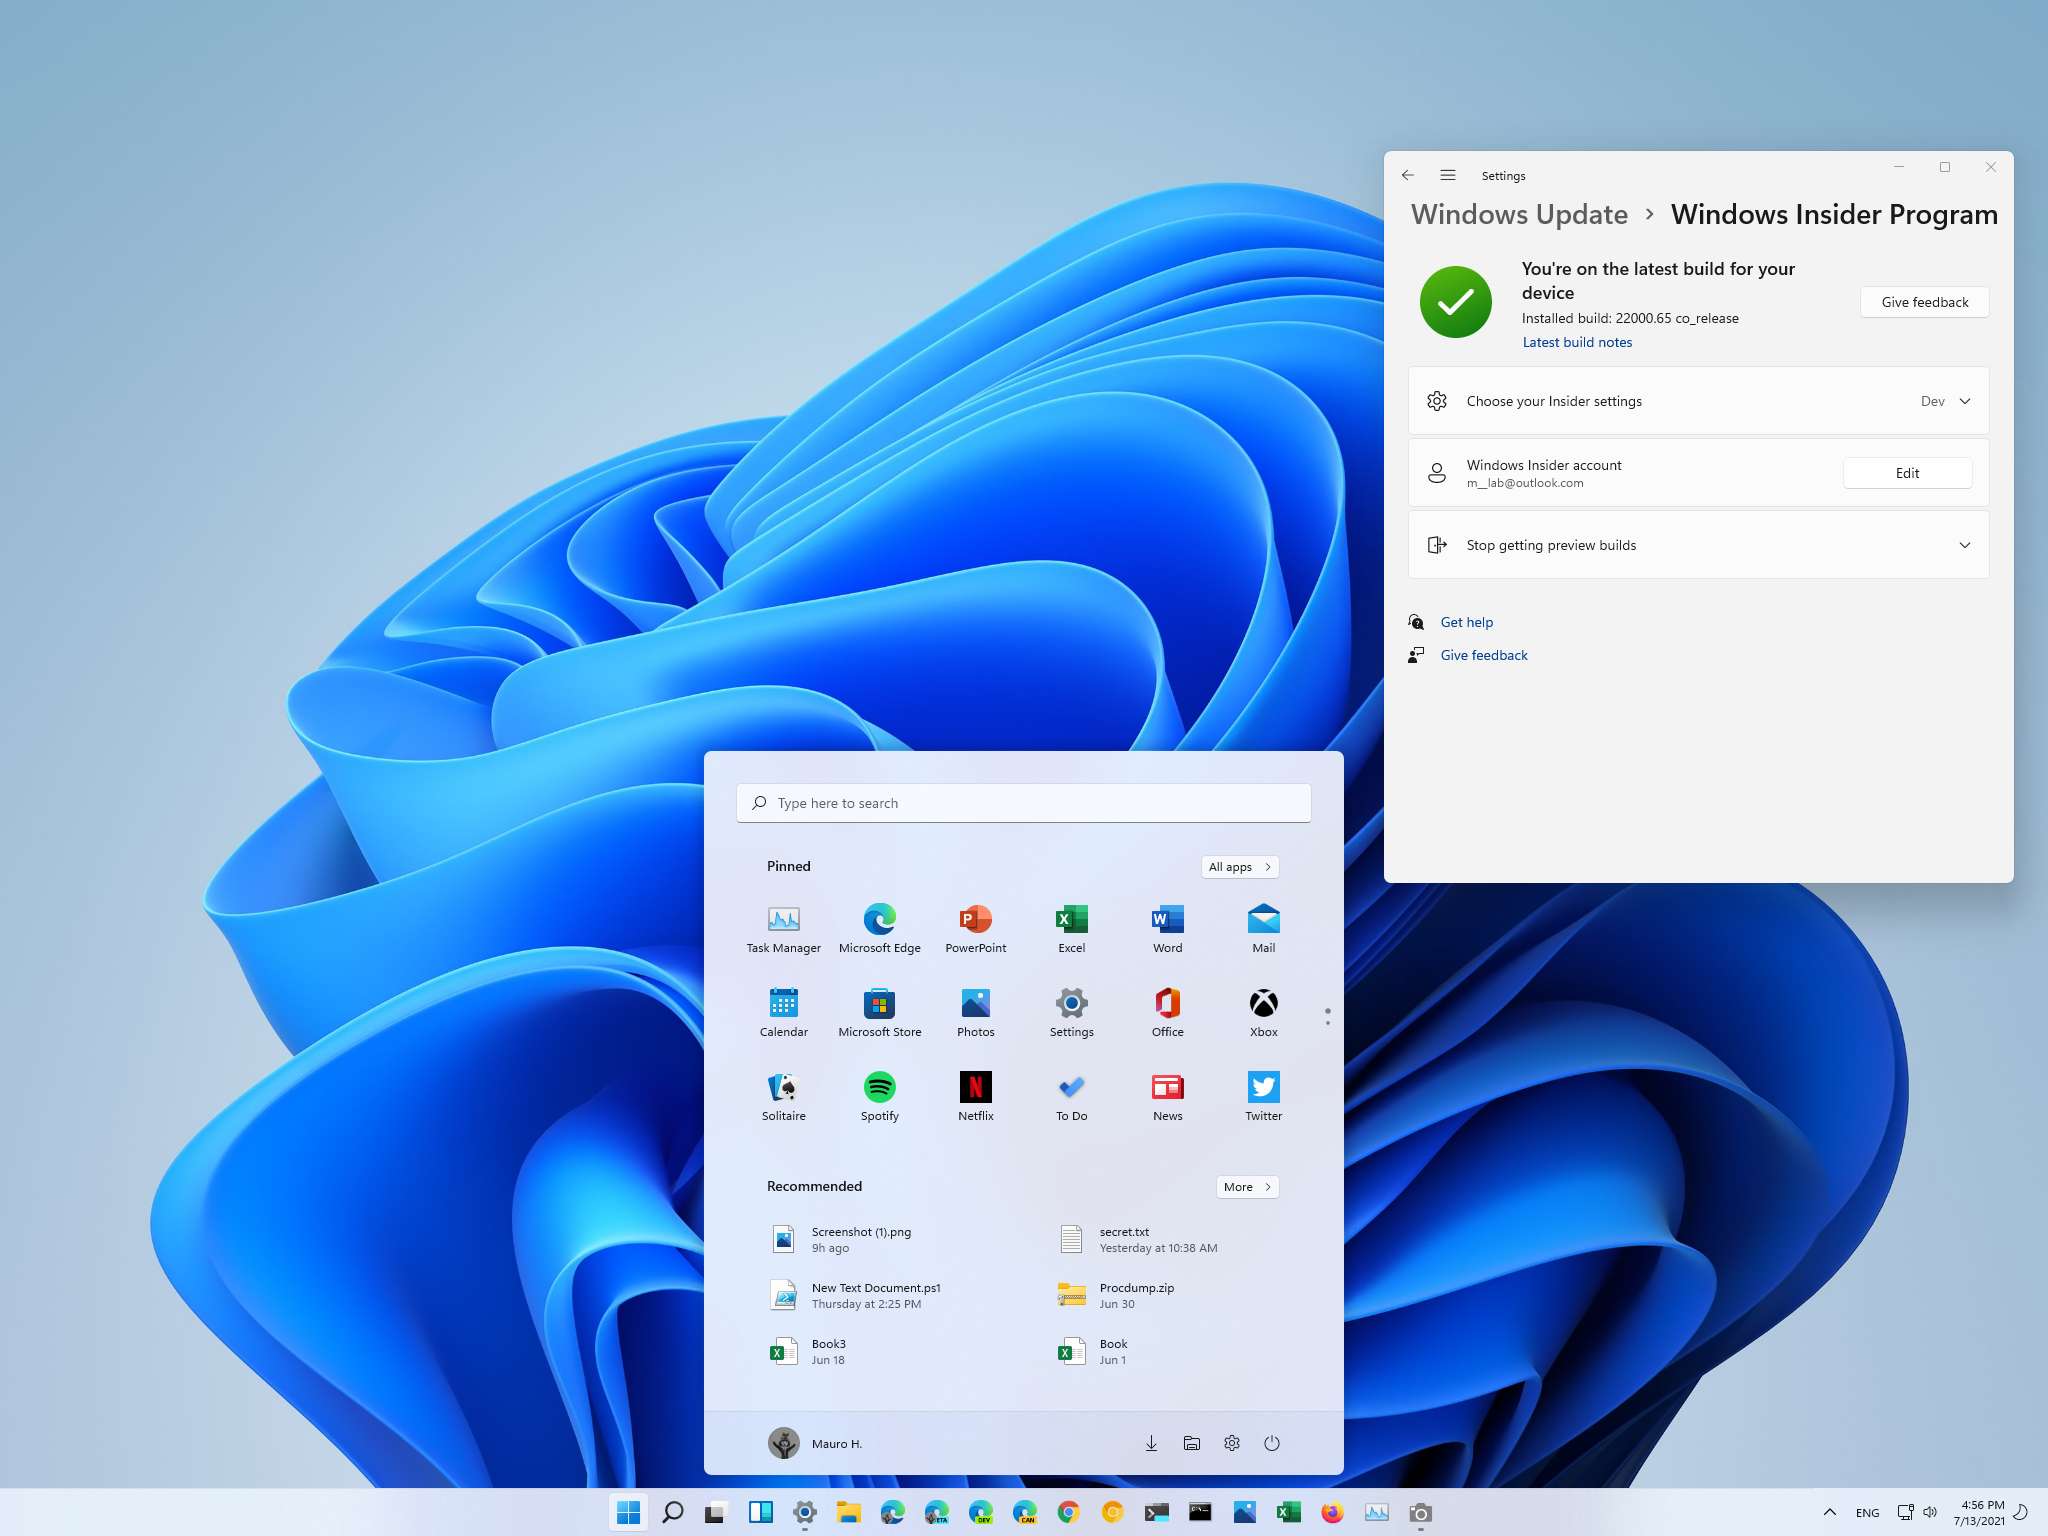
How to try Windows 11 alongside Windows 10 using a virtual machine
You can safely test previews of Windows 11 using a virtual machine, and here's how on Windows 10.
All the latest news, reviews, and guides for Windows and Xbox diehards.
You are now subscribed
Your newsletter sign-up was successful
Although you can already download the pre-release version of Windows 11, upgrading your primary machine is not recommended since this new version is not yet ready. It contains bugs and issues that may negatively affect your experience. In some cases, it may even cause data loss.
Instead, if you want to test Windows 11 Insider Preview builds to get early access to the new features and changes, you should be using a spare computer, dual-boot setup, or virtual machine. In the case that you use Windows 10 Pro, you can install the Microsoft Hyper-V feature to create a virtual machine to test drive the Insider previews without the need for separate hardware or complex setups.
In this Windows 10 guide, we will walk you through the steps to use Hyper-V to create a virtual machine to test Insider Preview builds of Windows 11.
- How to install Hyper-V on Windows 10
- How to create a Windows 11 virtual machine using Hyper-V
- How to install Windows 11 on virtual machine using Hyper-V
How to install Hyper-V on Windows 10
On Windows 10, Hyper-V is a virtualization platform available on the Pro and higher editions, and it allows you to create and manage multiple virtual machines running different systems (for example, Windows 11) without using separate hardware or resourcing to dual-boot configurations.
Check support for Hyper-V
The computer must meet these minimum hardware specifications to enable Hyper-V:
- 64-bit processor with Second Level Address Translation (SLAT).
- Processor must support VM Monitor Mode Extension (VT-c on Intel chips).
- Minimum of 4GB of RAM.
In addition, you have to check whether the Virtualization Technology and Hardware Enforced Data Execution Prevention options are enabled on system firmware.
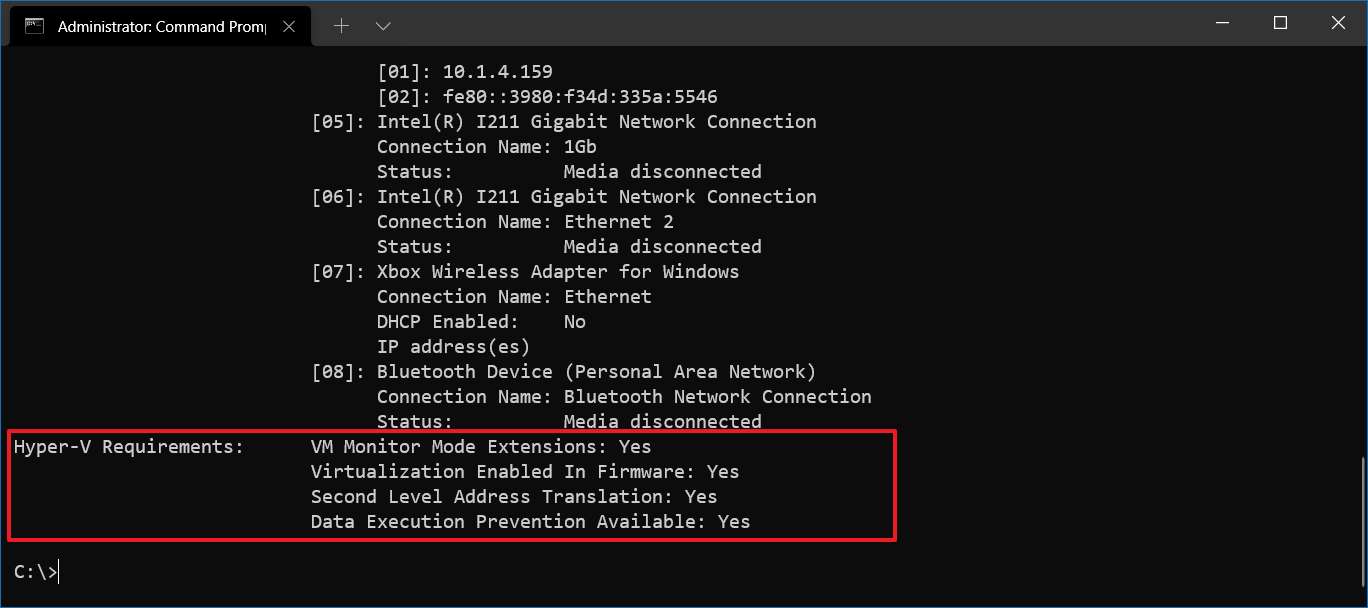
To confirm the computer has the required support for Hyper-V using Systeminfo.exe:
All the latest news, reviews, and guides for Windows and Xbox diehards.
- Open Start.
- Search Command Prompt and click the top result to open the app.
- Type the following command and press Enter:
systeminfo.exe - Under the Hyper-V Requirements section, confirm whether the result reads Yes for all the options.
If the command displays No under Hyper-V Requirements, your computer doesn't support this feature, or you need to enable the corresponding settings.
Since we are using virtualization, the device's hardware does not have to meet the requirements to run Windows 11 on bare metal.
Install Hyper-V on Windows 10
To enable Hype-V on Windows 10, use these steps:
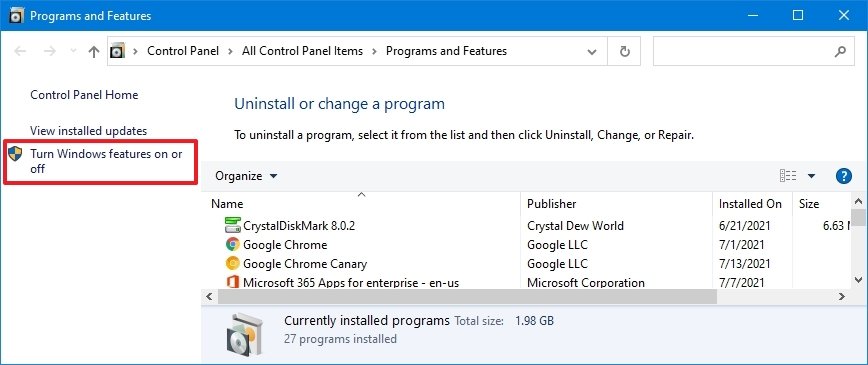
- Open Control Panel.
- Click on Programs.
- Click on Turn Windows features on or off.
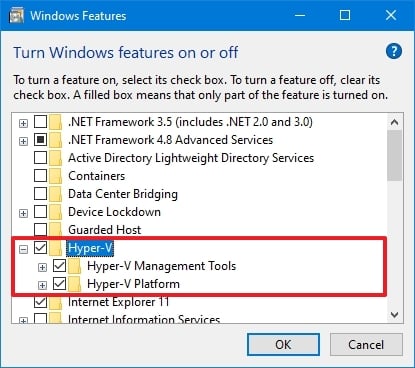
- Check the Hyper-V option making sure that Hyper-V Management Tools and Hyper-V Platform are also selected.
- Click OK to begin the process.
- Click Restart now to apply the changes.
Once you complete the steps, you can proceed to create a virtual machine to run Windows 11.
How to create a Windows 11 virtual machine using Hyper-V
To create a virtual machine to run Windows 11 Insider Preview builds, use these steps:
- Open Start.
- Search for Hyper-V Manager and click the top result to open the app.
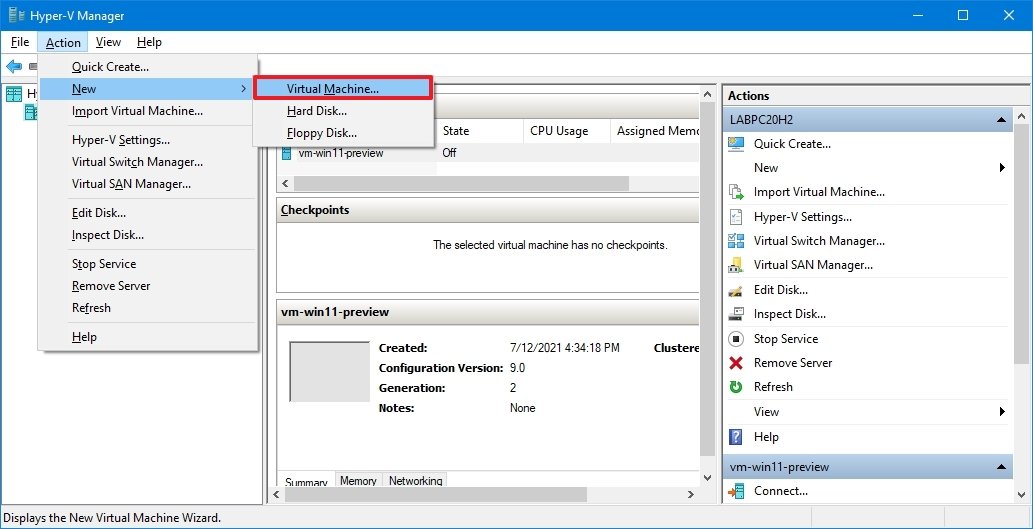
- Click on the Action menu.
- Select the New submenu and click on the Virtual Machine option.
- Click the Next button.
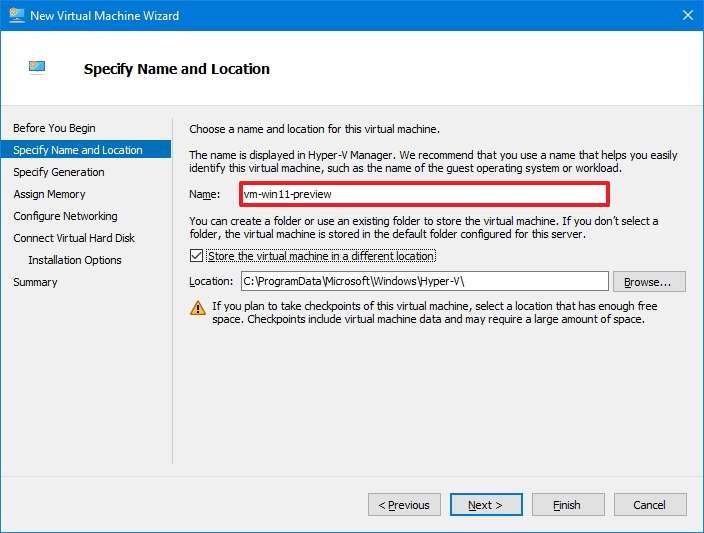
- Confirm a descriptive name for the virtual machine — for example, vm-win11-preview.
- (Optional) Check the Store the virtual machine in a different location option and click the Browse button to select a different location to store the VM.
- Click the Next button.
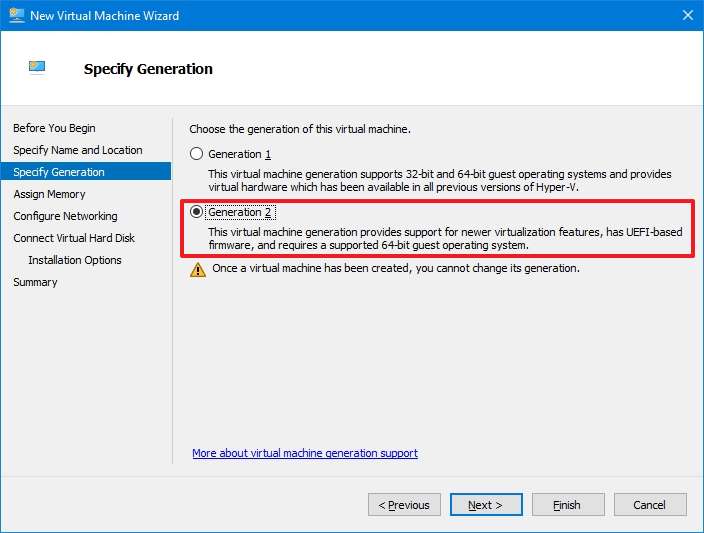
- Select the Generation 2 option.
- Click the Next button.
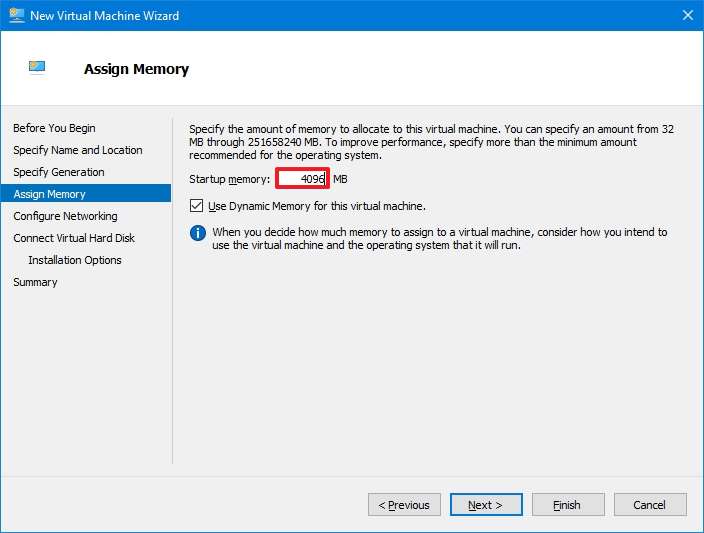
- In the "Startup memory" setting, specify at least 4GB (4096 MB) of memory.
- Check the Use Dynamic Memory for this virtual machine option.
- Click the Next button.
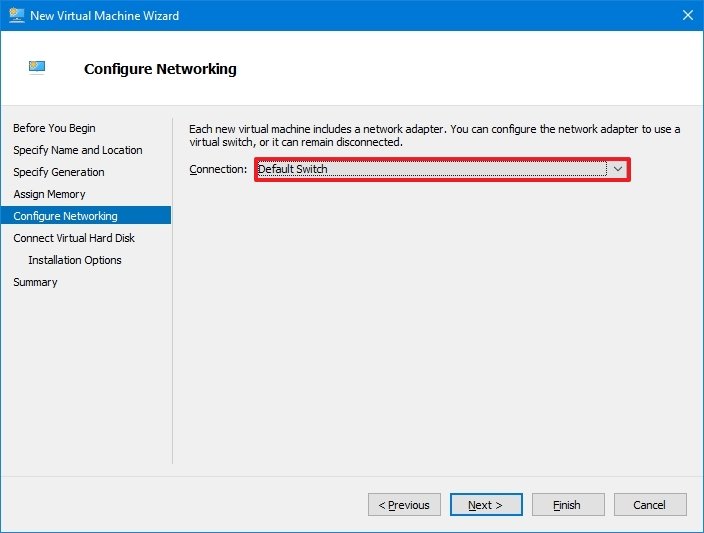
- Use the "Connection" drop-down menu and select the Default Switch option.
- Click the Next button.
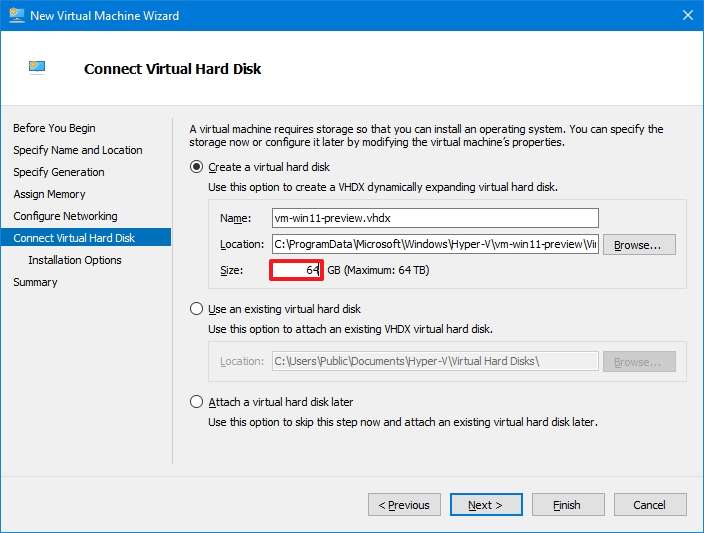
- Select the Create a virtual hard disk option.
- Use the default settings, but in the "Size" setting, specify the size of storage you want to use for the virtual machine (must be larger than 64GB).
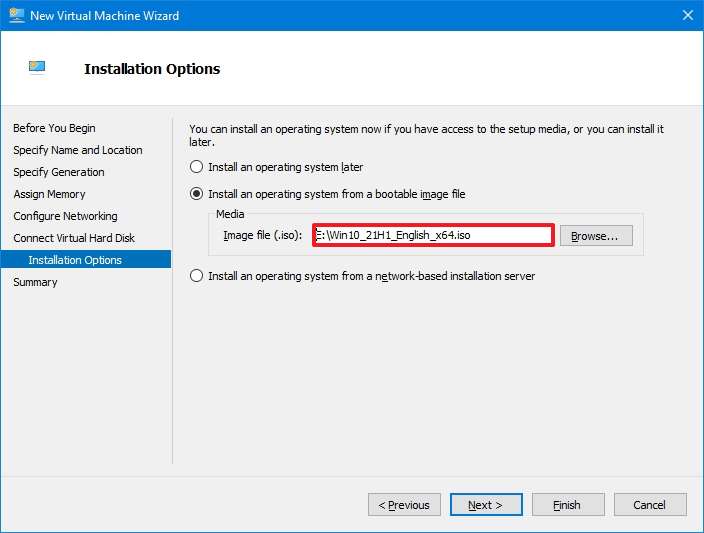
- Select the Install an operating system from a bootable CD/DVD-ROM option.
- Click the Browse button.
- Select the Windows 10 ISO file and click the Open button.
- Click the Next button.
- Click the Finish button.
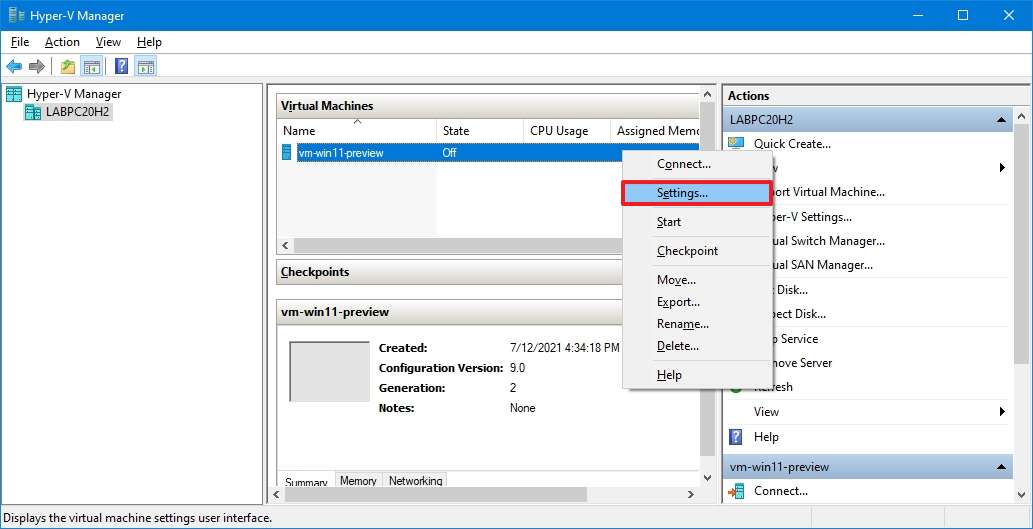
- Right-click the newly created virtual machine and select the Settings option.
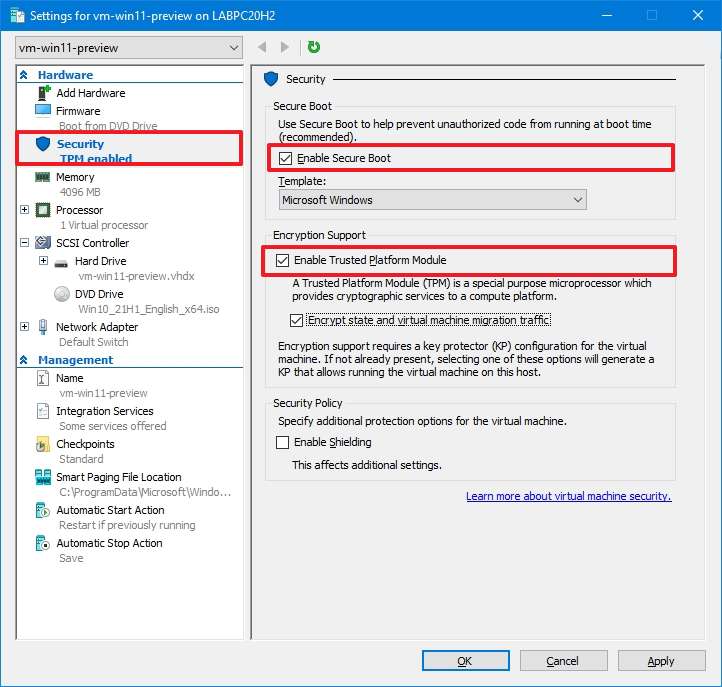
- Click on Security from the left pane.
- Under the "Secure Boot" section, check the Enable Secure Boot option.
- Use the Microsoft Windows default option for the "Template" setting.
- Under the "Encryption Support" option, check the Enable Trusted Platform Module option to enable the TPM requirement.
- Check the Encrypt state and virtual machine migration traffic option.
- Click the Apply button.
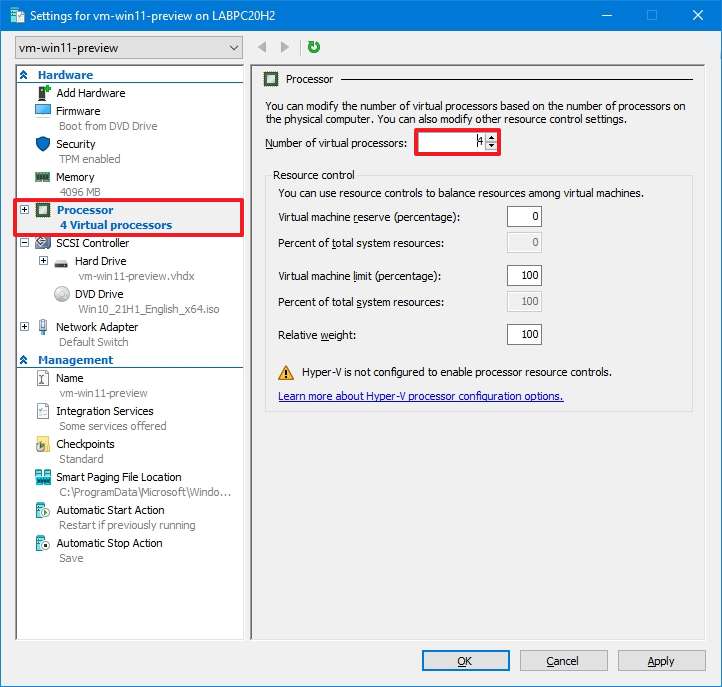
- Click on Processor from the left pane.
- Specify two or more cores to dedicate to the device based on your processor capabilities.
- Click the Apply button.
- Click the OK button.
Once you complete the steps, the virtual machine will be created, and you can continue with the steps below to install Windows 11 previews.
How to install Windows 11 on virtual machine using Hyper-V
The steps below will guide you through installing Windows 10 and then joining the device to the Windows Insider Program to download and install previews of Windows 11. Once Microsoft starts publishing ISO files, you can install the OS directly without going through the extra steps to install Windows 10 and then upgrading to Windows 11.
To install previews of Windows 11 on a virtual machine, use these steps:
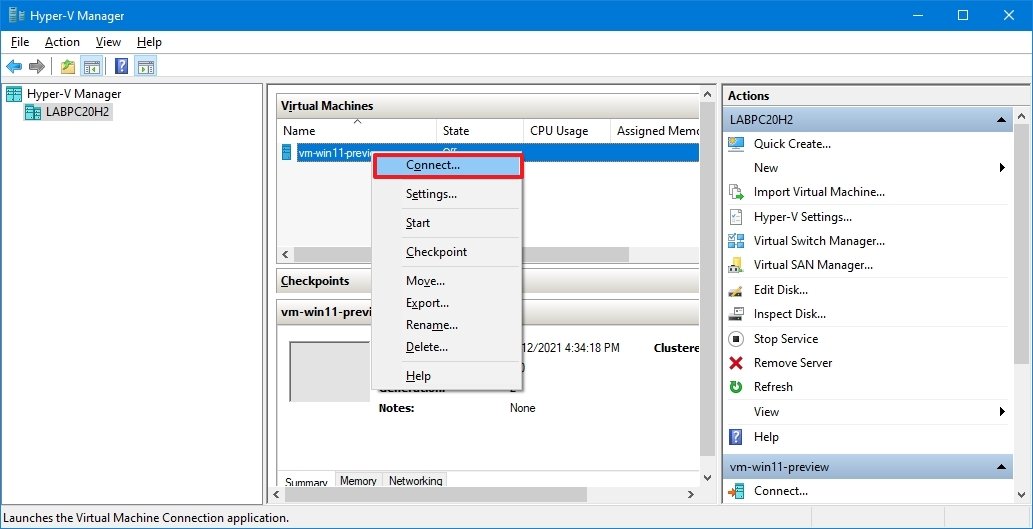
- Open Hyper-V Manager.
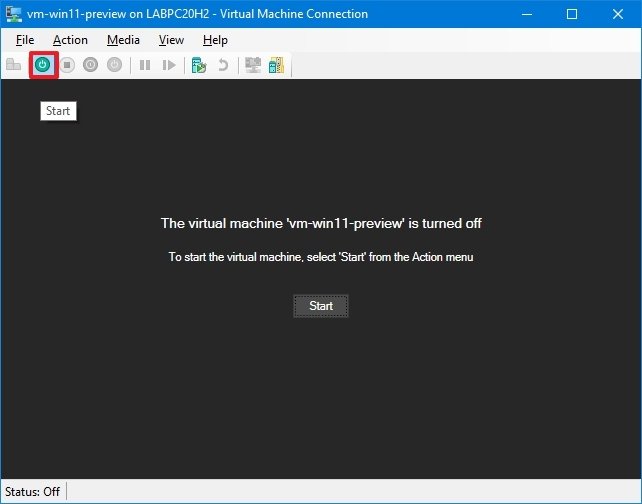
- Right-click the newly created device and select the Connect option.
- Click the Start button.
- Click Next on the Windows 10 setup screen.
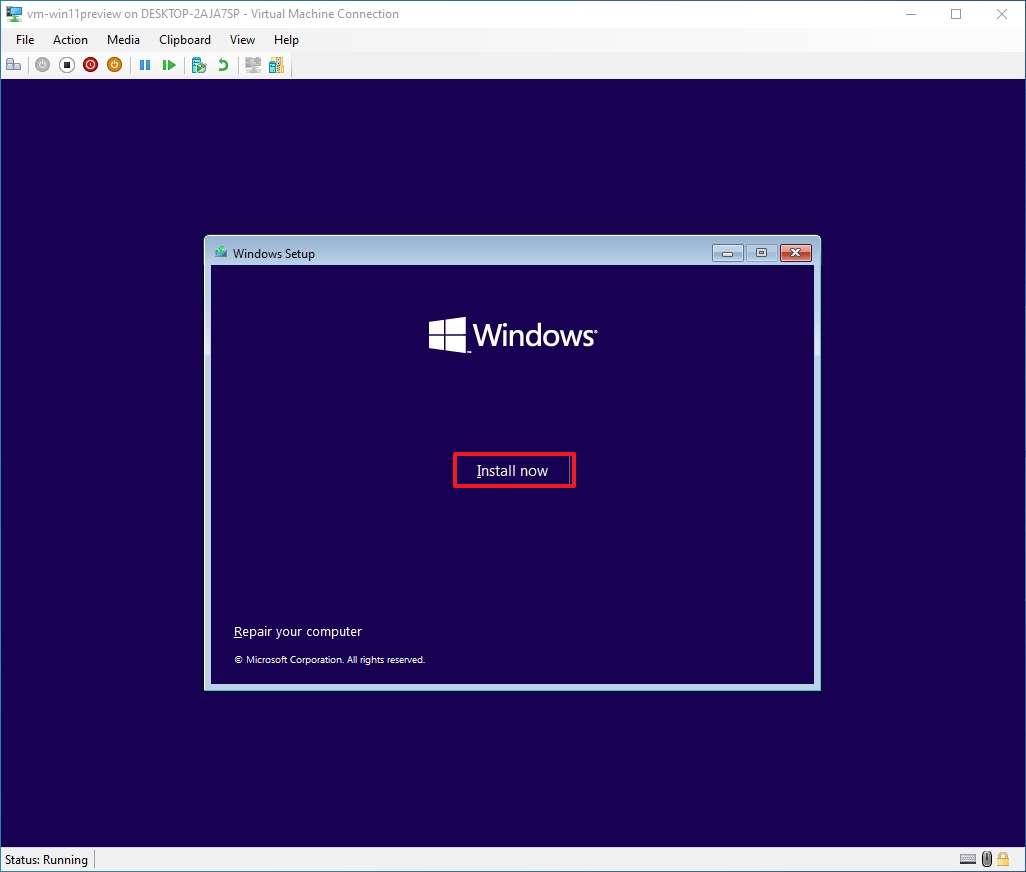
- Click the Install now button.
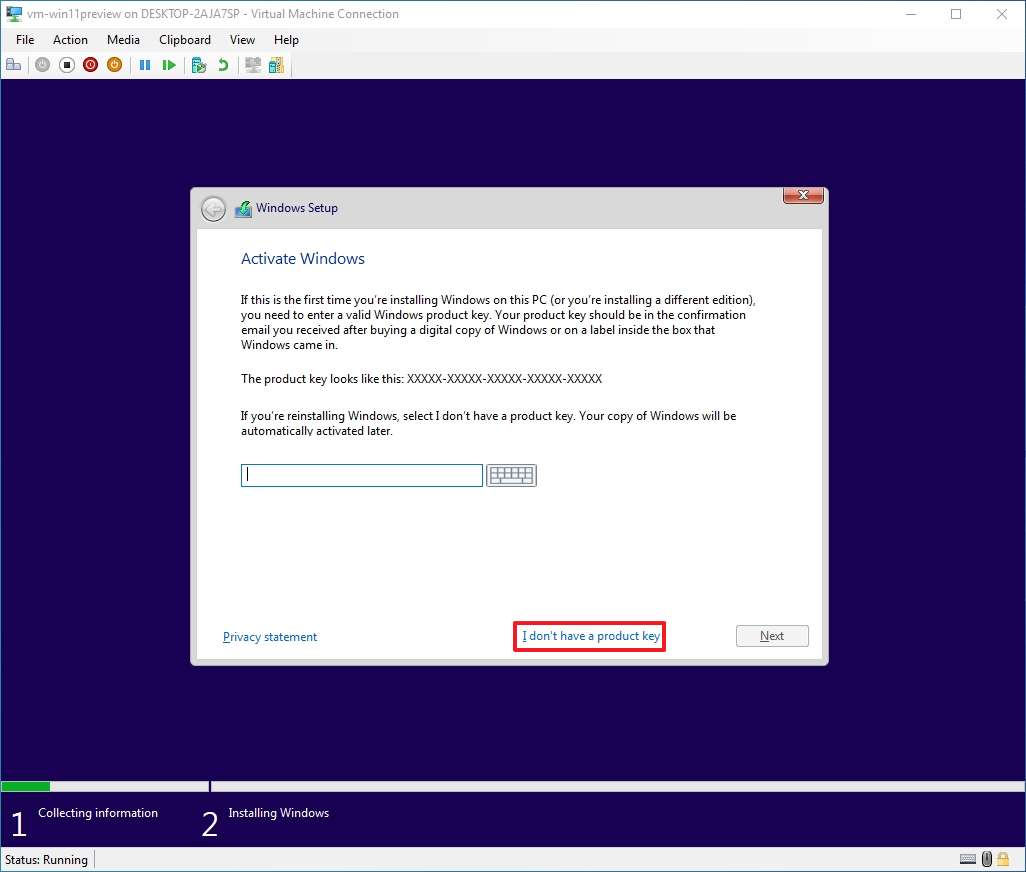
- Confirm the product key if prompted. (You can always click the I don't have a product key option to skip the step, but you'll need to enter it after the installation.)
- Click the Next button.
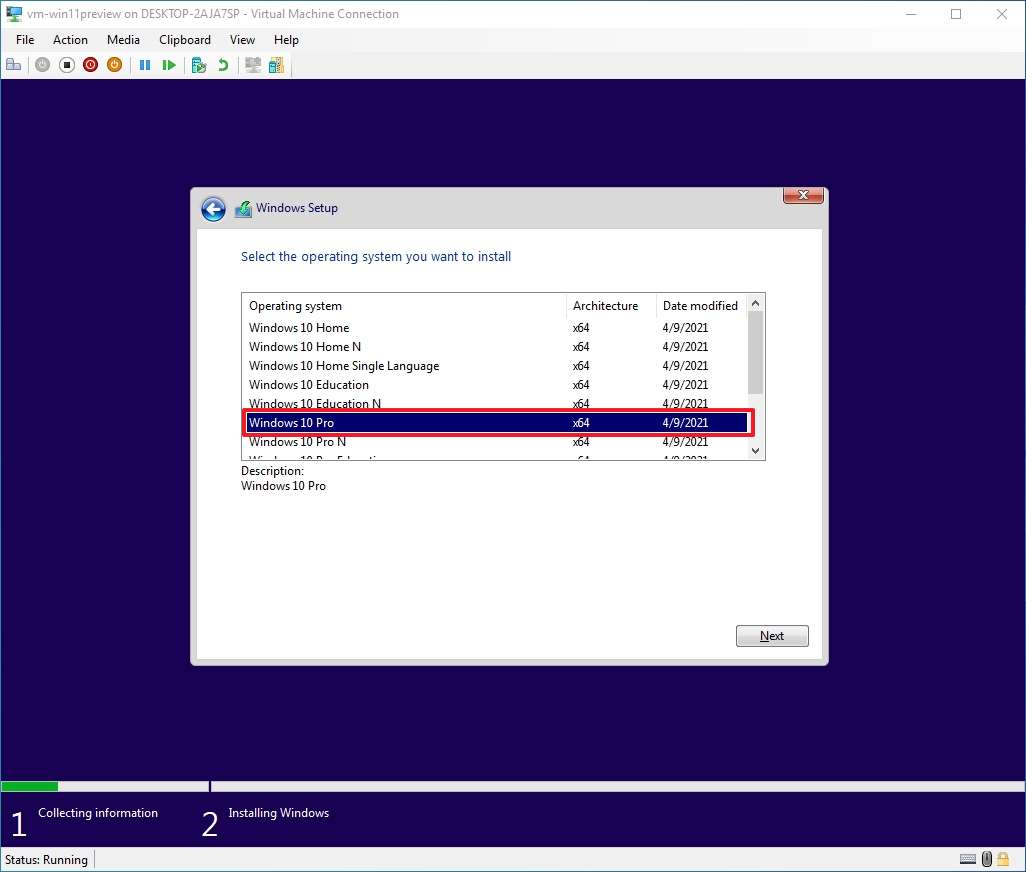
- Select the version of Windows 10 the product key activates.
- Click the Next button.
- Check the accept the licensing agreements option.
- Click the Next button.
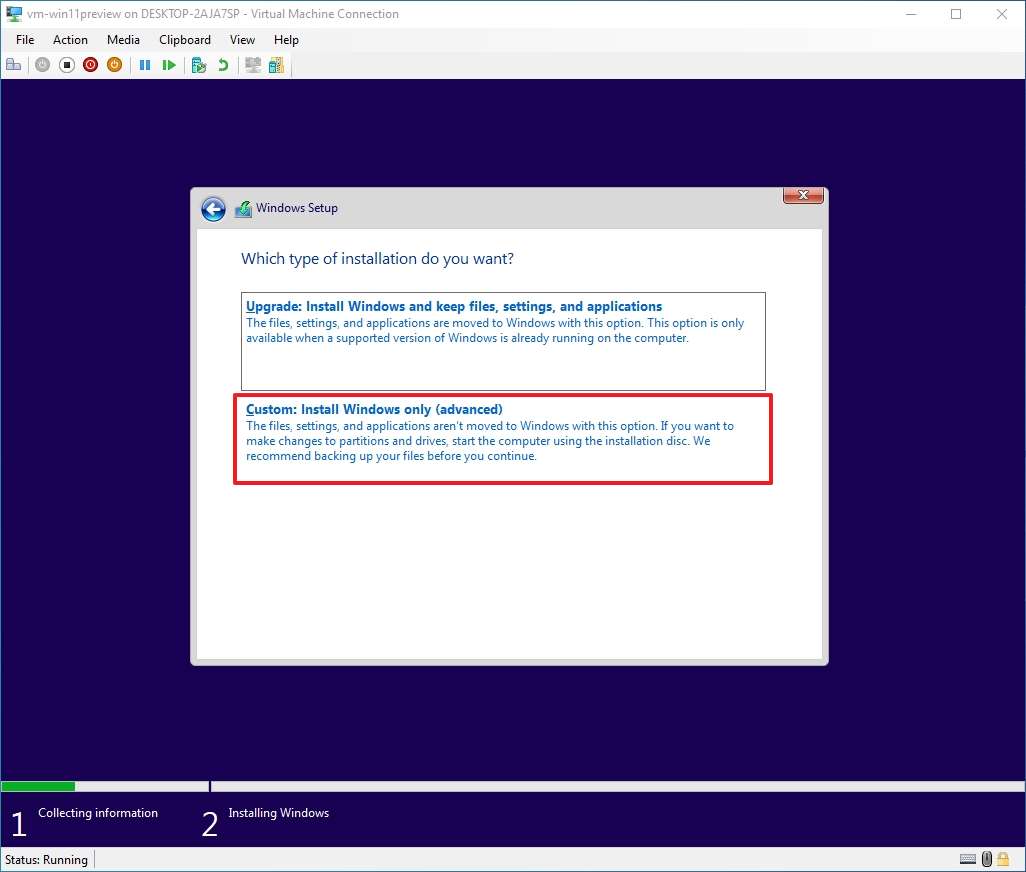
- Click the Custom: Install Windows Only (advanced) option.
- Click the Next button.
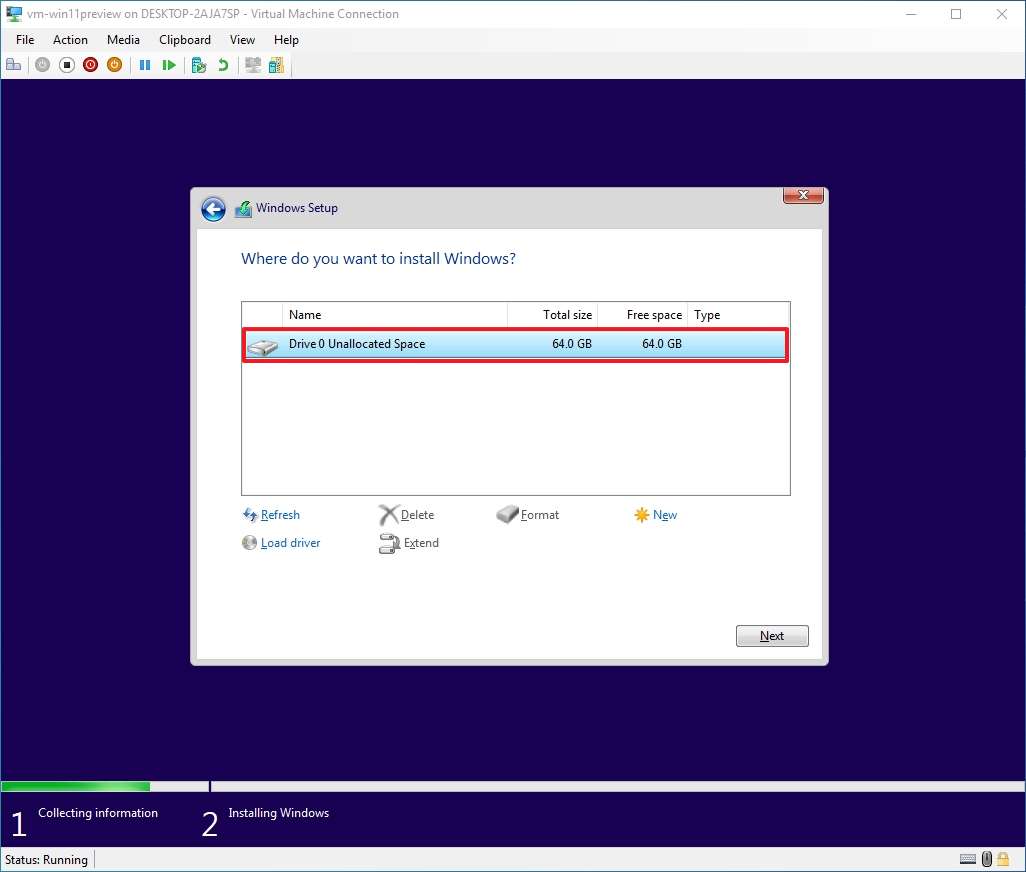
- Select the empty drive (Drive 0 Unallocated Space).
- Click the Next button.
- Continue with the on-screen direction to complete the out-of-box experience (OOBE) to create select your preferences, create a local account, and choose your privacy settings.Quick note: If you additional assistance with OOBE process, you can check this guide.
- Open Settings.
- Click on Update & Security.
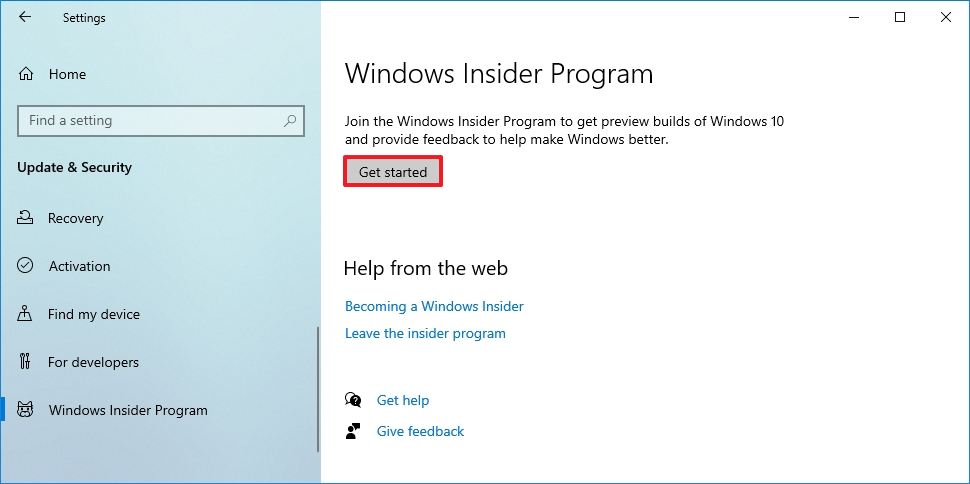
- Click on Windows Insider Program.Quick tip: If you don't see the option to configure the feature, then go to Settings > Privacy > Diagnostics & feedback, and check the Optional diagnostic data option, and then return to the "Windows Insider Program" page.
- Click the Get started button.
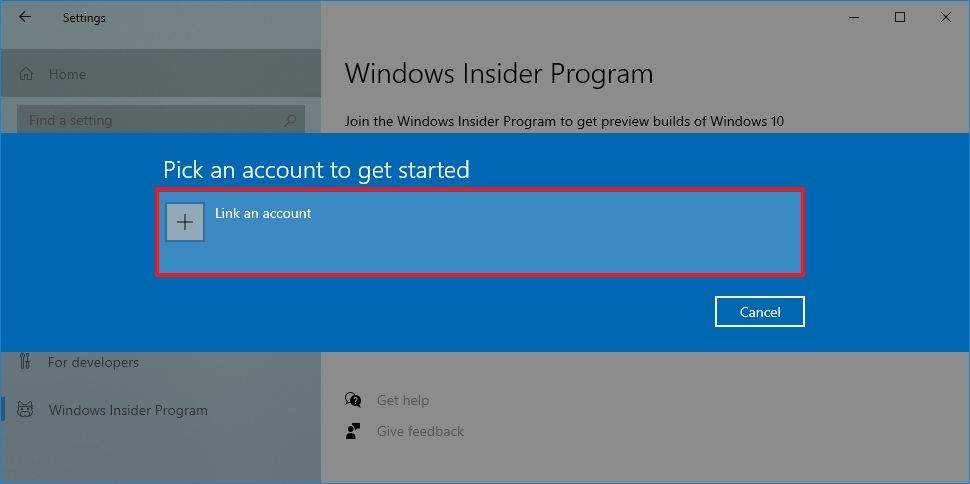
- Click the Link an account button.
- Select your Microsoft account from the list.
- Click the Continue button.
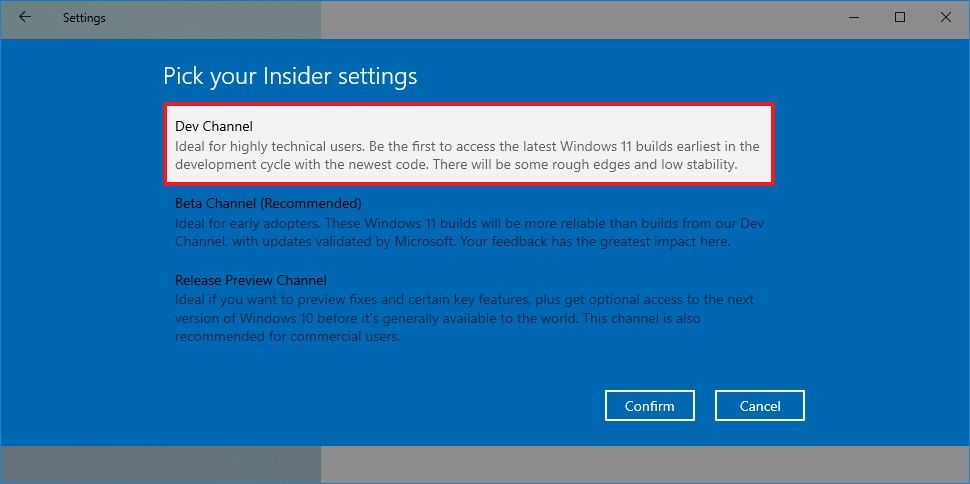
- Under the "Pick your Insider settings" section, select the Dev Channel option.
- Click the Confirm button.
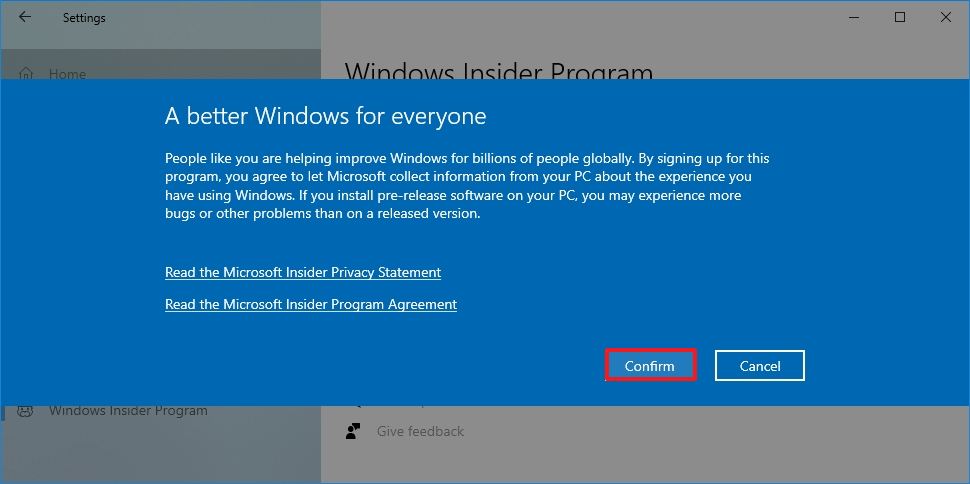
- Click the Confirm button one more time to agree to the terms.
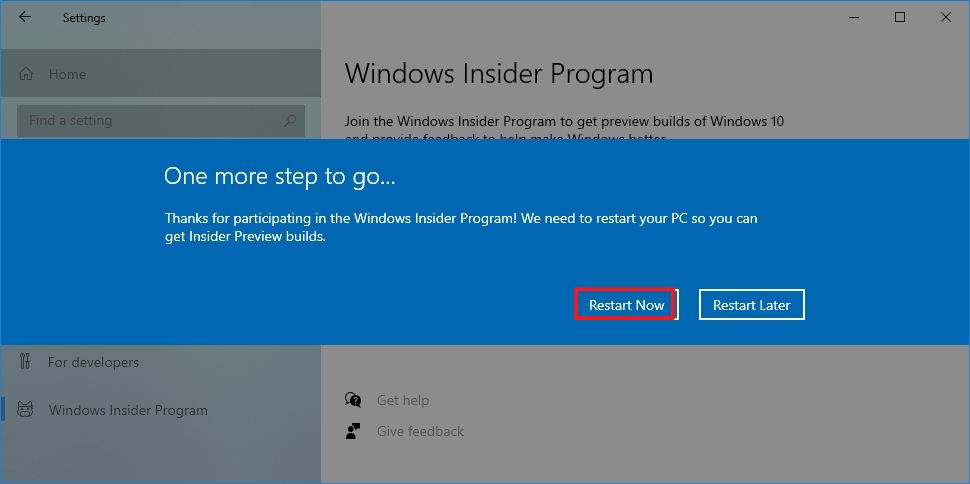
- Click the Restart now button.
- Open Settings again.
- Click on Update & Security.
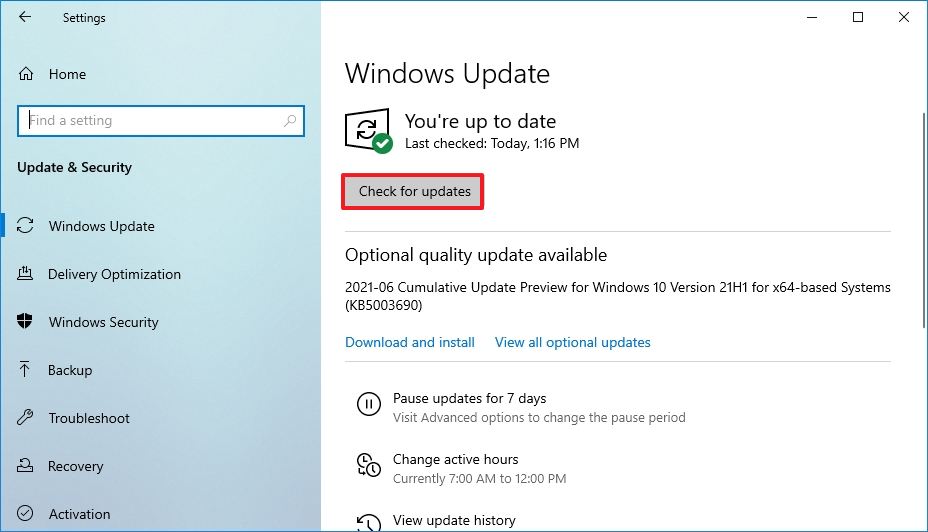
- Click on Windows Update.
- Click the Check for updates button.
- Click the Restart now button.
- Continue with the on-screen directions (if applicable).
After you complete the steps, the Windows 11 preview will download and install like any other pre-release of Windows you may have installed in the past.
You may be able to install previews of Windows 11 on a virtual machine that doesn't meet the minimum requirements, but in this guide, we try to configure the environment that match the final release hardware requirements.
More Windows resources
For more helpful articles, coverage, and answers to common questions about Windows 10 and Windows 11, visit the following resources:
- Windows 10 on Windows Central — All you need to know
- Windows 10 help, tips, and tricks
- Windows 11 on Windows Central — All you need to know

Mauro Huculak has been a Windows How-To Expert contributor for WindowsCentral.com for nearly a decade and has over 22 years of combined experience in IT and technical writing. He holds various professional certifications from Microsoft, Cisco, VMware, and CompTIA and has been recognized as a Microsoft MVP for many years.
