Adobe Rush beginner's guide: Getting started with video editing
Adobe Rush is a lightweight video editing tool for Windows 10 PCs and mobile devices. If you want something powerful without the full-blown complexity of Adobe Premiere, this might be a good option for you.
Adobe Rush is a lightweight video editor for Windows 10 PCs and mobile devices. While not as powerful as full-blown Adobe Premiere, it is still a potent option for lightweight video editing and is nowhere near as expensive at $10 per month.
If you're interested in getting to grips with Adobe Rush, I put together some quick tips on how to get started.
Note: You don't need to "save" an Adobe Rush project, as they save automatically with every action taken.
Article continues belowChoosing a file to get started
Once you get started with Adobe Rush, you'll first want to choose a raw video file to work from. For this example, we're just going to play around with some clips from the Xbox game DVR, uploaded to OneDrive.
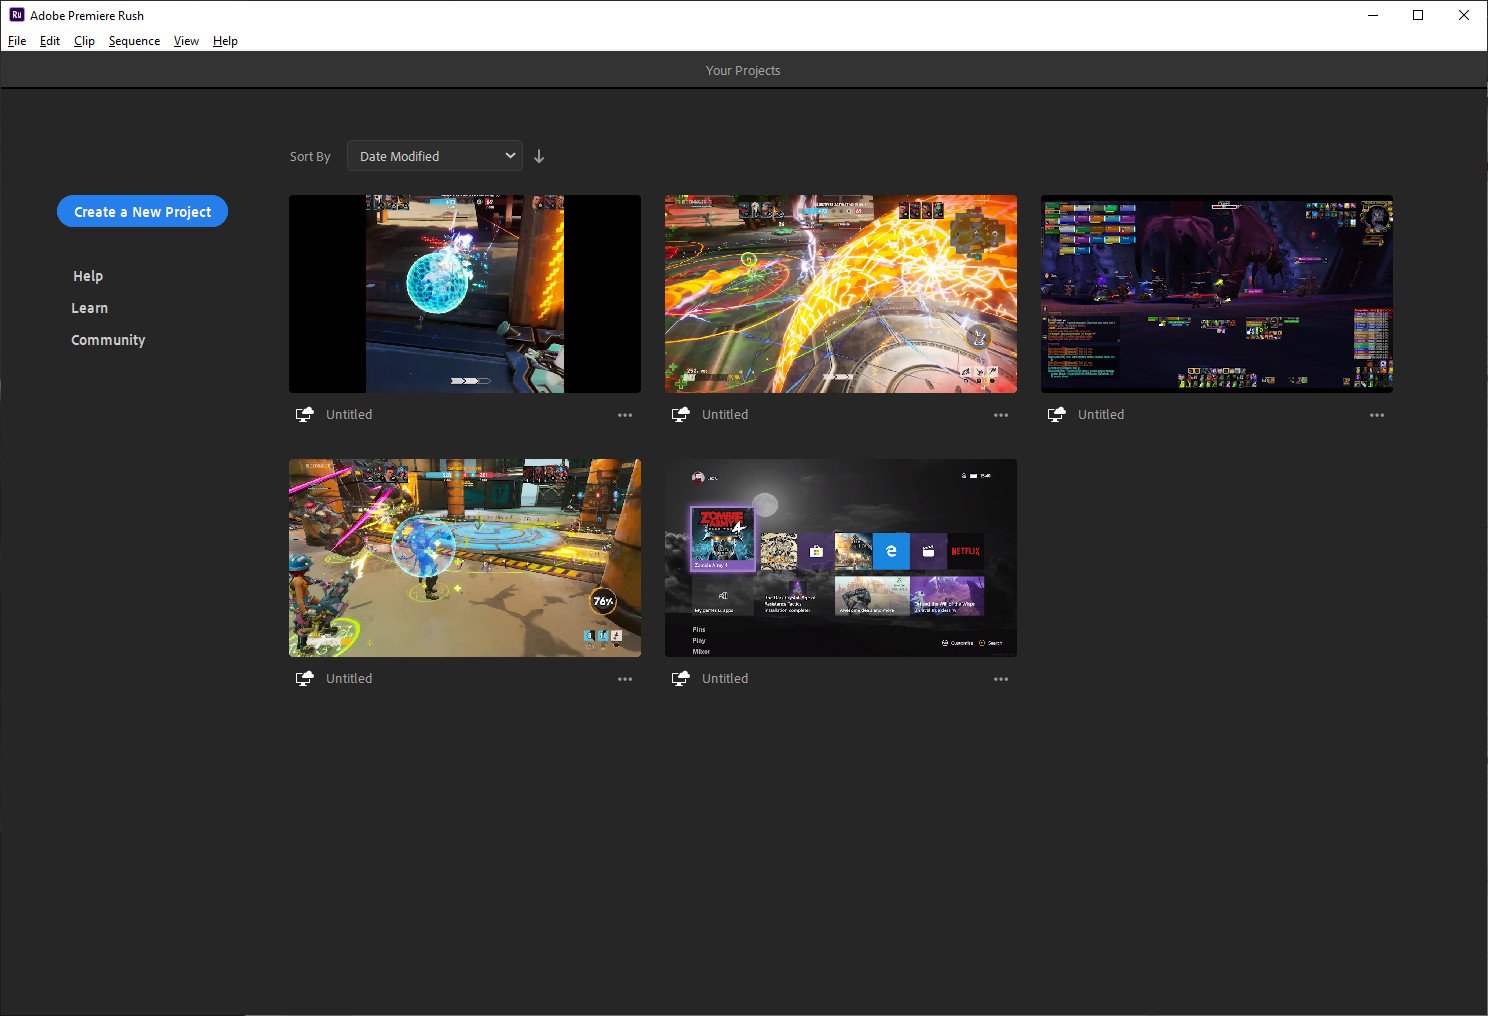
- Click create a new project to get started.
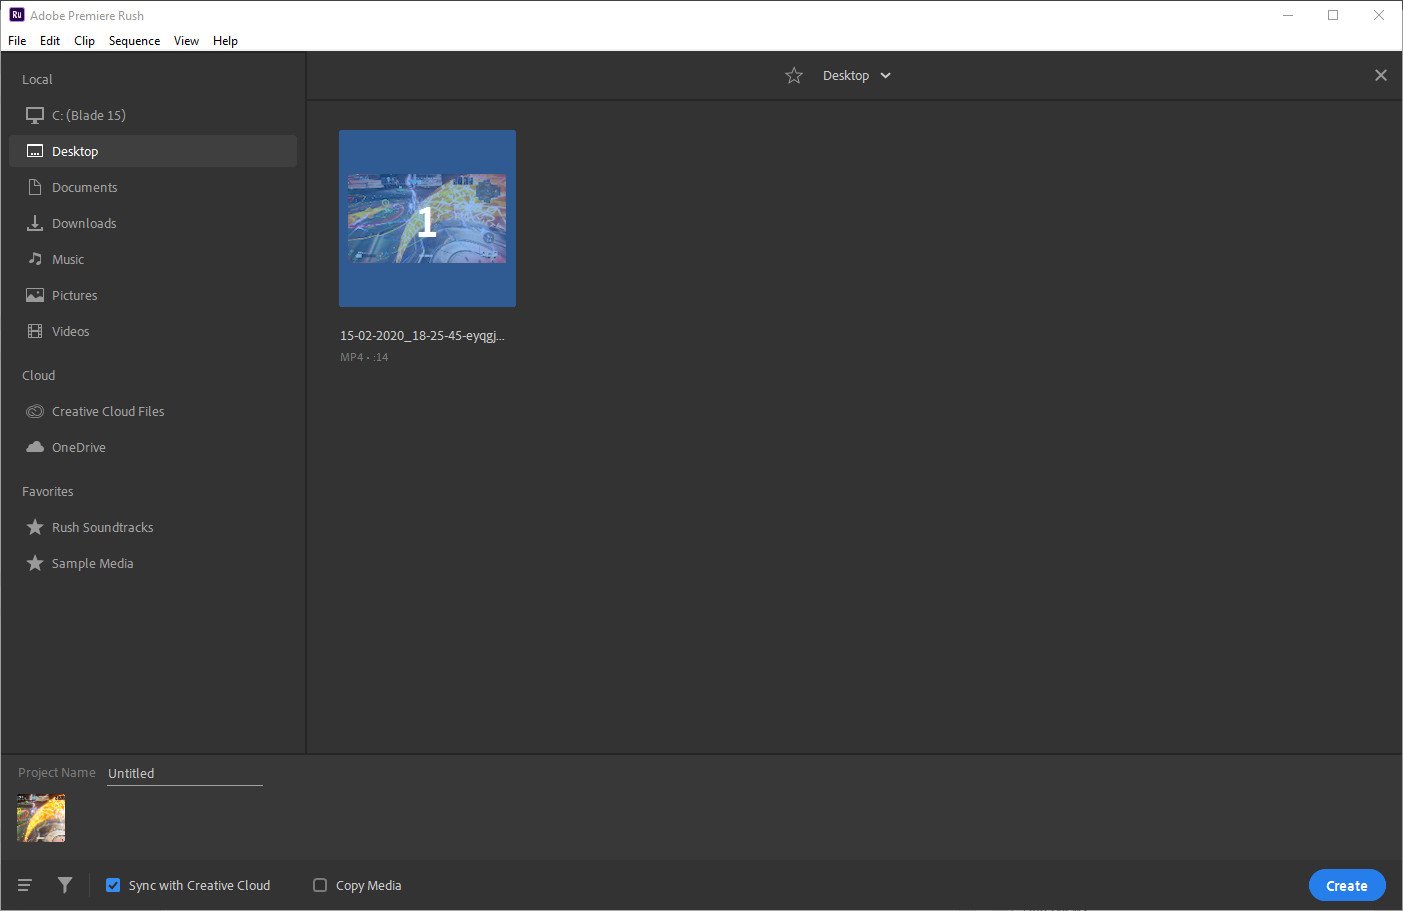
- Here, you can now select a file to get started with. Use the filters and sorting icons in the bottom left corner to find your files more easily.
- You can also give your project a name at the bottom, and choose whether to sync the data with Adobe Creative Cloud.
- Click Create when you're ready.
Resizing your canvas
Once you've got your video into the timeline, you'll want to choose a size for the format you're making. Instagram uses square or vertical video for example, while Twitter and YouTube use horizontal 4:3 or 16:9.
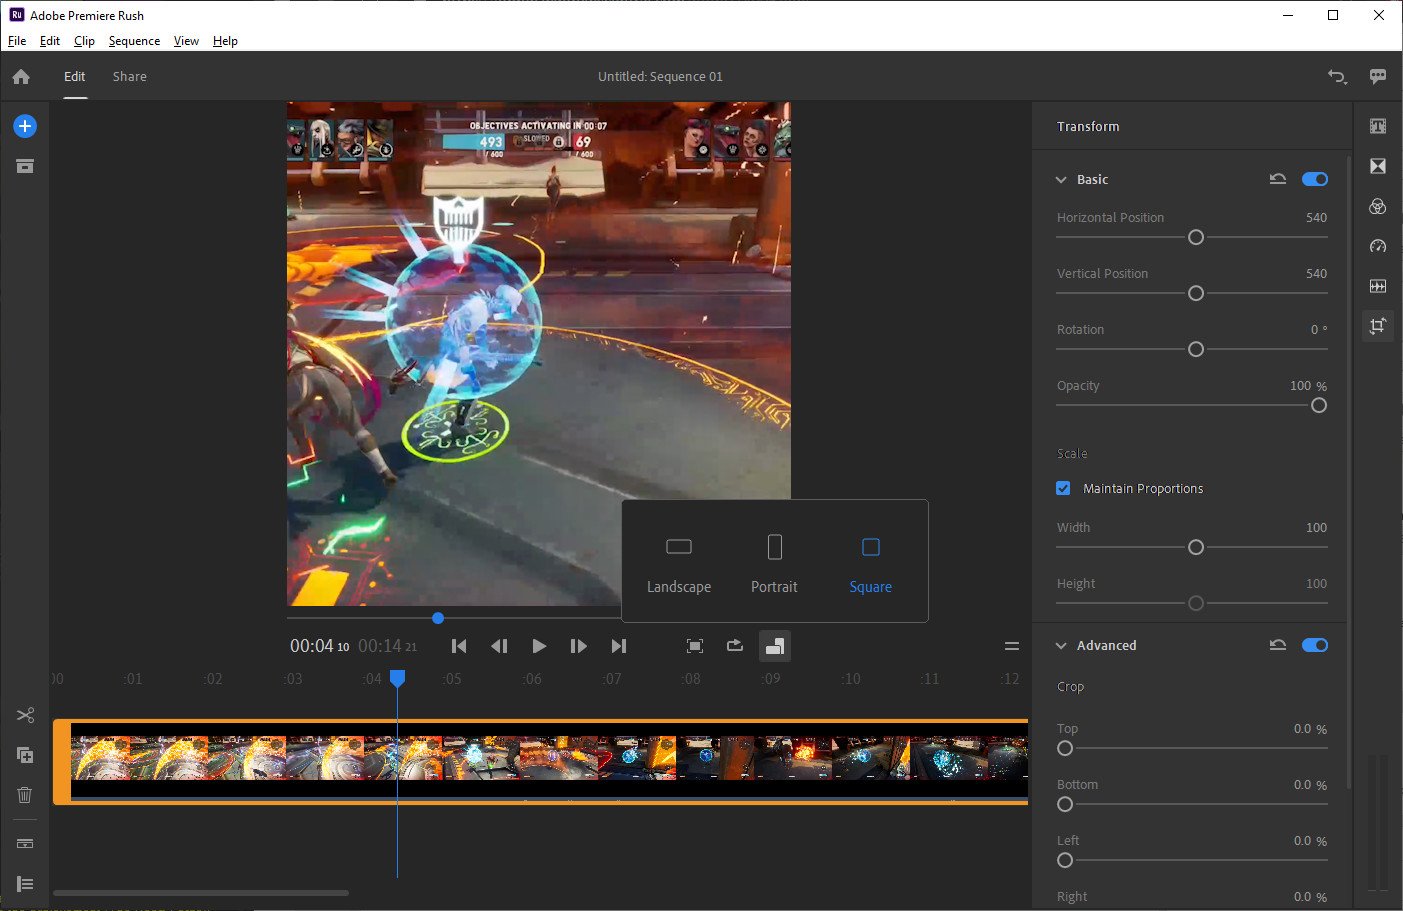
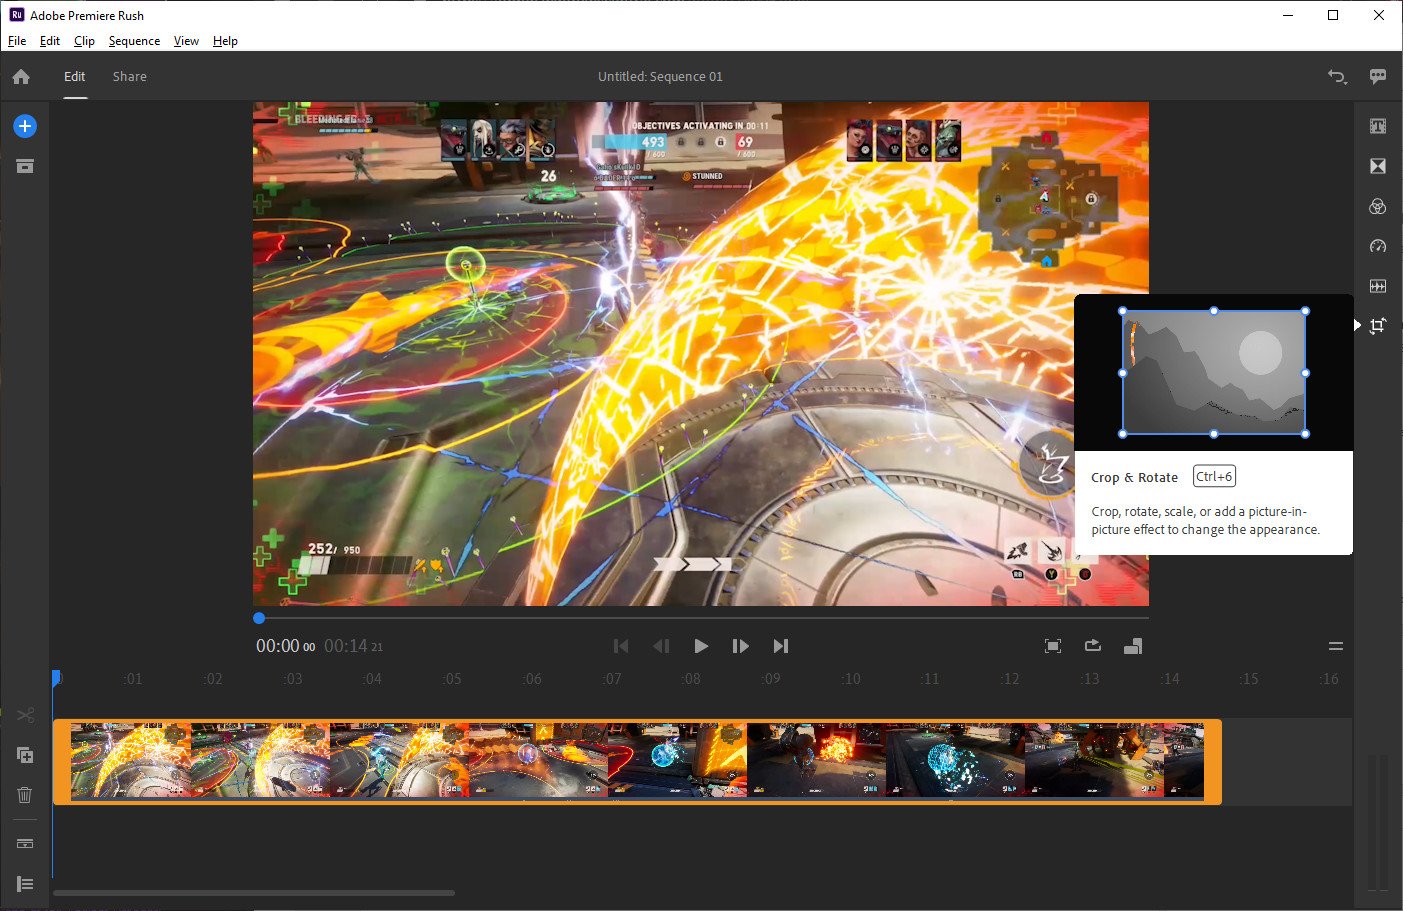
- Click the crop tool on the right, as shown in the screenshot above.
- It will open a sidebar, giving you control over the size and trim of the video shape itself.
- Click the sequence orientation button as seen above to change the size between vertical, square, and horizontal.
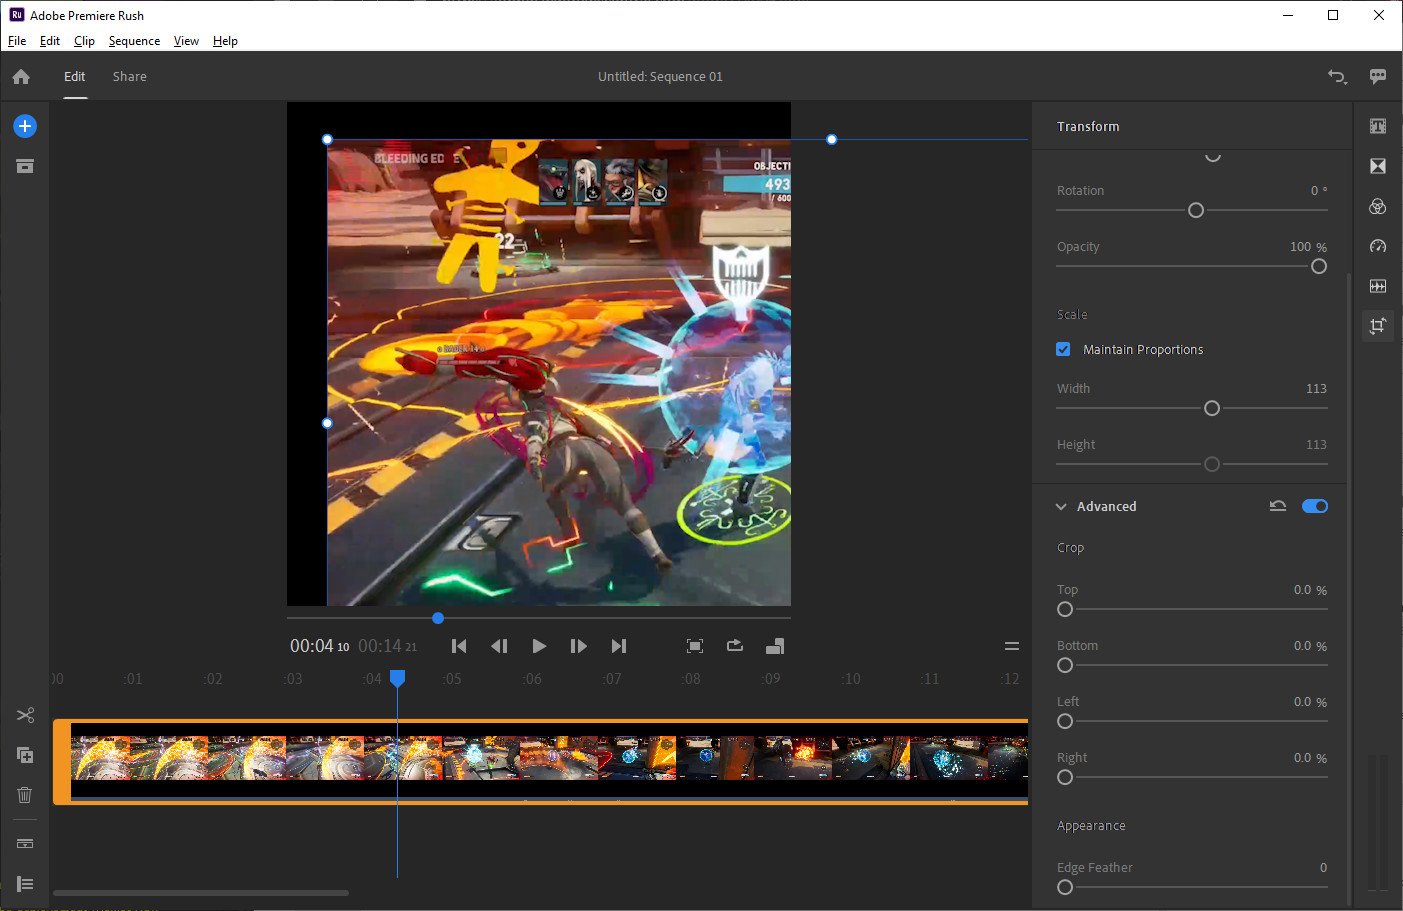
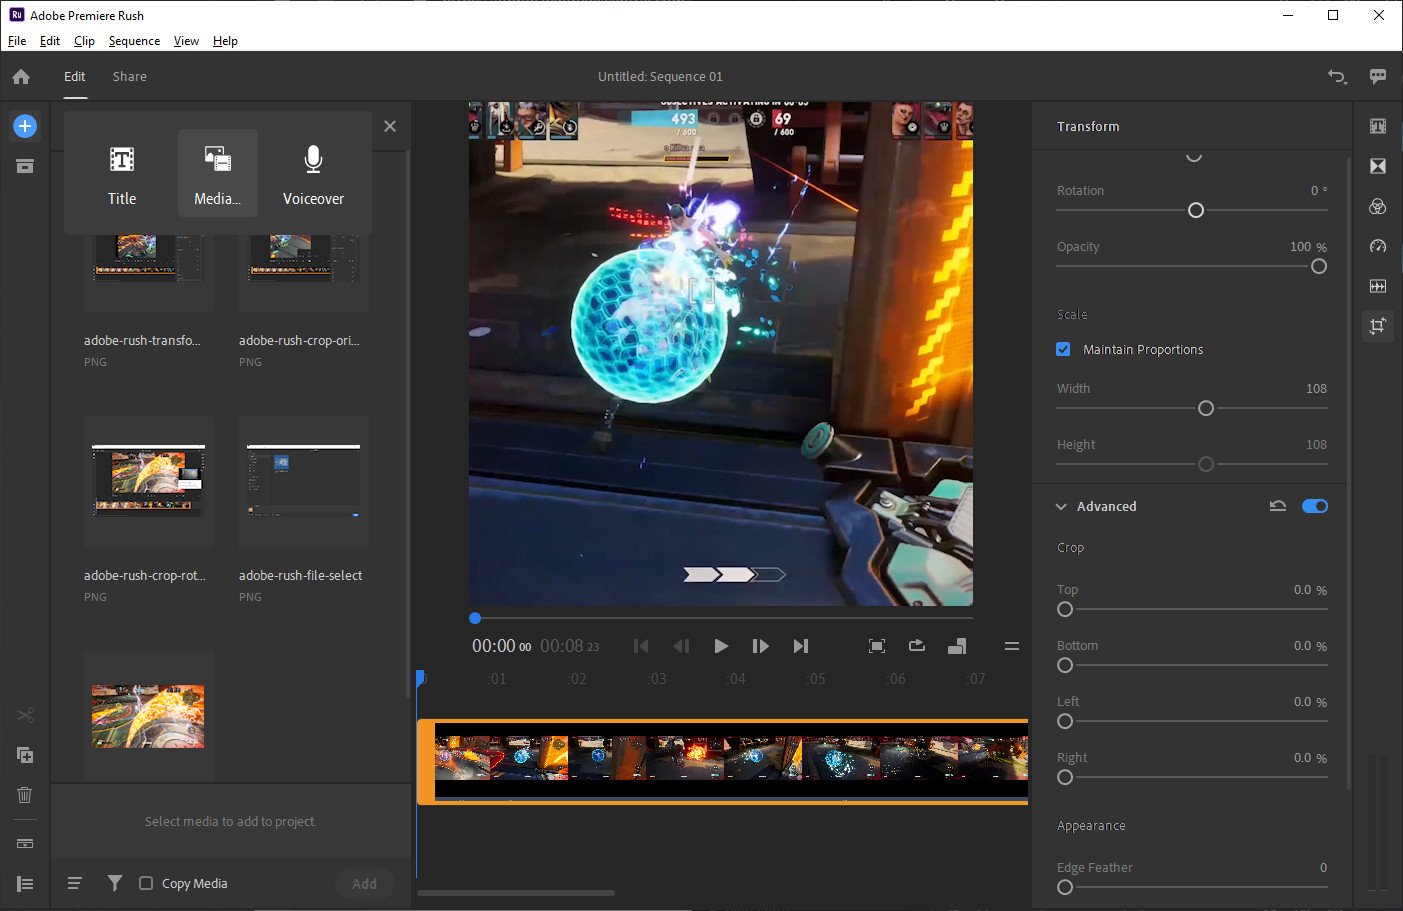
- You can also click on the video itself to resize, crop, and so on, as seen above.Note: If you screw anything up, you can always hit CTRL+Z or press the undo button in the top right corner to reverse a step.
Trimming, splitting, and transitions
Next, we'll want to look at organizing your video sequence, manipulating clips to your liking.
- You can add more video clips at any time by clicking the blue plus icon in the top left corner, as seen above.
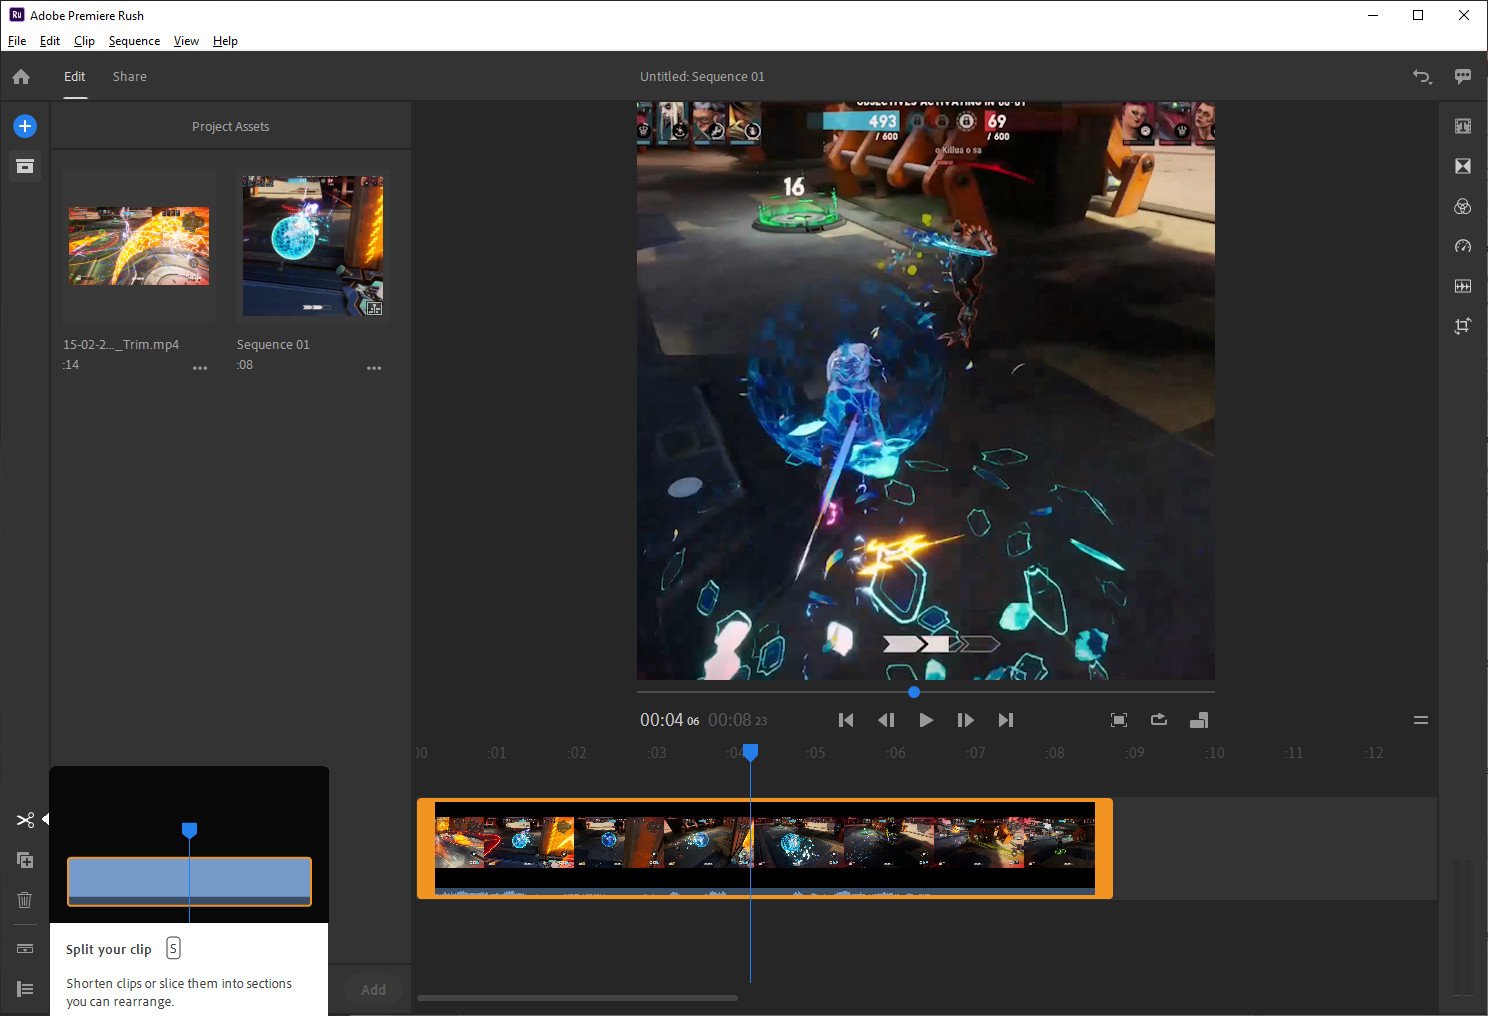
- Below the blue plus is the Project Assets drawer icon that lets you see all media and images you've currently got in your project. Simply drag and drop media assets onto the timeline to include them.Note: You can close panels like Project Assets and cropping by simply clicking on the icon for a second time.
- To split a clip, select the video in the timeline, so that it turns yellow.
- Now drag or click on the part of the video you want to snip in half. A blue line will appear.
- Now, click on the scissors icon on the left side or press S on your keyboard to snip your video in half.
- You can drag the sides of the video in the timeline to shorten them and trim parts off.
- You can also delete sections by selecting the clip and hitting backspace or delete on your keyboard.
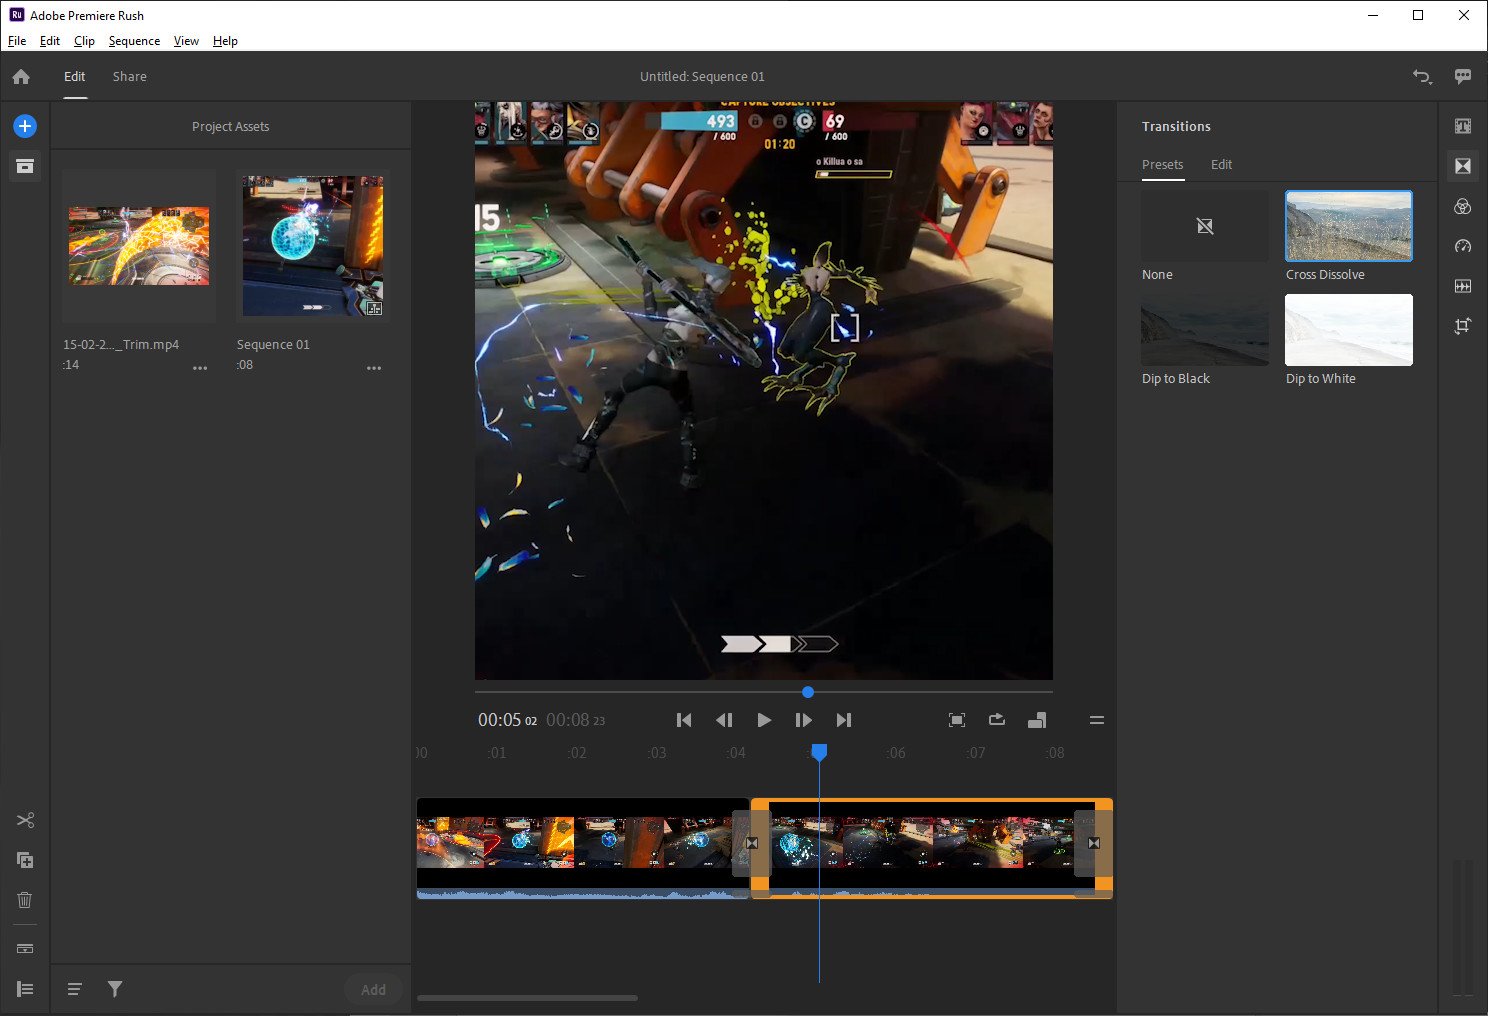
- If you click on the transitions button on the right sidebar, you can then select a clip to instantly add a transition.
- You can also drag and drop a transition where you want it to appear in the timeline, and even click on it to delete it, or drag the sides to make the transition longer or shorter.
Adding titles
Now that you've prepared all of your clips, you might want to add additional titles, overlays, or tweak audio settings. Here's how to go about that.
All the latest news, reviews, and guides for Windows and Xbox diehards.
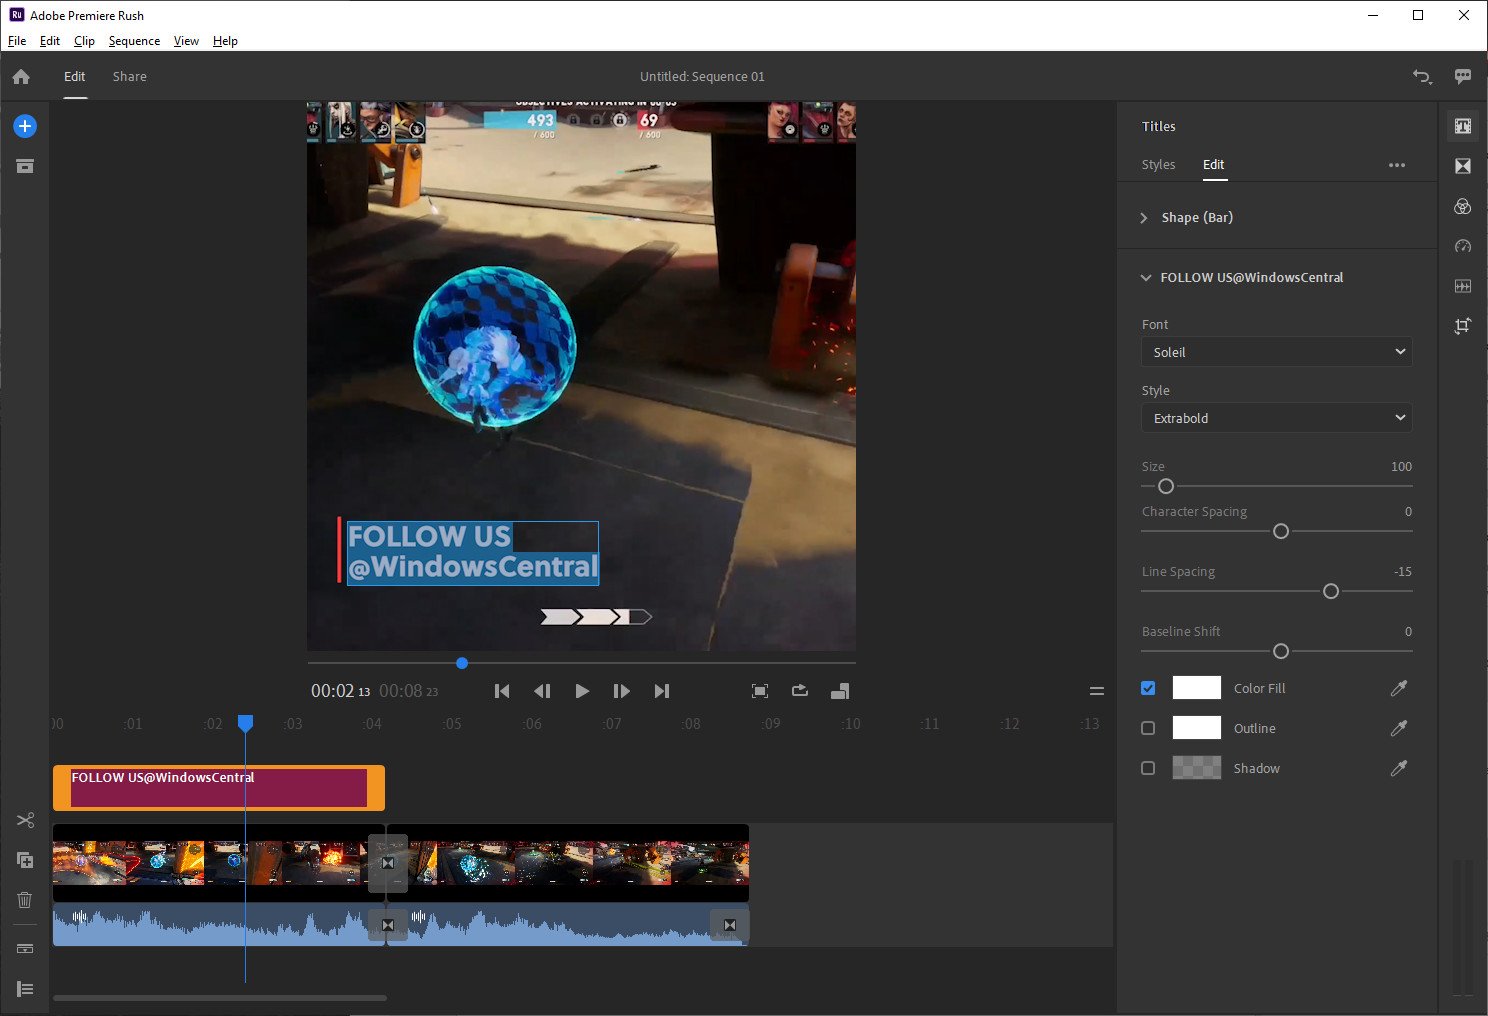
- Let's say you want to add a title or graphic to your video. Adobe has made it easy by providing dozens of templates inside Adobe Rush, which you can also browse over here.
- Select the titles panel as shown above. You can either import motion templates you've downloaded from the web, or browse the stock provided by the Adobe Rush subscription by clicking More Titles.
- We've added a basic "Follow us" animated graphic by dragging and dropping it onto the timeline in a new layer. You can drag it onto the main timeline to add it infront of your video as a separate clip, or drag it above the video to layer it no top.
- When the title is on the timeline, you can select edit, as shown above, to change aspects of the title, such as the colors of shapes, the font type, and more.
- If you click on the title in the video viewer, you an change the text, reposition the animation, and drag the sides of the clip to shorten or lengthen the clip to your leisure.
Tweaking audio
If you want to play around with the audio of your clips, Adobe Rush makes it pretty easy with a dedicated panel and the ability to see the wave form of each audio clip.
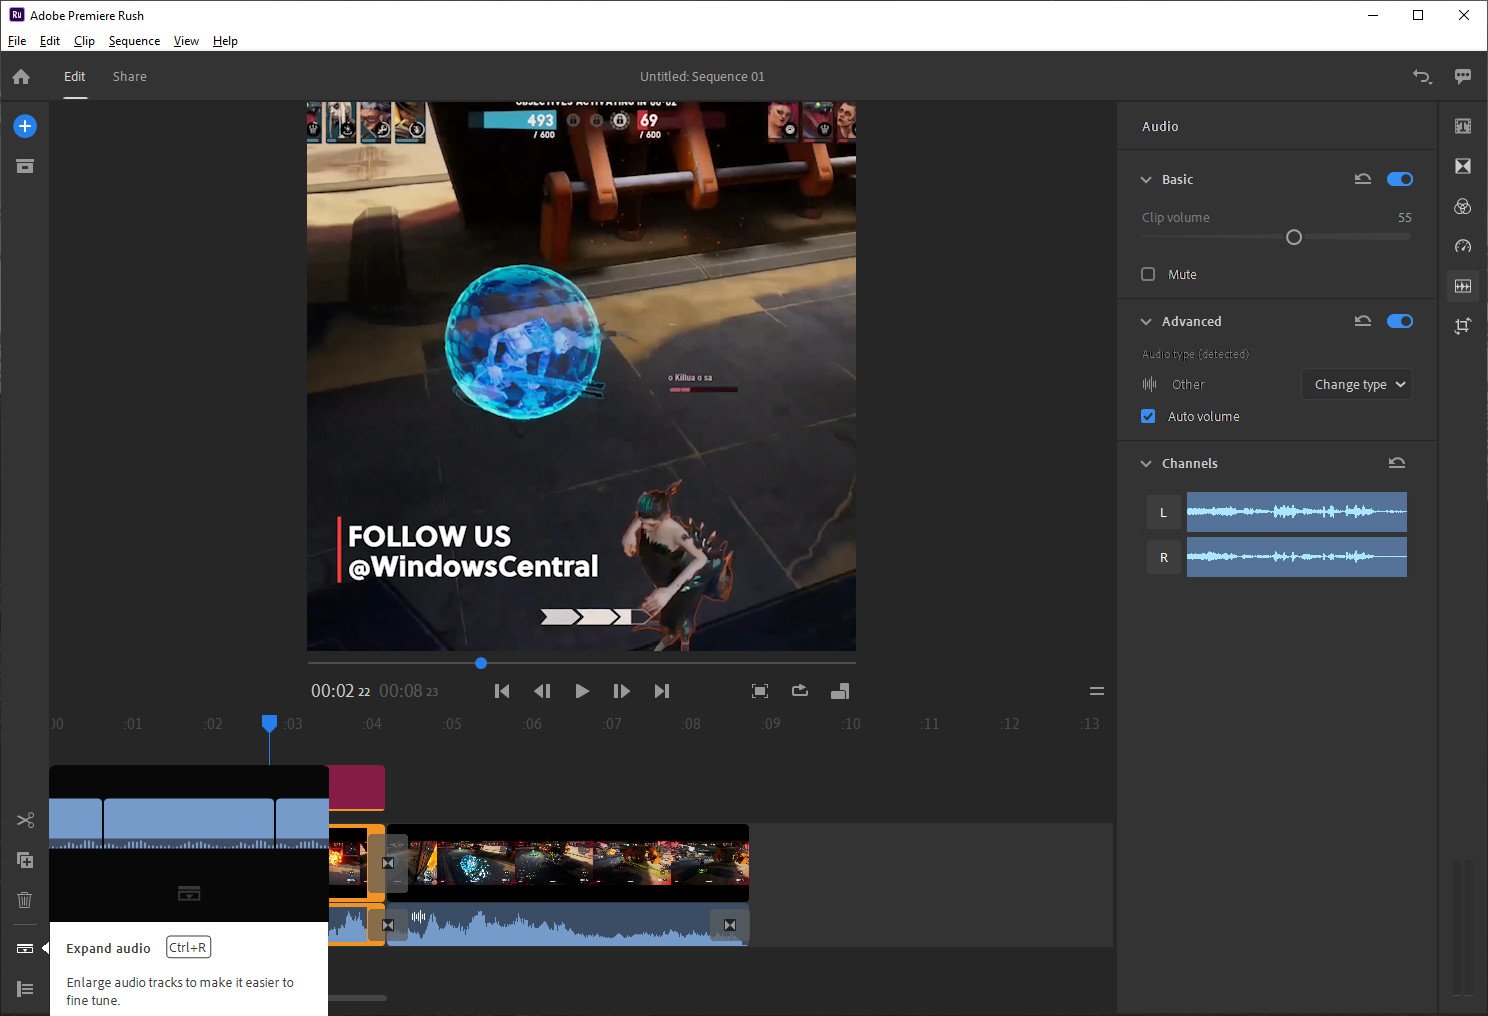
- Click on the expand audio feature in the bottom left corner to get a better look at your audio, as pictured.
- Click on the audio panel on the right to get access to a range of audio settings including volume, muting, and some advanced tools that will help clean audio in some situations, by selecting the audio type.
Note: When it comes to volume, you'll want the wave form peaks to remain within view. If the peaks go above the top line out of sight, you'll get audio clipping which sounds bad!
Export and you're done!
Exporting is straight forward and simple, truly living up to the app's "Rush" monicker. Here's how to go about it.
- Click on share at the top, next to edit.
- Here, you can select the filename, save destination (I typically save to desktop to make it easier to find things), and so on.
- If you click advanced you can alter resolution, frame rates, and general quality settings.
- On the left, you can also sign in to various social networks for direct upload.
Those are the absolute basics of using Adobe Rush, which is a refreshingly easy program to use. Some of the other panels include slow motion and speed control, as well as color grading and filtering. If you mouse over any panel, an information tooltip will popup telling you what each action does, as well as giving you advice on keyboard shortcuts to make things go even faster.

Jez Corden is the Executive Editor at Windows Central, focusing primarily on all things Xbox and gaming. Jez is known for breaking exclusive news and analysis as relates to the Microsoft ecosystem — while being powered by tea. Follow on X.com/JezCorden and tune in to the XB2 Podcast, all about, you guessed it, Xbox!

 Windows Central Insider


