How to disable Shared Experiences on Windows 10
You can prevent users from using Nearby sharing and Share across devices features, and in this guide, we'll show you how to do it.
All the latest news, reviews, and guides for Windows and Xbox diehards.
You are now subscribed
Your newsletter sign-up was successful
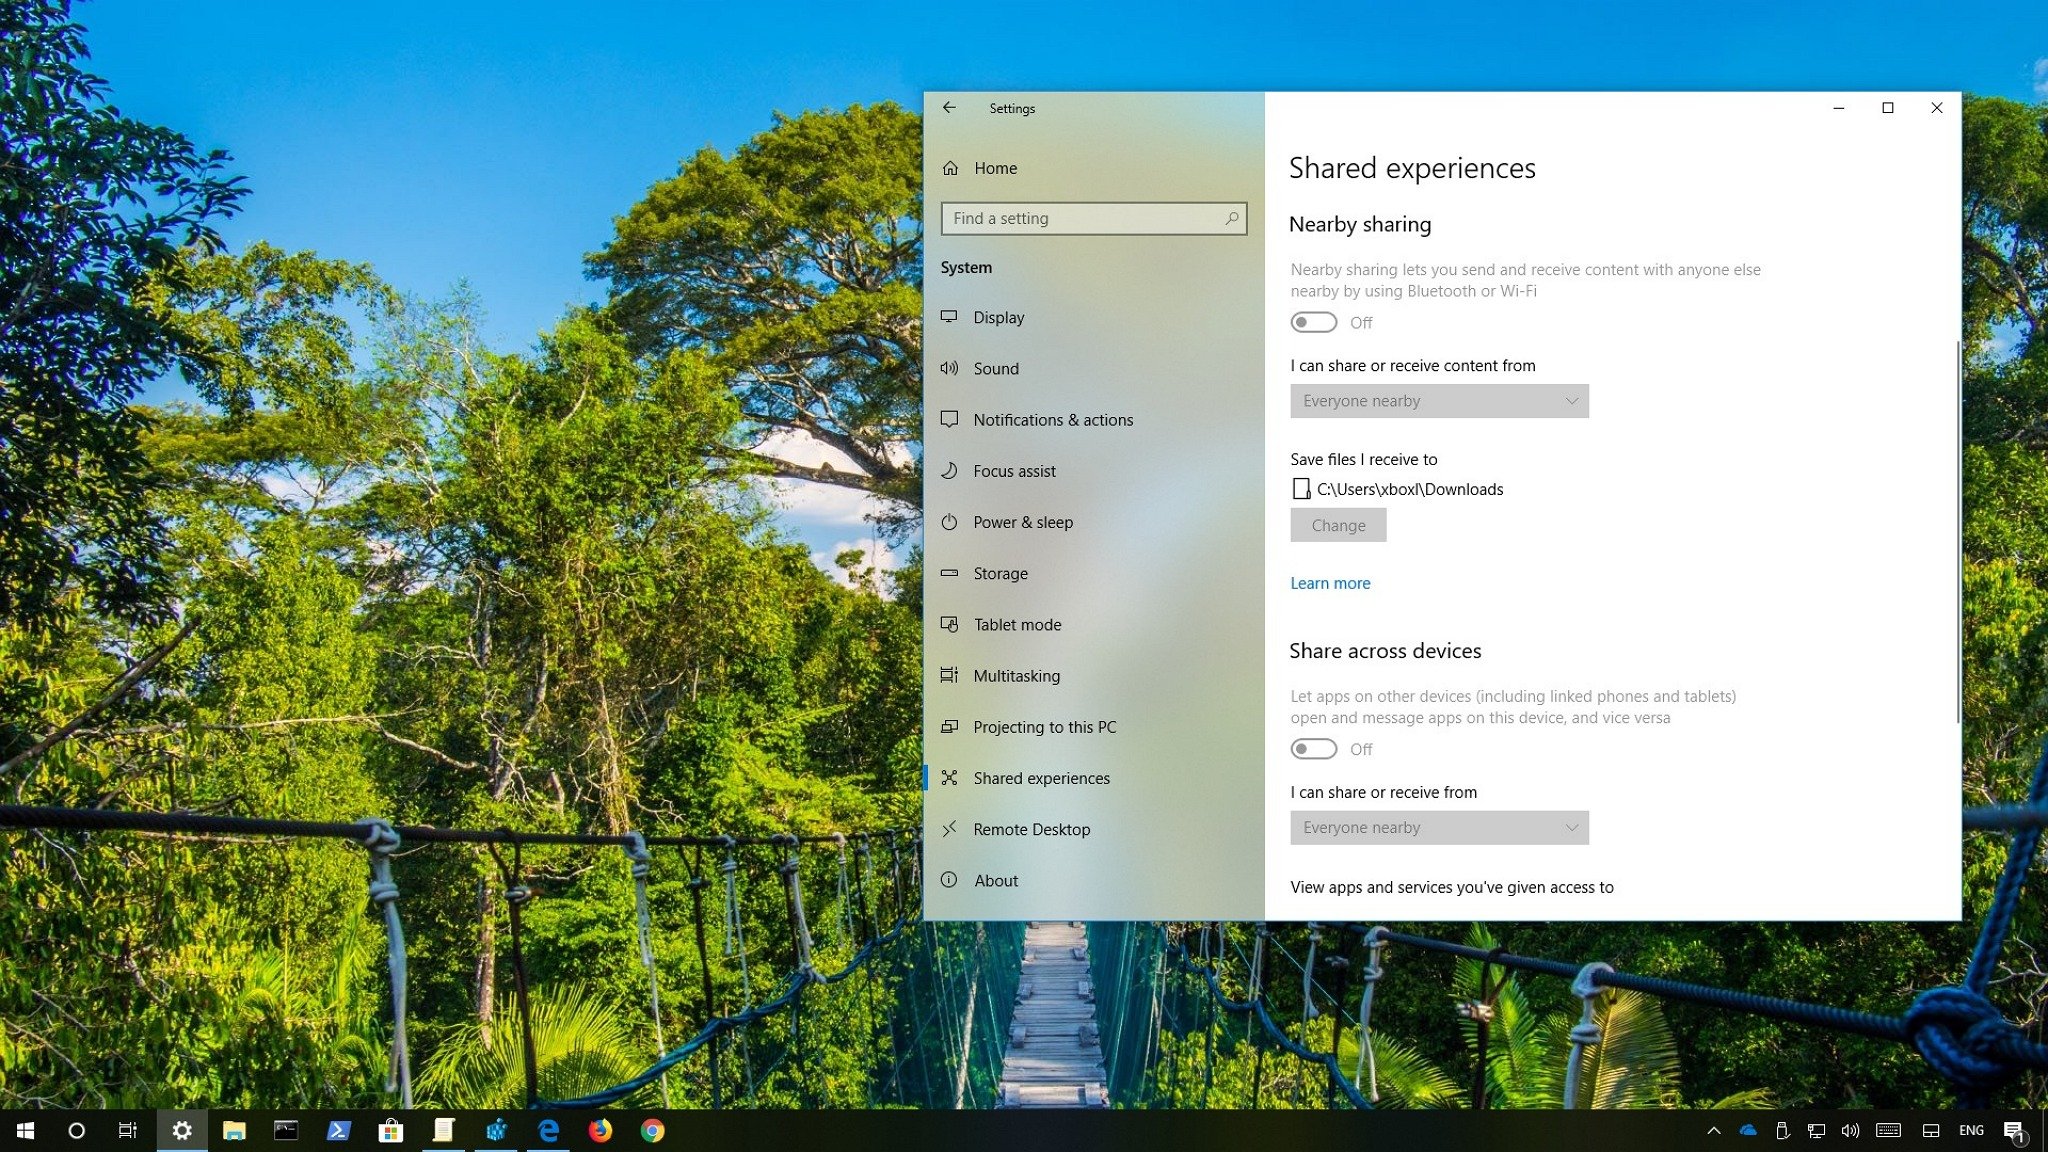
On Windows 10, Shared Experiences is the feature responsible for Nearby sharing to quickly send files to another device, and the ability to resume app activities that you started on a different computer.
Although these are pretty handy features, if you're a network administrator working on an environment where you must prevent users from participating on cross-device experiences, or you don't find it useful, and you don't want to make your device discoverable by other devices, you can disable Shared Experiences using the Group Policy or Registry.
In this Windows 10 guide, we'll walk you through the steps to completely disable the Shared Experiences feature on your computer.
- How to disable Shared Experiences using Group Policy
- How to disable Shared Experiences using Registry
How to disable Shared Experiences using Group Policy
If you're running Windows 10 Pro, the easiest way to disable Shared Experiences is using the Local Group Policy Editor with these steps:
- Use the Windows key + R keyboard shortcut to open the Run command.
- Type gpedit.msc and click OK to open the Local Group Policy Editor.
- Browse the following path:
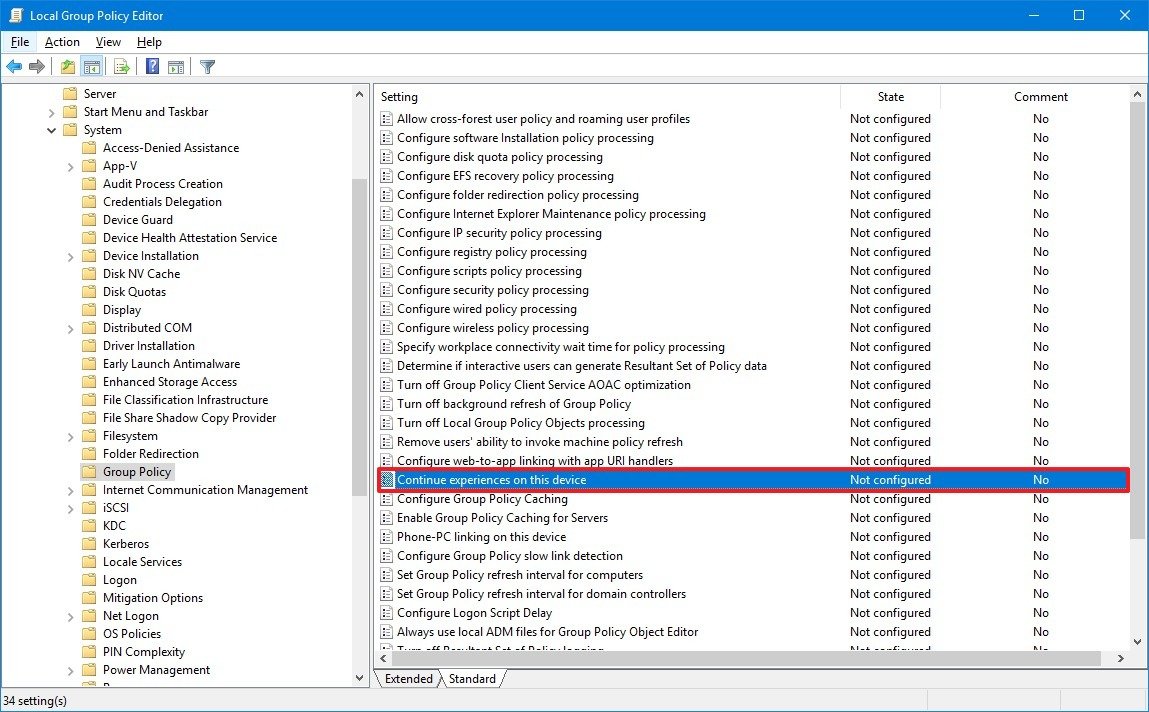
Computer Configuration > Administrative Templates > System > Group Policy - On the right side, double-click the Continue experiences on this device policy.
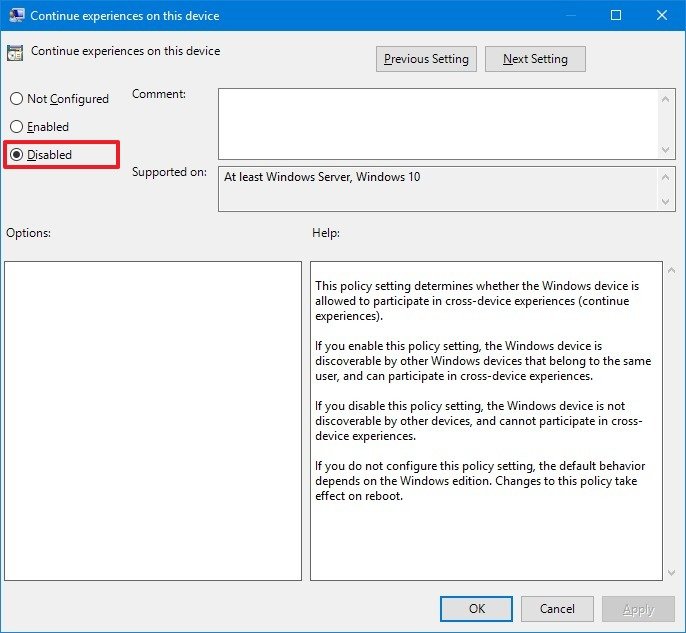
- Select the Disable option.
- Click Apply.
- Click OK.
After completing the steps, Nearby sharing will no longer be available when using the Share feature. Users won't be able to resume activities from other devices. The Shared experiences settings will appear grayed out in the Settings app, and your PC won't be discoverable by other devices in the network.
If you want to revert the changes, you can use the same instructions to re-enable the feature, but on step No. 5, select the Not Configured option.
How to disable Shared Experiences using Registry
If you're trying to disable Shared Experiences on Windows 10 Home, you won't have access to the Local Group Policy Editor, but you can still turn off the experience by modifying the Registry using these steps:
All the latest news, reviews, and guides for Windows and Xbox diehards.
Warning: This is a friendly reminder that editing the Registry is risky, and it can cause irreversible damage to your installation if you don't do it correctly. It's recommended to make a full backup of your PC before proceeding.
- Use the Windows key + R keyboard shortcut to open the Run command.
- Type regedit, and click OK to open the Registry.
- Browse the following path:
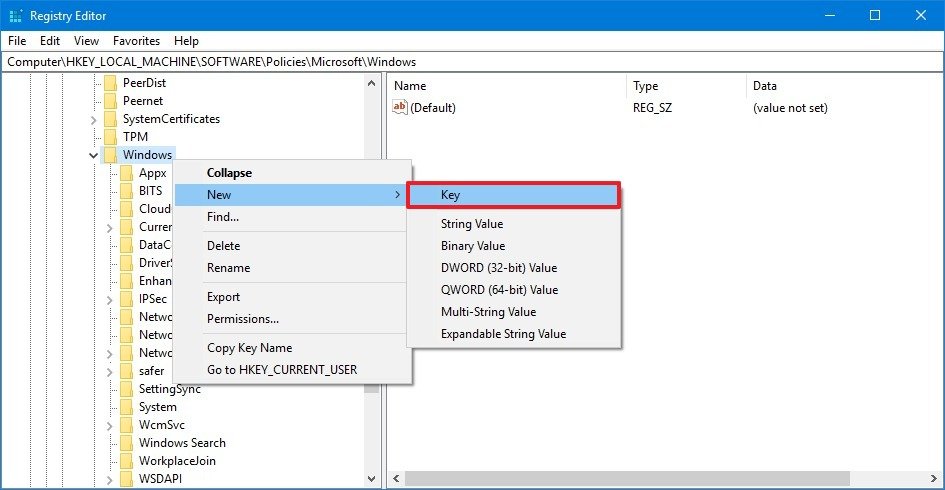
HKEY_LOCAL_MACHINE\SOFTWARE\Policies\Microsoft\WindowsQuick Tip: On Windows 10, you can now copy and paste the path in the Registry's address bar to quickly jump to the key destination. - Right-click the Windows (folder) key, select New, and click on Key.
- Name the key System and press Enter.
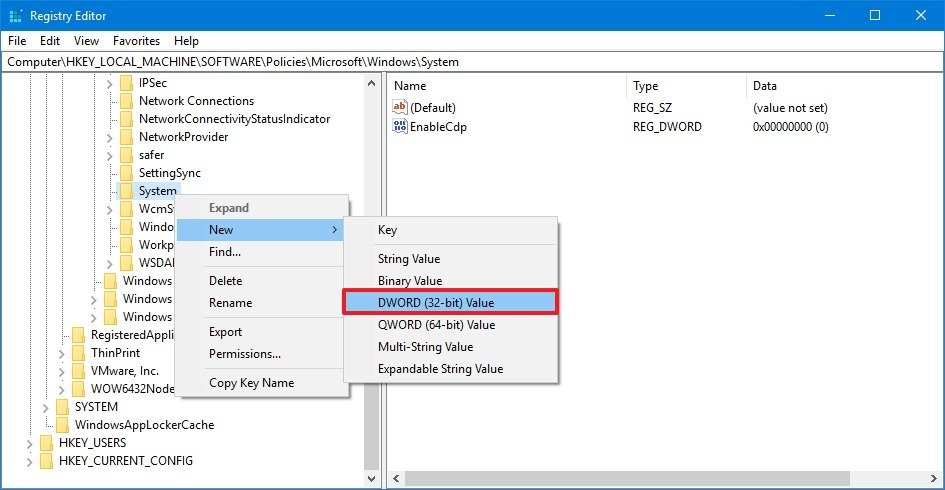
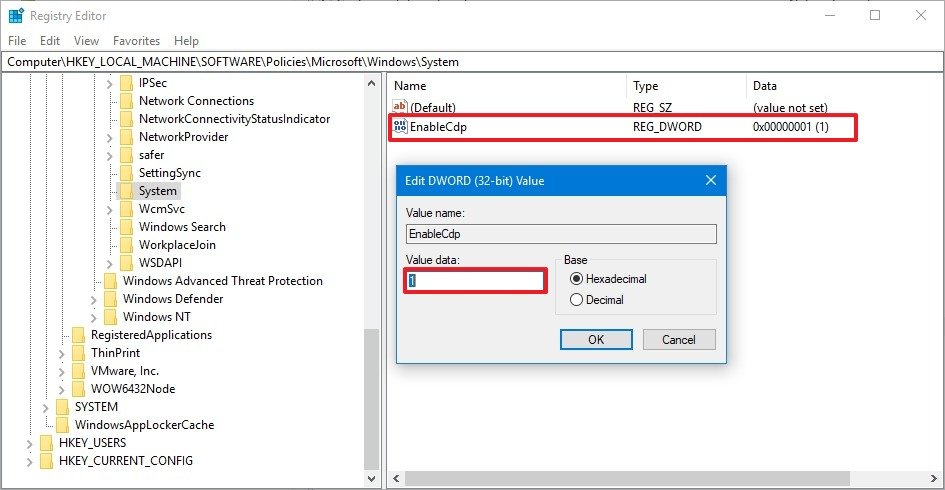
- Right-click the newly created key, select New, and click on DWORD (32-bit) Value.
- Name the key EnableCdp and press Enter.
- Double-click the newly created DWORD and set the value from 0 to 1.
- Click OK.
Once you've completed the steps, your device will no longer participate in cross-device experiences, and it'll no longer be discoverable by other devices in the network.
At any time, you can rollback the previous settings using the same instructions, but on step No. 4, make sure to right-click the System (folder) key, and select the Delete option.
Although we're focusing this guide on disabling the feature, if you landed in this guide because the settings are already grayed out, and you're not able to modify them, you can also refer to this guide to re-enable Shared Experiences to fix the problem.
More Windows 10 resources
For more helpful articles, coverage, and answers to common questions about Windows 10, visit the following resources:
- Windows 10 on Windows Central – All you need to know
- Windows 10 help, tips, and tricks
- Windows 10 forums on Windows Central

Mauro Huculak has been a Windows How-To Expert contributor for WindowsCentral.com for nearly a decade and has over 22 years of combined experience in IT and technical writing. He holds various professional certifications from Microsoft, Cisco, VMware, and CompTIA and has been recognized as a Microsoft MVP for many years.
