How to launch apps automatically during startup on Windows 11 and Windows 10
Windows 11 offers multiple ways to launch apps automatically on startup, and in this guide, we'll show you how.
All the latest news, reviews, and guides for Windows and Xbox diehards.
You are now subscribed
Your newsletter sign-up was successful
On Windows 11, if you have a few apps you open immediately every time you sign into your account, you can configure them to launch automatically to save extra steps and get to them faster.
You have at least four ways to auto-start an app on Windows 11. If the app can start automatically by design, you can control this behavior from the "Startup" settings page or the app's preference page. In addition, you can place a shortcut in the "Startup" folder, which the system will detect and run to launch the program automatically, or you can create a task to launch the app automatically as the user logs in.
In this how-to guide, I'll explain the different ways to launch apps automatically on your computer.
How to configure app automatic start from Startup settings
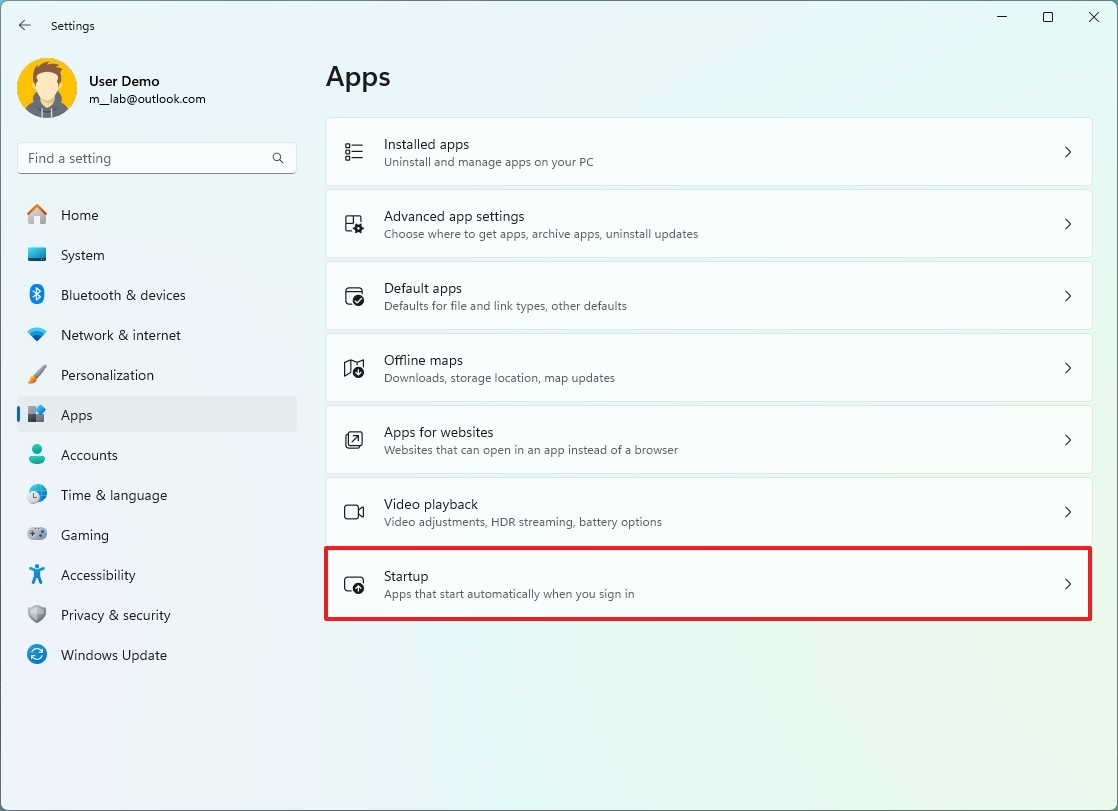
To launch an app at startup on Windows 11, use these steps:
- Open Settings.
- Click on Apps.
- Click the Startup page on the right side.
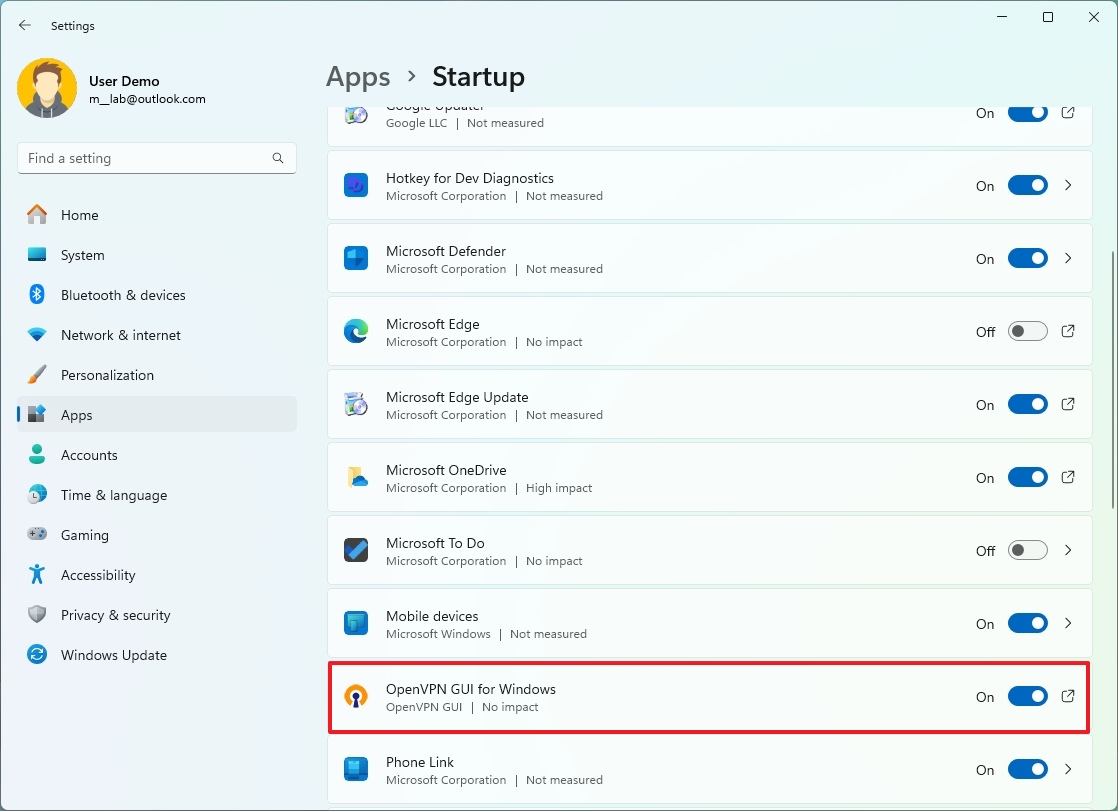
- Turn on the toggle switch for the app you want to launch at startup.
Once you complete the steps, the app will start as you sign into the account automatically. You may need to repeat the steps to configure other apps.
On Windows 11, certain apps you acquire from the Microsoft Store are capable of launching automatically after restarting the computer. I'm focusing this guide on configuring specific apps, but if you want any compatible app to launch automatically, you can enable the features from Settings > Accounts > Sign-in options and turn on the "Automatically save my restorable apps and restart them when I sign back in" toggle switch.
How to configure app automatic start from Startup folder
Windows 11 also includes the "Startup" folder, a known folder that the system checks every time you sign in and run any app or script found in the location. If the app you want isn't available through the Settings app, you can place a shortcut to launch automatically on startup.
All the latest news, reviews, and guides for Windows and Xbox diehards.
To start an app automatically through the Startup folder, use these steps:
- Open Start.
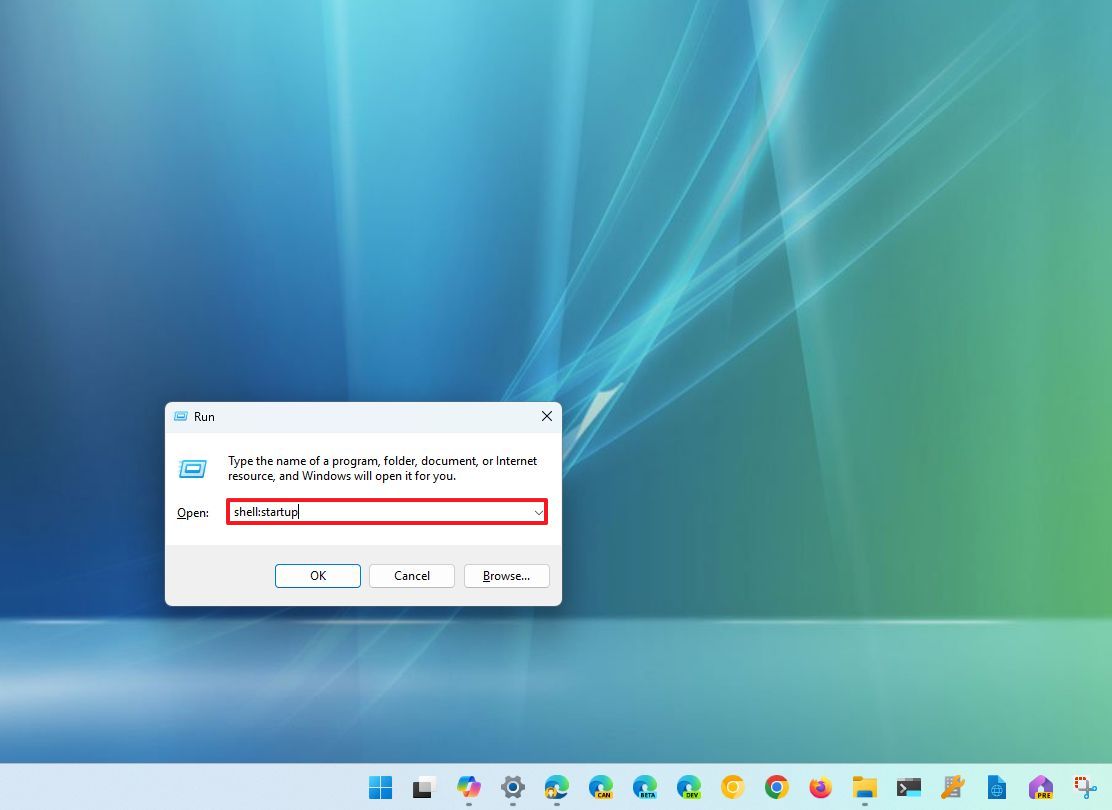
- Search for Run and click the top result to launch the tool.
- Type the following command and click the OK button.shell:startup
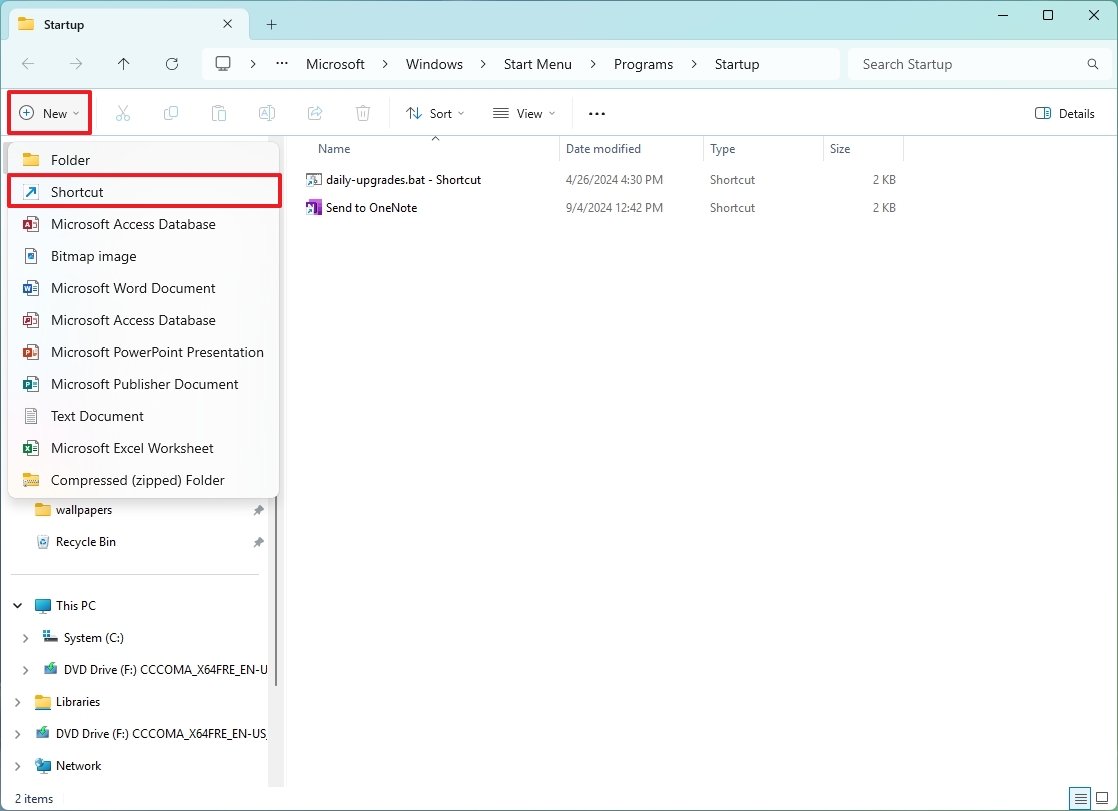
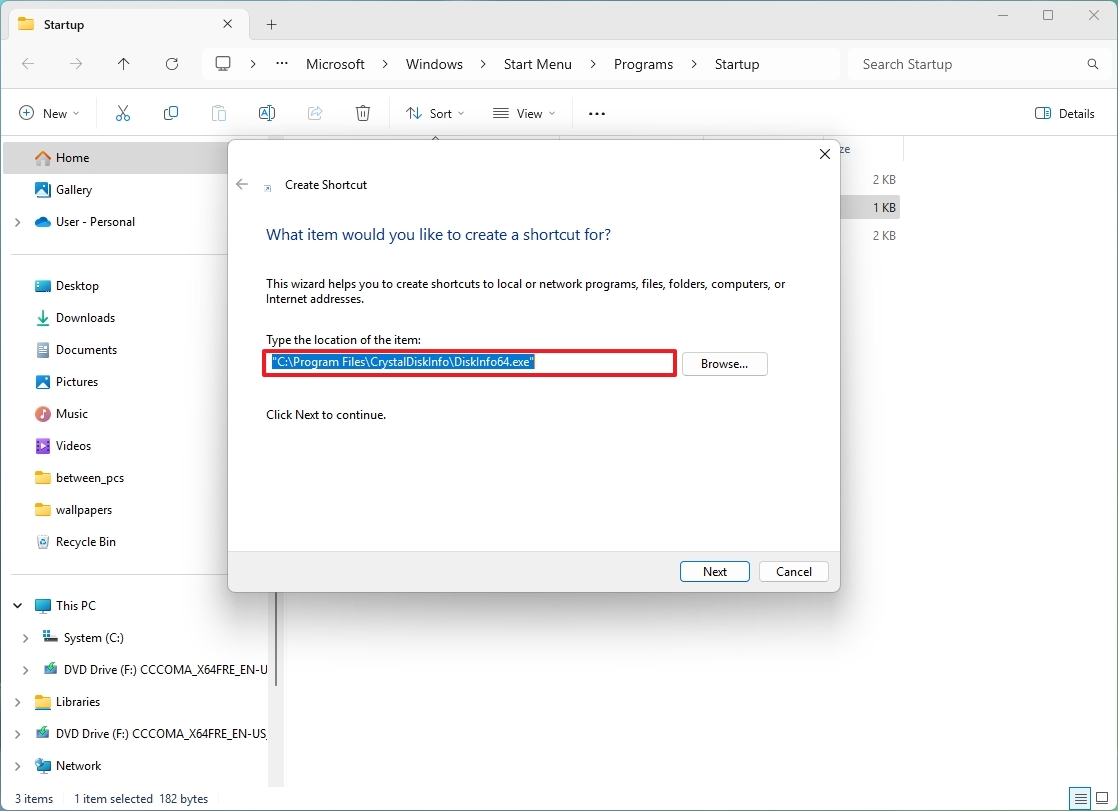
- Click the New menu and select the Shortcut option.
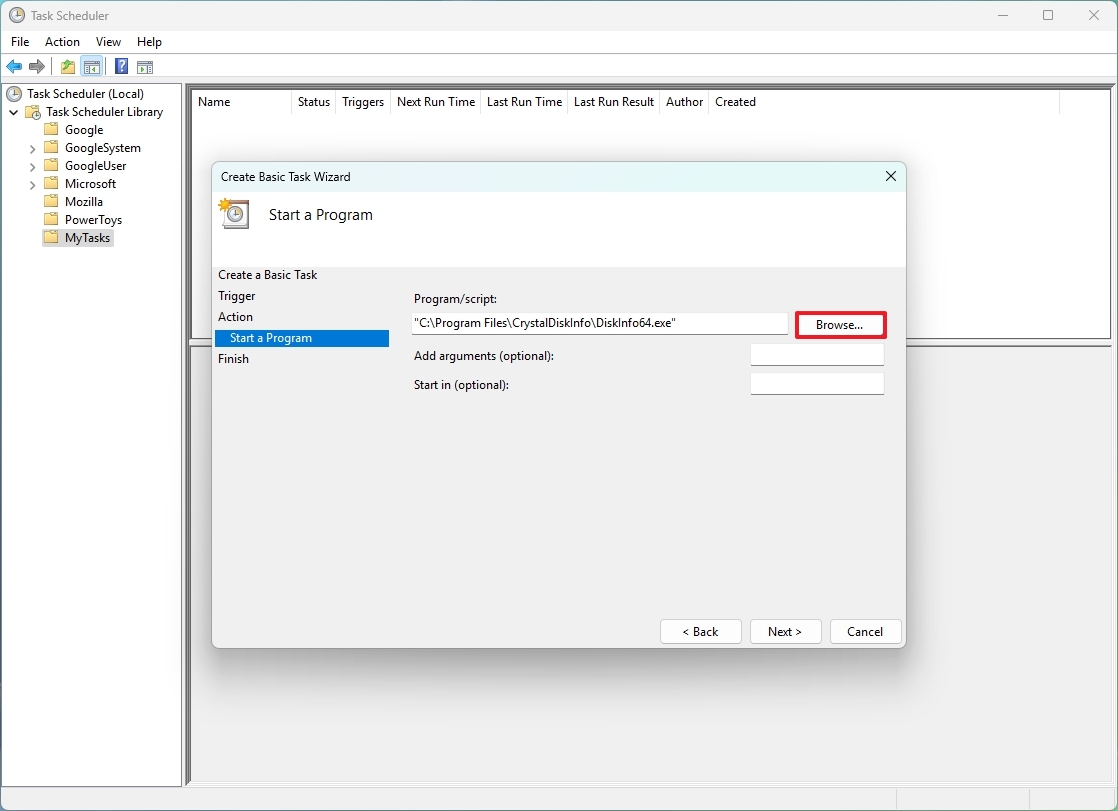
- Click the Browse button.
- Open the app installation folder.
- Quick tip: Classic 32-bit applications are usually installed in the "Program Files (x86)" folder, and 64-bit applications are typically installed in the "Programs Files" folder.
- Select the app executable (.exe) file that launches the program.
- Quick note: Usually, the exe file has the name (or part of the name) and the icon of the program. For instance, the "CrystalDiskInfo" executable file is the "DiskInfo64.exe" file.
- Click the OK button.
- Click the Next button.
- Click the Finish button.
After you complete the steps, Windows 11 will launch any app, shortcut, or script that it finds in the Startup folder.
How to configure app automatic start from app settings
You may also be able to configure an app to launch at startup from the app's settings. Here's an example to enable Microsoft Teams (consumer) to launch at startup automatically:
- Open the Microsoft Teams app.
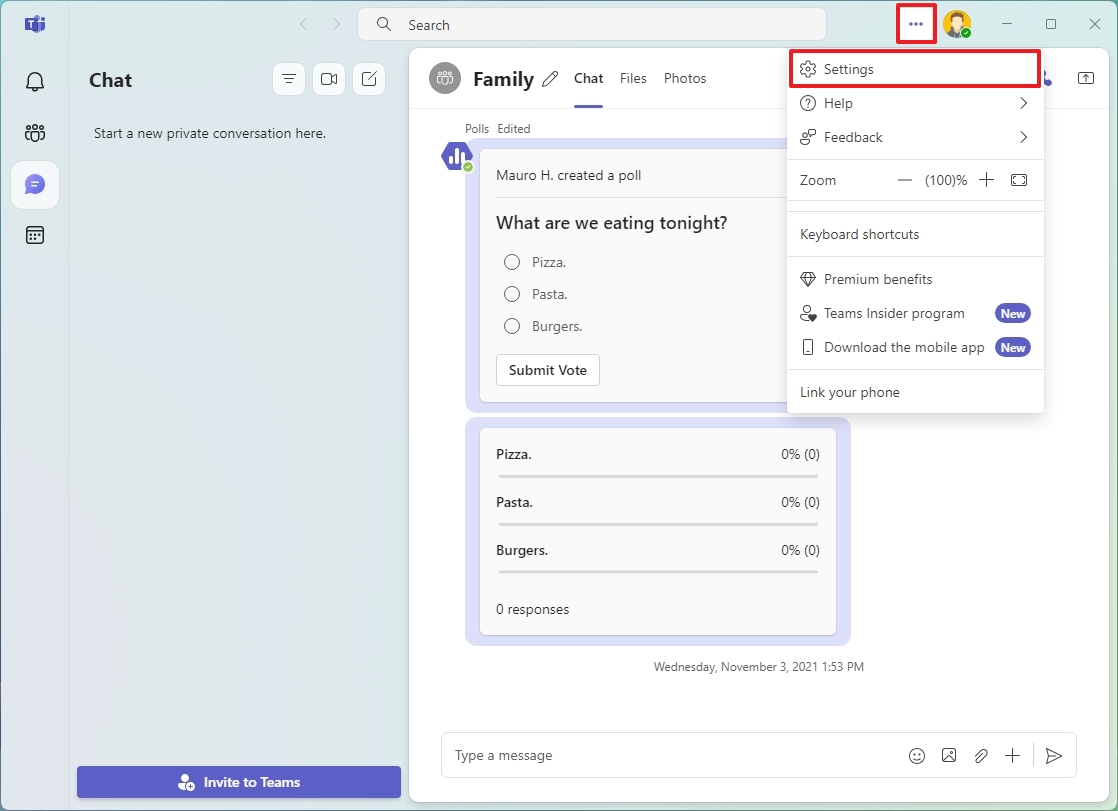
- Click the Settings and more (three-dotted) menu.
- Select the Settings option.
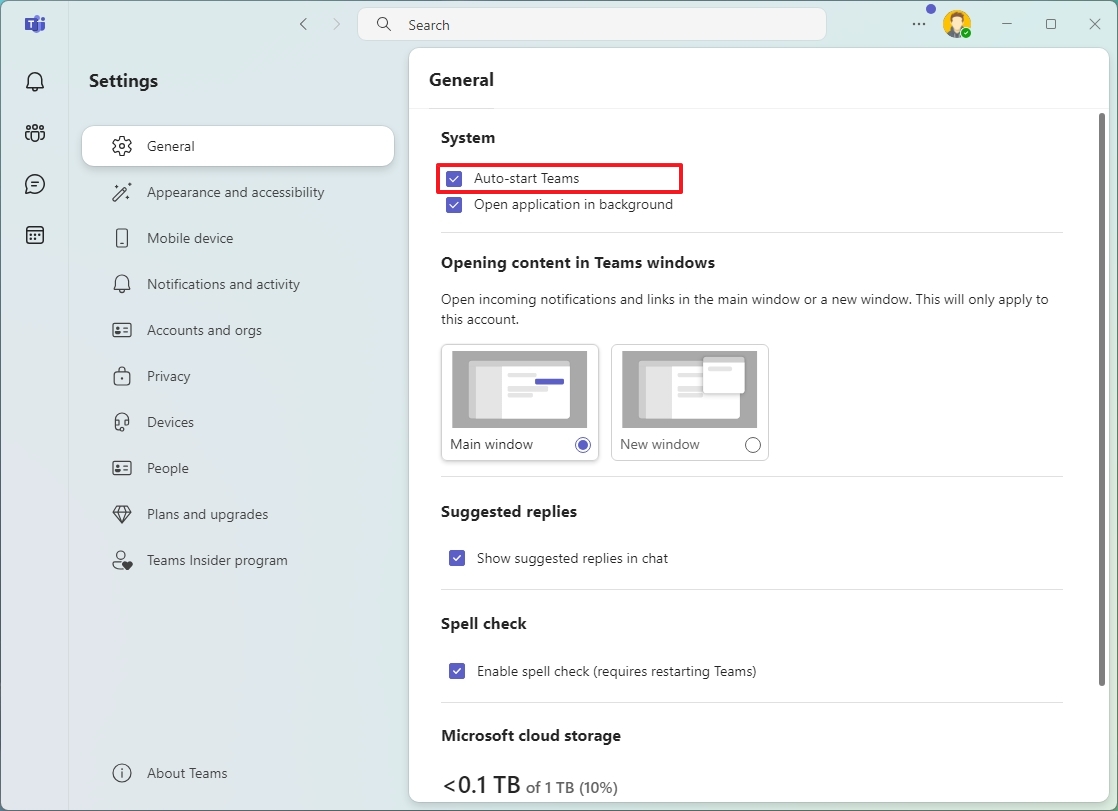
- Click on General.
- Check the Auto-start Teams option.
Once you complete the steps, the app will launch automatically when Windows starts up. Although these steps are specific to the Microsoft Teams app, the concept applies to most classic desktop programs.
How to configure app automatic start from Task Scheduler
Alternatively, it's also possible to run apps during startup by creating a scheduled task using the Task Scheduler app.
To auto-start apps on Windows 11 with Task Scheduler, use these steps:
- Open Start.
- Search Task Scheduler and click the top result to open the app.
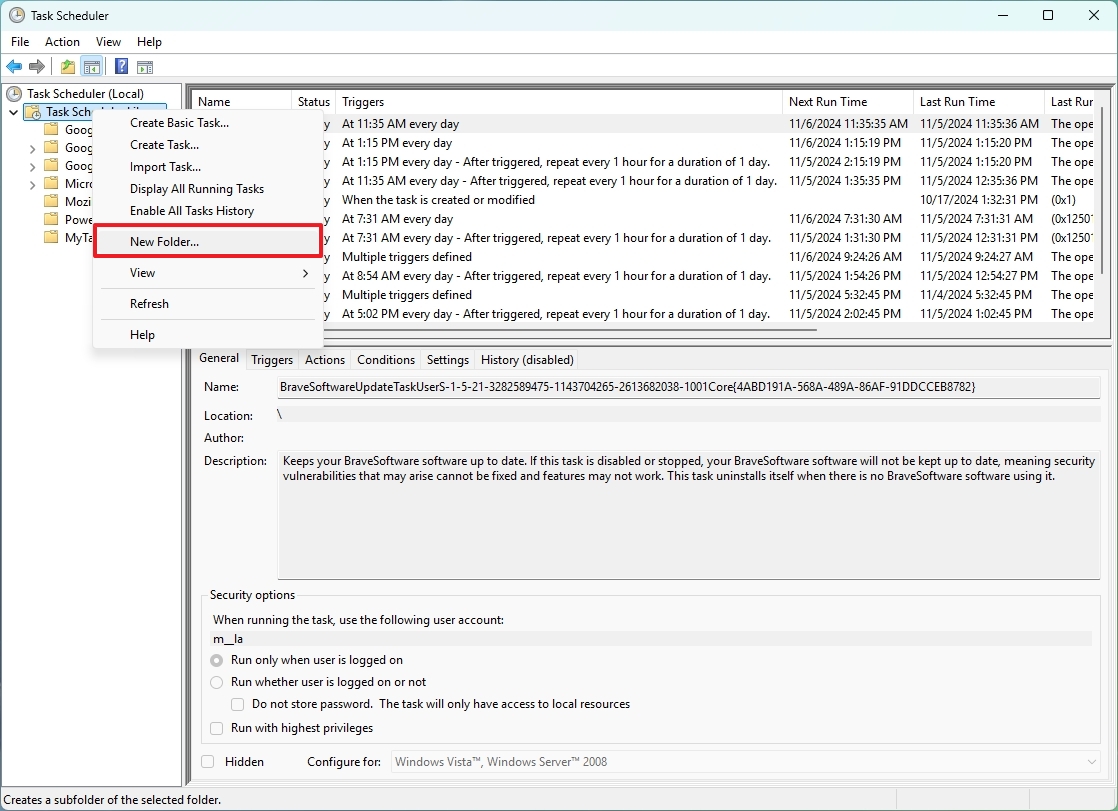
- Right-click the "Task Scheduler Library" branch, and select the New Folder option.
- Type a name for the folder — for example, MyTasks.
- Quick note: This step isn't a requirement, but it's a recommended step to keep your tasks separate from the system and apps tasks.
- Click the OK button.
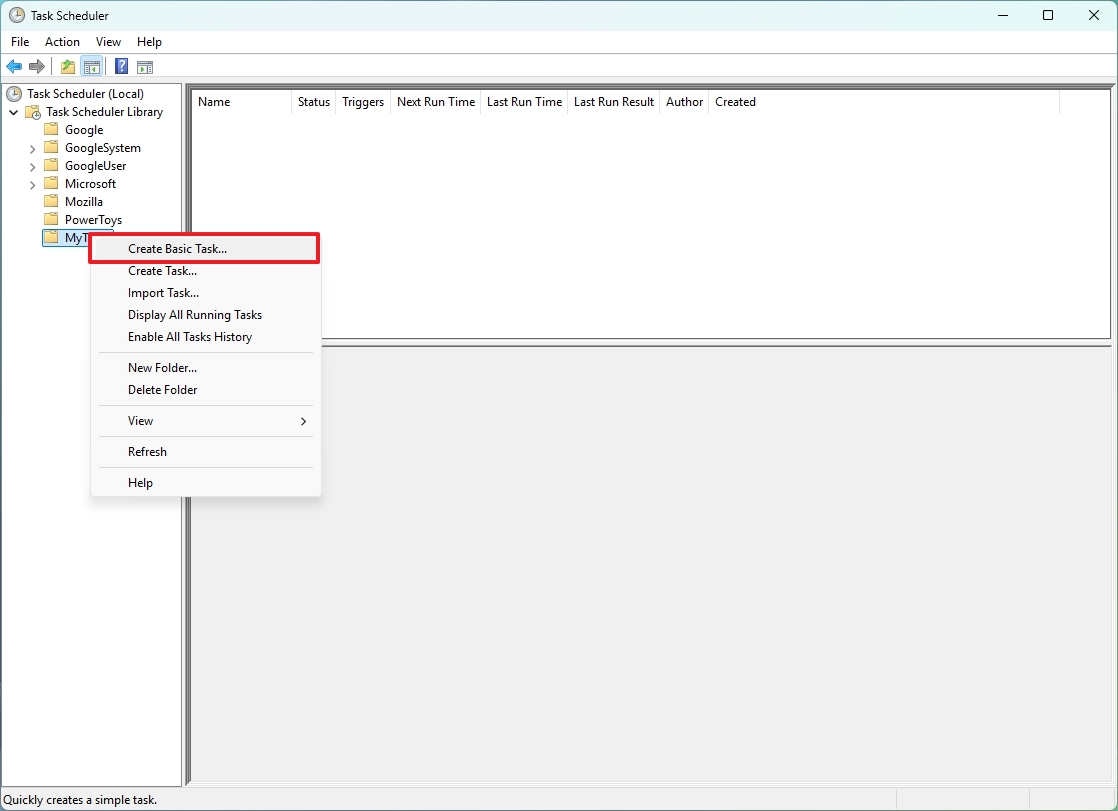
- Expand the "Task Scheduler Library" branch and select the MyTasks folder.
- Click the Action menu.
- Select the "Create Basic Task" option.
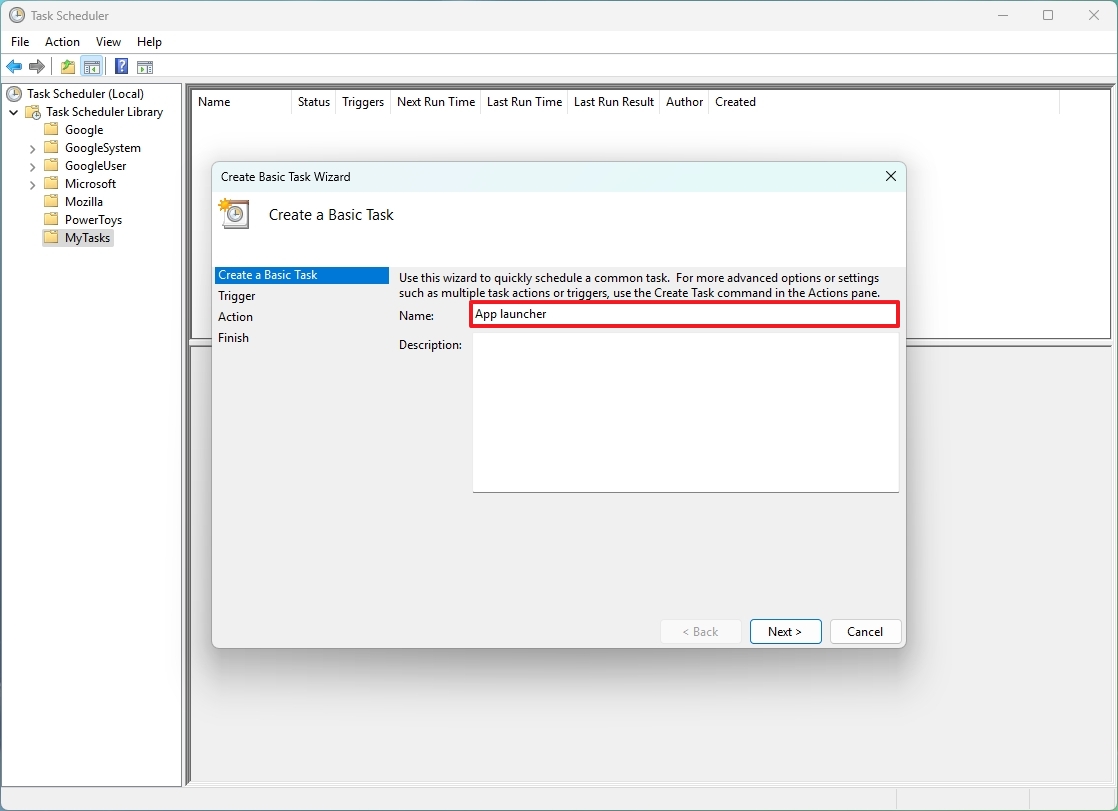
- Confirm a name for the task.
- (Optional) Create a description for the task in the "Description" setting.
- Click the Next button.
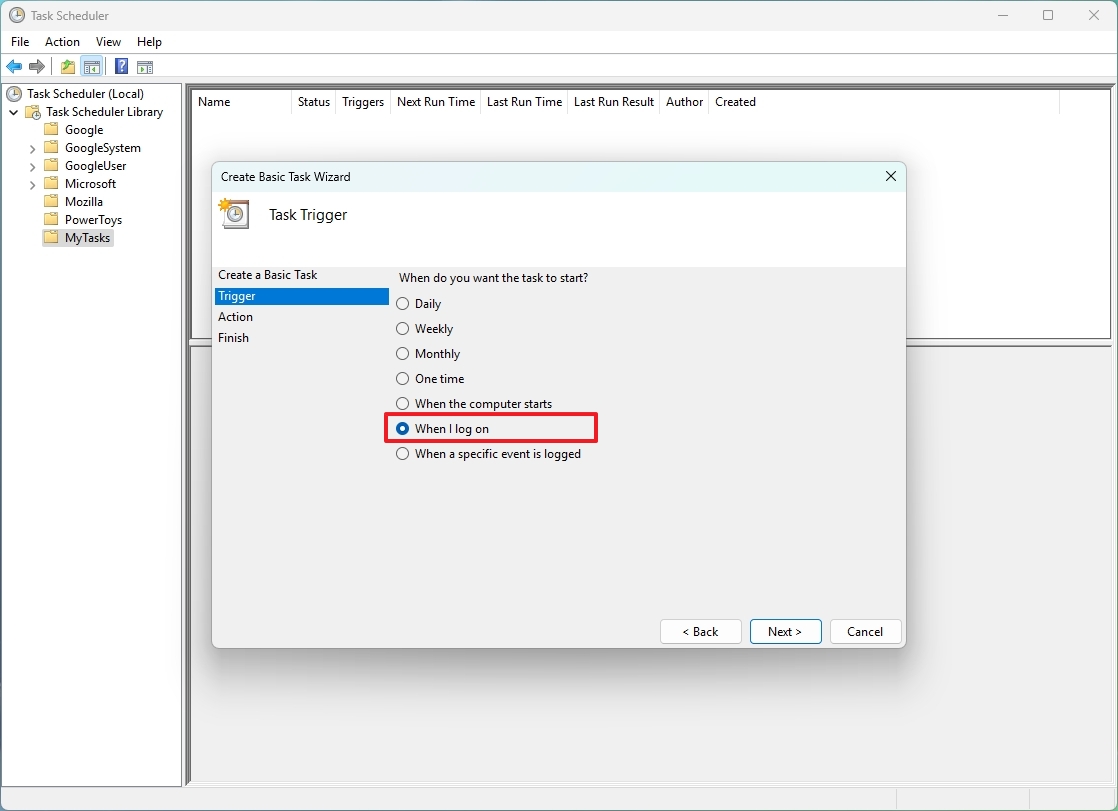
- Select the "When I log on" option.
- Quick tip: You could select the "When the computer starts" option, but it might require changing the "Security options" in the task's advanced properties to work correctly.
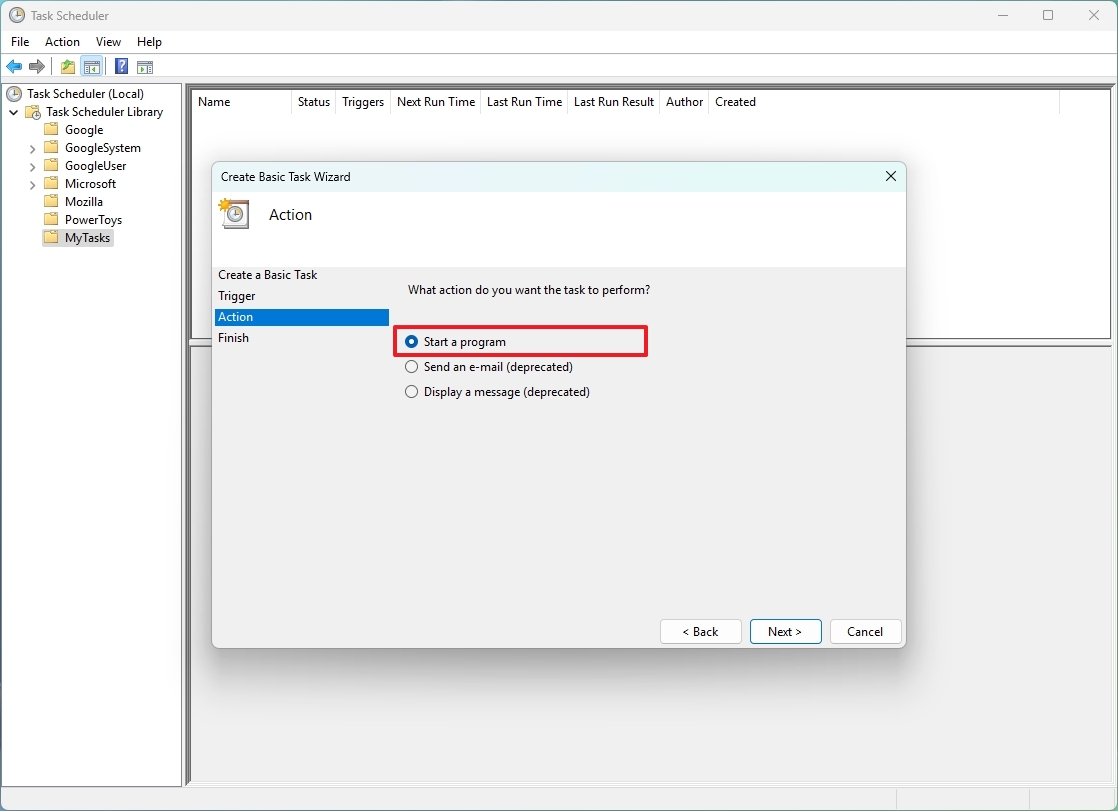
- Select the "Start a program" option.
- Click the Next option.
- Click the Browse button.
- Open the app installation folder.
- Select the app executable (.exe) file that launches the program.
- Click the Open button.
- Click the Next button.
- Click the Finish button.
Once you complete the steps, the app will launch automatically on Windows 11 every time you sign in.
While there are many ways to launch apps automatically, it's worth pointing out that having too many apps starting automatically can affect system performance. You should only auto-start those that you need the most. If you have a lot of apps launching at startup, you can use these steps to disable those you don't need.
More resources
For more helpful articles, coverage, and answers to common questions about Windows 10 and Windows 11, visit the following resources:
- Windows 11 on Windows Central — All you need to know
- Windows 10 on Windows Central — All you need to know
How to launch apps automatically during startup on Windows 10
While a number of apps you install on Windows 10 feature an option to launch automatically when your computer loads, you can also configure any app whether the option is available or not by simply adding its shortcut to the Startup folder.
Also, you're not just limited to desktop applications. You can set Windows Store apps to start automatically as well as files, folders, and websites.
In this Windows 10 guide, we'll walk you through the steps to automatically launch apps, files, folders, and websites on startup to speed up your daily tasks.
If you work with the same apps or launch the same websites on a regular basis, then use these steps to get them started automatically as you sign in to your Windows 10 account:
- Use the Windows key + R keyboard shortcut to open the Run command.
- Type the following command to open the Startup folder and press Enter:shell:startup
- Click OK.
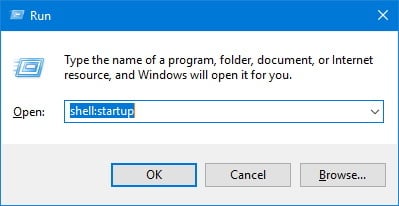
- Use the Windows key + R keyboard shortcut to open the Run command.
- Type the following command to open the Applications folder, which contains shortcuts of all your installed applications (including Windows Store apps), and press Enter:shell:AppsFolder
- Click OK.
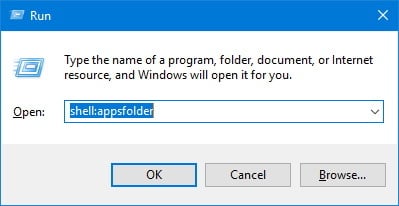
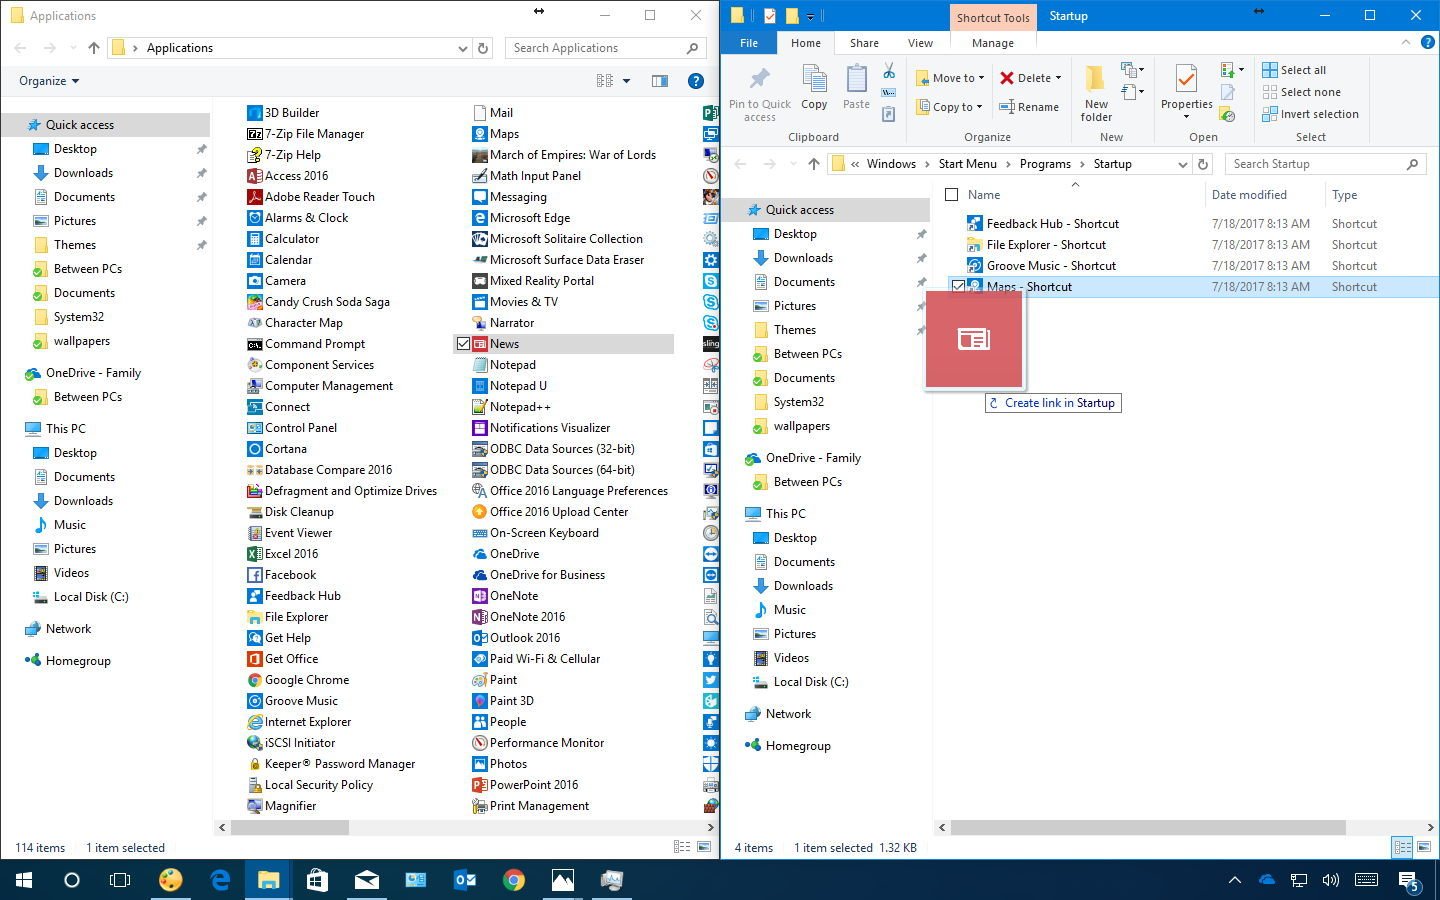
- Snap the Applications folder to the left, and the Startup folder to the right.
- Select the app you want from the Applications folders and drag and drop to the Startup folder.
- Repeat step No. 8 for all the applications you want to launch after signing in to your account.
Once you completed the steps, every time you access your account apps will open automatically. If you want an app to start maximized, just click the maximize button, and then the app will remember the window size.
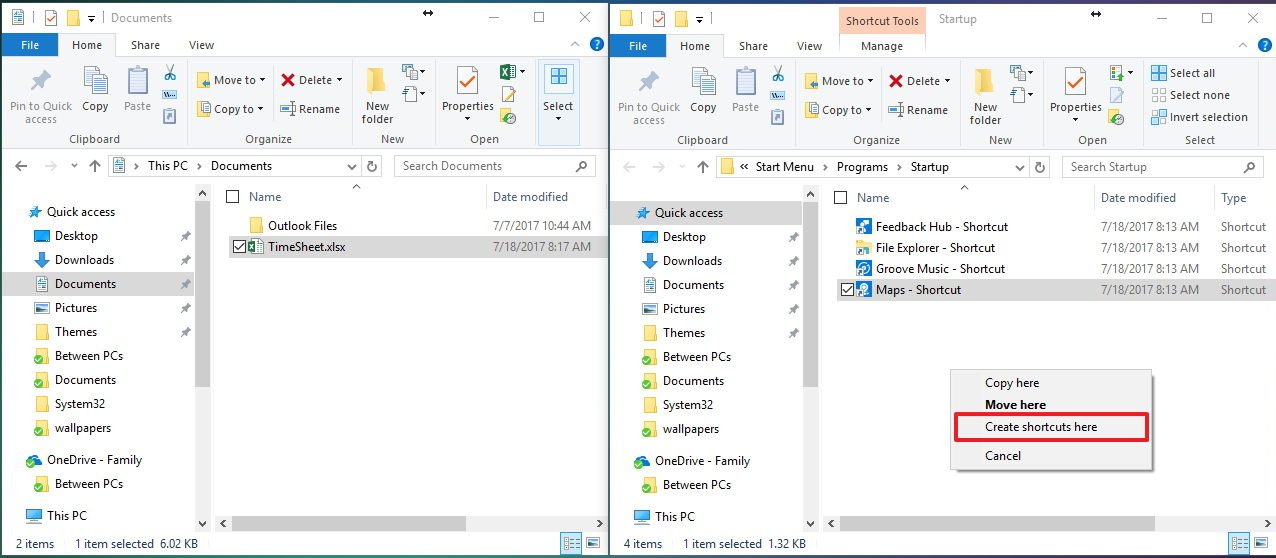
In the above instructions, we show the steps to add an app, but you can also add files, folders, and shortcuts to websites. For example, if you usually work with an Excel spreadsheet, you don't need to add the shortcut to open Excel. It's easier to right-click, drag, and drop the spreadsheet file in the Startup folder and select the Create shortcut here option from the context menu.
Just remember that each shortcut you include in the Startup folder will cause Windows 10 to take a bit longer to load, as such it's only recommended to keep the list of items small as possible. (You can also refer you our guide to manage apps on startup.)
More Windows 10 resources
For more helpful articles, coverage, and answers to common questions about Windows 10, visit the following resources:
- Windows 10 on Windows Central – All you need to know
- Windows 10 help, tips, and tricks
- Windows 10 forums on Windows Central

Mauro Huculak has been a Windows How-To Expert contributor for WindowsCentral.com for nearly a decade and has over 22 years of combined experience in IT and technical writing. He holds various professional certifications from Microsoft, Cisco, VMware, and CompTIA and has been recognized as a Microsoft MVP for many years.
You must confirm your public display name before commenting
Please logout and then login again, you will then be prompted to enter your display name.
