How to change account name on Windows 11
Do you need to update your account name? Here's how on Windows 11.
All the latest news, reviews, and guides for Windows and Xbox diehards.
You are now subscribed
Your newsletter sign-up was successful
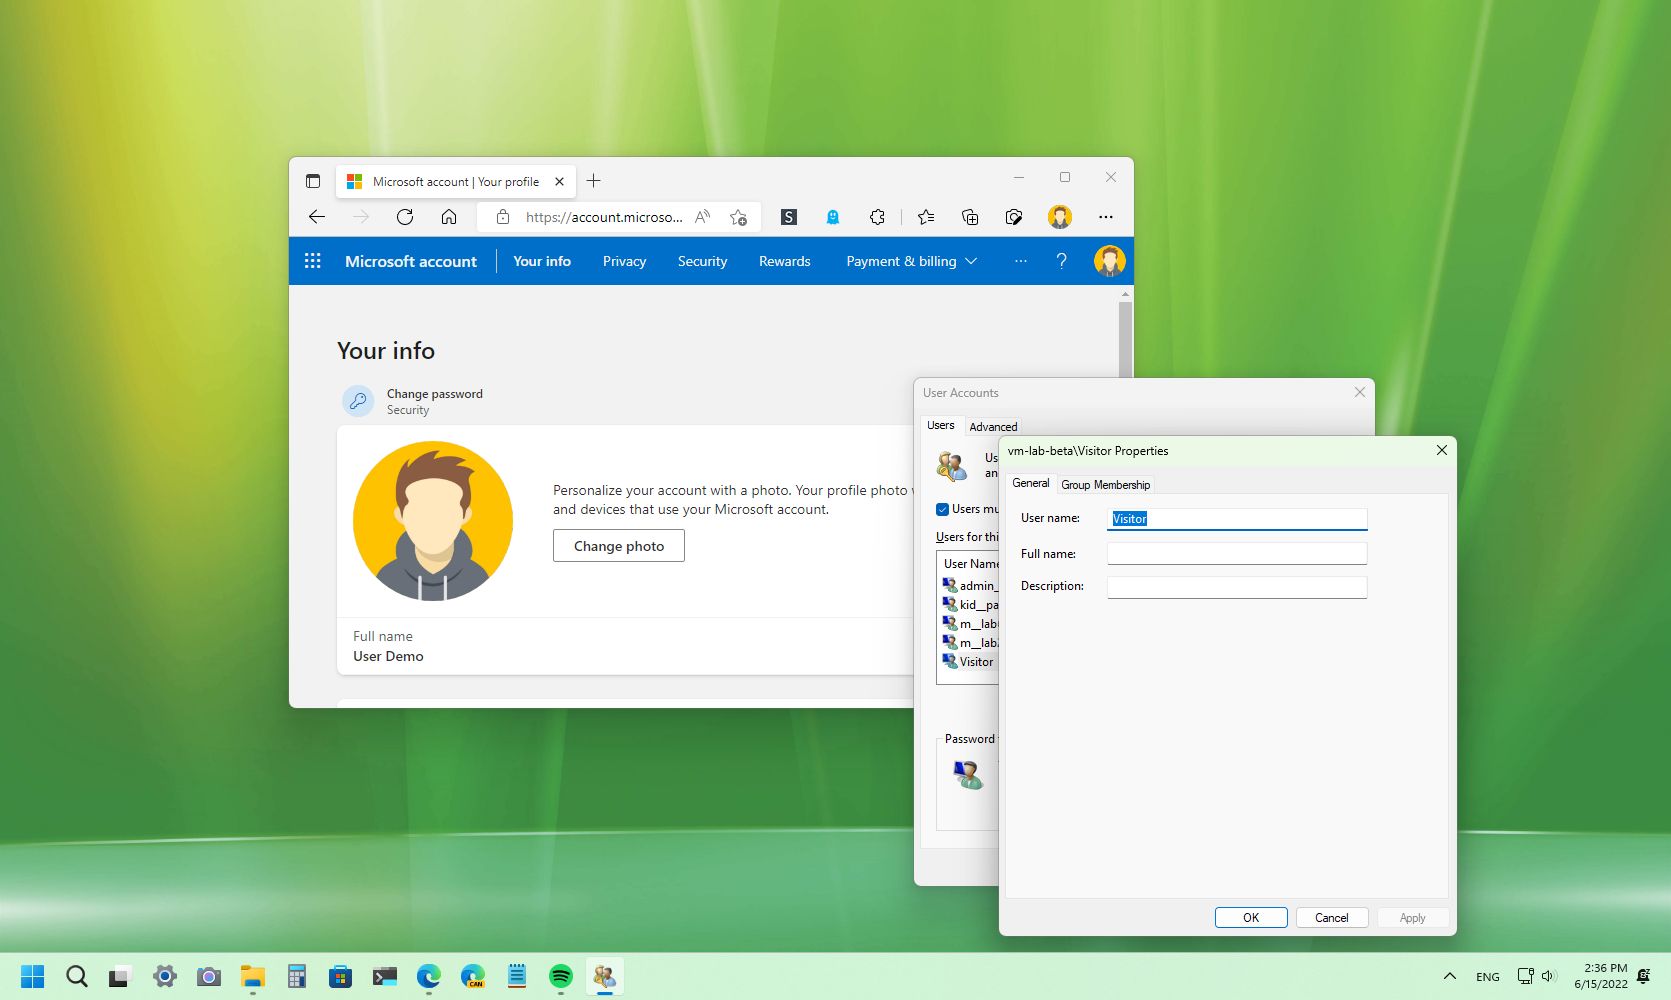
You can change the name of your Windows 11 account at any time for any reason. You can change it because the name is spelled wrong, you recently updated your name, or you want to make it a little more private. Or you use a local account and wish to display your real name instead of a nickname.
Regardless of the reason, Windows 11 allows you to update the account name in different ways, depending on the account type you use.
In this guide, we will walk you through the different ways to update your account in the Sign-in screen for a Microsoft and local account.
How to change account name using Settings
When creating a Windows 11 account with a Microsoft account, the system will show the name from your online account. If this is the case, you would have to change your online settings to change the name on your computer.
To change the account name on Windows 11, use these steps:
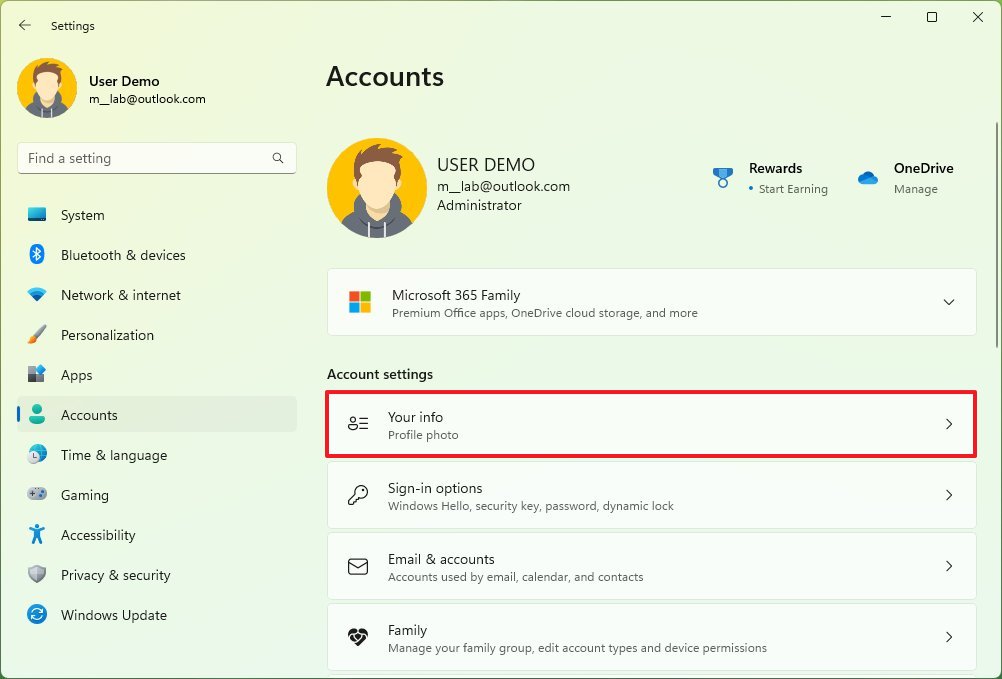
- Open Settings.
- Click on Accounts.
- Click the Your info page on the right side.
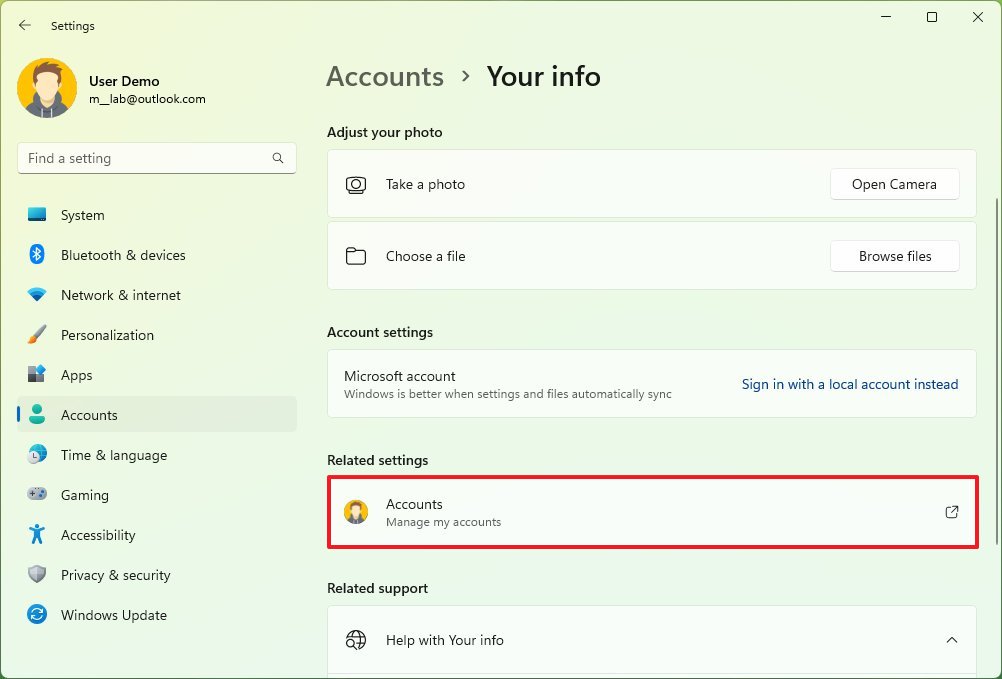
- Click the Manage my accounts option under the "Related settings" section.
- Quick tip: You can always access your account settings online on this Microsoft page.
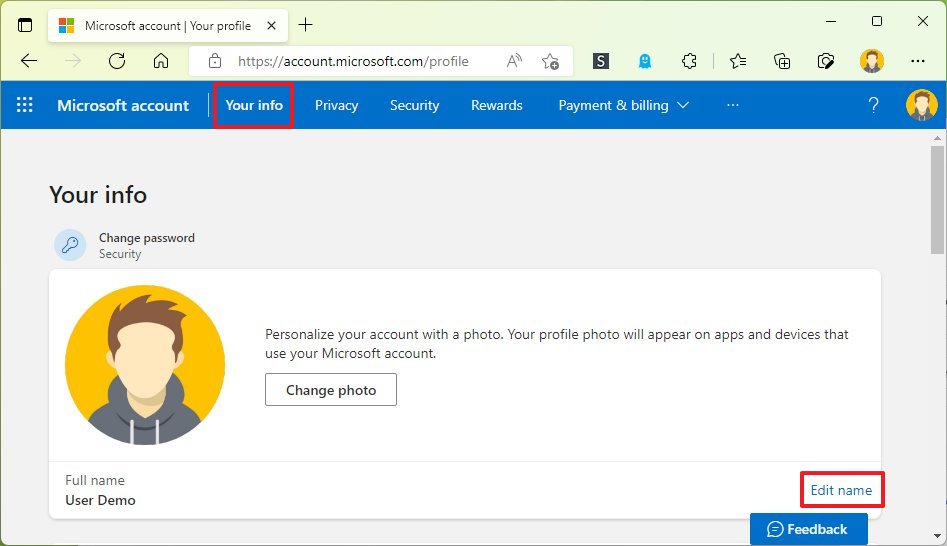
- Sign in with your credentials (if applicable).
- Click the Your Info tab.
- Under the current name of the account, click the Edit name option.
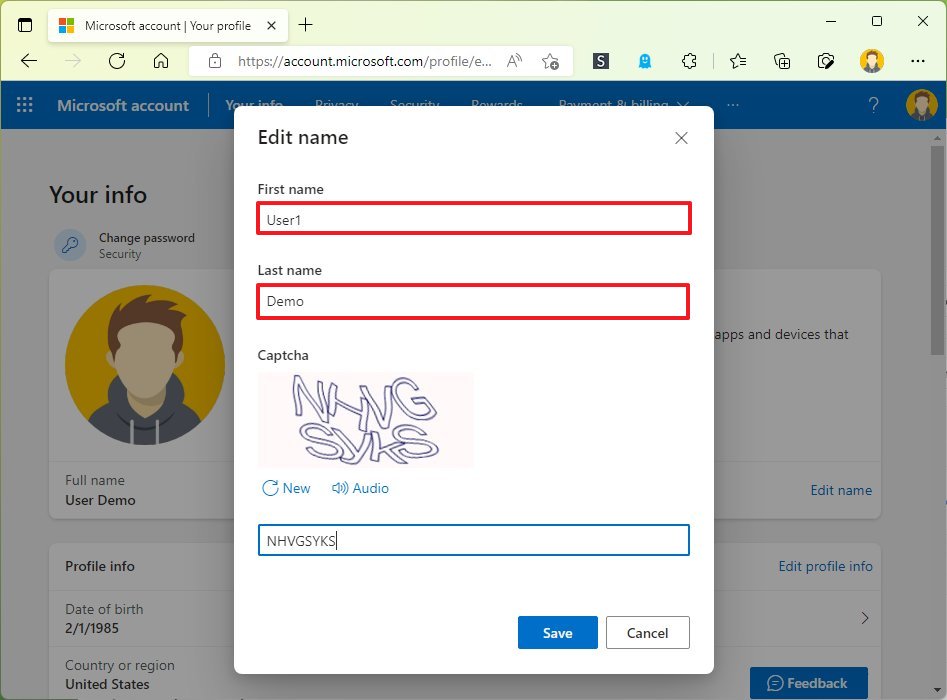
- Change the account's first and last name.
- Quick tip: You can technically use anything you want, but to make your information a little more private, you can use the first six letters of your name and the first two letters of your last name.
- Confirm the challenge to verify that a robot is not making the changes.
- Click the Save button.
- Restart the computer.
Once you complete the steps, the Sign-in screen will update the information and display the new name.
Although making changes to your account is easy, this will also update the information on every service provided by the company, including Outlook mail, Microsoft 365, and Xbox network.
All the latest news, reviews, and guides for Windows and Xbox diehards.
How to change account name using Control Panel
If you use a local account (without a Microsoft account), you have multiple methods to change the account name on Windows 11.
User Accounts
To modify the account name through the User Accounts settings, use these steps:
- Open Control Panel.
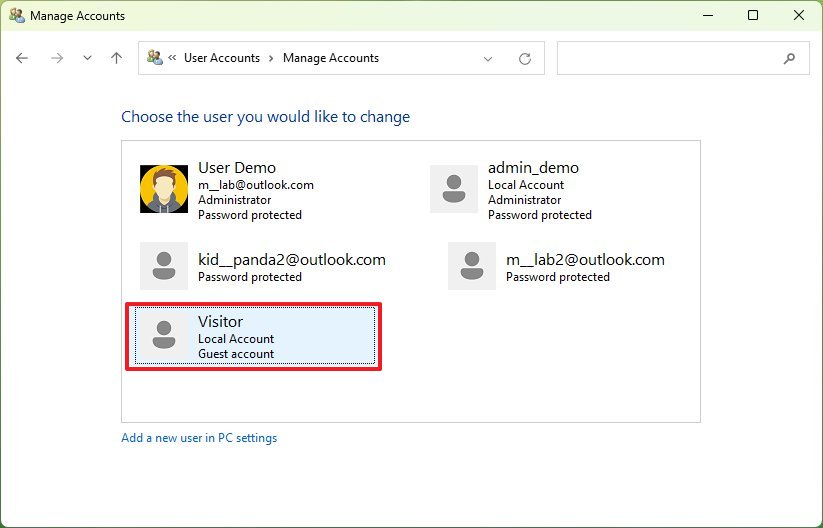
- Under the "User Accounts" section, click the Change account type option.
- Select the local account to update.
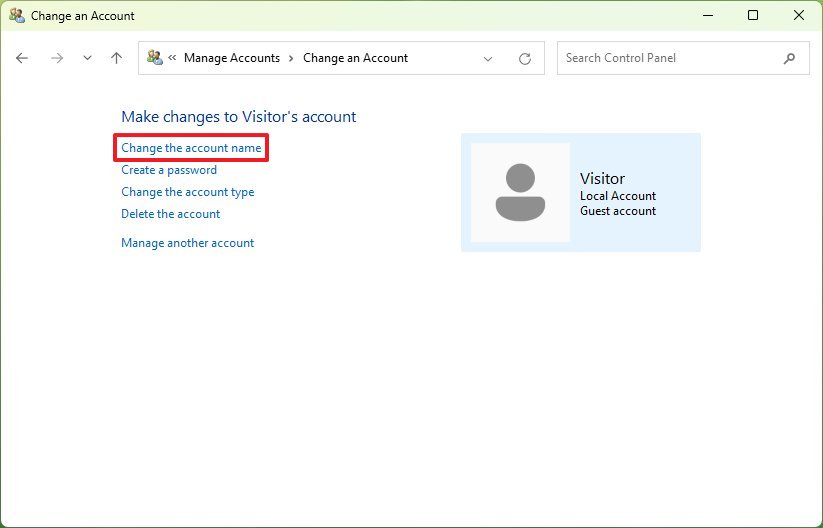
- Click the Change the account name option.
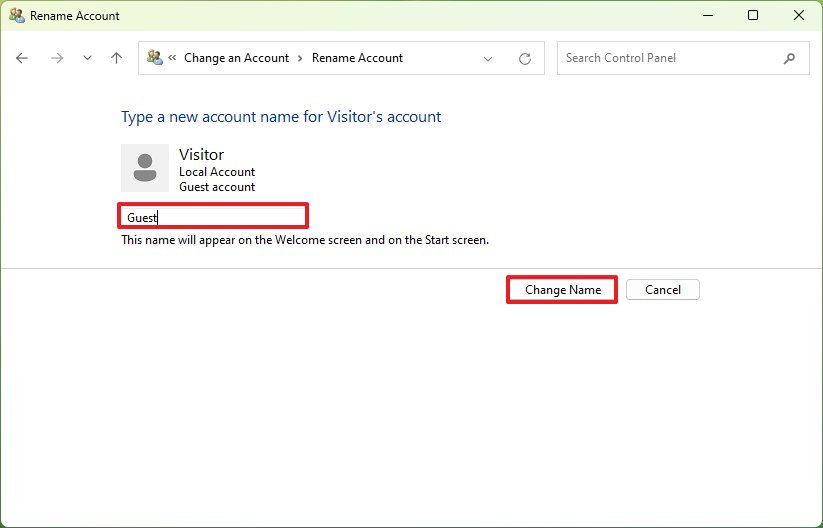
- Confirm the new account name.
- Click the Change Name button.
After you complete the steps, the next time you sign into your account, the name will be reflected on the screen.
Netplwiz
Alternatively, you can use the legacy user manager to change the account name on Windows 11.
To change the account name with netplwiz, use these steps:
- Open Start.
- Search for netplwiz and click the top result to open the legacy account manager tool.
- Click the Users tab.
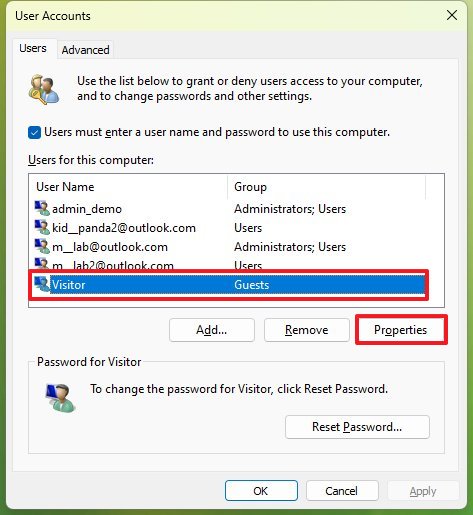
- Select the account to update.
- Click the Properties button.
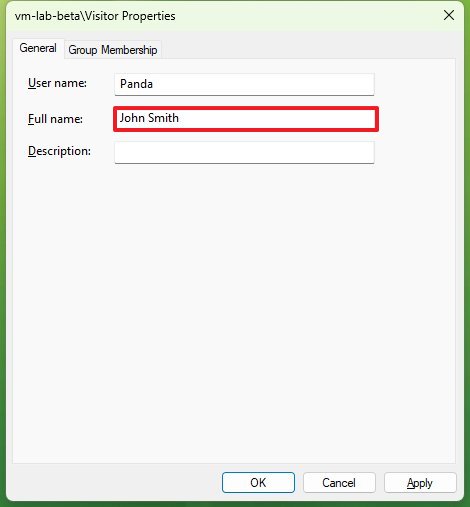
- (Optional) Change the "User name" information to change the account nickname.
- Confirm the new account name in the "Full Name" field — for example, "John Smith."
- Quick tip: If you want to display a nickname instead of your real name, don't enter anything in the "Full Name" field.
- Click the Apply button.
- Click the OK button.
- Click the OK button again.
Once you complete the steps, the Sign-in screen will reflect the new name on Windows 11.
The settings will also display your Microsoft accounts (if applicable), but the cloud settings will overwrite the information if you try to change your account name with this tool.
Computer Management
To change the account name through the Computer Management app, use these steps:
- Open Start.
- Search for Computer Management and click the top result to open the app.
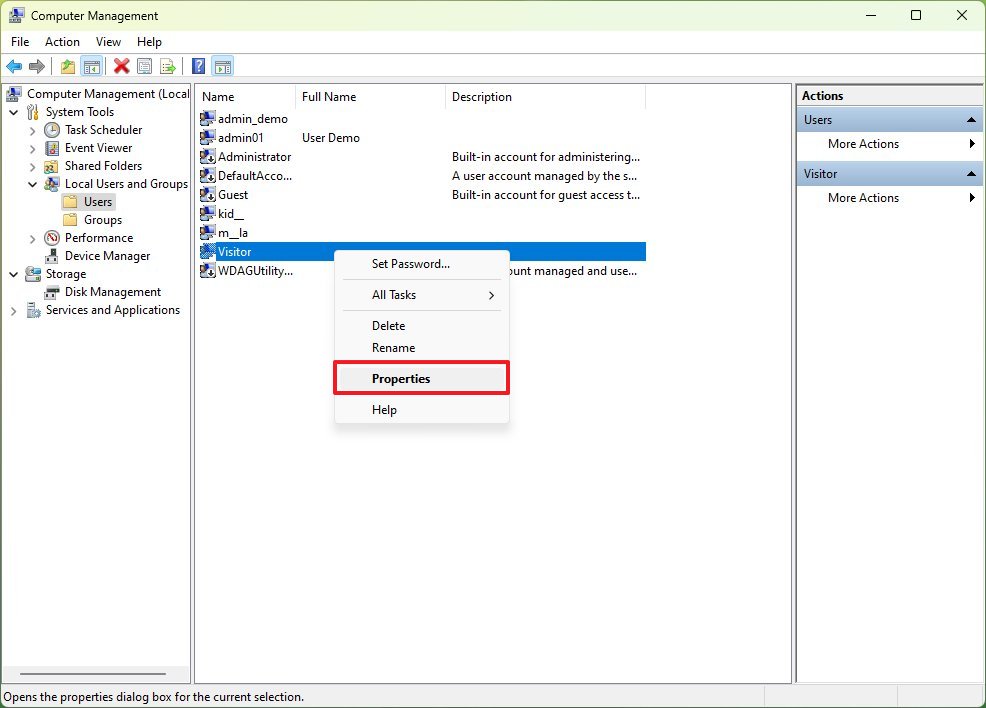
- Double-click to expand the System Tools branch.
- Double-click the Local Users and Groups branch.
- Click on Users.
- Right-click the account and select the Properties option.
- Quick tip: You can use the Rename option to change the profile nickname.
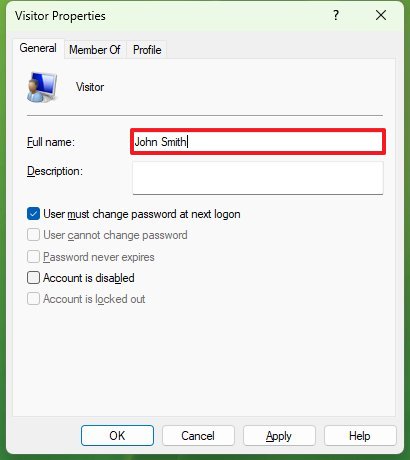
- Click the General tab.
- Confirm a new name for the account in the "Full Name" field.
- Click the Apply button.
- Click the OK button.
After you complete the steps, the new local account name will appear on the Sign-in screen and across the experience.
While it's possible to change the account name in more than one way, there's not an option that will rename your profile folder inside the "Users" folder. If you also want to change the name of your profile folder, it's best to create an entirely new account and transfer the information to the newly created profile.
More Windows resources
For more helpful articles, coverage, and answers to common questions about Windows 10 and Windows 11, visit the following resources:

Mauro Huculak has been a Windows How-To Expert contributor for WindowsCentral.com for nearly a decade and has over 22 years of combined experience in IT and technical writing. He holds various professional certifications from Microsoft, Cisco, VMware, and CompTIA and has been recognized as a Microsoft MVP for many years.
