How to change owner and organization details on Windows 11
Do you need to change the registered owner or organization on your Windows 11 computer? Here's how.

All the latest news, reviews, and guides for Windows and Xbox diehards.
You are now subscribed
Your newsletter sign-up was successful
On Windows 11, to simplify the initial setup steps, the out-of-the-box experience (OOBE) doesn't include the settings to specify the registered owner and organization information. Instead, as you continue the setup, the system will leave the organization information blank and use your Microsoft account details for the owner details.
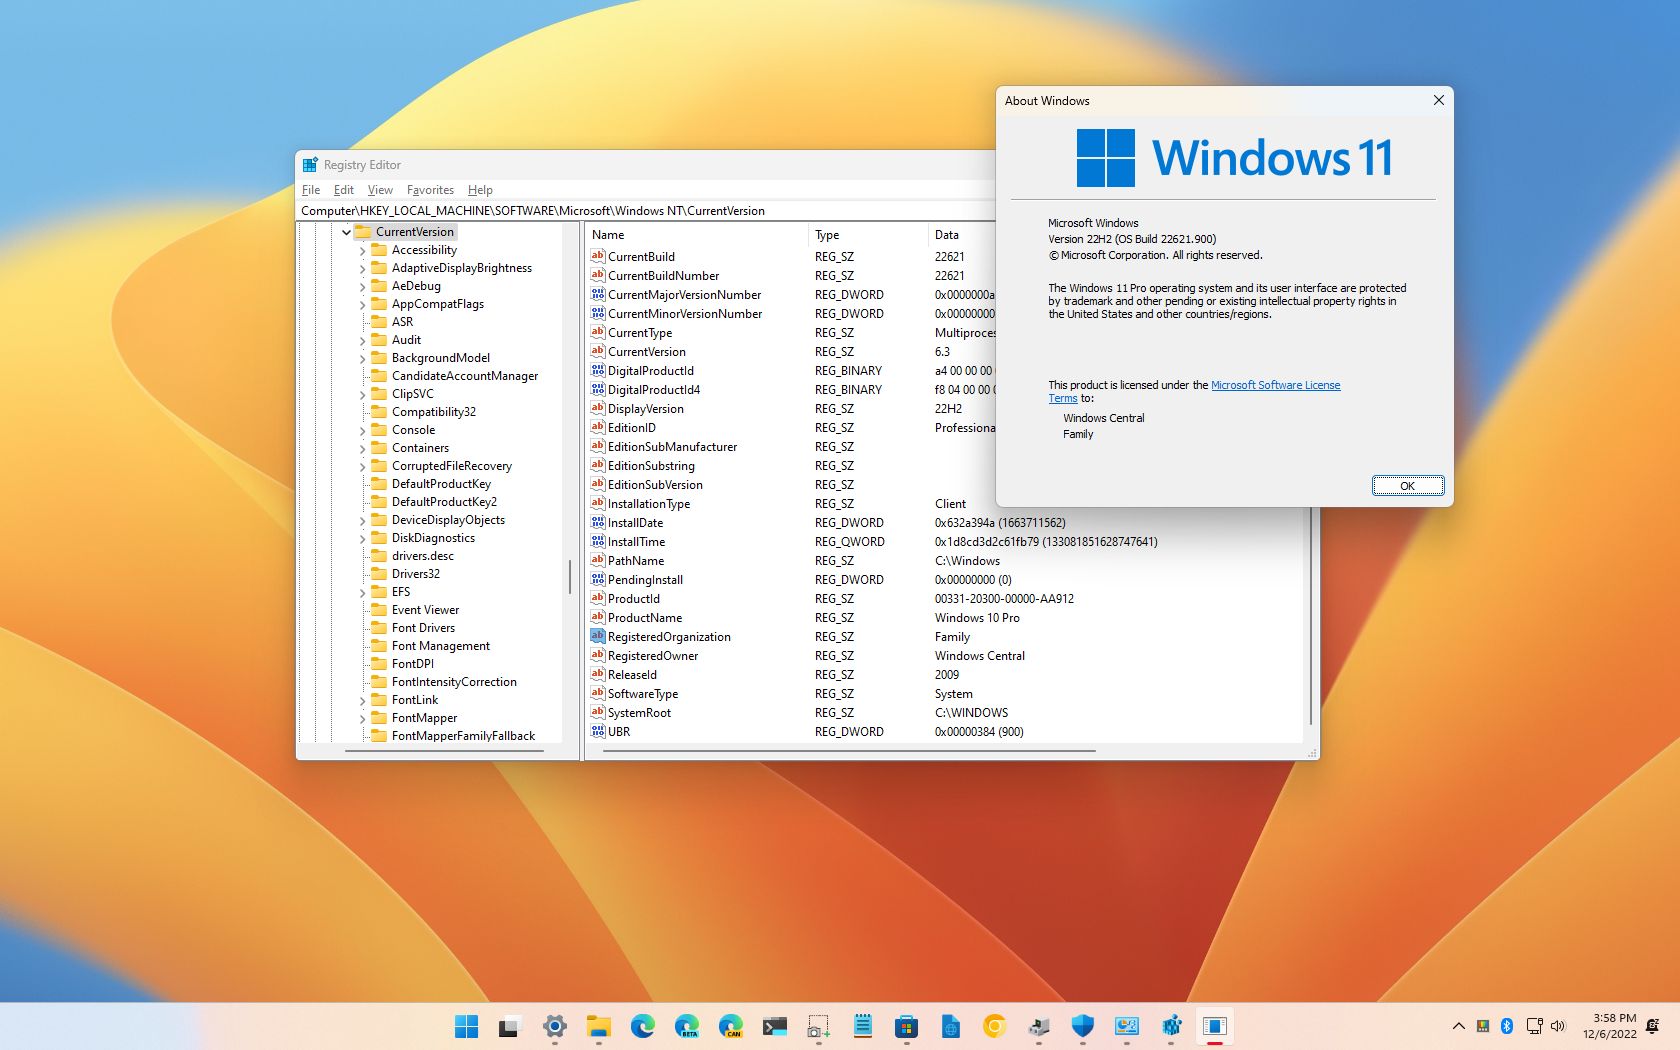
Although these pieces of information are visible in a few places, such as on the "About Windows" (winver) page, some applications may query this information to customize the experience.
Whatever the reason might be, on Windows 11, you can use the Registry to update the registered owner and organization to display the correct information on your computer.
This guide will walk you through the steps to change the registered owner and organization on Windows 11.
Warning: This is a friendly reminder that editing the Registry is risky and can cause irreversible damage to your installation if you do not complete the task correctly. It is a good idea to create a backup of the device before proceeding.
How to change registration details on Windows 11
To change the registered owner and organization details on Windows 11, use these steps:
- Open Start.
- Search for regedit and click the top result to open the Registry Editor.
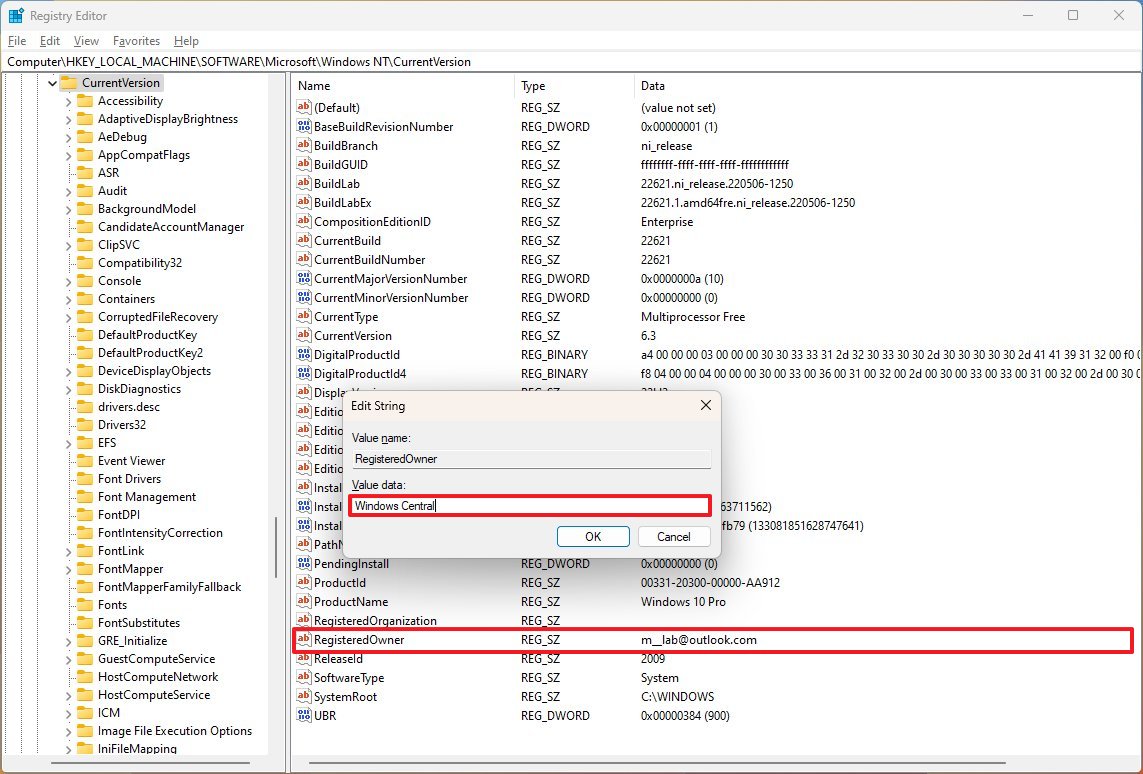
- Browse the following path: HKEY_LOCAL_MACHINE\SOFTWARE\Microsoft\Windows NT\CurrentVersion
- Double-click the RegisteredOwner string.
- Confirm the new registered owner information.
- Quick note: Usually, you want to use your name for the registered owner.
- Click the OK button.
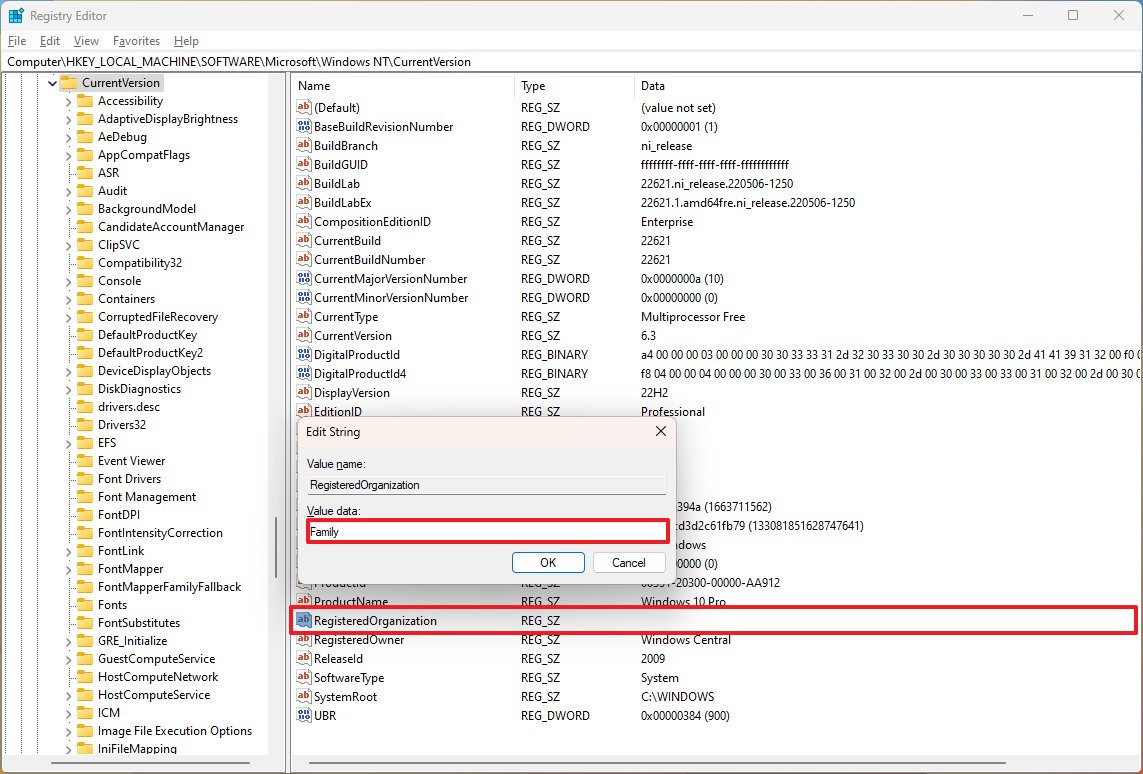
- Double-click the RegisteredOrganization string.
- Confirm the organization information – for example, "Family" for users or your organization's name.
- Quick tip: If you cannot find the strings, you may need to create them by right-clicking the CurrentVersion key, selecting New, choosing the String Value option, naming it "RegisteredOwner," and then creating another one called "RegisteredOrganization."
- Click the OK button.
- Restart the computer.
After you complete the steps, the system will reflect the new owner and organization names.
All the latest news, reviews, and guides for Windows and Xbox diehards.
You can confirm the new changes by using the "Windows key + R" keyboard shortcut to open the Run command and querying the winver command.
More resources
For more helpful articles, coverage, and answers to common questions about Windows 10 and Windows 11, visit the following resources:
- Windows 11 on Windows Central — All you need to know
- Windows 10 on Windows Central — All you need to know

Mauro Huculak has been a Windows How-To Expert contributor for WindowsCentral.com for nearly a decade and has over 22 years of combined experience in IT and technical writing. He holds various professional certifications from Microsoft, Cisco, VMware, and CompTIA and has been recognized as a Microsoft MVP for many years.


