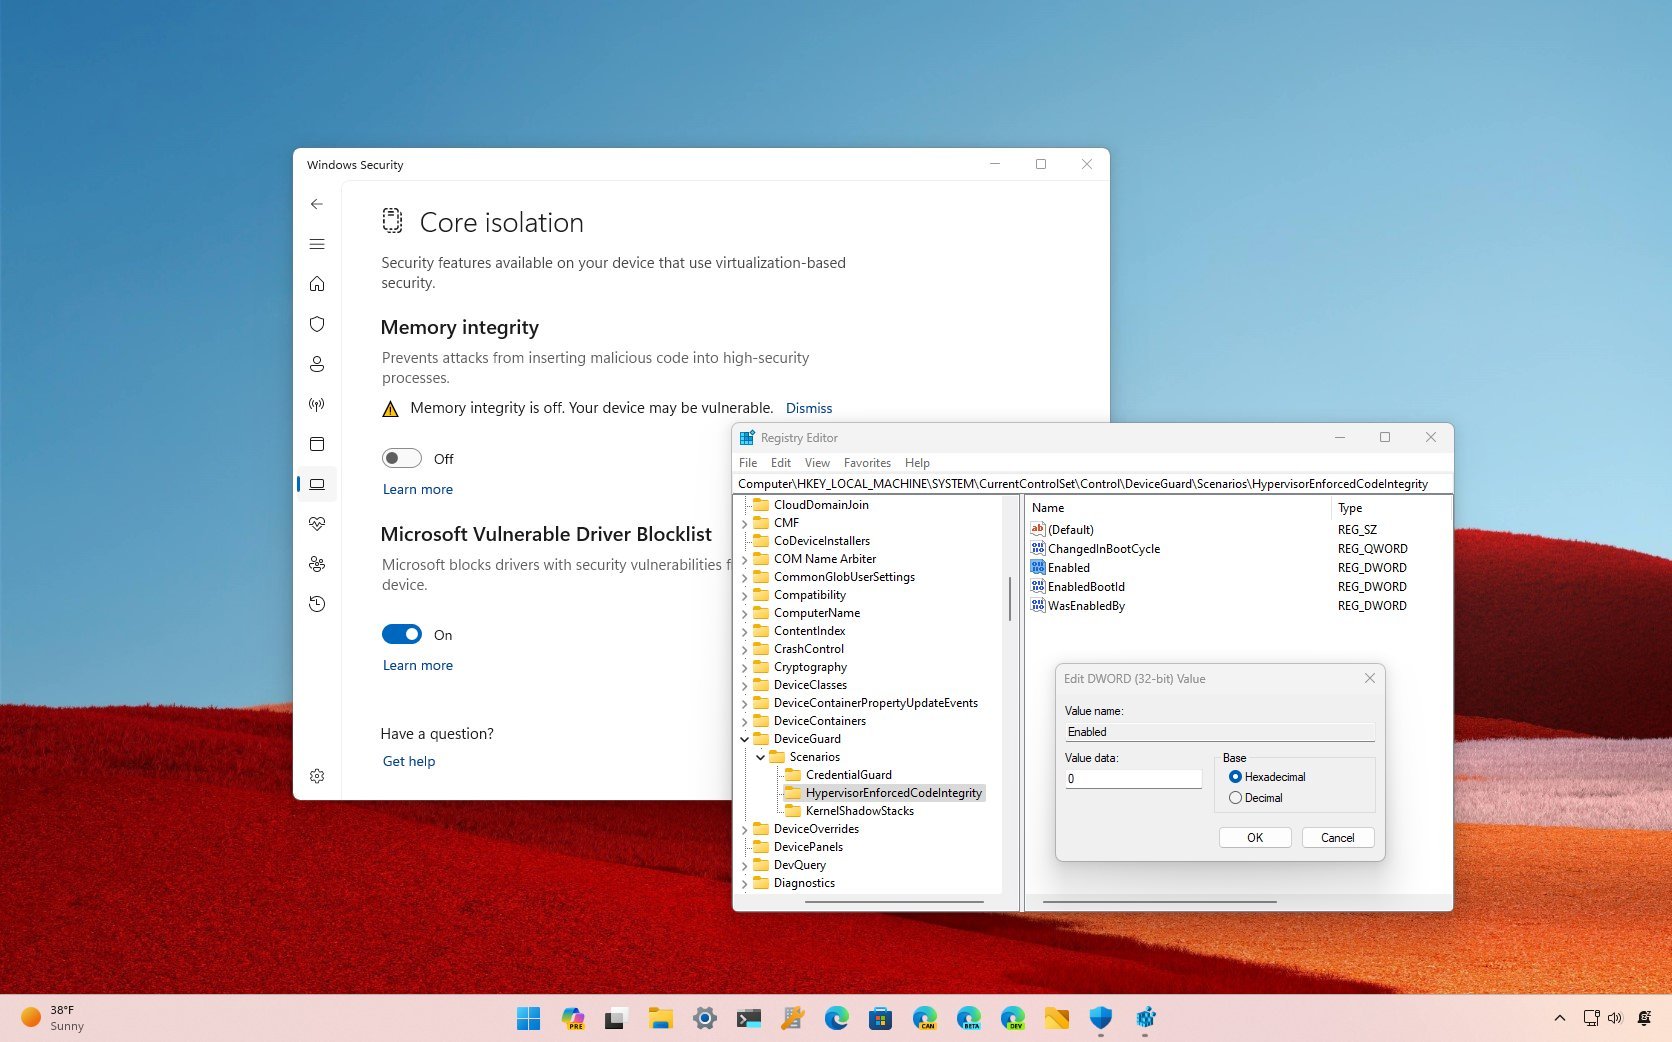
How to enable Core isolation's Memory integrity feature on Windows 11
Here's how and why to enable (or disable) Core isolation's Memory integrity feature on Windows 11.
All the latest news, reviews, and guides for Windows and Xbox diehards.
You are now subscribed
Your newsletter sign-up was successful
Core isolation is a set of virtualization-based security features on Windows 11 that provides additional protection from hackers and malicious code. One of the main features is "Memory Integrity," which prevents malware and other malicious code from hijacking high-security processes.
The protection makes the kernel memory pages executable only if they pass the integrity check. Also, the "Microsoft Vulnerable Driver Blocklist" feature is part of the scope, and it allows the system to prevent the installation of drivers that may contain vulnerabilities. The "Core isolation" features, including memory integrity, should be enabled by default. However, if they're not enabled or are causing performance problems, you can control these features from the Windows Security app.
In this how-to guide, I will walk you through the steps to manage the Core isolation features on Windows 11.
Warning: This guide includes steps to modify the Registry. As such, this is a friendly reminder that editing the Registry is risky and can cause irreversible damage to your installation if you don't do it correctly. It's recommended to make a full backup of your computer before proceeding.
How to enable Core isolation's Memory integrity on Windows 11
On Windows 11, you can enable the Core isolation features from the Settings app or through the Registry, and here's how.
Enable Core isolation from Settings
To enable Core isolation on Windows 11, use these steps:
- Open Start.
- Search for Windows Security and click the top result to open the app.
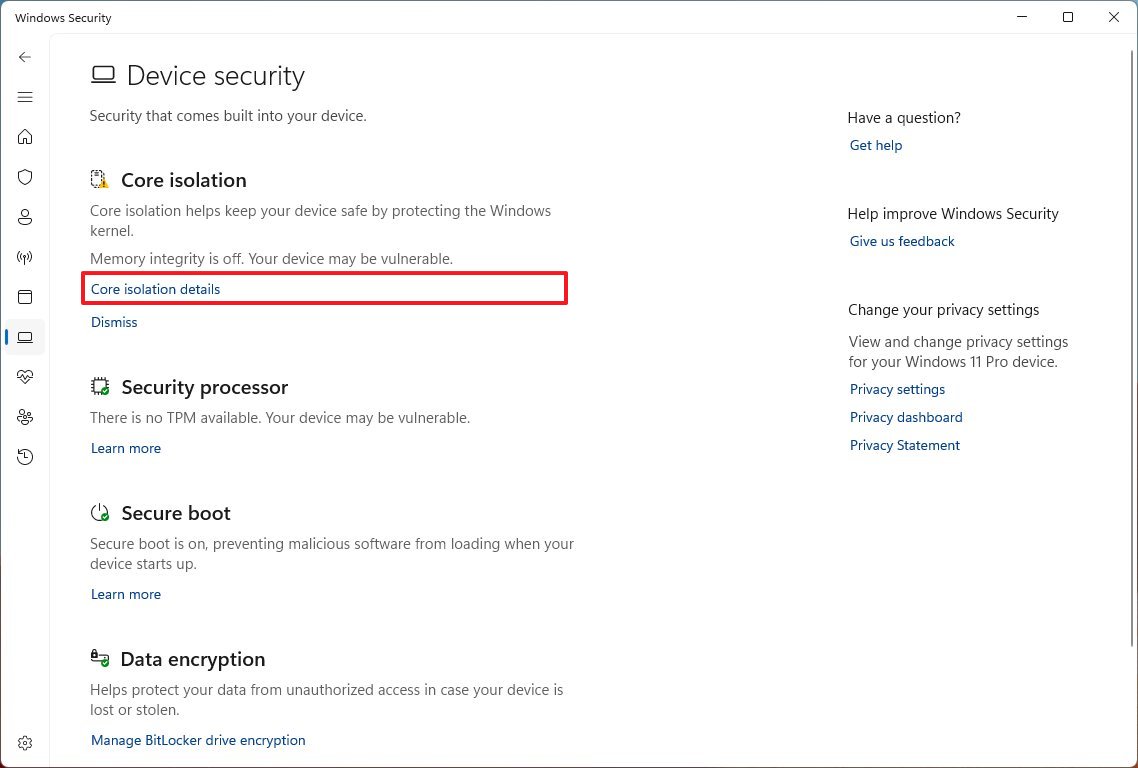
- Click on Device security.
- Under the "Core isolation" section, click the "Core isolation details" option.
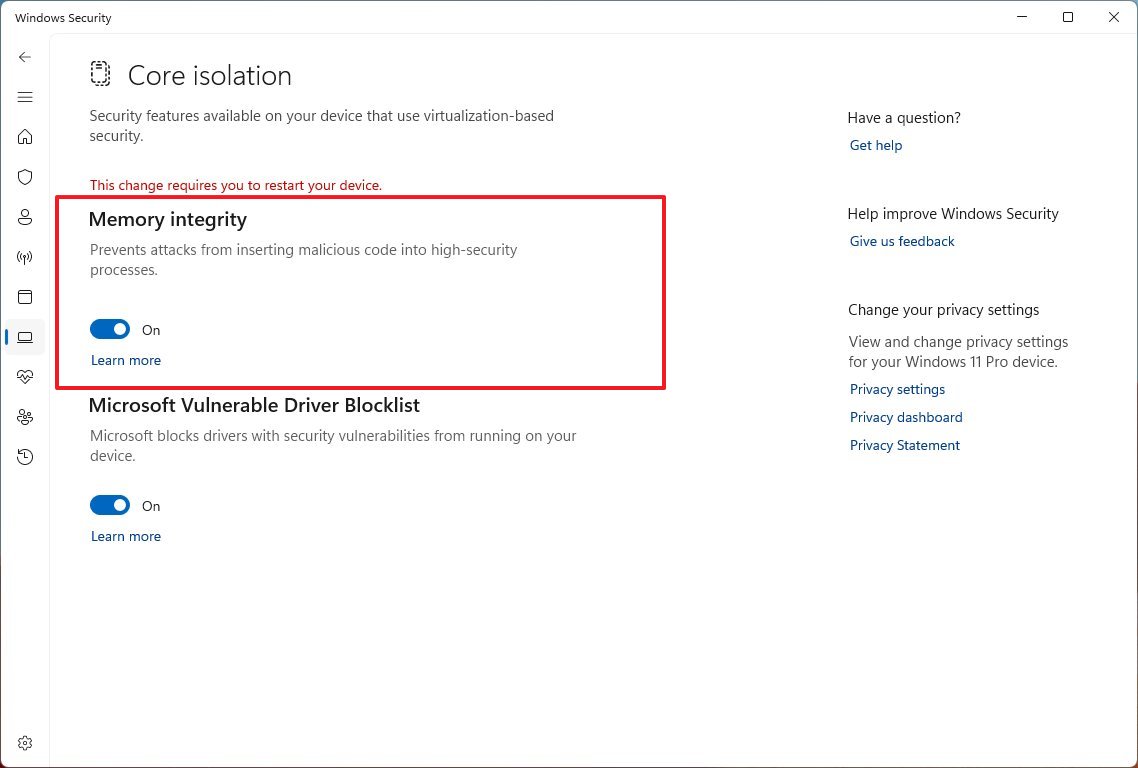
- Turn on the Memory integrity toggle switch to disable the feature.
Once you complete the steps, restart the computer to apply the settings to protect your computer from malicious code injecting into high-security processes.
All the latest news, reviews, and guides for Windows and Xbox diehards.
Enable Core isolation from Registry
If the Core isolation options are greyed out, you may be able to enable the features from the Registry:
- Open Start.
- Search regedit and click the top result to open the Registry Editor.
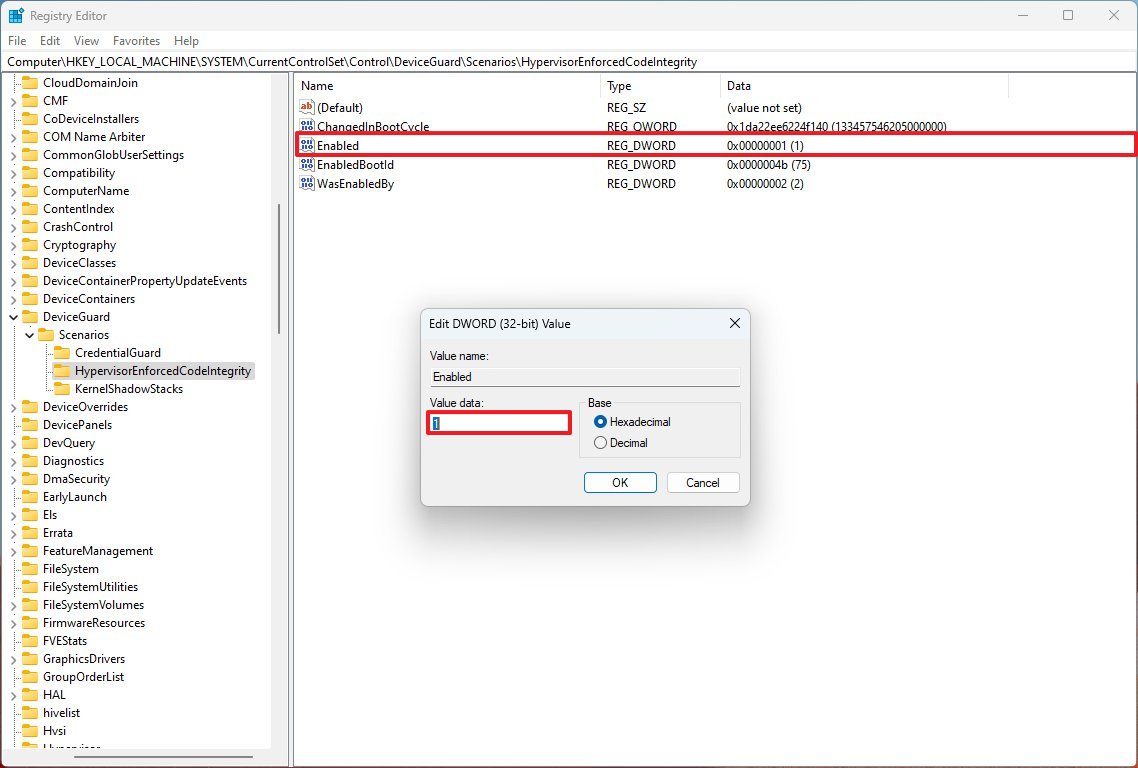
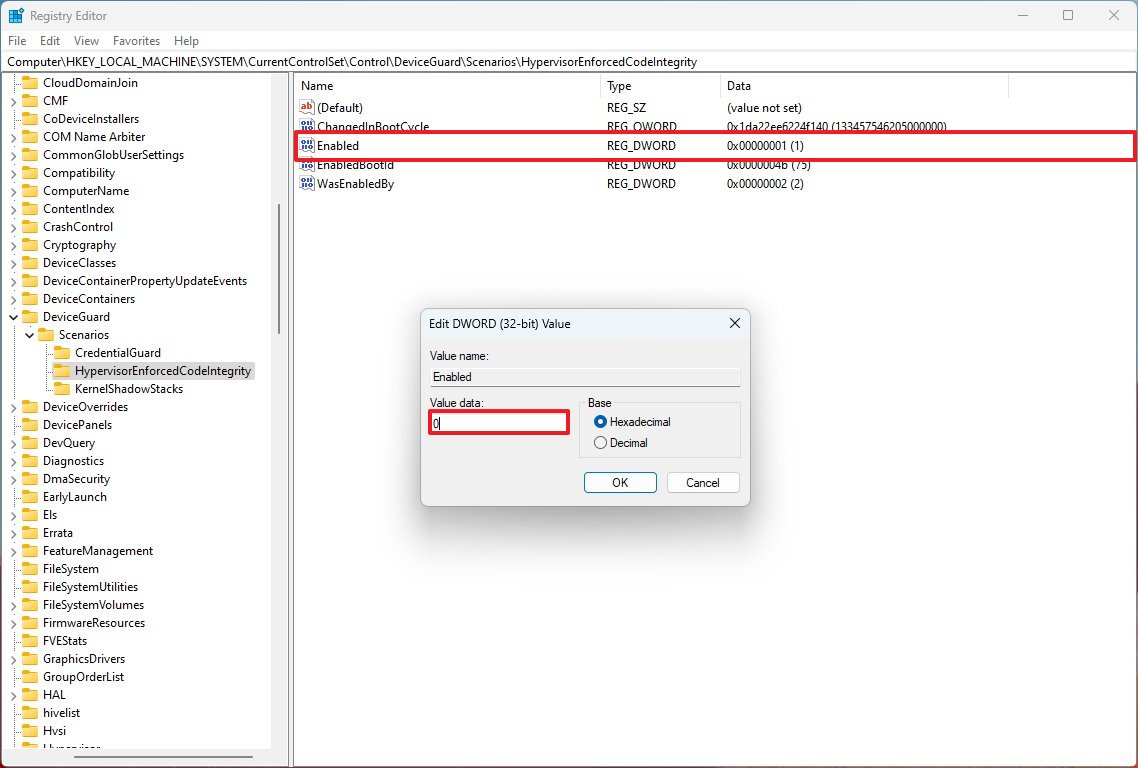
- Browse the following path: HKEY_LOCAL_MACHINE\SYSTEM\CurrentControlSet\Control\DeviceGuard\Scenarios\HypervisorEnforcedCodeIntegrity
- Double-click the Enabled key and change its value from 0 to 1.
- Click the OK button.
After you complete the steps, restart the computer to apply the changes.
Using this method will disable the option to control the settings from the "Core isolation" settings page, and you will see a "This setting is managed by your administrator" message. If you want to control the settings again from the Windows Security app, you'll have to disable the option from the Registry (see instructions below).
How to disable Core isolation's Memory integrity on Windows 11
If the feature conflicts with other components, you can always disable it. Also, if you use your computer for gaming, Microsoft recommends disabling Core isolation (in addition to the "Virtual Machine Platform" from the Windows Feature settings) to boost performance.
Disable Core isolation from Settings
To disable Core isolation, use these steps:
- Open Start.
- Search for Windows Security and click the top result to open the app.
- Click on Device security.
- Under the "Core isolation" section, click the "Core isolation details" option.
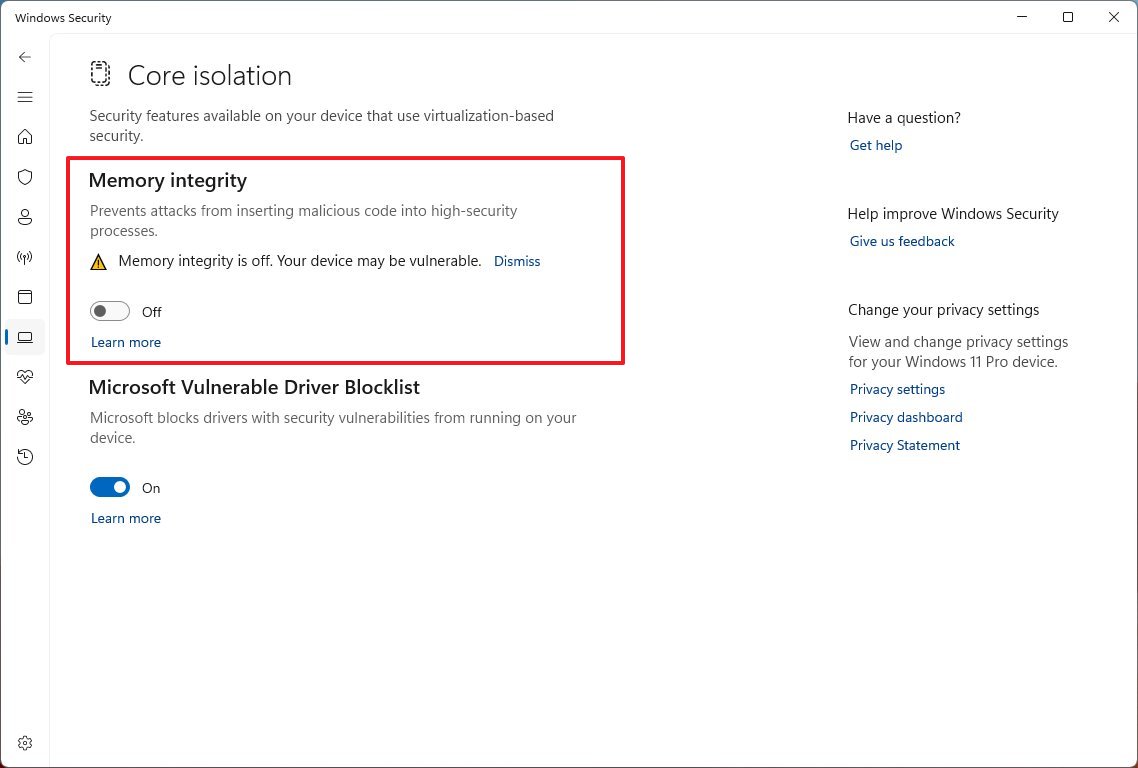
- Turn off the Memory integrity toggle switch to disable the feature.
- (Optional) Turn off the "Microsoft Vulnerable Driver Blocklist" toggle switch if you're trying a good-known driver that's being blocked by this feature.
After you complete the steps, restart the computer to apply the changes.
If you turn off Core isolation to play games on Windows 11, it's a good idea to re-enable the feature after you're playing as per Microsoft's recommendations.
Disable Core isolation from Registry
If the option to turn off Core isolation is greyed out, you may be able to disable the feature from the Registry:
- Open Start.
- Search regedit and click the top result to open the Registry Editor.
- Browse the following path: HKEY_LOCAL_MACHINE\SYSTEM\CurrentControlSet\Control\DeviceGuard\Scenarios\HypervisorEnforcedCodeIntegrity
- Double-click the Enabled key and change its value from 1 to 0.
- Click the OK button.
Once you complete the steps, restart the computer to complete the setup.
More resources
For more helpful articles, coverage, and answers to common questions about Windows 10 and Windows 11, visit the following resources:
- Windows 11 on Windows Central — All you need to know
- Windows 10 on Windows Central — All you need to know

Mauro Huculak has been a Windows How-To Expert contributor for WindowsCentral.com for nearly a decade and has over 22 years of combined experience in IT and technical writing. He holds various professional certifications from Microsoft, Cisco, VMware, and CompTIA and has been recognized as a Microsoft MVP for many years.
