How to enable virtualization on Windows 11
If you need to use virtualization on Windows 11, you have to enable the feature manually, and here's how.
All the latest news, reviews, and guides for Windows and Xbox diehards.
You are now subscribed
Your newsletter sign-up was successful
On Windows 11, virtualization enables you to run multiple instances of Windows 11, older versions, and operating systems from other platforms, such as Linux. In addition, the support allows you to enable other virtualization experiences like Windows Subsystem for Linux (WSL) and Windows Subsystem for Android (WSA).
Although Windows 11 has virtualization support, it's something that, in most cases, you may have to enable manually in the Unified Extensible Firmware Interface (UEFI) firmware and on the operating system's settings.
This guide will walk you through the steps to enable all the features and components to support virtualization on Windows 11.
How to enable hardware virtualization on Windows 11
To enable hardware virtualization on Windows 11, use these steps:
- Open Settings.
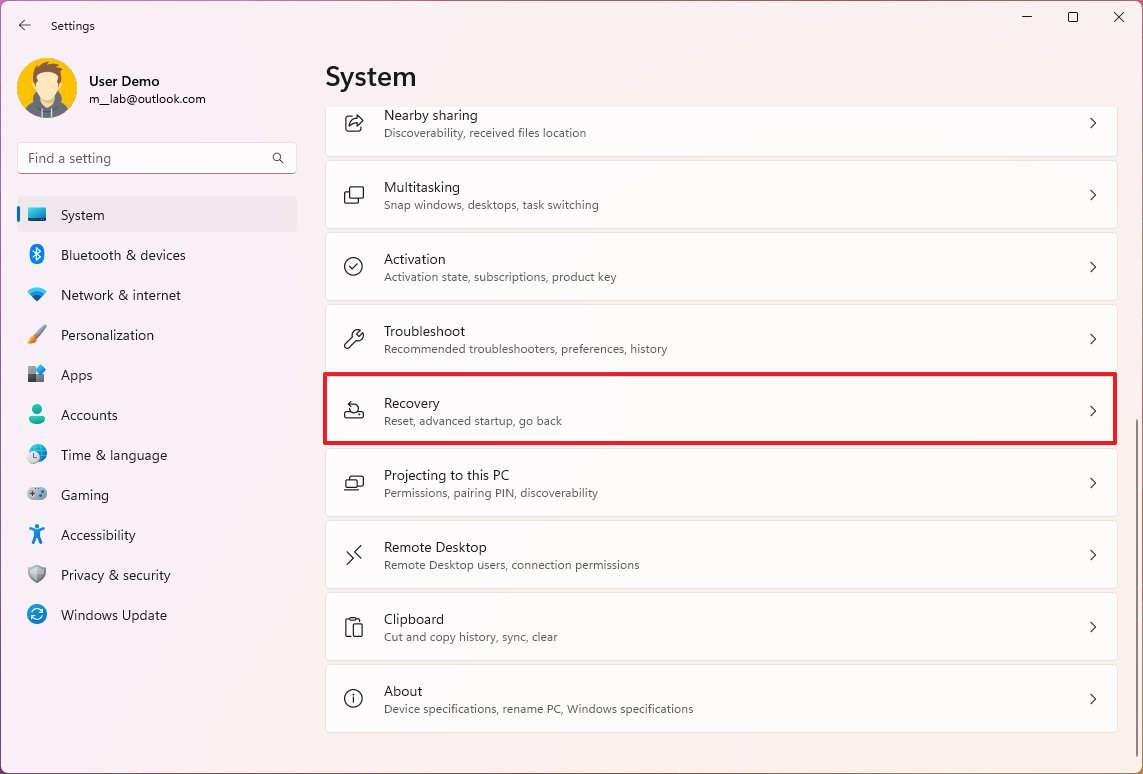
- Click on System.
- Click the Recovery page on the right side.
- Under the "Recovery options" section, click the Restart now button for the "Advanced startup" setting.
- Click the Restart now button again.
- Click on Troubleshoot.
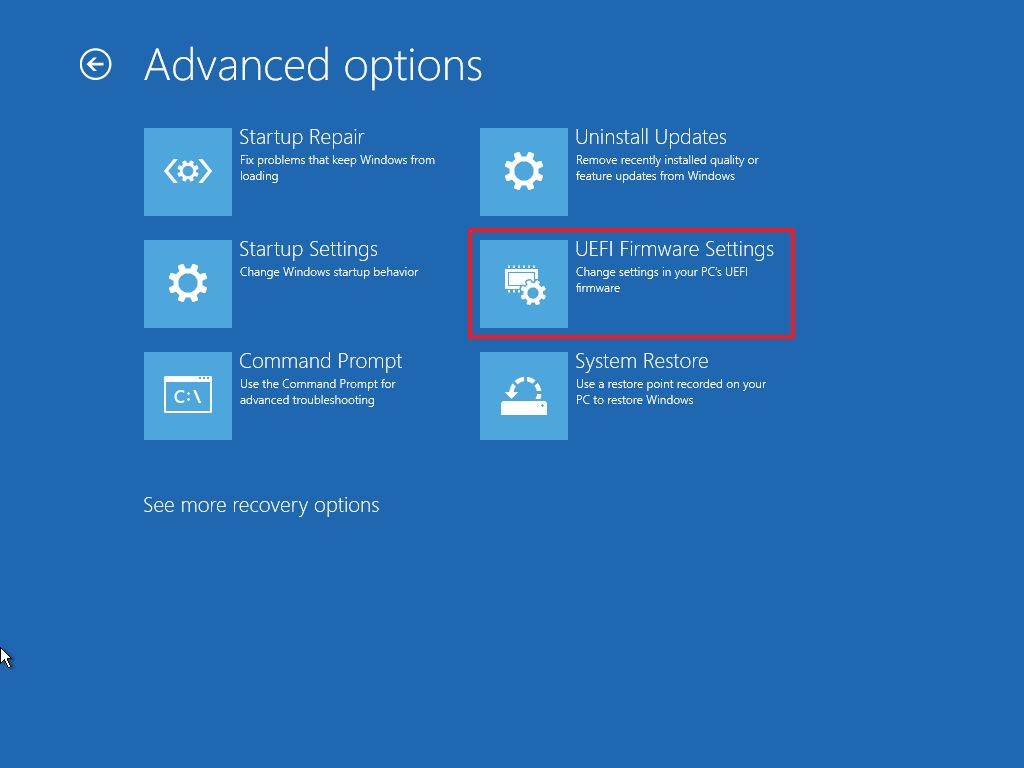
- Click on Advanced options.
- Click the UEFI Firmware Settings option.
- Click the Restart button.
- In the UEFI settings, open the Advanced, Configuration, or Security page.
- Quick note: If you need help finding the setting, you may have to check your hardware manufacturer to determine the location to enable the feature.
- Turn on virtualization.
- Quick note: The feature may have the "Virtualization Technology," "Intel Virtual Technology," or "SVM mode," but the name could be different on the motherboard.
- Save the settings.
- Restart computer.
Once you complete the steps, the computer will have support for virtualization features on Windows 11.
How to enable software virtualization on Windows 11
After enabling the virtualization at the hardware level, you can enable the virtualization components available on Windows 11 or install other solutions, such as VMware. (VirtualBox from Oracle doesn't require hardware or software virtualization to be enabled before installation.)
To enable the software virtualization elements on Windows 11, use these steps:
All the latest news, reviews, and guides for Windows and Xbox diehards.
- Open Settings.
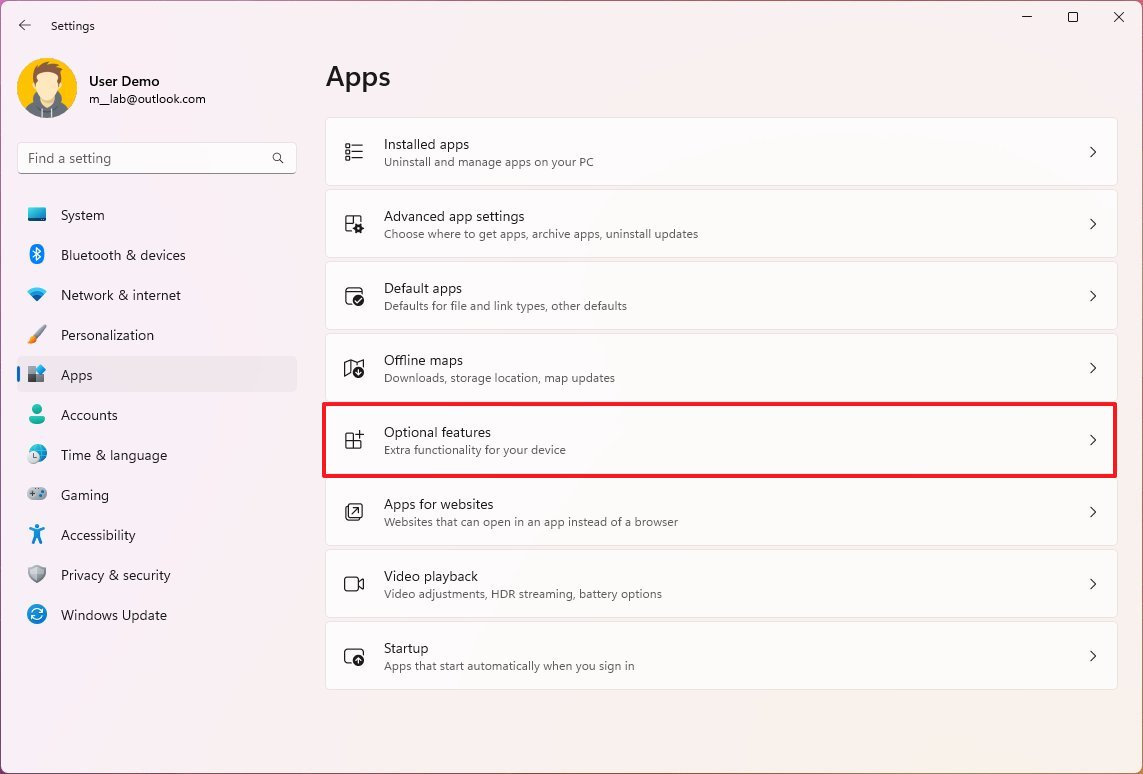
- Click on Apps.
- Click the Optional features page on the right side.
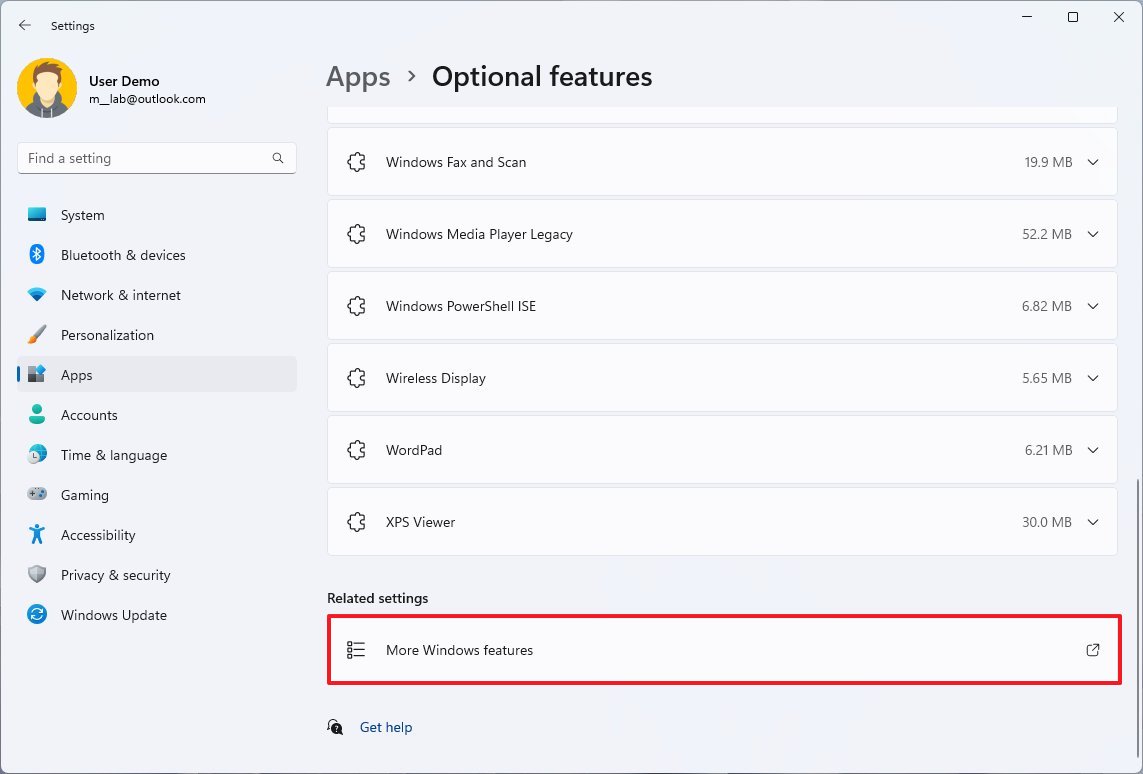
- Under the "Related settings" section, click the "More Windows features" setting.
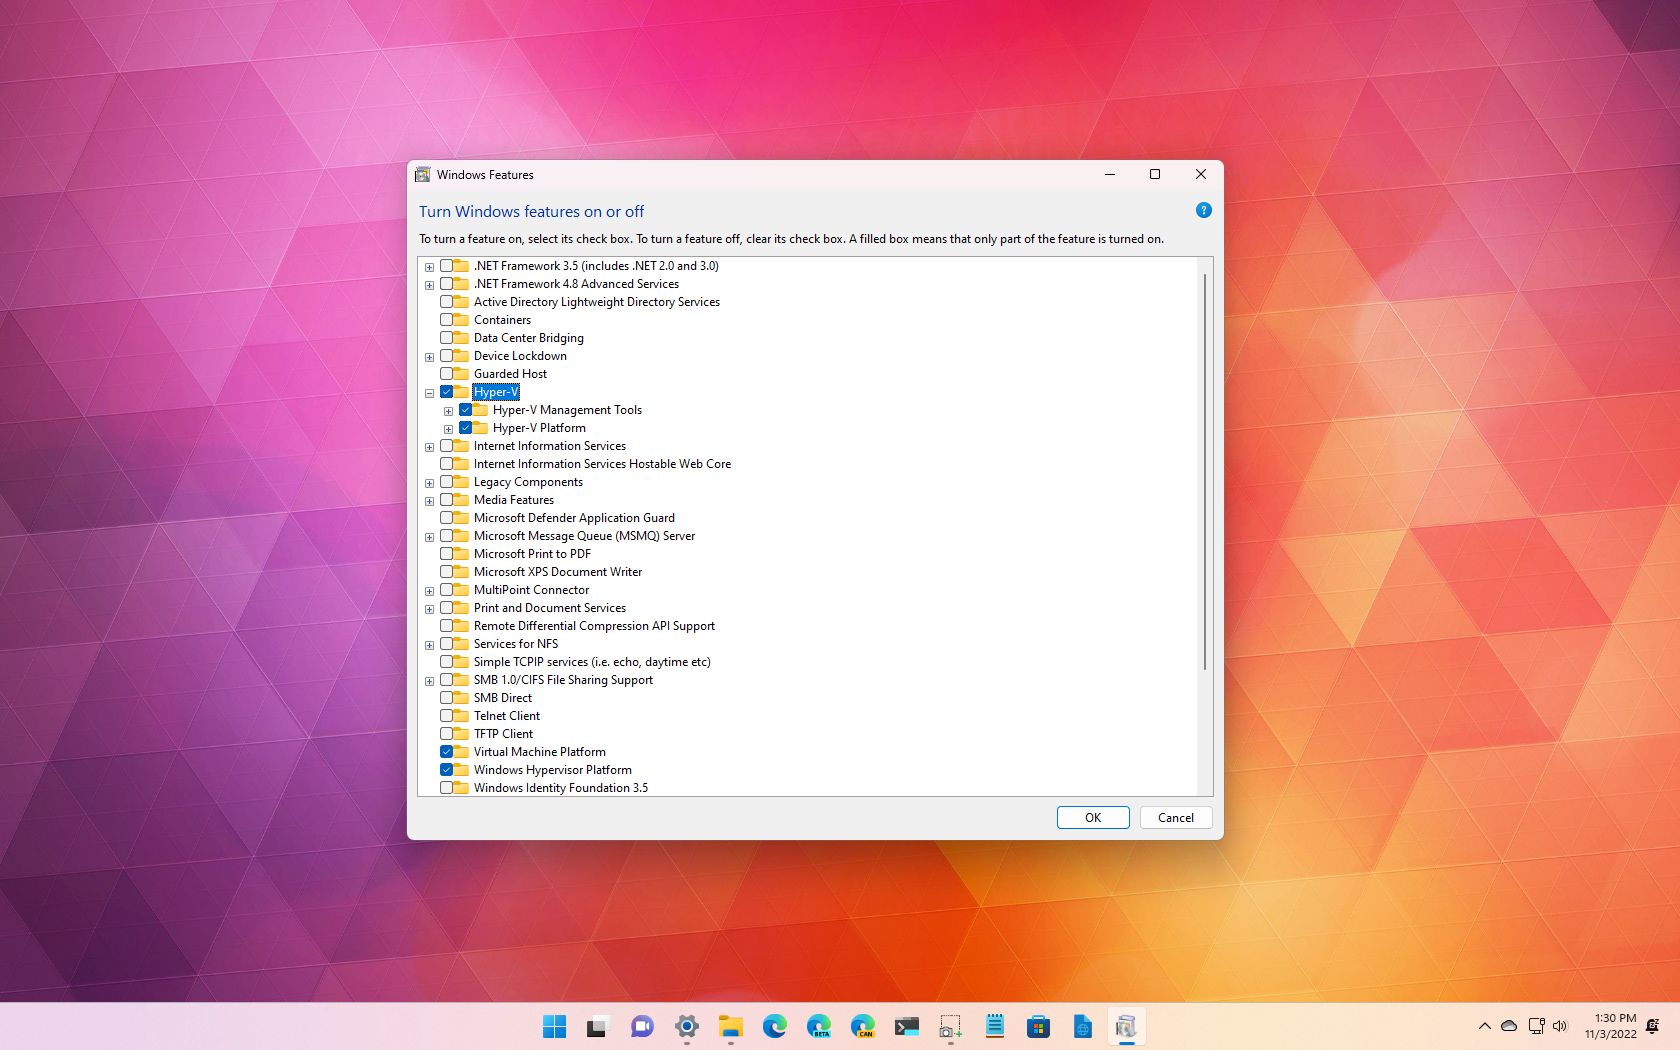
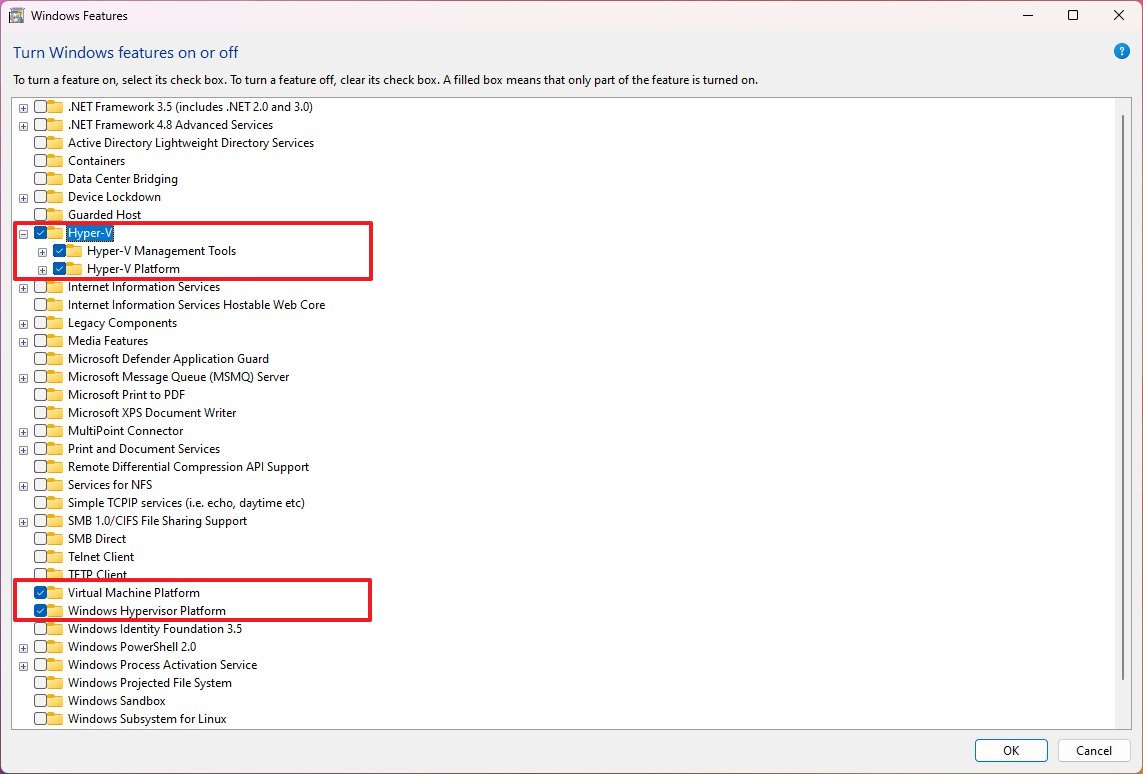
- Check the Hyper-V option to enable the Microsoft virtualization elements and the tools to create and run virtual machines on Windows 11.
- Check the Virtual Machine Platform option to enable the virtualization components to set up other virtualization solutions, such as Windows Subsystem for Linux (WSL), Windows Subsystem for Android (WSA), or another software that requires this technology.
- Check the Windows Hypervisor Platform option to add an extended user-mode API for third-party virtualization stacks and apps.
- Quick note: It's uncommon for regular users to enable this feature. Usually, you will only need to enable this feature if you have to set up a solution that requires it.
- Click the OK button.
- Click the Restart now button.
After you complete the steps, you can create virtual machines with the Hyper-V manager. Depending on your selection, you can install other solutions like WSL, WSA, and other platforms.
More resources
For more helpful articles, coverage, and answers to common questions about Windows 10 and Windows 11, visit the following resources:

Mauro Huculak has been a Windows How-To Expert contributor for WindowsCentral.com for nearly a decade and has over 22 years of combined experience in IT and technical writing. He holds various professional certifications from Microsoft, Cisco, VMware, and CompTIA and has been recognized as a Microsoft MVP for many years.
