How to check basic memory info on Windows 11
These two easy ways will help you determine the basic information about the memory installed on your computer.

All the latest news, reviews, and guides for Windows and Xbox diehards.
You are now subscribed
Your newsletter sign-up was successful
On Windows 11, if the laptop or desktop computer doesn't have enough RAM (Random Access Memory) to handle games, apps, and background services, it will not run smoothly, and you're likely to run into issues.
Whether you're building a custom computer, trying to upgrade the system memory to run more demanding games or applications, or want to understand more specific details about the hardware, Windows 11 offers more than one way to check the total amount, speed, type, and more, using the Settings app and Task Manager.
In this how-to guide, I'll show you the steps to determine the basic memory specs information available on your computer.
How to check memory specs on Windows 11
On Windows 11, if you only need to determine the amount of memory installed on the computer, you can use the Settings app. You can use the Task Manager if you need to find out other details, such as the speed, form factor, the number of modules installed, and how many the system supports.
Check total memory amount
To check the total amount of memory with the Settings app, use these steps:
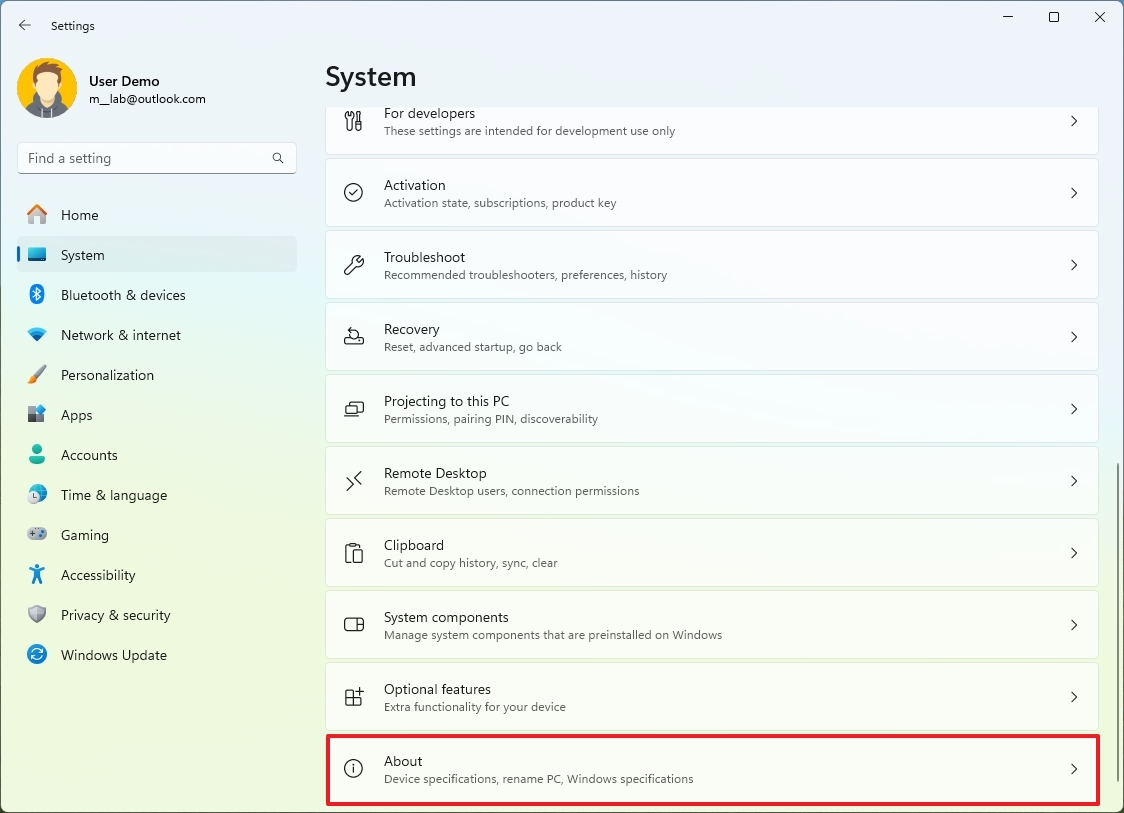
- Open Settings.
- Click on System.
- Click the About page on the right side.
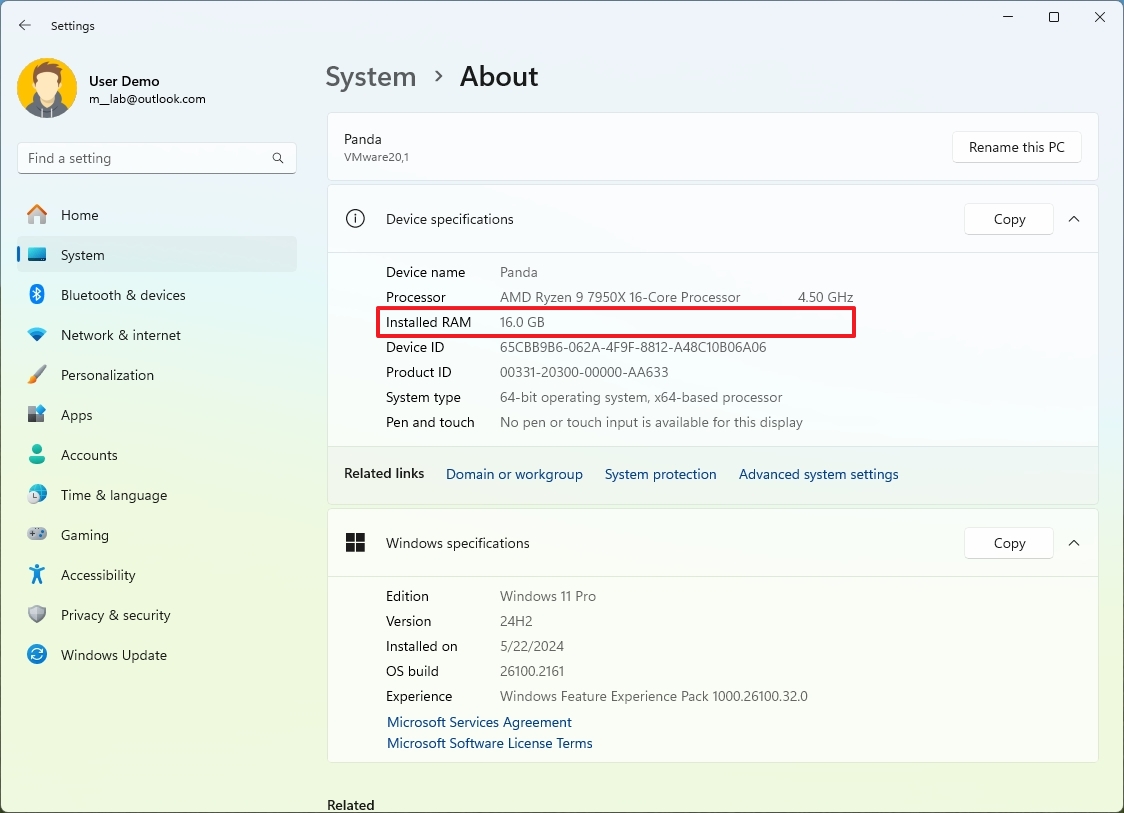
- Confirm the amount of RAM installed on the computer under the "Device specifications" section.
Once you complete the steps, you will know the amount of memory installed on your computer. If the usable system memory is less than the total amount, it's because the system is probably sharing some of the memory with a graphics card.
Check memory speed, sticks, form factor
To some basic memory specs on Windows 11, use these steps:
All the latest news, reviews, and guides for Windows and Xbox diehards.
- Open Start.
- Search for Task Manager and click the top result to open the app.
- Click the More details option (if applicable).
- Click the Performance tab.
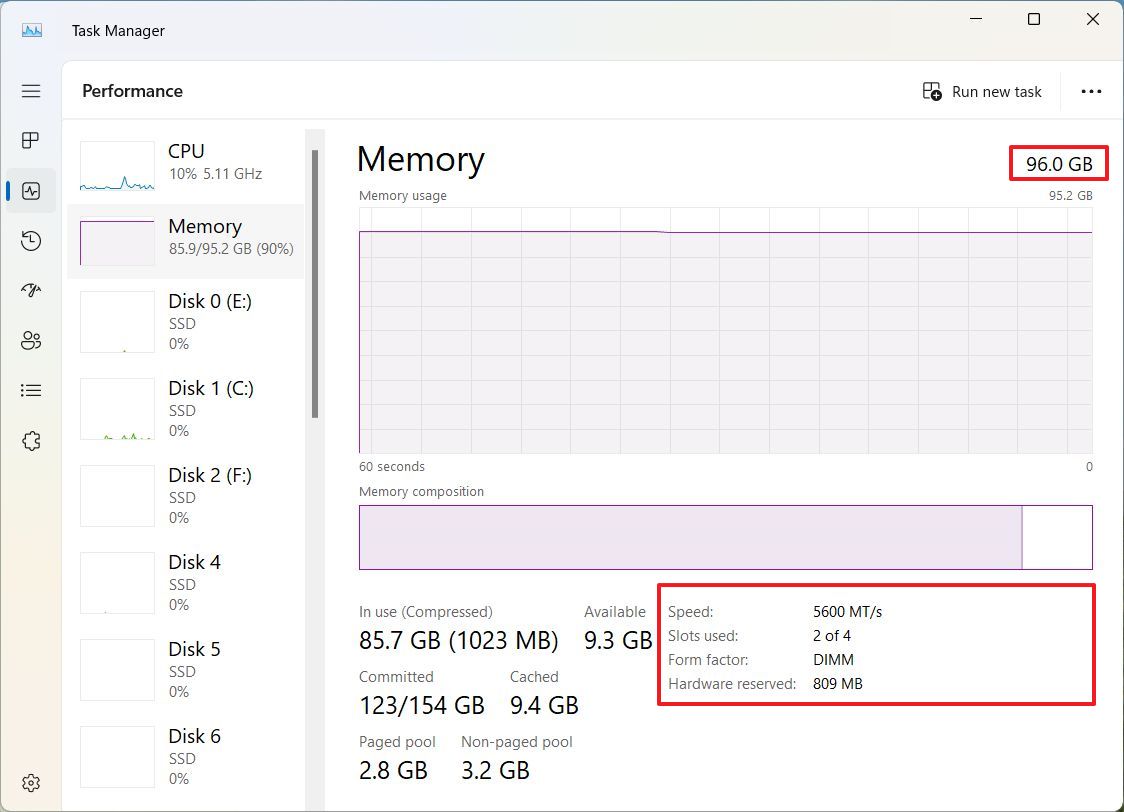
- Click on Memory.
- Confirm the total amount of RAM installed on the computer.
- Confirm the current memory speed.
- Check the number of memory slots on the system and how many are populated.
- Quick note: You can use this information to determine how many memory sticks are installed on the computer and whether you can install another stick or need a new memory kit with higher capacity.
- Confirm the form factor type.
- Quick note: Usually, the factor type for laptops and compact devices would be "SODIMM" and "DIMM" for desktop computers.
After you complete the steps, you will have technical specifications about the system memory that can come in handy when it's time to upgrade.
More resources
For more helpful articles, coverage, and answers to common questions about Windows 10 and Windows 11, visit the following resources:
- Windows 11 on Windows Central — All you need to know
- Windows 10 on Windows Central — All you need to know

Mauro Huculak has been a Windows How-To Expert contributor for WindowsCentral.com for nearly a decade and has over 22 years of combined experience in IT and technical writing. He holds various professional certifications from Microsoft, Cisco, VMware, and CompTIA and has been recognized as a Microsoft MVP for many years.


