How to create and manage power plans on Windows 11
You can optimize power usage using custom power plans, and in this guide, we'll show how on Windows 11.
All the latest news, reviews, and guides for Windows and Xbox diehards.
You are now subscribed
Your newsletter sign-up was successful
On Windows 11, you can use power plans to control how the computer consumes energy by configuring specific hardware and system (for example, brightness and sleep) settings. The system comes with three schemes (Balanced, Power saver, and High performance). And each has been designed to save battery, optimize the device for performance, or balance battery life and performance.
You can always modify existing power plans, but it's also possible to create custom power plans with specific settings to achieve the specific results you want.
This guide will walk you through the steps to create, configure, and delete power plans on Windows 11.
These instructions has been updated to ensure accuracy and reflect changes to the process in the operating system.
How to create a power plan on Windows 11
To create a power plan on Windows 11, use these steps:
- Open Control Panel.
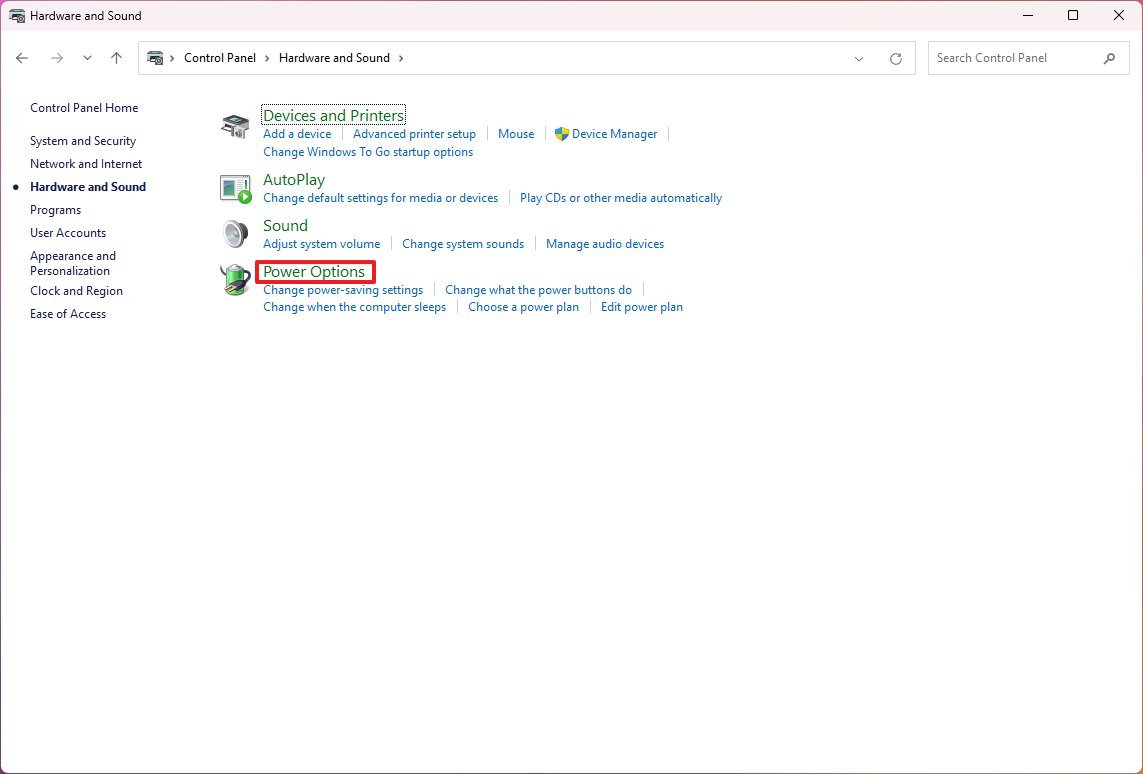
- Click on Hardware and Sound.
- Click on Power Options.
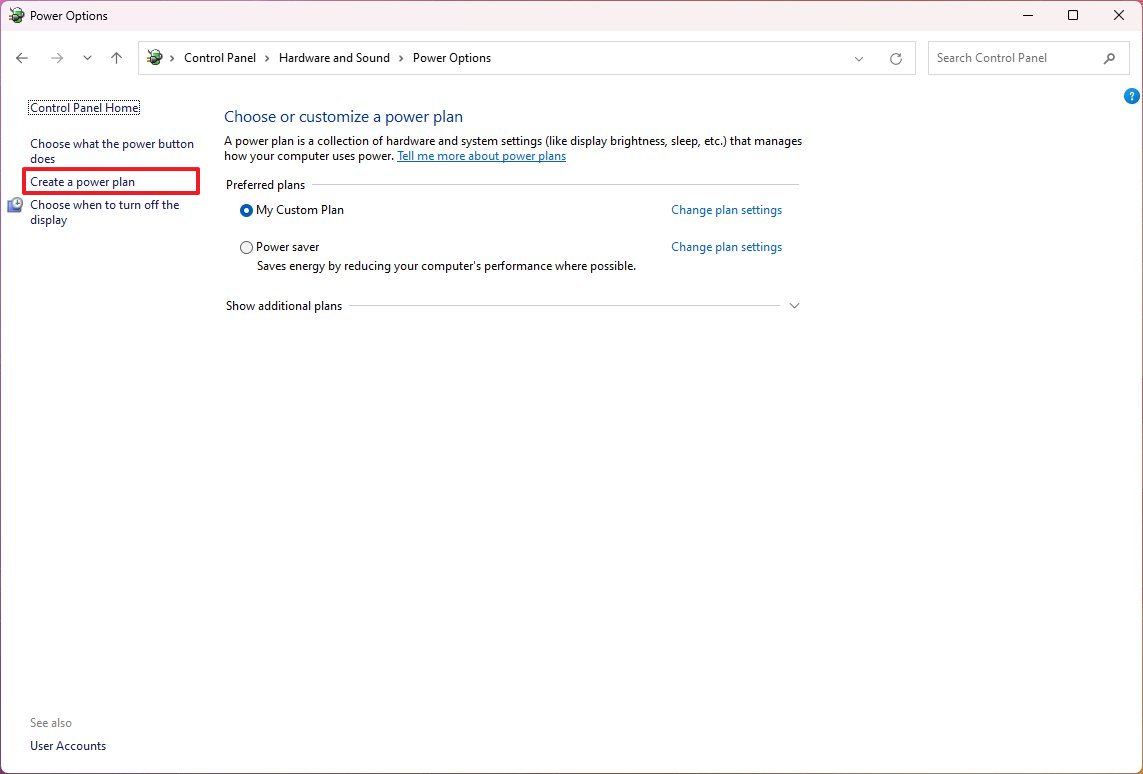
- Click the "Create a power plan" button from the left pane.
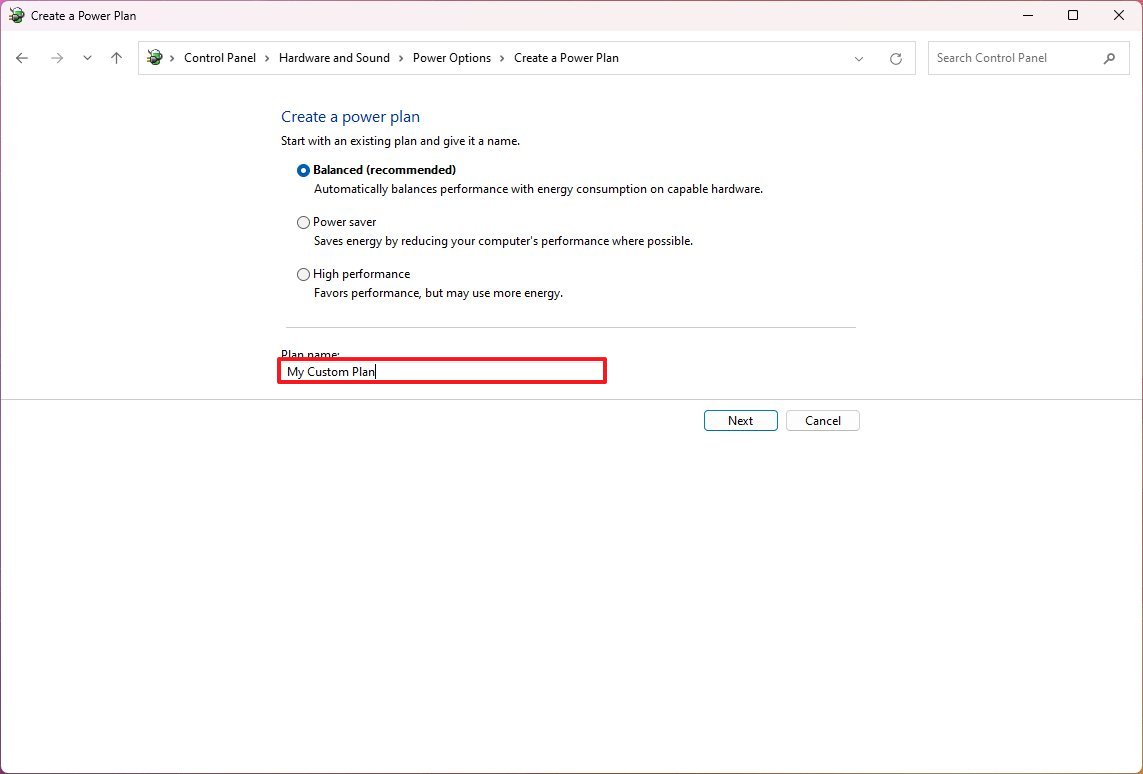
- Select the base power plan with the settings to start.
- Under the "Plan name" section, type a descriptive name for the new power scheme.
- Click the Next button.
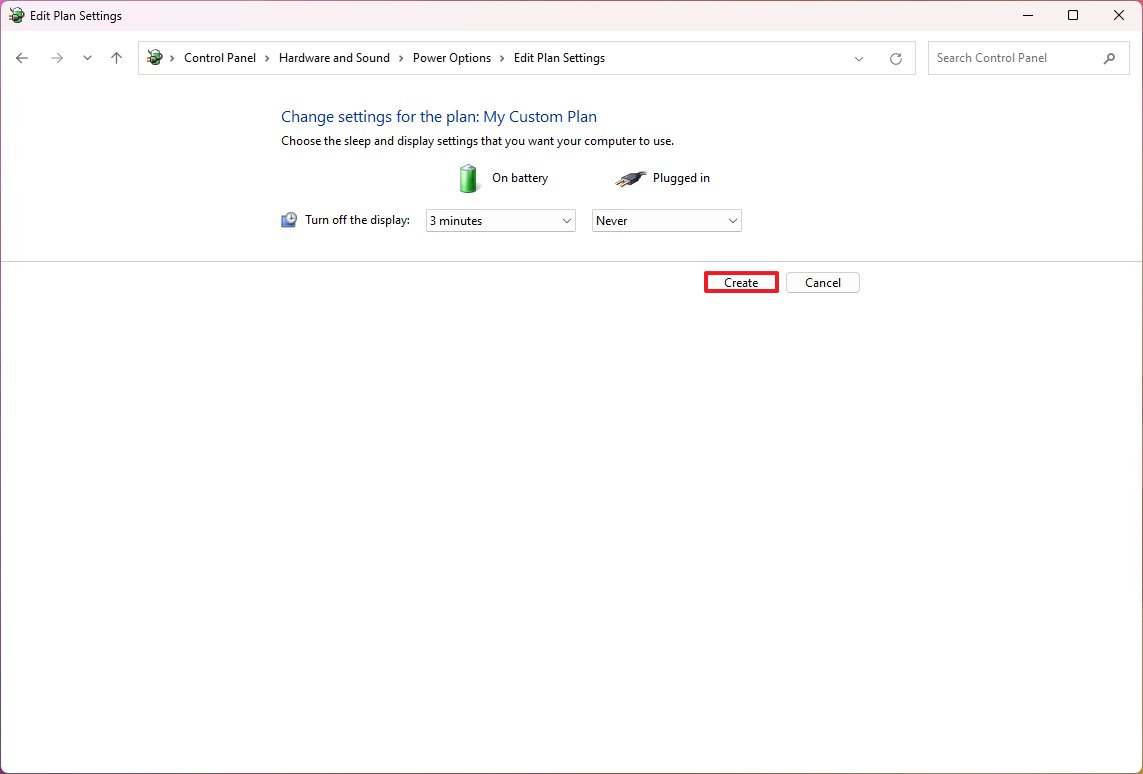
- Select when the device should turn off the display and go to sleep.
- Click the Create button.
Once you complete the steps, the new plan will be created, and you can now adjust its settings.
How to customize a power plan on Windows 11
To edit a custom power plan on Windows 11, use these steps:
- Open Control Panel.
- Click on Hardware and Sound.
- Click on Power Options.
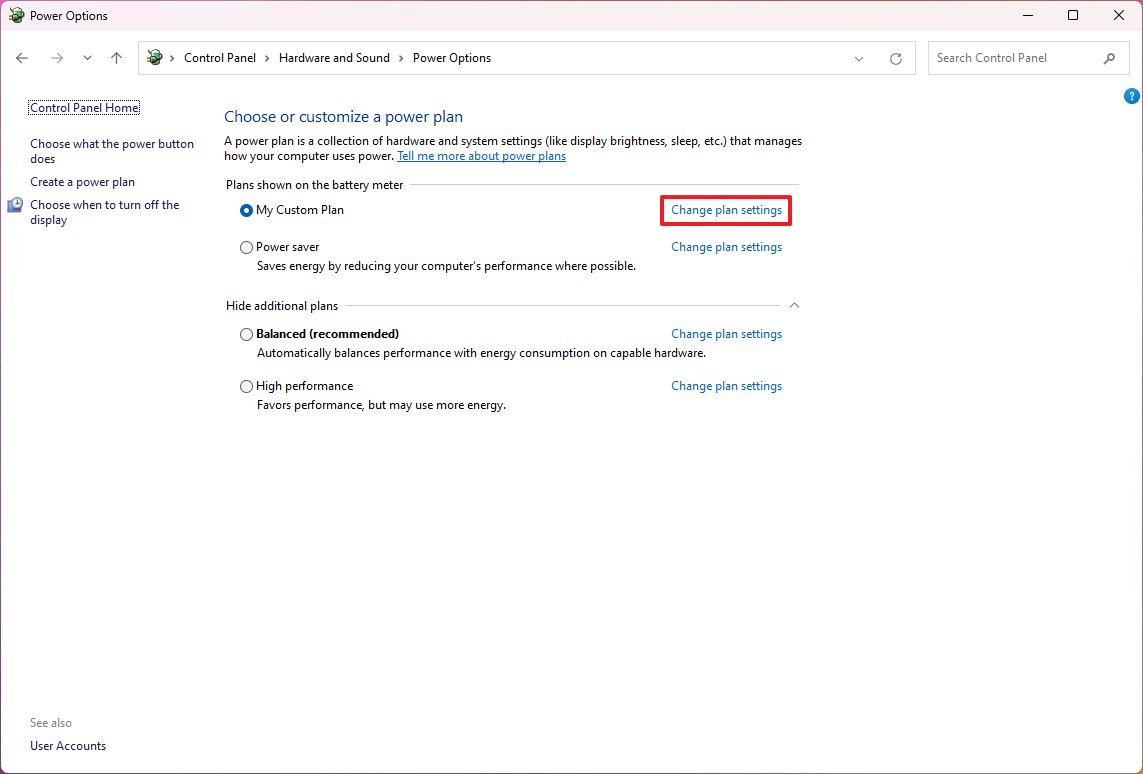
- Click the "Change plan settings" option next to the custom power plan.
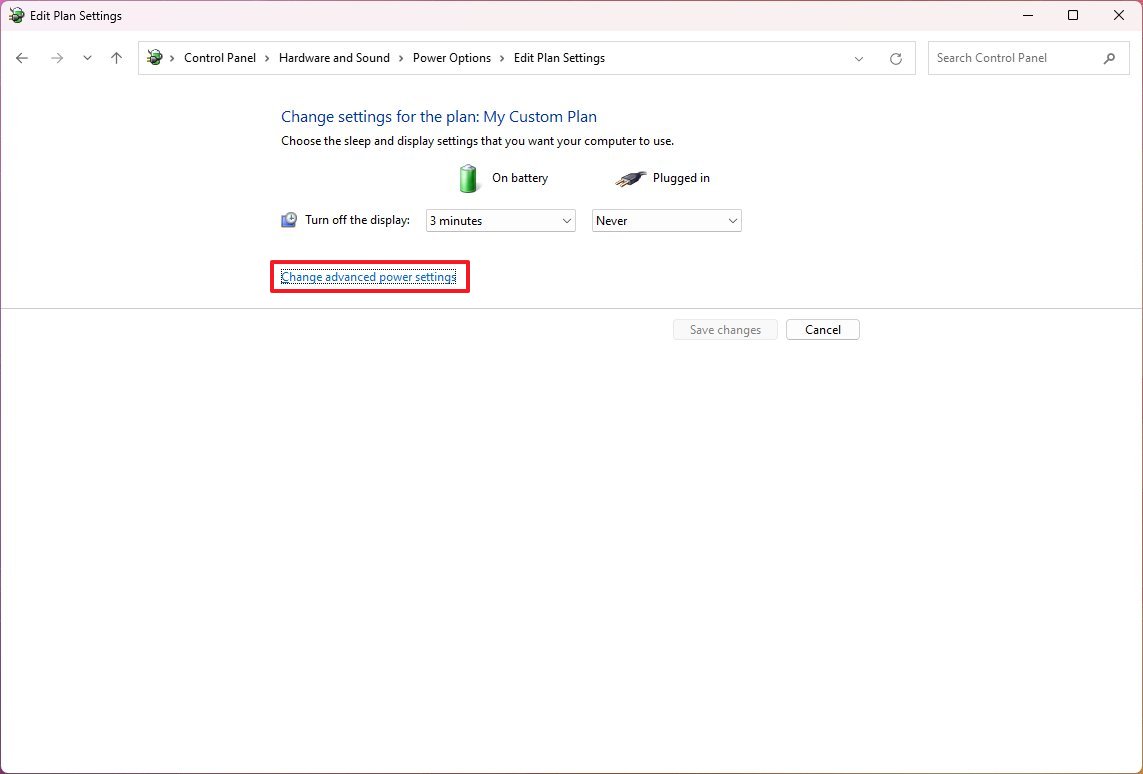
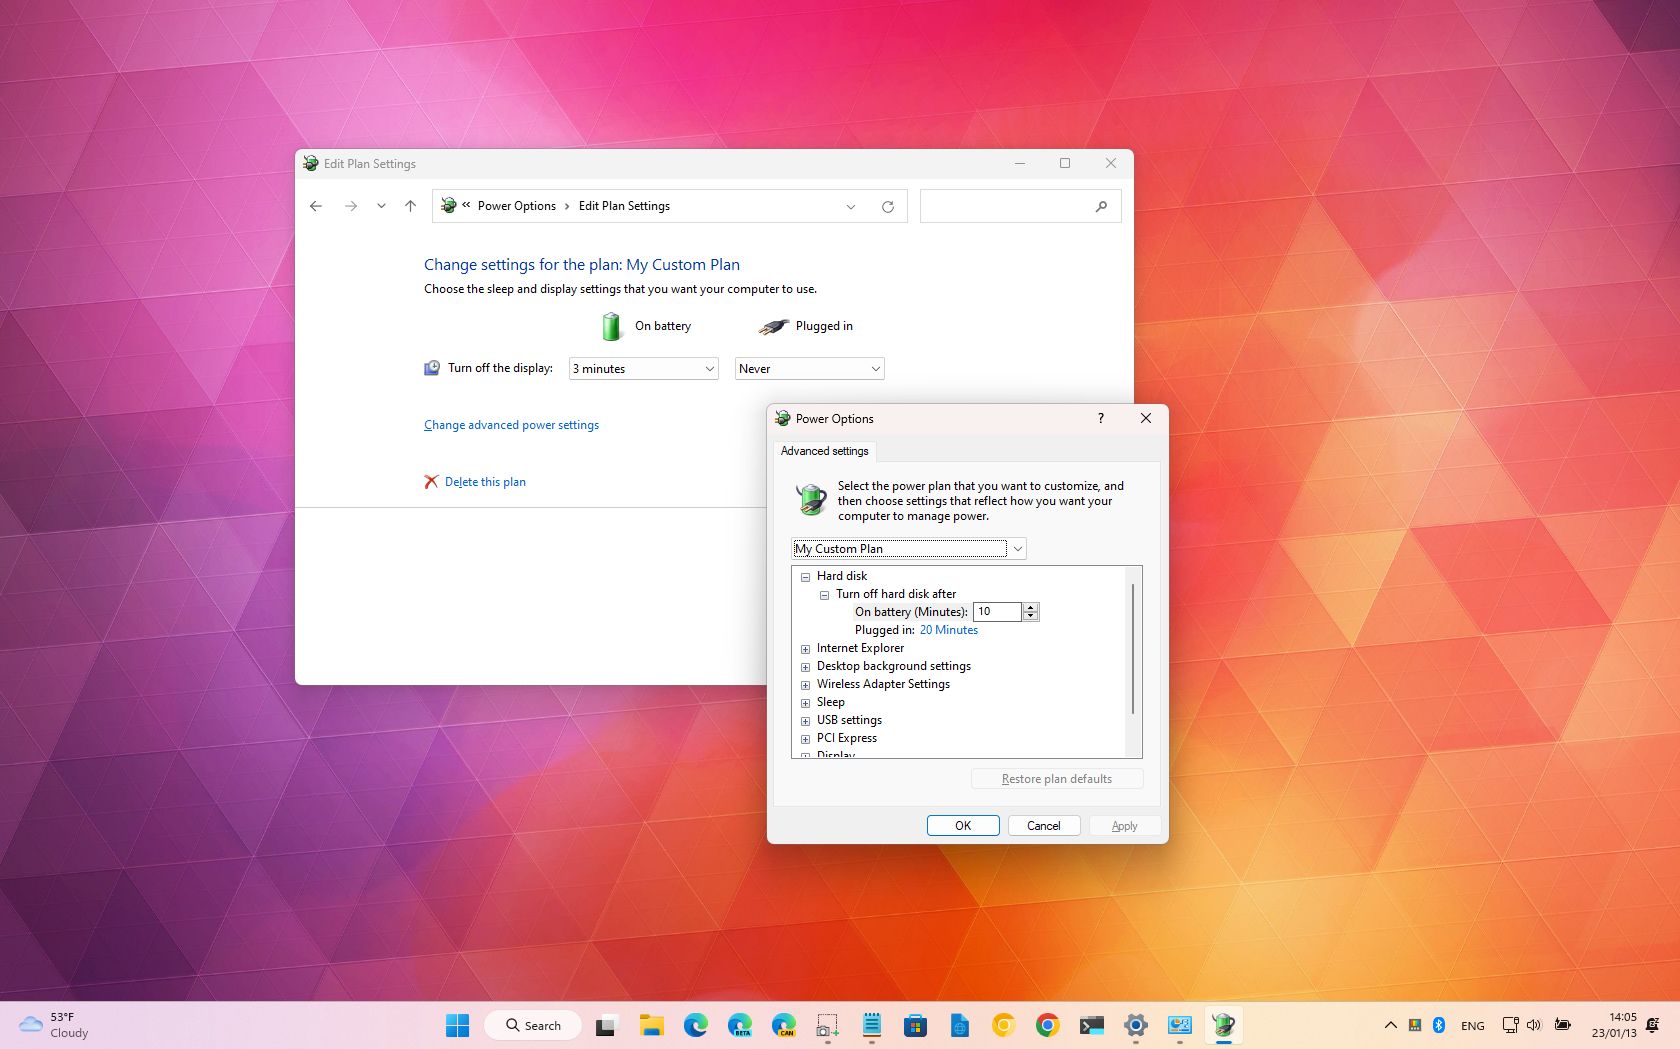
- Click the "Change advanced power settings" option.
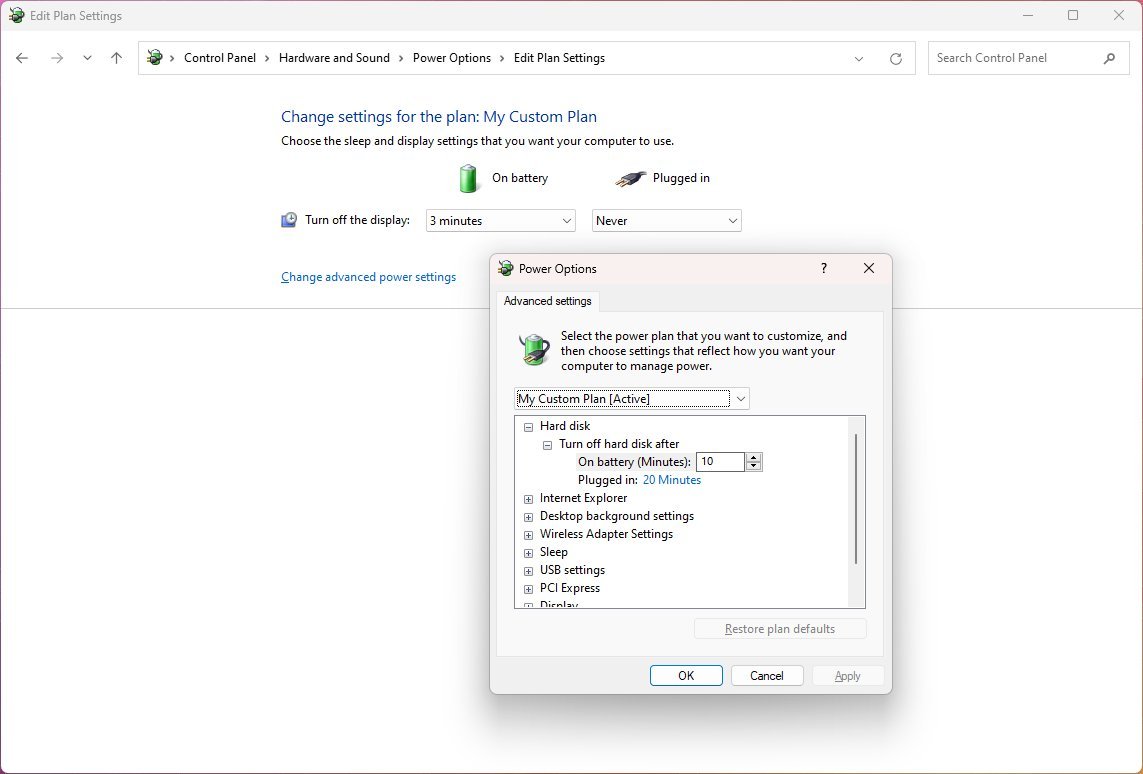
While on the "Advanced settings" tab, you can customize various settings, depending on whether you use a laptop or desktop computer.
All the latest news, reviews, and guides for Windows and Xbox diehards.
If you have a computer with a traditional rotating platter hard drive, you can use the "Hard disk" option to specify when to turn it off.
The "Wireless Adapter Settings" option lets you set the power mode of the adapter, which helps you save battery.
The "Sleep" option includes the settings to decide when the computer should sleep in battery mode or when plugged in. You can also control whether the wake timers should be enabled or disabled.
If available, you will also see the "USB settings" option that allows you to control the selective suspend setting to conserve battery.
The "Display" option lets you control when the display should turn off to save energy.
The "Battery" setting includes several options to control critical battery notification, critical battery action, low battery level, critical battery level, low battery notification, low battery action, and reserved battery level.
Usually, you won't be modifying these settings, but you can control the "Desktop background settings," which allows you to specify when the desktop background slide show should be available.
In the "PCI Express" settings, you can customize the power settings for the "Link State Power Management," which is part of the PCI Express specification and works in combination with the Active State Power Management (ASPM) to save energy for PCIe devices. (Typically, you want to use the default setting.)
Finally, you will also find the "Processor power management" (PPM) settings that allow you to change the processor's efficiency at the software level to optimize power consumption while on battery or plugged in. (Typically, you want to use the default setting.)
How to delete a power plan on Windows 11
Usually, you won't be modifying these settings, but you can control the "Desktop background settings," which allows you to specify when the desktop background slide show should be available.
- Open Control Panel.
- Click on Hardware and Sound.
- Click on Power Options.
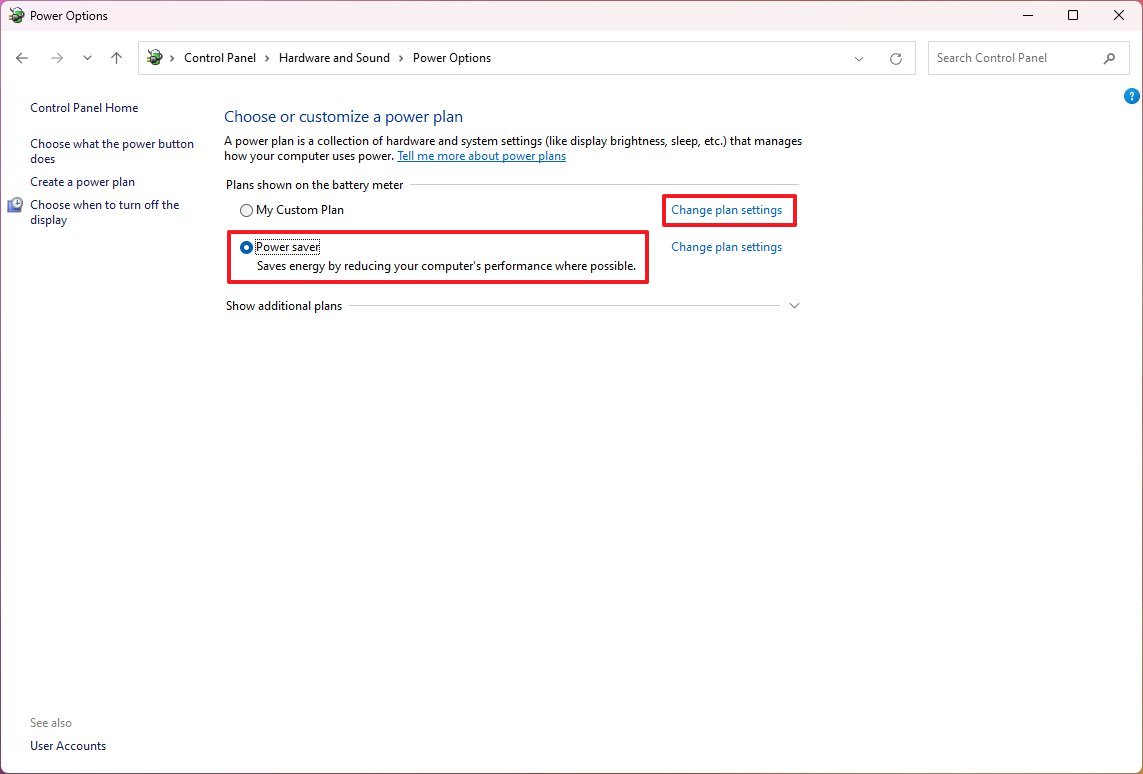
- Select a different power plan option if the one to delete is currently selected.
- Click the "Change plan settings" option next to the custom power plan.
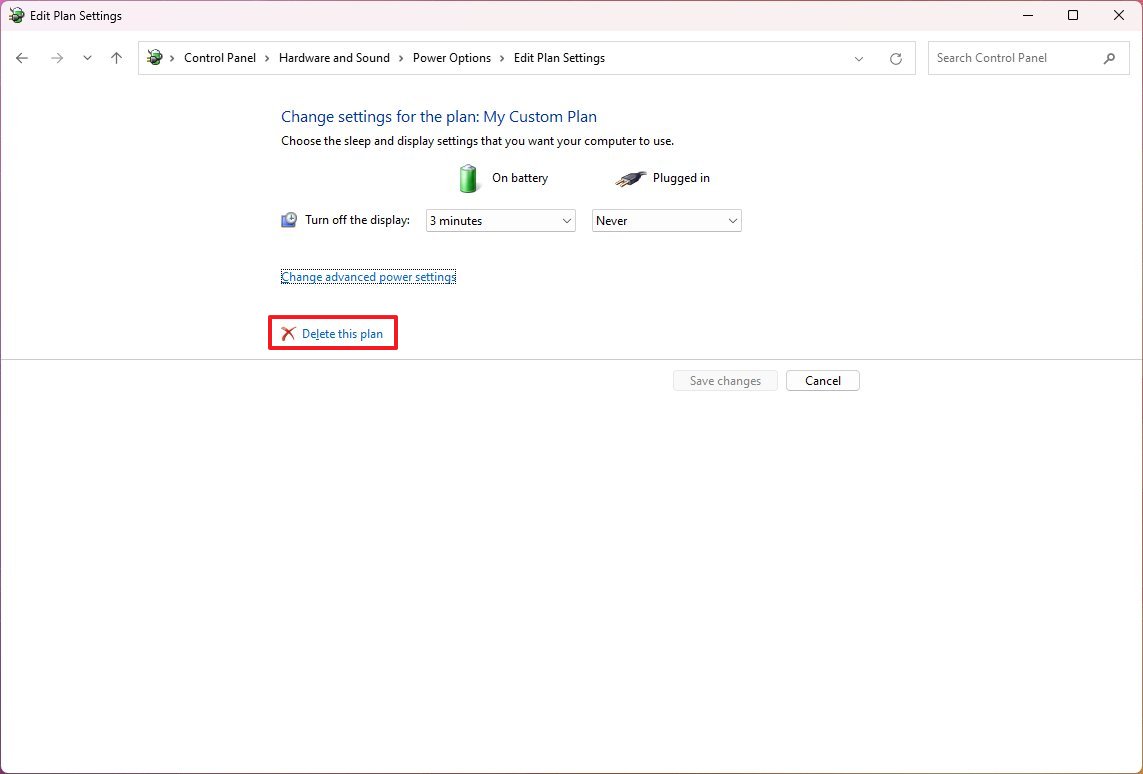
- Click the "Delete this plan" option.
- Click the OK button.
After you complete the steps, the power plan will no longer be available on the device.
It's important to note that a "power plan" is not the same as a "power mode." Although these features share some similarities, the power mode allows the system to optimize battery life on laptops and tablets. The power plan lets you customize the power usage for desktops, laptops, and tablets.
More resources
For more helpful articles, coverage, and answers to common questions about Windows 10 and Windows 11, visit the following resources:
- Windows 11 on Windows Central — All you need to know
- Windows 10 on Windows Central — All you need to know

Mauro Huculak has been a Windows How-To Expert contributor for WindowsCentral.com for nearly a decade and has over 22 years of combined experience in IT and technical writing. He holds various professional certifications from Microsoft, Cisco, VMware, and CompTIA and has been recognized as a Microsoft MVP for many years.
