How to reclaim space by reducing size of WinSxS folder on Windows 10
You can't delete the WinSxS folder, but you can clean it up to free up space on Windows 10, and here's how.
All the latest news, reviews, and guides for Windows and Xbox diehards.
You are now subscribed
Your newsletter sign-up was successful
On Windows 10, "WinSxS" (Windows Side by Side) is an essential folder within the "Windows" folder, which houses most of the components to customize and update the current setup. For example, inside the WinSxS folder are the files to add or remove features, switch editions, recover damaged or missing system files, and pretty much everything else that makes up the operating system.
Also, when installing quality updates, the new components will store in the WinSxS folder, and the previous version of the components in case rolling back to an earlier build is necessary to deal with a buggy update. As a result, the folder will continue to increase its size over time without a set limit.
While the WinSxS folder is expected to grow over time, the actual size on the disk isn't as big as it may seem. The problem is that most people would use File Explorer to calculate its size. Because the folder uses "hard linking," a technique that allows the creation of pointers of an original file with entirely different names and locations in the same partition, they'll appear as separate files to applications (such as File Explorer) reporting the wrong size.
If you try to free up space, you won't be able to delete the WinSxS folder. However, it's possible to reduce its size by deleting those files that are no longer required for Windows 10. You can accomplish this task using Command Prompt, Storage Sense, and even the legacy Disk Cleanup tool.
This guide will walk you through the steps to properly clean up the WinSxS folder to reclaim storage space on Windows 10.
How to reduce size of WinSxS folder using Command Prompt
Checking WinSxS folder size
To determine the actual size of the WinSxS folder, use these steps:
All the latest news, reviews, and guides for Windows and Xbox diehards.
- Open Start.
- Search for Command Prompt, right-click the top result, and select the Run as administrator option.
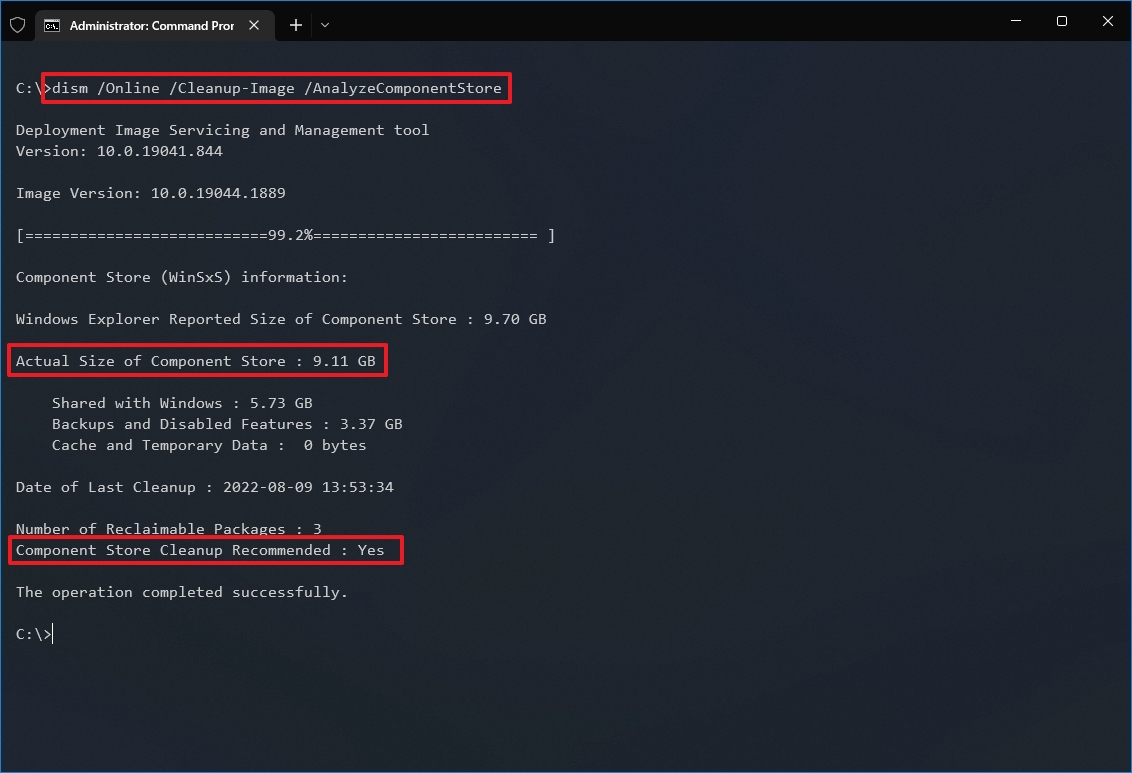
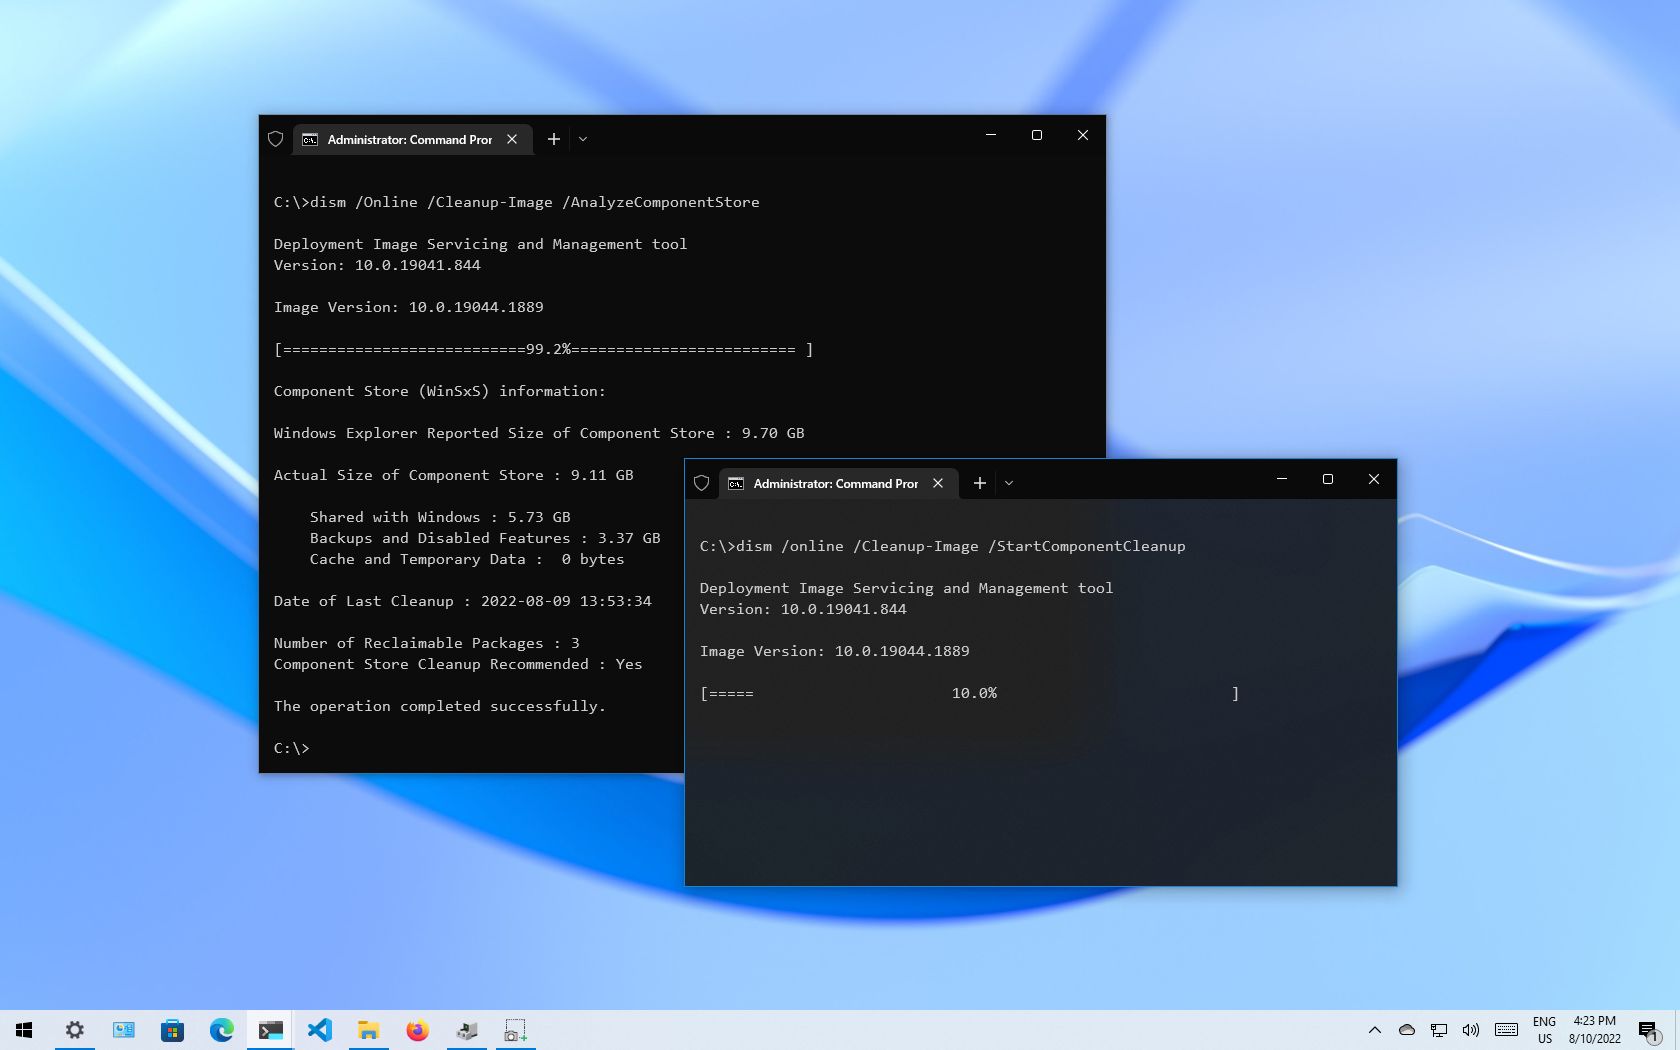
- Type the following command to determine the size of the WinSxS folder and press Enter: dism /Online /Cleanup-Image /AnalyzeComponentStore
- Confirm the reported size of the component store to see how much space the WinSxS folder is taking.
- Check the "Component Store Cleanup Recommended" information to determine whether cleanup is necessary.
Once you complete the steps, you'll be able to determine the size of the Windows Side by Side folder and whether cleanup is recommended.
In addition, the command will return other useful information, such as how much of the components are shared with Windows 10 as well as the size for backups and disabled features, and the last time you used the cleanup tool.
Cleaning up WinSxS folder
To reduce the size of the WinSxS folder using Command Prompt, use these steps:
- Open Start.
- Search for Command Prompt, right-click the top result, and select the Run as administrator option.
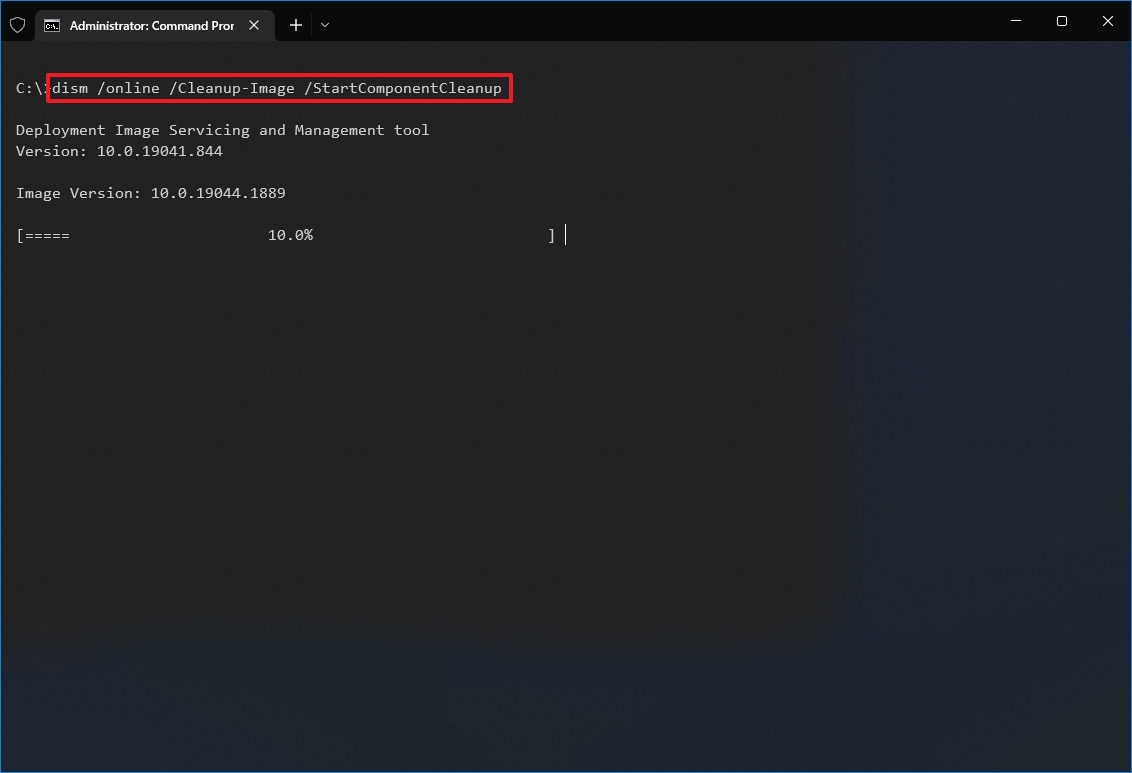
- Type the following command to determine the size of the WinSxS folder and press Enter: dism /online /Cleanup-Image /StartComponentCleanup
After you complete the steps, the command will run to delete those components wasting space on the hard drive. However, once the WinSxS is clean, you won't be able to roll back to a previous build until the next update.
If you want to determine how much space you have reclaimed using Command Prompt, you can re-run the command to analyze the folder and compare the "Actual Size of Component Store" values with the previous result.
How to reduce size of WinSxS folder using Storage Sense
To clean up the WinSxS folder with Storage sense, use these steps:
- Open Settings.
- Click on System.
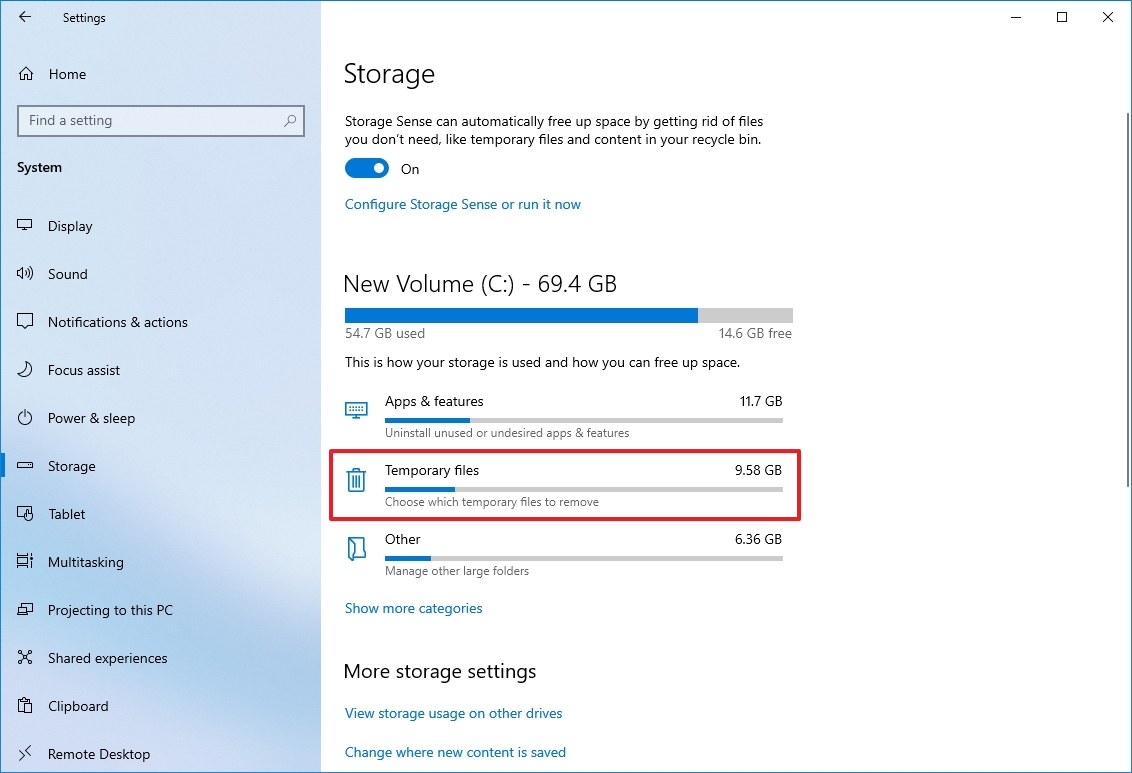
- Click on Storage.
- Under the "Local Disk" section, click the Temporary files option.
- Quick tip: If you don't see the item, click the Show more categories option to find it.
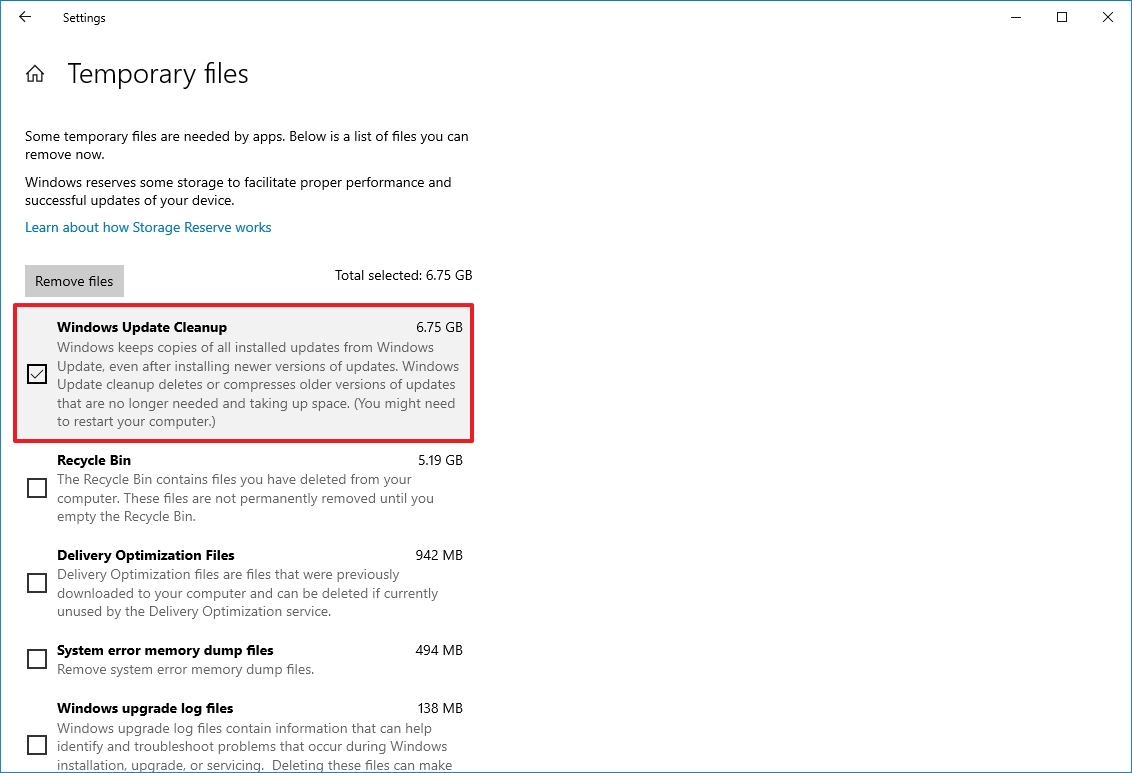
- Clear the default selection.
- Check the Windows Update Cleanup option.
- Click the Remove files option.
Once you complete the steps, the Windows Update Cleanup item will disappear from Storage sense, but it doesn't mean that the WinSxS folder is no longer available. It'll still be part of the "Windows" folder, but without the files that may unnecessarily be using space on the primary hard drive.
How to reduce size of WinSxS folder using Disk Cleanup
Alternatively, you can also shrink the size of the WinSxS folder with the legacy Disk Cleanup tool using these steps:
- Open File Explorer.
- Click on This PC from the left pane.
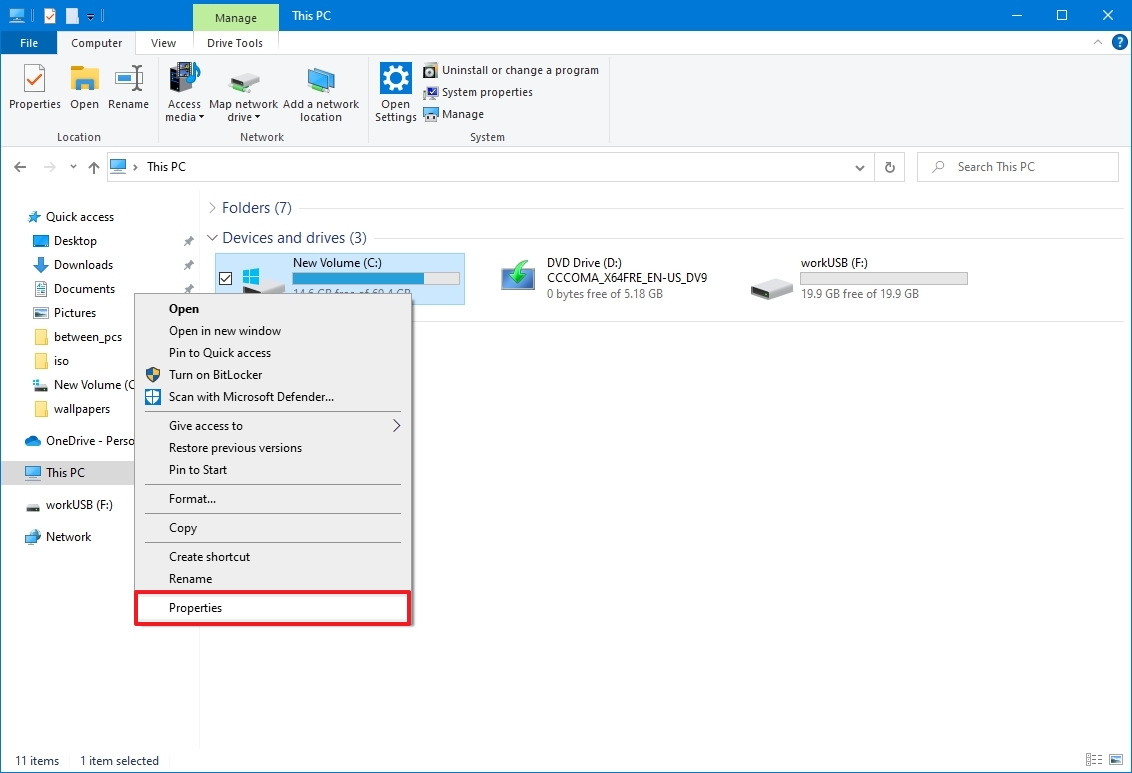
- Under the "Devices and drives" section, right-click the "Local Disk" drive and select the Properties option.
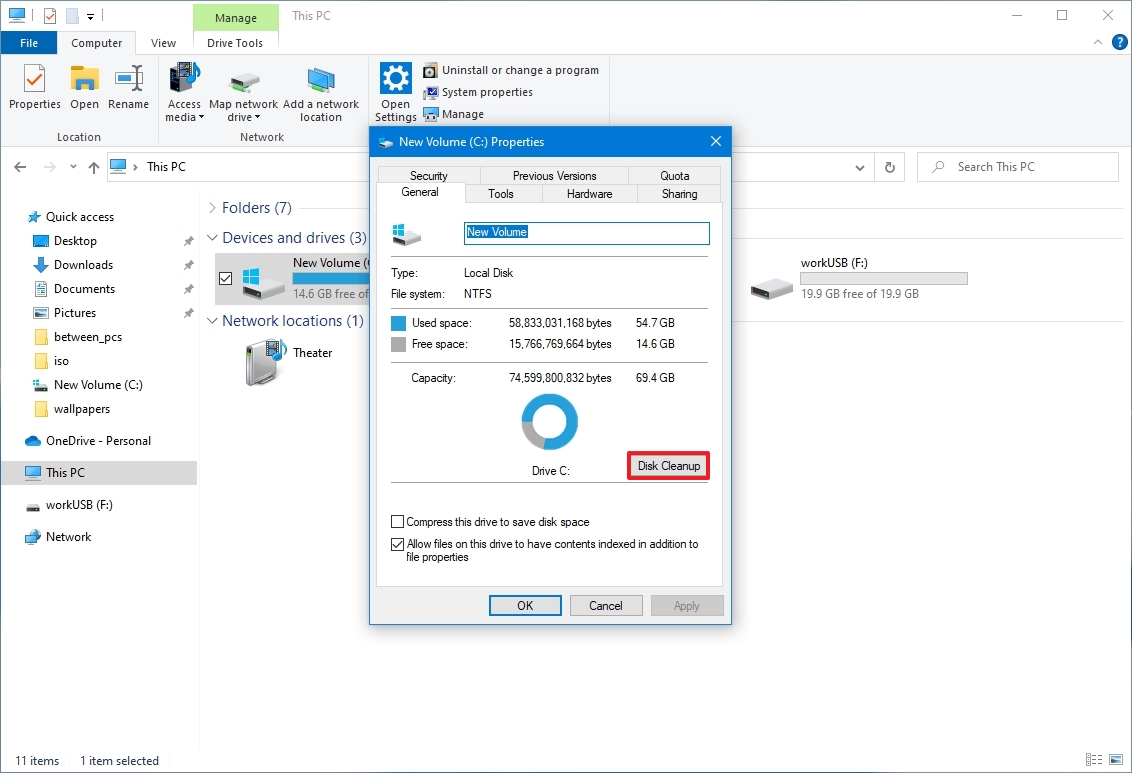
- Click the General tab.
- Click the Disk Cleanup button.
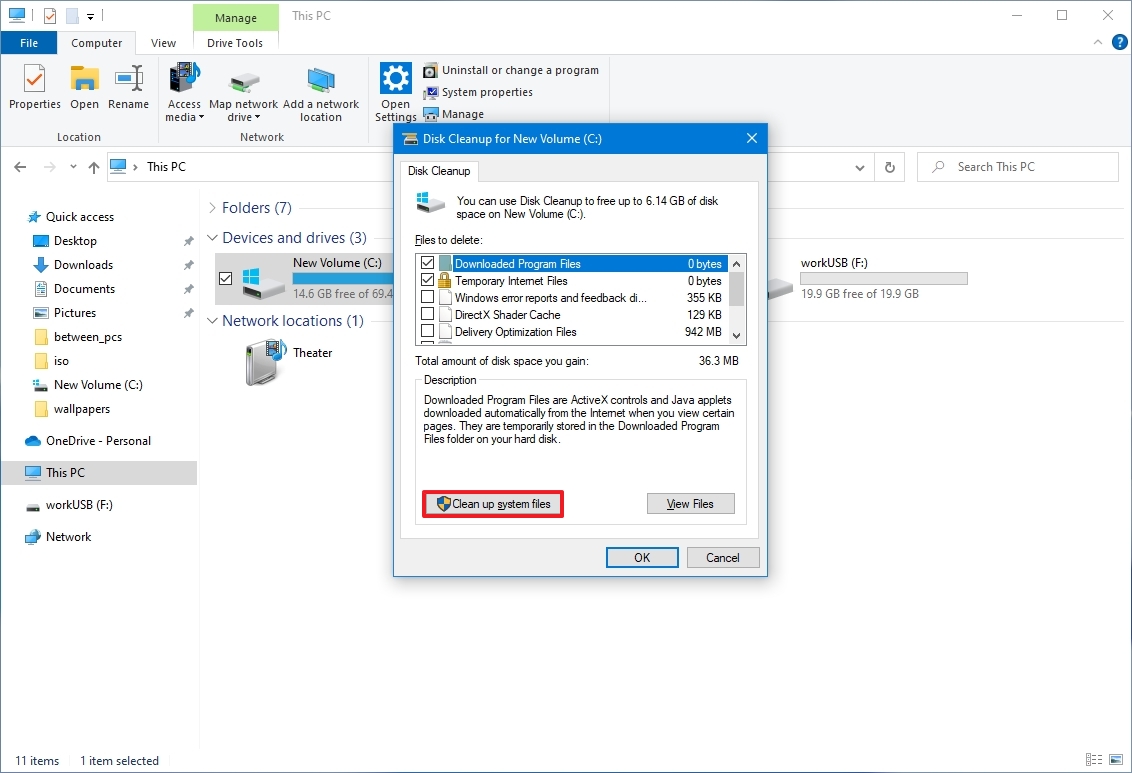
- Click the Clean up system files button.
- Clear the default selection.
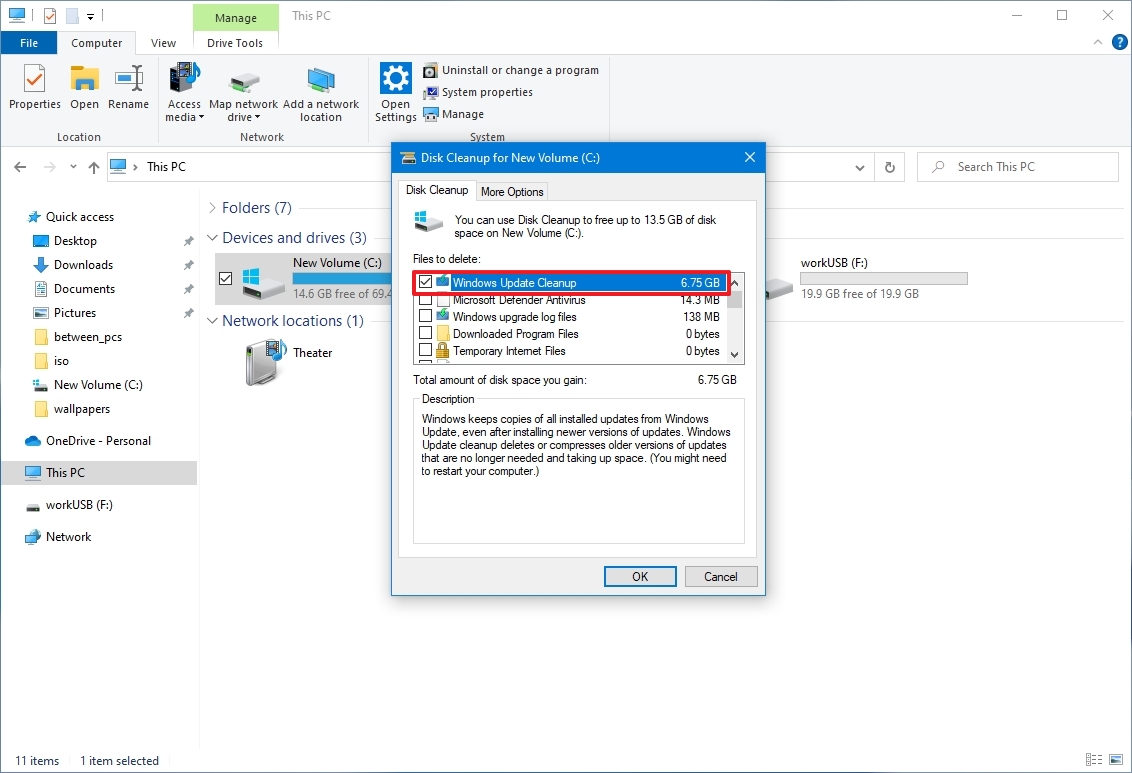
- Check the Windows Update Cleanup option.
- Click the OK button.
After you complete the steps, the Disk Cleanup tool will delete all the temporary files found inside WinSxS, but without removing the folder.
While these instructions will help to reduce the footprint of WinSxS, the folder will eventually increase in size again as new updates and components become available. As part of the maintenance process, Windows 10 will reduce the folder size automatically, but you can always repeat the steps regularly to keep it as small as possible.
If you're looking for other ways to free up space on Windows 10, check out this comprehensive guide with the best tips to delete temporary files from your computer.
More resources
For more helpful articles, coverage, and answers to common questions about Windows 10 and Windows 11, visit the following resources:

Mauro Huculak has been a Windows How-To Expert contributor for WindowsCentral.com for nearly a decade and has over 22 years of combined experience in IT and technical writing. He holds various professional certifications from Microsoft, Cisco, VMware, and CompTIA and has been recognized as a Microsoft MVP for many years.
