How to start and stop services manually on Windows 10
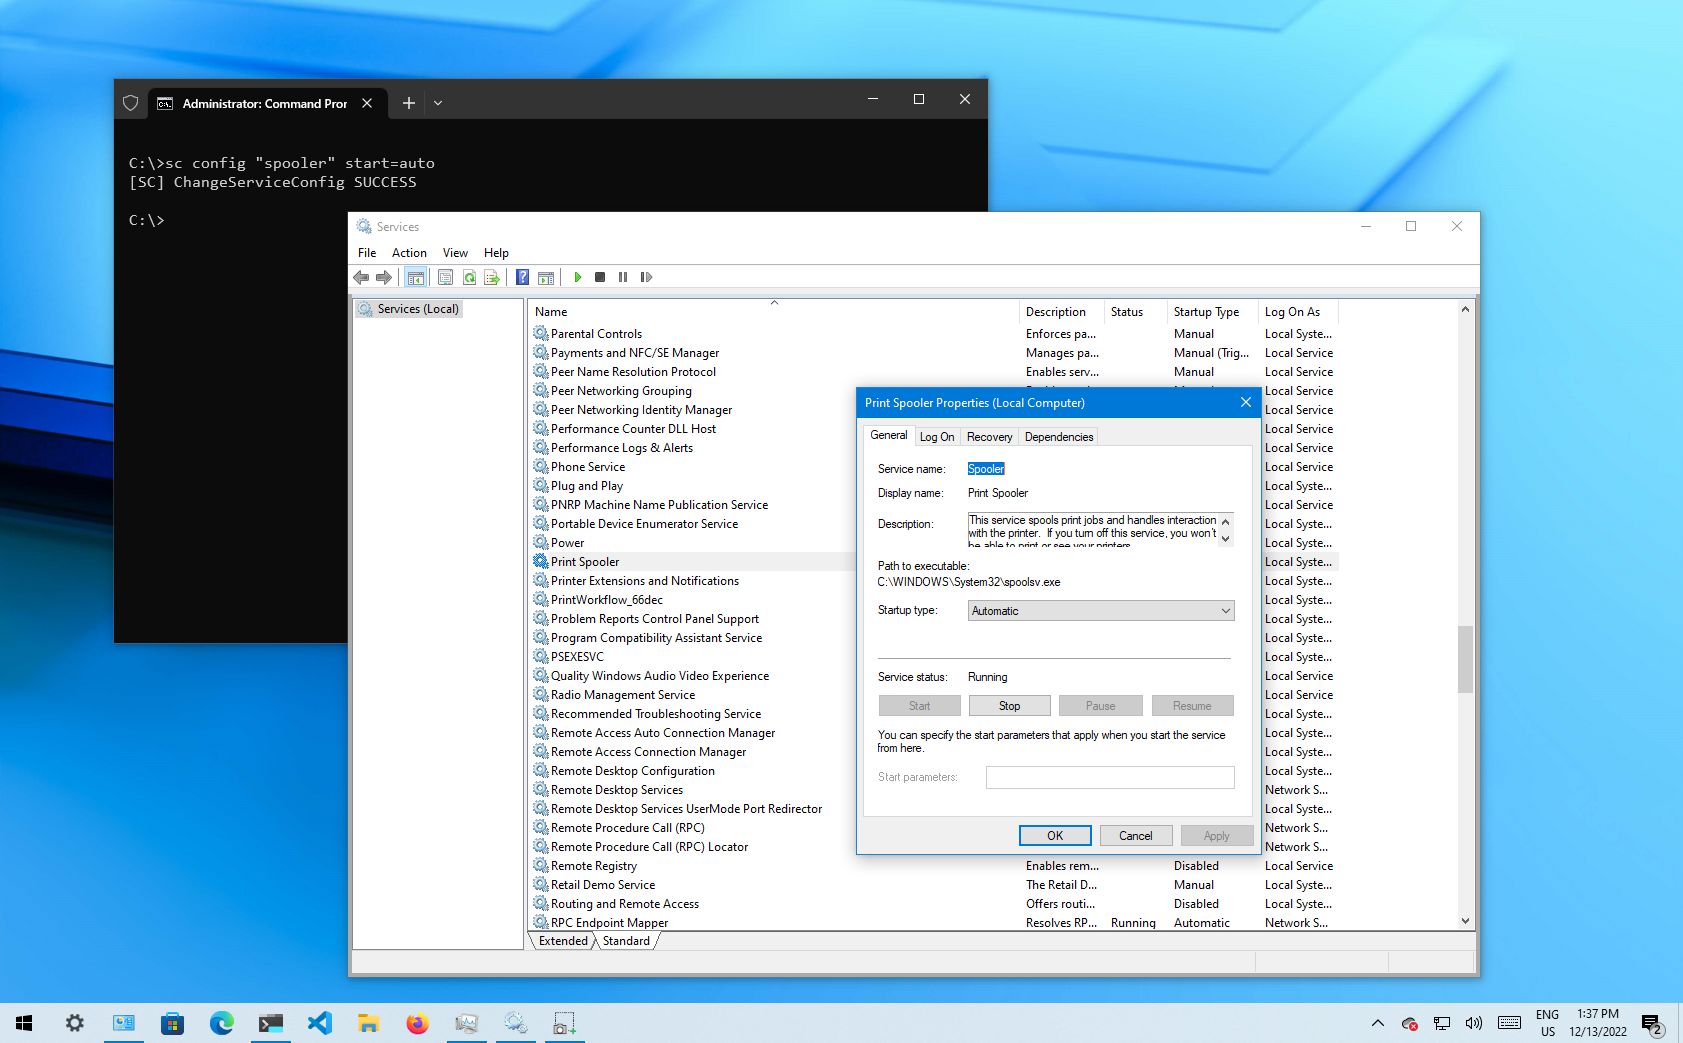
Here are four ways to manage services on Windows 10.
All the latest news, reviews, and guides for Windows and Xbox diehards.
You are now subscribed
Your newsletter sign-up was successful
On Windows 10, services are programs that run in the background without a user interface and enable system features (such as printing, networking, remote access, File Explorer, Windows Search, updates, etc.) and apps to operate as intended.
Although the system does a pretty good job managing background services, you may sometimes need to control them manually when a feature or app isn't working correctly or requires you to manage its services manually.
Whatever the case might be, Windows 10 includes at least four methods to stop, start, disable, or enable services using the Services console, Task Manager, Command Prompt, and PowerShell.
This guide will walk you through the steps to manage system and app services on Windows 10.
How to manage services from Services console
Using the Services consoles is perhaps the simplest method to stop, start, disable, or enable one or multiple services on Windows 10.
Stop service
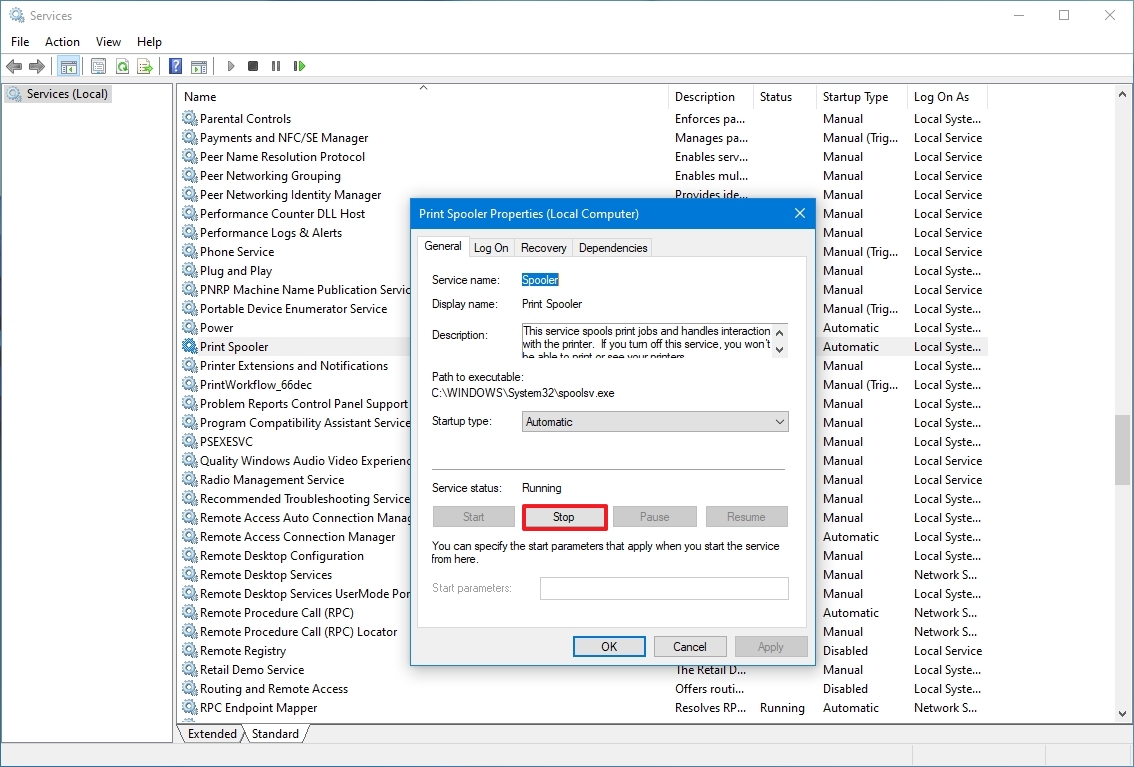
To stop a running service using Services, use these steps:
All the latest news, reviews, and guides for Windows and Xbox diehards.
- Open Start.
- Search for Services and click the top result to open the console.
- Double-click the service that you intend to stop.
- Click the Stop button.
- Quick tip: You can also manage the state by right-clicking the service and selecting the option. Or you can select the service and then use the controls at the top to start, stop, pause, or restart.
- Click the Apply button.
- Click the OK button.
Once you complete the steps, the service will stop running on the device.
If you're unable to stop a system service, consider that some services are required for the operation of Windows 10, and they can't be stopped.
Start service
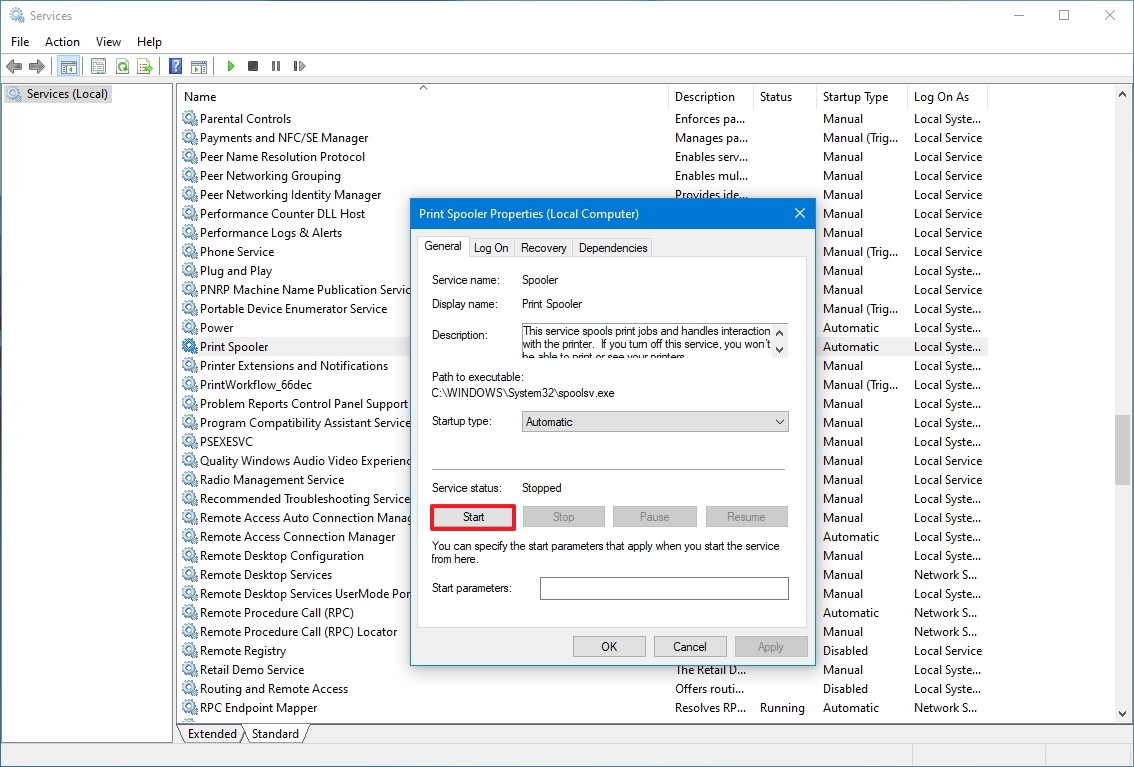
To start a service on Windows 10, use these steps:
- Open Start.
- Search for Services and click the top result to open the console.
- Double-click the service that you intend to stop.
- Click the Start button.
- Click the Apply button.
- Click the OK button.
After you complete the steps, the service you specified will start for the current session.
Disable service
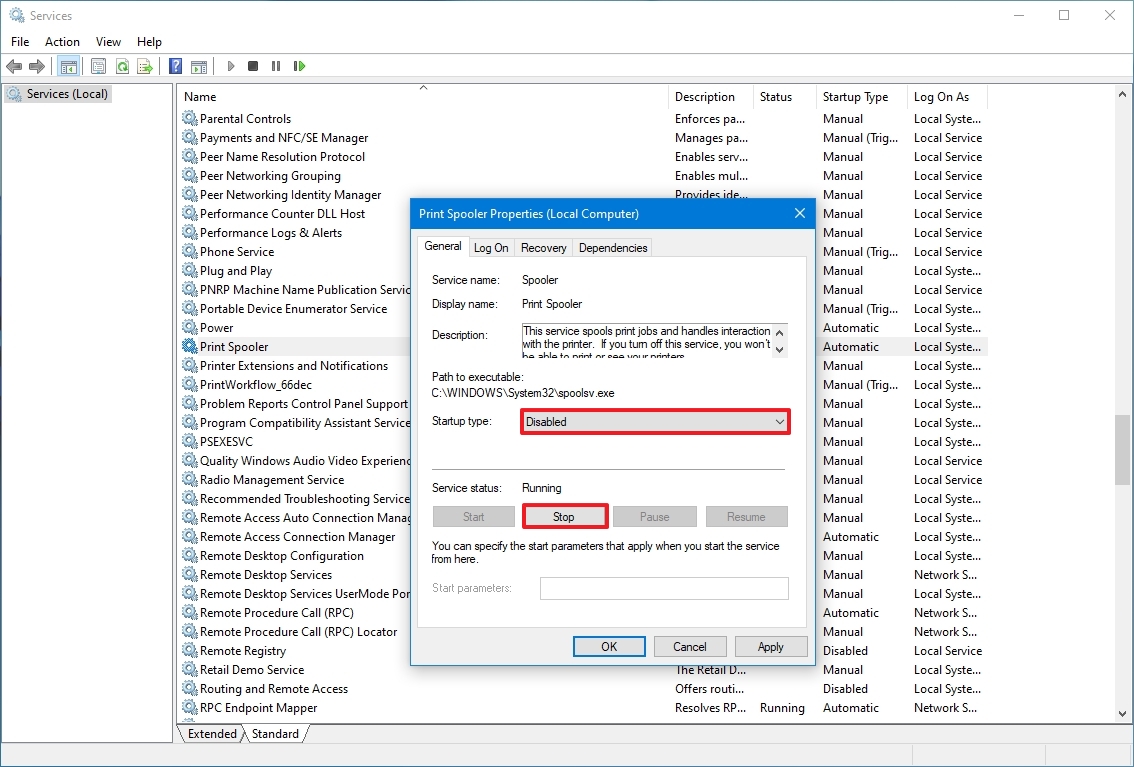
To set a service a disabled, use these steps:
- Open Start.
- Search for Services and click the top result to open the console.
- Double-click the service that you intend to stop.
- Click the Stop button.
- Use the "Start type" drop-down menu and select the Disabled option.
- Click the Apply button.
- Click the OK button.
Once you complete the steps, the service will no longer start automatically after restarting your device.
Enable service
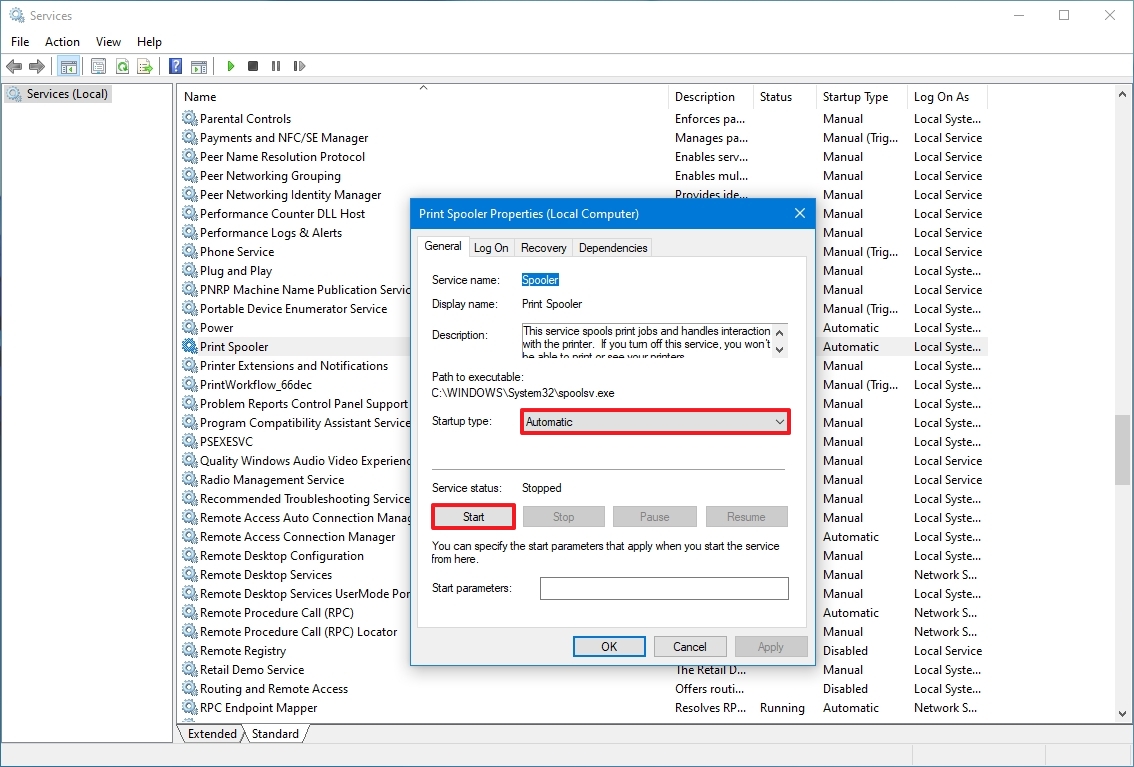
To enable a specific service, use these steps:
- Open Start.
- Search for Services and click the top result to open the console.
- Double-click the service that you intend to stop.
- Click the Start button.
- Use the "Start type" drop-down menu and select the Automatic option. These are the Startup types on Windows 10:
- Automatic – service starts at boot.
- Automatic (Delayed Start) – service start after boot.
- Manual – starts service manually as needed.
- Disabled – stops service from running.
- Click the Apply button.
- Click the OK button.
After you complete the steps, the Windows 10 or app service will enable, but if it was in a stopped state, you'd need to start it manually or restart the device for the service to run.
How to manage services from Task Manager
Task Manager also includes a section to manage services for Windows 10 and apps quickly.
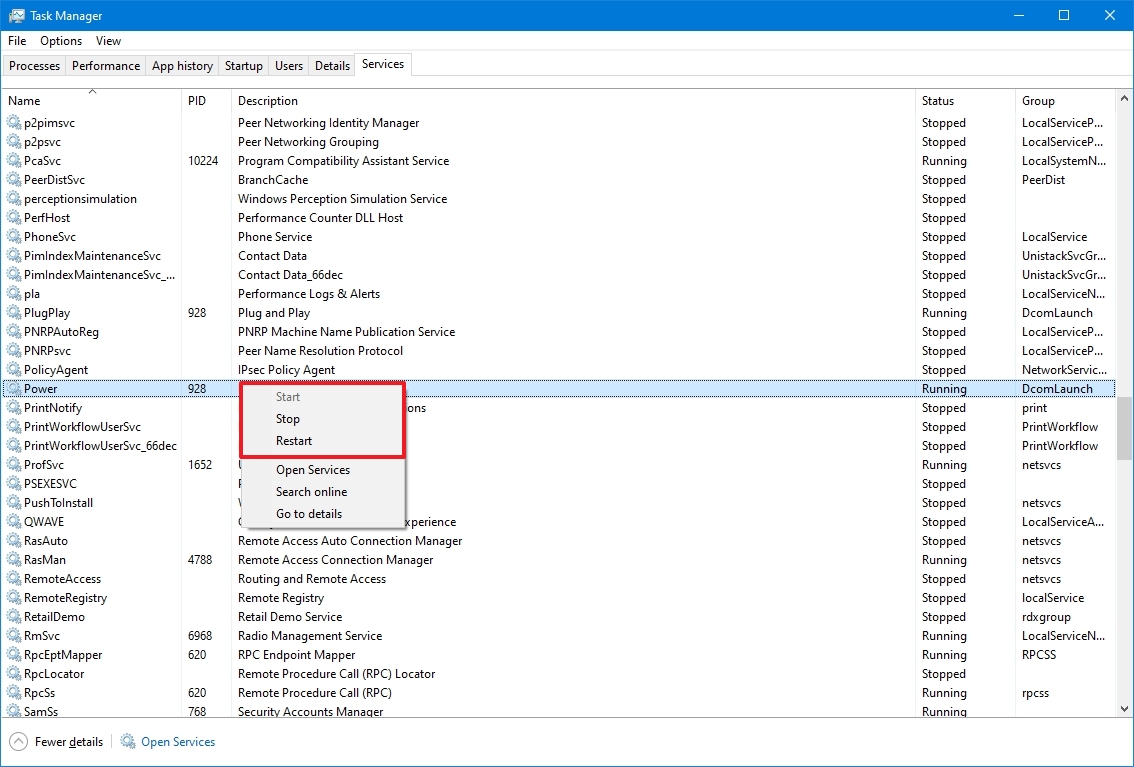
To stop, start, or restart a service using Task Manager, use these steps:
- Open Start.
- Search for Task Manager and click the top result to open the app.
- Quick tip: Windows 10 includes many other ways to open the experience, including right-clicking the taskbar and selecting the Task Manager option, and using the "Ctrl + Shift + ESC" keyboard shortcut.
- Click the Services tab.
- Right-click the service name and select one of the options:
- Stop.
- Start.
- Restart.
- Quick note: Task Manager only displays the service name, not the display name. For example, if you're using this method, you'll the "Print Spooler" defined as "Spooler."
Once you complete the steps, the service will respond to the option you selected.
How to manage services from PowerShell
You can also use PowerShell commands to manage background services for Windows 10 and apps.
Stop service
To stop a specific service with PowerShell, use these steps:
- Open Start.
- Search for PowerShell, right-click the top result, and select the Run as administrator option.
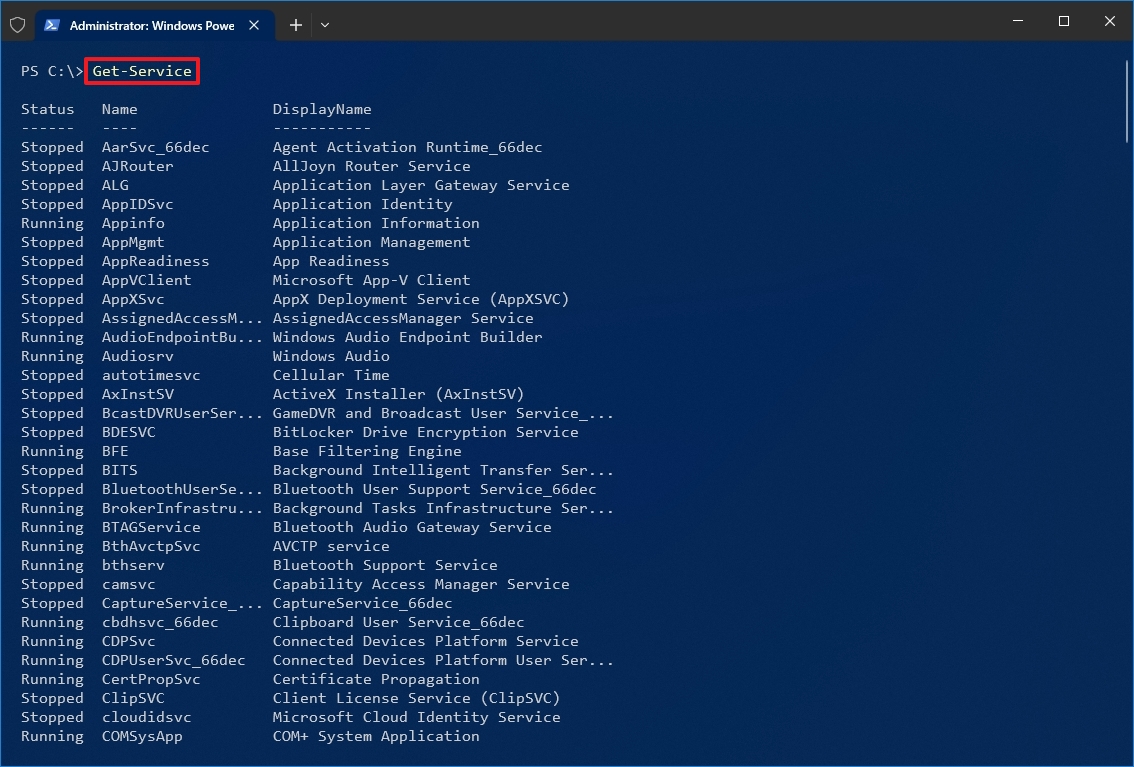
- (Optional) Type the following command to view a list of all the services and press Enter: Get-Service
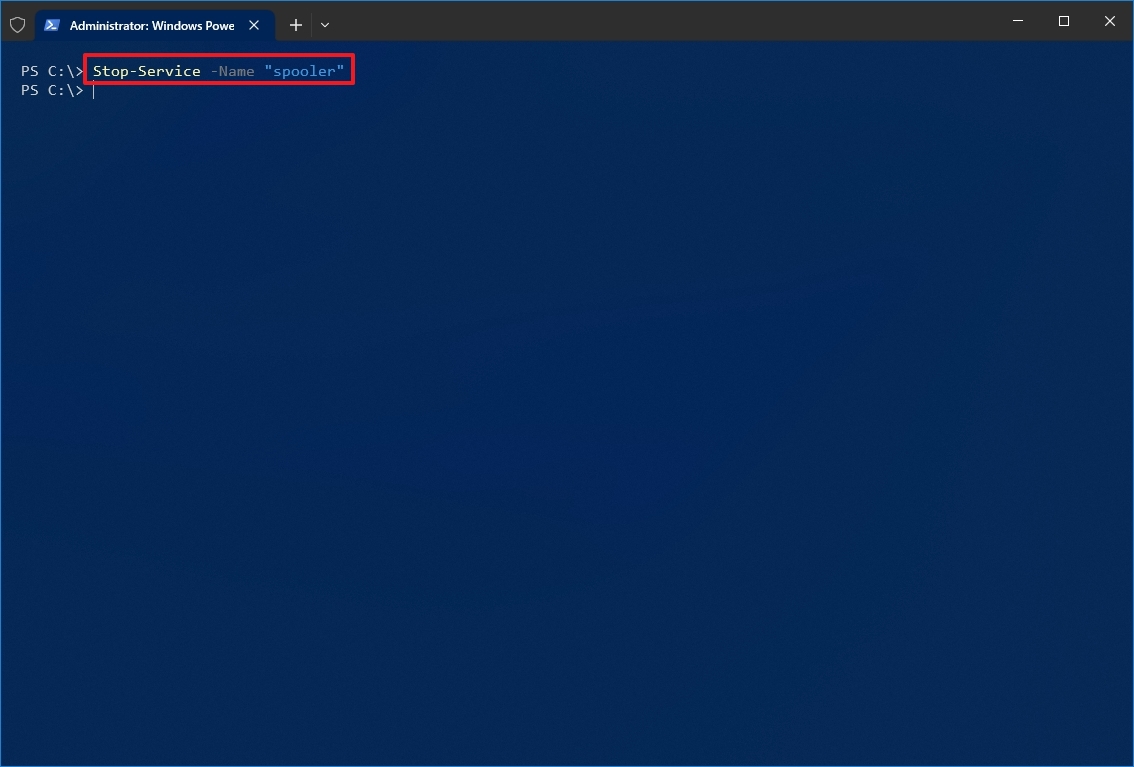
- Type the following command to stop a service and press Enter: Stop-Service -Name "SERVICE-NAME"
For example, this command stops the printer spooler service on Windows 10: Stop-Service -Name "spooler"
In the command, replace "SERVICE-NAME" with the name of the service you intend to stop. If you want to use the display name, replace -Name with -DisplayName and then specify the service's display name.
Alternatively, you can also use this variant of the command to stop the service: Set-Service -Name "SERVICE-NAME" -Status stopped
In the command, replace "SERVICE-NAME" with the name of the service you intend to stop. If you want to use the display name, replace -Name with -DisplayName and then specify the service's display name. You only need quotation marks if there's a space within the name.
- Quick tip: If you're getting a dependency error, you can append the -force option in either of the commands to stop the service. For example, Stop-Service -Name "SERVICE-NAME" -Force.
After you complete the steps, the PowerShell command will stop the service on your device.
Start service
To start a Windows 10 or app service with PowerShell, use these steps:
- Open Start.
- Search for PowerShell, right-click the top result, and select the Run as administrator option.
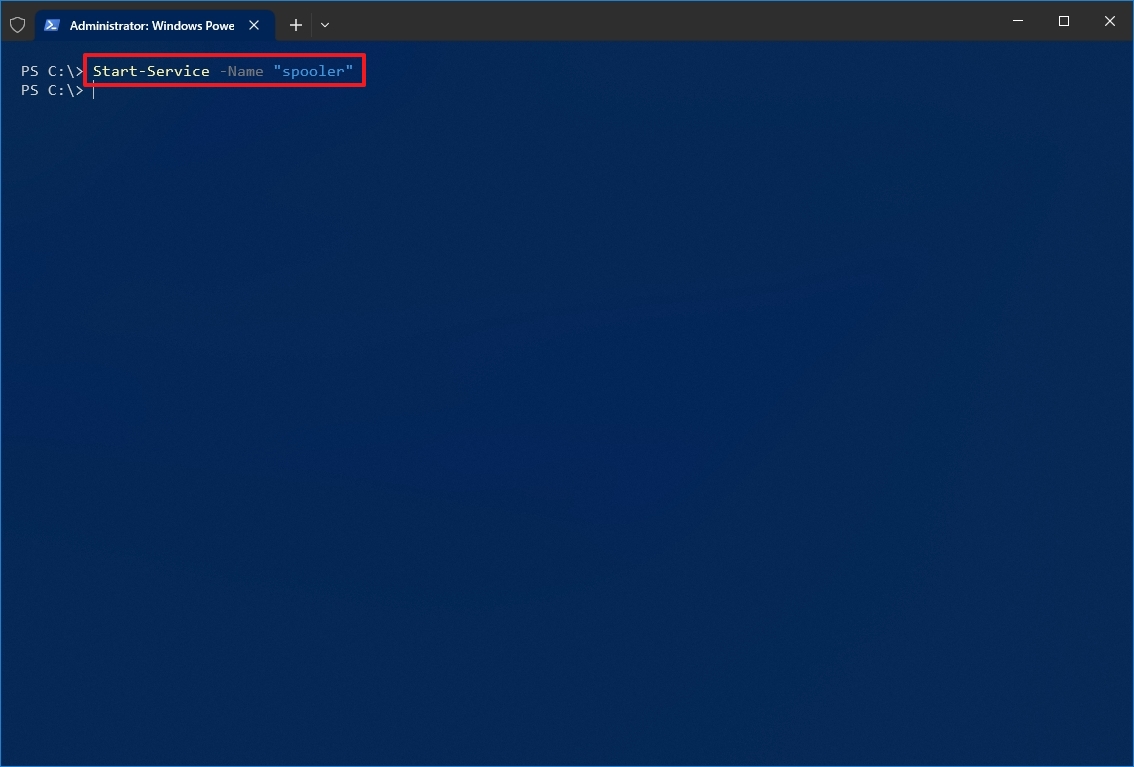
- Type the following command to start a service and press Enter: Start-Service -Name "SERVICE-NAME"
For example, this command starts the printer spooler service on Windows 10: Start-Service -Name "spooler"
In the command, replace "SERVICE-NAME" with the name of the service. Using the display name is supported, replacing -Name with -DisplayName and specifying the service's display name.
Alternatively, you can also use this variant of the command to start a service: Set-Service -Name "SERVICE-NAME" -Status running
In the command, replace "SERVICE-NAME" with the name of the service. If you want to use the display name, replace -Name with -DisplayName and then specify the service's display name.
Once you complete the steps, the service will start on your computer.
Disable service
To disable a service using a PowerShell command, use these steps:
- Open Start.
- Search for PowerShell, right-click the top result, and select the Run as administrator option.
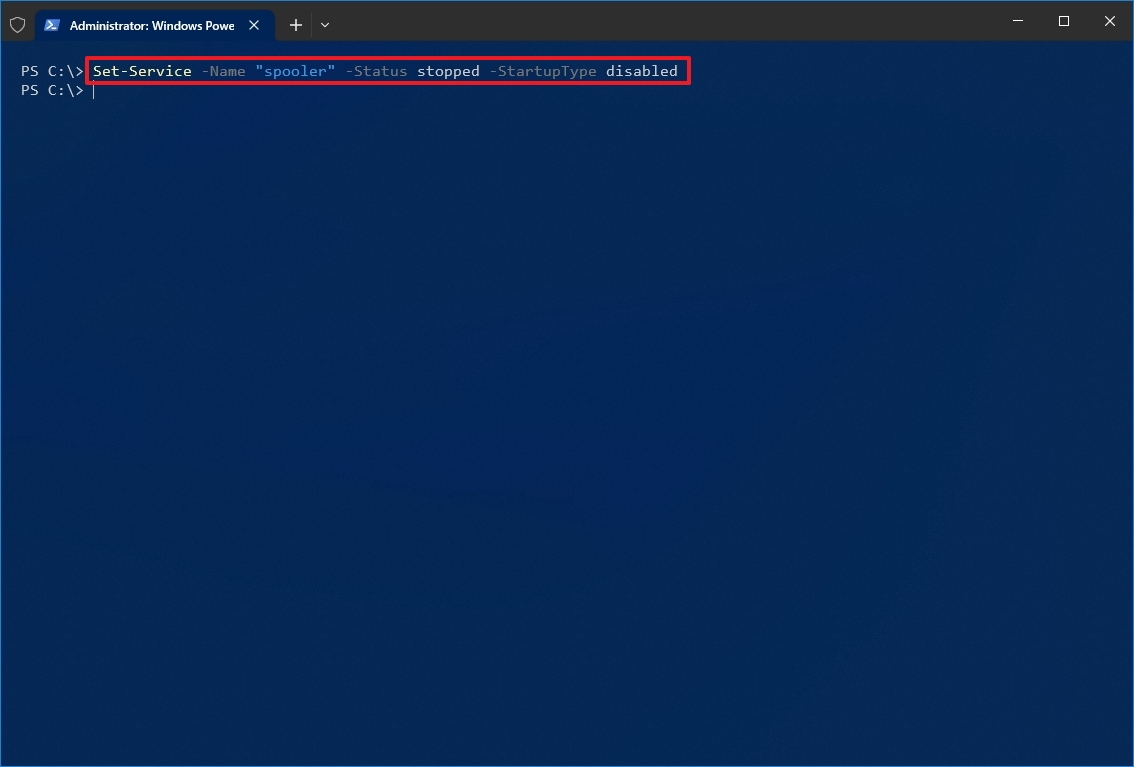
- Type the following command to disable a service and press Enter: Set-Service -Name "SERVICE-NAME" -Status stopped -StartupType disabled
In the command, update "SERVICE-NAME" for the name of the service. If you want to use the service's display name, replace -Name with -DisplayName and specify the service name. If you want to disable the service without stopping it immediately, you can remove the -Status stopped portion of the command.
For example, this command disables the printer spooler service on Windows 10: Set-Service -Name "spooler" -Status stopped -StartupType disabled
After you complete the steps, the PowerShell command will disable the specified service.
Enable service
To enable a specific background service with PowerShell, use these steps:
- Open Start.
- Search for PowerShell, right-click the top result, and select the Run as administrator option.
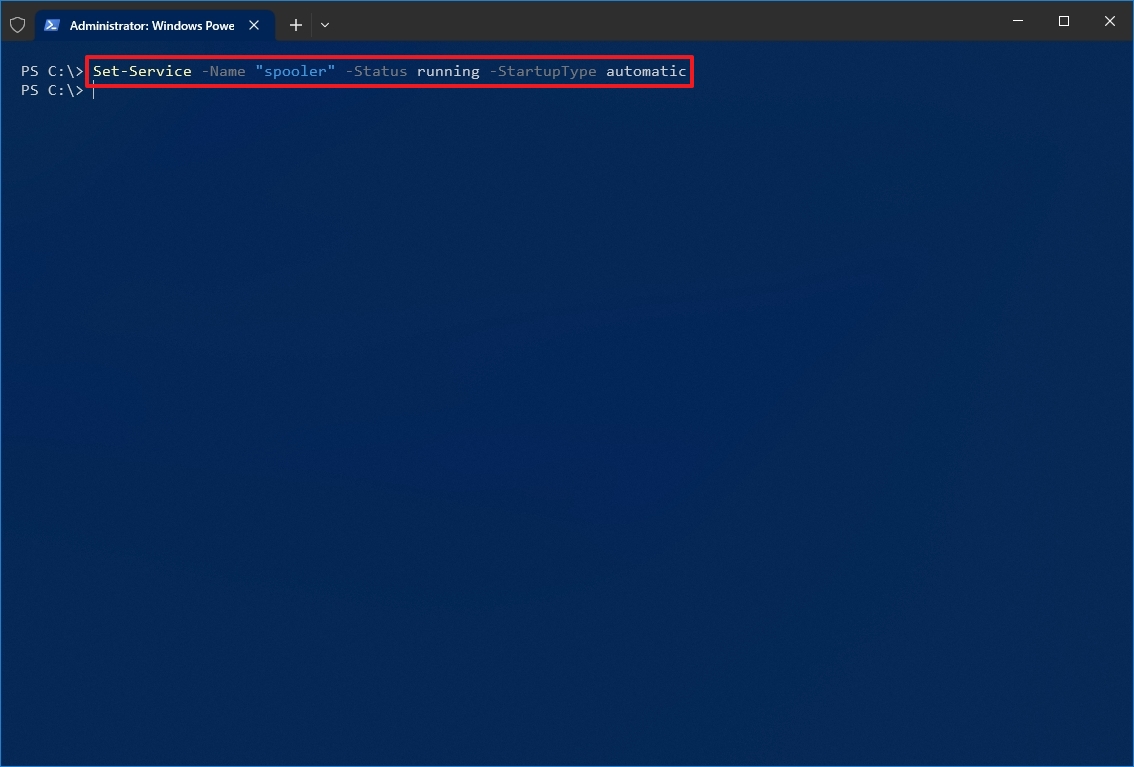
- Type the following command to enable a service and press Enter: Set-Service -Name "SERVICE-NAME" -Status running -StartupType automatic
For example, this command enables the printer spooler service using PowerShell: Set-Service -Name "spooler" -Status running -StartupType automatic
- Quick note: You may able to use the display -DisplayName option, but the command may also prompt you to supply the name of the service, adding an extra step to the process. If you want to enable the service without starting it immediately, you can remove the -Status running portion of the command.
Once you complete the steps, PowerShell will enable the service specified with the command.
How to manage services from Command Prompt
If you're comfortable using the command line, Command Prompt offers the "net" command (older) to stop or start or the "sc" command (newer) to stop, start, disable, or enable services on Windows 10.
Stop service
To stop a Windows 10 or app service with Command Prompt, use these steps:
- Open Start.
- Search for Command Prompt, right-click the top result, and select the Run as administrator option.
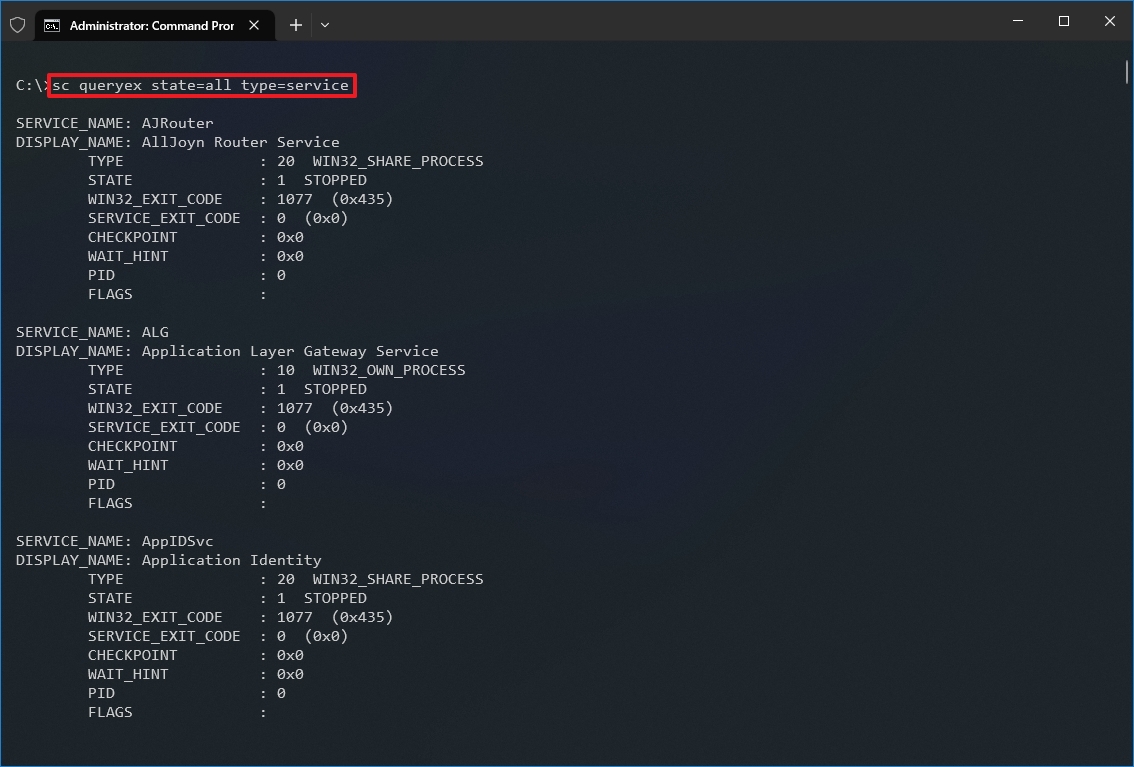
- (Optional) Type the following command to view a list of all the services and press Enter: sc queryex state=all type=service
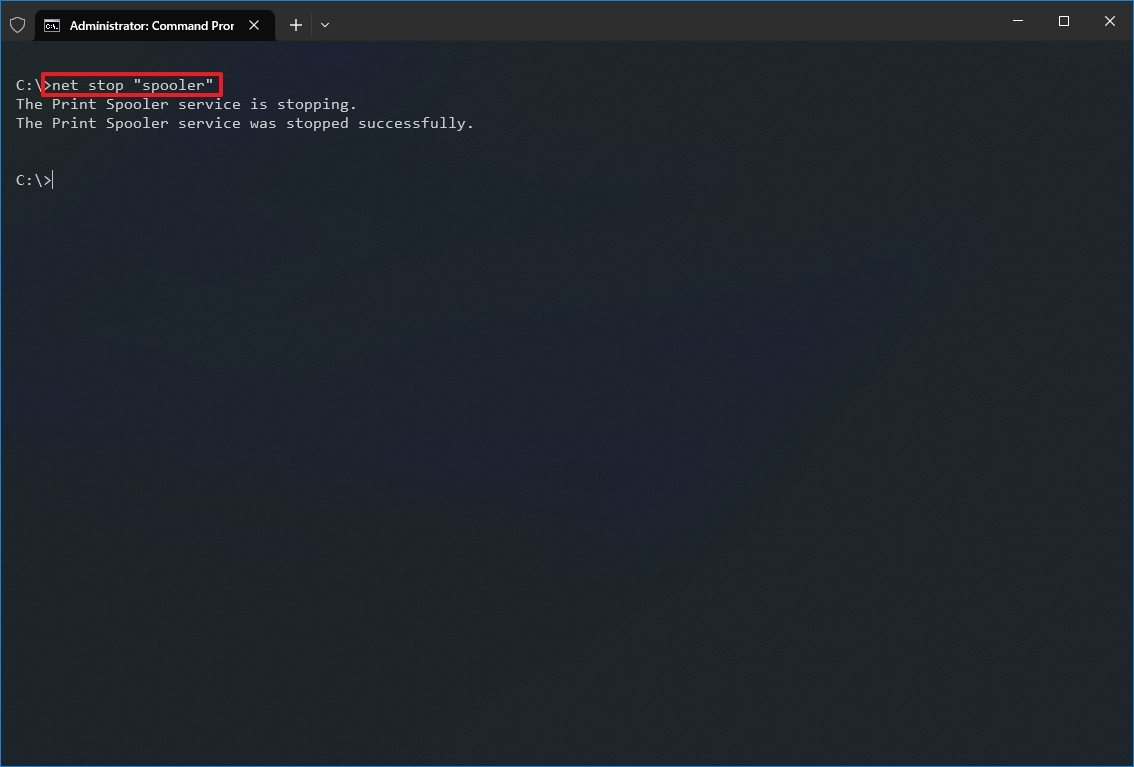
- Type the following command to stop a service and press Enter: net stop "SERVICE-NAME"
In the command, replace "SERVICE-NAME" with the name or display the name of the service. You only need quotation marks if there's a space within the name. For example, this command stops the printer spooler using the service name: net stop "spooler"
Alternatively, you can also use the more advanced "sc" command: sc stop "SERVICE-NAME"
For example, this command stops the printer spooler using the service name: sc stop "spooler"
After you complete the steps, the command will stop the specified service on Windows 10.
Start service
To start a service with the command line, use these steps:
- Open Start.
- Search for Command Prompt, right-click the top result, and select the Run as administrator option.
- Type the following command to start a service and press Enter:
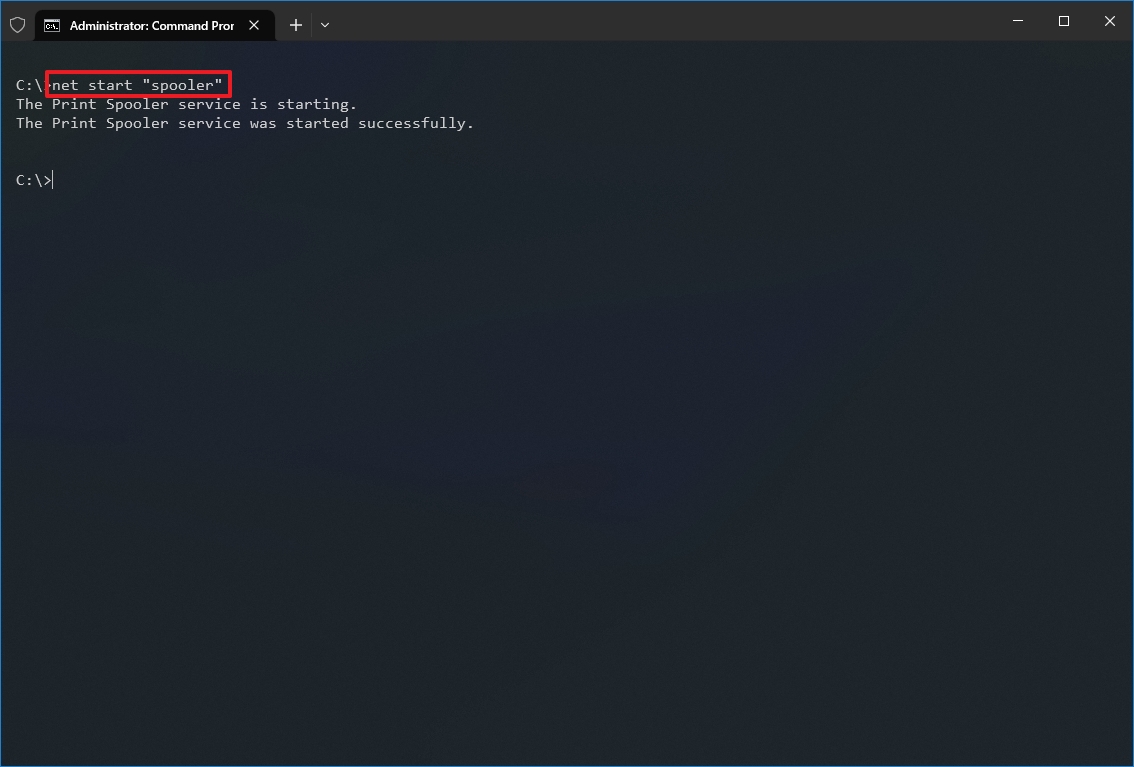
net start "SERVICE-NAME"
In the command, replace "SERVICE-NAME" with the name or display the name of the service. You only need quotation marks if there's a space within the name. For example, this command starts the printer spooler using the service name: net start "spooler"
Alternatively, you can also use the "sc" command: sc start "SERVICE-NAME"
For example, this command starts the printer spooler using the service name: sc start "spooler"
Once you complete the steps, the command will execute and start the service you specified.
Disable service
To disable a service with Command Prompt, use these steps:
- Open Start.
- Search for Command Prompt, right-click the top result, and select the Run as administrator option.
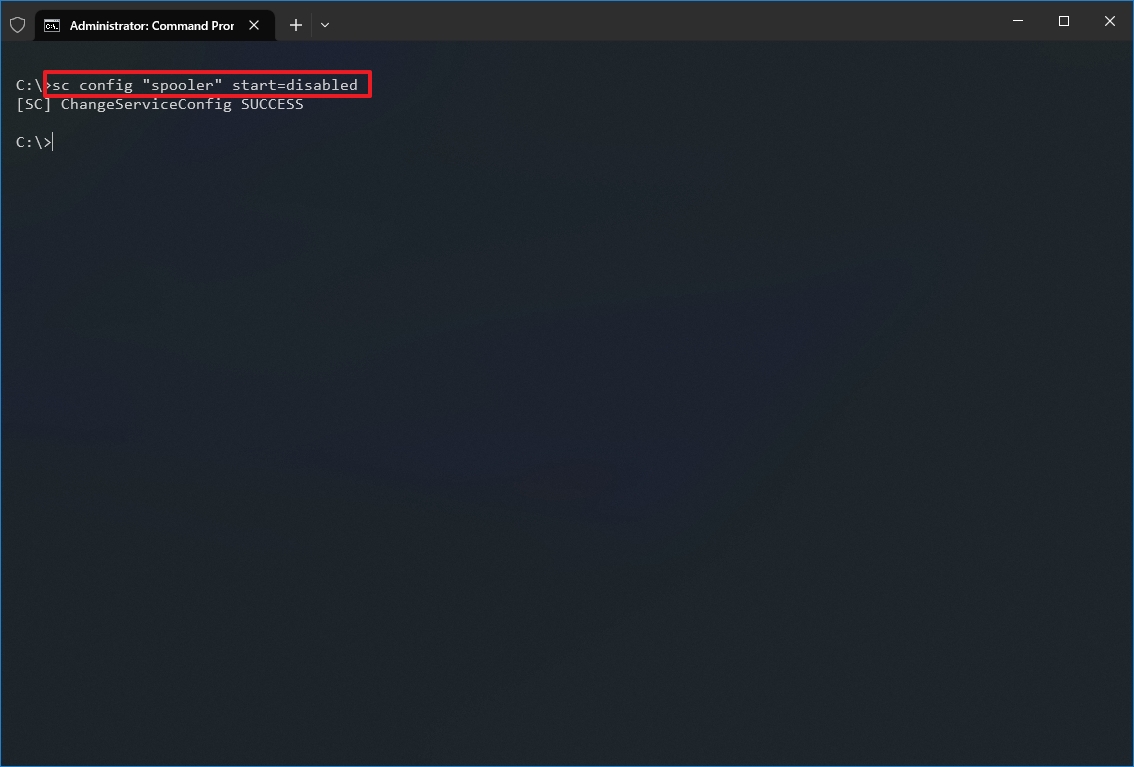
- Type the following command to disable a service and press Enter: sc config "SERVICE-NAME" start=disabled
In the command, replace "SERVICE-NAME" with the name of the service that you want to disable.
For example, this command disables the printer spooler using the service name: sc config "spooler" start=disabled
- (Optional) Type the following command to stop the service and press Enter: sc stop "SERVICE-NAME"
- Quick note: When you disable a service, it doesn't stop the current state of the service. You can either restart your computer or stop the service using the above command.
After you complete the steps, the sc command will run disabling the Windows 10 or app service you specified.
Enable service
To enable a service with a command, use these steps:
- Open Start.
- Search for Command Prompt, right-click the top result, and select the Run as administrator option.
- Type the following command to enable a particular service and press Enter:
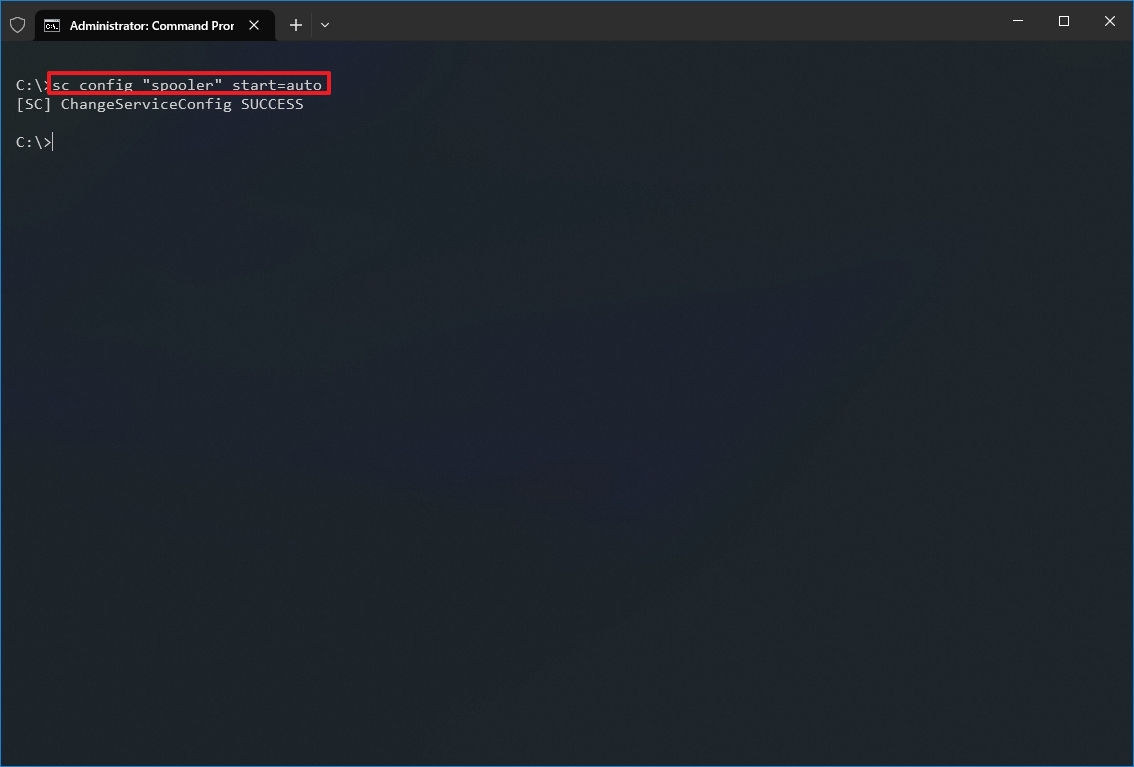
sc config "SERVICE-NAME" start=auto
In the command, replace "SERVICE-NAME" with the name of the service that you want to enable. For example, this command enables the printer spooler automatically using the service name: sc config "spooler" start=auto
These are alternative commands to enable a particular service:
- Manual: sc config "SERVICE-NAME" start=demand
- Automatic Delayed: sc config "SERVICE-NAME" start=delayed-auto
- (Optional) Type the following command to start the service and press Enter: sc start "SERVICE-NAME"
Once you complete the steps, the service will enable and start automatically on reboot according to the command you used.
You can only use the "net" command to start or stop services. The "sc" command allows you to perform more tasks, including start, stop, enable, or disable services, among other options. If you're choosing to manage services with command lines, then, in either case, it's best to use the service name instead of the display name.
Also, when using any of the methods outlined above, consider that making modifications to the default settings can alter the operation of one or more features that depend on that service, negatively affecting the experience. Furthermore, if you restart a service, you might be required to start its dependencies manually as well to make the app or feature operational again.
We're focusing this guide on Windows 10, but the ability to manage services has been available for several years, which means that you can refer to this guide if you're still running Windows 8.1, Windows 7, and older versions.
More resources
For more helpful articles, coverage, and answers to common questions about Windows 10 and Windows 11, visit the following resources:
- Windows 11 on Windows Central — All you need to know
- Windows 10 on Windows Central — All you need to know

Mauro Huculak has been a Windows How-To Expert contributor for WindowsCentral.com for nearly a decade and has over 22 years of combined experience in IT and technical writing. He holds various professional certifications from Microsoft, Cisco, VMware, and CompTIA and has been recognized as a Microsoft MVP for many years.
