How to stream Oculus Rift on Twitch and Mixer
All the latest news, reviews, and guides for Windows and Xbox diehards.
You are now subscribed
Your newsletter sign-up was successful
The Oculus Rift is one of the premier PC-based VR systems available now, and there is a ton of content available. Playing on your own is one thing, but why not share it with the rest of the world? Whether you prefer streaming on Twitch or Mixer, here are the steps involved to get things set up.
How to stream Oculus Rift gameplay on Mixer
Whether you're using your Oculus Rift with the Oculus app or SteamVR, streaming gameplay to Mixer is relatively easy. In either case, it involves using the Windows 10 Game Bar. As long as you're signed into the Windows 10 Xbox app, your Mixer account should automatically be selected when you choose to start streaming. Here's how it all works.
- Launch an Oculus experience or SteamVR experience that you'd like to stream.
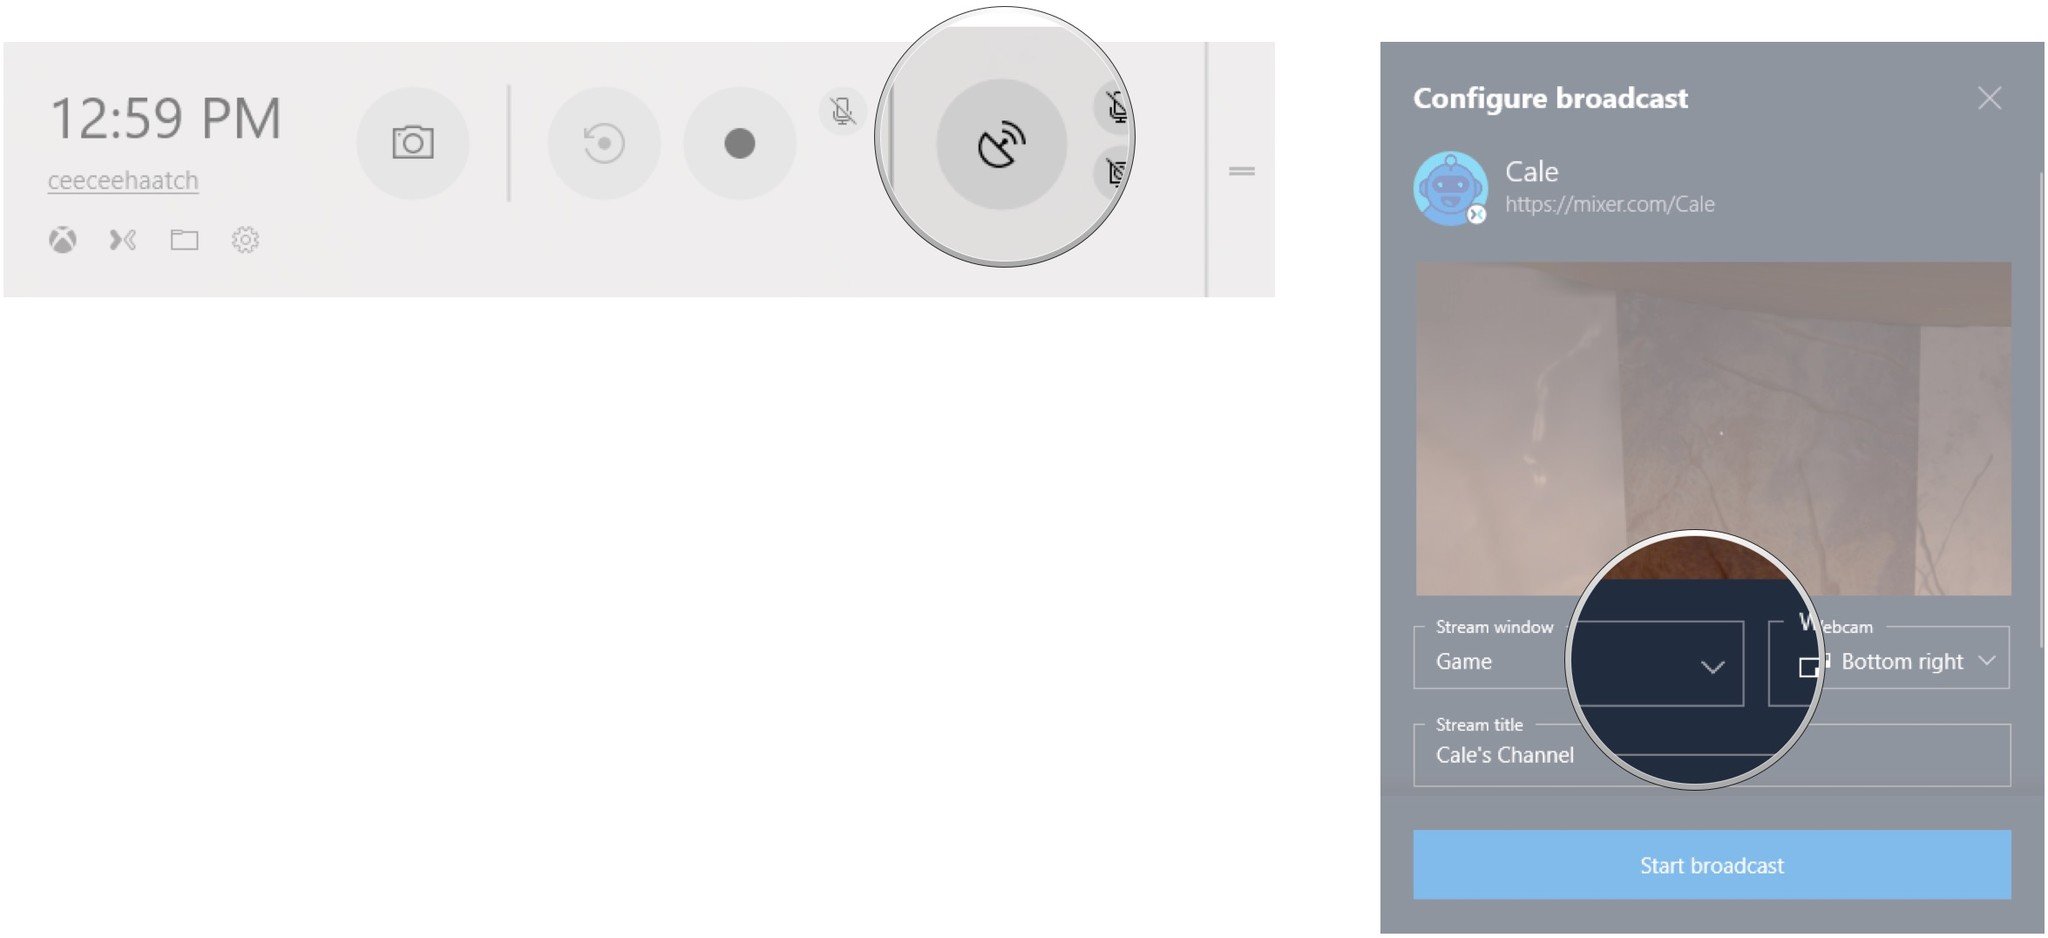
- Hit the Windows Key + G shortcut on your keyboard to bring up the Windows 10 Game Bar.
- Click the Start broadcasting button.
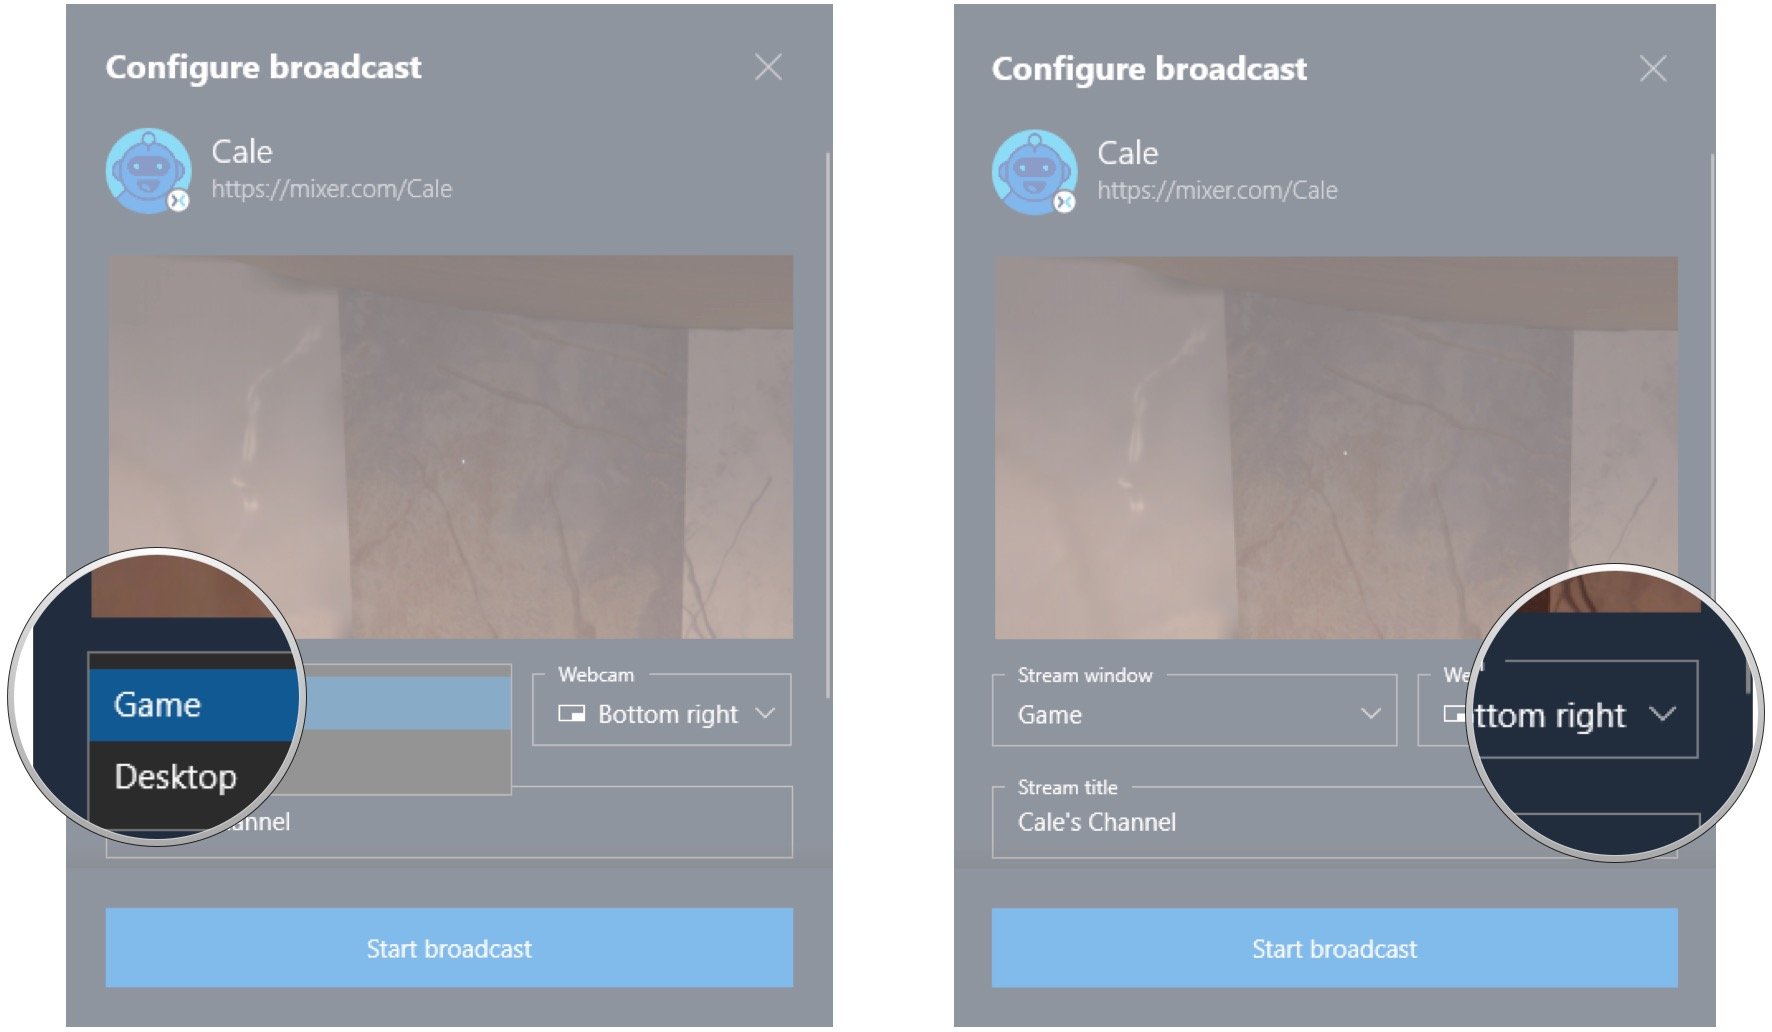
- Click the dropdown arrow in the Stream windows section.
- Click Game.
- Click the dropdown arrow in the Webcam section.
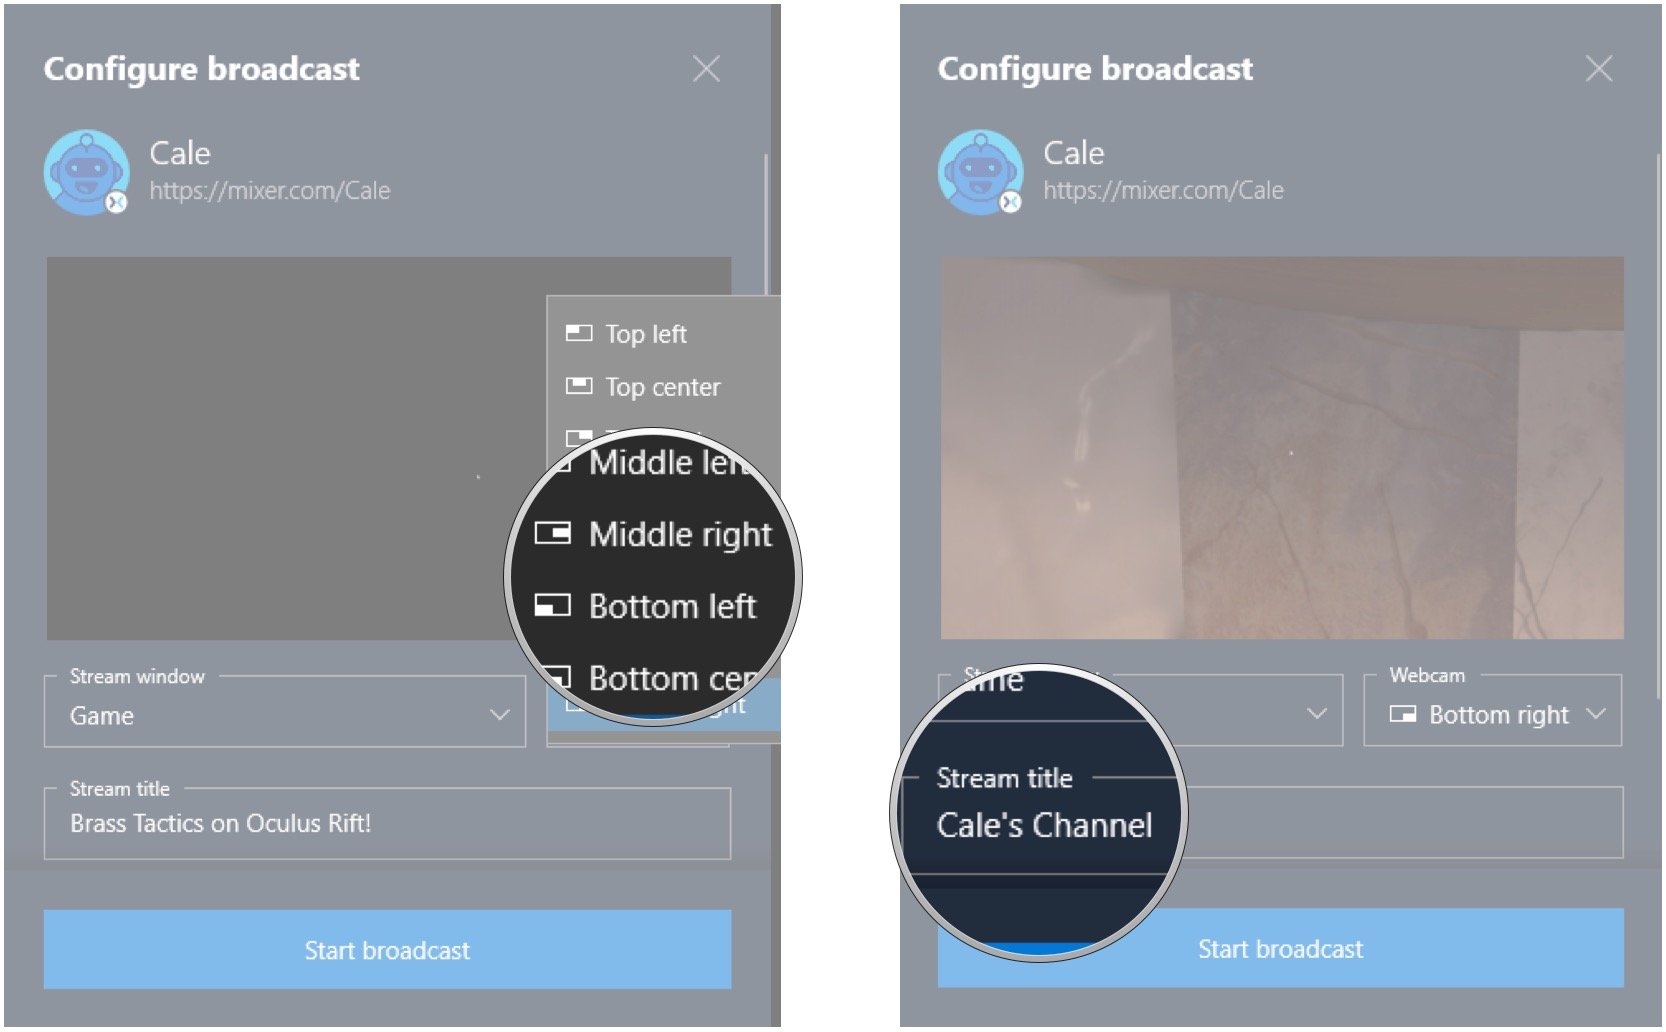
- Click a position for your webcam. If you don't have a camera connected, nothing will appear.
- Click the Stream title field.
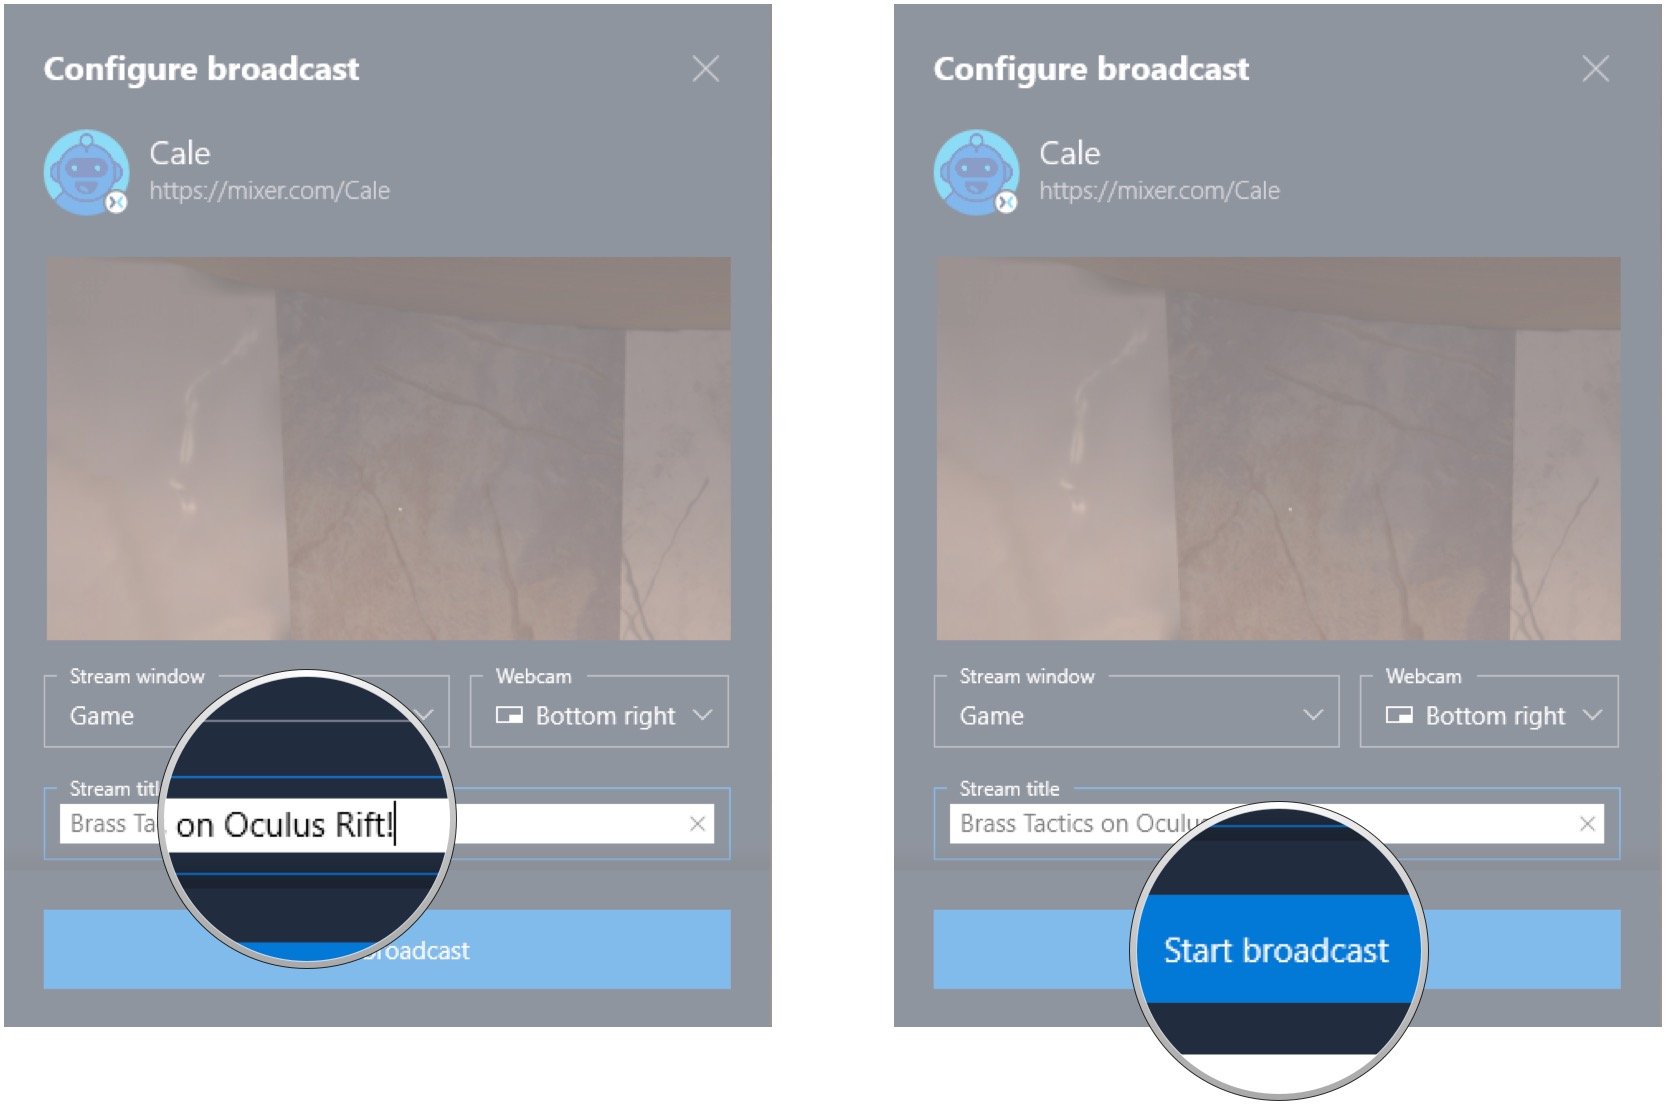
- Type a name for your stream.
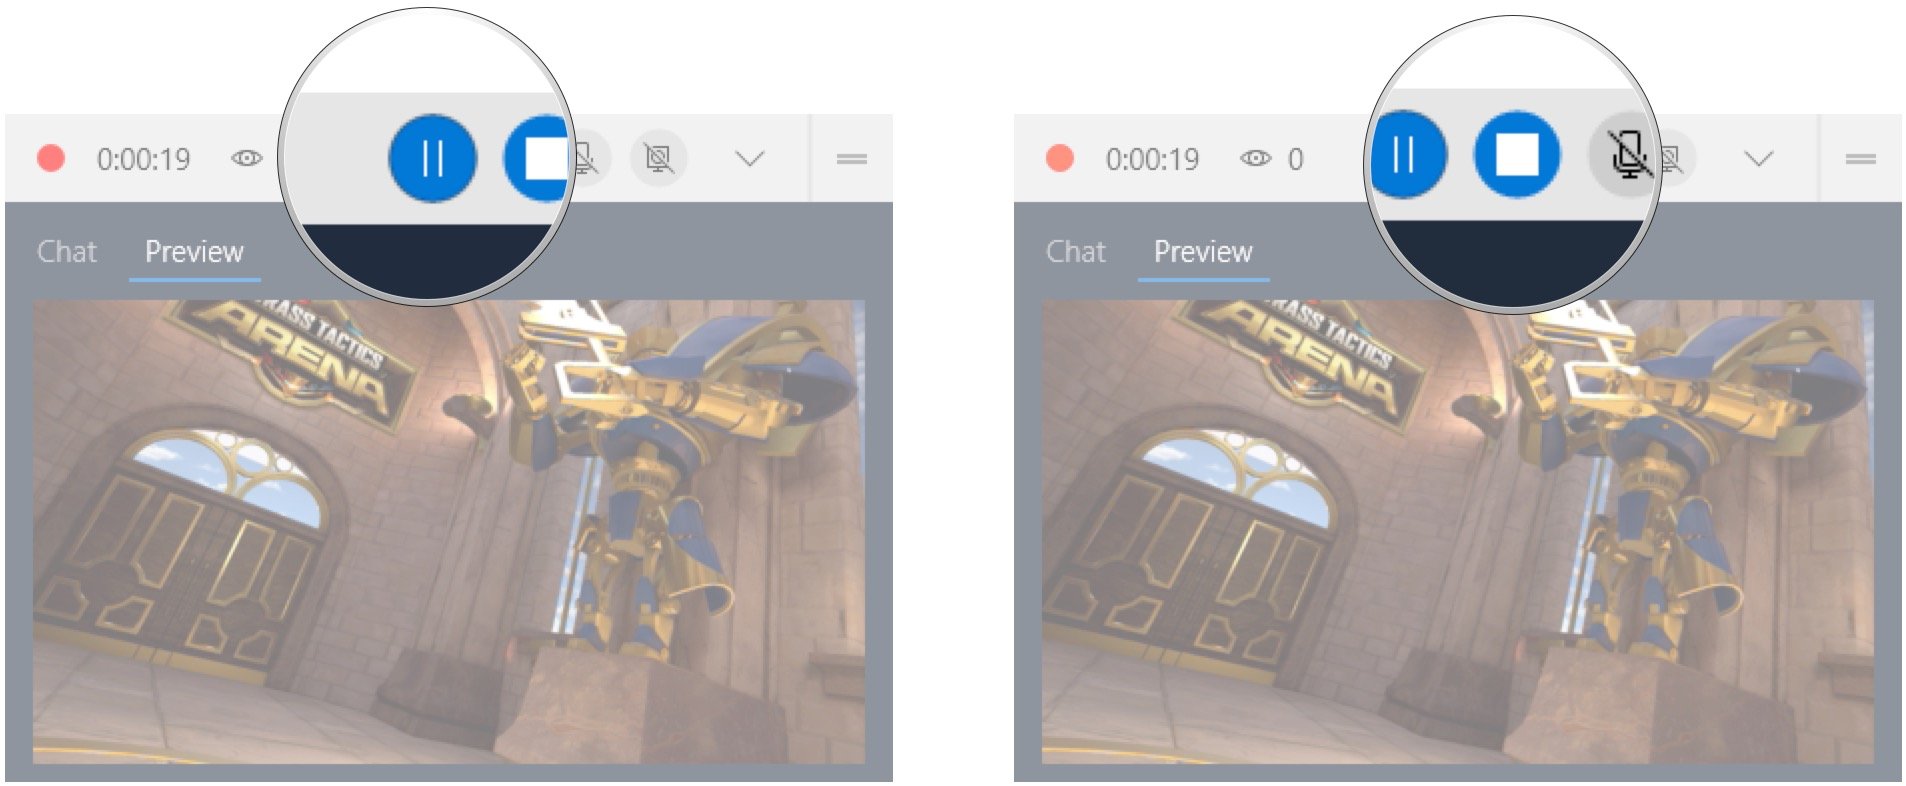
- Click Start broadcast. You should now see a small window appear that has streaming options.
- Click the Pause button to temporarily pause the stream.
- Click the Stop button to completely stop the stream.
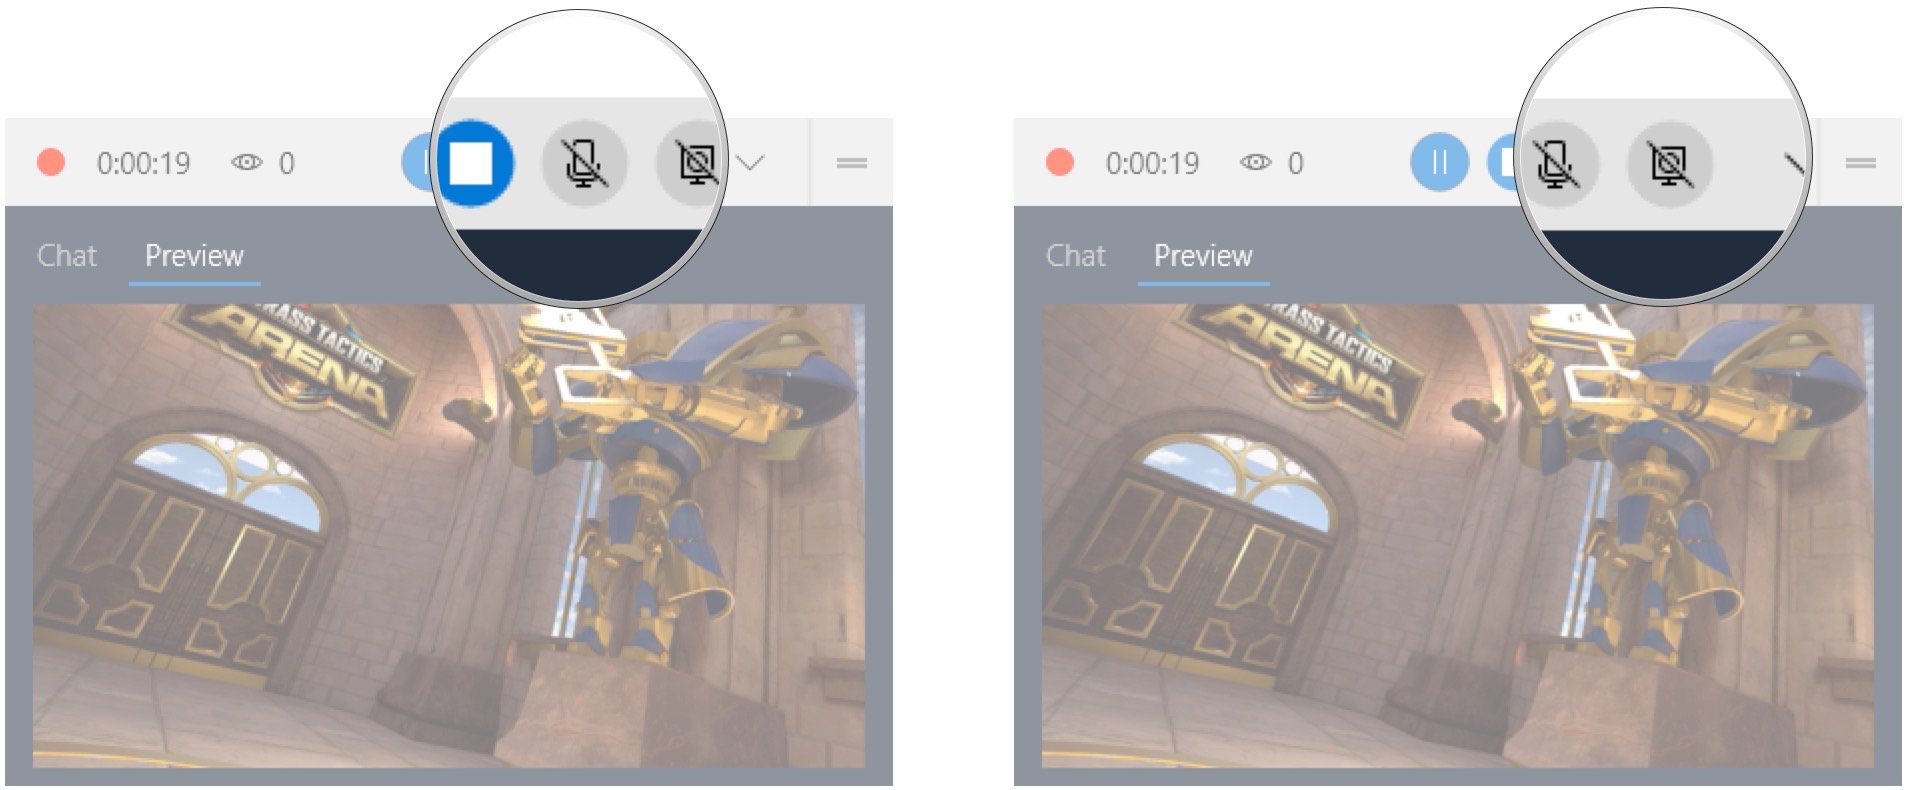
- Click the Microphone button to toggle your microphone.
- Click the Camera button to toggle your webcam.
That's all there is to it! This is likely the quickest way to start streaming your Rift content.
How to stream Oculus Rift gameplay on Twitch
Unlike Mixer streaming, which is baked into Windows 10 thanks to the Game Bar, streaming your Oculus Rift content to Twitch requires some free third-party software. In this case, I'm using OBS Studio to get things done.
You will need to download and install OBS Studio, you'll need a Twitch account, and you'll need to know how to find your unique stream key; we've covered these steps and more in our beginner's guide to setting up and streaming with OBS.
Now that you have the basics covered, here's how to start streaming your Oculus Rift gameplay on Twitch, whether with the Oculus app or SteamVR.
- Launch an Oculus experience or SteamVR experience that you'd like to stream.
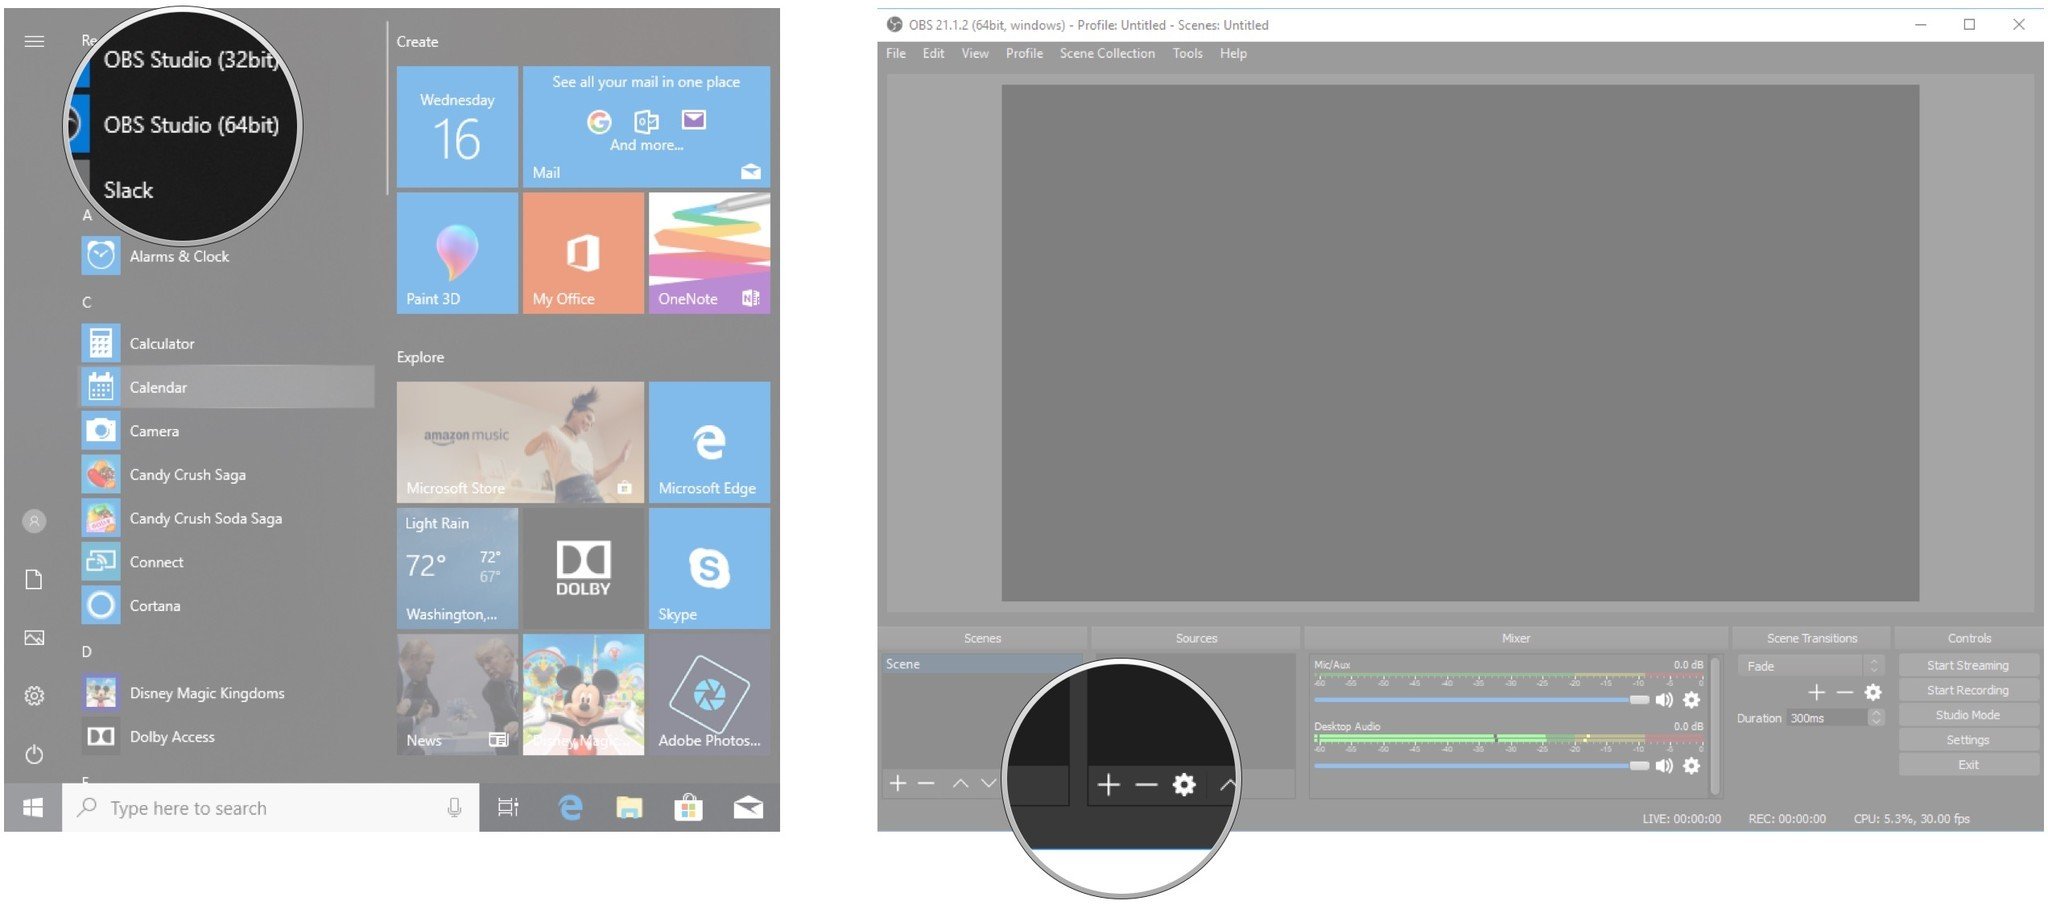
- Launch OBS Studio.
- Click the + button in the Sources section.
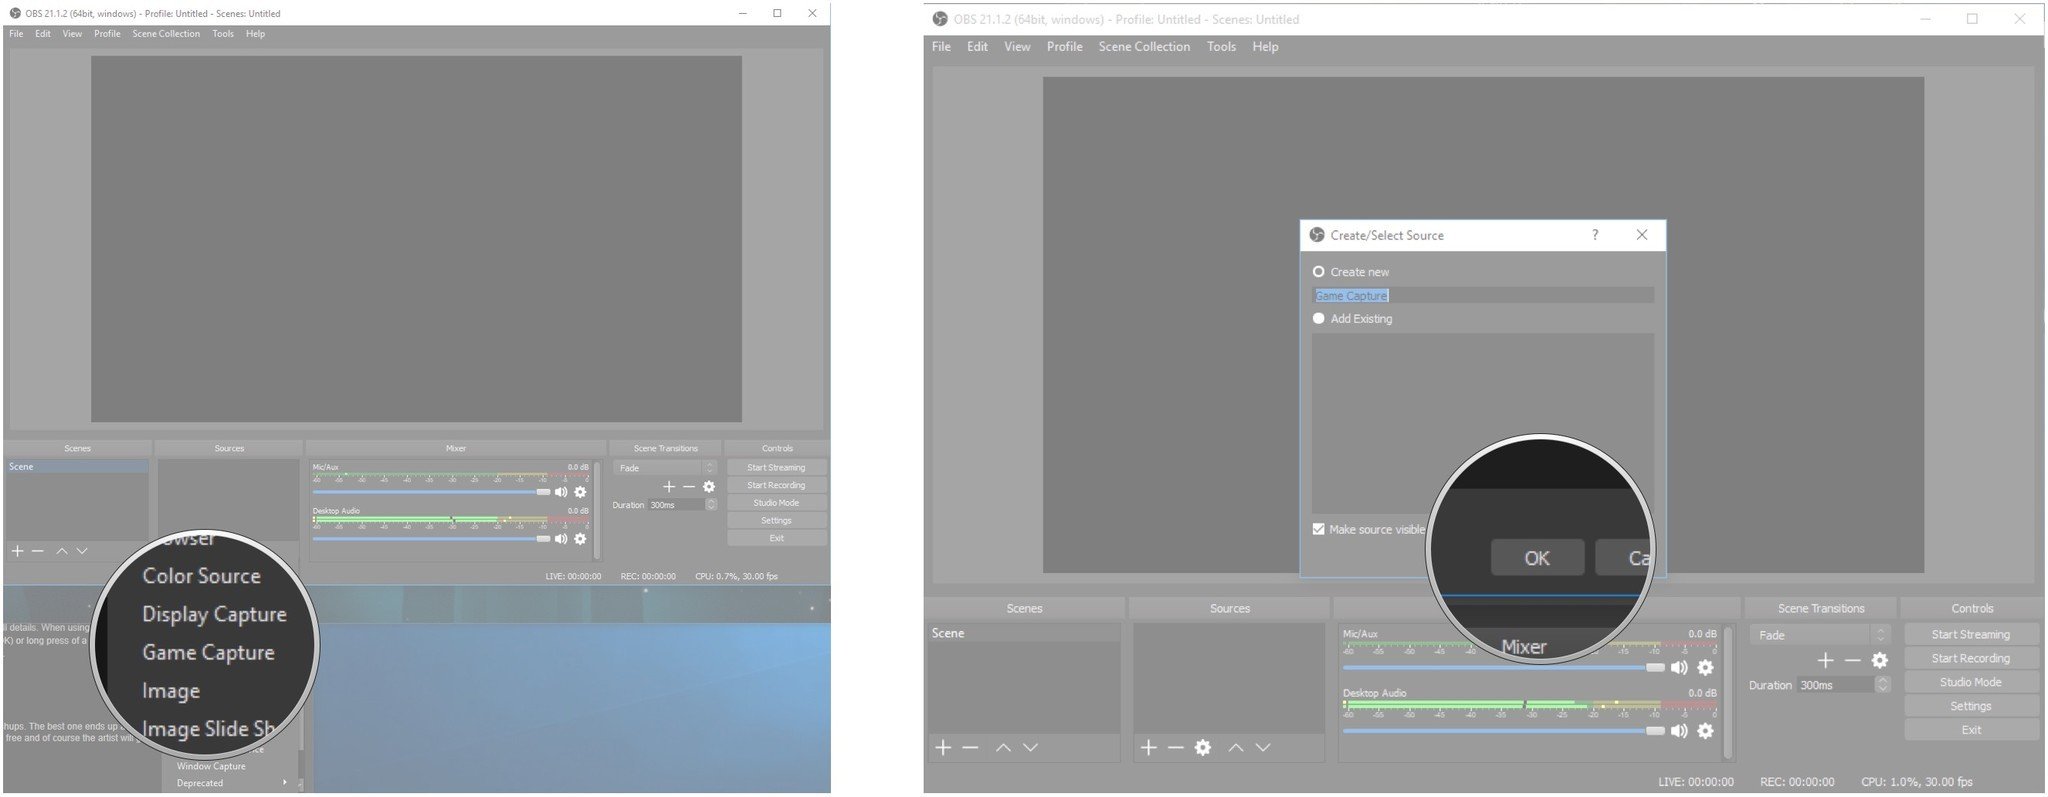
- Click Game Capture.
- Click OK.
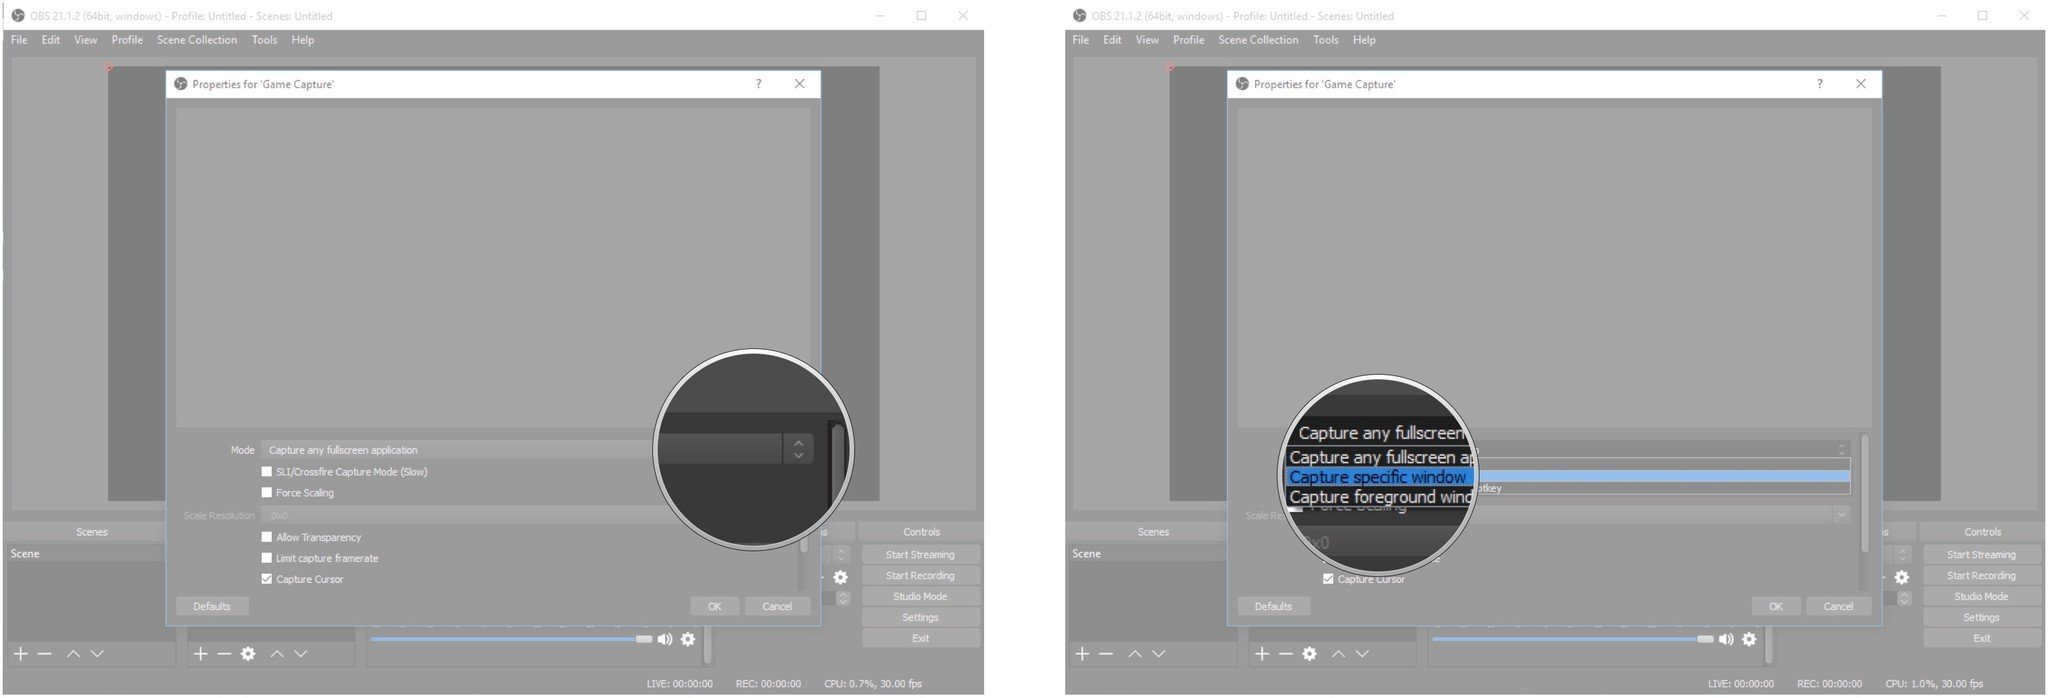
- Click the dropdown menu in the Mode section.
- Click Capture specific window.
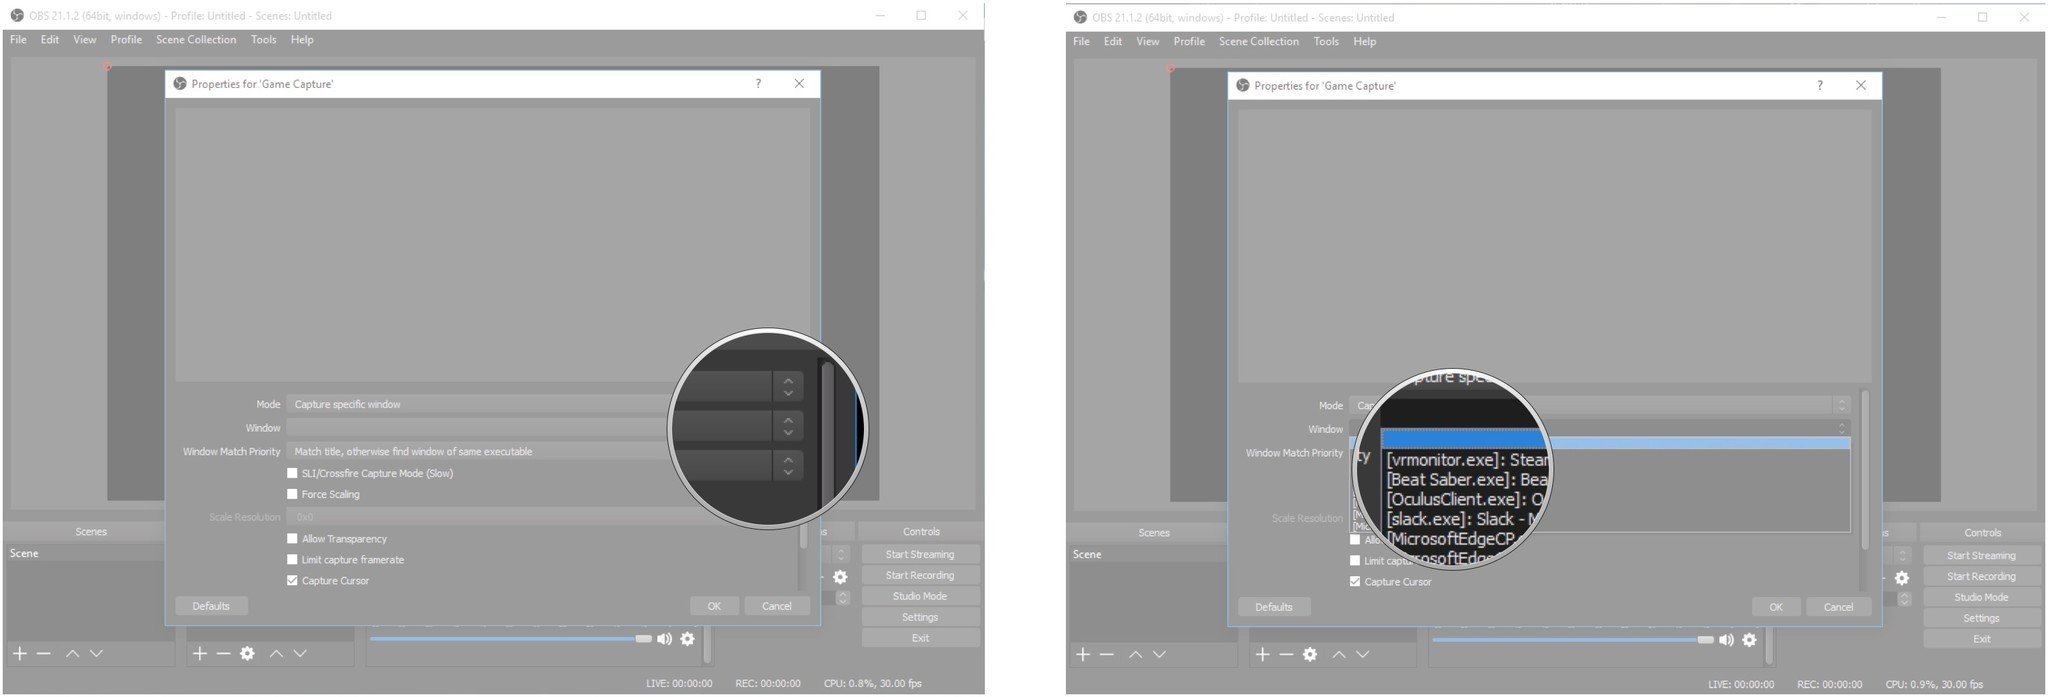
- Click the dropdown menu in the Window section.
- Click the window that corresponds with the Rift experience you'd like to stream.
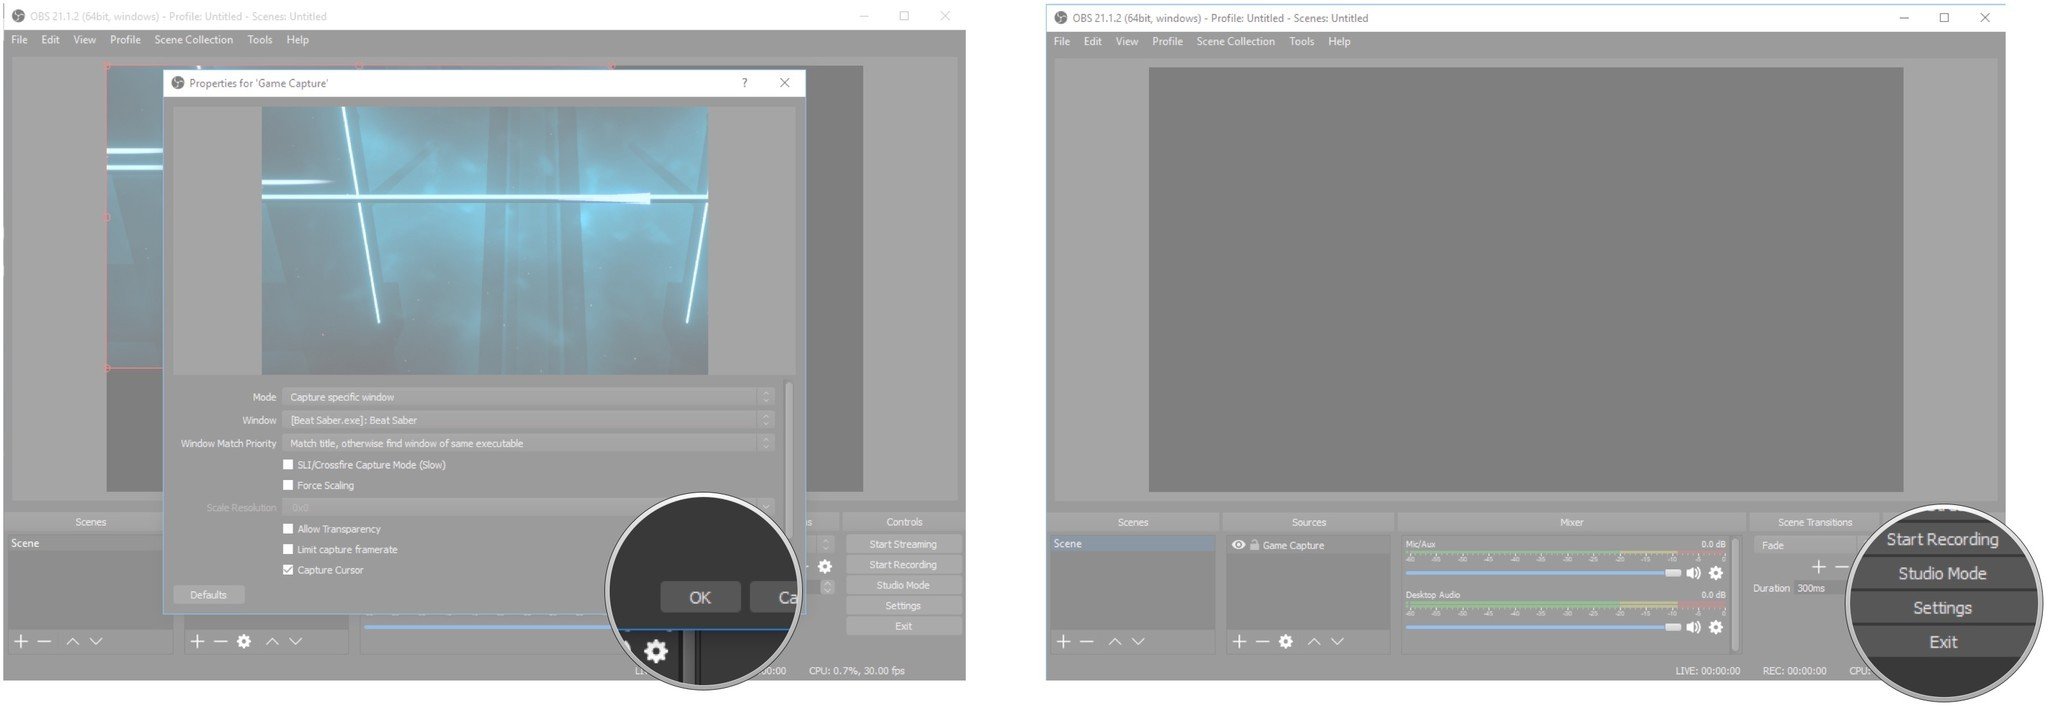
- Click OK. You should now be able to see a frame in OBS that contains the Rift experience.
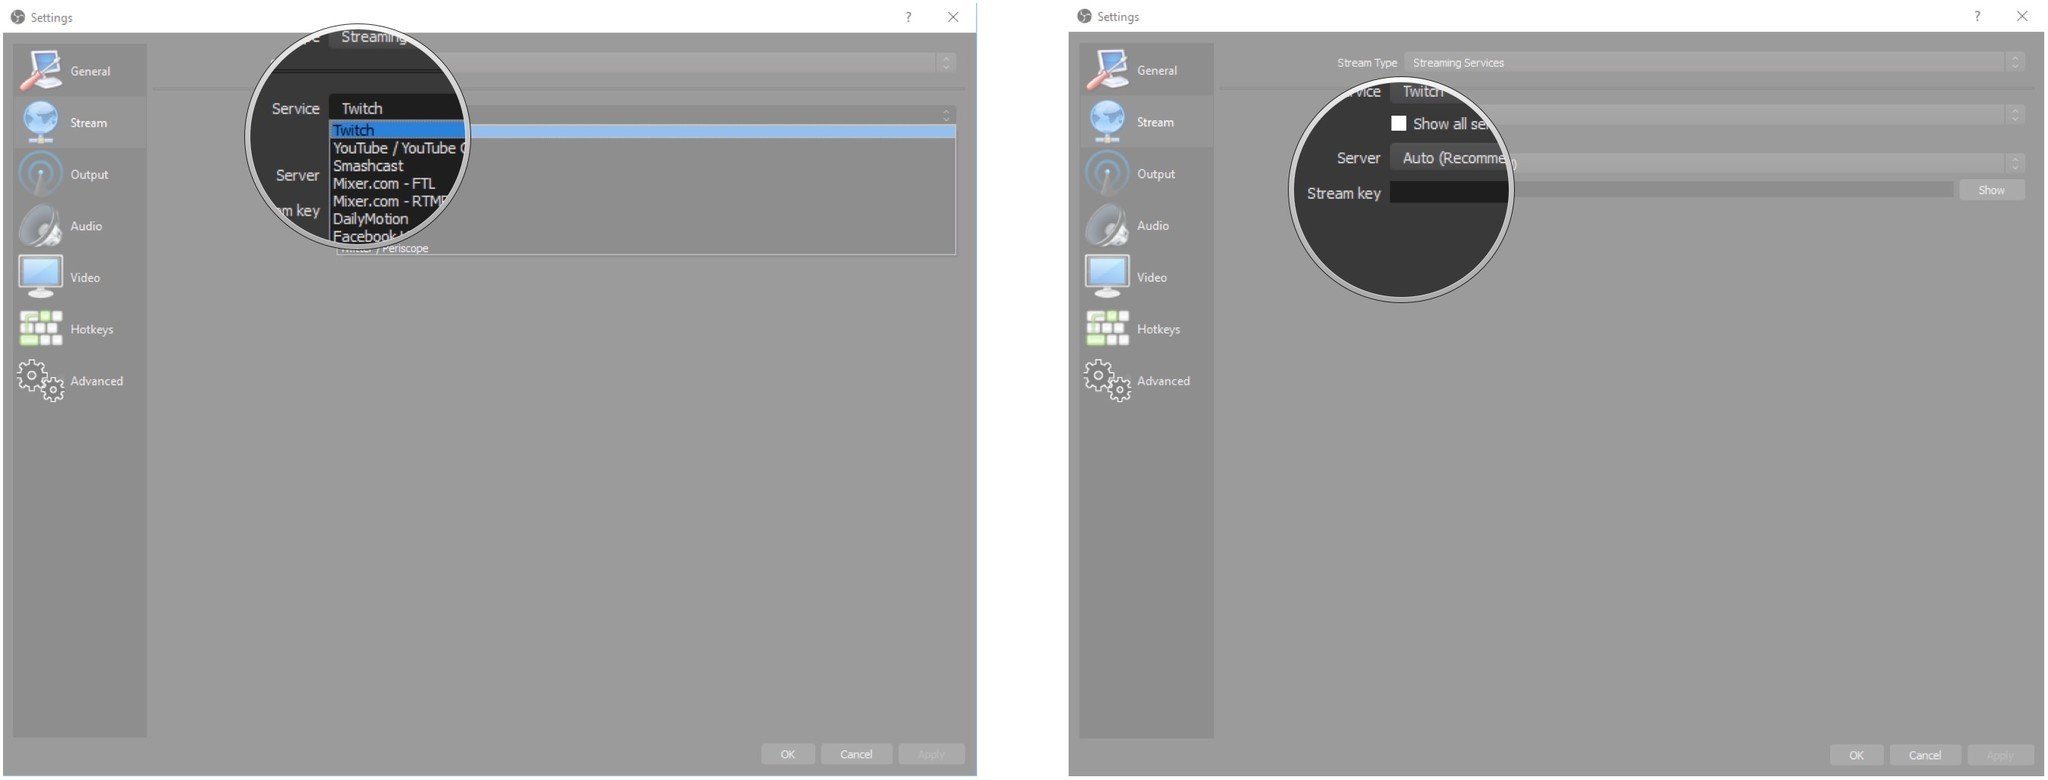
- Click Settings.
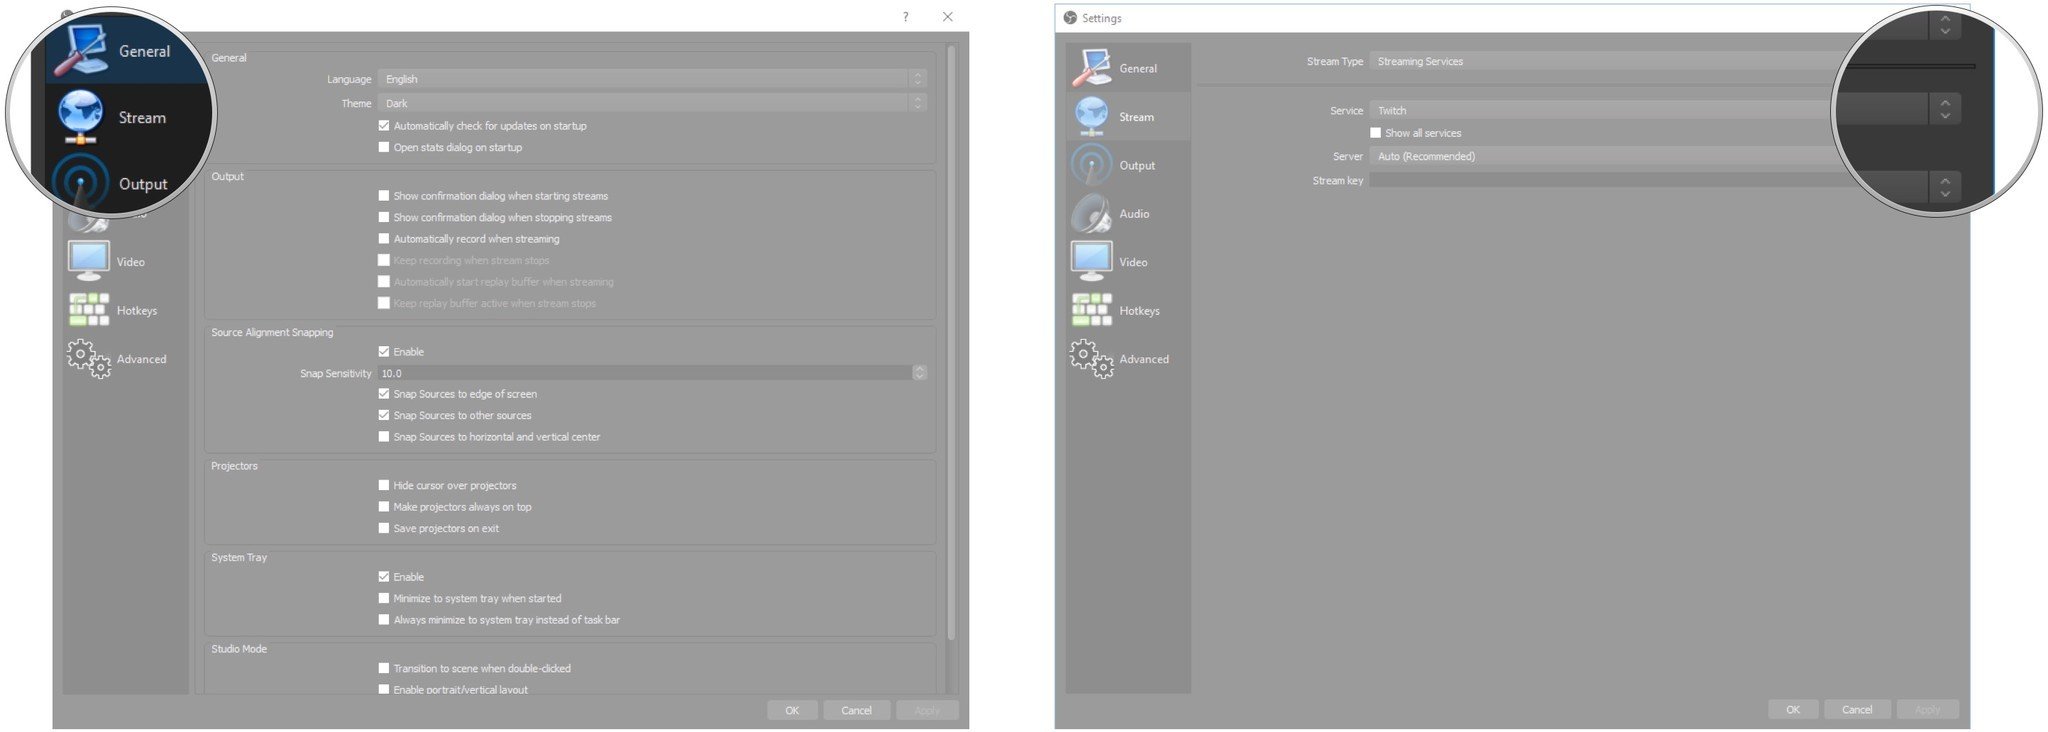
- Click Stream.
- Click the dropdown menu in the Service section.
- Click Twitch.
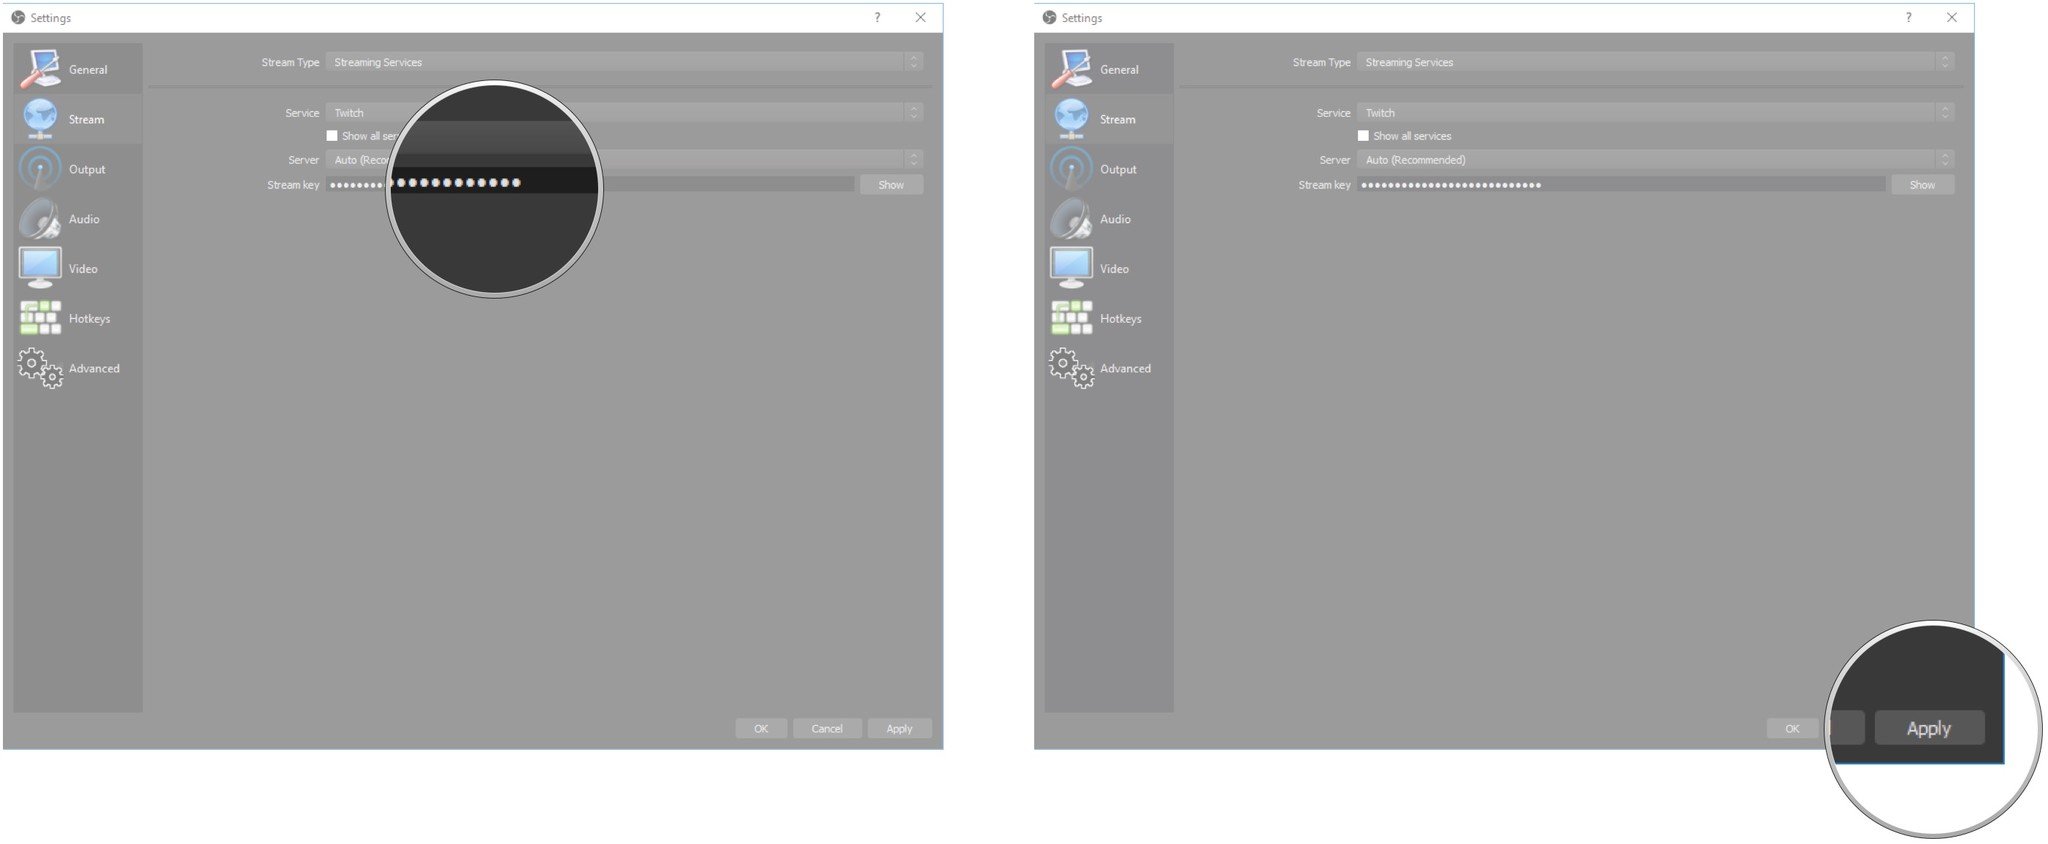
- Click the Stream key field.
- Type your unique stream key. Remember, don't share this with anyone.
- Click Apply.
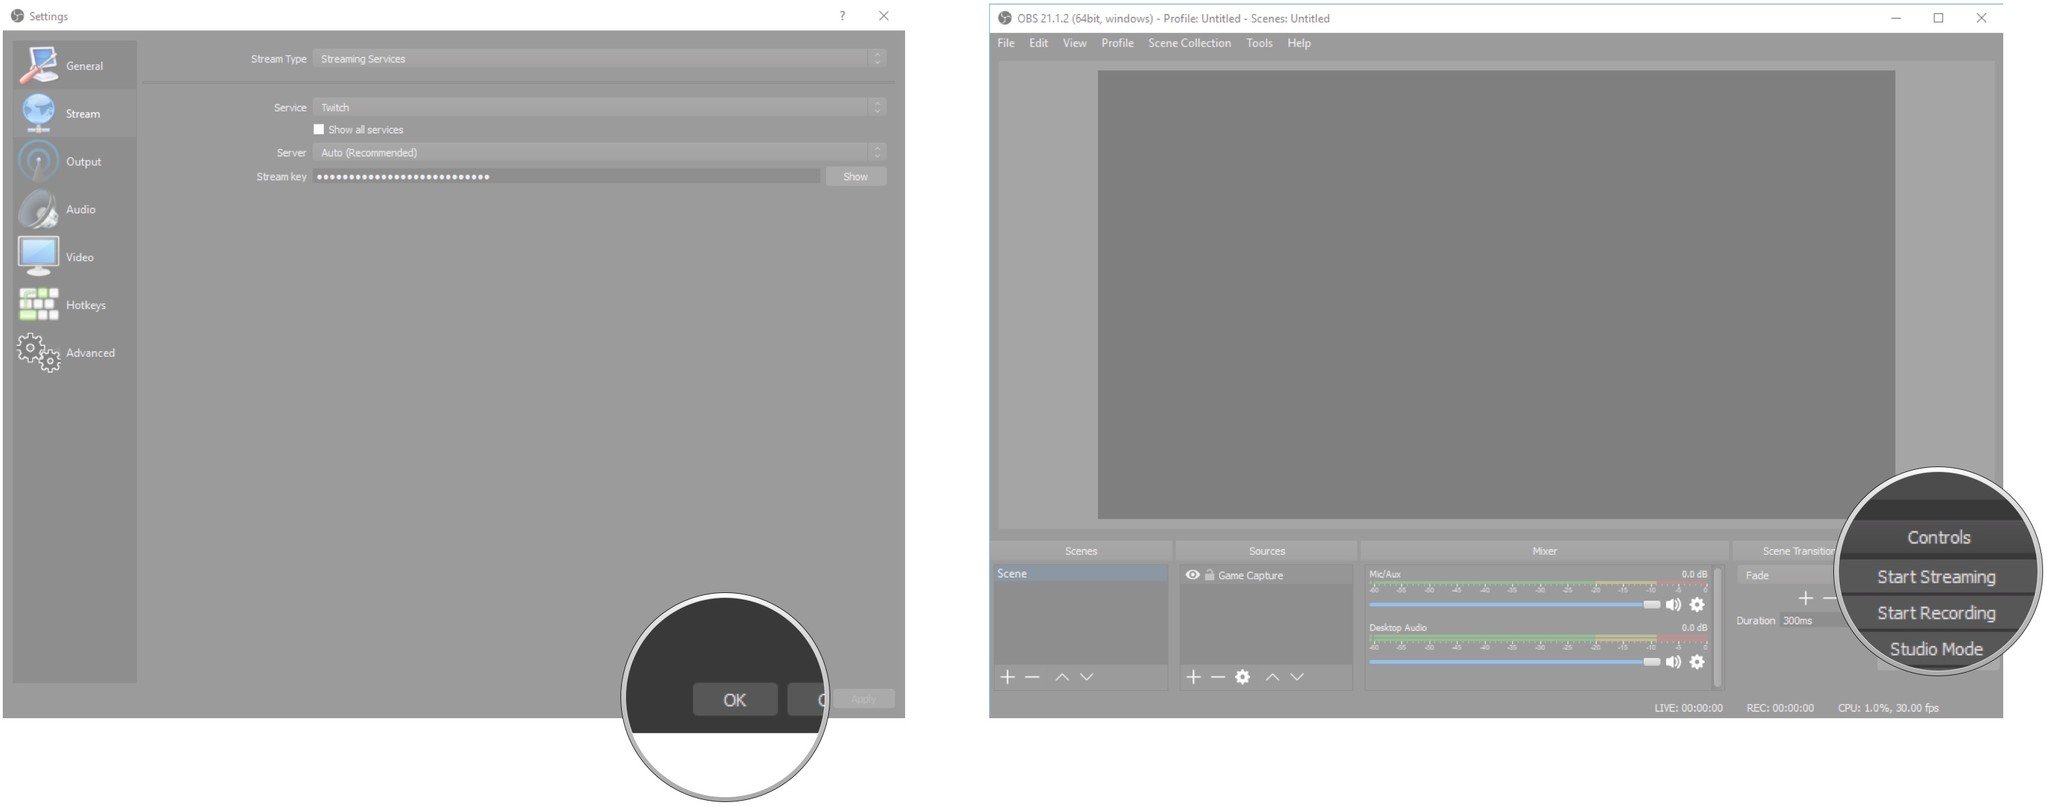
- Click OK.
- Click Start Streaming. Your gameplay should now go live on your Twitch account.
Be sure to check your Twitch page to ensure content is actually going out. From here, OBS Studio has plenty of settings that you can tweak to your heart's content; don't despair if your first few streams aren't the same quality as your favorites that you already watch. It's a long road to internet stardom!
All the latest news, reviews, and guides for Windows and Xbox diehards.
More resources

Cale Hunt brings to Windows Central more than nine years of experience writing about laptops, PCs, accessories, games, and beyond. If it runs Windows or in some way complements the hardware, there’s a good chance he knows about it, has written about it, or is already busy testing it.
