Resident Evil 7 speedrun guide: How to beat the game in under four hours
All the latest news, reviews, and guides for Windows and Xbox diehards.
You are now subscribed
Your newsletter sign-up was successful
Join the club
Get full access to premium articles, exclusive features and a growing list of member rewards.
We've already provided numerous guides for Resident Evil 7: Biohazard, Capcom's amazing first-person horror game. Our Achievement Guide provides some general tips on how to complete the game in under four hours (which unlocks the amazing Circular Saw weapon), but we really want you to be prepared for your speedrun. Hence this full speedrun walkthrough, with all the strategies you'll need to beat the game as fast as possible!
As a special bonus for Xbox gamers, Resident Evil 7 also happens to be an Xbox Play Anywhere title. If you buy the game digitally from the Windows Store, you get access to both the Xbox One and Windows 10 versions, with full cross-save support.
Article continues belowGoals and Achievements
The primary goal of this walkthrough is to help players complete Resident Evil 7 on Easy difficulty in less than four hours. You should have completed the game at least once (unlocking the Albert 01-R pistol and the Secrets of Defense) before following this guide.
Successfully beating the game in less than four hours will unlock the 'Just Get me Outta Here' Achievement/Trophy and the Circular Saw weapon for use in subsequent playthroughs. That weapon, in turn, makes surviving Madhouse difficulty much easier.
As recommended in our Achievement Guide, you can also pursue two optional Achievements during this speedrun:
Resource Manager
Complete the game without opening the Item Box more than 3 times.
All the latest news, reviews, and guides for Windows and Xbox diehards.
There are three times in which you must access Item Boxes: Testing Area (before and after the Party Room), and the Swamp safe room immediately after the Wrecked Ship. In this walkthrough, we won't use Item Boxes at any other time.
Walk it Off
Complete the game using only 3 First Aid Meds or less.
While going for this Achievement/Trophy, never pick up Herbs or First Aid Meds. You can use Steroids to heal though, which has the added benefit of increasing Ethan's health capacity as well. There are four Steroids in the game, which we'll pick up in this guide.
If you struggle with combining the time pressure of the speedrun and avoiding healing, I suggest doing a separate run for this Achievement (I did it during my first playthrough instead of the speedrun).
How time works in Resident Evil 7
Before we begin, it's important to understand what adds to your time during a playthrough and what doesn't.
- Most cinematics are unskippable and add to your time. The only skippable cinematics are the one that plays after the old videotape sequence on the Wrecked Ship and the ending movies.
- Time passes while using menus, checking the map, and saving the game.
- Retrying after death adds time too, so consider reloading a manual save if you die.
- Time does not pass while the game is paused, so pause whenever you're looking at this walkthrough or thinking about what to do.
- Speedrun tip: Ignore all phone calls unless otherwise instructed in this guide.
With those tips and guidelines out of the way, let's begin!
Outside the Guest House
The introduction movie can't be skipped, alas!
- As soon as Ethan exits the car, sprint down the path towards the house.
- Turn left in front of the house.
- Ignore the van and run through the gate.
- At the fork with the crows on the right, go left and crouch under gate.
- Hop down the ledge before the fire (ignoring Mia's purse) and enter the Guest House.
The Guest House
- Head down the hall, through the kitchen, and turn right into the next hall.
- Go past the staircase and turn into the second door on the right, the Living Room.
- Approach the fireplace, crouch, and pull the handle inside.
- Enter the passage that opens to the right and climb down the ladder.
- While navigating through the water, hug the wall to the right to avoid the floating body.
- When you reach the cell where Mia is kept, turn left (east) and grab the Bolt Cutters.
- Use the Bolt Cutters to enter Mia's cell.
- Interact with Mia to wake her up.
- Follow Mia as she slowly leads you to the Storage Room. Once there, she should sit down on the couch.
- Enter the nearby Storeroom, examine the doll on the shelf, and Mia will be abducted.
- Take the newly opened passage that leads upstairs.
- Enter the Bathroom (take the First Aid Med if you're not on a No-Healing run), and then check the locked door at the end of the hallway. You should start hearing banging sounds.
- Head back to the staircase you came from. After a few steps, you'll be attacked. Press the attack button to Resist when prompted.
- After the first Mia encounter, move around the hallway again until Mia stands up and throws you through the wall.
- Pick up the Axe from the floor and use it to defeat her.
- When the phone in the hallway rings, take the call.
- Retrieve the Axe and then go through the newly opened door in the hallway.
- Go back through the Kitchen and use the Bolt Cutters to open the cabinet and get the Fuse.
- Return to the Living Room and use the Fuse in the panel beside the door.
- Take the stairs to the second floor safe room and press the button to lower the staircase to the third floor.
- On the third floor, you can optionally enter the room on the right to get the Handgun and a couple of consumables. This room is skippable.
- Enter the Attic at the end of the hall.
- Start climbing the ladder, and then immediately back away from it.
- Boss fight! Defeat Mia using either the Axe or Handgun. If using the Axe, get behind her and hack away.
- Wander around until Jack automatically catches you, initiating a cinematic.
Main House: Introduction through Garage boss fight

- As soon as you can move around, exit to the hallway.
- Take a right around the corner (towards the Main Hall), and you should see Jack lean over on the corner table.
- The Hatch Key you need is on that corner table. Either lead Jack away, dodging his attacks, or simply grab the key.
- Once you have the key, run straight to the Kitchen.
- From the Kitchen, run into the Pantry and use the key to open the hatch.
- Take the underground passage to the Laundry Room , optionally grabbing the Antique Coin from the lawn mower along the way.
- Unlock the door to the hallway and then answer the phone.
- Save the game! If you're not avoiding Item Boxes, grab the Albert 01-R and any other items you've unlocked. Otherwise, avoid the Item Box like the plague.
- Head back to the Dining Area, collect the ammo from the drawer in the corner, and kill time until you hear the Deputy knocking outside.
- Meet the Deputy at the window to get the Knife.
- Use the Knife to open the Garage door.
- Boss battle! Immediately head right and grab the Car Keys from the worktable.
- Get in the car, use the key to start it, and run over Jack repeatedly.
- After Jack wrecks the car, get out and check these locations for items: table in the corner, box, and locker.
- Jack will approach on foot. Allow him to grab you right away.
- Grab the Deputy's Pistol if you haven't already, and then head up the ladder.
- Examine the frame, unscrew the nut on the back, and take the Ox Statuette.
- Push the shelf out of the way and return to the hallway.
- Use the Ox Statuette to open the door to the Main Hall.
Main House: Wooden Statue, Shadow plinth puzzle, and monitoring room
- Take the Antique Coin from the drawer in the northwest corner (optional).
- Take the western stairs to the second floor. Ignore the phone.
- Go down the hall to the Bathroom.
- Optional: get the Antique Coin from the toilet. That's three coins, enough to buy the Steroids in the Trailer later.
- Pick up the item from the drawer and then drain the tub to find the Wooden Statue.
- When you try to exit, Jack will attack. Hide behind the tub, run around him, and run back to the Main Hall.
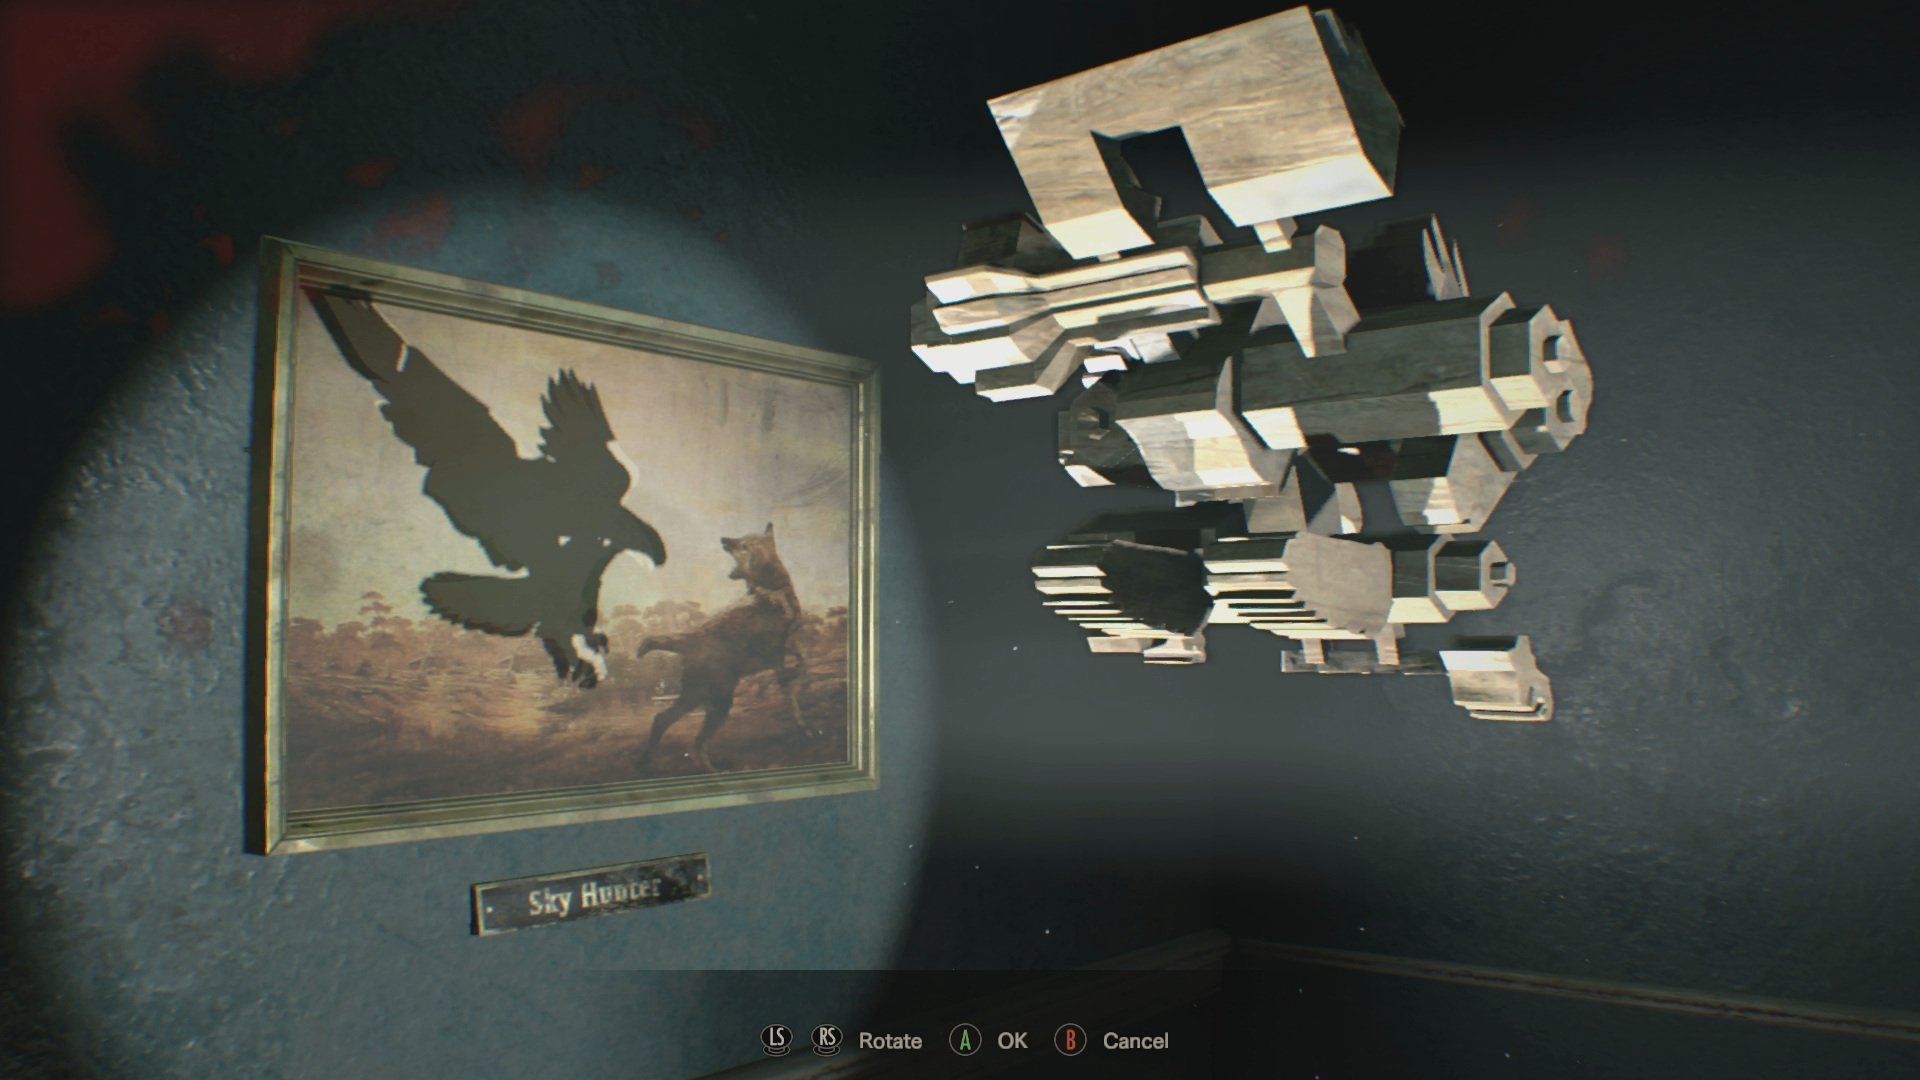
- In the southeast corner of the Main Hall, use the Wooden Statue to solve the shadow plinth puzzle.
- Take the secret passage to the Drawing Room. Collect any items you see there.
- From the Drawing Room, take the western door and then enter the Monitoring Room.
- Run past the Molded all the way to the northern safe room.
- Collect the item from the armoire to the right, and then save your game!
- Exit and take the nearby stairs down to the Processing Area.
Processing Area: Dissection Room Key, Morgue boss fight, and Scorpion Key
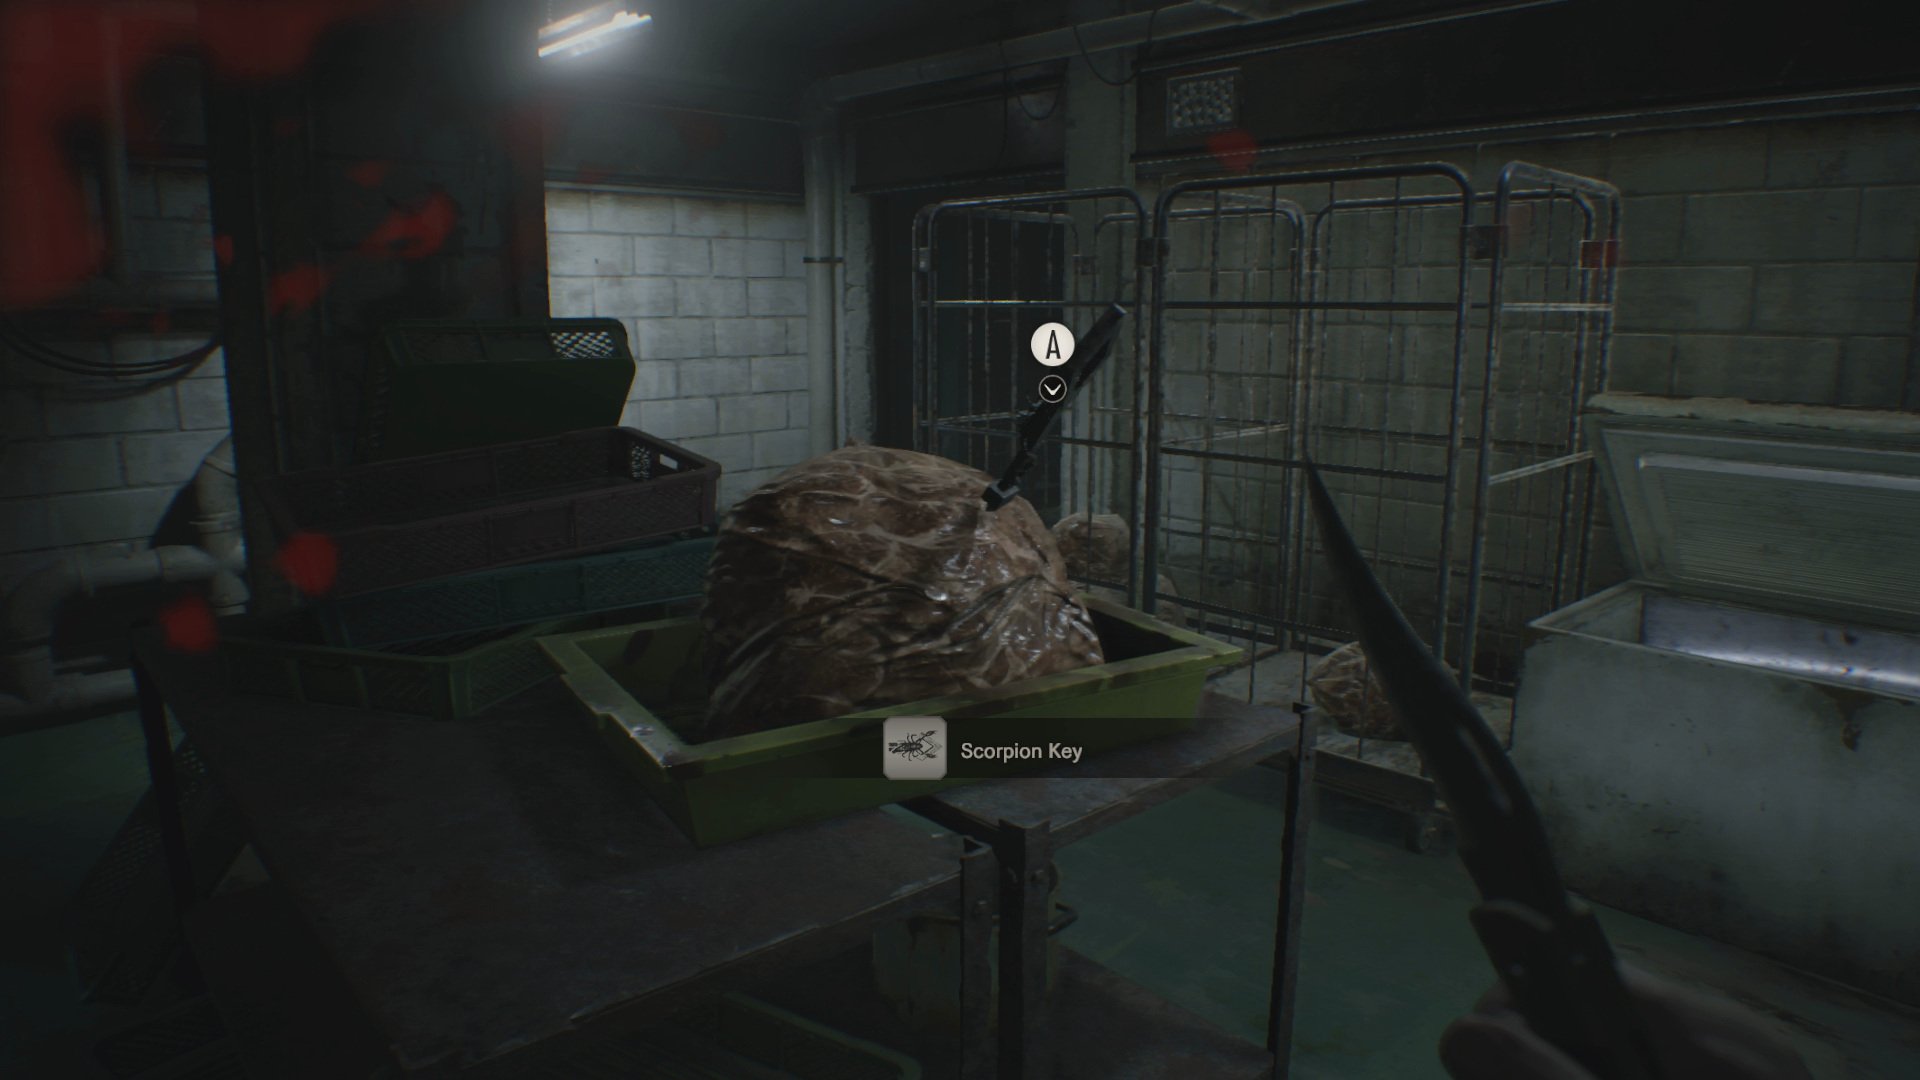
- When you get down the stairs, take the left path towards the Incinerator Room.
- Run past the Molded who attacks along the way.
- The Incinerator Room is the first door on the right. Enter and close the door behind you.
- Inside, a Molded will attack. You can solve the puzzle and get the key here without getting hit by either Molded, but it's safest to at least kill the first one.
- Open the oven with the handprint on it and then the one on the far right (the third and sixth from the left).
- Now open the first oven from the left and immediately step back. A Spiked-Arm Molded will emerge.
- Lead the enemy towards the back corner of the room, away from the oven.
- Once the Molded has followed you, grab the Dissection Room Key from the oven, and escape out the door.
- Take the southern door that leads towards the Boiler Room.
- Inside the room right before the Boiler Room, one Molded will attack from in front and another from behind. Run past both of them and into the Boiler Room.
- Dash through the Boiler Room, heading straight to the door on the northwest side via the northern path. You'll have to run by one Molded, but this can be done safely if you're fast and careful.
- Quickly open the door using the Dissection Room Key and escape!
- Follow the path towards the Morgue.
- Inside the Morgue, ignore the door to the Dissection Room on the right. Just grab at the Red Dog Head and initiate the boss fight.
- Boss fight! If you can afford the bullets, shoot Jack in the head with your pistol repeatedly during the first phase of the battle. Shoot or knife him when he bends over. Damaging Jack speeds up the start of the second phase of the fight. Otherwise, you can probably spare a few minutes of dodging him without ruining your chances at the speedrun Achievement.
- As soon as Jack opens the cage to get his new weapon, grab the chainsaw.
- Don't bother moving around the arena. Just attack repeatedly and block Jack's attacks when you see them. Step around behind him when he says, 'That's it!' and charges.
- After the fight ends, use the chainsaw to open the door to the fence.
- Backtrack the way you came, ending up in the hallway that leads to the Boiler Room.
- Take the western path and opening the corrugated room divider.
- Grab the Scorpion Key from the table and the Processing Area Map from the shelf. Don't open the crates, or an enemy will drop down from the ceiling.
- Optional: Grab the Treasure Photo from the shelf in the western corner of the map, by the locked door. You'll need this to get the first Steroids, so it's essential for no-healing runs.
- Exit via the door to the north and head back upstairs, dodging the Molded if one spawns in the hallway.
Main House: Dog's Heads and Broken Shotgun
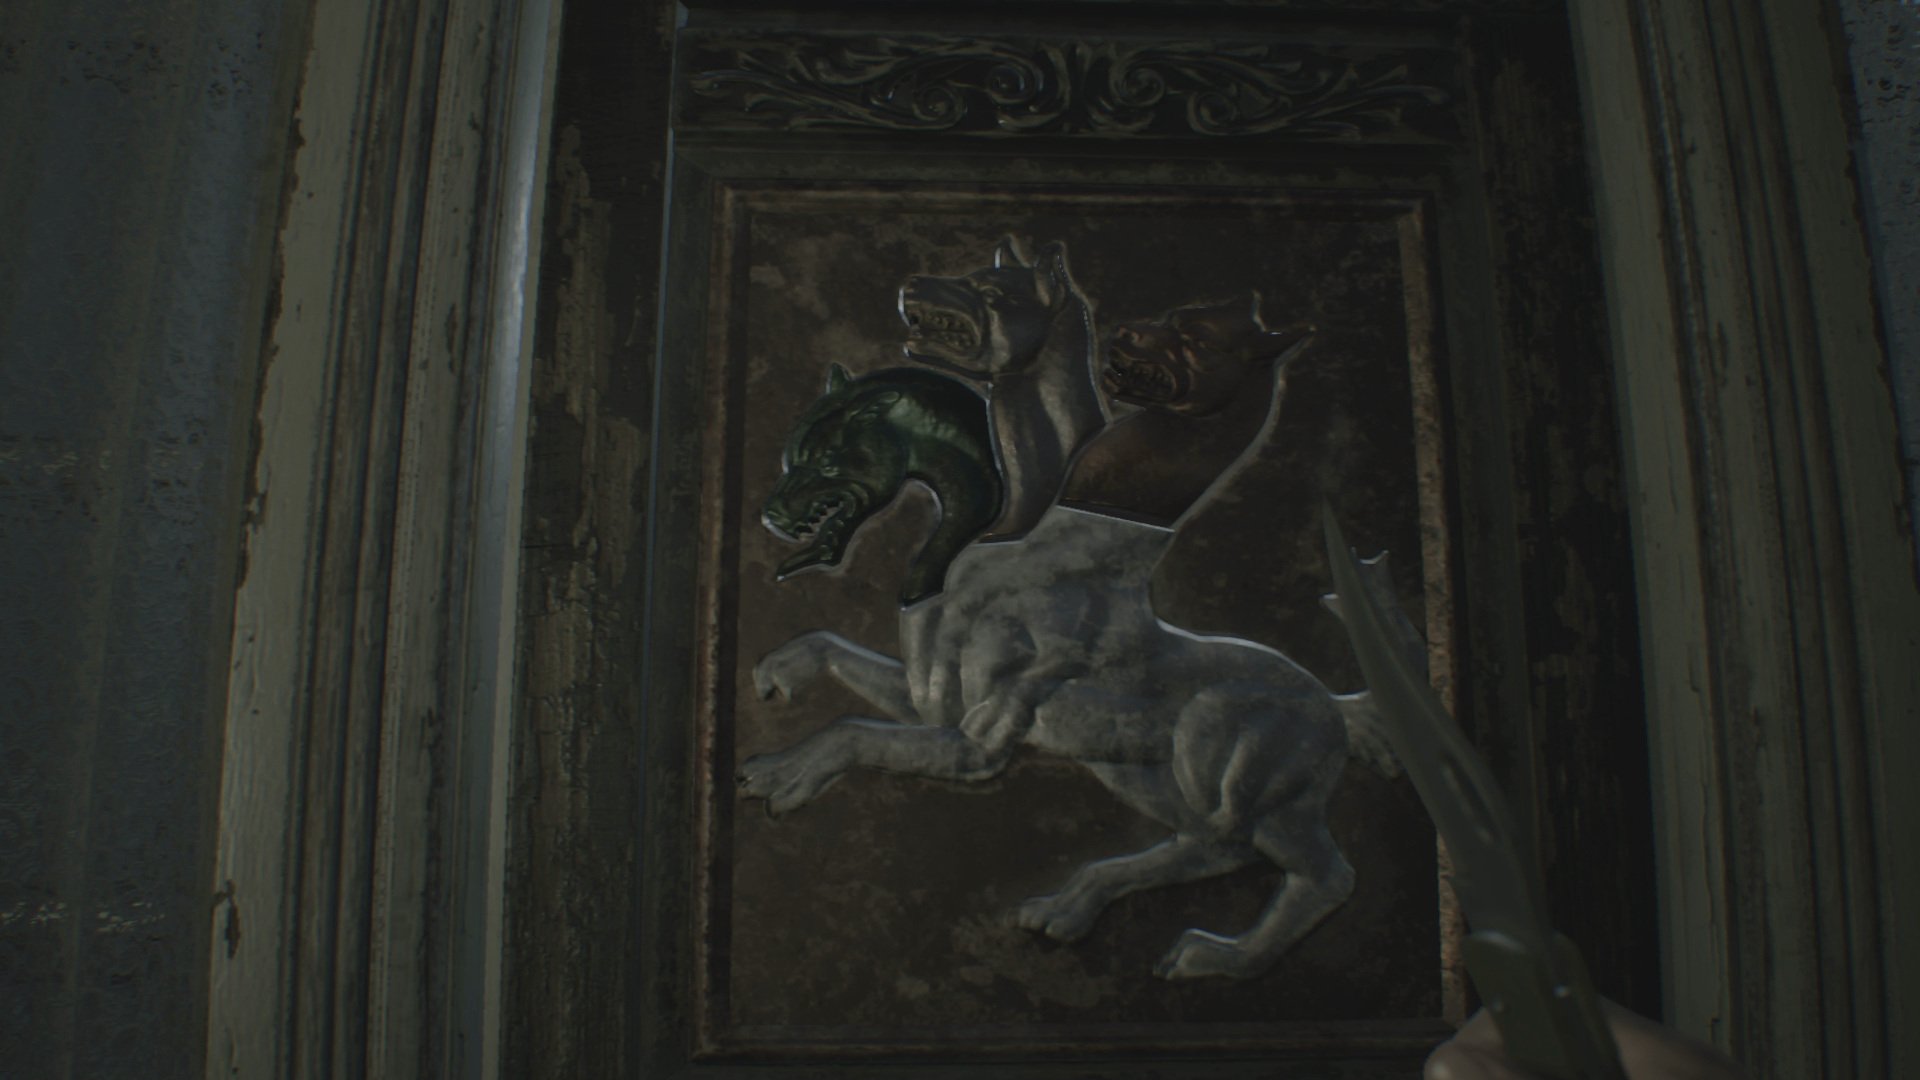
- For safety's sake, stop by the northern safe room and save. Skip saving if you're confident enough.
- Head down the hall to the western door and unlock it with the Scorpion Key. Enter the Main Hall.
- Grab the Pendulum from the grandfather clock.
- Take the western stairs back up to the second floor.
- Enter the Recreation Room.
- Inside, open the book on the left to find the Blue Dog Head. The trashcan beside it contains an item, but it's probably just Gunpowder. Ignore the Mia videotape.
- Open the door to Grandma's Room using the Scorpion Key. Go inside.
- Grab the Broken Shotgun and the consumable on the bed.
- Return to the second floor hallway.
- Head west past the Bathroom and drop down the broken bannister to the first floor.
- Head back through the Dining Area to the Living Room.
- Use the Pendulum on the grandfather clock to get the White Dog's Head.
- Optional: If you wanted the M37 Shotgun instead of the M21 Shotgun, now would be the time to get it from the Soldier Statue in the Main Hall. However, I recommend repairing the M21 instead.
- Optional: If you picked up the Treasure Photo, head to the Drawing Room. Look at the photo, press the switch by the fireplace, and grab the Steroids. Discard the photo from your inventory. Save these Steroids for before or after the Greenhouse boss battle.
- Back in the Main Hall, use the Dog's Heads on the northern door and step outside into the Yard.
The Yard: Repair Kit and Trailer
- If you're repairing the Broken Shotgun, step off the porch and remove the metal panel blocking the path to the Repair Kit. Go under the house, get the kit, and use it on the Broken Shotgun to make the M21 Shotgun. See our Broken Weapons and Repair Kit guide for more detailed instructions.
- Head north and enter the Trailer safe room.
- Optional: If you have three Antique Coins, you can buy the Steroids now. Save them for healing either before or after the Greenhouse boss fight.
- Answer the phone and save your game.
- Exit and go northeast to the Old House.
The Old House: Shadow plinth puzzle, Crank, Crow Key, First Marguerite fight
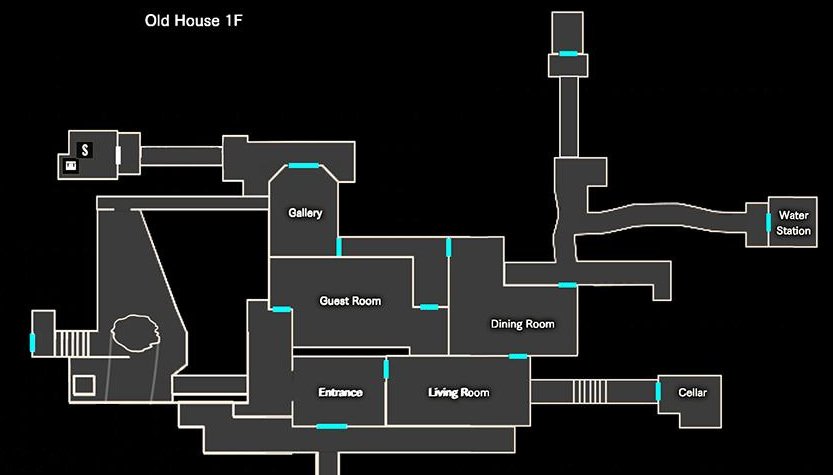
- Take the eastern door to the Living Room.
- Crouch and stick to the southern side of the Living Room to avoid the first bug nest.
- Staying couched, blast the nest blocking the path to the Cellar at point-blank range with your Shotgun. You're likely to get hit a little, but time is of the essence.
- Take the passage east to the Cellar and grab the Stone Statuette. Don't interact with Mia; just move on!
- Back in the Living Room, try to return to the Entrance via the same path you came from. Marguerite will block the door.
- Go north to the Dining Room, through the western hallway (grabbing the Old House map), and to the Gallery (the shadow plinth room) on the west.
- Solve the shadow plinth puzzle in the Gallery.
- Head northwest to the safe room (ignoring the Burner part along the way). Grab the Backpack and save.
- One of the trashcans by the Gallery has a random consumable; check for it after saving. If you find ammo, run back and save again. Ammunition is scarce at this point in the game.
- Back in the Gallery, take the secret passage to the western side of the house.
- Go south and turn the corner to find the underground passage.
- In the underground passage, grab the Crank. On the way back out, hurry past the insect or kill it with your knife.
- Just outside of the passage, use the Crank to raise the bridge to the Entrance.
- Head northeast to the back door. If you encounter Marguerite, just run past her (possibly taking minor damage).
- Outside, kill the large flying bugs to the left of the bug nest with your pistol if you can (you might have to skip this if Marguerite's swarm is following you).
- Run straight up to the northern bug nest and destroy it with close-range shotgun blasts. You need to save at least two shotgun shells for your Marguerite pit encounter, so switch to pistol shots if ammo runs too low.
- Use the Crank to raise the bridge to the Outhouse. Ignore any insects attacking you, as they should stop after a moment.
- Inside the Outhouse, open the chest and take the Crow Key.
- Return to the house. If you see Marguerite, take the path that she isn't blocking and make your way to the Crow Key door on the west side of the house.
- Marguerite will appear at the door and throw you into a pit.
- Look up and shoot Marguerite twice with the shotgun. Follow-up with pistol headshots until she falls into the pit. Don't give her a chance to throw insects.
- As soon as Marguerite falls, climb the ladder to escape.
- Use the Crow Key to open the door and enter the Altar room.
- Open the case and read the Serum Documentation file.
- Answer the phone.
- Proceed up the stairs to the north and check the drawer in the room with the doll for ammo.
- In the next room to the east, interact with the door that is locked by the scale.
- Head back downstairs and you should see Marguerite in the pit.
- Optional, but highly recommended: Instead of jumping down into the pit, walk carefully north, take the secret passage back to the shadow plinth room, and save your game in the safe room. The upcoming Marguerite boss fight is the hardest part of the game and might take a few tries, so you want your save to be as current as possible.
- Jump down into the pit and follow Marguerite.
- When you emerge aboveground, head straight up the nearby stairs and into the Greenhouse.
Greenhouse boss battle
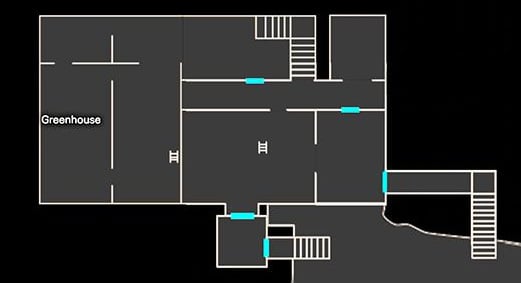
- Upon entering the Greenhouse, drop down the hole in the first room.
- If you're not on a no-healing run, walk past the staircase that leads to Marguerite. Enter the room just east of it and approach the case with bugs on it. Kill them and take the ammo inside.
- Turn the corner and go up the stairs that lead towards the wall that Marguerite bursts out of. As soon as you touch the top step, back way. Do this fast enough and you'll avoid her attack.
- If you dodged Marguerite's initial attack, you should be able to get 2-4 headshots in with the shotgun while she peers through the wall.
- Explore the second floor and then the first, looking for ammo.
- Whenever Marguerite appears, use the shotgun to shoot her in the belly or head. Back away from her while reloading. Use up all of your shotgun ammo, and then switch to the pistol if necessary.
- With any luck, you'll kill her before you take too much damage.
- Take the Lantern from Marguerite's body.
- Open the gate to the southeast, grab the item in the drawer, and exit the Greenhouse.
Old House: D-Series Arm and escape
- Drop into the manhole next to the Greenhouse stairs (the one you climbed out of before) and return to the Old House.
- Return to the second floor and use the Lantern to balance the scale by the door that leads east.
- Head through the Kids Room Contaminated Room, hallway, and finally to the Detention Room , which has a child's bed in it.
- In the Detention Room, crouch, then crawl through the hidden passage in the wall behind the bed.
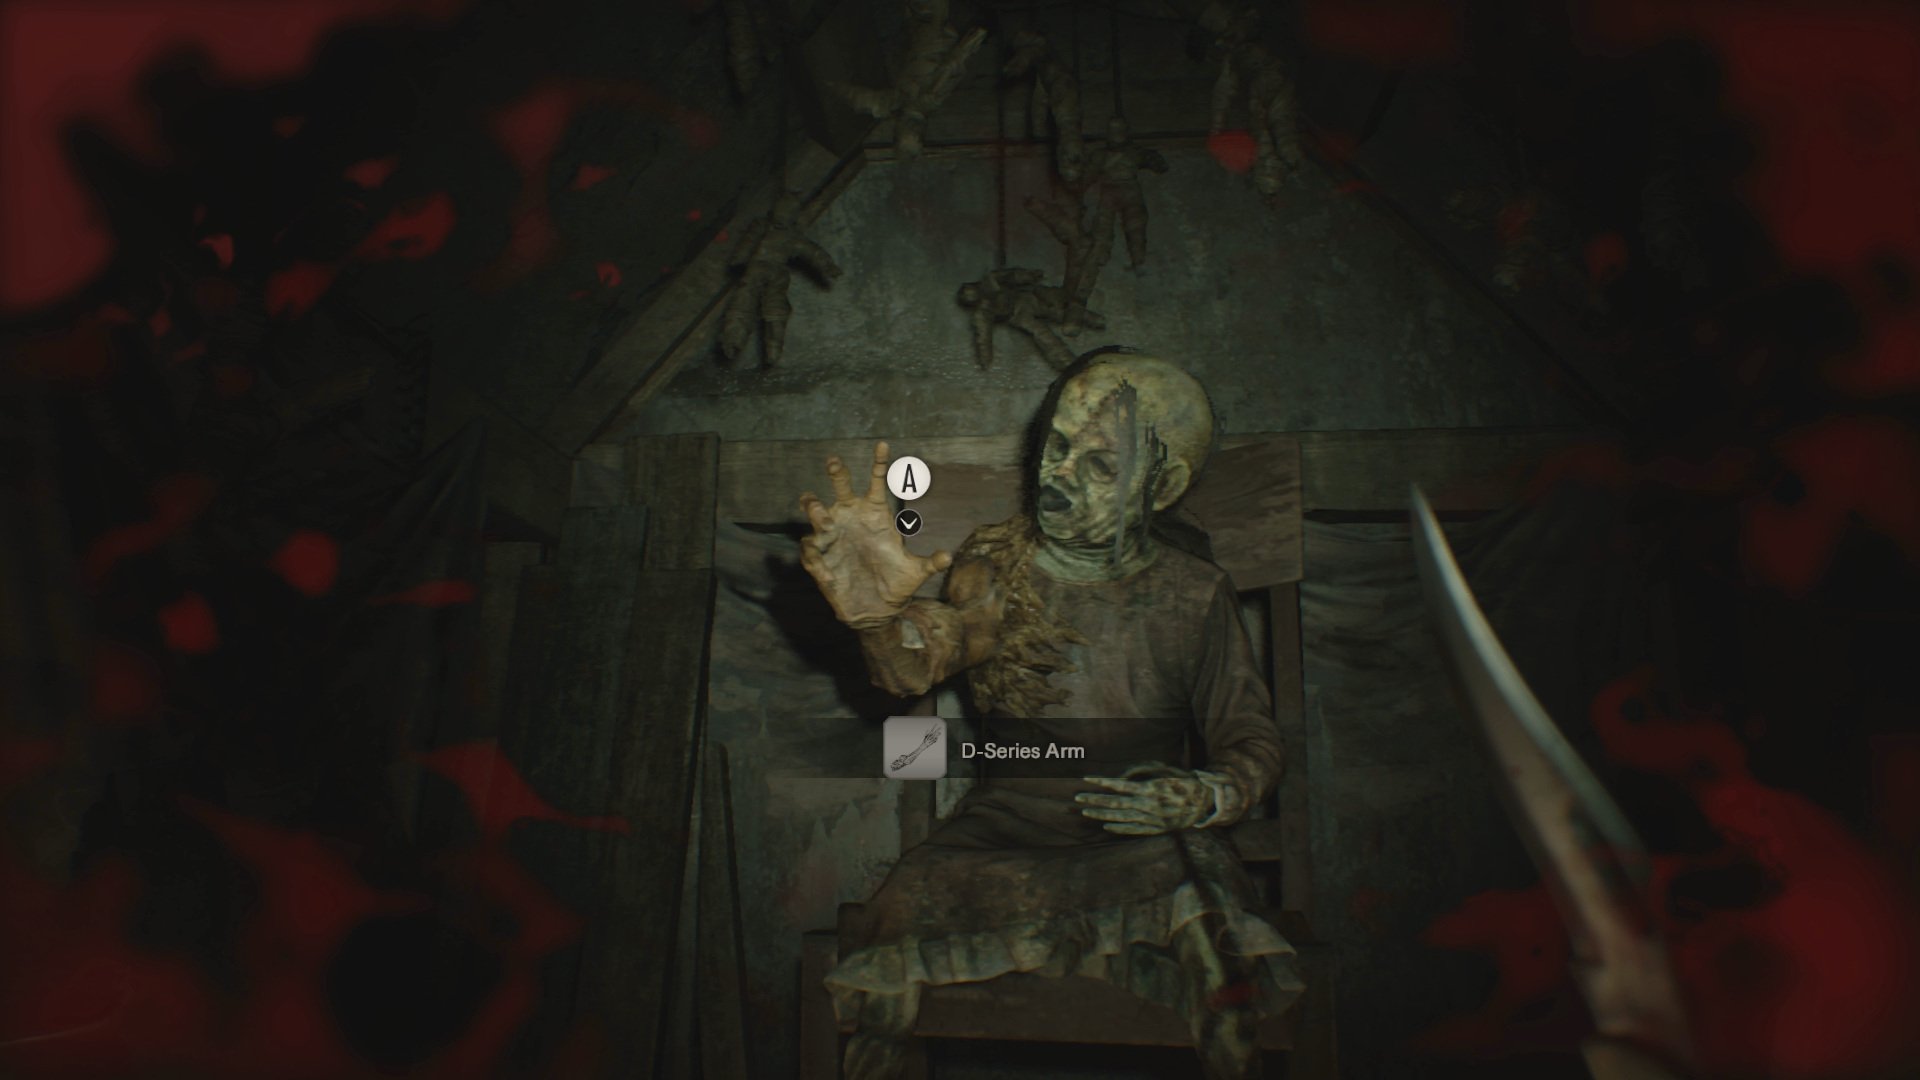
- Take the D-Series Arm from the corpse and start to head back towards the first floor.
- When you step out of the Detention Room, shoot and kill the Molded waiting on the other side of the door. Alternately, you can lure it into the room and then run around it to escape.
- Run past all remaining Molded on your way to the first floor. Ignore the phone in the Altar Room.
- Exit the Old House from the front door.
- Head outside to the Trailer in the Yard.
Trailer: Save and ignore phone call
- Enter the Trailer and save your game.
- When the phone rings, don't answer it.
- Leave and return to the Main House.
Main House: Processing Area, Red keycard, and Blue Keycard
- From the Main Hall, take the Scorpion door to the east.
- Stop and save in the northeast safe room if you like.
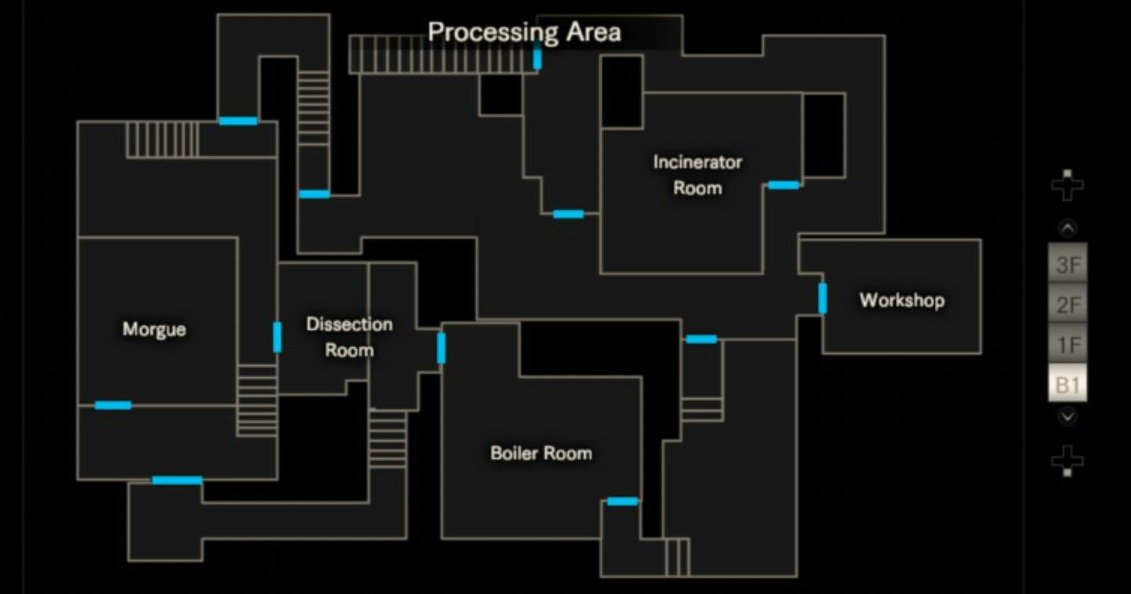
- Head downstairs to the Processing Area.
- Run all the way to the Dissection Room above the Morgue.
- Check the neck of the deputy for the Snake Key.
- Run to the northern door in the Morgue Area, past a Molded, and use the Snake Key to exit.
- Exit the Processing Area, dodging any Molded that attack along the way.
- Save in the northeast safe room.
- In the Main Hall, run past the Molded, and use the Snake Key to enter the Master Bedroom on the east side of the second floor.
- From the Master Bedroom, enter the Storage Room to the south and grab the Backpack.
- Back in the Master Bedroom, set the clock on the nightstand to 10:15 to open the passage to the Workshop.
- In the Workshop, pick up the Red Keycard from the table.
- Escape the Processing Area again, running past any Molded on the prowl.
- Save again! Saving is good for you.
- Back in the Main Hall, quickly run past the Molded and get to the west side of the second floor.
- Use the Snake Key to enter the Kids Room.
- Examine the lamp and push the button to lower the ladder to the Attic. Grab the consumables by the ladder if you need them.
- In the Attic, complete the Judgment shadow plinth puzzle to get the Blue Keycard.
- Optional: If you want to go for the Stabilizer in the Yard, grab the Toy Axe from the shelf behind the wardrobe (near the ladder). It's a useful item and won't take long to get.
- Head back downstairs, ignore the phone , and exit to the Yard.
Yard: Shadow plinth puzzle (optional) and head to Testing Area
- Dash to the Trailer and enter it to get rid of the Molded in the Yard.
- If you got the Toy Axe, step off the western porch stairs and head southwest to the hidden shadow plinth puzzle. Make a 7 with the axe to solve the puzzle, which will get you a Stabilizer. Use it immediately.
- Run back to the trailer to reset the enemies again and save your game.
- Back in the Yard, run to the western gate and use the Red and Blue Keycards to enter. This is a point of no return, so hopefully you didn't forget anything.
Testing Area: Keypad attempts, Steroids, Fat Molded fight
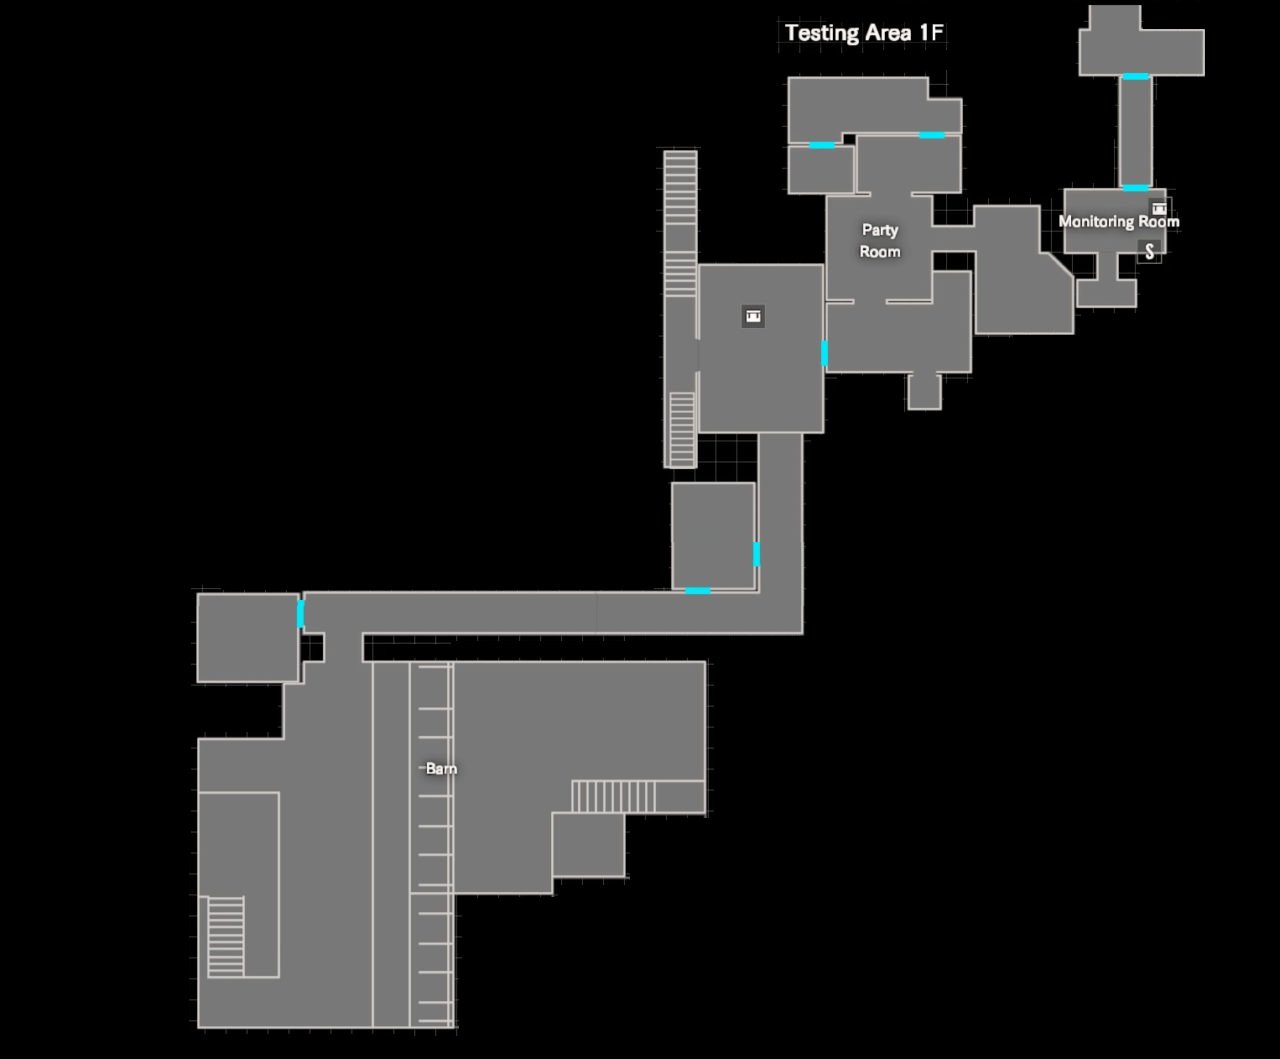
- You start out on Testing Area 2F, not the first floor. In the first room of the Testing Area, interact with the television.
- Take the corridor to the room with a box and some shelves. Watch out for two trip-mines in this room.
- The next room (the Supply Room) has several more trip-mines. Shoot or avoid them and continue to the next hallway.
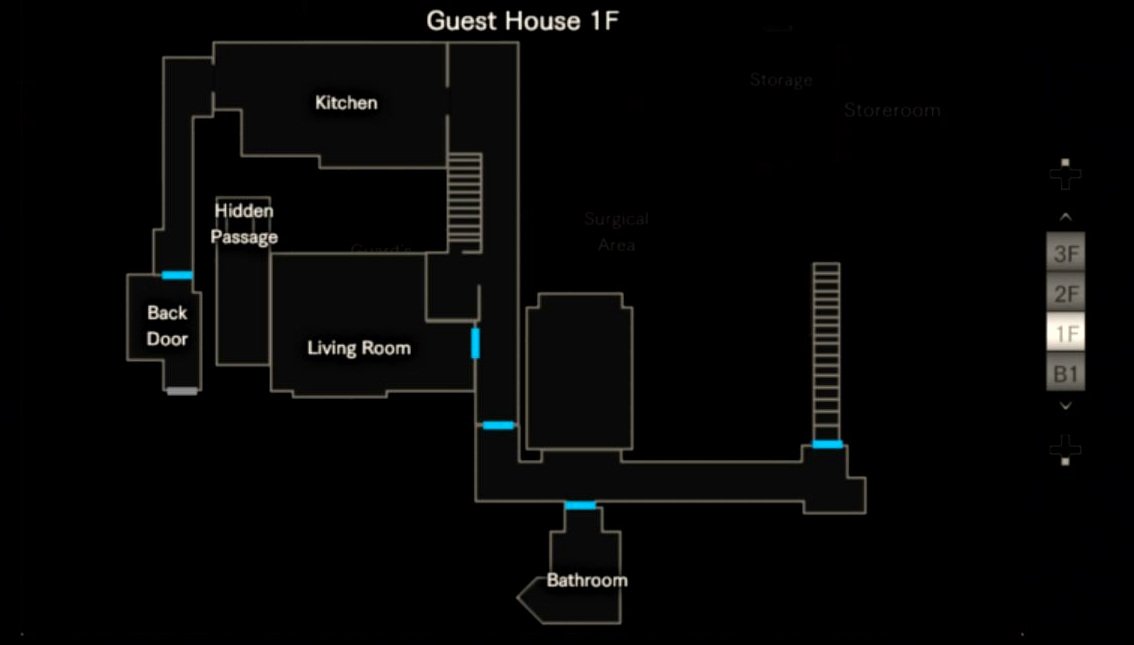
- In the hallway, break the first crate but don't destroy the one on the stairs; it's booby-trapped. The stairway leads to the first floor, which is shown in the map above.
- When you reach the room on the left with the keypad on the door, carefully shoot the tripwire bomb before entering. Another bomb is hidden up on the wall to the right.
- Interact with the keypad. As soon as you're given the option, enter one of the codes Lucas gives you (such as 0621) and then back away from the door while the boobytrap swings down.
- Enter another code, such as 0514. This opens a side door to the right.
- Take the side door that opens to the hallway. Head through the room at the corner and back into the hallway. The box just outside of the corner room is safe to open.
- Duck under the tripwire just before the corner that leads to the barn. Beware the crawler just beyond it.
- Right beyond that tripwire at the corner, there's a small room with four explosives in it. Run into the room and close the door to avoid the crawler.
- Clear out the bombs in the room. Then grab the precious Steroids from the base of the locker. Don't open the crate in the locker, as it's boobytrapped.
- Sprint through the barn, past three Molded, and up the stairs to the second floor.
- Enter the safe room at the top of the stairs and save.
- Drop down to the northeast area where the Fat Molded fight will soon occur.
- Take the stairs up and grab the Battery from the barrel. All of the crates except for the one on the desk upstairs are safe to open.
- Back downstairs, use the Battery on the console.
- Fat Molded battle! When the elevator opens, aim at the Fat Molded from up close and immediately dodge his bile by stepping just behind the elevator wall. Then shoot him repeatedly in the head with your pistol. 10-20 continuous headshots should destroy him.
- After killing the Fat Molded, stand aside to avoid taking damage from the explosion.
- Take the elevator up and head into the Rest Area (the room with the burnt corpse).
- Read the file taped to the corpse.
- Just north of the Rest Area, push the button to lower the stairs.
- After taking the stairs back to the first floor, step into the room with the keypad and Item Box.
- Put all of your items into the Item Box. This is the first of three times you must use an Item Box to progress in the game.
- Enter 1408 on the keypad and head into the Party Room area.
The Party Room: Puzzle, D-Series Head, and restoring inventory
- Take the candle from the dummy.
- Go through the door on the left and then the door on the right to reach the room with a cake in it.
- Look at the cake to receive instructions from Lucas.
- Turn on the stove relight the candle.
- Turn right and use the candle to burn the rope holding a door shut. Enter the balloon room.
- Inside the balloon room, enter the word LOSER on the lock.
- Enter and take the Valve Handle.
- Back in the birthday cake room, find pipe near a door and attach the Valve Handle to it. Turn off the sprinkler.
- Use the stove to light the candle once more.
- Put the candle on the cake.
- Pull the boards off the hole in the wall.
- Grab the bomb from the floor, place it in the wall hole , and step around the corner to avoid the explosion.
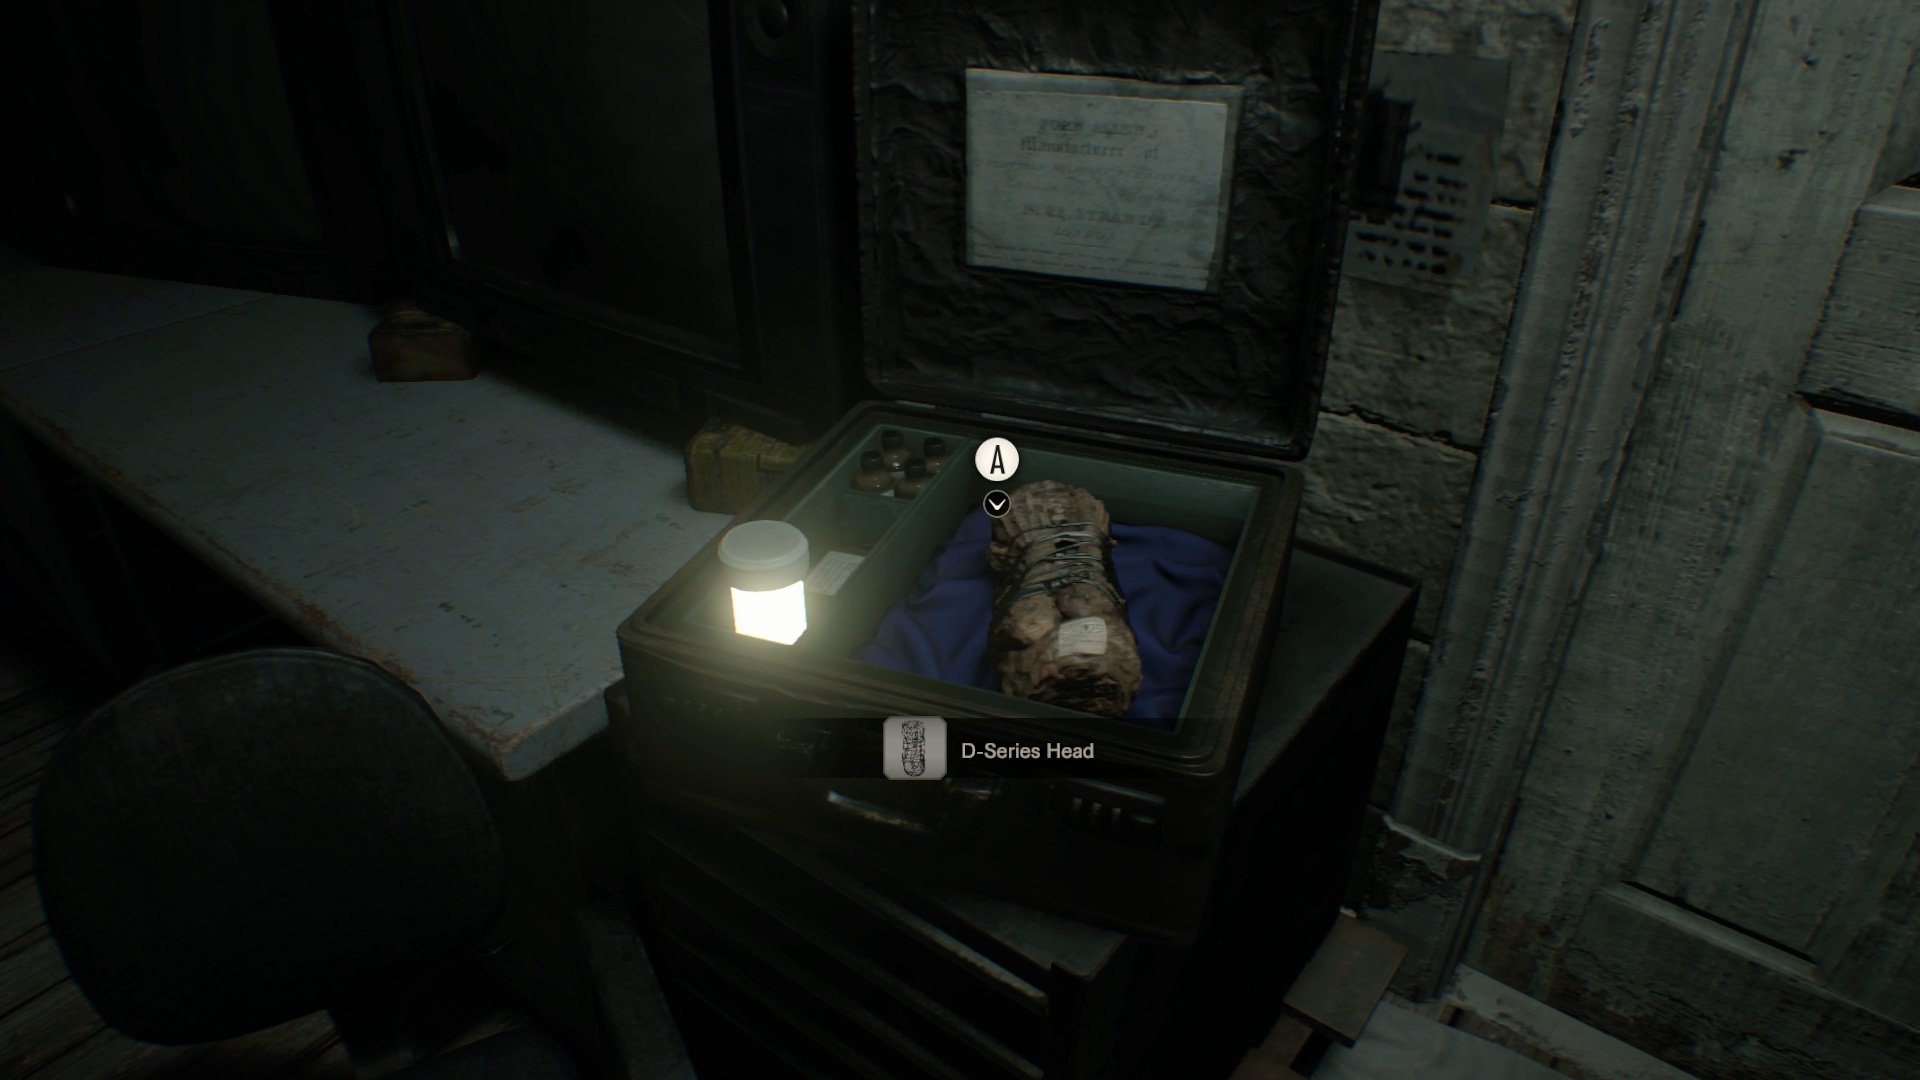
- Pick up the D-Series Head and the Testing Area Map in the Monitoring Room.
- Save your game before using the item box.
- Use the Item Box to withdraw your pistol, shotgun, knife, Crank, D-Series Arm, and ammo. If you've unlocked the Albert R-01 pistol, withdraw that instead of the standard pistol.
- Save again and then exit to the Boat House.
Boat House: Safe room, boss fight, and curing Mia
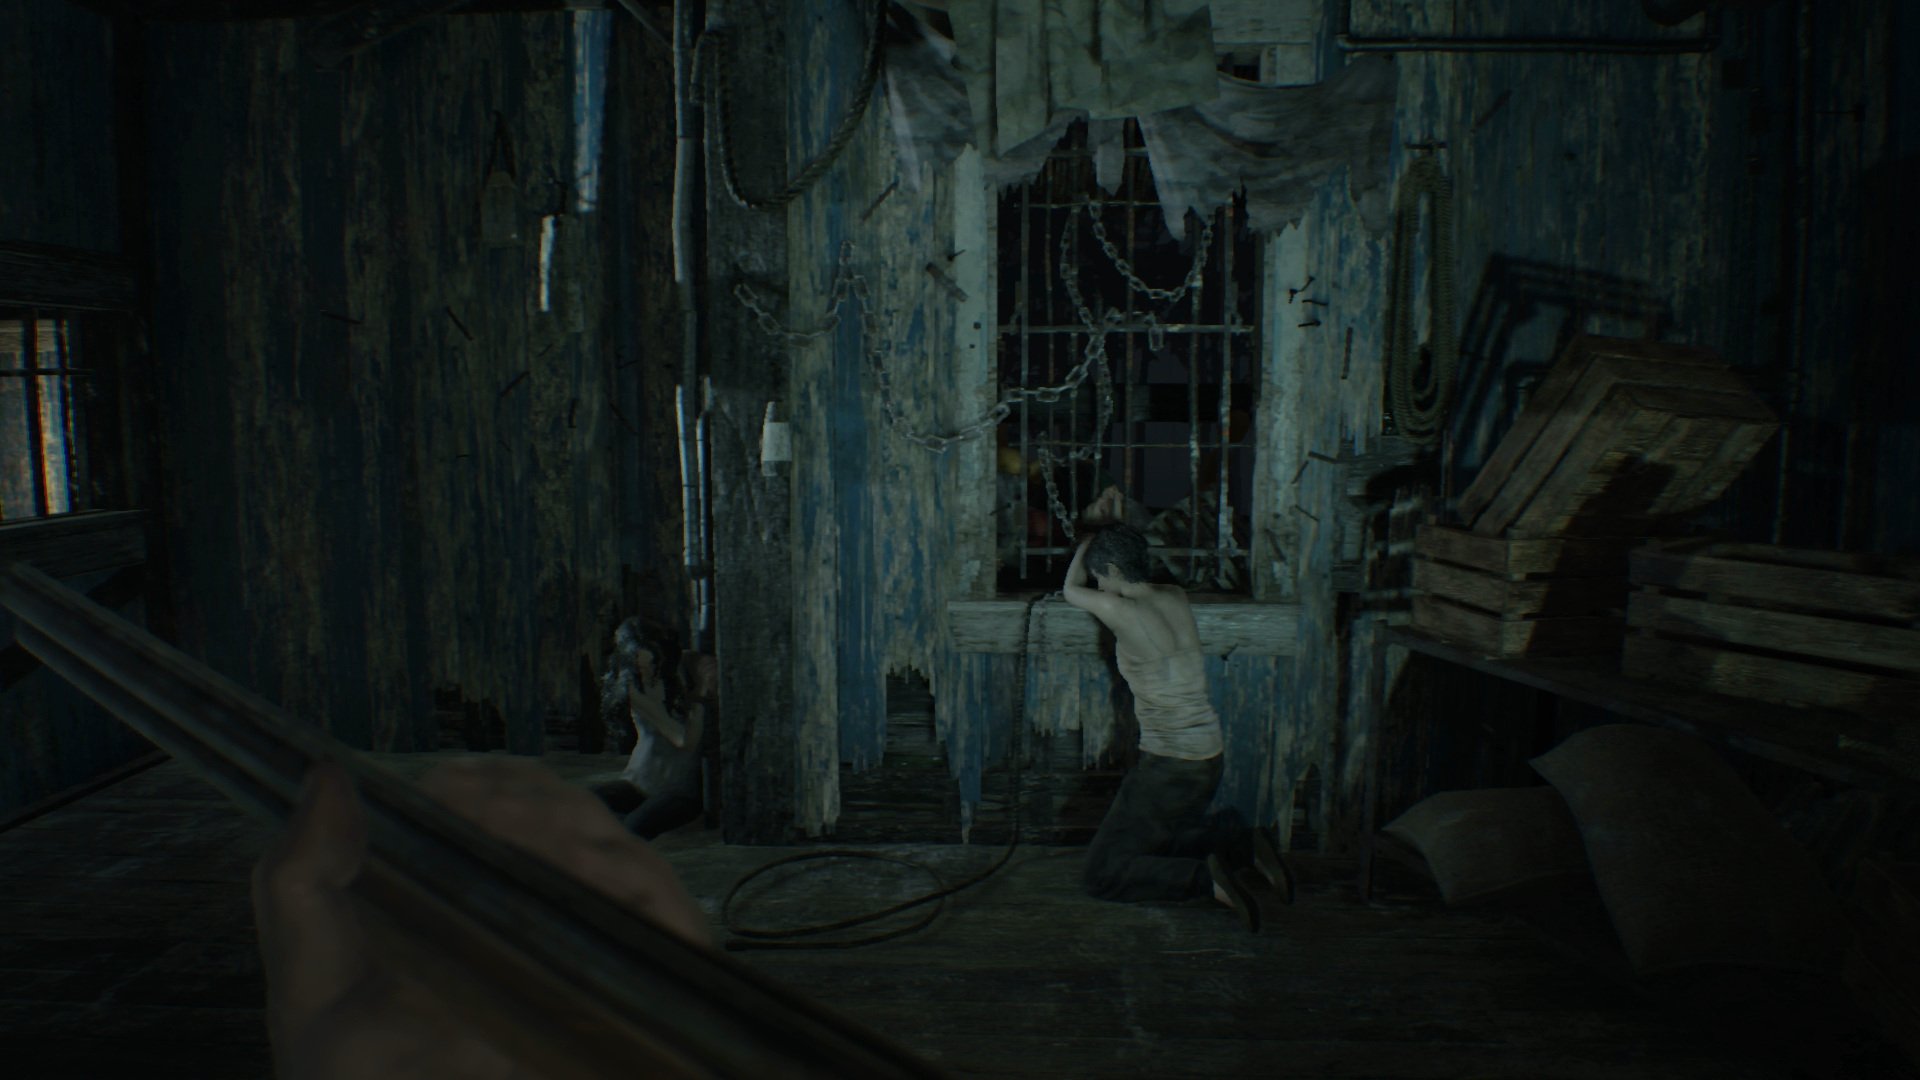
- Use the Crank on the first winch. Pick up the nearby item (if needed) before crossing the bridge.
- Check the shack to the northeast and the crate by the second winch for ammo.
- Apply the Crank to the second winch.
- Run west to the main Boat House. You should have to dodge two Molded near the entrance, one of which is a crawler.
- In the Boat House safe room, grab all ammunition and save your game. My time at this point: 1:44:00 (you can do better!).
- Head upstairs and interact with Zoey for a cinematic. Accept the items she hands you.
- Boss fight! Drop into the water and blast Jack's lowest eye with your shotgun until he stumbles. Shoot the next eye, then run and grab ammo from the corner of the room. Keep firing at his eyes from close range with the shotgun, which should stun him nearly continuously. Switch to the pistol if he climbs to the upper level, then back to shotgun when he comes down again. Never go back to the upper level.
- After defeating Jack, wait at the door. You'll have to inject him with the serum when he grabs you one last time.
- When asked to choose between Mia and Zoey, cure Mia.
Wrecked Ship: Fuse and Old Videotape
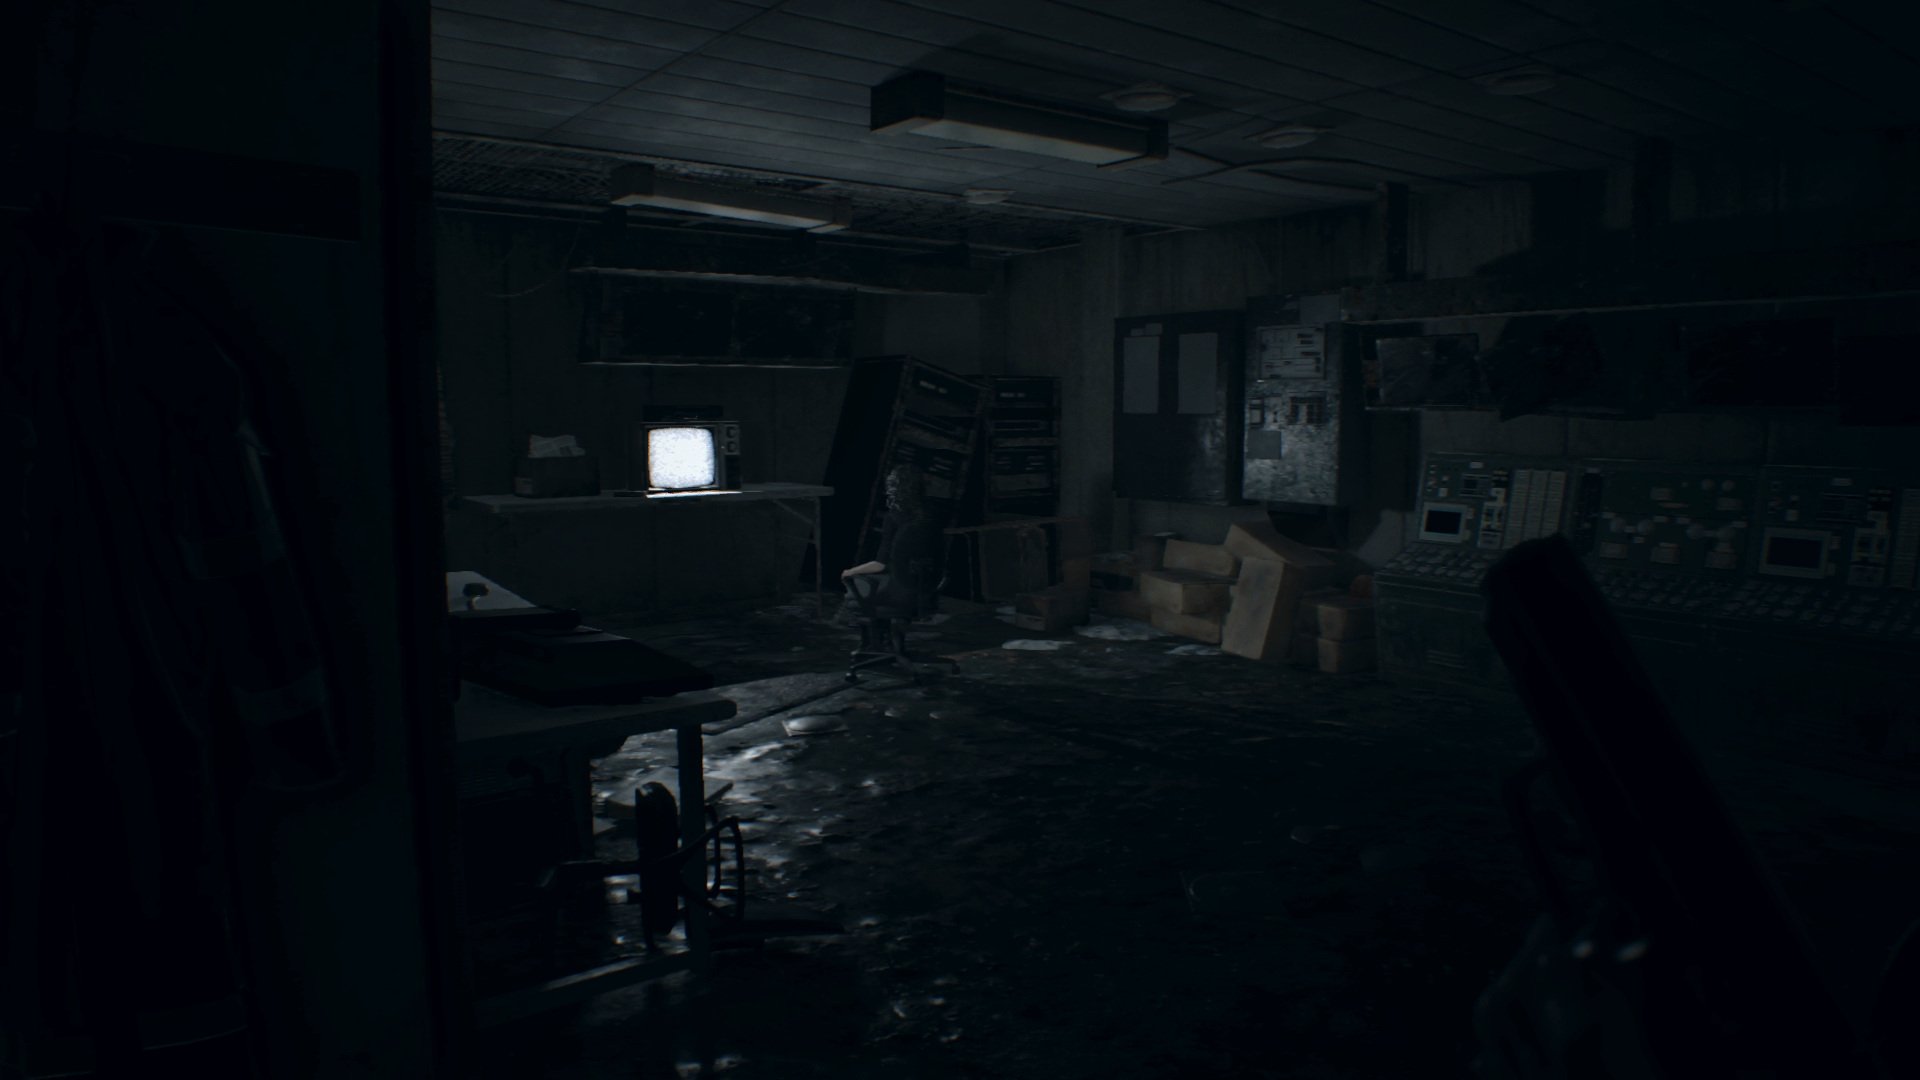
- Examine Ethan's body.
- Enter the ship and proceed through its hallways.
- Go to the room onWrecked Ship S1 with a hatch in the floor. Trigger the cut scene by walking around, which opens the hatch.
- Drop down the hatch and take the passageway to floor S2.
- On floor S2, take the northern path that leads to an area where the ship's wall has been destroyed.
- From there, head up the stairs and then climb the ladder.
- Drop into the water, climb the next ladder, and continue up the stairs to Wrecked Ship 1F.
- Enter the Laundry Room, the large room just east of the staircase in the center.
- Head to the fuse box on the southern wall of the room. Dodge the Molded and grab the Fuse.
- Exit from the eastern door and head northwest to the fuse box near the door leading to the western staircase.
- Use the Fuse on the fuse box and enter the stairwell.
- Take the staircase to the third floor.
- Enter the Security Room and play the Old Videotape.
Old Videotape
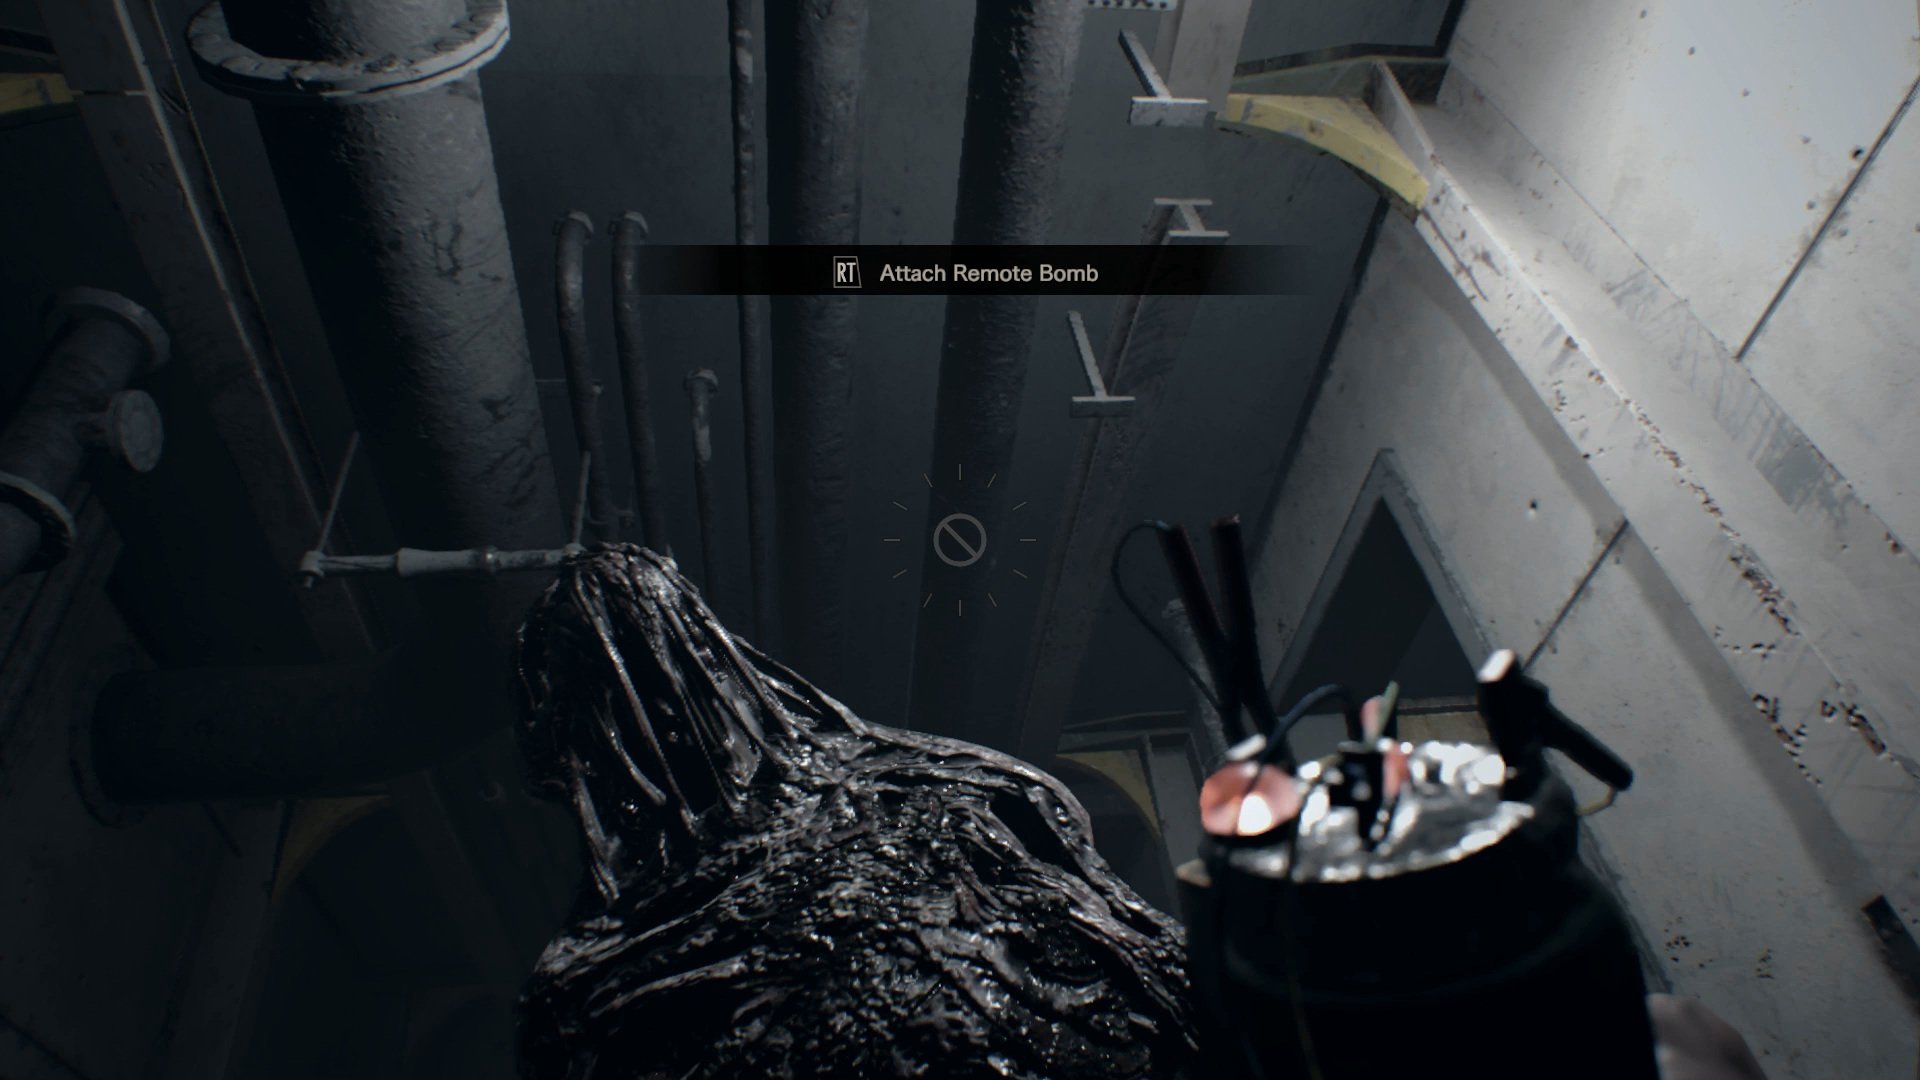
- Exit the safe room and head east to the Dining Room.
- Crawl through the southeastern passage and look at the black vomit.
- Return to the hall and then head southeast through the Bunk Room, dodging the Molded inside. Exit throught the southern door and close the door behind you.
- Enter the elevator and kill the Molded who drops into it.
- Push the button for Floor S2.
- On floor S2, run through the hallway, dodge the Molded that appears on the left, and grab the ammo at the end.
- In the room outside of the No. 1 Engine Room, run directly to the Remote Bombs on the wall. Dodge the Molded that drops from the ceiling and escape with the bombs.
- In the No. 1 Engine Room, dodge the Molded at the top of the staircase and proceed west to the Cargo Bay.
- Enter the Cargo Bay and collect the Corrosives.
- Directly south of the Cargo Bay, use the Corrosives to open the No. 2 Engine Bay and go inside.
- Circle clockwise around the room and reach the door you came through just as Evie closes it.
- Run back to the elevator, shooting or detonating the Molded in the No. 1 Engine Room and in the hallway outside of the elevator.
- Call the elevator and head to the third floor.
- Climb out of the elevator and head northeast through the Bunk Room. If an enemy ambushes you outside of the northern Bunk Room exit, lure it into the room and then run around th table to escape back to the hallway.
- Return to the Dining Room and go west through it to the Break Room.
- Climb through the hole near the ceiling to the hallway.
- Take the stairs up to the third floor.
- Head through the Security Room and meet Alan.
- Enter the Control Room and exit through the northern door. Do not use the computer!
- Skip the movie that plays when you run into Evie. Yes, this one can be skipped!
Wrecked Ship: Repair the elevator, save Ethan, leave

- Save your game in the Security Room. My time at this point: 2:14:00.
- Head to the elevator and open it.
- Inside, climb the ladder and drop down to Ship 4F.
- Go southeast to the Captain's Cabin.
- Grab the Lug Wrench and the Wrecked Ship map from the desk. Then head out to the elevator.
- Drop down the elevator and use the Lug Wrench on the hatch.
- Climb down to the first floor and save your game in the Maintenance Room to the southwest. You can grab the MPM Handgun from the drawer, but you'll never need to use it.
- Grab the Fuse from the box by the northwest stairwell.
- Return to the elevator and climb up to the second floor. You can grab the Survival Knife outside of the elevator, but you'll never need to use it.
- Enter the Guest Room in the southwest and get the Corrosive from the floor.
- Take the northwestern stairwell up to the third floor.
- Save your game in the Security Room. Better safe than sorry!
- Head through the Control Room and use the Corrosive on the northern door. If you're fast enough, you can avoid damage from the Molded that spawns while you open it.
- Follow the path into the Sick Bay. A Fat molded spawns when you enter.
- Grab the Power Cable from the machine on the western wall and run past the Fat Molded back to the hall. He's so slow!
- Return to the elevator , dodging the Molded in the Control Room.
- Drop down the hatch and use the Fuse and Power Cable on the elevator wall panel. You might also run back to the Security Room to save before proceding.
- Take the elevator to floor S2.
- Dodge a couple of Molded, including a crawler, on your way to the No. 1 Engine Room.
- In the No. 1 Engine Room, run past the Molded and Fat Molded. You don't have to fight them!
- Enter the No. 2 Engine Room and look at Ethan.
- After the cinematic, leave the ship and enter the Swamp.
Swamp
- Follow the path to the safe room.
- Collect the items in the building, including the Backpack and Grenade Launcher.
- Save your game before using the item box.
- Use the item box for the final time, equipping the grenade launcher, shotgun, handgun, knife, and ammo. Take the Albert R-01 pistol instead of the regular one, if you have it.
- Save your game again before heading outside.
- Run south to the elevator and push the button to call it, dodging Molded until you enter.
- Head down to the Salt Mine.
Salt Mine
- A crawler will attack at the end of the first room. Run past it, but crouch to avoid the tripwires in the next area.
- Continue running past all Molded on your way to the four-way intersection.
- At the intersection, grab the Remote Bombs and then head west.
- Push the minecart through the southern wall.
- Run past the wall you just destroyed, dodging the Molded who approaches from the left.
- In the room with the staircase, shoot the tripwire bomb before climbing the stairs. Don't open the crate at the top of the stairs.
- In the Cultivation Room with the laptop computer, grab the final Steroids from behind the two bathtubs that are close together.
- From there, go south into the Storage Space.
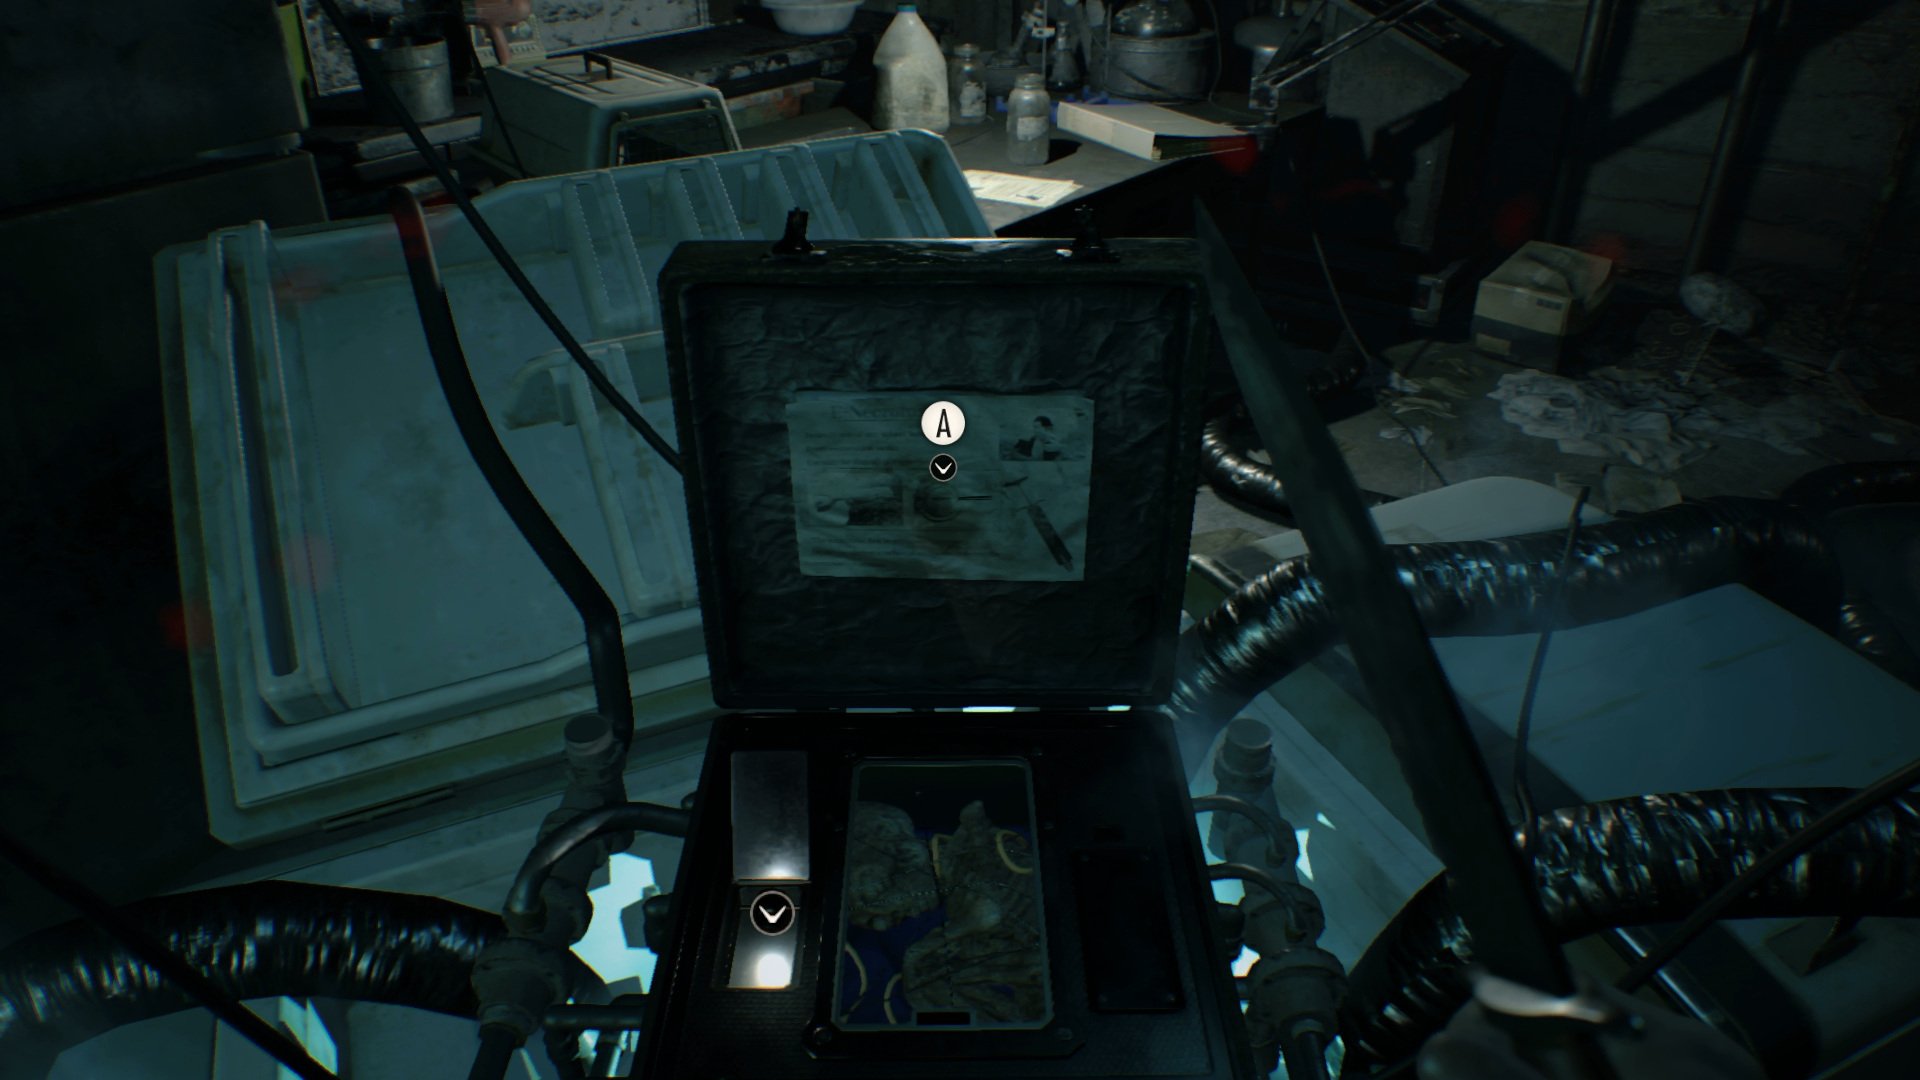
- Open the case and use Eveline's Tissue Samples on it.
- Take the E-Necrotoxin produced by the case.
- Go south into the safe room. Grab any nearby ammo and save your game. My save time: 2:34:00.
- Step out to the west and make your way along the path.
- Run past as many Molded as possible, using your shotgun to shoot only the enemies that block thin pathways.
- In the room with the two Fat Molded, hit them with a single Remote Bomb when they spawn. If you're super fast and lucky, you can climb the ladder before they recover and shoot you. However, it's safest just to finish them off with bombs. You only need one bomb for the final boss.
- Escape through the thin break in the wall and reach the final safe room. Save! My save time: 2:38:00.
- Push the boarded wall down and enter the Guest House for the last time.
Guest House

- Proceed through the first floor and just past the Kitchen, where you'll confront Eveline and threaten her with the E-Necrotoxin.
- Go upstairs to the Attic and confront Evie.
- Walk towards Evie until you reach and inject her with the E-Necrotoxin.
- Boss fight! Use a Remote Bomb on the monster's face as soon as it becomes vulnerable. Then blast her with grenade shots until the next phase begins. If you die here, you're probably making good enough time that you can just restart from the checkpoint rather than reloading your save.
- Once the fight goes outside, shoot Evie with your pistol and/or Grenade Launcher.
- Grab the Albert 01-R when it becomes available (even if you already have one) and unload shots into the boss's face until she dies.
- Skip the ending movies and/or credits if you're in a hurry.
- That's it! This whole playthrough should have taken under three hours. My time was 2:46:00, and I sacrificed time to refine this guide. The 'Just Get me Outta Here' Achievement/Trophy is yours!
More guides to surviving the horror
Resident Evil 7: Biohazard is a game that fans of horror games won't want to miss. And because it's an Xbox Play Anywhere title, Windows 10 gamers won't have to miss out either.
For more help, check out our Achievement Guide, Files Guide, Antique Coins Guide, and Mr. Everywhere Statues Guide. You also don't want to miss our full review!

Paul Acevedo was formerly a Games Editor at Windows Central. A lifelong gamer, he has written about videogames for over 15 years and reviewed over 350 games for our site. Follow him on Twitter @PaulRAcevedo. Don’t hate. Appreciate!

 Windows Central Insider


