How to create mirror volume on Windows 11
Here are two ways to create mirror storage to protect your files from a hardware failure on Windows 11.
All the latest news, reviews, and guides for Windows and Xbox diehards.
You are now subscribed
Your newsletter sign-up was successful
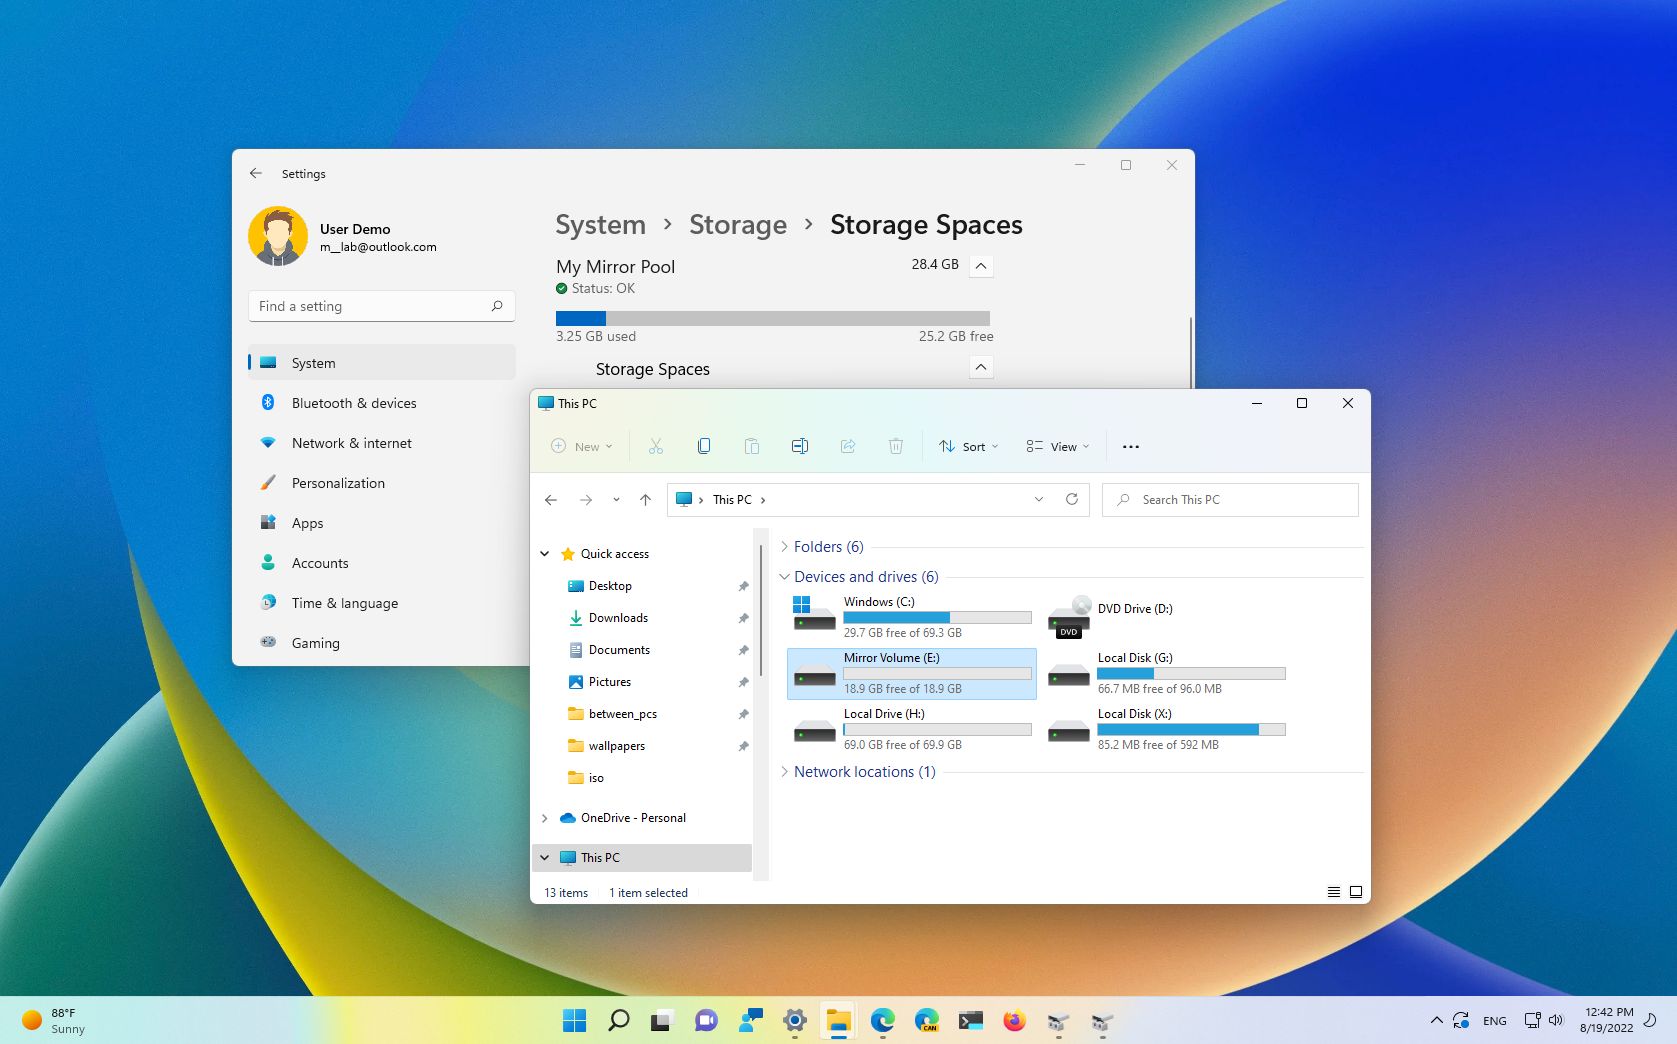
On Windows 11, you have multiple ways to create a mirror volume to protect your data from drive failure, and in this guide, you will learn how.
Usually, we store files on the system's installation drive or external storage. Although this is a typical scenario, the problem with this approach is that the data has no redundancy. If the storage dies (unless you have a backup), you will also lose your files.
However, on Windows 11, you can use Disk Management or Storage Spaces to create a mirror configuration using two drives to protect your files in case of physical or logical problems with one of the drives.
The "mirror" reference comes from the "RAID" (Redundant Array of Independent Disks) levels, which is the standard that defines the different ways you can use to combine drives for redundancy, performance, or speed.
On RAID, "mirror" is defined in level one, and this array consists of two physical drives that have the exact copy of the data. If one drive fails, you will still have seamless access to the data from the other drive. The mirror array has a minimum requirement of two drives, but you can always have more as long as you add them in pairs.
This guide will teach you the ways to create mirror volume on Windows 11.
How to create mirror volume with Disk Management
To create a mirror volume on Windows 11 with the Disk Management tool, use these steps:
All the latest news, reviews, and guides for Windows and Xbox diehards.
- Open Start.
- Search for "Create and format hard disk" and click the top result to open the Disk Management app.
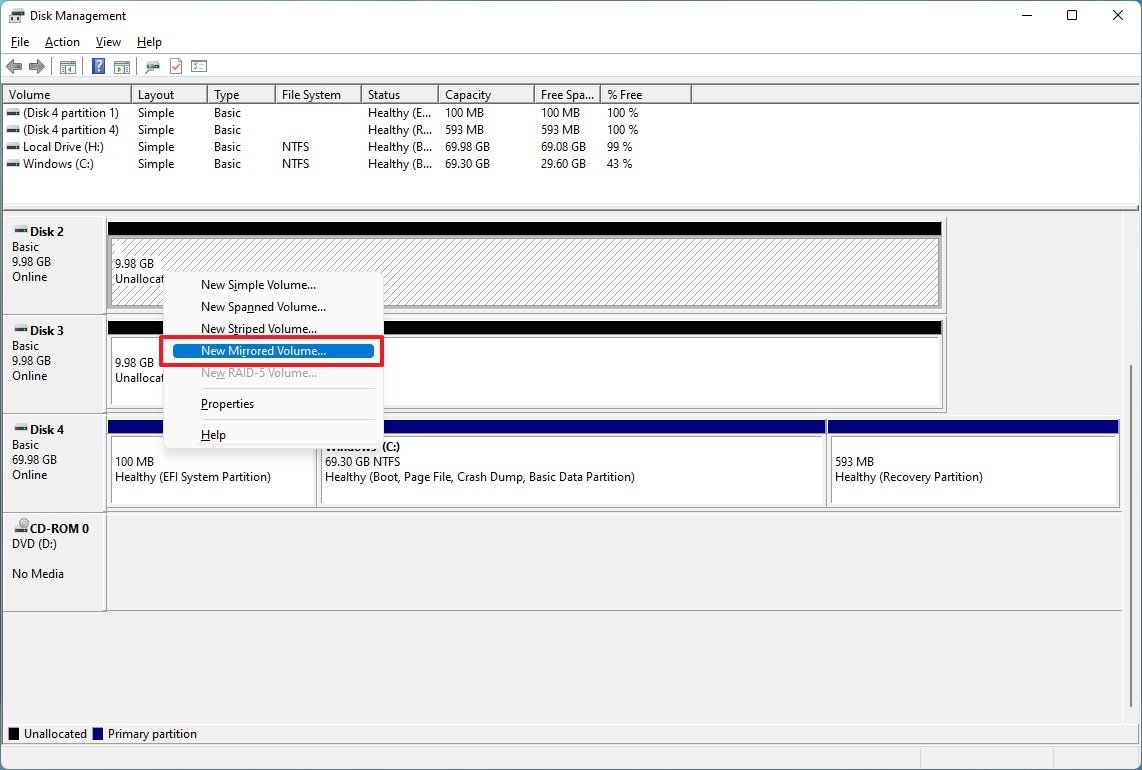
- Right-click the "Unallocated" drive space and select the New Mirrored Volume option.
- Click the Next button.
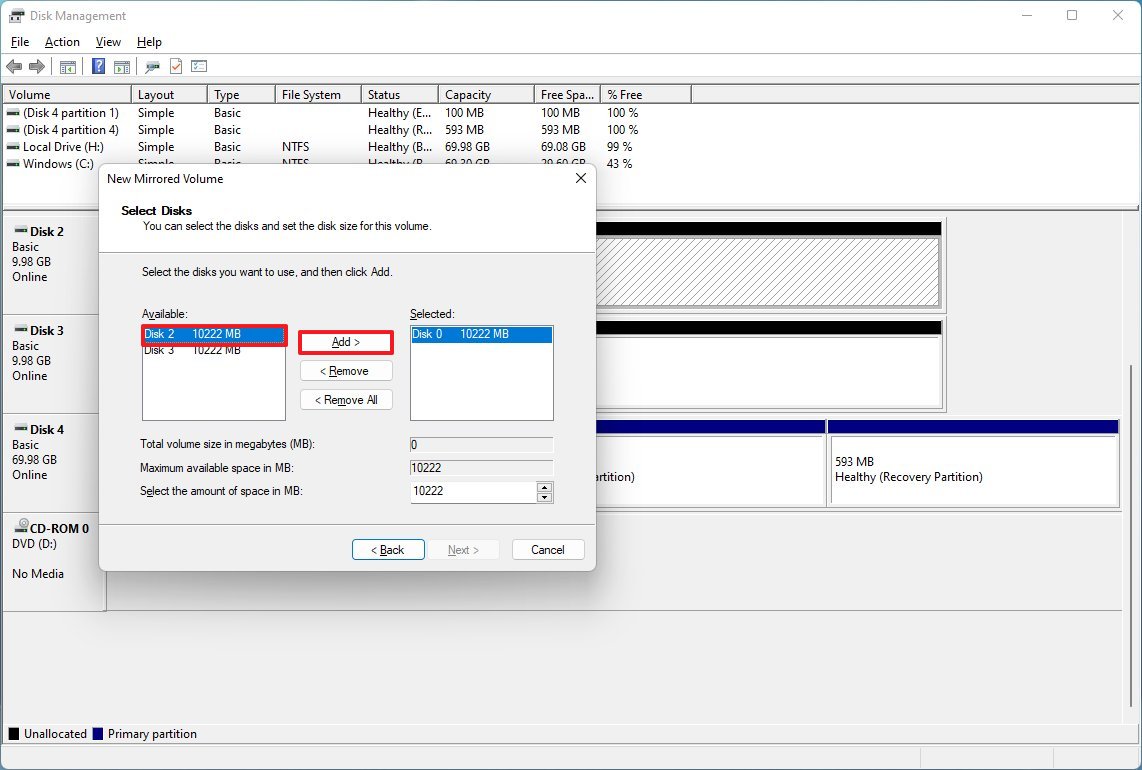
- Select the available drive from the left.
- Click the Add button.
- (Optional) Specify the space for the mirror volume.
- Quick note: Typically, you don't want to change this setting. However, it's important to note that the new partition cannot be larger than the size of the smaller hard drive.
- Click the Next button.
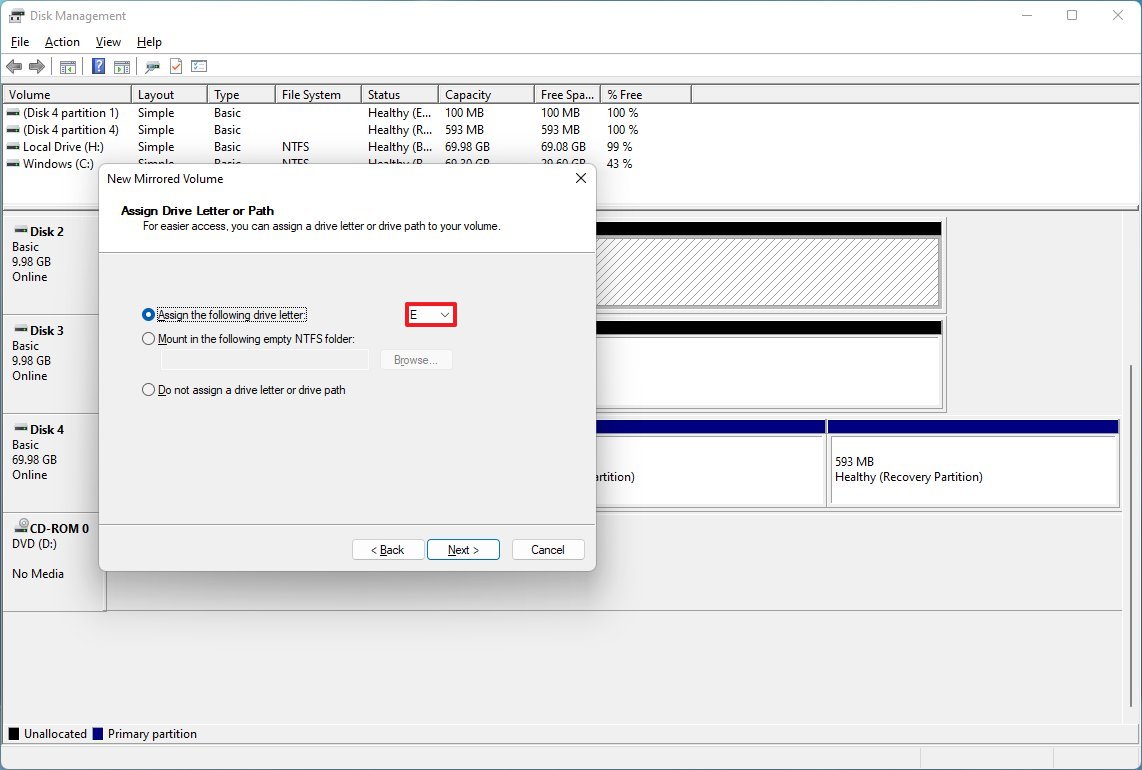
- Choose the driver letter for the volume.
- Click the Next button.
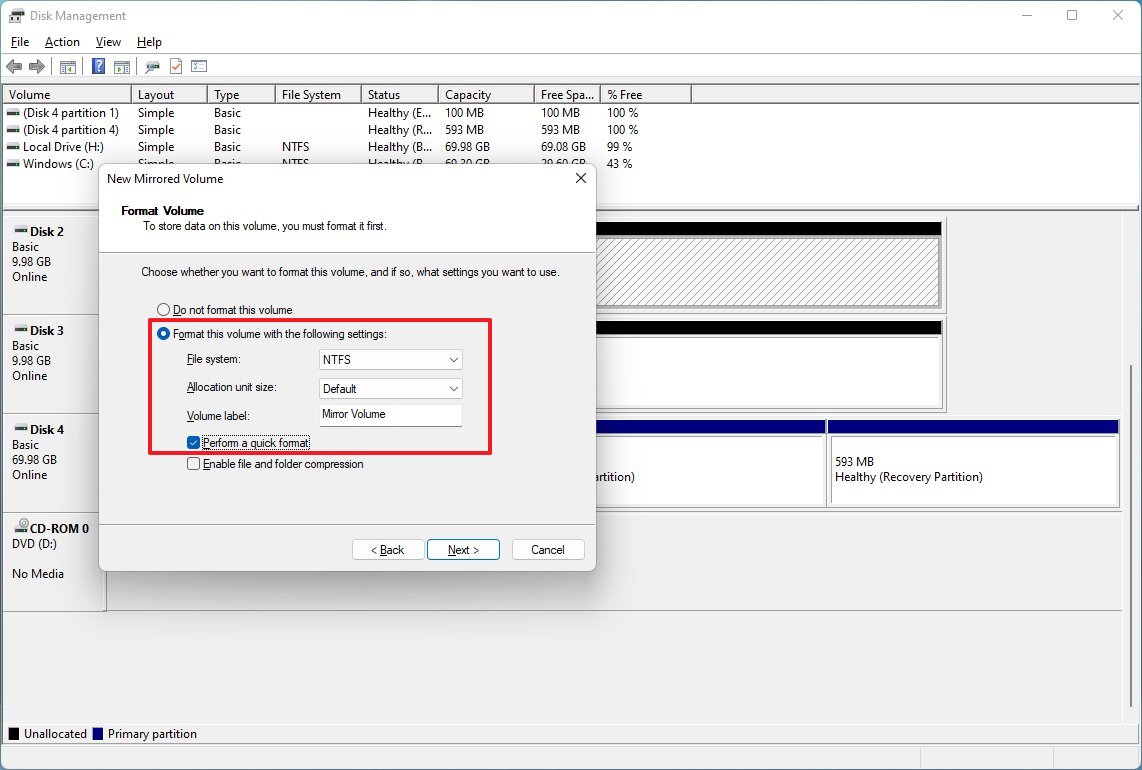
- Select the "Format this volume with the following settings" option.
- In the "File system" setting, choose the NTFS option.
- In the "Allocation unit size" setting, choose the Default option.
- In the "Volume label" setting, confirm a descriptive name for the drive.
- Check the "Perform a quick format" option.
- Click the Next button.
- Click the Finish button.
- Click the Yes button.
Once you complete the steps, the mirror drive will appear on File Explorer, and any data you store in this location will be duplicated on both drives for redundancy.
Create mirror volume from existing drive with data
If you already have a drive with data, it's still possible to make storage redundant using mirroring.
To create a mirror volume with a drive with data on Windows 11, use these steps:
- Open Start.
- Search for "Create and format hard disk" and click the top result to open the Disk Management app.
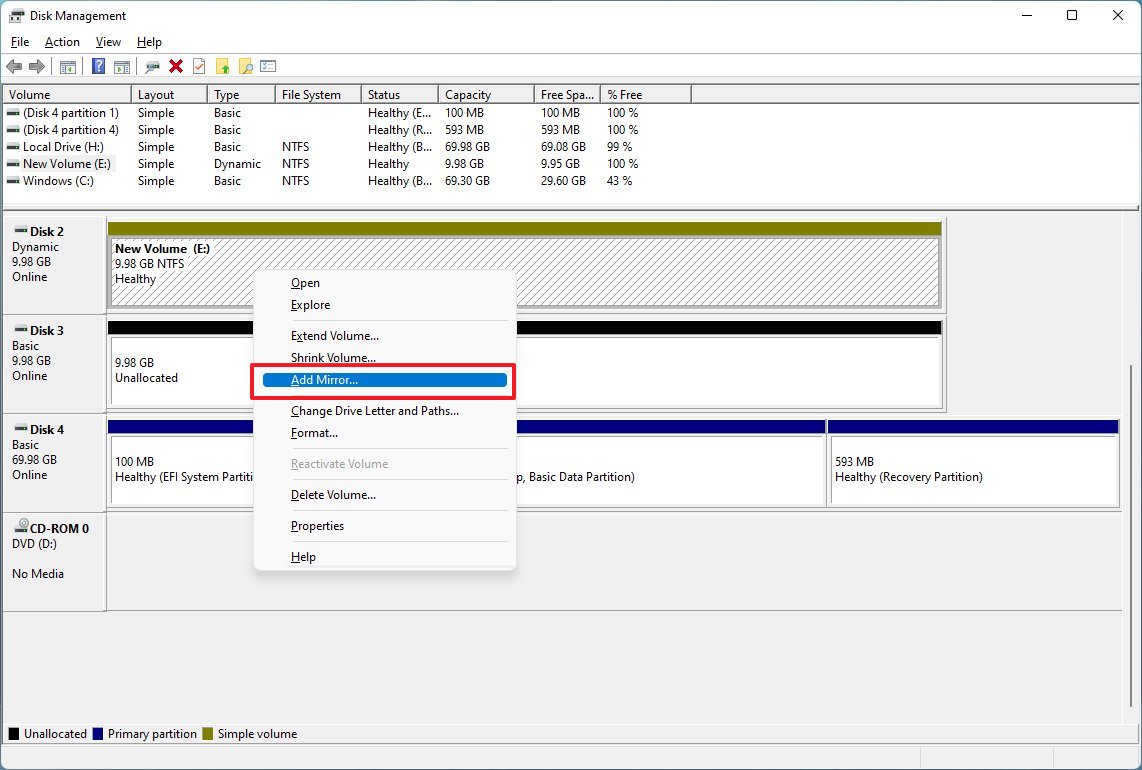
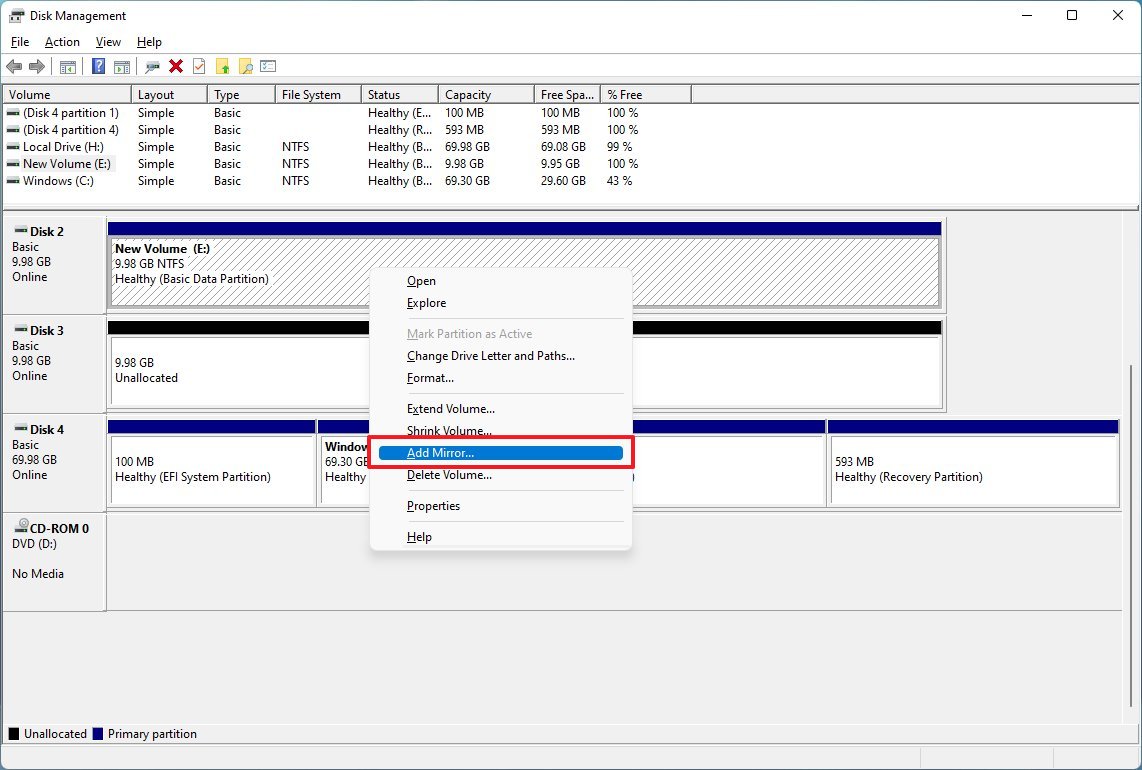
- Right-click the drive with data and select the Add Mirror option.
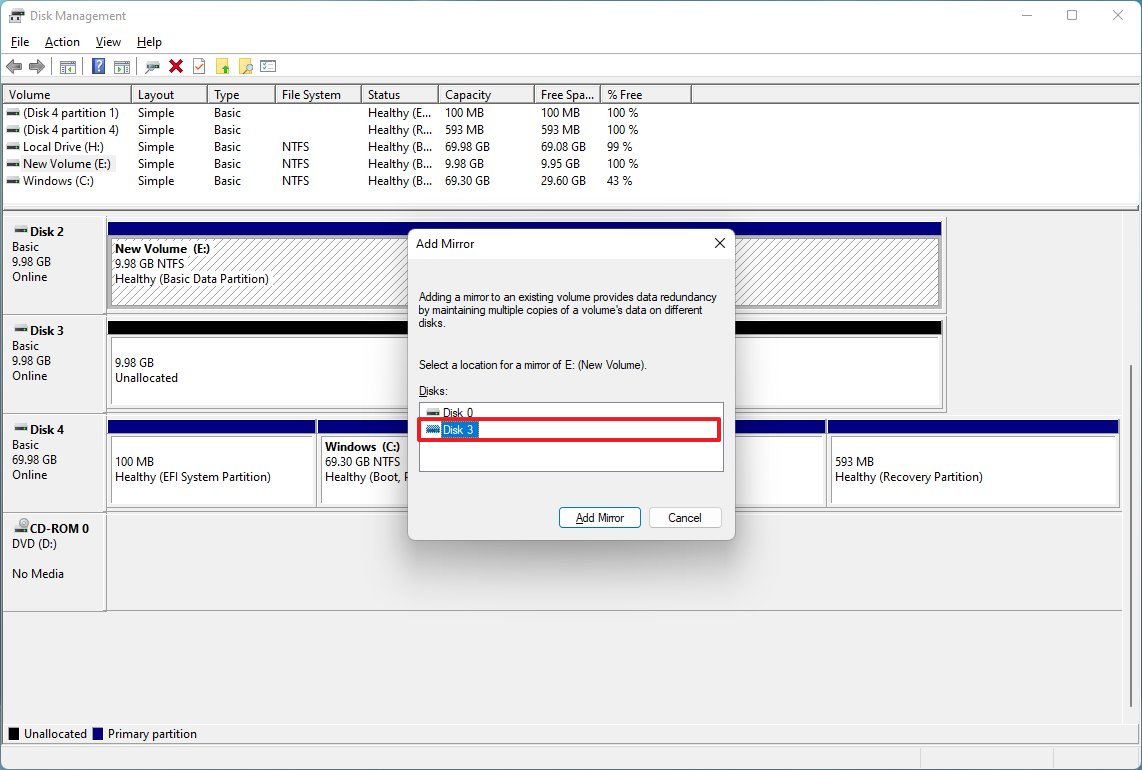
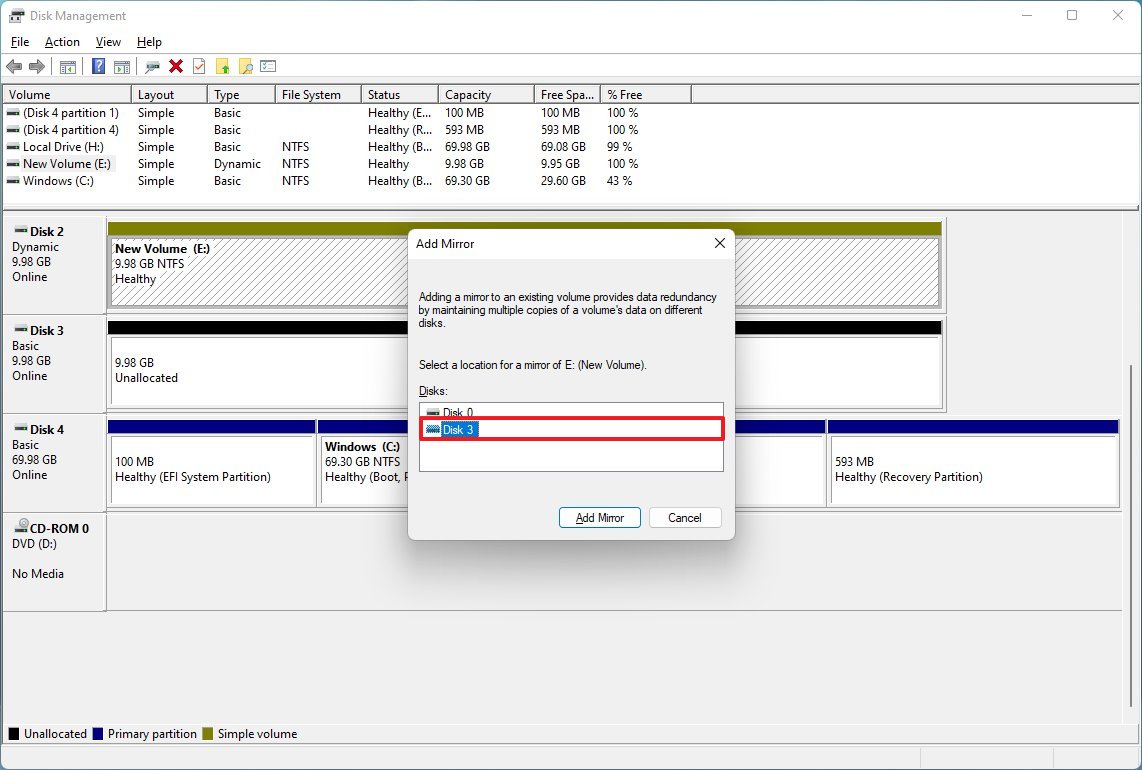
- Choose the other drive to create a mirror setup.
- Click the Add Mirror button.
- Click the Yes button.
After you complete the steps, the existing data on the drive will replicate across the new storage forming a mirror volume.
Recreate mirror volume after driver failure
To replace a failed drive on a mirror volume, use these steps:
- Open Start.
- Search for "Create and format hard disk" and click the top result to open the Disk Management app.
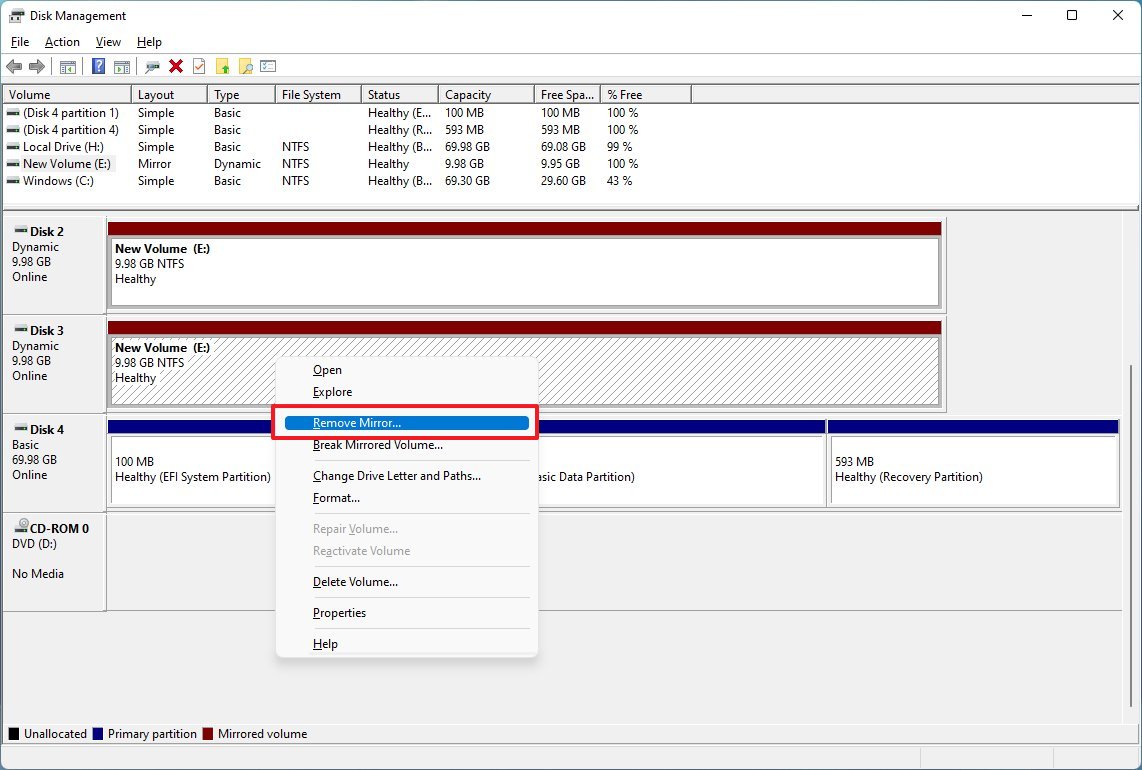
- Right-click the drive with the failure and select the Remove Mirror option.
- Choose the drive noted as Missing.
- Click the Yes button.
- Right-click the working drive with the data and select the Add Mirror button.
- Select the new drive to replace the failed drive in the mirrored volume.
- Click the Add Mirror button.
- Click the Yes button.
Once you complete the steps, the mirror volume will be recreated on Windows 11.
How to create mirror volume with Storage Spaces
To create a mirror volume with Storage Spaces on Windows 11, use these steps:
- Open Settings.
- Click on System.
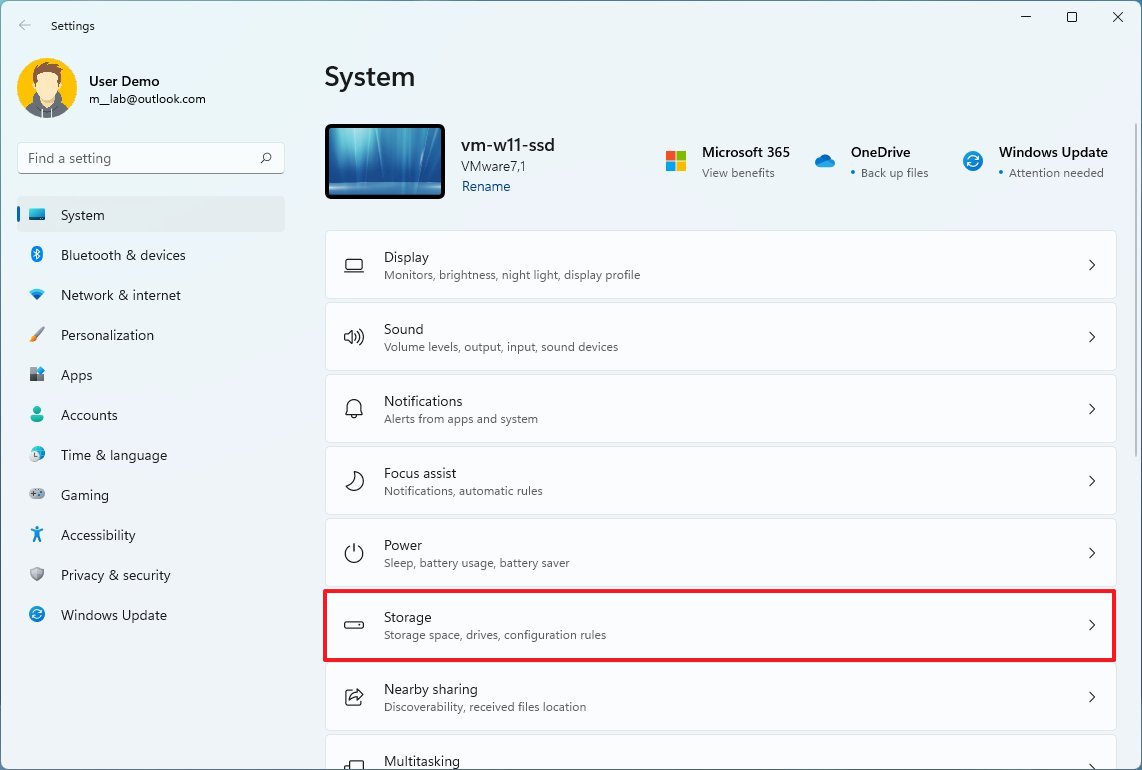
- Click the Storage page on the right side.
- Under the Storage management section, click on Advanced storage settings.
- Click the Storage Spaces setting.
- Click the "Create a storage pool and Storage Space" option.
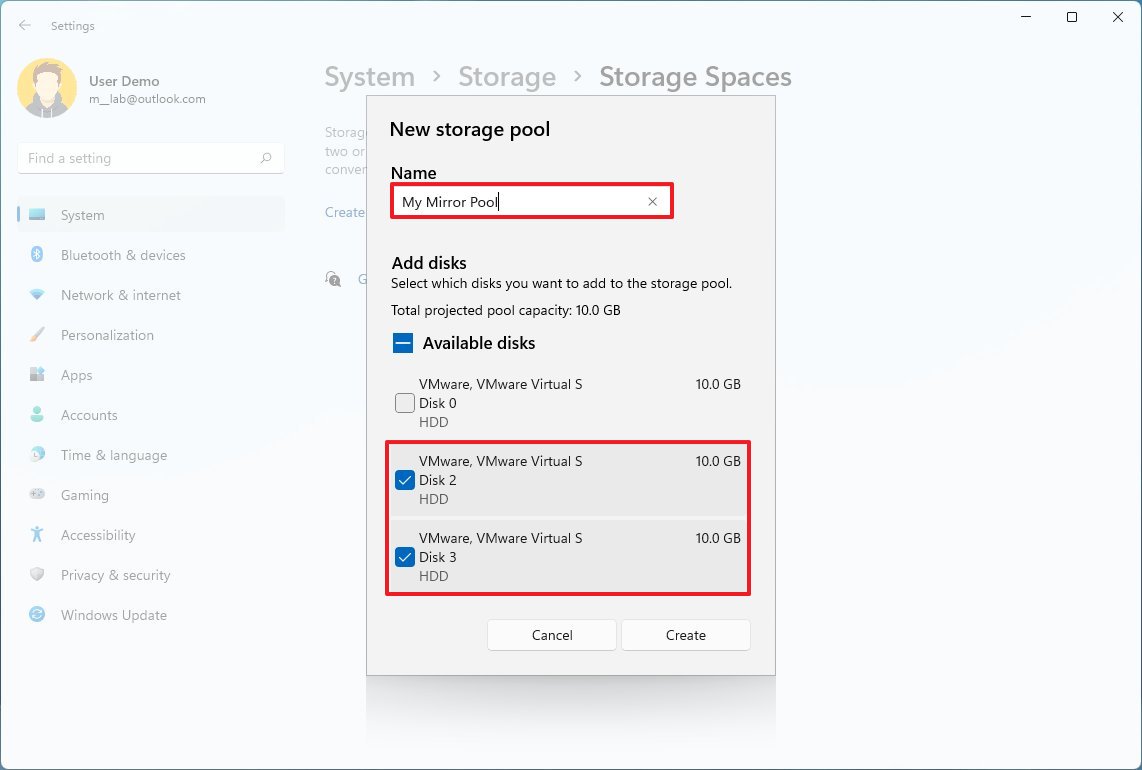
- Confirm a name for the pool – for example, My Mirror Pool.
- Select the two drives to create the mirror volume.
- Click the Create button.
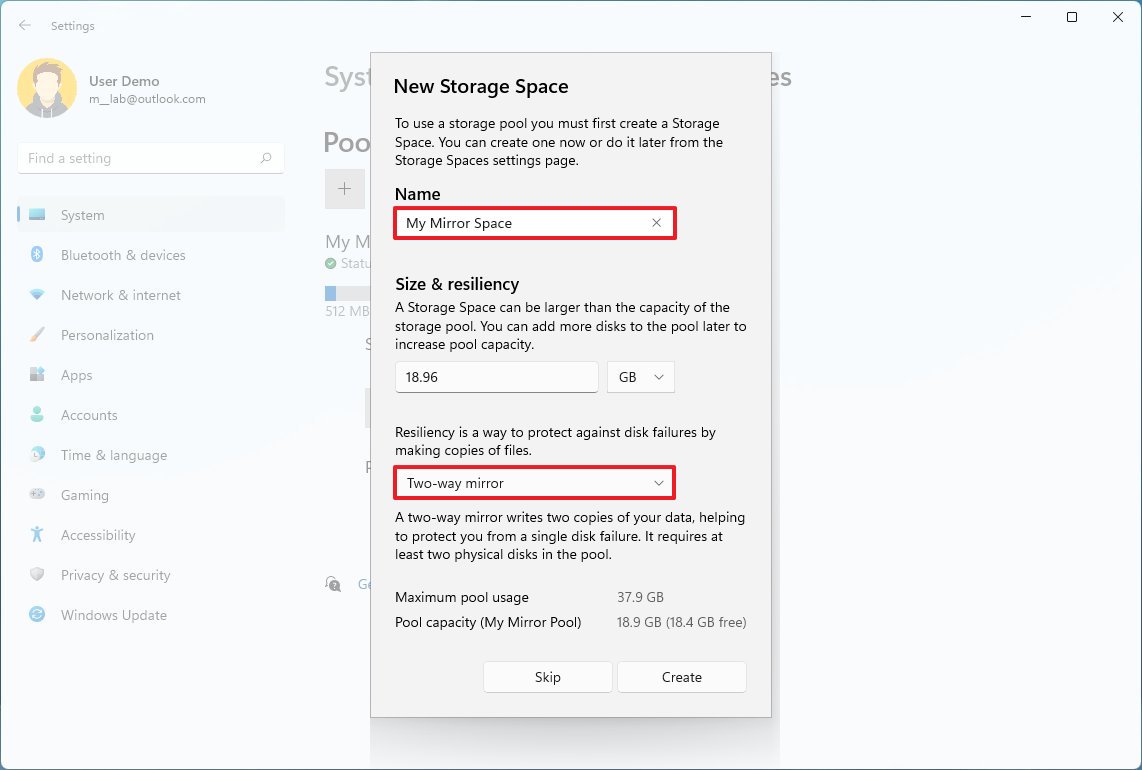
- Confirm a name for the mirror volume – for example, My Mirror Space.
- (Optional) In the size setting, specify a size for the volume. (Usually, you want to use the default amount.)
- In the resiliency drop-down menu, select the Two-way mirror option.
- Click the Create button.
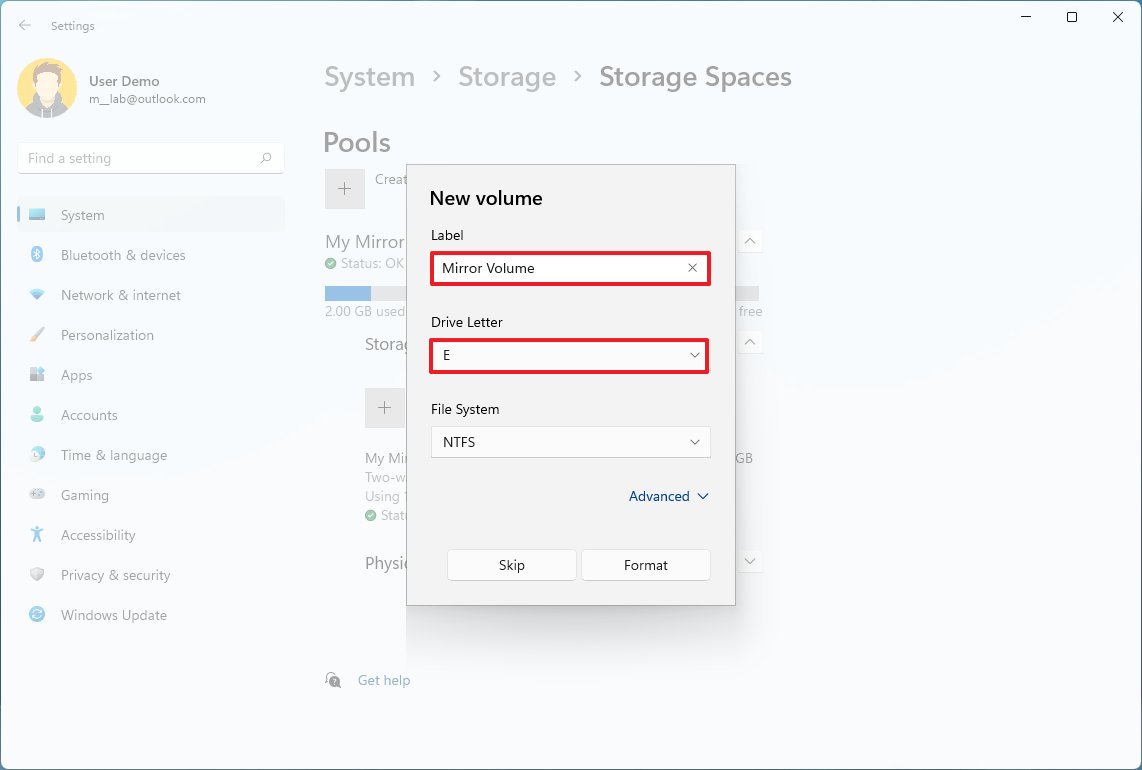
- In the "Label" setting, specify a name for the drive. (This is the name you will see in File Explorer.)
- In the "Drive Letter" setting, choose a letter for the drive.
- Use the "File System" drop-down menu and select the NTFS option.
- Click the Format button.
After you complete the steps, the mirror volume will create and appear in File Explorer with the letter and name you specified.
Recreate mirror volume after driver failure
To repair a volume with a damaged drive with Storage Spaces, use these steps:
- Open Settings.
- Click on System.
- Click the Storage page on the right side.
- Under the Storage management section, click on Advanced storage settings.
- Click the Storage Spaces setting.
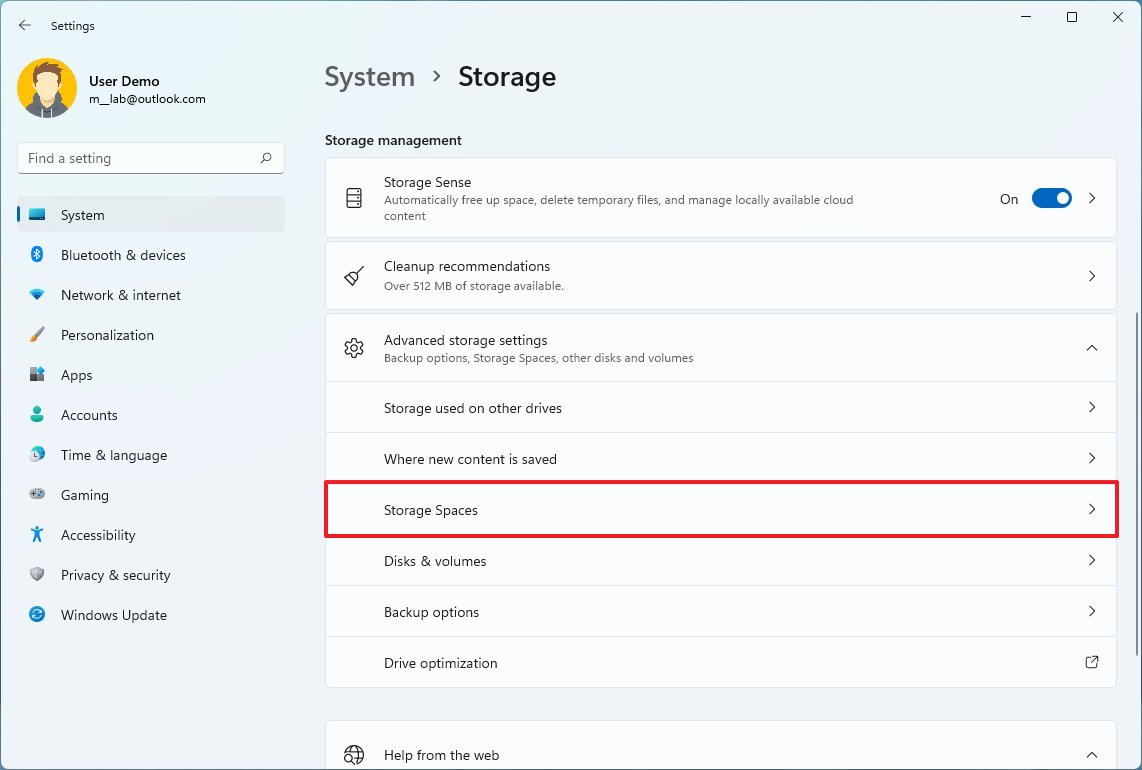
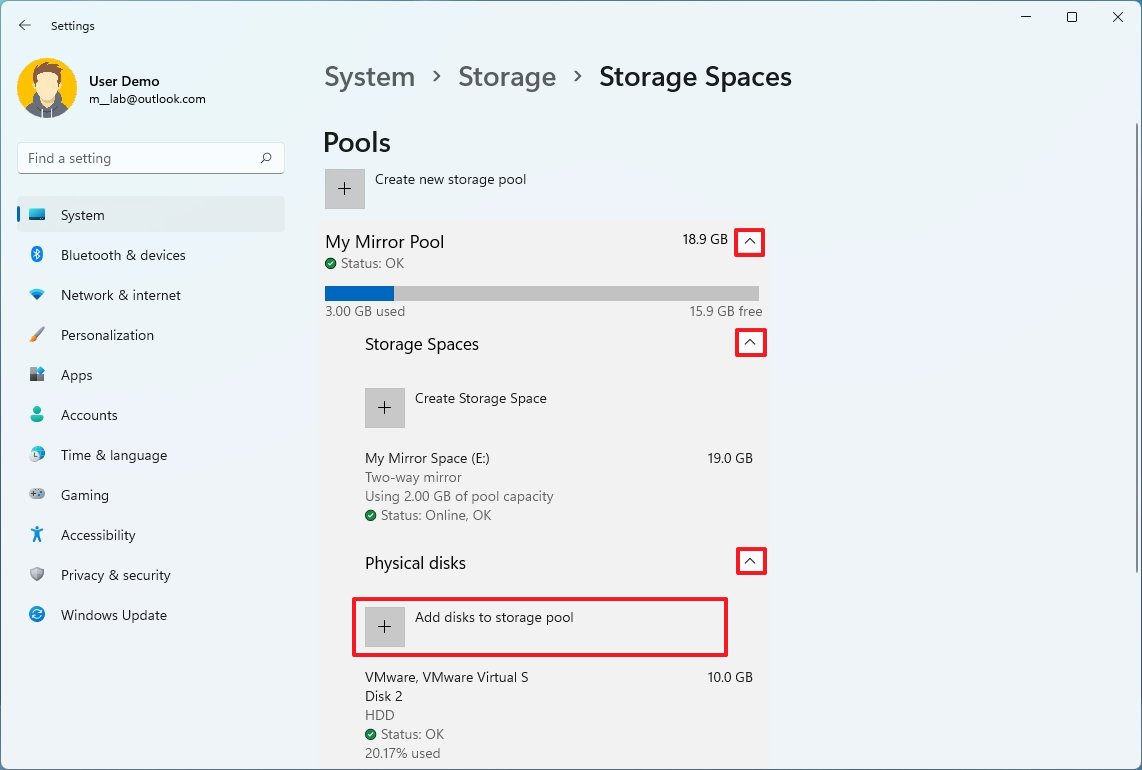
- Expand the pool.
- Expand the space.
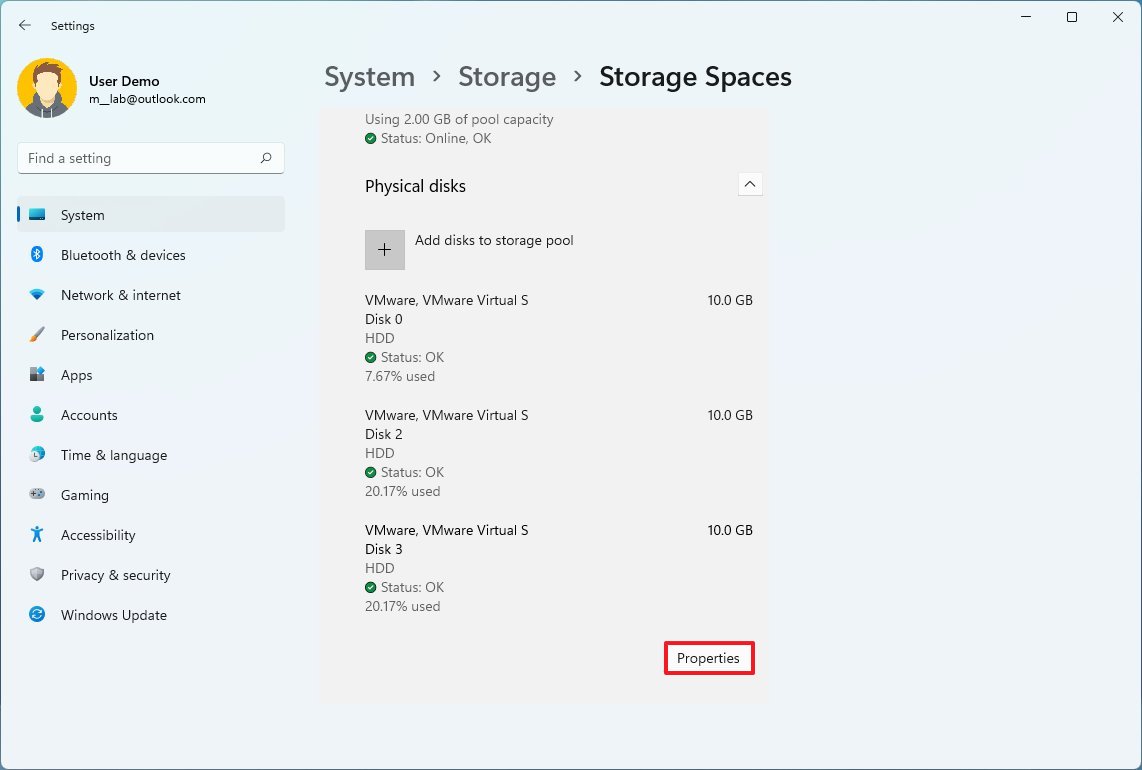
- Expand the physical disks.
- Click the "Add disks to storage pool" option.
- Check the drive that will replace the failed one in the mirror.
- Click the Add button.
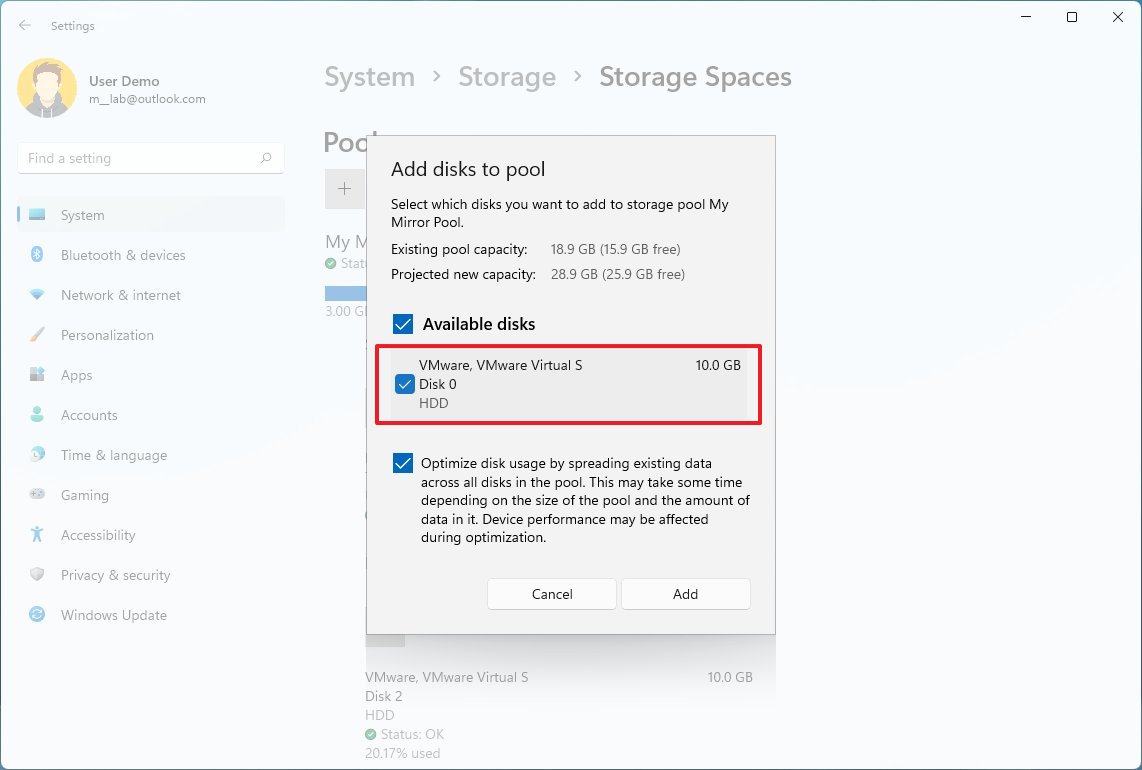
- Select the failed drive and click the Properties button.
- Click the Prepare for removal button.
- Click the Remove button.
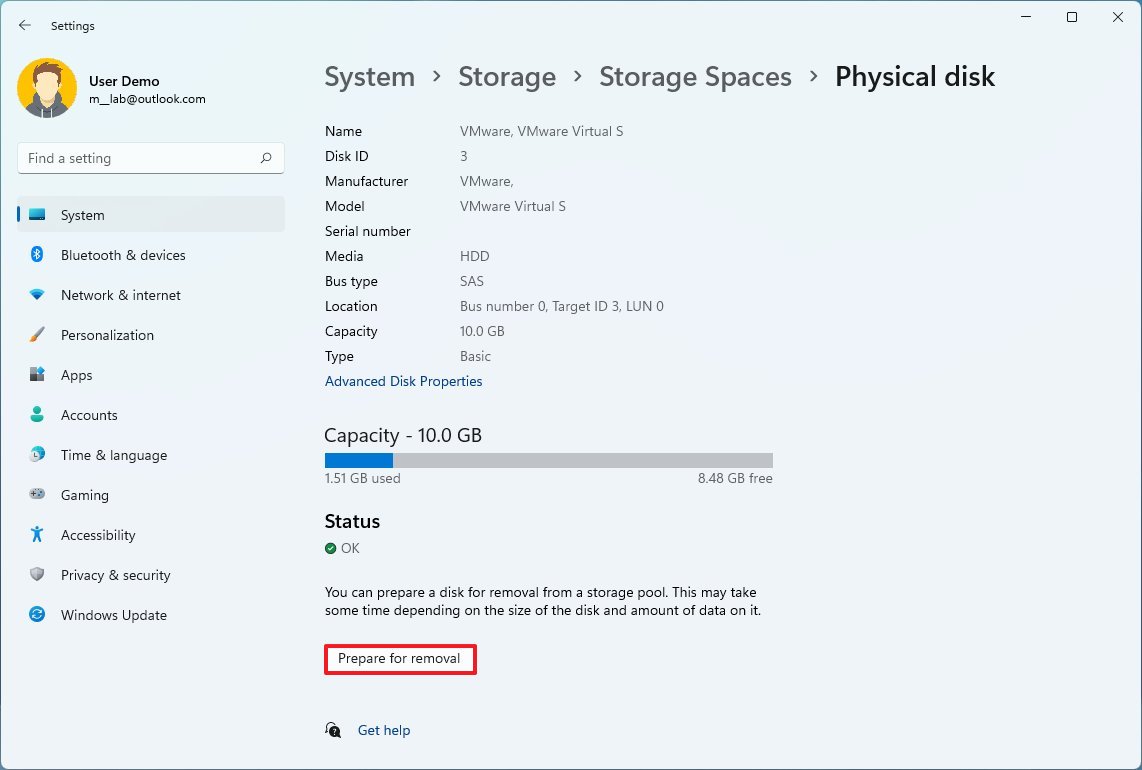
Once you complete the steps, the mirror will recreate, but this process may take a long time depending on the amount of data.
Since Storage Spaces require cleaning the drives before adding them to the pool, you can not mirror a drive that already has data. If you want to create a new volume with this drive, you first need to create a file backup, create the two-way mirror volume, and then restore the data from the backup.
This guide covers the steps to create a redundant volume to store files on a secondary drive. If you want to install Windows 11 on a mirror configuration, you may want to create a mirror on the device's UEFI firmware. However, since firmware are different per manufacturer and even per computer model, it's best to consult your manufacturer for more specific instructions.
More resources
For more helpful articles, coverage, and answers to common questions about Windows 10 and Windows 11, visit the following resources:

Mauro Huculak has been a Windows How-To Expert contributor for WindowsCentral.com for nearly a decade and has over 22 years of combined experience in IT and technical writing. He holds various professional certifications from Microsoft, Cisco, VMware, and CompTIA and has been recognized as a Microsoft MVP for many years.
