How to disable Microsoft Defender Antivirus on Windows 11
All the latest news, reviews, and guides for Windows and Xbox diehards.
You are now subscribed
Your newsletter sign-up was successful
Microsoft Defender Antivirus is the default anti-malware solution built into Windows 11 to protect your device and data from viruses, ransomware, spyware, and many other types of malware and malicious individuals.
Although it's one of the best antivirus software, you may still have reasons for wanting to disable it permanently. The only problem is that as Microsoft keeps stepping up and prioritizing security, the company is making it harder to disable the antivirus.
In previous versions of the operating system, you could permanently disable the anti-malware application using various methods, including the Registry and Group Policy, but those options do not work anymore. However, if you must disable the Microsoft Defender Antivirus on Windows 11, you still have two choices. You can disable the real-time protection, which only works temporarily, or install another antivirus that will permanently disable the default anti-malware (as long as there is another active protection.)
This guide will walk you through the different methods to disable the Microsoft Defender Antivirus on Windows 11.
How to disable Microsoft Defender Antivirus from Windows Security
You don't need to disable the antivirus permanently when making system changes. You can always disable the protection temporarily.
To temporarily disable the real-time antivirus protection on Windows 11, use these steps:
- Open Start.
- Search for Windows Security and click the top result to open the app.
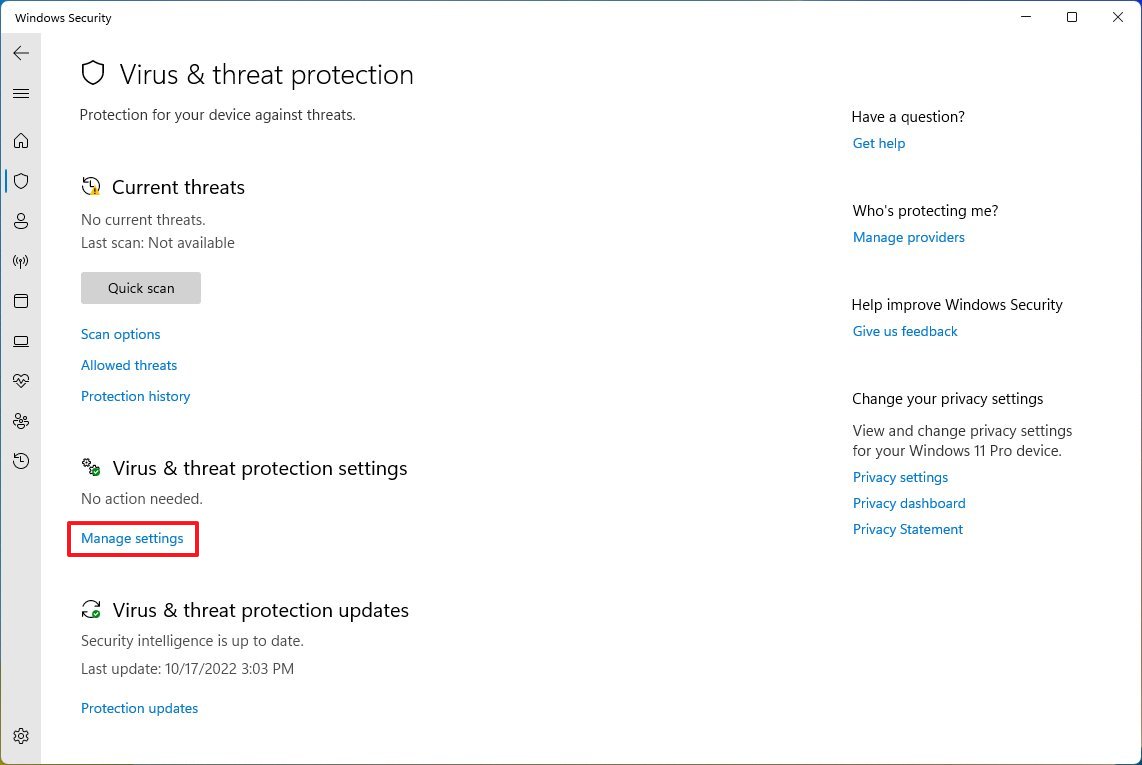
- Click on Virus & threat protection.
- Under the "Virus & threat protection settings" section, click the Manage settings option.
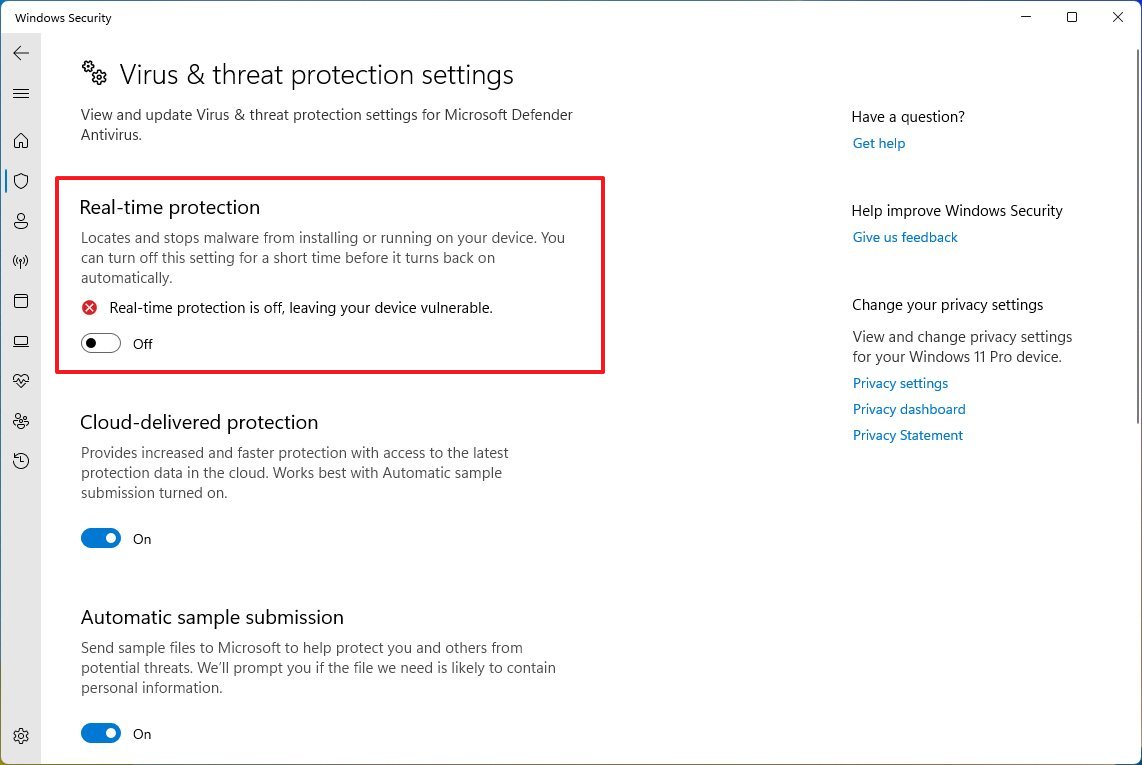
- Turn off the "Real-time protection" toggle switch to disable Microsoft Defender Antivirus temporarily.
Once you complete the steps, the real-time antivirus protection will temporarily be disabled on the computer to install other apps or make system changes without conflicts.
All the latest news, reviews, and guides for Windows and Xbox diehards.
You can always use the same instructions outlined above to re-enable the antivirus, but on step 5, turn on the Real-time protection toggle switch.
This option is not a permanent solution, but it's the best option to disable the antivirus to install programs and make system changes that otherwise will cause conflicts.
How to disable Microsoft Defender Antivirus from third-party app
Although you can't uninstall the Microsoft Defender Antivirus to install another solution, you don't need to disable it either because it'll turn off automatically when the system detects the installation of another antivirus.
To disable Microsoft Defender Antivirus by installing a third-party security software, use these steps:
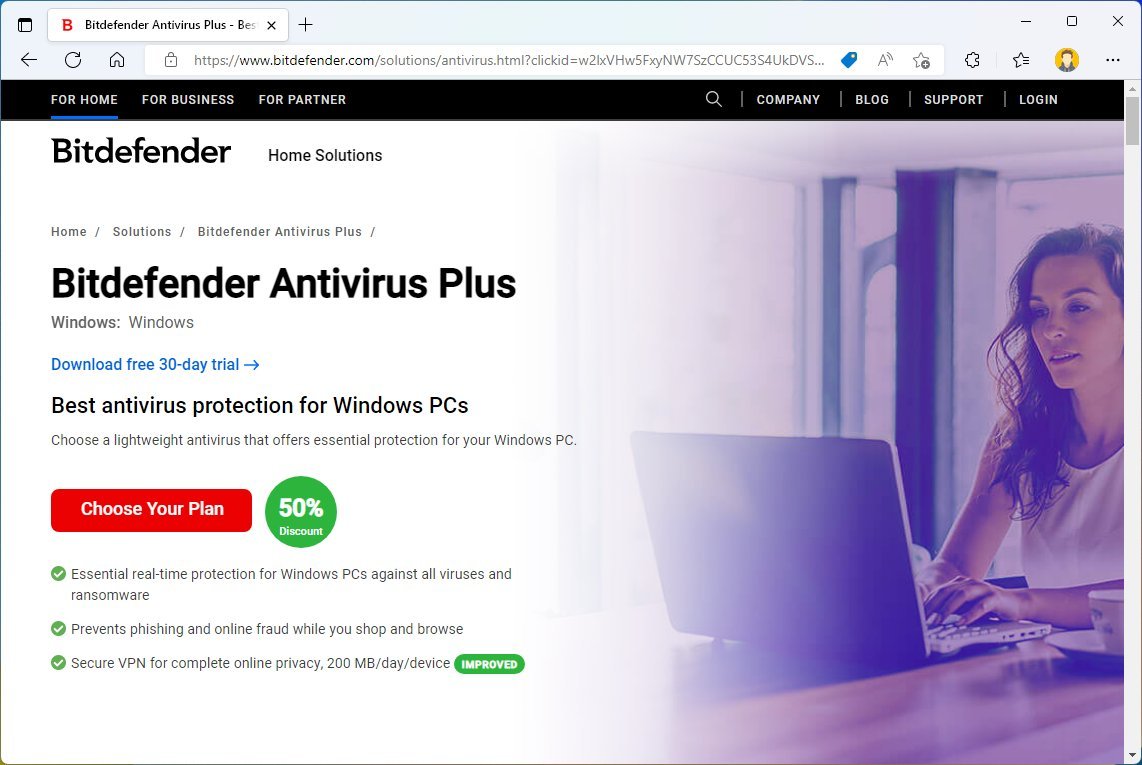
- Open the antivirus download page.
- Quick note: We're randomly picking to install Bitdefender. However, the process will be similar for other solutions.
- Click the Download button to save the installer on the device.
- Double-click the file to launch the installation.
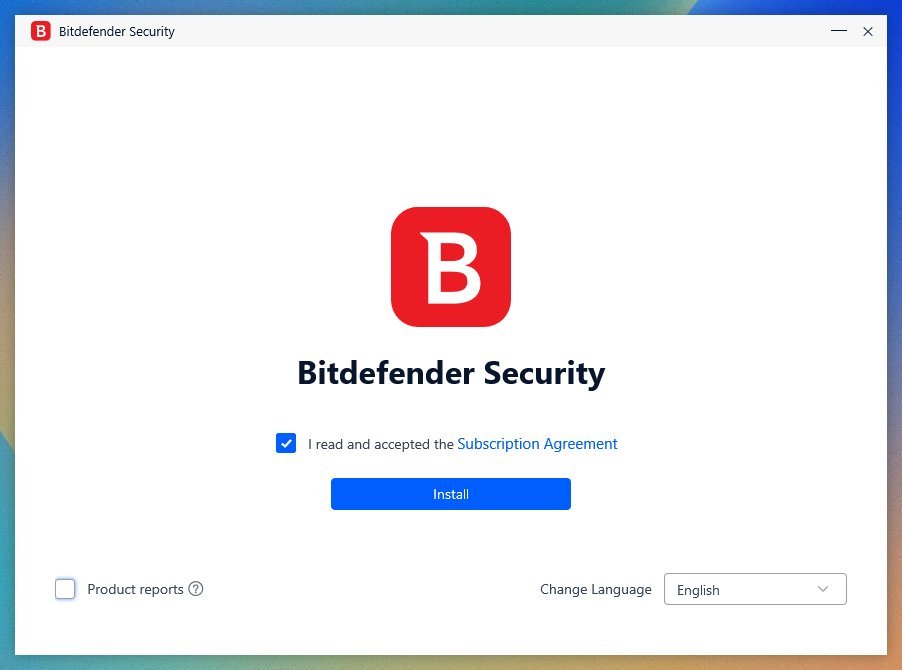
- Check the option to agree to the licensing terms (if applicable).
- Click the Install button.
Once you complete the steps, the system will disable the antivirus automatically.
Check antivirus is disabled
To confirm the default antivirus has been disabled on Windows 11, use these steps:
- Open Start.
- Search for Windows Security and click the top result to open the app.
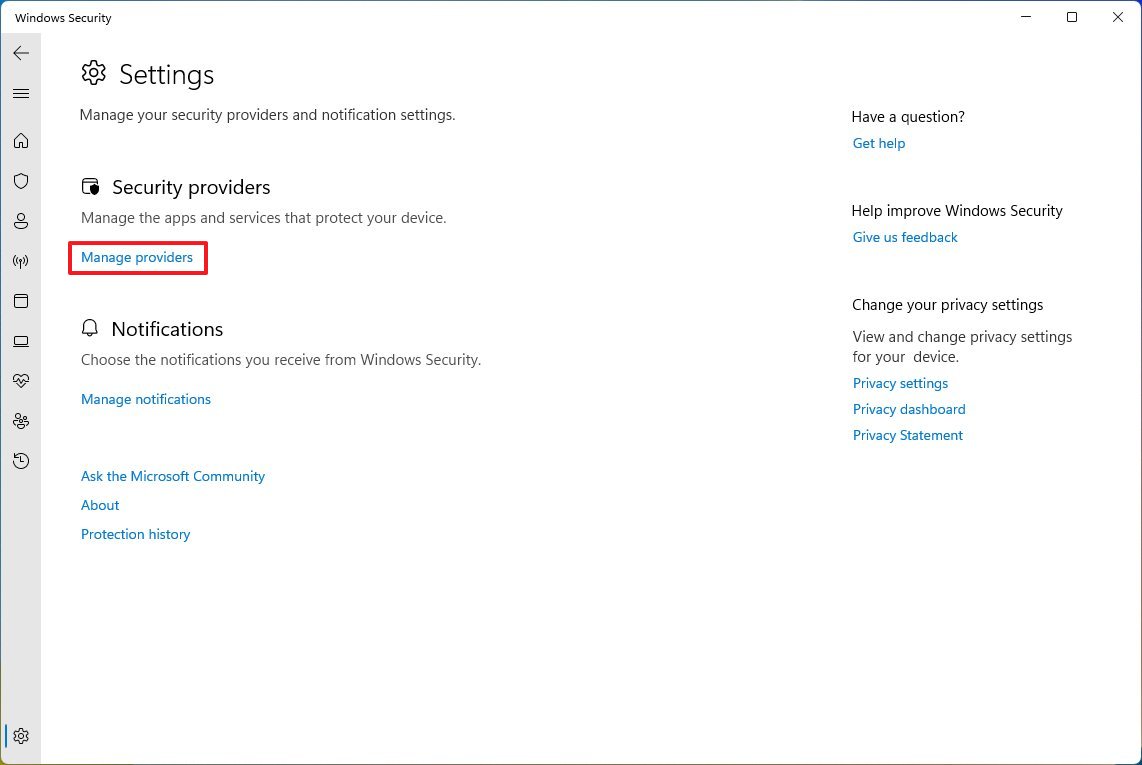
- Click on Settings at the bottom of the page.
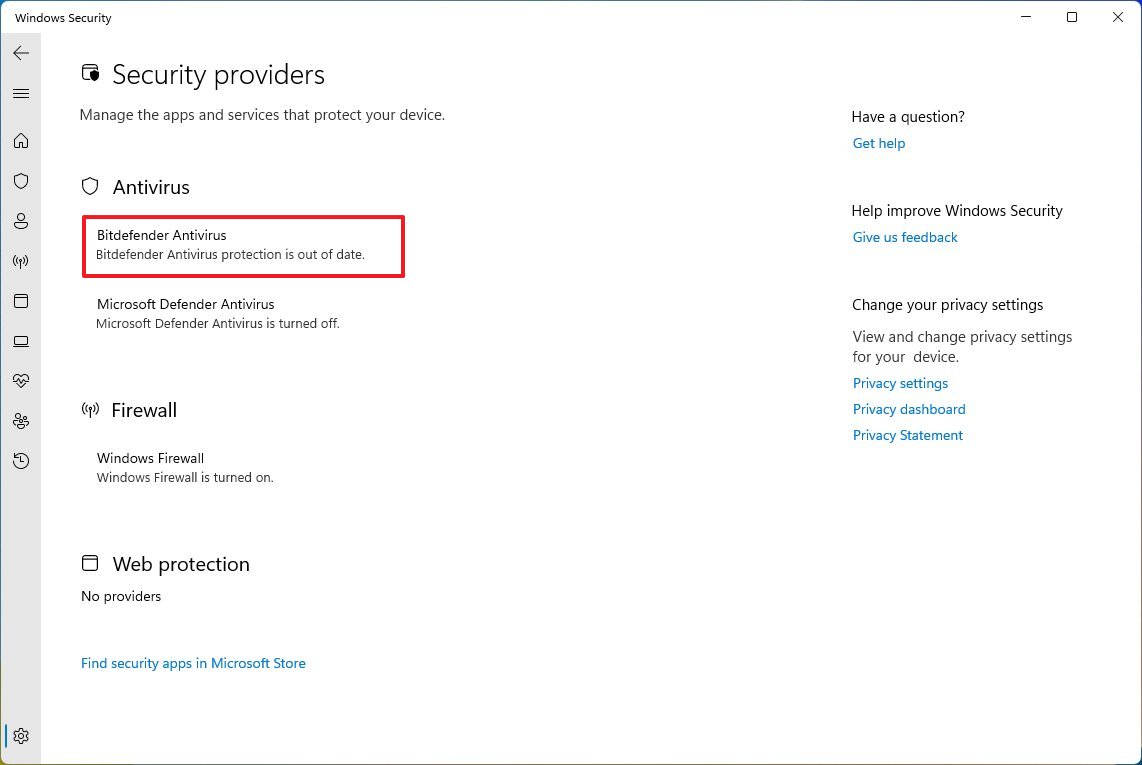
- Under the "Security providers" section, click the Manage providers option.
- Under the "Antivirus" section, Microsoft Defender Antivirus should appear permanently disabled.
After you complete the steps, the default antivirus will no longer protect your computer against malware.
Enable periodically scan
If you opt to run another antivirus, you can add an extra layer of security by enabling periodic scanning.
On Microsoft Defender Antivirus, periodic scanning is a feature you can manually turn on after installing a third-party solution. Once enabled, the Microsoft anti-malware application will remain disabled, but it'll turn on periodically to scan and detect any malware your preferred application may not be able to detect.
To enable periodic scanning on Windows 11, use these steps:
- Open Start.
- Search for Windows Security and click the top result to open the app.
- Click on Virus & threat protection.
- Click the "Microsoft Defender Antivirus options" setting.
- Turn on the Periodic scanning toggle switch.
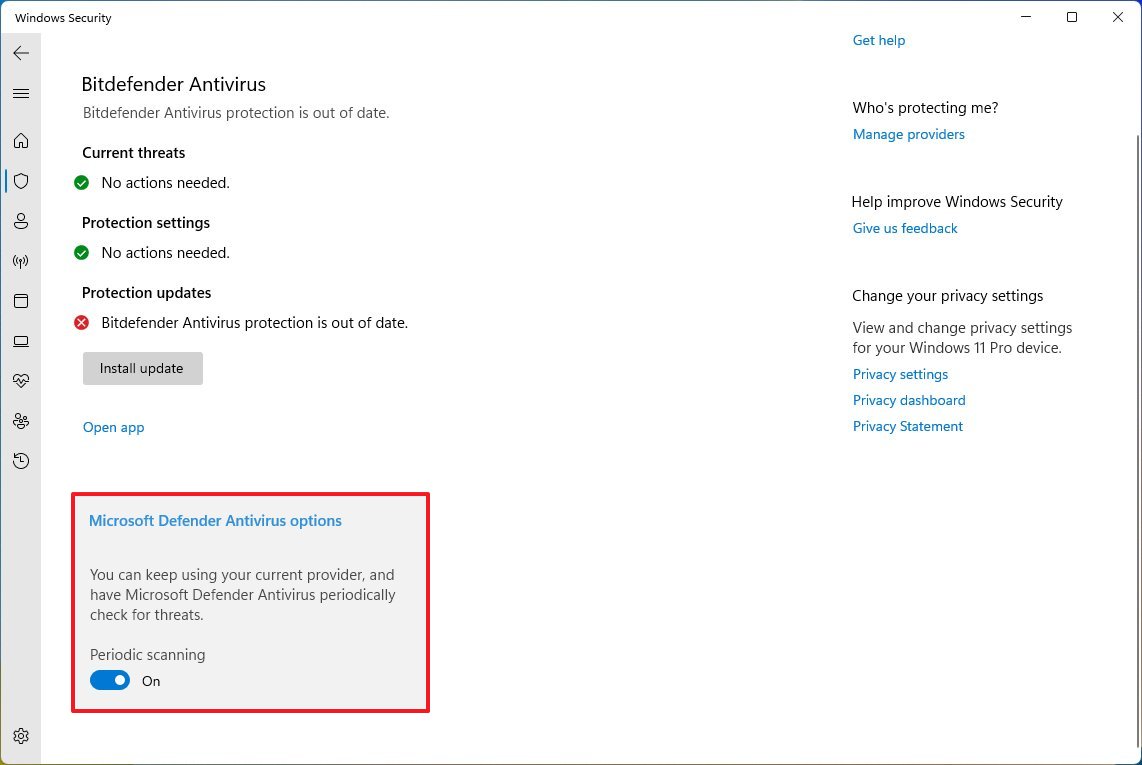
Once you complete the steps, the Windows 11 antivirus will remain disabled, but it'll periodically turn itself on to perform a scan for malware.
While there are still a couple of methods to disable the default antivirus on Windows 11, using a computer without anti-malware protection is not a good idea. However, some situations might still be where disabling the security feature could make sense.
Also, you may find different workarounds across the internet. However, they likely won't work, or you may end up spending a lot of time and breaking your installation due to the many system modifications they require.
If you are in the market for an alternative to Microsoft Defender Antivirus, you should consider these options:
More resources
For more helpful articles, coverage, and answers to common questions about Windows 10 and Windows 11, visit the following resources:

Mauro Huculak has been a Windows How-To Expert contributor for WindowsCentral.com for nearly a decade and has over 22 years of combined experience in IT and technical writing. He holds various professional certifications from Microsoft, Cisco, VMware, and CompTIA and has been recognized as a Microsoft MVP for many years.
