How to find MAC address on Windows 11
Here are five ways to determine the physical address of your computer on Windows 11.
All the latest news, reviews, and guides for Windows and Xbox diehards.
You are now subscribed
Your newsletter sign-up was successful
On Windows 11, a network adapter (Ethernet, Wi-Fi, and Bluetooth) includes a unique physical identifier referred to as the Media Access Control (MAC, MAC address, or physical address), an essential component, which in addition to the Internet Protocol (IP), allows a computer to connect to the network and communicate with other devices.
Since these addresses are embedded into the network card and never change, you don't have to worry about them. However, sometimes, you may need to find the MAC address for various reasons. For example, to find a computer and configure access lists on the router, and many other reasons.
Regardless of the reason, Windows 11 includes multiple ways to find the physical address of your computer through the Settings app, Control Panel, System Information, Command Prompt, and even PowerShell.
This guide will walk you through the different ways to determine the MAC address of the active network adapters available on Windows 11.
How to find MAC address from Settings
To determine the MAC of the network adapter on Windows 11, use these steps:
- Open Settings.
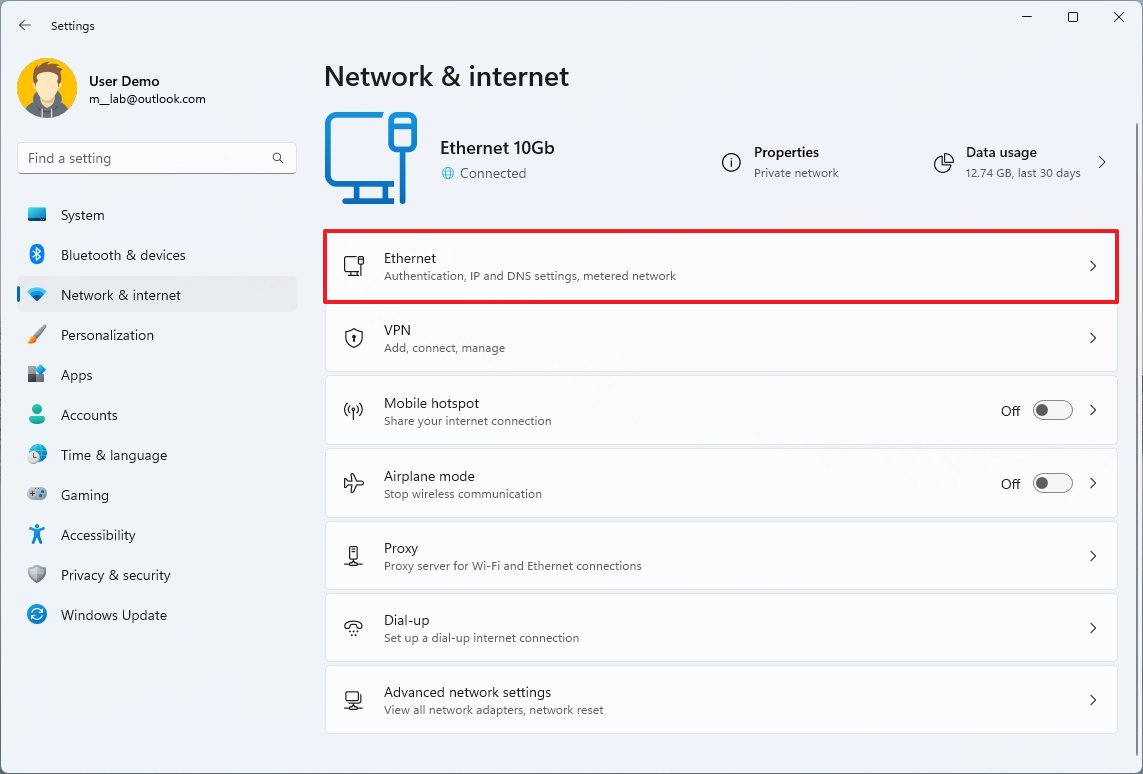
- Click on Network & internet.
- Click the Ethernet or Wi-Fi page on the right side.
- Quick note: If you have a Wi-Fi connection, you will need to access the wireless properties setting to access connection information.
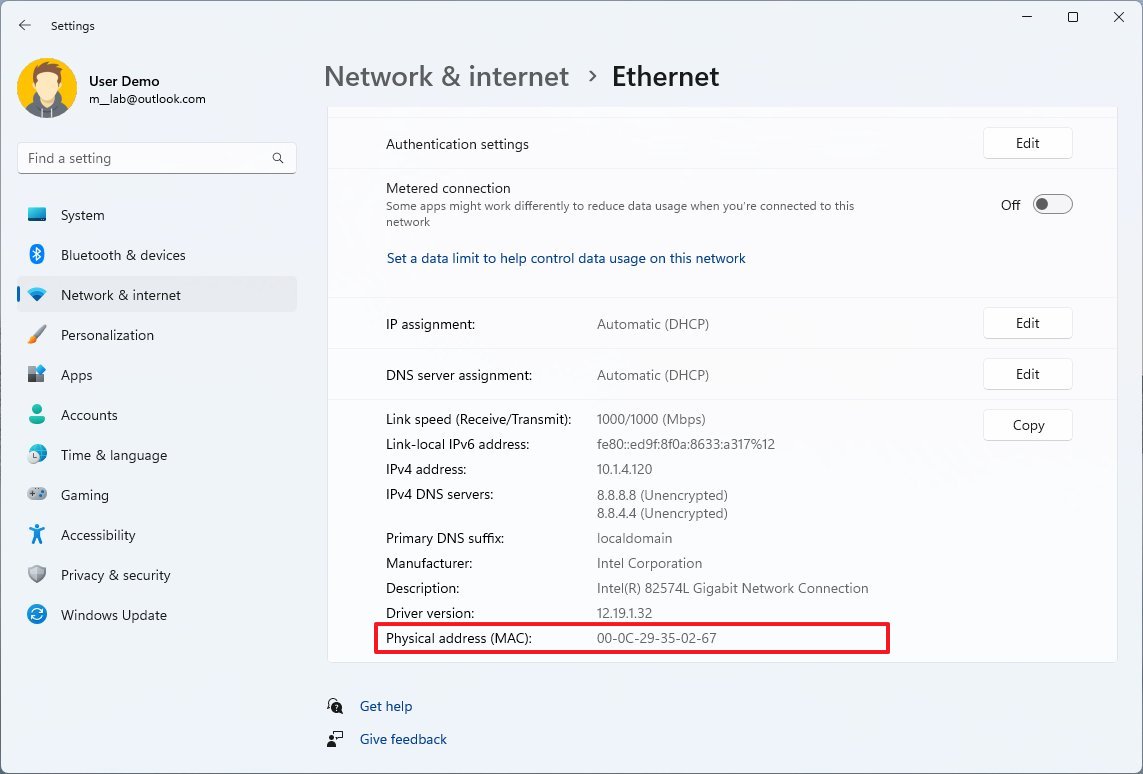
- Under the "Physical address (Mac)" section, confirm the address.
Once you complete the steps, the Settings app will display the physical address of the network adapter.
Determine MAC for all adapters
All the latest news, reviews, and guides for Windows and Xbox diehards.
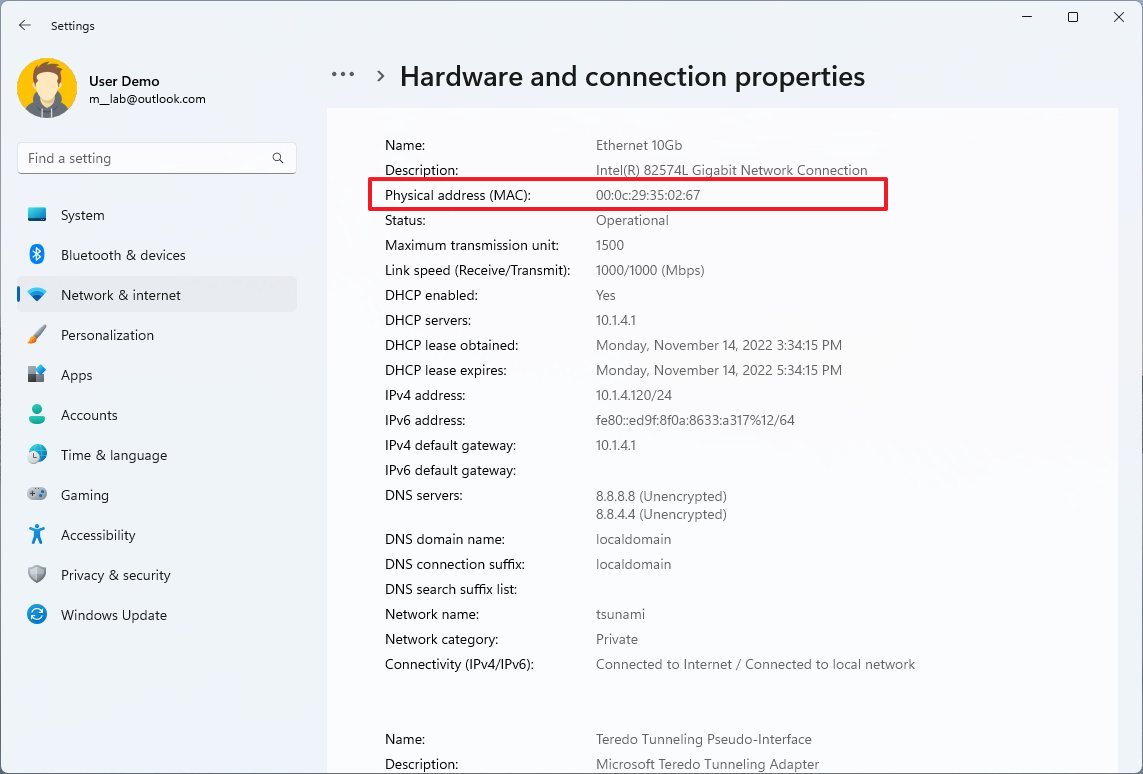
Alternatively, you can also find the MAC address of all the network adapters from the "Hardware and connection properties" page. Here's how:
- Open Settings.
- Click on Network & internet.
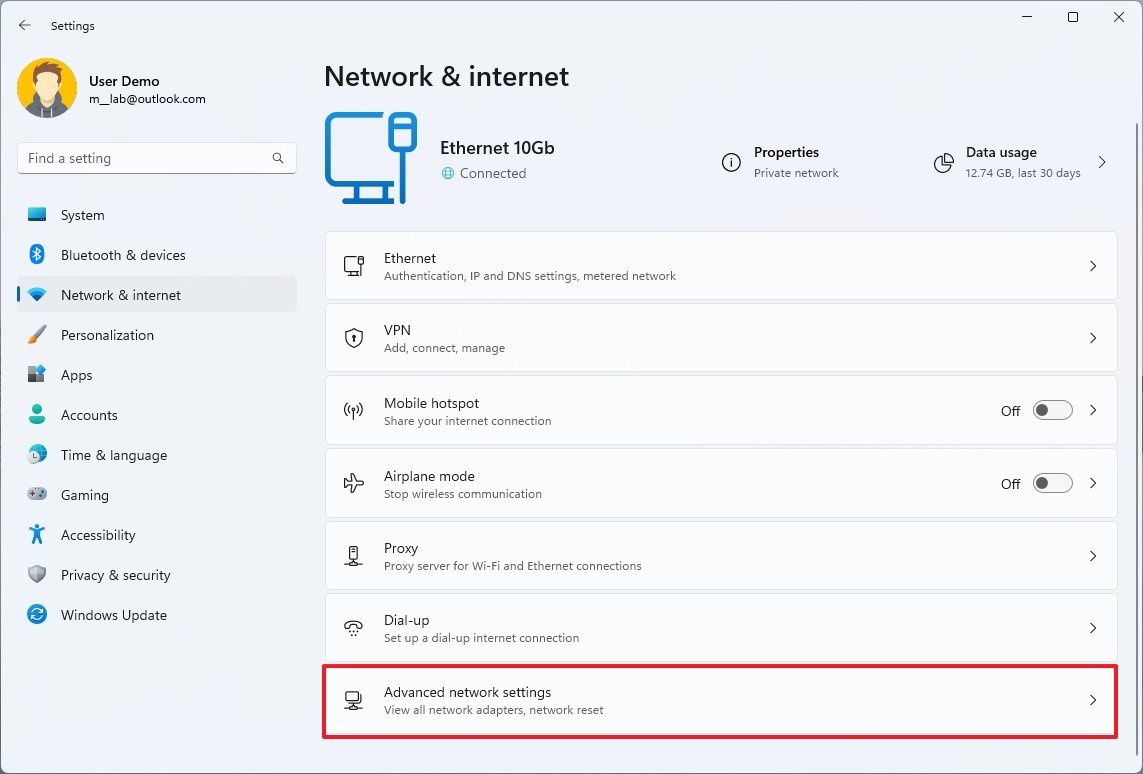
- Click the "Advanced network settings" page on the right side.
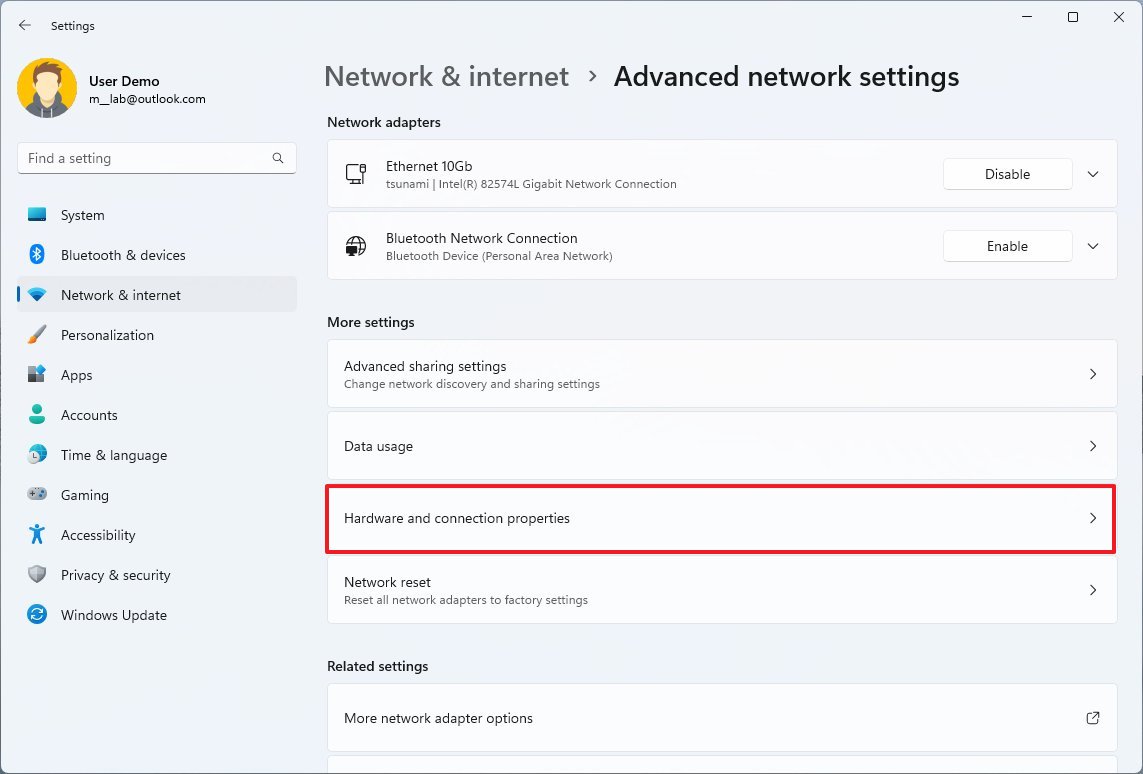
- Under the "More settings" section, click the "Hardware and connection properties" setting.
- Identify the name of the network adapter.
- Under the "Physical address (MAC)" section, confirm the address for the network adapter.
After you complete the steps, the properties page will list the configuration for every network adapter on your computer alongside the MAC address.
How to find MAC address from Control Panel
To find the MAC address from the Control Panel settings, use these steps:
- Open Control Panel.
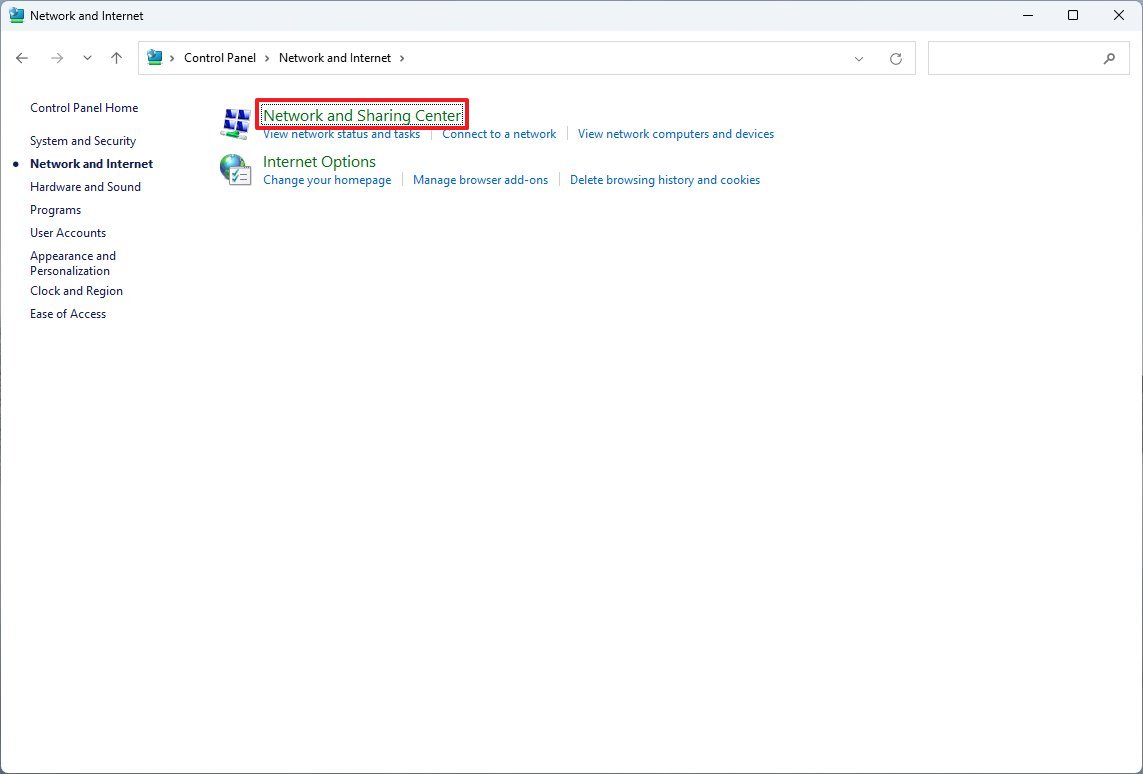
- Click on Network and Internet.
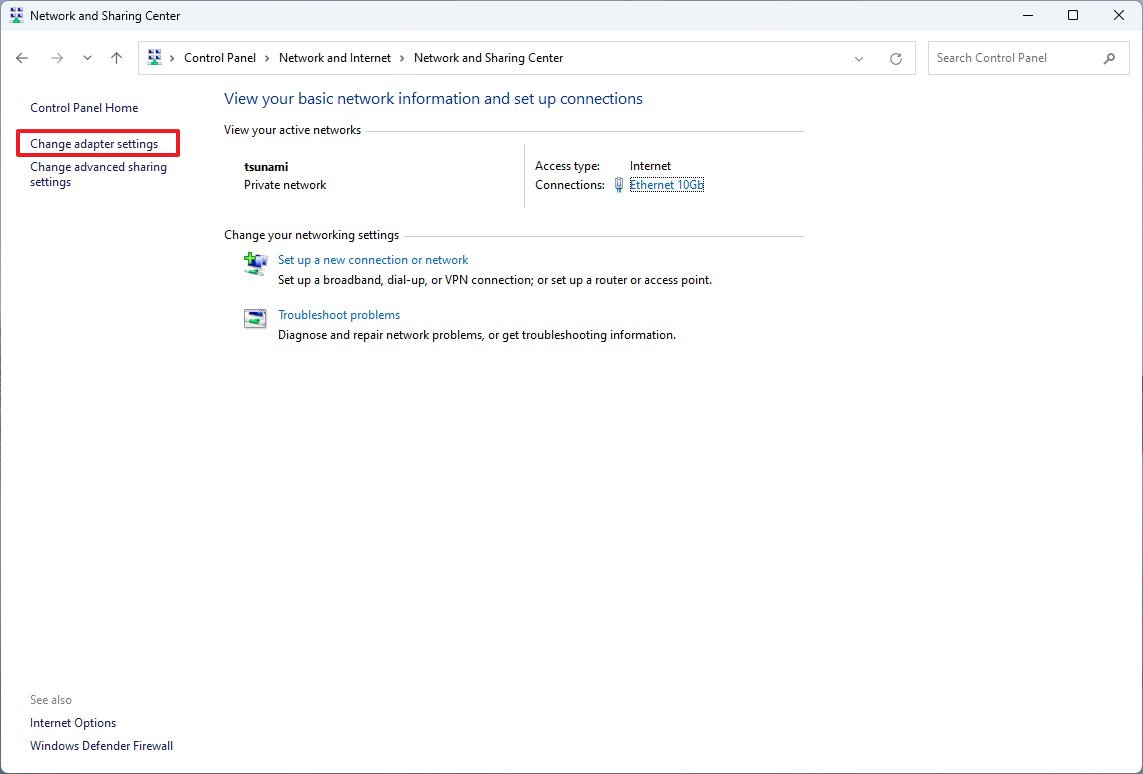
- Click on Network and Sharing Center.
- Click the "Change adapter settings" from the left pane.
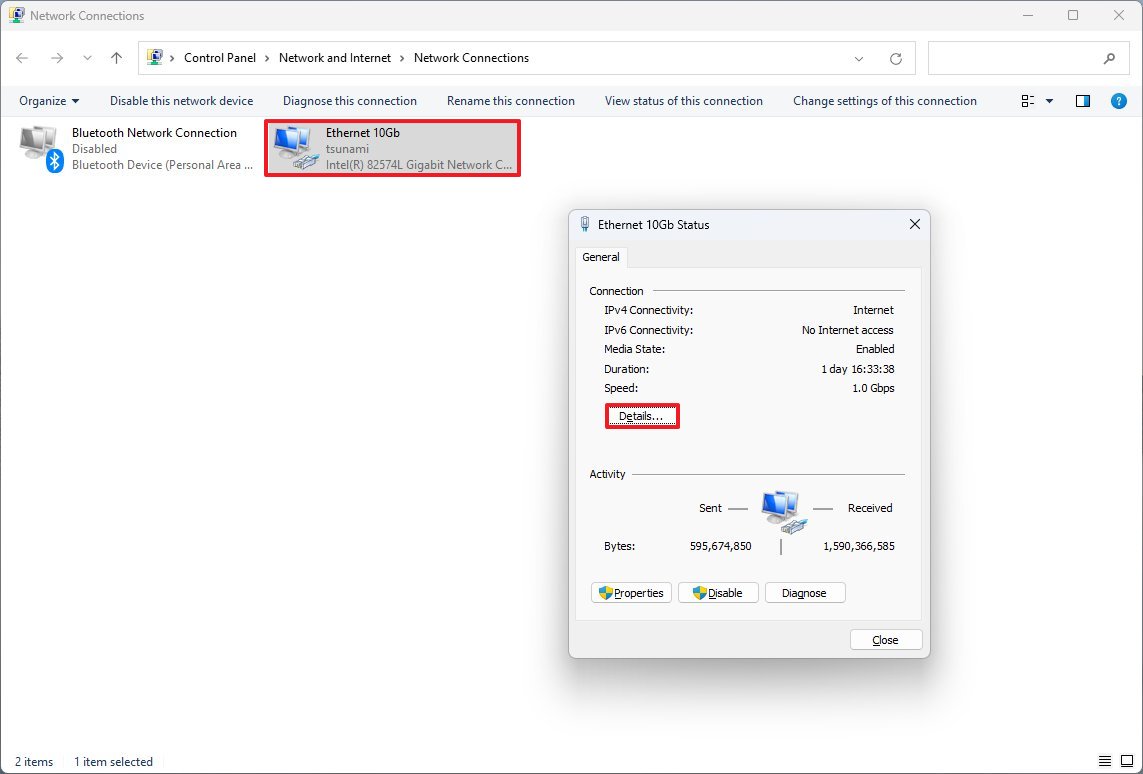
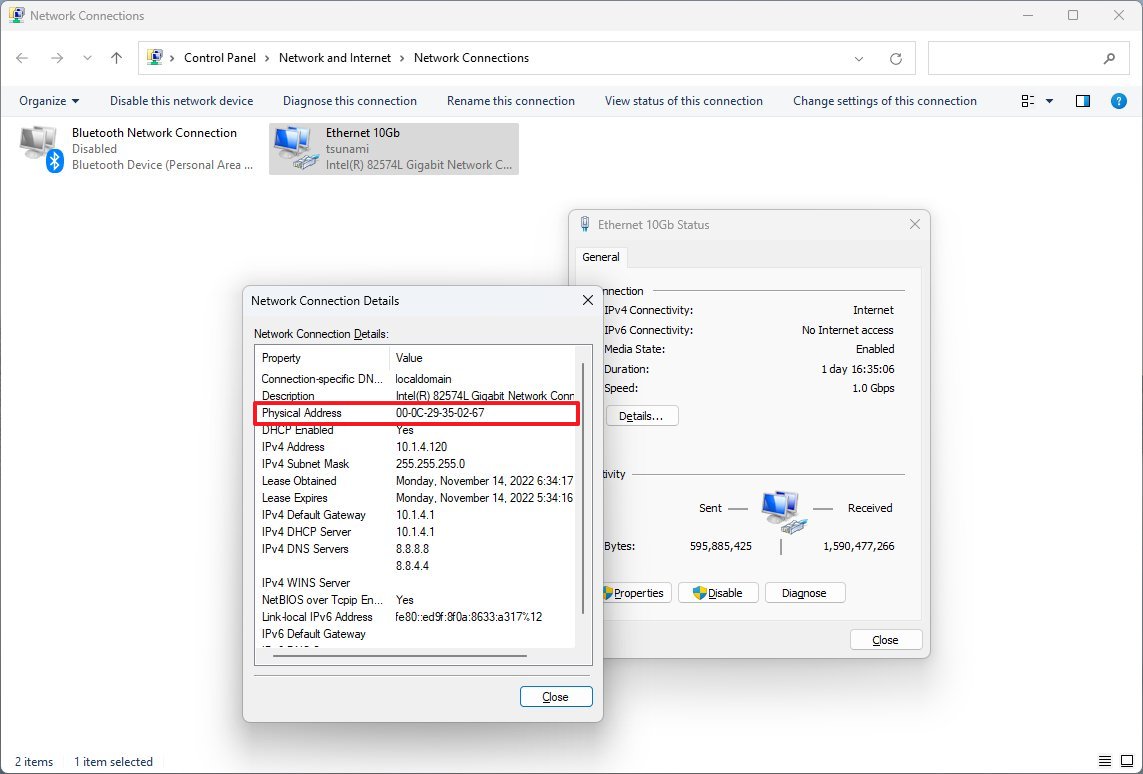
- Double-click the active network adapter (Ethernet or Wi-Fi).
- Click the Details button.
- Under the "Physical address (MAC)" section, confirm the address for the adapter.
Once you complete the steps, the page will display the network configuration, including the physical address of the adapter.
How to find MAC address from System Information
To determine the MAC with the System Information app on Windows 11, use these steps:
- Open Start.
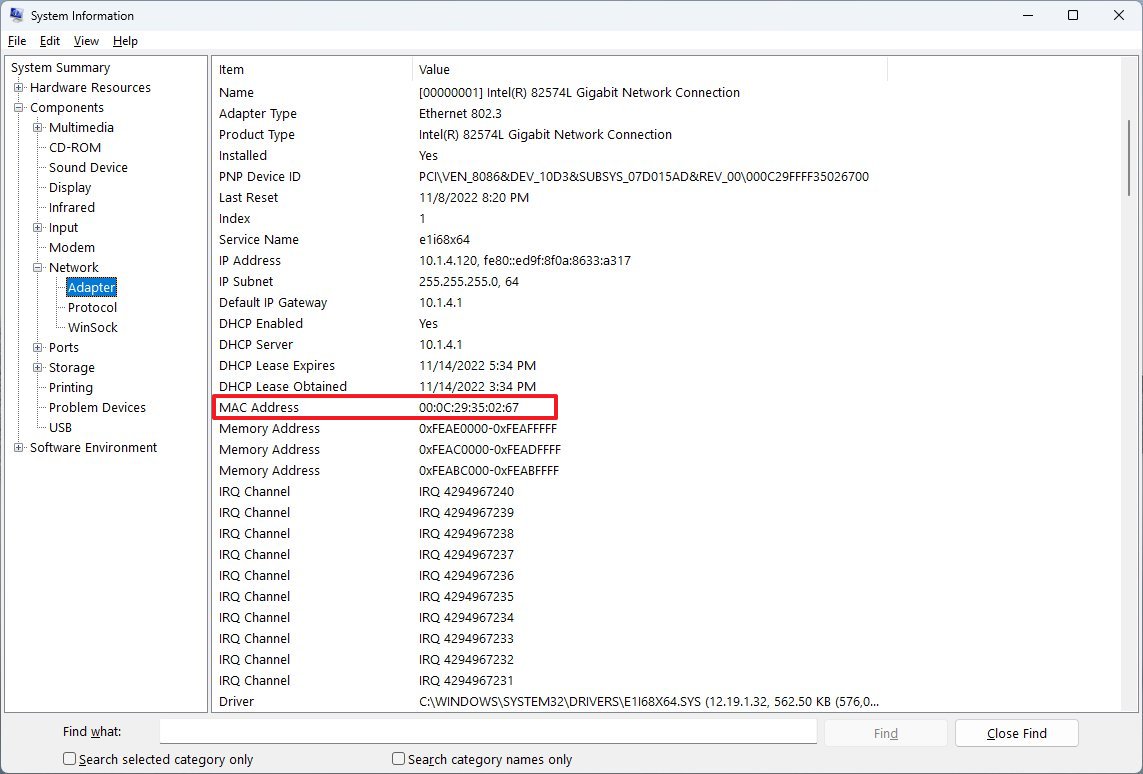
- Search for System Information and click the top result to open the app.
- Expand the Components branch.
- Expand the Network branch.
- Select the Adapter option.
- Scroll down to the network adapter you want.
- Under the "MAC Address" section, confirm the hardware address.
After completing the steps, you will know the adapter's MAC address.
How to find MAC address from Command Prompt
To determine the MAC address on Windows 11 with Command Prompt, use these steps:
- Open Start.
- Search for Command Prompt and click the top result to open the app.
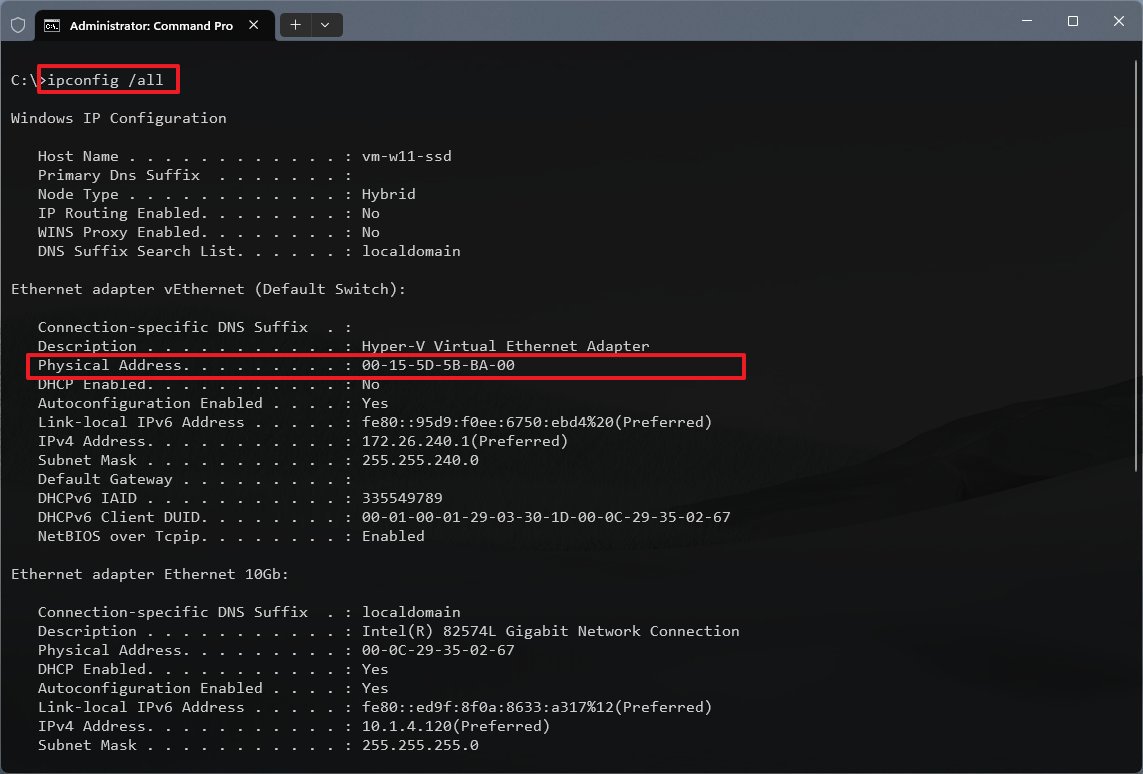
- Type the following command to determine the MAC of your computer's network connection and press Enter: ipconfig /all
- Identify the name of the network adapter (if applicable).
- Under the "Physical Address" section, confirm the MAC address of your computer.
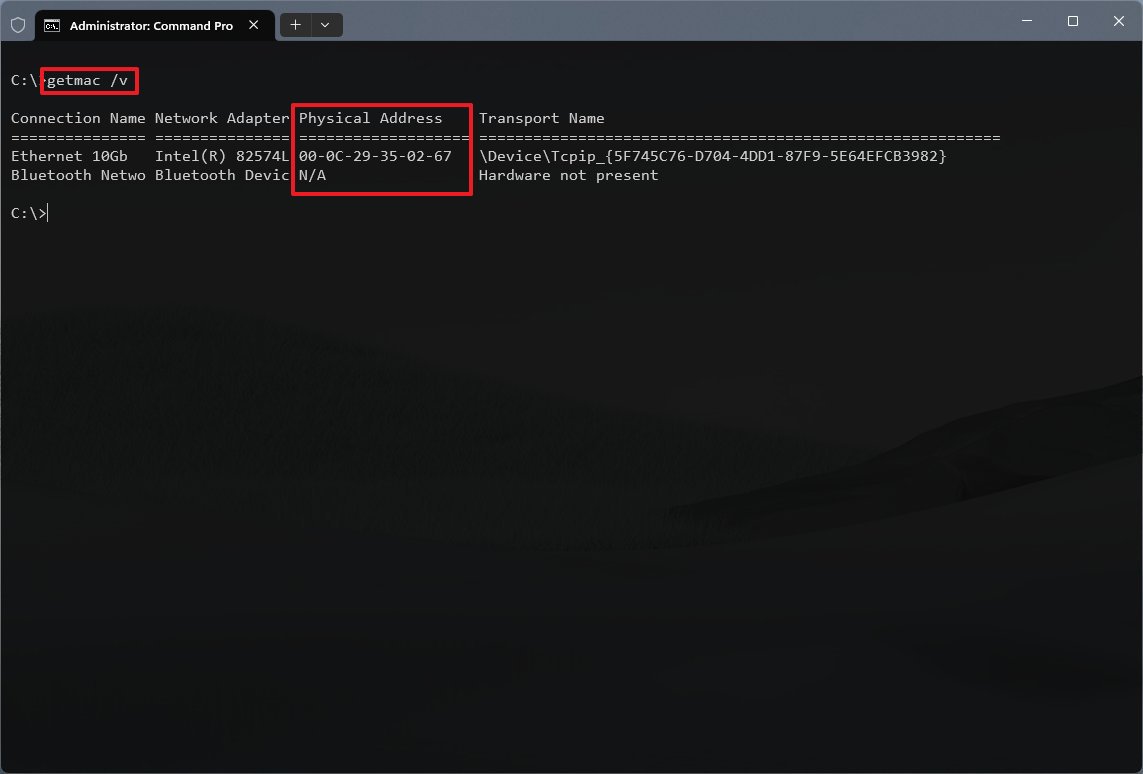
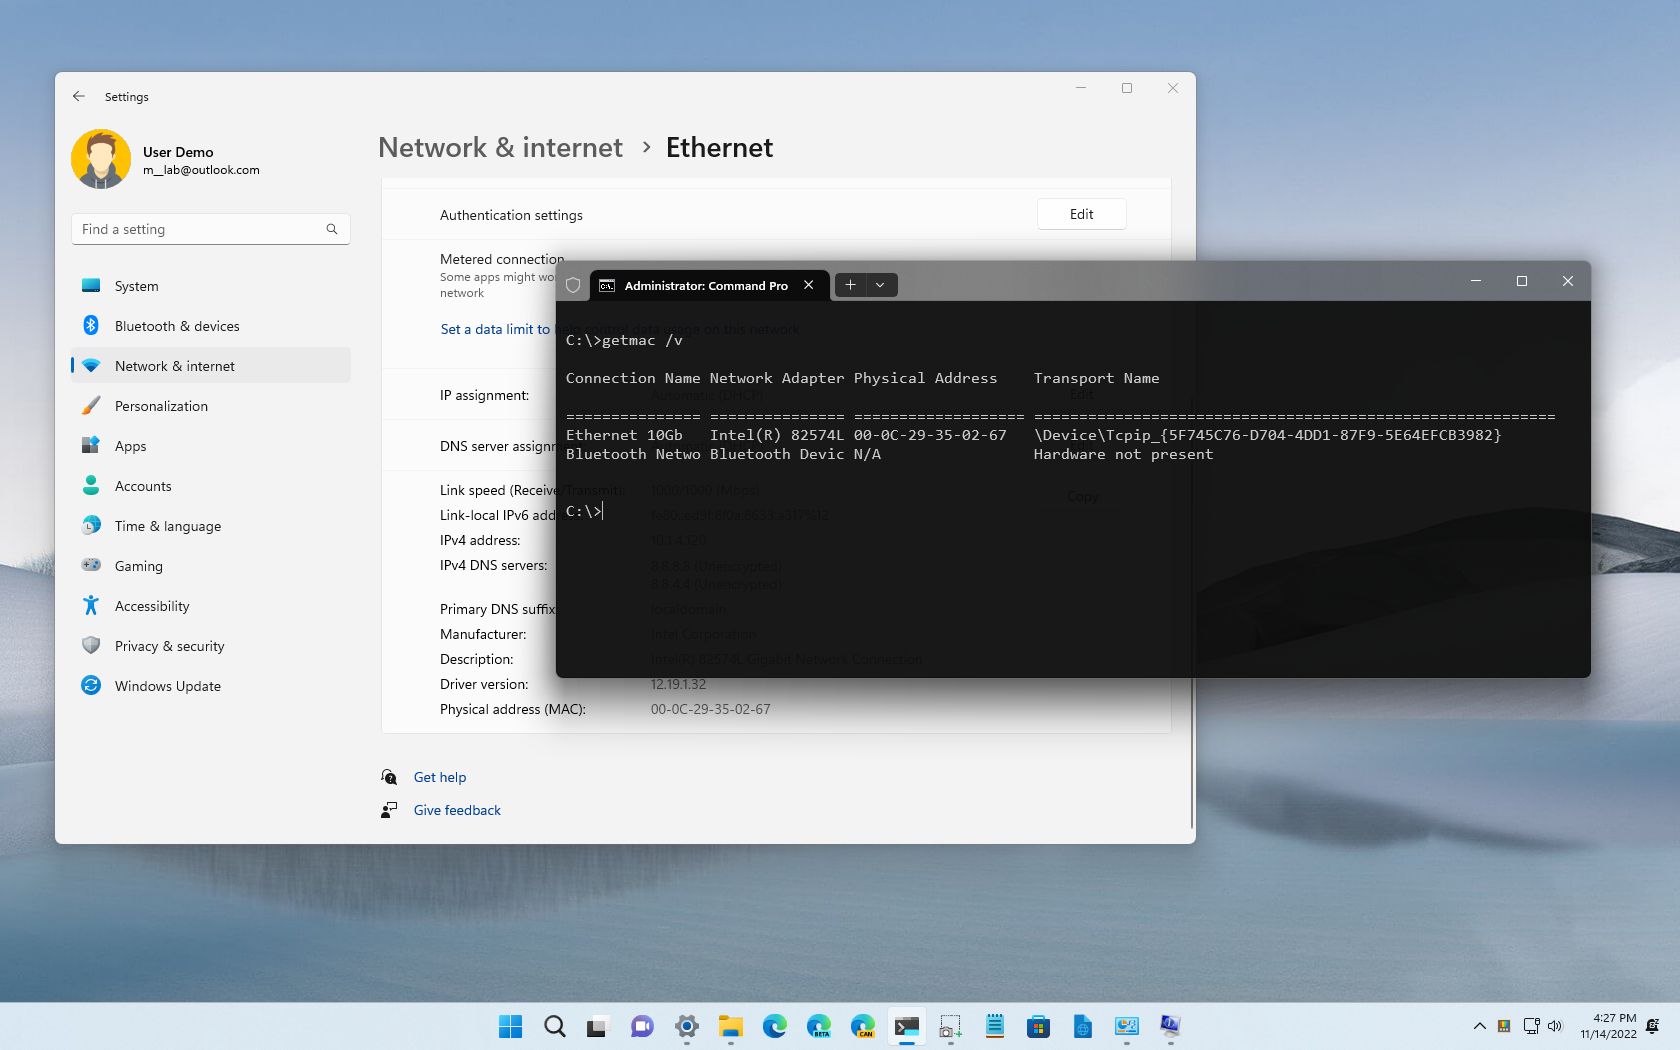
- (Optional) Type the following command to check the MAC address of the active network adapters and press Enter: getmac /v
Once you complete the steps, the command will return the MAC information for the network adapters installed on your computer.
How to find MAC address from PowerShell
To check the network adapter MAC address with PowerShell commands, use these steps:
- Open Start.
- Search for PowerShell and click the top result to open the app.
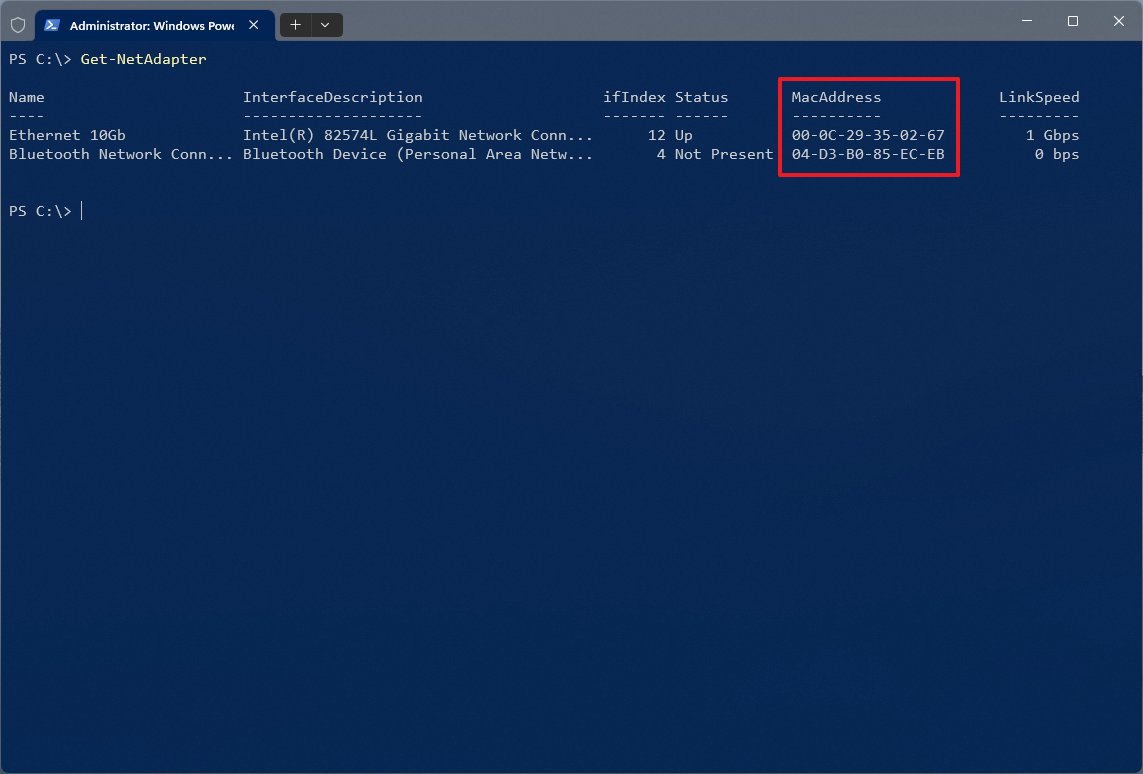
- Type the following command and press Enter: Get-NetAdapter
- Under the "MacAddress" section, confirm the physical address for the active network adapter.
After you complete the steps, the PowerShell command will list the adapters with the respective MAC addresses on Windows 11.
More resources
For more helpful articles, coverage, and answers to common questions about Windows 10 and Windows 11, visit the following resources:

Mauro Huculak has been a Windows How-To Expert contributor for WindowsCentral.com for nearly a decade and has over 22 years of combined experience in IT and technical writing. He holds various professional certifications from Microsoft, Cisco, VMware, and CompTIA and has been recognized as a Microsoft MVP for many years.
