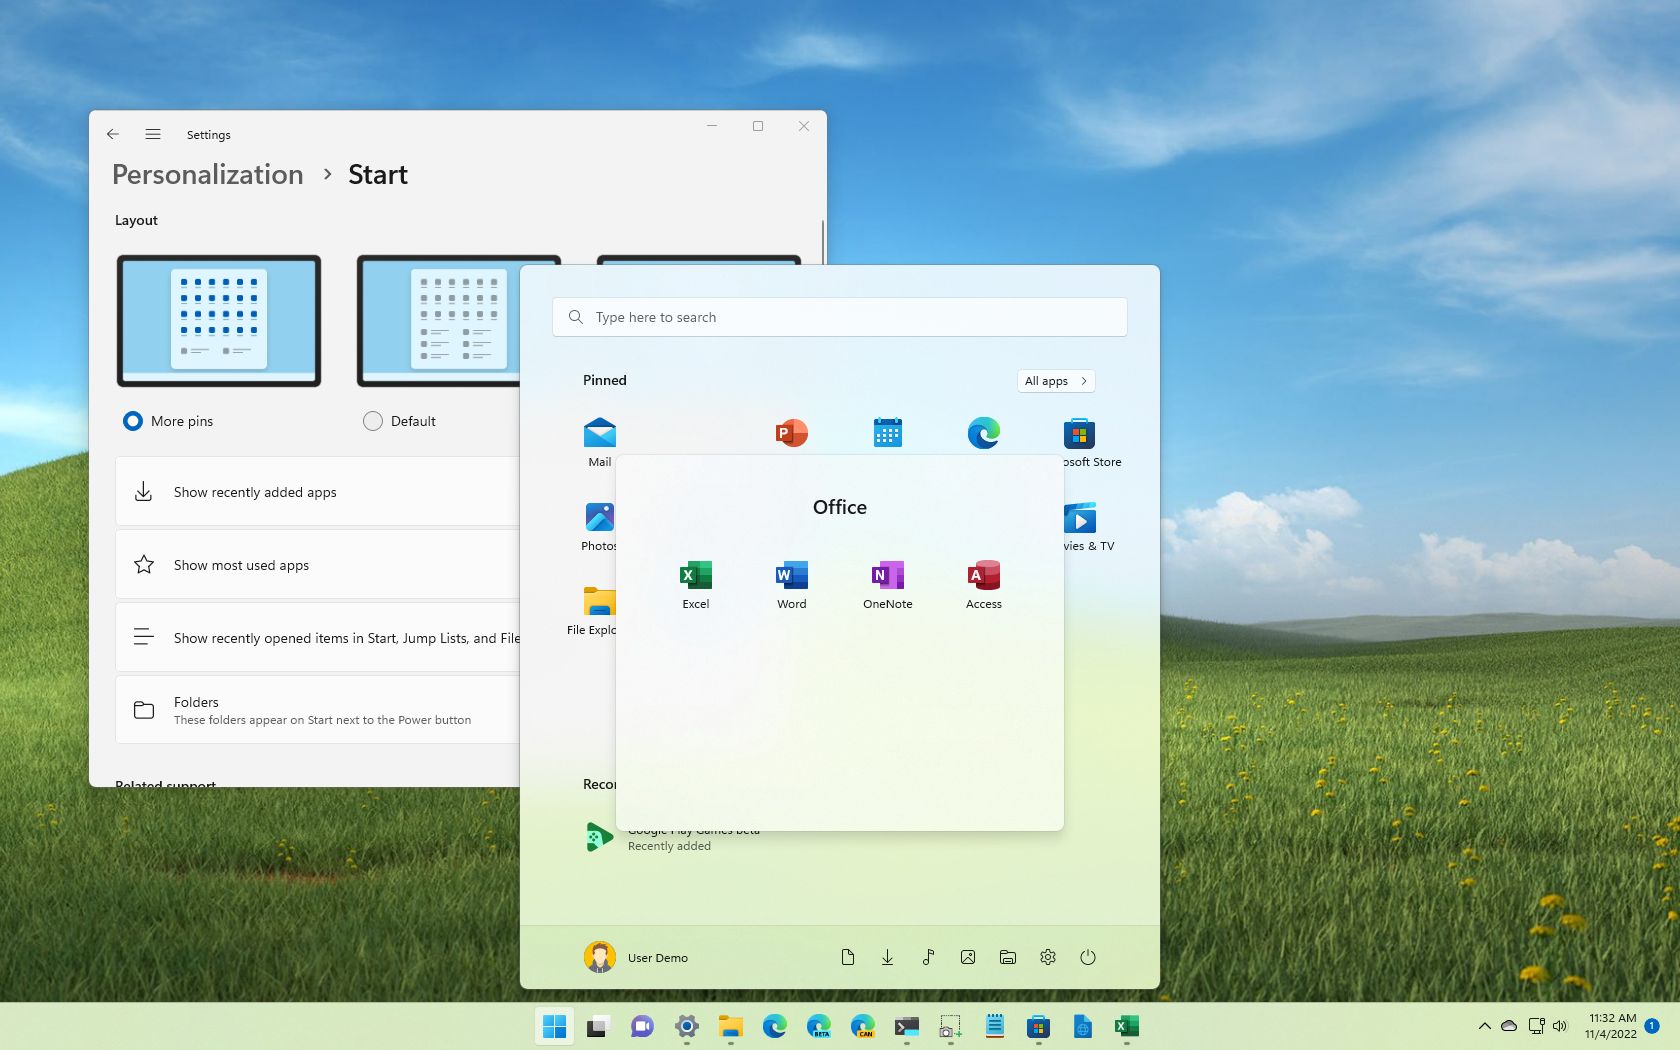
How to organize apps in Start menu on Windows 11
Here are the easy steps to make the Start menu more personal on Windows 11.
All the latest news, reviews, and guides for Windows and Xbox diehards.
You are now subscribed
Your newsletter sign-up was successful
Although the new Start menu on Windows 11 has a simple design that ditches the Live Tiles in favor of traditional icons, you have several ways to organize the experience for easier access to your apps.
For example, you can add, remove, and rearrange your apps. You can group your favorite apps into folders, and while you can't remove the recommendations, it's possible to change the layout to show more pins.
This guide will walk you through the easy steps to organize your apps in the Start menu on Windows 11.
How to organize apps in the Windows 11 Start menu
Windows 11 offers several ways to organize your apps in the Start menu, and the steps below will show you how.
Manage pinned apps
To pin and arrange apps in the Start menu, use these steps:
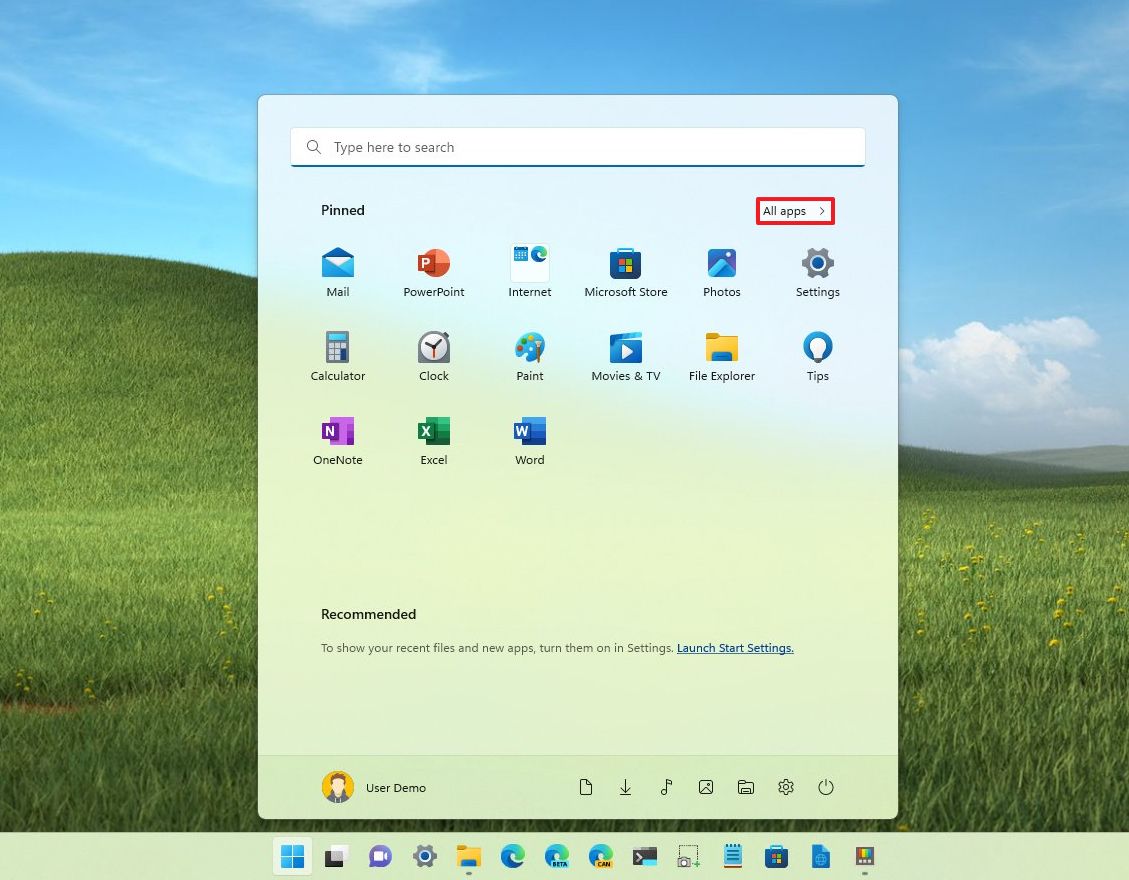
- Open Start.
- Click the All apps button in the top-right corner.
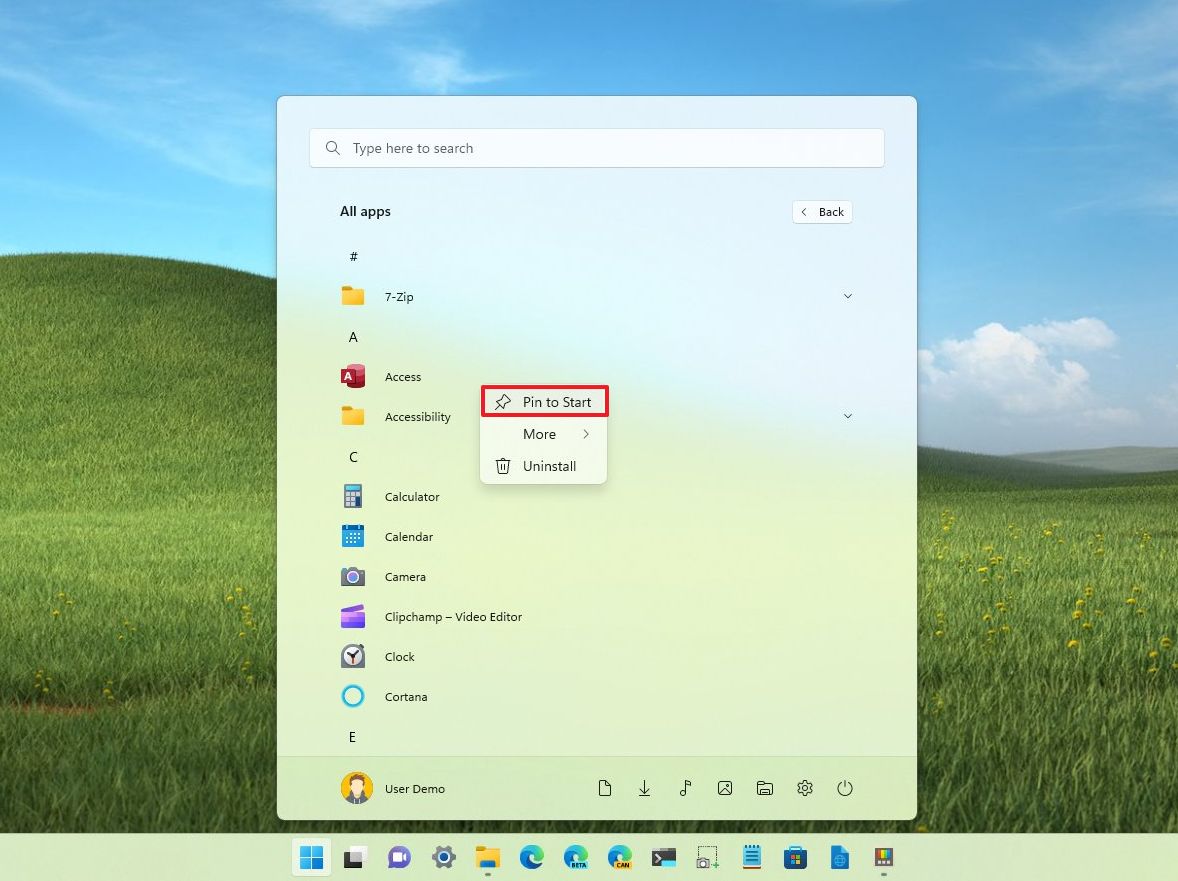
- Right-click the app and select the Pin to Start option.
- Repeat step 3 to pin other apps.
- Quick note: You can pin as many apps as you want. As the Pinned section reaches the number of apps, the Start menu will create a new page, which you can access by scrolling or using the navigation controls on the right side.
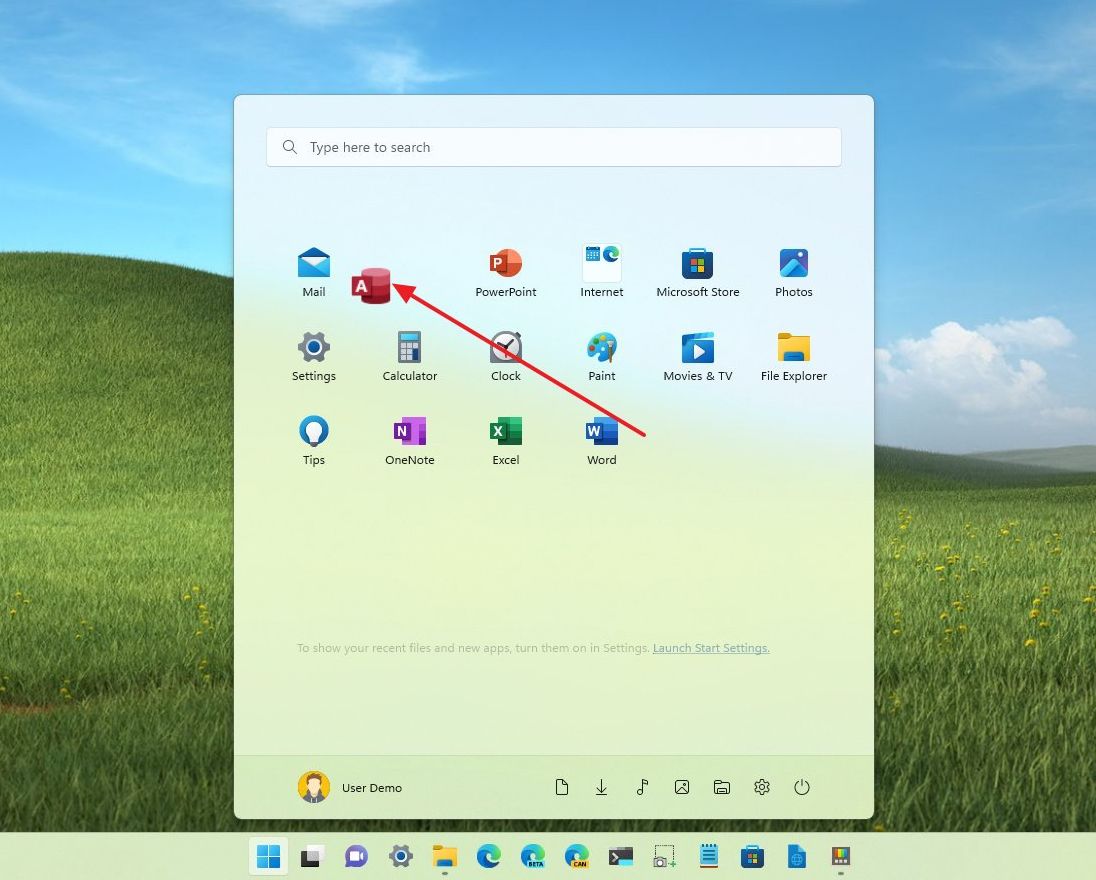
- (Optional) Drag and drop the app in the position you want it to appear in the Start menu.
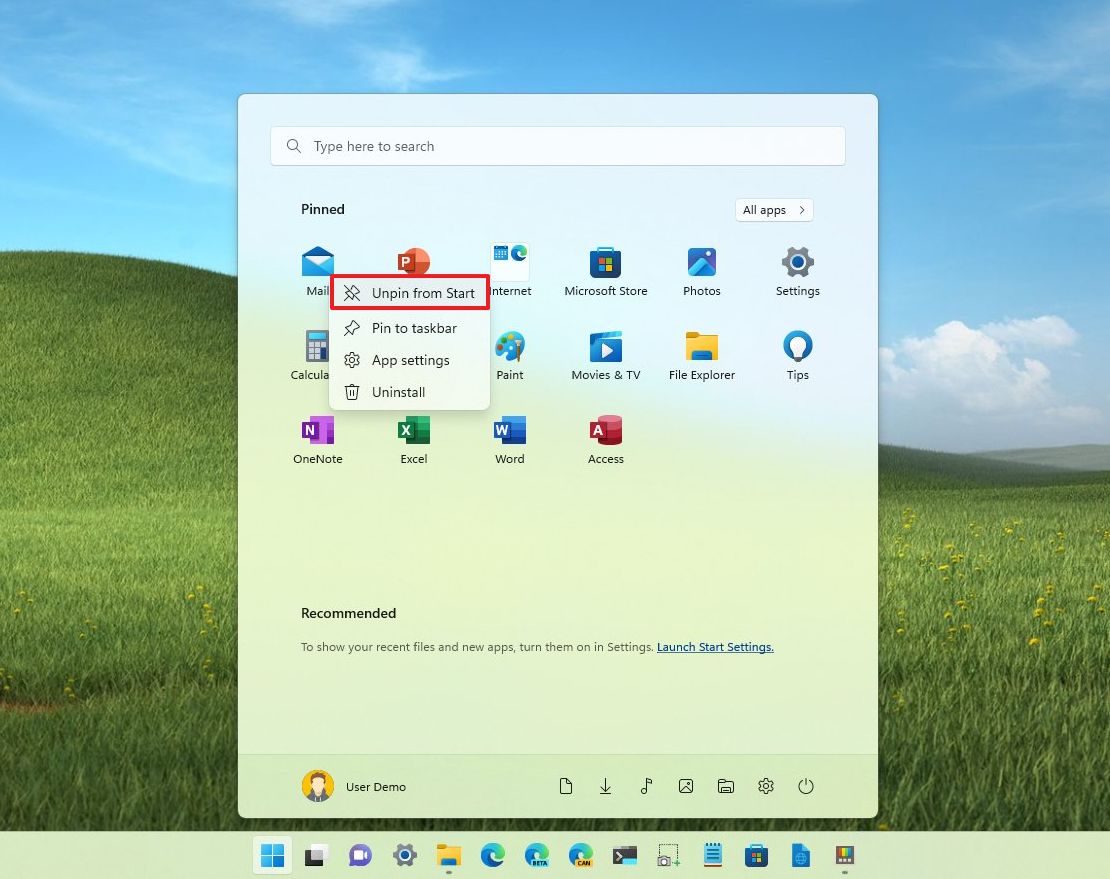
- (Optional) Right-click the app and select the "Unpin from Start" option to remove those apps you rarely use from the menu.
- Quick tip: If you don't plan to use the app or its promotional app, you can choose the Uninstall option to remove and free up space on your computer.
Once you complete the steps, the new organization will make it easier to launch your favorite apps.
All the latest news, reviews, and guides for Windows and Xbox diehards.
Create app folder
Starting with version 22H2, you can create folders to organize apps into groups that take up less space in the same area, much like you group apps on your phone.
To create a new app folder in the Start menu, use these steps:
- Open Start.
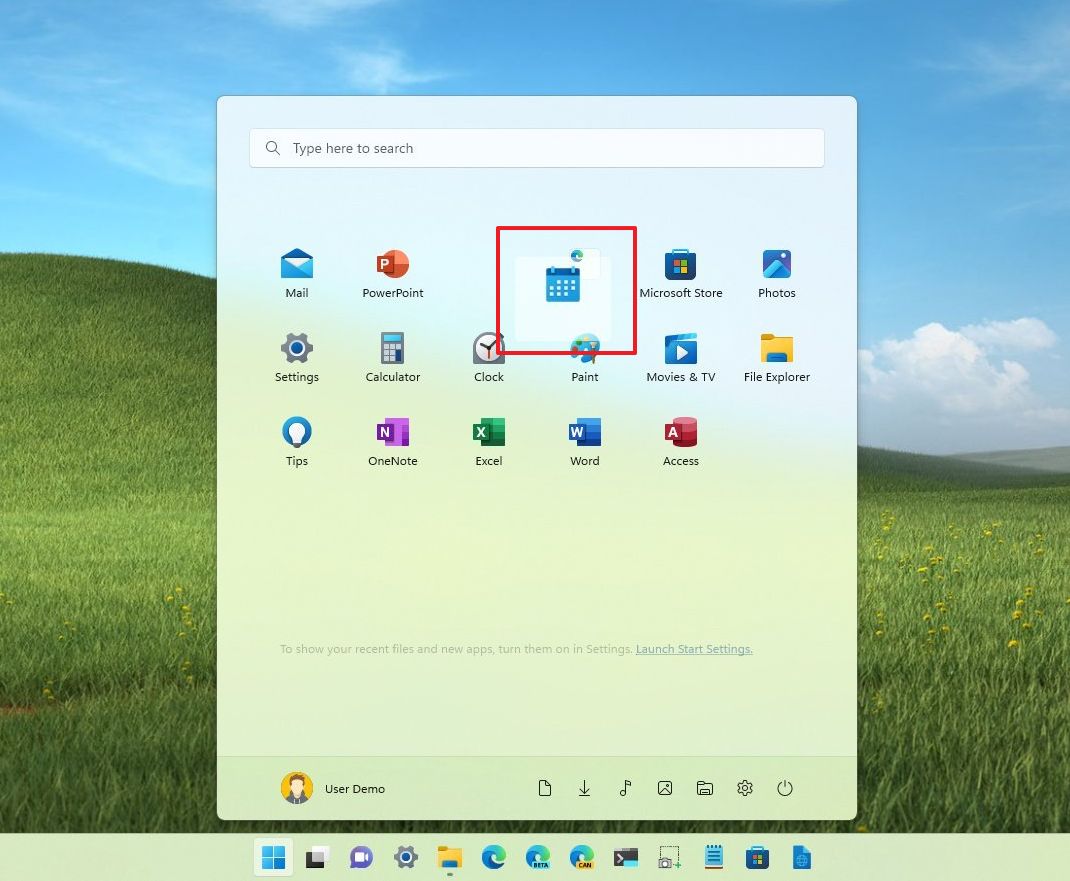
- Drag and drop an app on top of another app to create a folder.
- Drag and drop another app to add it to the folder.
- Repeat step 3 to add more apps to the folder.
After you create the folder, it'll generate a thumbnail with the icons of the first four apps. If you want to customize the preview, you need to arrange the first four apps with the ones you want to see in the preview.
Assign folder name
To assign a name for the app folder, use these steps:
- Open Start.
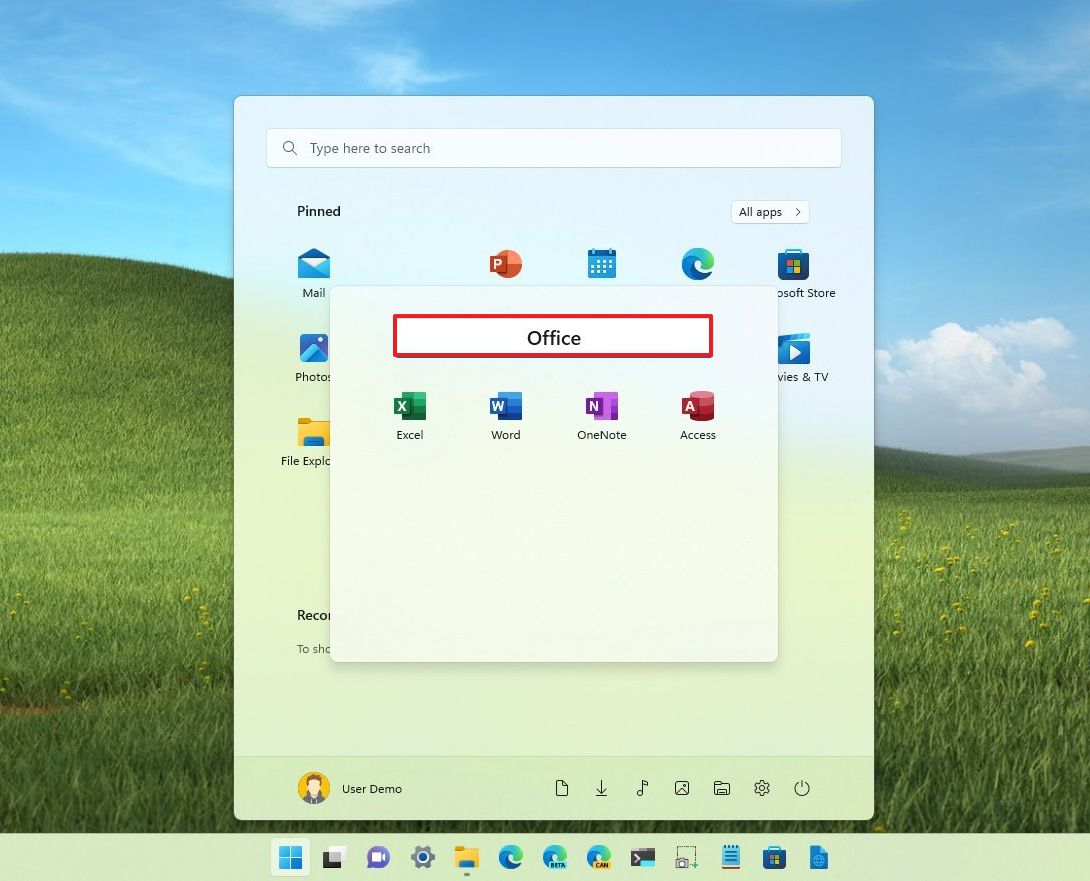
- Click to open the app folder.
- Click the Edit name option.
- Confirm a new name for the app folder.
Once you complete the steps, the folder will reflect the new name.
Remove app folder
To remove a folder from the Start menu, use these steps:
- Open Start.
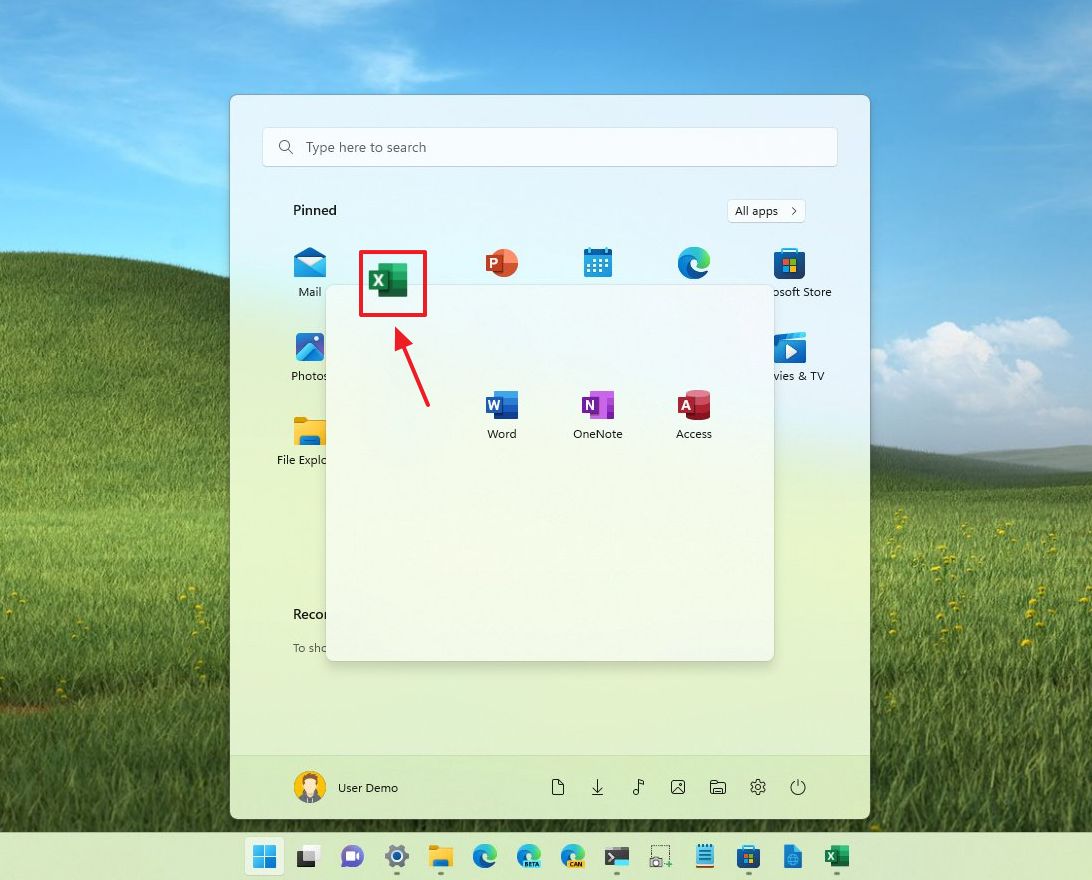
- Click to open the app folder.
- Drag and drop the app outside the folder.
- Drag and drop the remaining apps, and the folder will delete automatically.
After you complete the steps, the app folder will no longer be available in the Start menu.
Change recommendations
To show more apps in the Pinned section on Windows 11, use these steps:
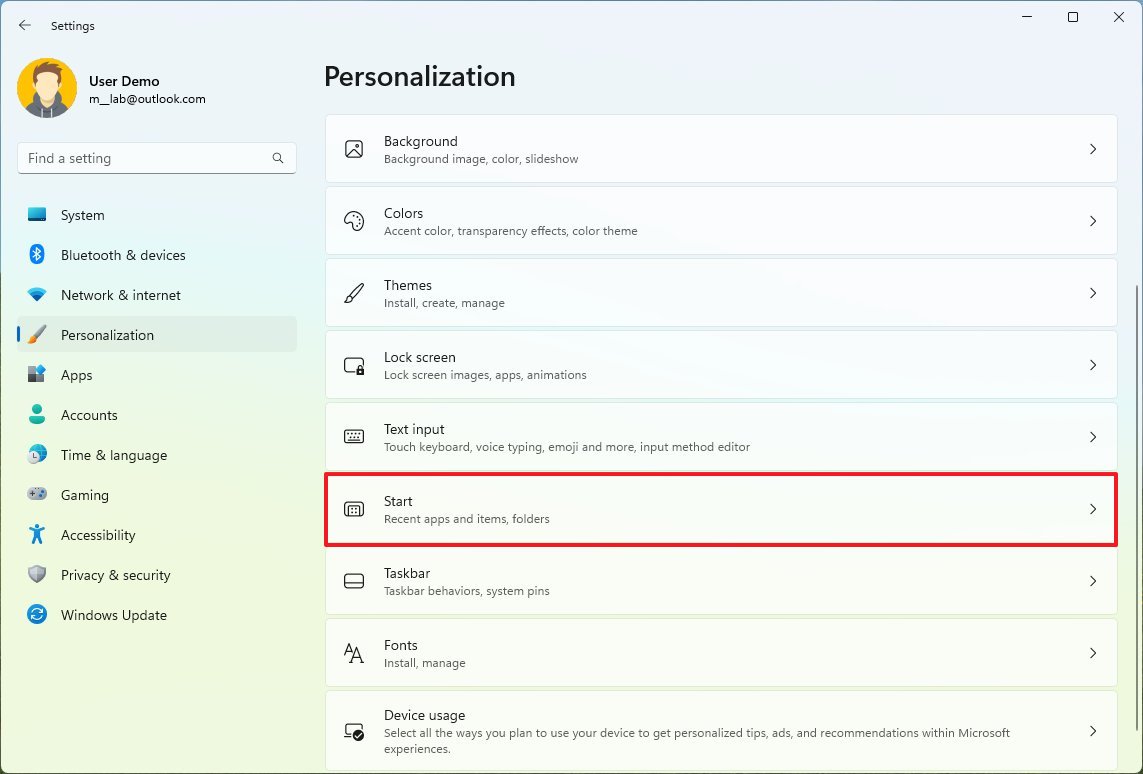
- Open Settings.
- Click on Personalization.
- Click the Start page on the right side.
- Under the "Layout" section, select the "More pins" option to add two more rows of pins and only one row of recommendations.
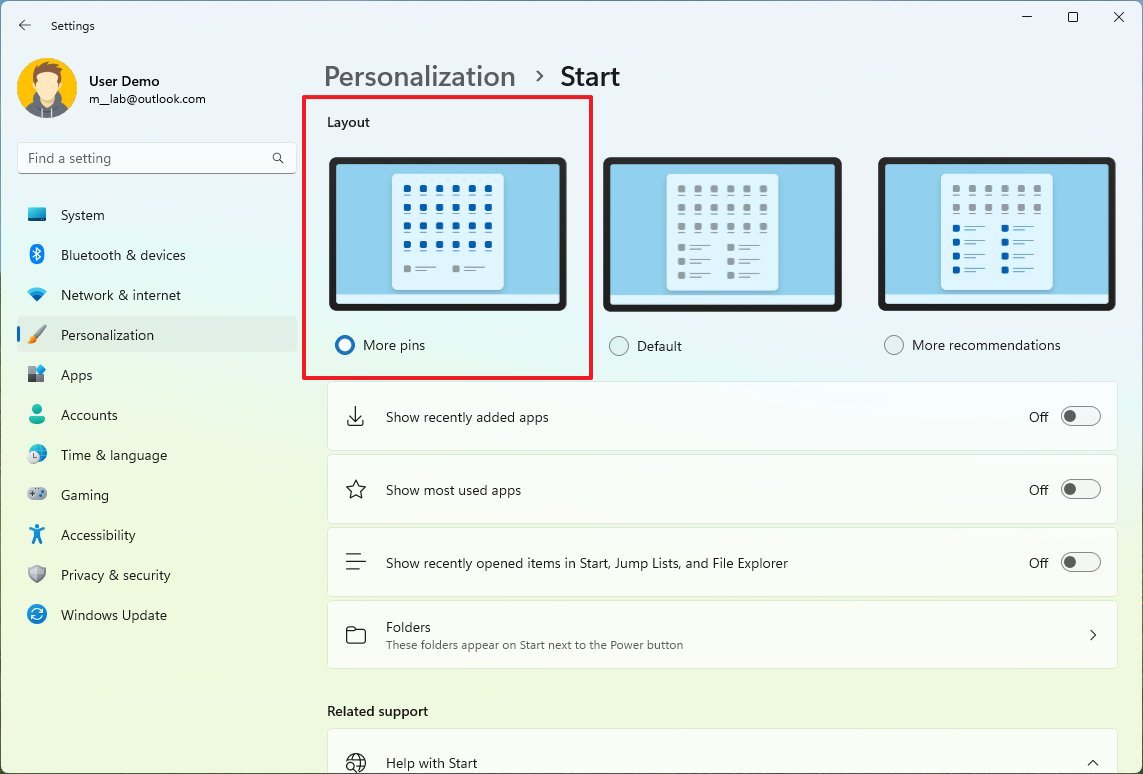
- Quick note: You can also choose the "More recommendations" option to show a total of four rows and two rows of pins." The "Default" option displays three rows of pins and three rows of recommendations.
Once you complete the steps, you will be able to see more pins (or recommendations) based on layout configuration.
Show recently used and recently installed apps
To show recently used and installed apps in the All apps menu, use these steps:
- Open Settings.
- Click on Personalization.
- Click the Start page on the right side.
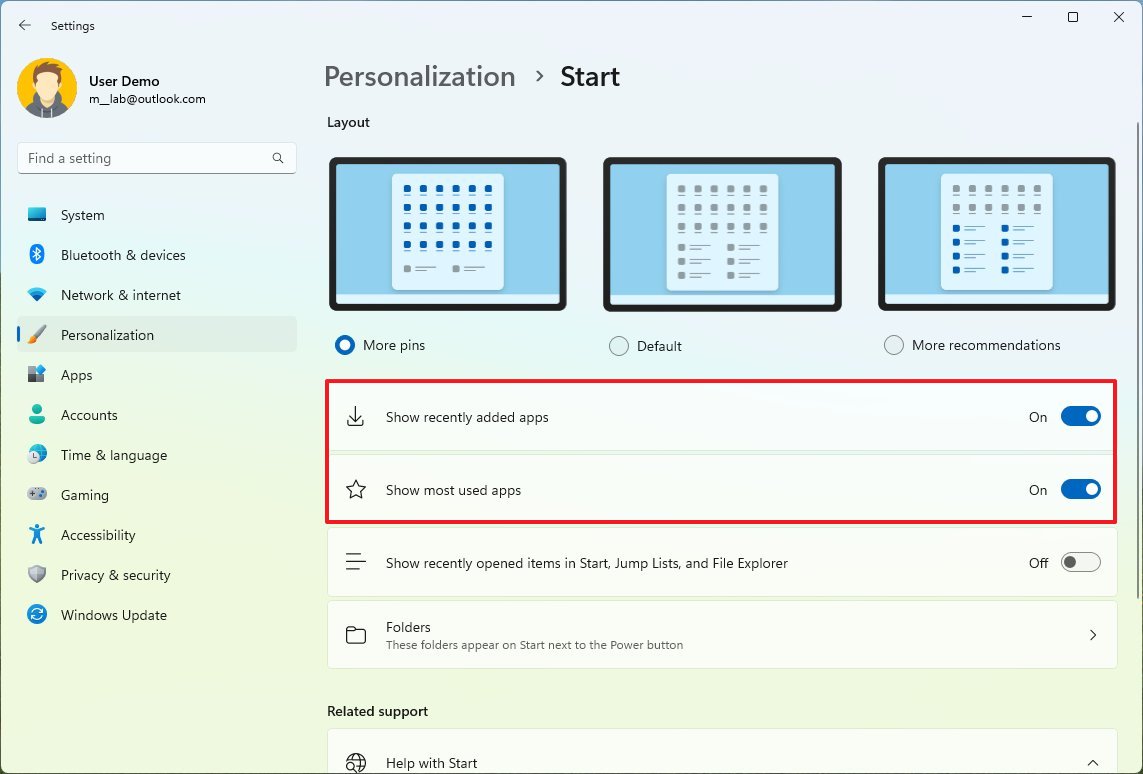
- Turn on the "Show recently added apps" toggle switch.
- Turn on the "Show most used apps" toggle switch.
After you complete the steps, the "All apps" menu will show recently installed and more frequent apps.
On Windows 11, it's not possible to disable the "Recommended" section, but if you can select the "More pins" layout and disable the "Show recently added apps," "Show more used apps," and "Show recently opened items in Start, Jump Lists, and File Explorer" options to stop showing recommendations while displaying most pins.
If you can't find some of the features, such as the app folder and the ability to change the Start menu layout, it's because you not running the latest version of Windows 11 (2022 Update).
More resources
For more helpful articles, coverage, and answers to common questions about Windows 10 and Windows 11, visit the following resources:

Mauro Huculak has been a Windows How-To Expert contributor for WindowsCentral.com for nearly a decade and has over 22 years of combined experience in IT and technical writing. He holds various professional certifications from Microsoft, Cisco, VMware, and CompTIA and has been recognized as a Microsoft MVP for many years.
