Windows 11's Start menu gets a bigger, new look: Get it today with these simple steps
Microsoft is now letting users try the Start menu redesign, and here's how to enable it manually.
All the latest news, reviews, and guides for Windows and Xbox diehards.
You are now subscribed
Your newsletter sign-up was successful
On Windows 11, Microsoft is testing a significant upgrade for the Start menu that simplifies the design with a larger, adaptable, and fully scrollable interface that makes it easier to access your applications and settings.
Also, the company is finally adding a way to turn off the "Recommended" section from the experience, which can be considered among the top requests from users.
The new Start menu design is available starting with the release of the Windows 11 build 26200.5641 (KB5060824) in the Dev Channel and build 26120.4250 (KB5060820) in the Beta Channel. However, if the new menu isn't available, it's still possible to turn it on manually using the ViveTool.
In this how-to guide, I'll explain the new design changes and show you the steps to enable the feature on your computer.
How is the Start menu changing on Windows 11
Starting with the latest preview of the operating system, Microsoft is officially making available the first official preview of the Start menu that includes a massive redesign.
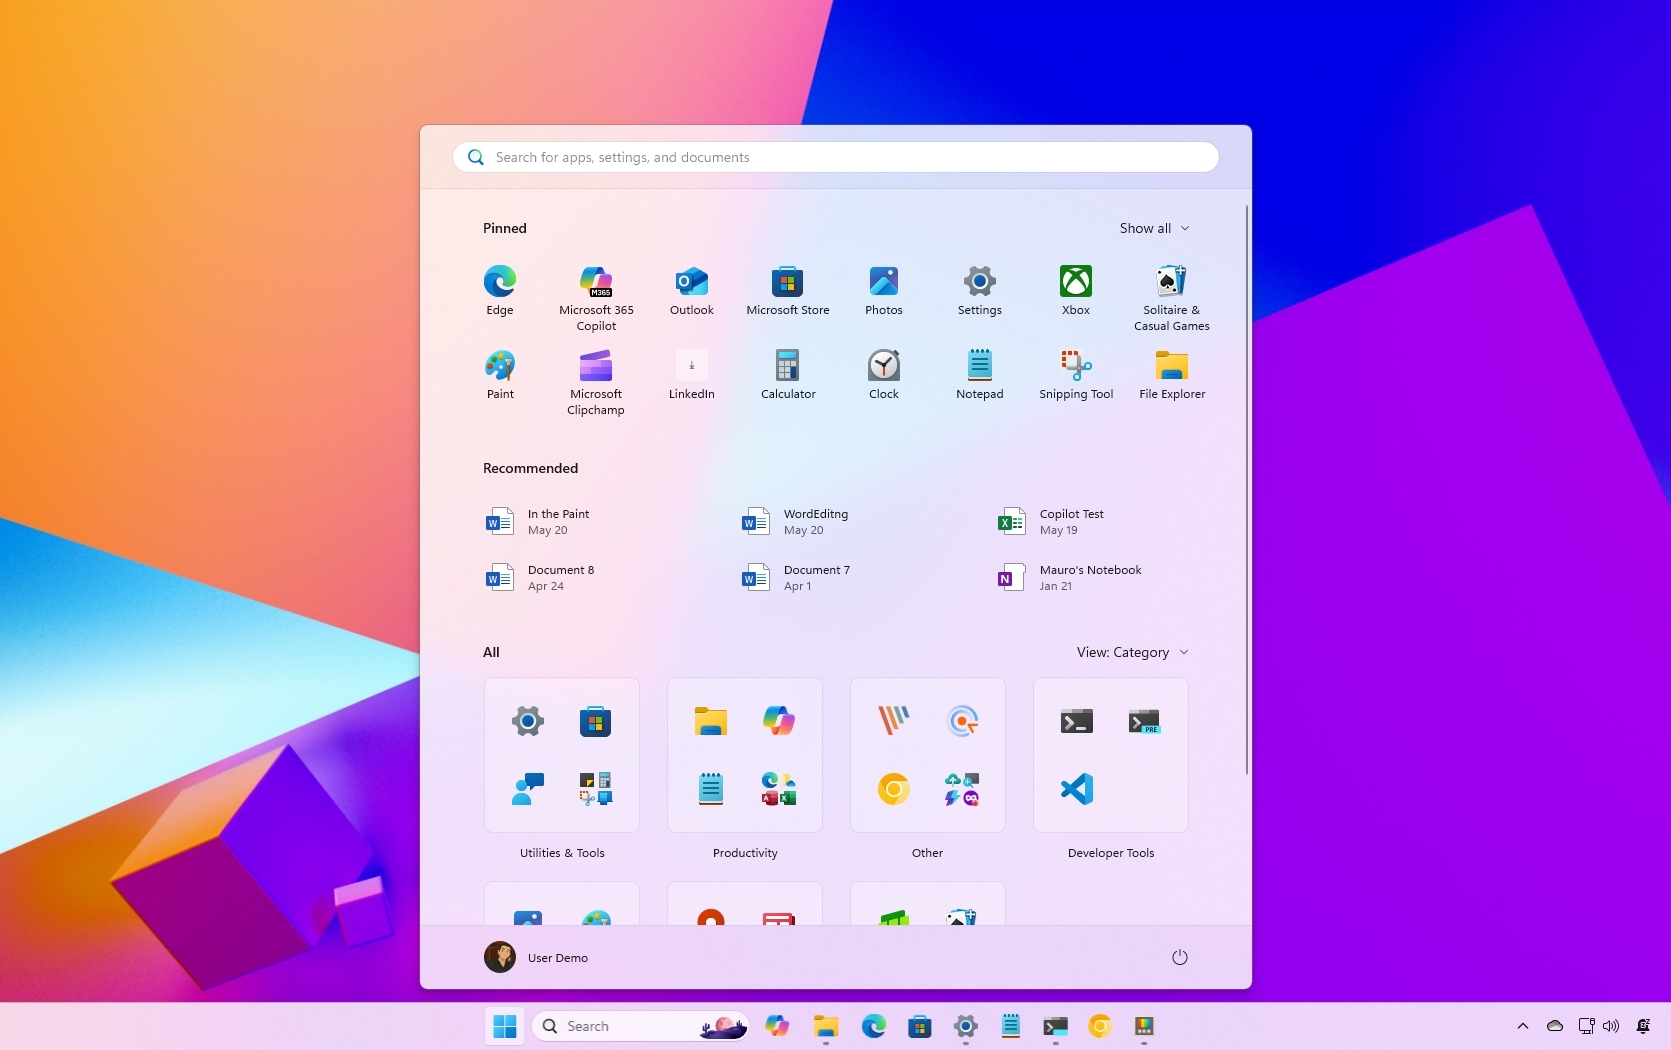
The new design combines the previous layout, which included the "Pinned" and "Recommended" sections, with the "All" menu into one scrollable interface.
As a result of these changes, the Start menu now has a much larger frame that you either like or dislike. However, depending on the screen size and resolution, the menu will resize automatically.
All the latest news, reviews, and guides for Windows and Xbox diehards.
Sidebar toggle
At the top-right, next to the search box, you'll find a new option to show or hide the mobile sidebar experience if your iPhone or Android phone is connected to your computer. This option makes sense since you previously needed to access the Start settings to access the same feature.
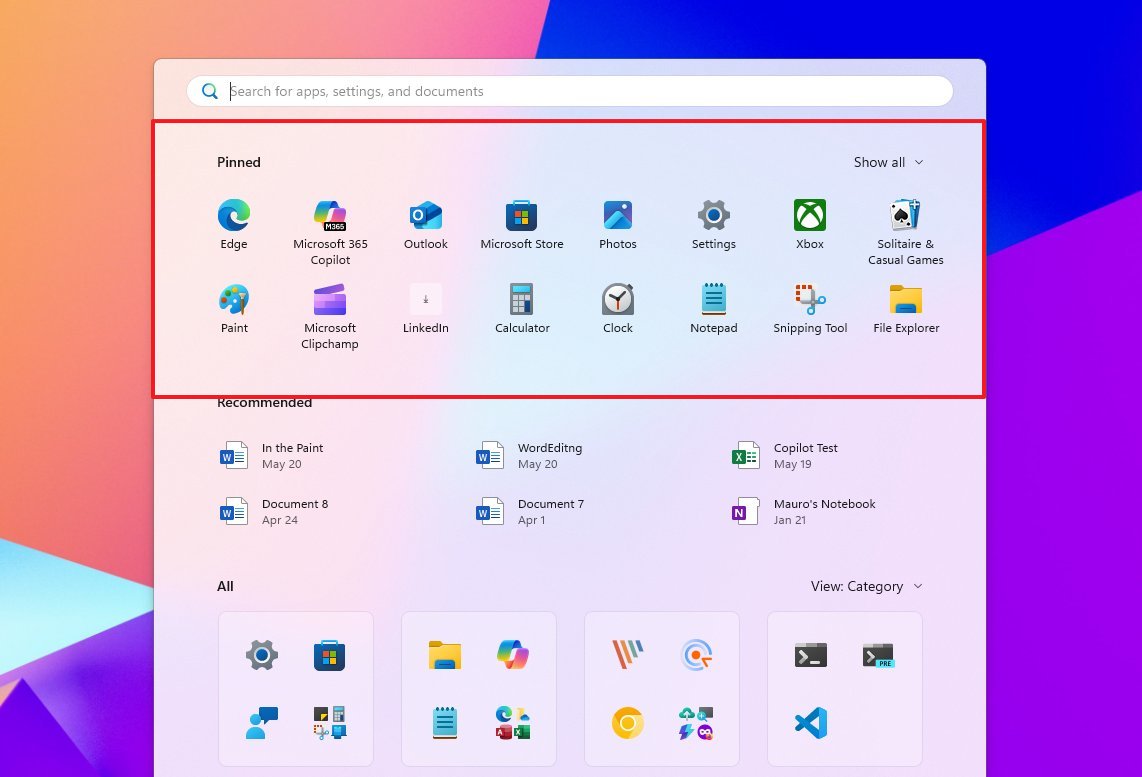
Pinned
In the "Pinned" section, you'll notice more pins in a single row. In this new design, you can have up to eight columns of apps, six recommendations, and four columns for category groups.
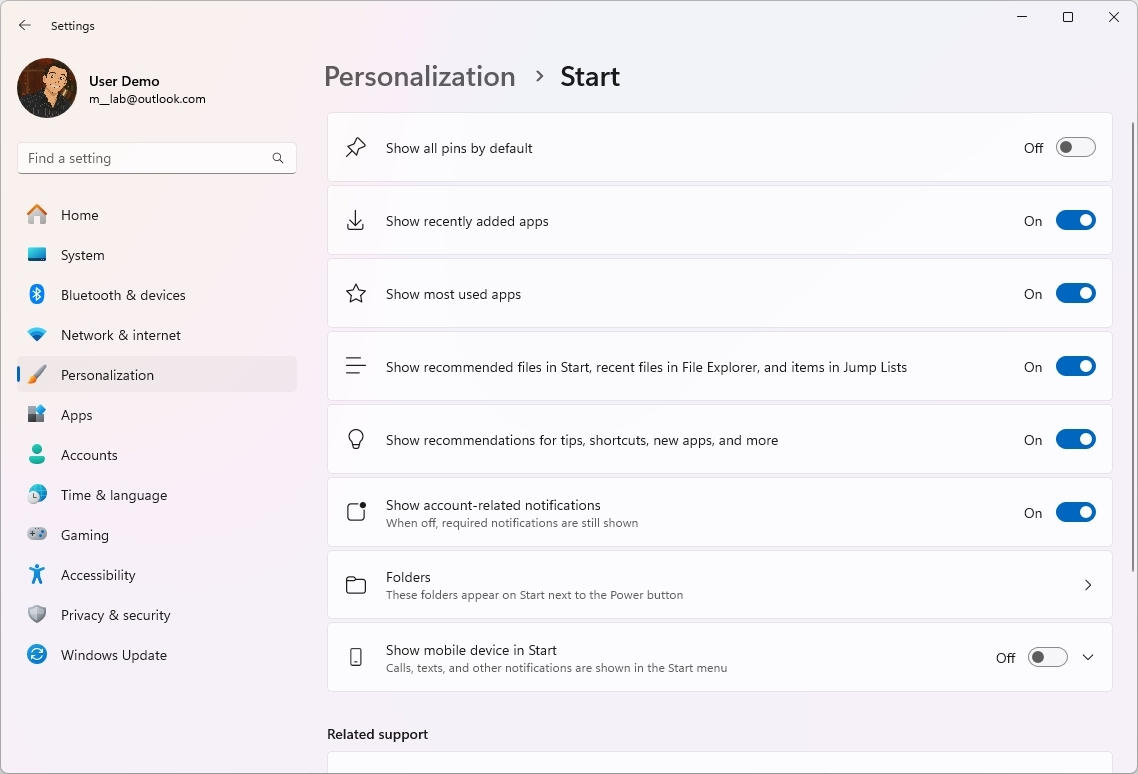
You can also click the "Show all" option on the top right to display every element you may have pinned. In the "Start" settings page, Microsoft is adding a new "Show all pins by default" option to list all your pins automatically every time you open the menu.
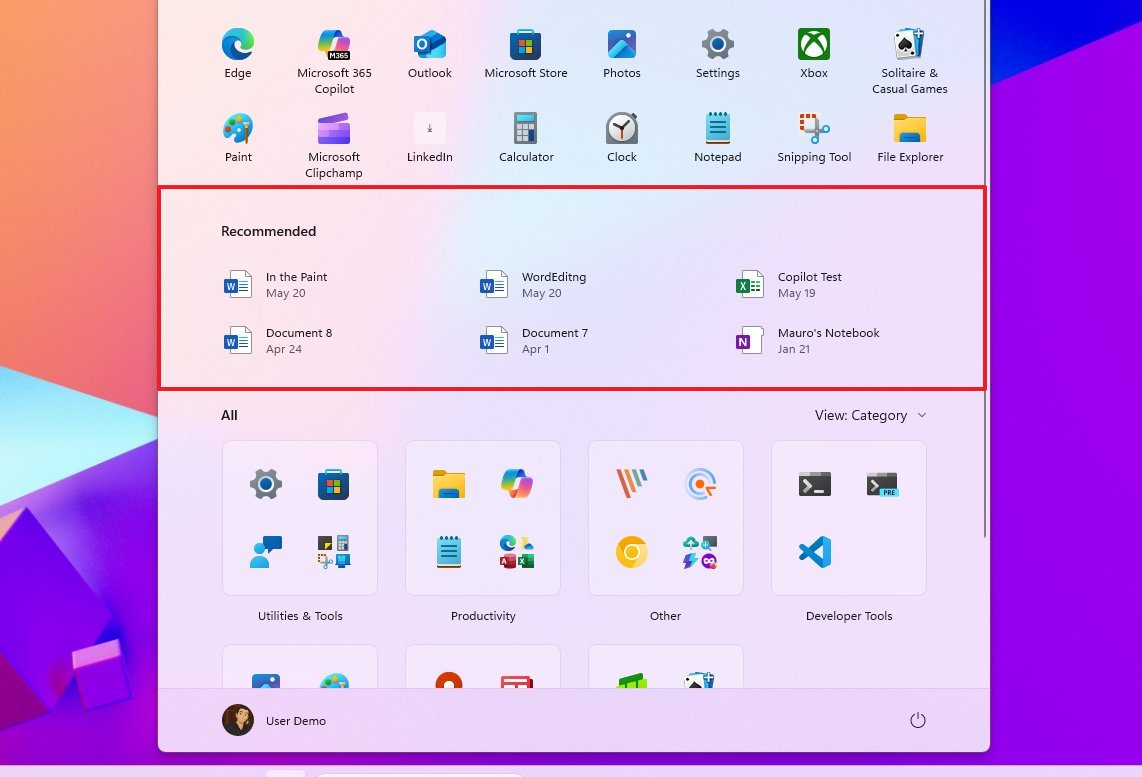
Recommended
In the "Recommended" sections, you won't see a lot of changes other than having up to six suggestions for apps and files.
However, a significant design change is the ability to remove the "Recommended" section.
If you don't want to see the system recommendations for apps and files, you'll have to turn off these features from the Start page:
- Show recently added apps.
- Show recommended files in Start.
- Show websites from your browsing history.
- Show recommendations for tips.
Although this is a welcome change, it appears that Microsoft is adding this behavior for more tech-savvy users since most regular users won't know they can turn off this feature since it's not intuitive.
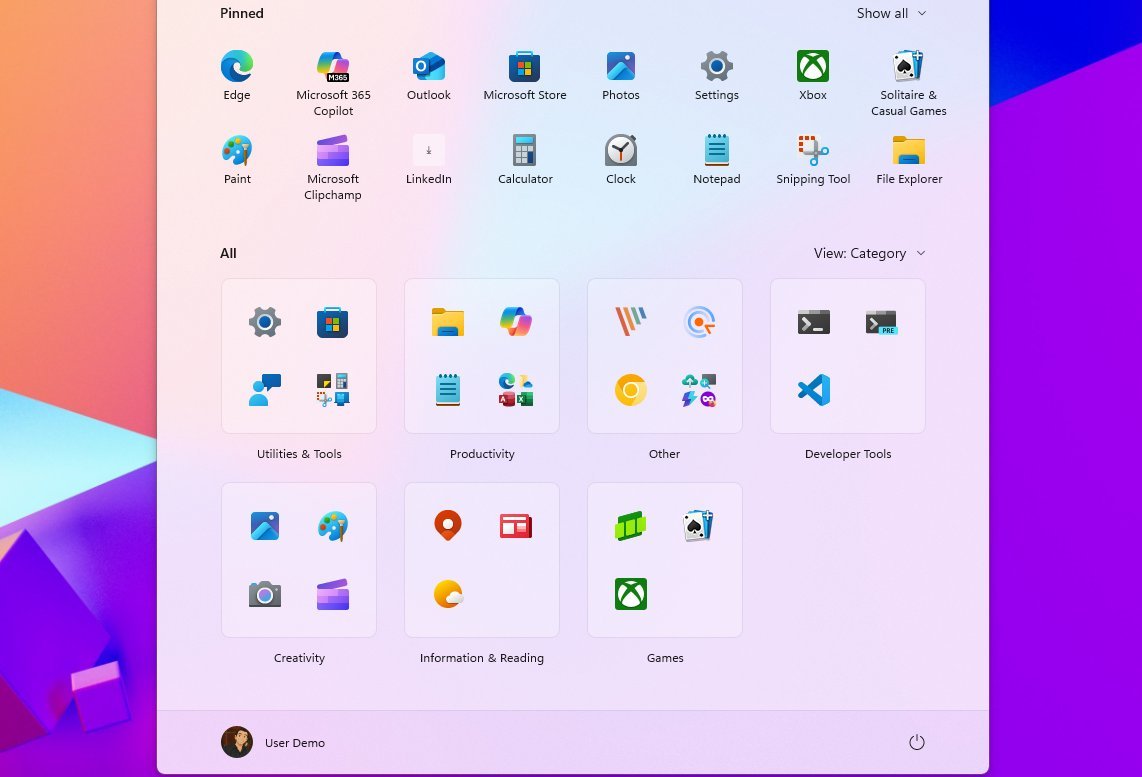
All
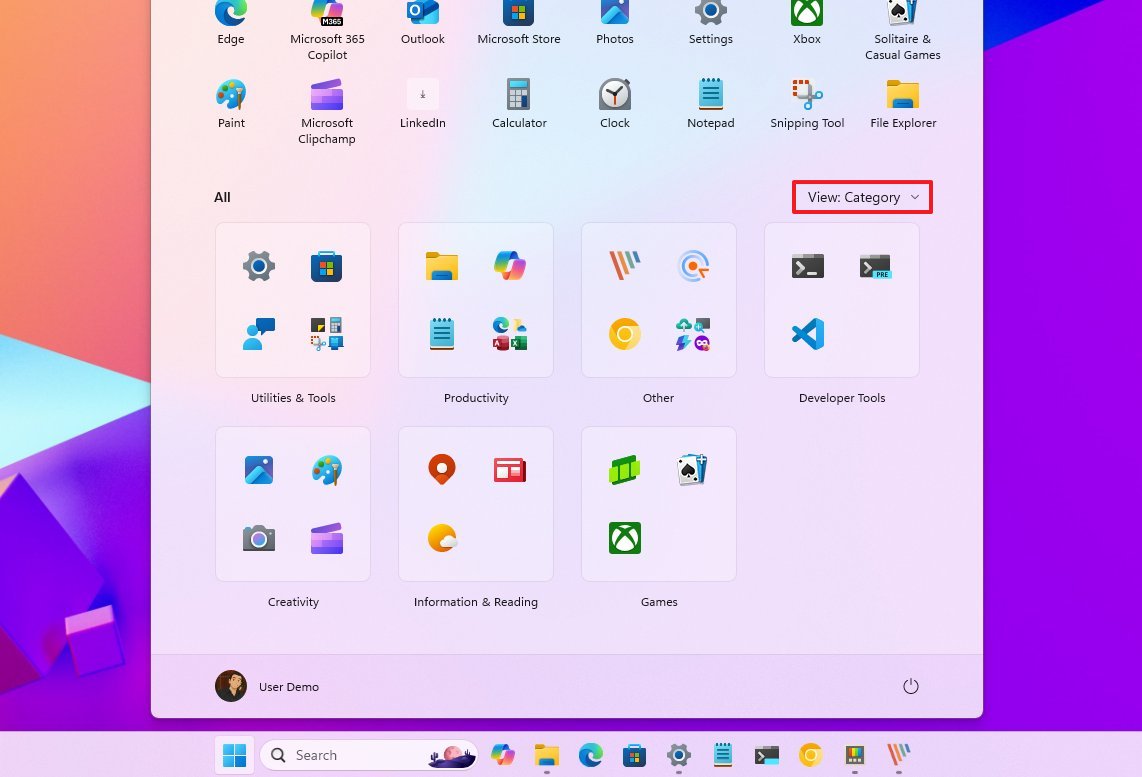
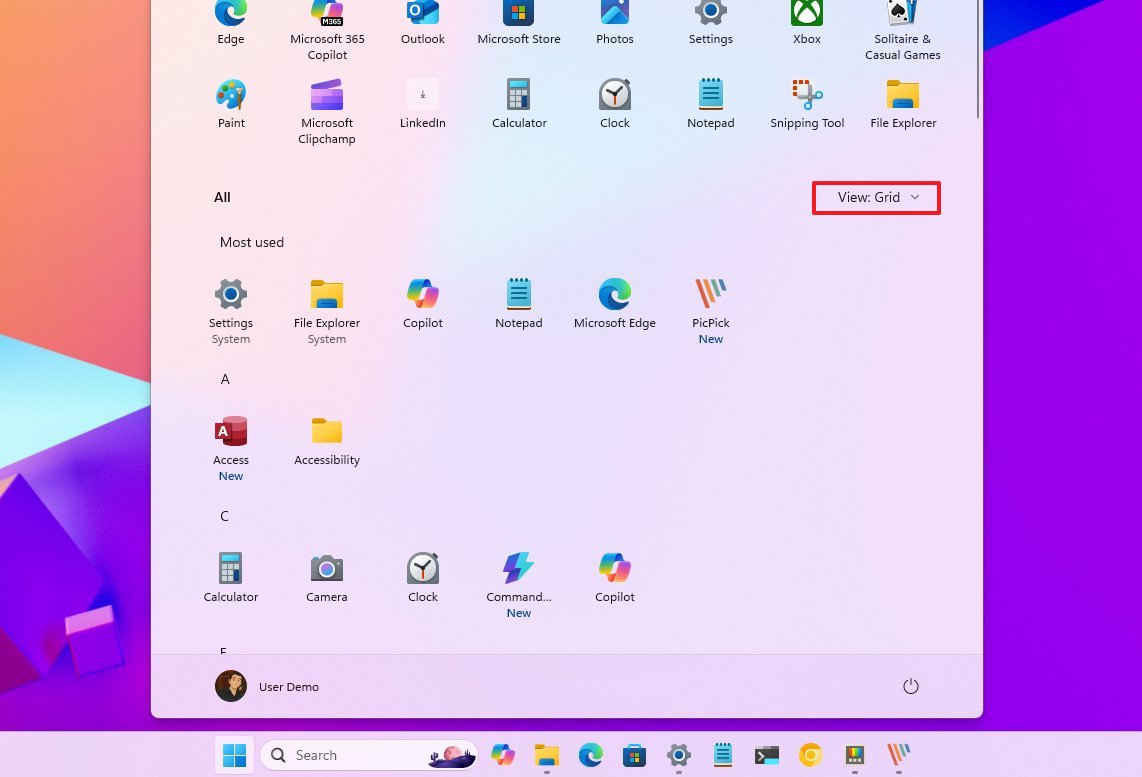
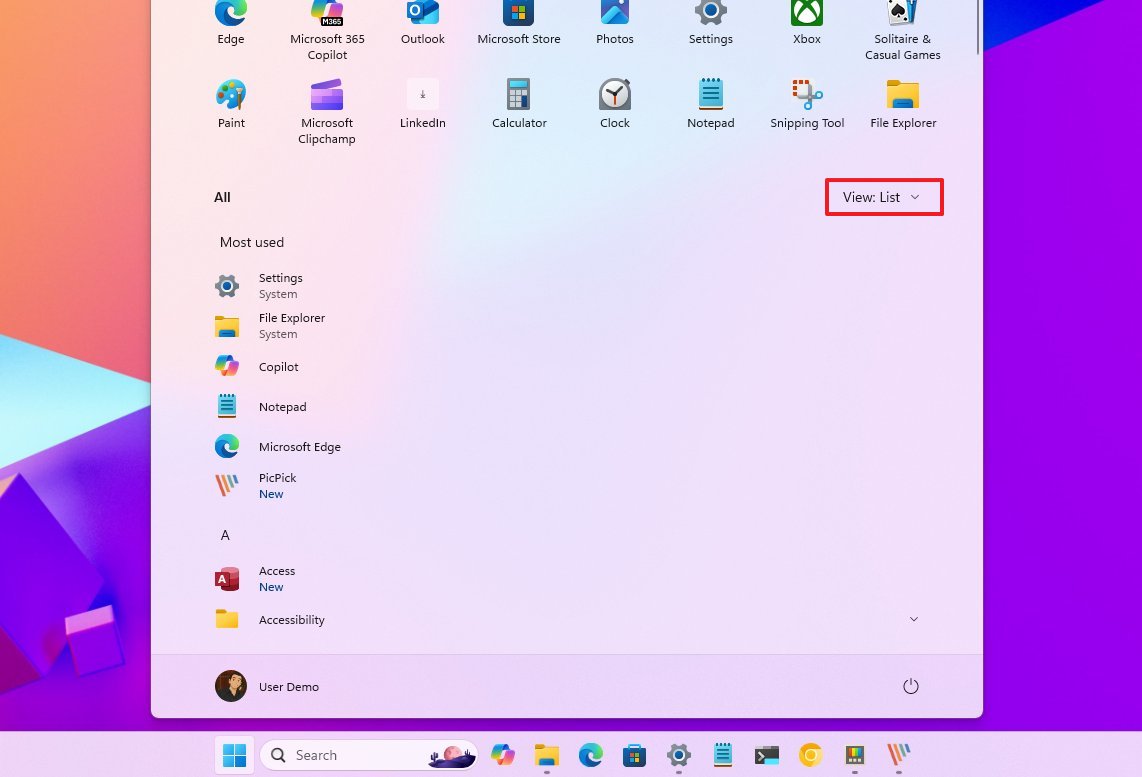
In the "All" section, you'll find the most significant visual changes to the Start menu. First, Microsoft is adding a new option to change the views for the list of installed apps, and it's making the "Category" view the system default.
The "Category" views groups apps automatically depending on their category. If this grouping feature seems familiar, it is because you can arrange apps into groups on your phone.
Microsoft says that the system has to detect at least three apps from the same category to create a group. Otherwise, the app will be grouped in the "Others" section.
The "Grid" view offers a horizontal grid view with alphabetical order, which should make it easier to scan and find apps.
The "List" view is still available and provides the same as the legacy "All" menu.
You may only see up to six columns of apps, three columns for categories, and three recommendations on smaller screens.
As a result of these changes, Microsoft is also updating the "Start" settings page, removing the no longer needed "Layout" setting and adding the new "Show all pins by default" option.
How to enable the new Start menu design on Windows 11
The new Start menu design is rolling out for devices enrolled in the Dev and Beta Channels of the Windows Insider Program. However, since the company is testing these changes gradually, they may not be available to everyone immediately after installing the latest preview build.
If this is the case, you can force the menu redesign using the ViveTool, which is a popular open-source tool that allows you to control experimental features that may become available on Windows 11.
To enable the early preview of the Start menu, use these steps:
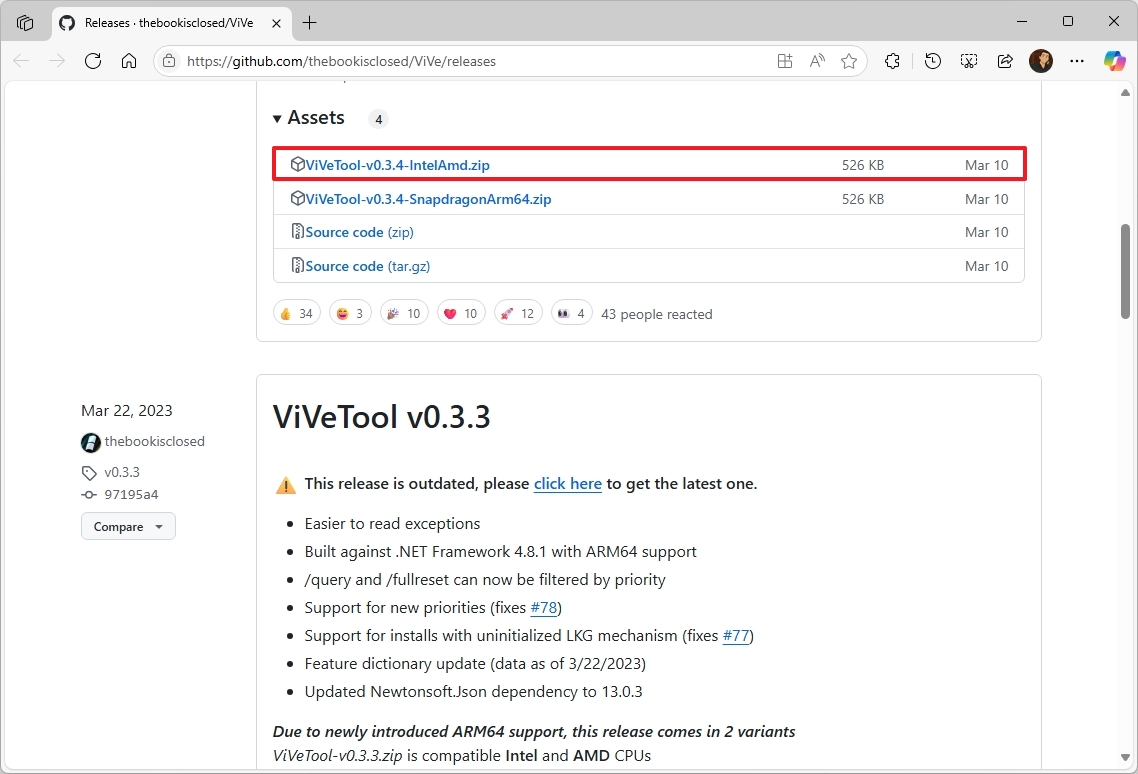
- Open the ViveTool GitHub page.
- Click on the latest version of the tool to download the package to your computer.
- Quick note: If you have a Copilot+ PC, you have to download the ARM64 version.
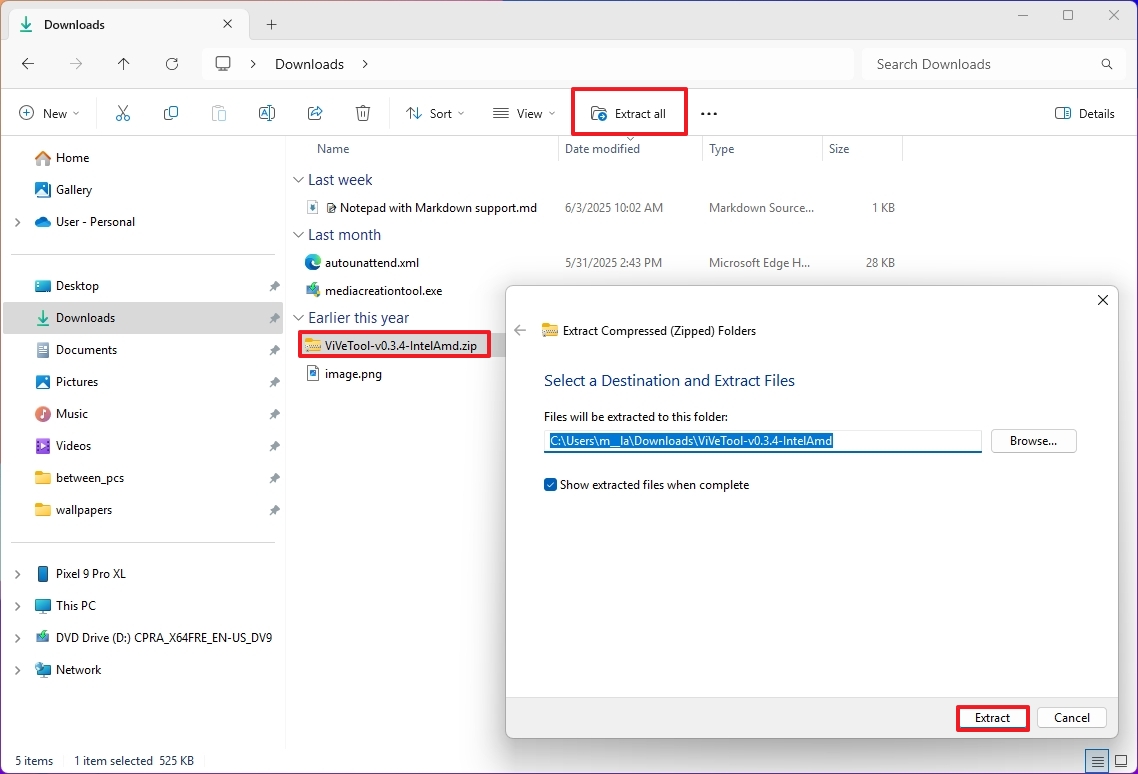
- Select the ".zip" folder and click the Extract All button from the command bar.
- Click the Extract button.
- Select and copy the folder path where you extracted the files.
- Open Start.
- Search for Command Prompt (or b), right-click the top result, and choose the Run as administrator option.
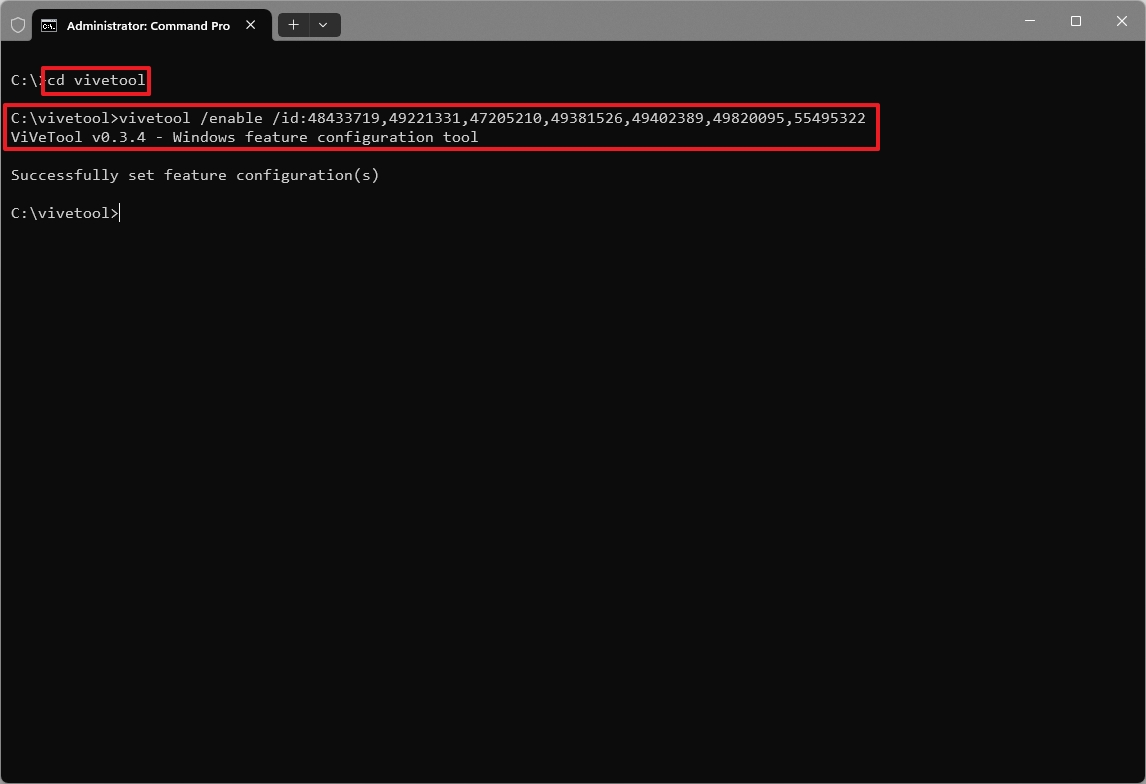
- Type this command to open the ViveTool location and press Enter: cd c:\folder\path\vivetool
- Type this command to enable the design of the Start menu and press Enter: vivetool /enable /id:48433719,49221331,47205210,49381526,49402389,49820095,55495322
Once you complete the steps, you may have to restart the computer to apply the changes.
I only suggest using these steps if you already have a device enrolled in one of the supported preview channels, since builds from the Windows Insider Program are not recommended for daily use.
If you still want to enroll your computer in the Windows Insider Program, from Settings > Windows Update > Windows Insider Program, click the "Get started" button, confirm your Microsoft account account, and choose either the Dev Channel or Beta Channel, and continue with the on-screen directions.
After enrolling the device, Windows Update will download and install the latest build in the channel. If the new Start menu isn't available, you can use the above steps to turn it on.
More resources
Explore more in-depth how-to guides, troubleshooting advice, and essential tips to get the most out of Windows 11 and 10. Start browsing here:

Mauro Huculak has been a Windows How-To Expert contributor for WindowsCentral.com for nearly a decade and has over 22 years of combined experience in IT and technical writing. He holds various professional certifications from Microsoft, Cisco, VMware, and CompTIA and has been recognized as a Microsoft MVP for many years.
You must confirm your public display name before commenting
Please logout and then login again, you will then be prompted to enter your display name.
