


Water cooling used to be a must-have for an enthusiast PC gaming rig — it wasn't long ago that powerful processors put out enough heat you could warm a house with them. The liquid-cooling systems took the burden off older and less efficient air coolers, most notably when overclocking and pushing the system to its limit. Times have changed, and processors are now more power efficient, but water cooling still has its place.
These days air coolers are much better when it comes to removing heat, but water coolers are still more than capable of keeping the temperature in check and thus unlock a whole new world of customization. Think lights, unique parts, more space for other case mods, and more. And if you plan on overclocking your system, you will need to consider water cooling as air alone may not be sufficient enough.
There's also something about using a liquid to cool electronics. It's a risk that brings great reward in the form of accomplishment when a stable water cooling solution is installed. That said, the risks are real, and leaks can occur. Mixing liquid and electronics could lead to a bad time.

The main downside with water cooling — custom setups at least — is that they can be rather expensive. Compare that $40 fan air cooler with a $500 water cooling solution containing a radiator, pump, piping, CPU and GPU attachments. But sealed closed-loop water cooling kits are now available, bringing down the price and reducing the chances of issues. I'll run through the basics of both options.
Sealed closed-loop kits

These handy solutions include a pump, reservoir, radiator and a fan or two that require little installation other than connecting the parts to the case itself and any components they need to cool. Everything is already sealed, tested and ready to go. This eliminates human error from attempting to do it yourself.
Prices have come down immensely for all-in-one (AiO) loops, and you can now pick one up from a reputable brand for little over $40. These units help reduce noise and improve the efficiency of cooling, though one can easily compare the better air coolers with more affordable water coolers in temperature readings.
The liquid that passes through the CPU (or GPU) block transfers heat from the component to the radiator, which is usually installed on the rear of a PC case. This helps exhaust heat straight out the back, instead of having temperatures inside the case creep up thanks to traditional means of dissipation.
Installing a closed-loop system only requires careful placement of the radiator and fans. There's no need to mess about with piping and more. That said, this severely restricts just how you can personalize the PC, which is a major advantage of water cooling. There's also the case that AiO cooling loops only have a single block attached, meaning you'll need separate ones for CPU and other components like the GPU.
Building your own custom loop

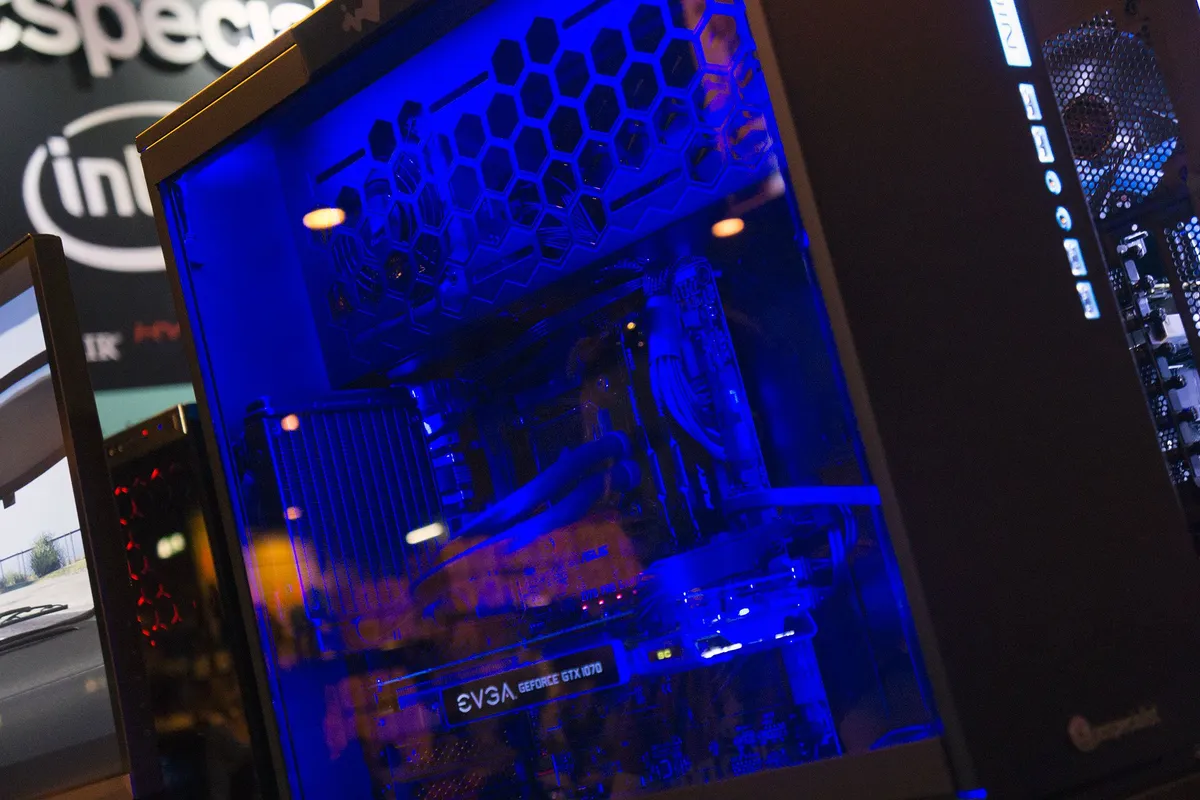
Going it alone and without the backing of experts and manufacturers doing all the hard work can result in some spectacular systems. There's something special about gazing inside a PC window to see some orange stuff being pumped around the unit, with chrome caps and transparent blocks.
You'll need a number of parts to get started:
The coolant liquid itself, which isn't simply water, is poured into the reservoir. This is then pumped around the system, carried along in connected tubes. The pipes connect to blocks, which are installed onto components like the CPU and GPU. The block is usually made of copper or aluminum with narrow channels running through that transfers heat from the metal to the liquid.
This is then carried out to the radiator where again the heat is transferred from the liquid to the metal contacts and then once again to the air, driven out by the attached fan(s). One may believe that there's not much difference between this whole effort and simply installing a CPU fan, but the addition of liquid to take the heat away from not only the component in question but the case itself faster, you can enjoy lower temperatures.
There are a few things to watch out for. Should you be cooling multiple blocks with a single loop you will need to think about adding another radiator between the two blocks. This way you can avoid trying to cool a component with already heated liquid, which is obviously less efficient. It's possible to top all this off with colored dye for the liquid solution and the ability to pipe the tubes around the case in a customized layout.

There's also the choice between fitting sizes and the type available, which will need to be. That's pretty much water cooling in a nutshell. You'll be able to find more details on actually crafting and installing a custom water cooling system should you wish to go down that route, but if you'd prefer to keep things simple, closed-loop coolers are available.
Opening the floodgates
Updated on February 22, 2019: We refreshed this guide to include more information, as well as links to other handy resources.

