How to add a Spotify now playing overlay to your Twitch stream
If you're playing music on stream with a Spotify soundtrack, it's really simple to share what you're listening to with your audience.
All the latest news, reviews, and guides for Windows and Xbox diehards.
You are now subscribed
Your newsletter sign-up was successful
Music can be an integral part of not only your own enjoyment while gaming, but also provide some additional entertainment to your audience when you're streaming. You may have noticed some of your favorite streamers with a little overlay on their broadcasts telling everyone what track they're currently listening to and thinking you'd like some of that yourself.
Fortunately, it's not complicated. I'm focusing on Spotify here because it's the most popular music streaming service and the one I use personally. But the program used here to do produce the overlay is compatible with other music apps, too.
Here's how to get set up in both XSplit and OBS.
Download Snip
To get the now playing information into a format that streaming software like OBS and XSplit can understand you need to use an additional program. One of the most popular and reliable is known as Snip.
It works in the background so you never really need to interact with it, but it'll pull the information from your music apps. Then it creates a text file that is constantly updated, and this is what you'll use to display the information in your stream.
Currently Snip works with Spotify, iTunes, Winamp, foobar2000, VLC, and Google Play Music Desktop Player. Download it at the link below.
All the latest news, reviews, and guides for Windows and Xbox diehards.
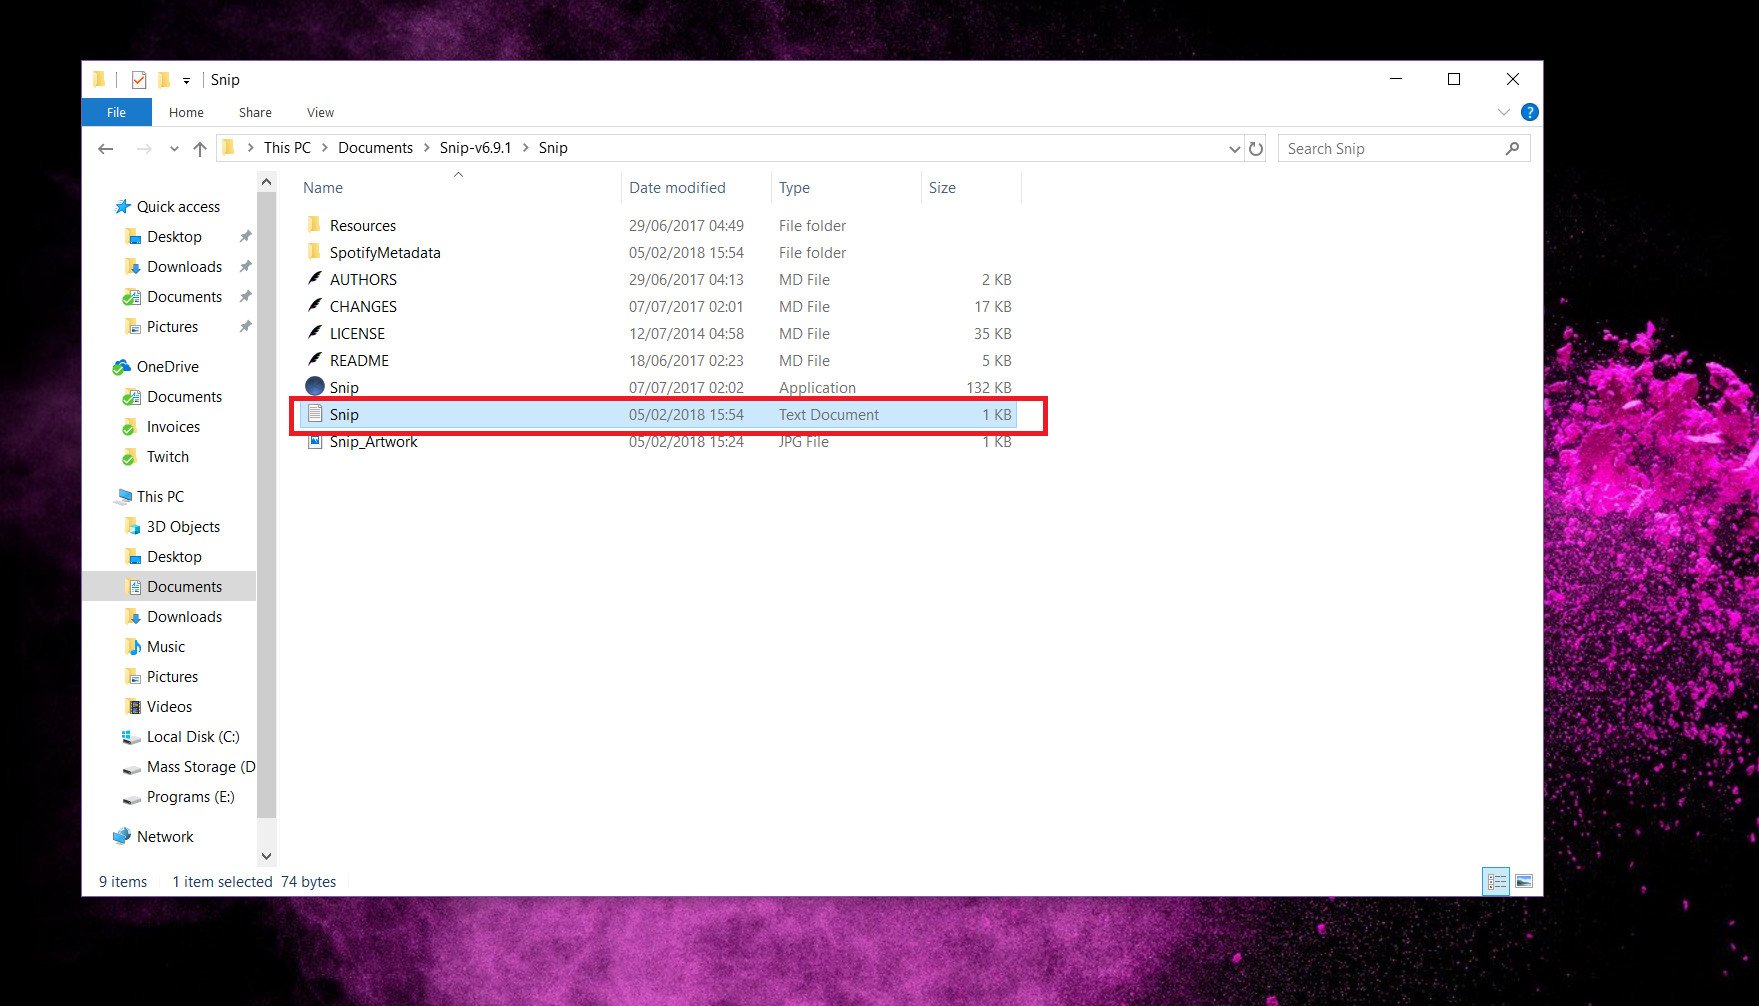
Once you've extracted the contents and run Snip for the first time, a text file will be generated in the same folder (snip.txt, pictured above). You'll need to know the exact location of this file before you go any further.
Setting up Snip with XSplit
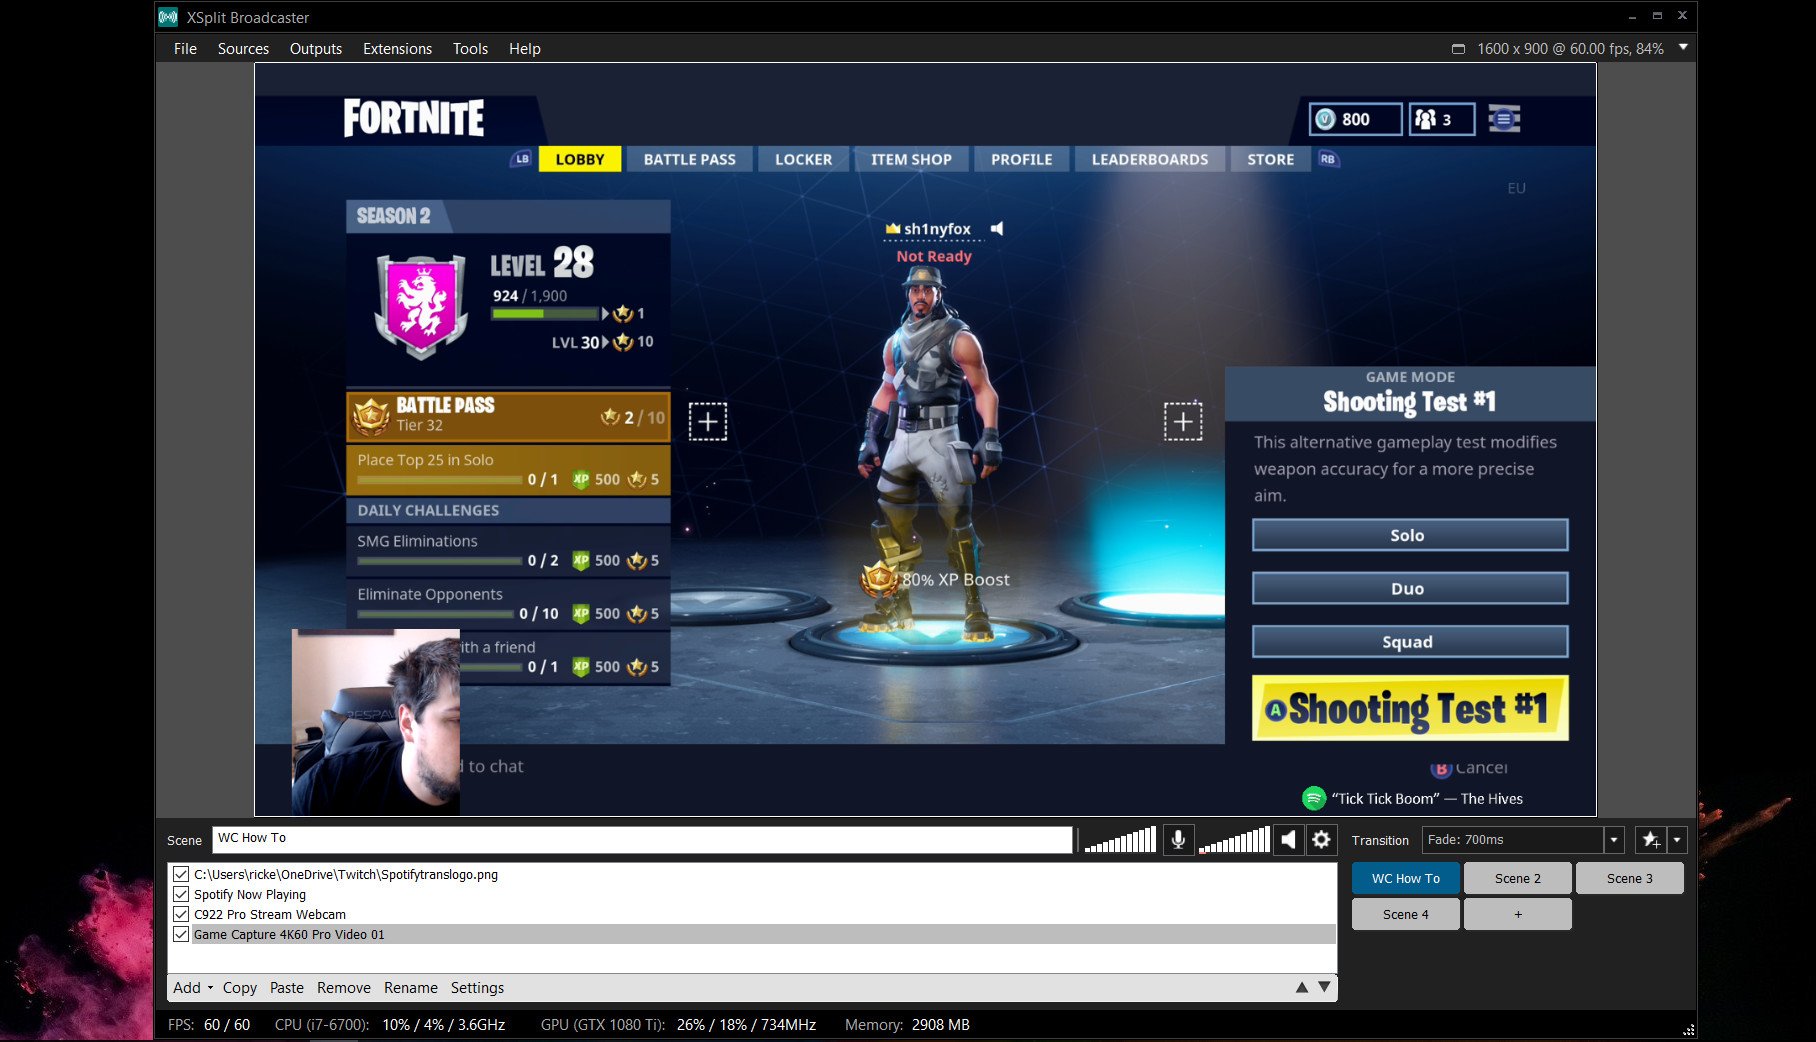
Adding your now playing information to streams powered by XSplit is pretty straightforward.
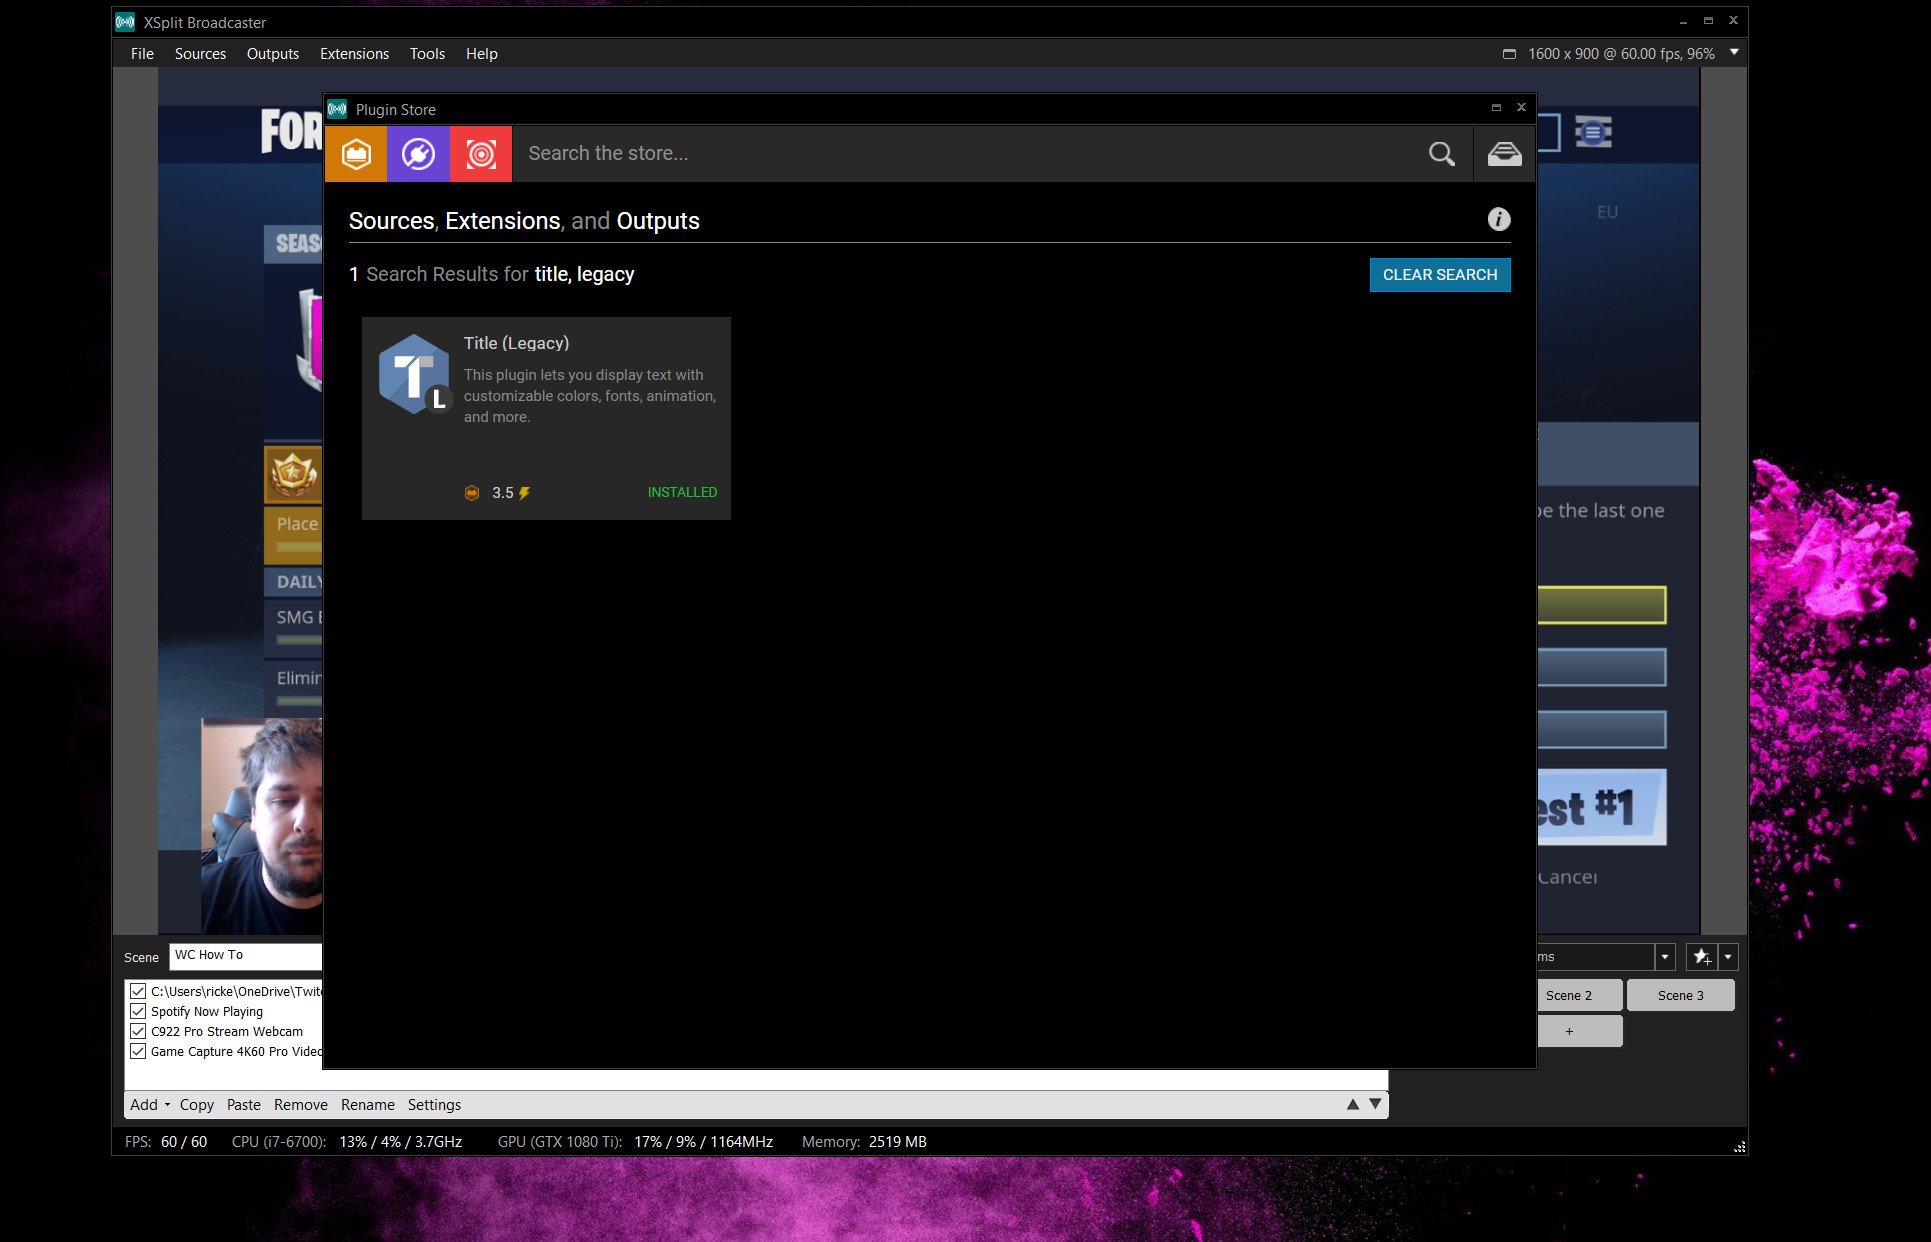
- From the plugin store, make sure title (legacy) is installed in XSplit.
- Select add in the sources list.
- Click widgets.
- Select title (legacy).
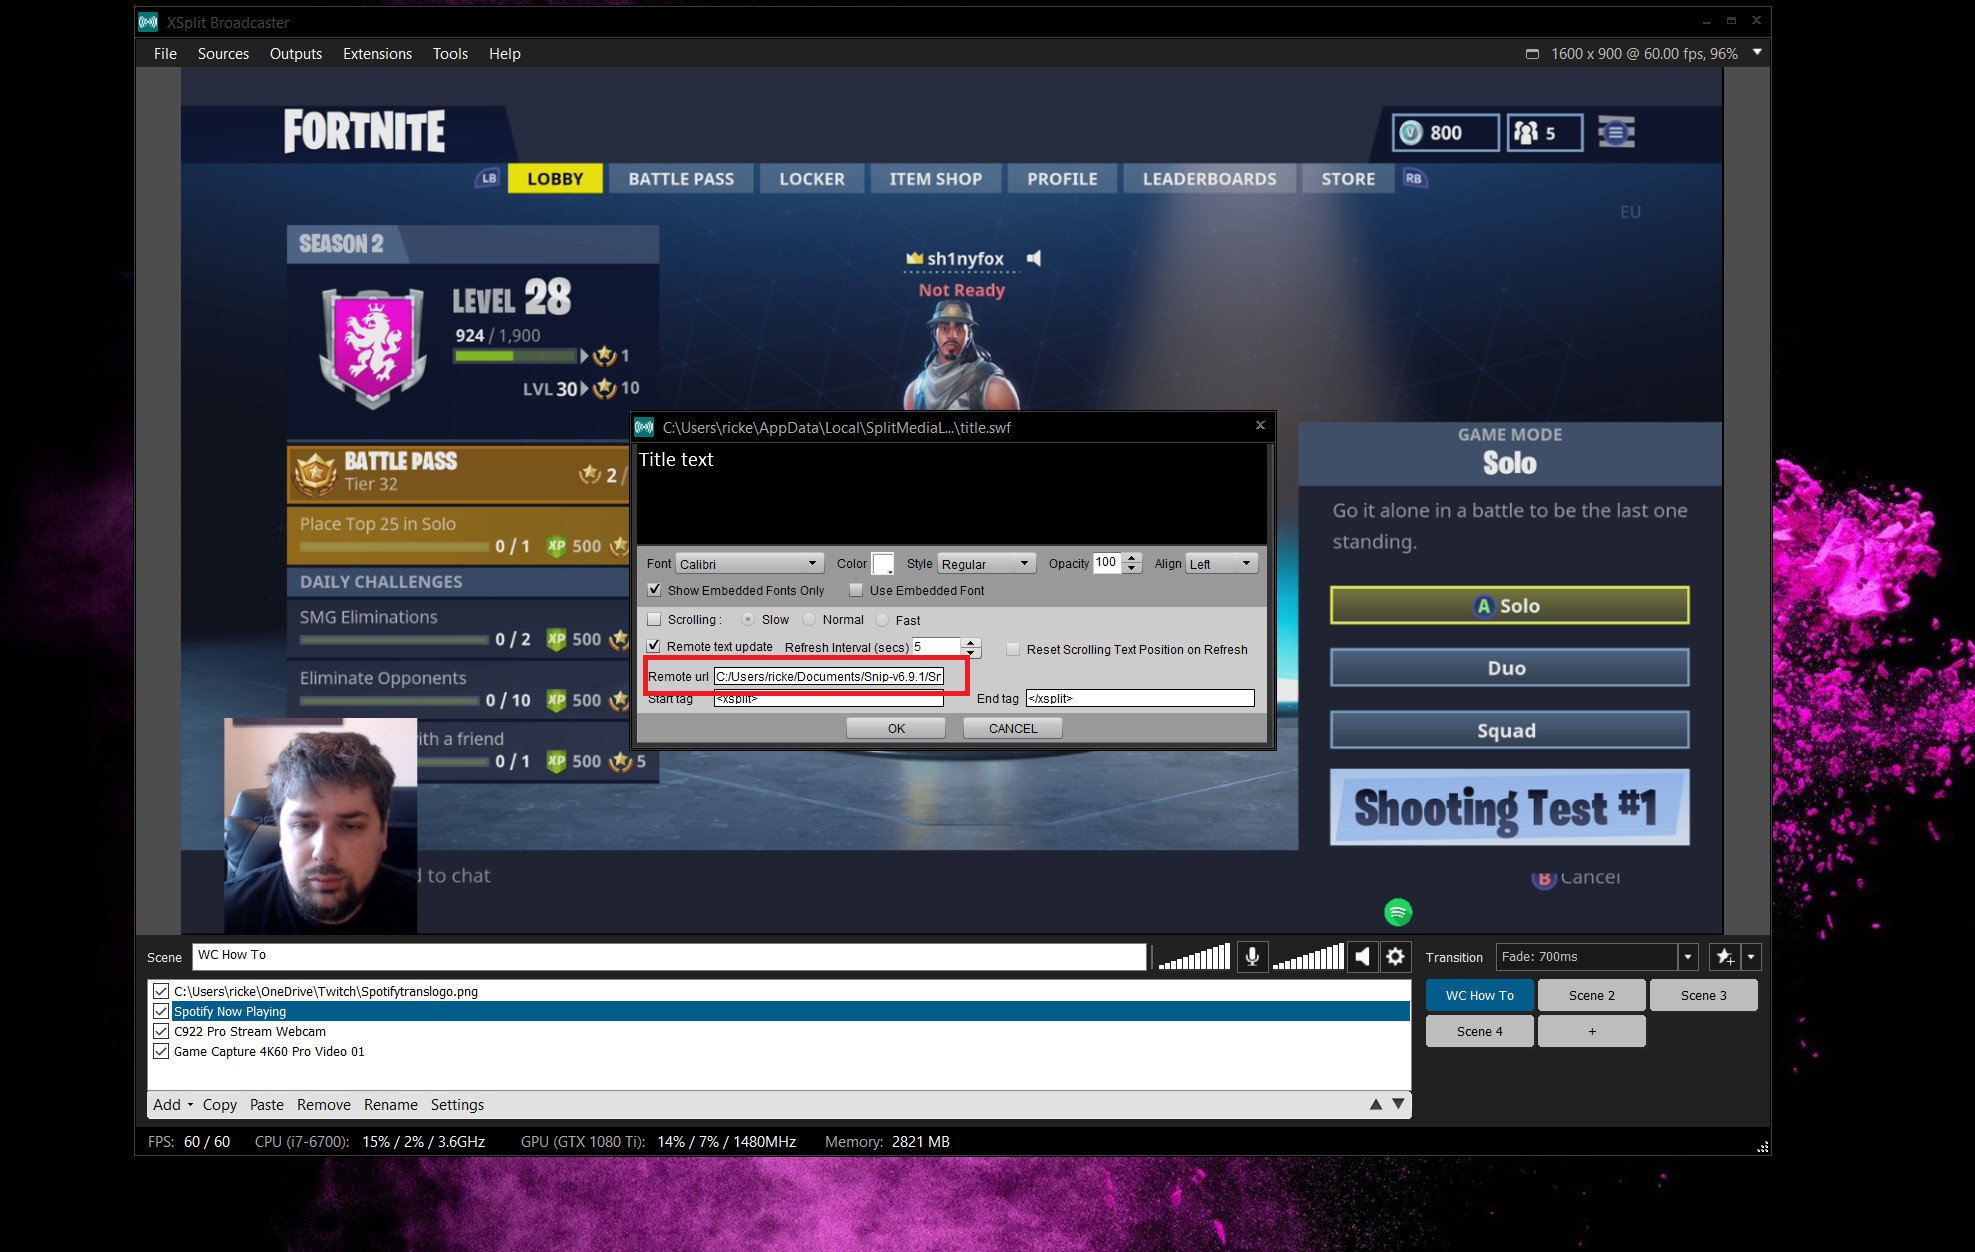
- In the box that appears, paste the file location for the Snip text file generated earlier.
- Ensure the remote text update box is checked.
- Click OK.
You'll now see a box that, when you're playing a song, will give you the track title and artist. There are some things you can do by going back and configuring, such as enable or disable scrolling, change the font and a good tip is to reduce the refresh interval to 5 seconds. That way you get fairly immediate updates when the track changes.
The box itself can be moved and resized just as any other item you might insert into your stream in XSplit.
Setting up Snip with OBS
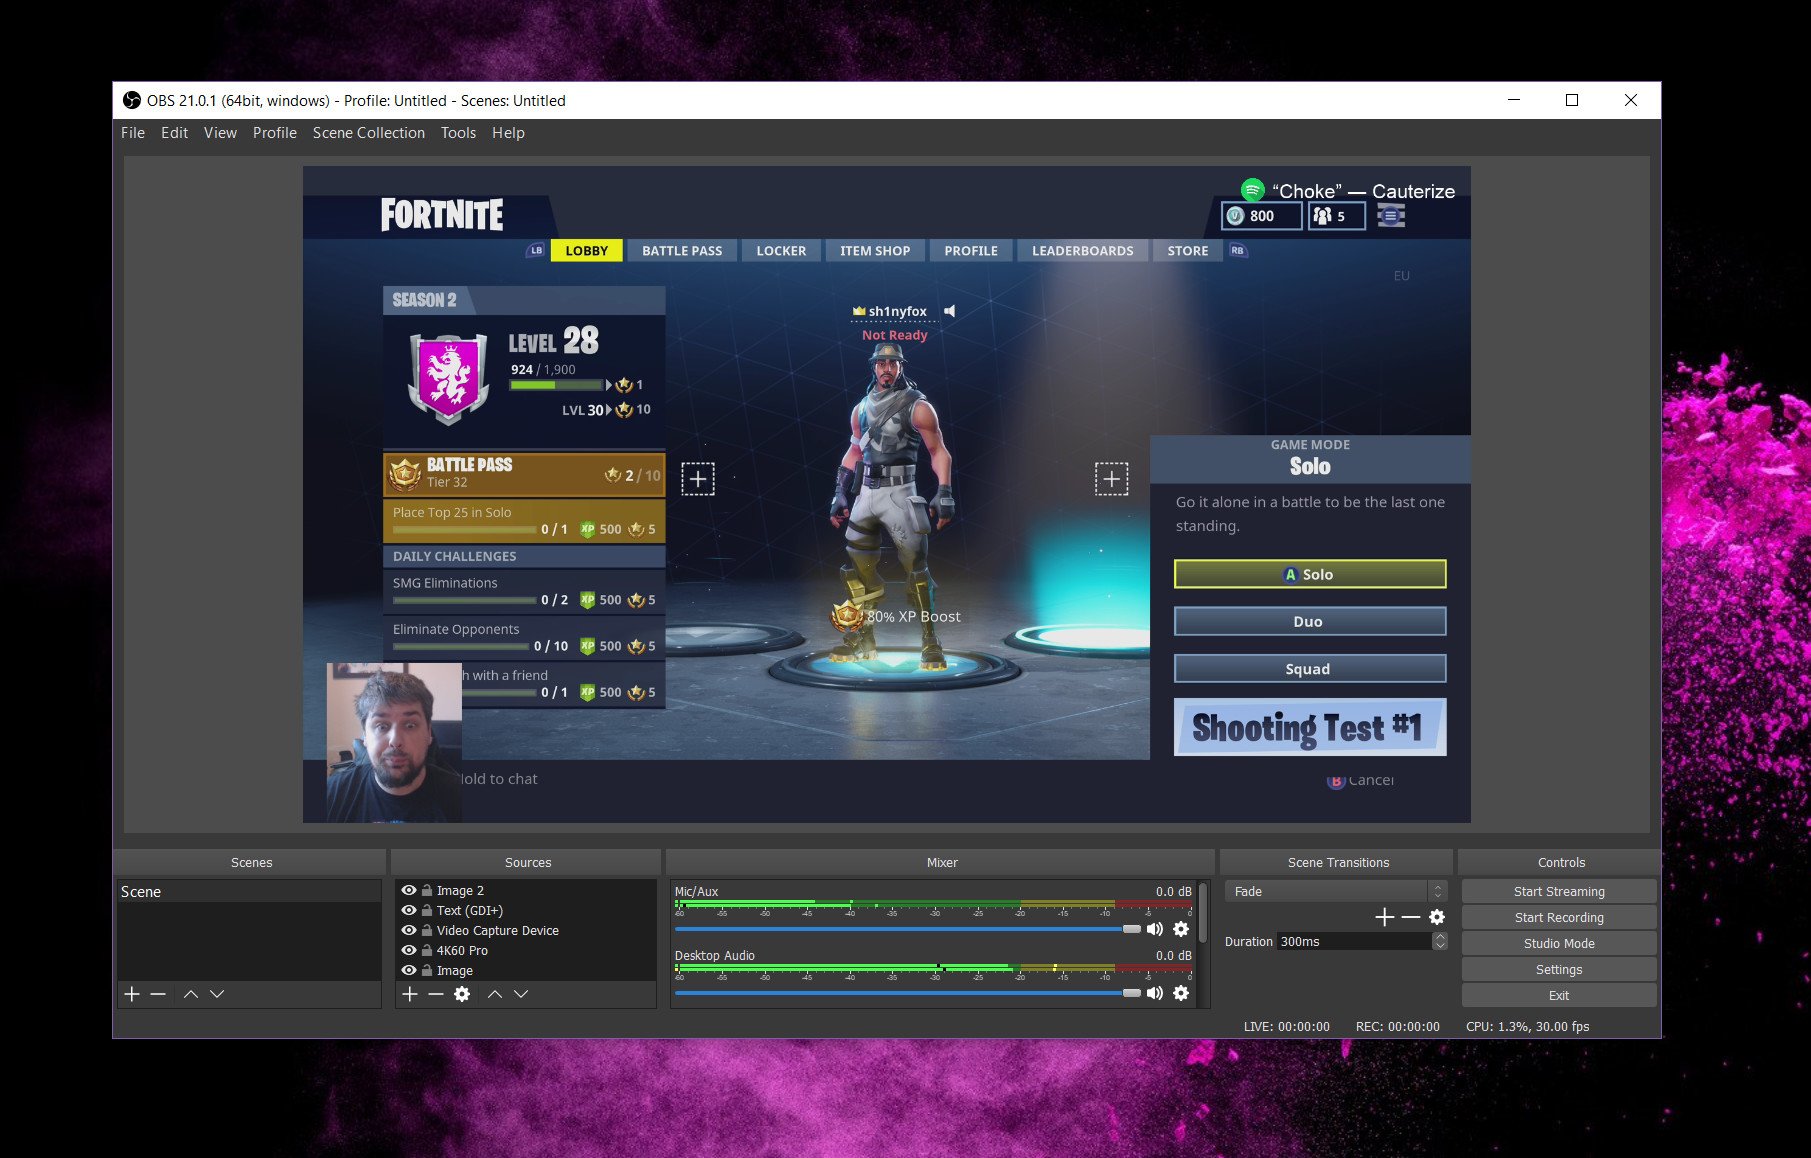
Setting up in OBS is as straightforward as it is in XSplit. Just follow these steps.
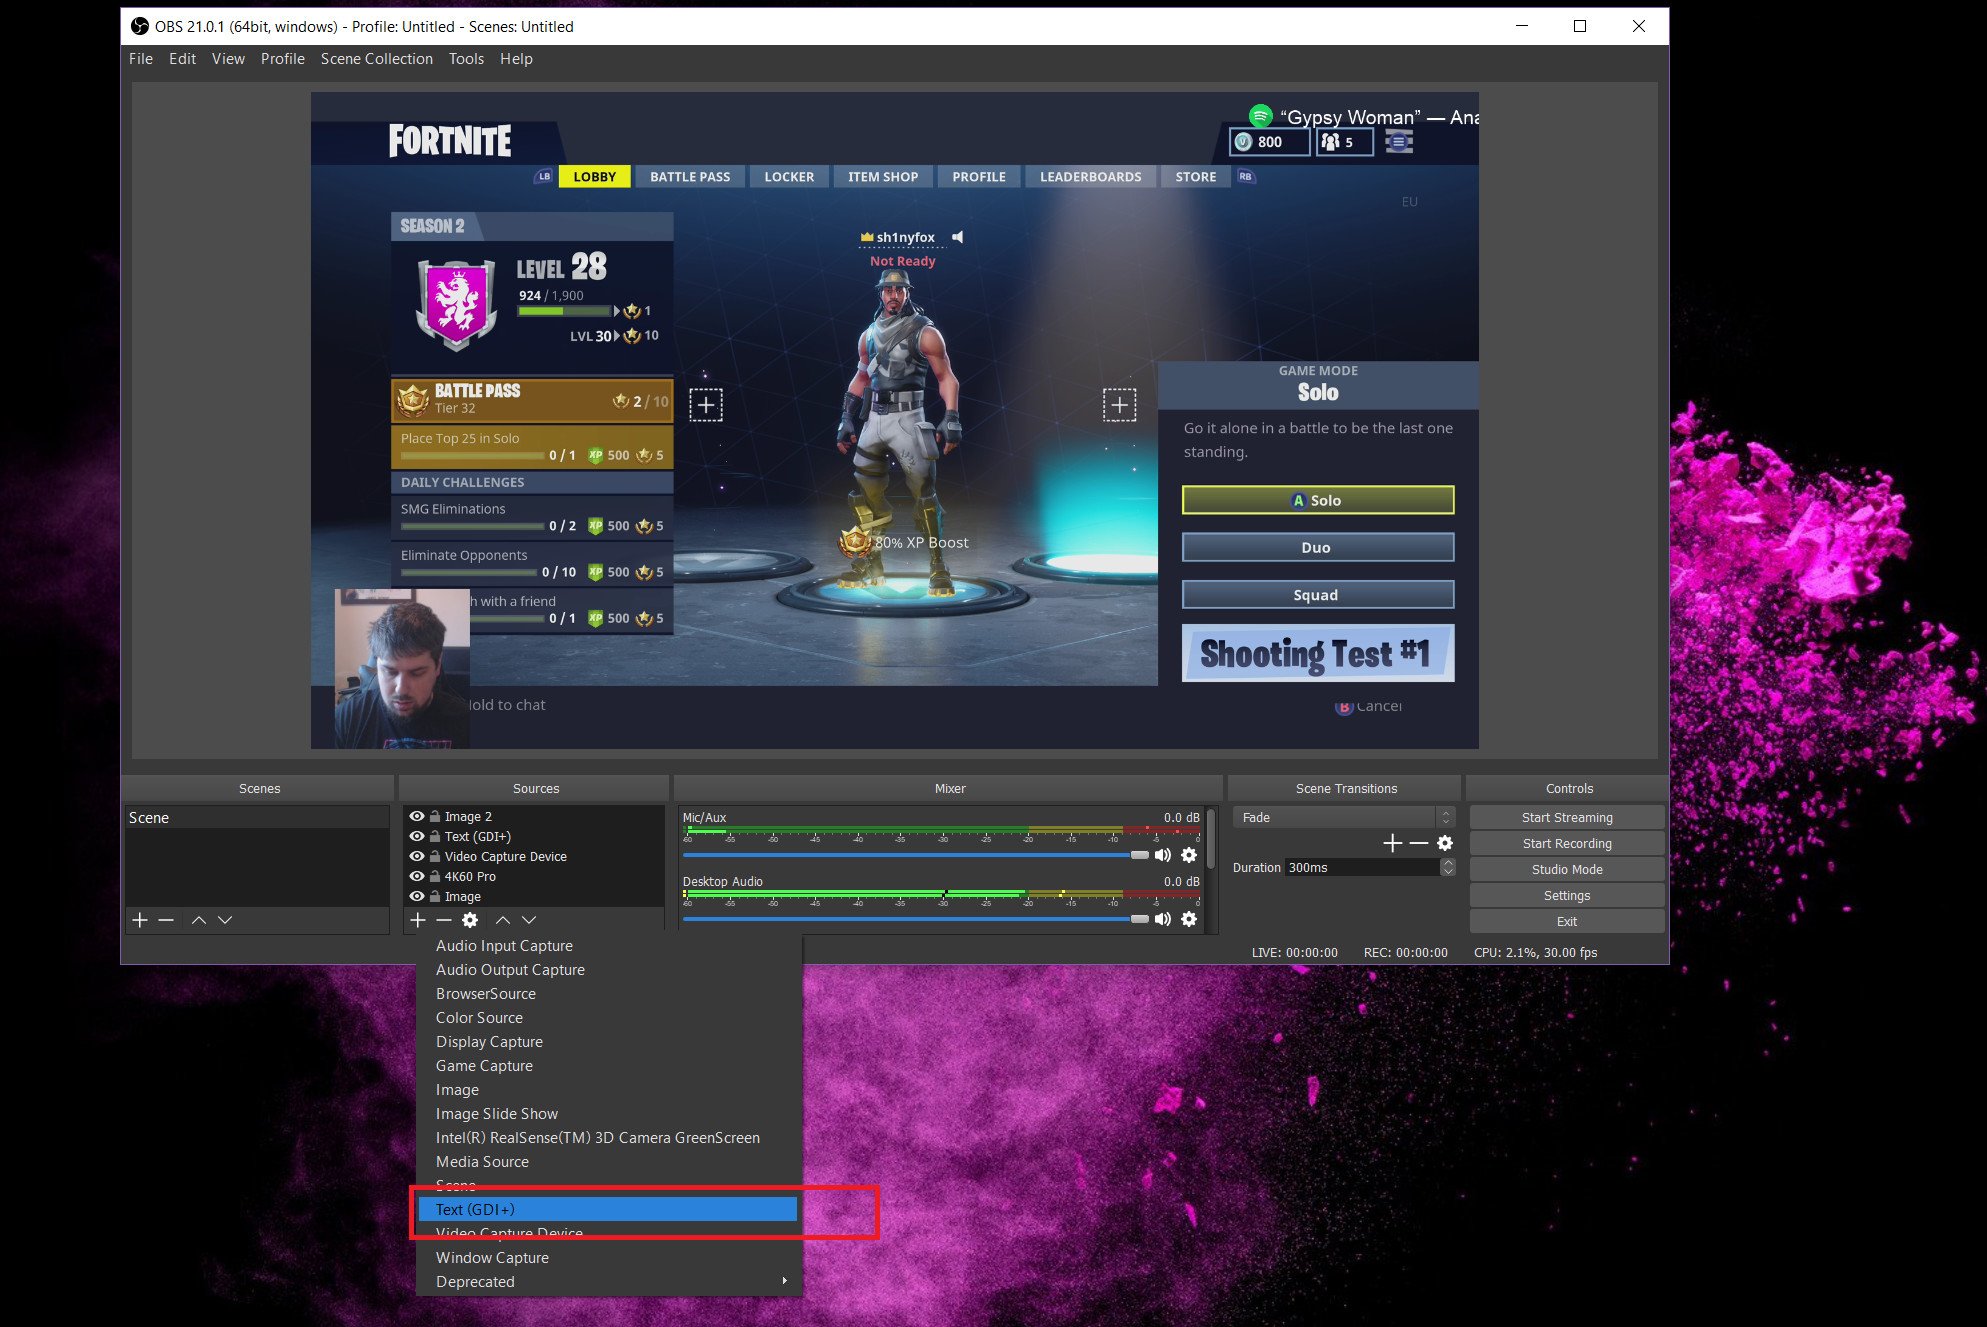
- Select the + button under sources to add new.
- Choose text (GDI+).
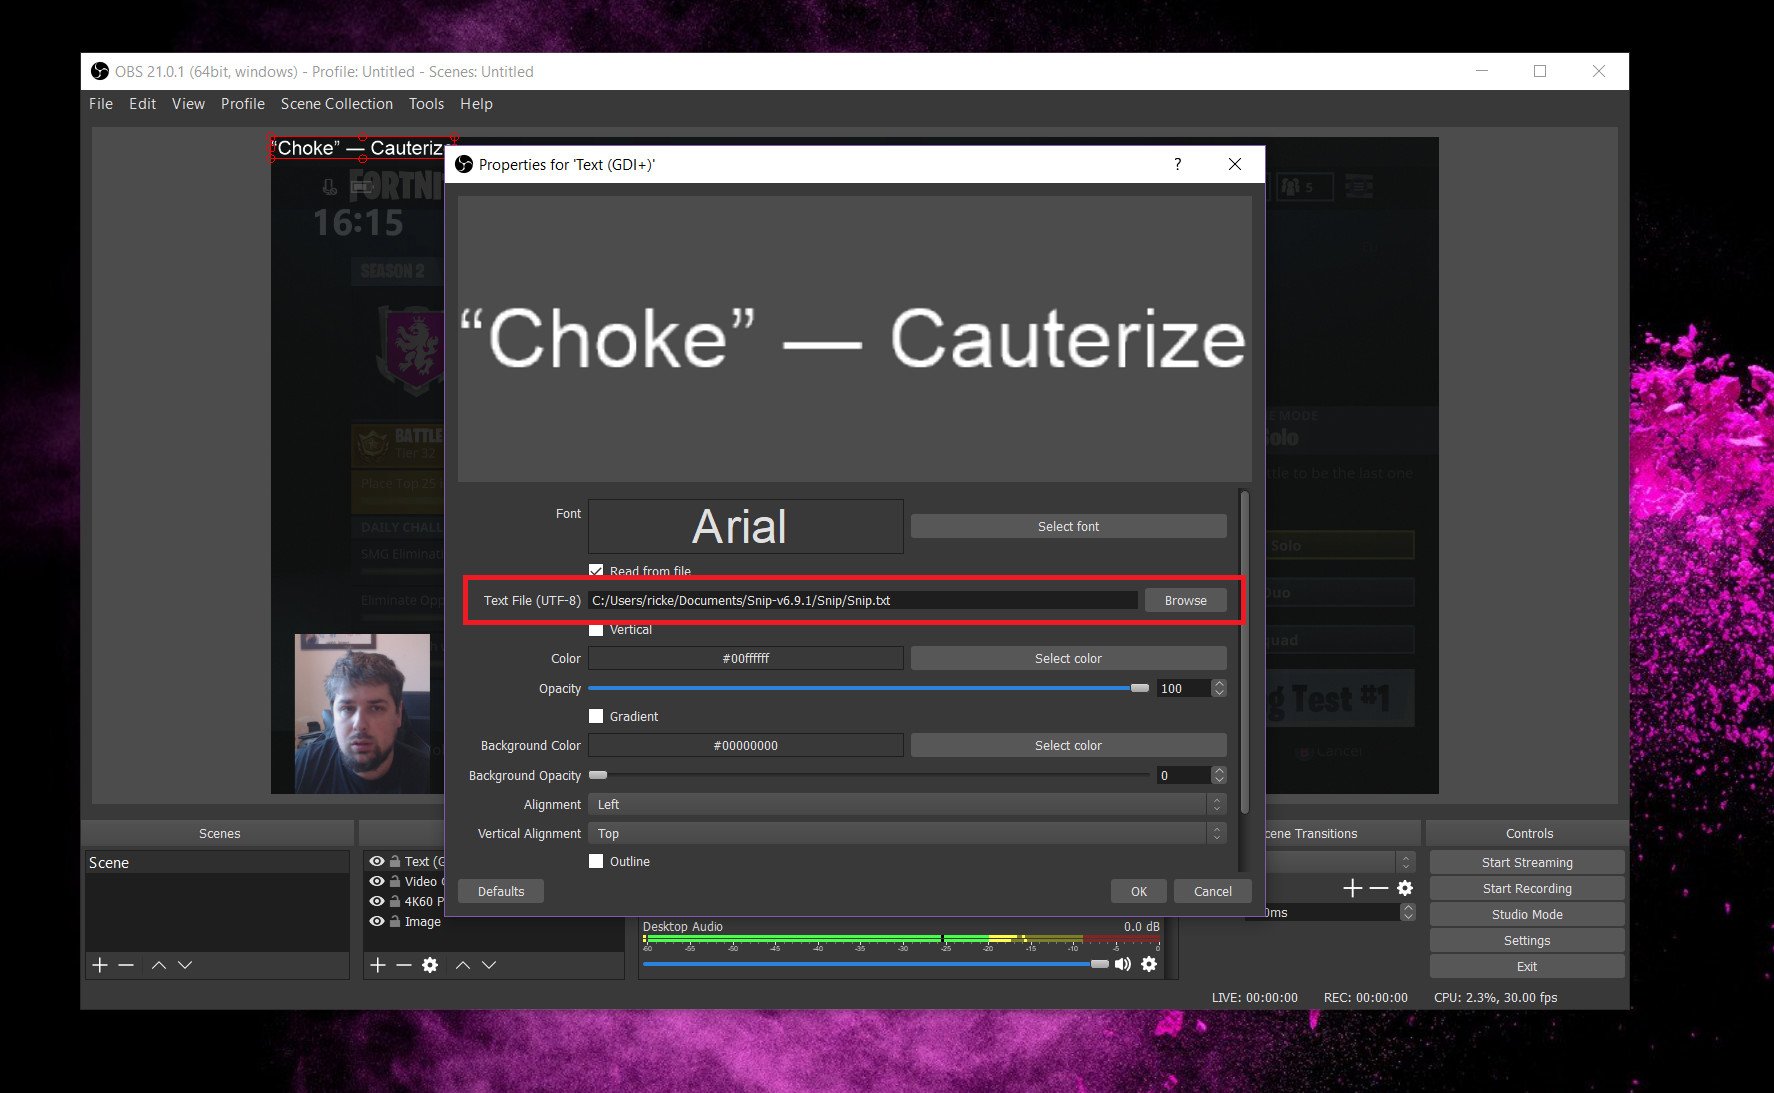
- In the next window, next to the text file box click on the browse button.
- Navigate to the Snip text file generated earlier.
- Click OK.
As with XSplit, you can move and resize the resultant box as any other item you'd add to your stream in OBS. In the configuration options for the text box, you can change a bunch of things like color, font, even whether you want it horizontal or vertical.
That's all there is to it. If you want a little extra visual flair, you could always add the Spotify logo (just find a PNG version online) just to make it pop a little bit against your stream. But as long as you have Snip running in the background, this little box on your stream will always update with your currently playing track.

Richard Devine is the Managing Editor at Windows Central with over a decade of experience. A former Project Manager and long-term tech addict, he joined Mobile Nations in 2011 and has been found in the past on Android Central as well as Windows Central. Currently, you'll find him steering the site's coverage of all manner of PC hardware and reviews. Find him on Mastodon at mstdn.social/@richdevine
