How to create automatic System Restore points daily on Windows 10
Use this hidden option to make sure there is always an up-to-date restore point to roll back changes in case of system issues on Windows 10.
All the latest news, reviews, and guides for Windows and Xbox diehards.
You are now subscribed
Your newsletter sign-up was successful
On Windows 10, System Restore is a feature that automatically checks for system changes on your device and saves a system state as a "restore point." In the future, if a problem occurs due to a change you made, or after a driver or software update, you can go back to a previous working state using the information from a restore point without causing data loss.
When the feature is enabled supported apps and Windows 10 can create restore points during significant changes happen, and you can even trigger them manually. However, if you accidentally make a change without creating a restore point and there isn't a recent checkpoint created, you may not be able to revert back. Furthermore, if there is only an old restore point, you may end up undoing other system changes.
If you want to make sure there is always a fresh restore point available, it's possible to enable a Windows Defender Antivirus hidden option to automatically create checkpoints every day before its daily scanning.
In this Windows 10 guide, we'll walk you through the steps to make sure a System Restore point is created automatically on the daily basis.
- How to enable System Restore on Windows 10
- How to enable automatic System Restore points using Group Policy
- How to enable automatic System Restore points using Registry
How to enable System Restore on Windows 10
By default System Restore isn't enabled on Windows 10, but you can use these steps to enable the feature:
- Open Start.
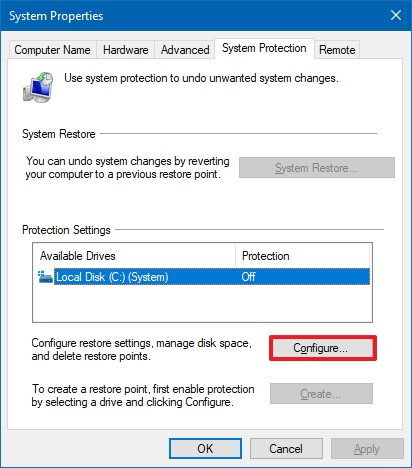
- Search for Create System Restore and click the result to open System Protection.
- Under "Protection Settings," if your device system drive has "Protection" set to Off, click the Configure button.
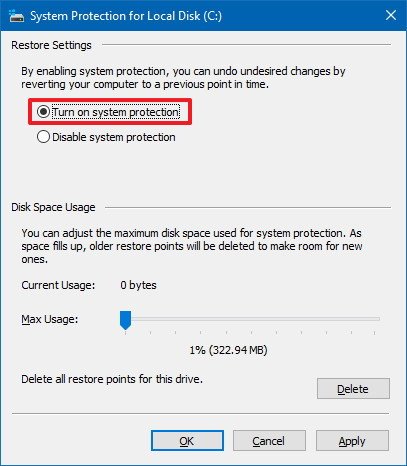
- Select the Turn on system protection option.
- Click Apply.
- Click OK.
After enabling System Protection, you can use the steps below to make sure restore points are created daily.
How to enable automatic System Restore points using Group Policy
If you're running Windows 10 Pro, you can modify the Group Policy settings to create restore points every day automatically.
All the latest news, reviews, and guides for Windows and Xbox diehards.
- Use the Windows key + R keyboard shortcut to open the Run command.
- Type gpedit.msc and click OK to open the Local Group Policy Editor.
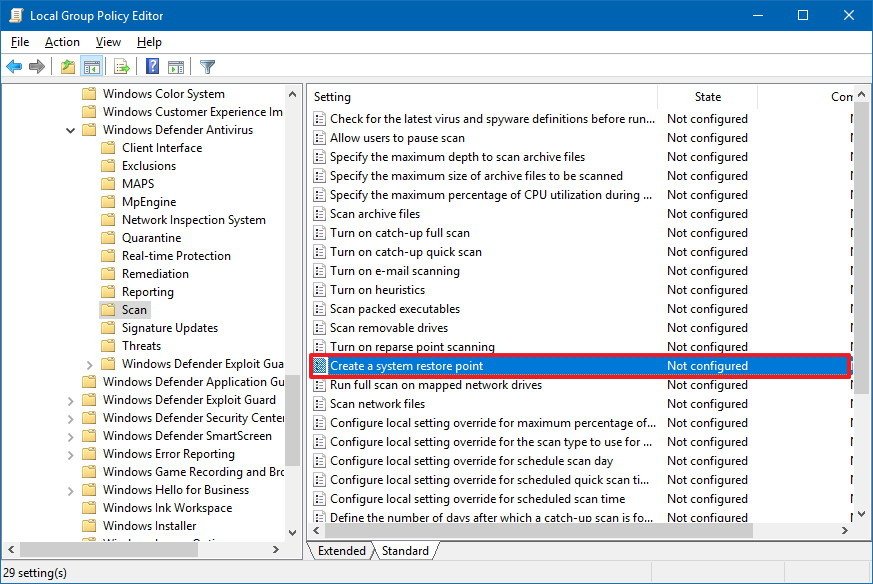
- Browse the following path:
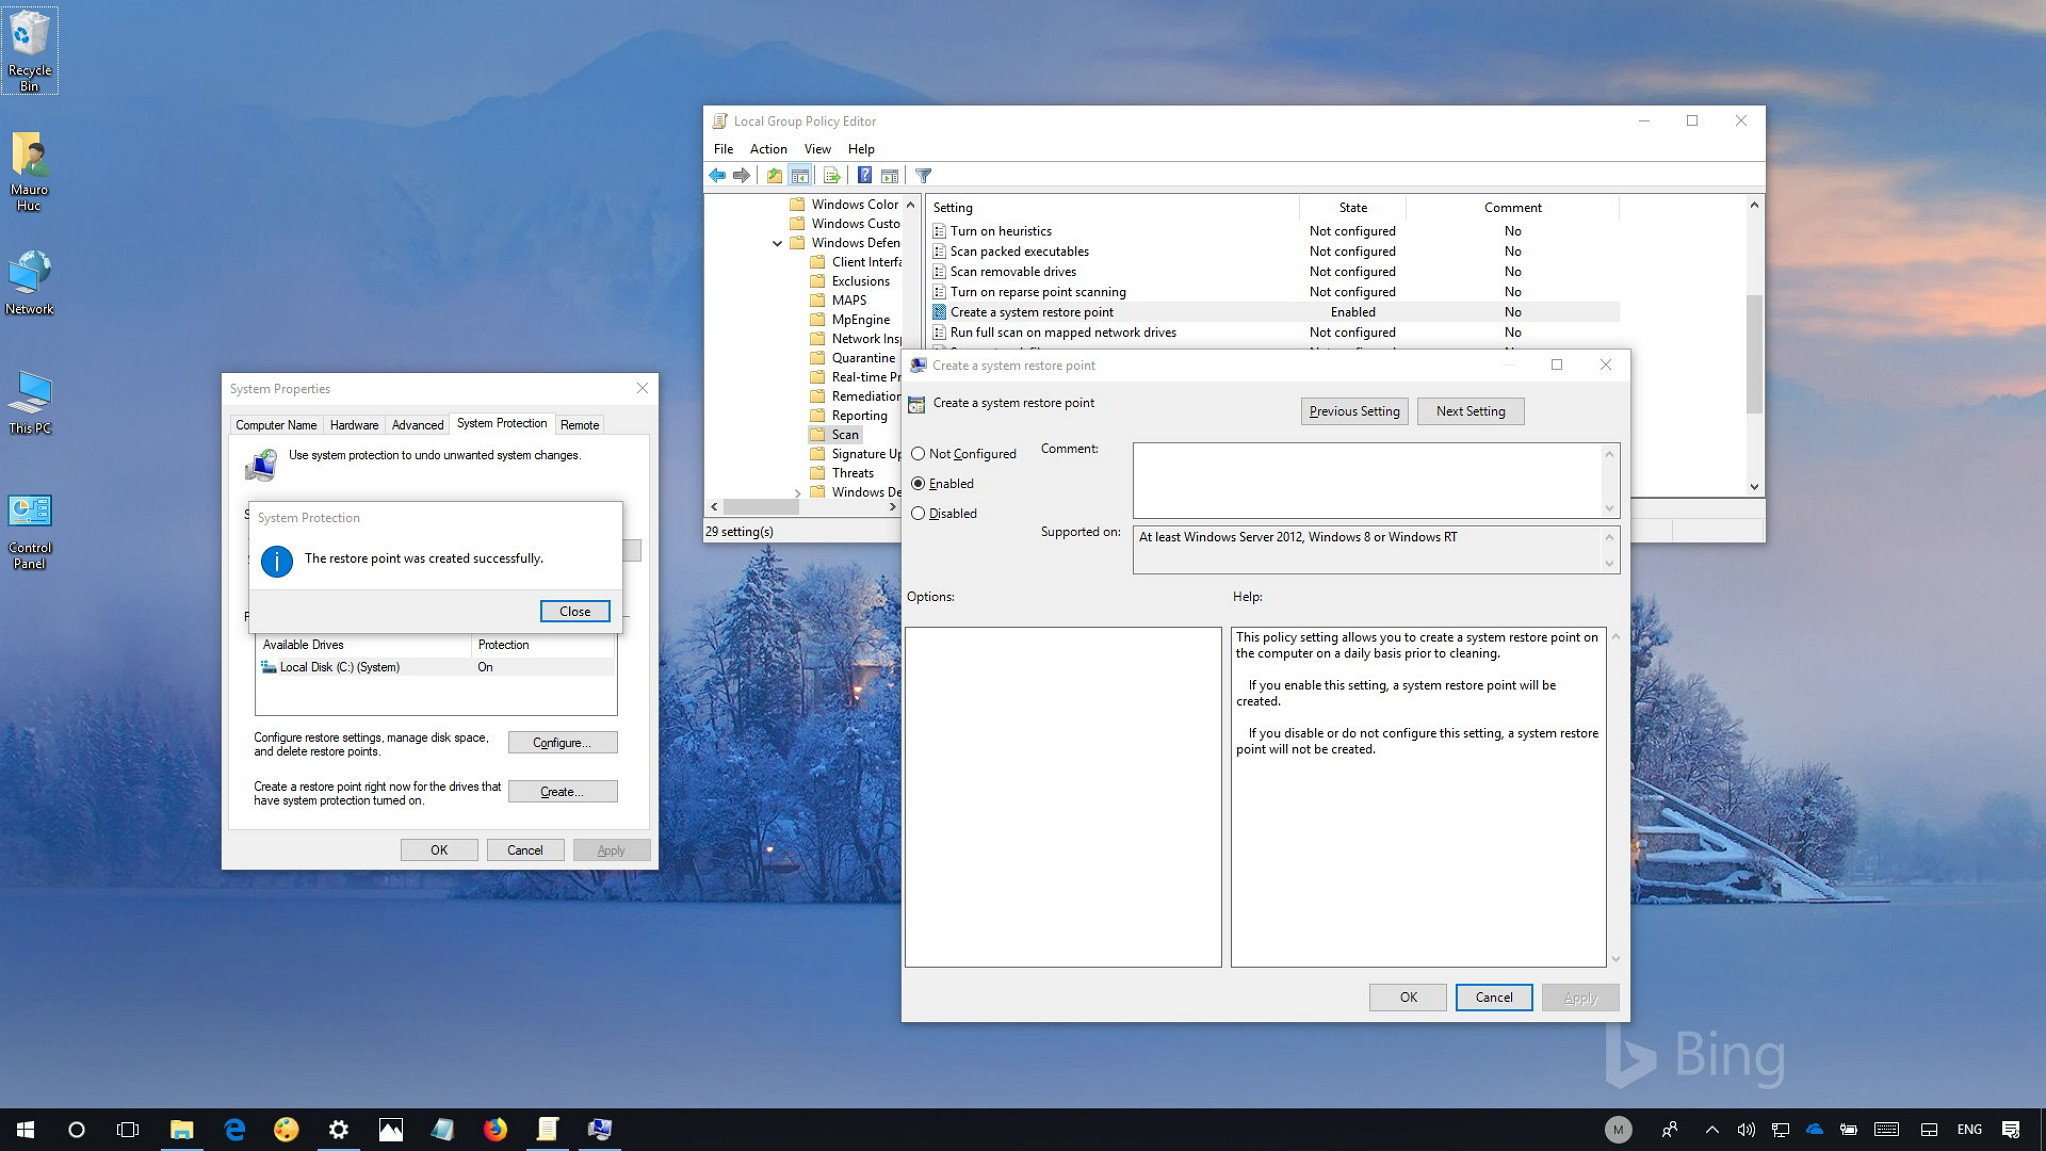
Computer Configuration > Administrative Templates > Windows Components > Windows Defender > Scan - On the right side, double-click the Create a system restore point policy.
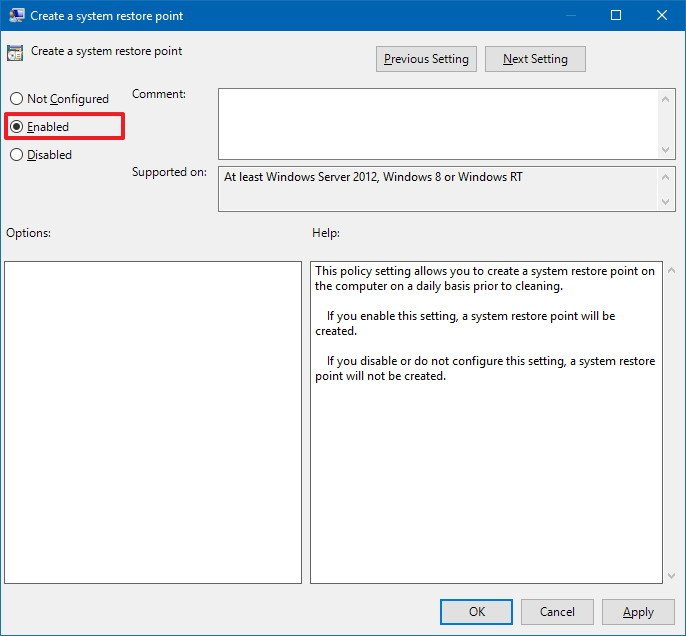
- Select the Enabled option.
- Click Apply.
- Click OK.
Once you've completed the steps, your computer will save a new restore point prior to every daily malware scan.
In case that you change your mind, you can always revert the changes following the same instructions, but on step No. 5, make sure to select the Not Configured option.
How to enable automatic System Restore points using Registry
If you're running Windows 10 Home, you won't have access to Group Policy, but you can change the same settings by editing the Registry.
Warning: This is a friendly reminder that editing the Registry is risky, and it can cause irreversible damage to your installation if you don't do it correctly. It's recommended to make a full backup of your PC before proceeding.
- Use the Windows key + R keyboard shortcut to open the Run command.
- Type regedit, and click OK to open the Registry.
- Browse the following path:
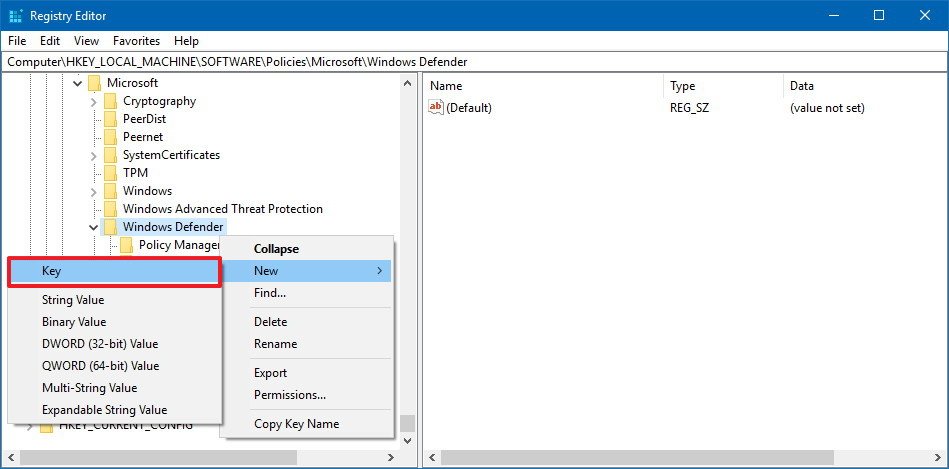
HKEY_LOCAL_MACHINE\SOFTWARE\Policies\Microsoft\Windows DefenderQuick Tip: On the Windows 10 Creators Update and later, you can copy and paste the path into the new Registry's address bar to quickly jump to the key destination. - Right-click on the Windows Defender (folder) key, select New, and click on Key.
- Name the key Scan and press Enter.
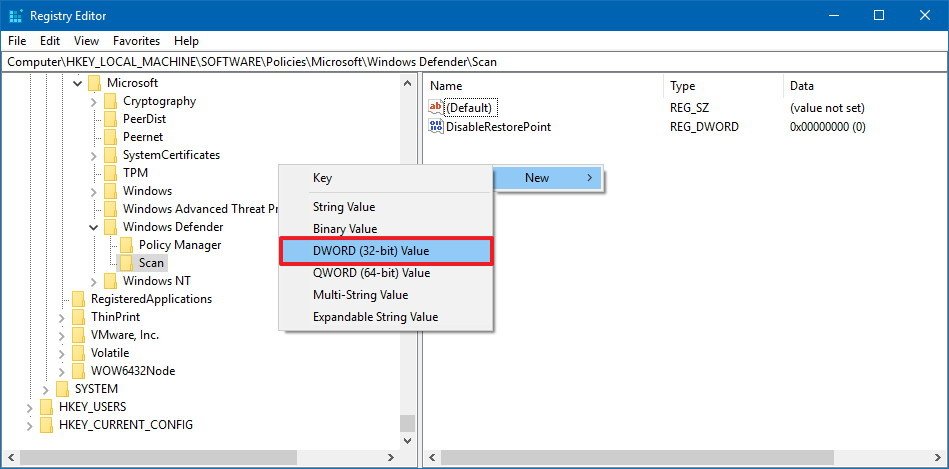
- Right-click on the right side, select New, and click on DWORD (32-bit) Value.
- Name the key DisableRestorePoint and press Enter.
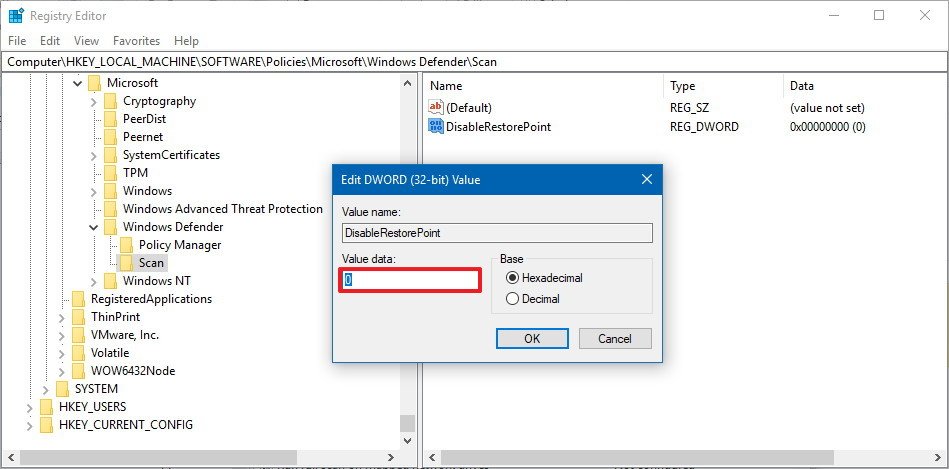
- Double-click the newly created DWORD and make sure its value is 0.
- Click OK.
After completing the steps, a checkpoint will be created every day, which you can use to undo changes that might have harmed your device.
If you want to revert the changes, simply follow the same instructions, but on step No. 5, right-click the Scan (folder) key and click Delete to remove the entries.
More Windows 10 resources
For more helpful articles, coverage, and answers to common questions about Windows 10, visit the following resources:
- Windows 10 on Windows Central – All you need to know
- Windows 10 help, tips, and tricks
- Windows 10 forums on Windows Central

Mauro Huculak has been a Windows How-To Expert contributor for WindowsCentral.com for nearly a decade and has over 22 years of combined experience in IT and technical writing. He holds various professional certifications from Microsoft, Cisco, VMware, and CompTIA and has been recognized as a Microsoft MVP for many years.
