How to disable automatic screen rotation on Windows 10
You can prevent the screen from rotating automatically on Windows 10, and in this guide we show you how.
All the latest news, reviews, and guides for Windows and Xbox diehards.
You are now subscribed
Your newsletter sign-up was successful
If you have a convertible device or tablet equipped with an accelerometer and gyroscope sensors, Windows 10 can rotate the display in portrait or landscape mode automatically so no matter how you grab it, the screen is always facing up.
Although it's a convenient feature, there are some situations in which auto-rotation can just get in the way, such as when trying to see an image or read content from a different angle. Windows 10 includes multiple ways to disable screen auto-rotation if it's not a feature that you need.
In this Windows 10 guide, we walk you through the steps to disable the screen auto-rotation feature using Action Center, Settings, and using the Registry.
- How to disable screen rotation using Action Center
- How to disable screen rotation using Settings
- How to disable screen rotation using Registry
How to disable screen rotation using Action Center
To disable automatic screen rotation using Action Center, use these steps:
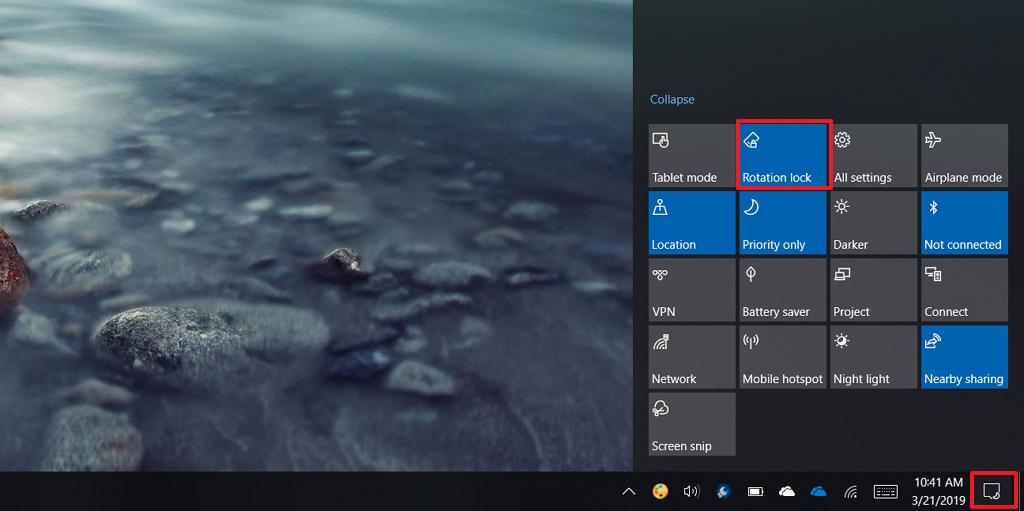
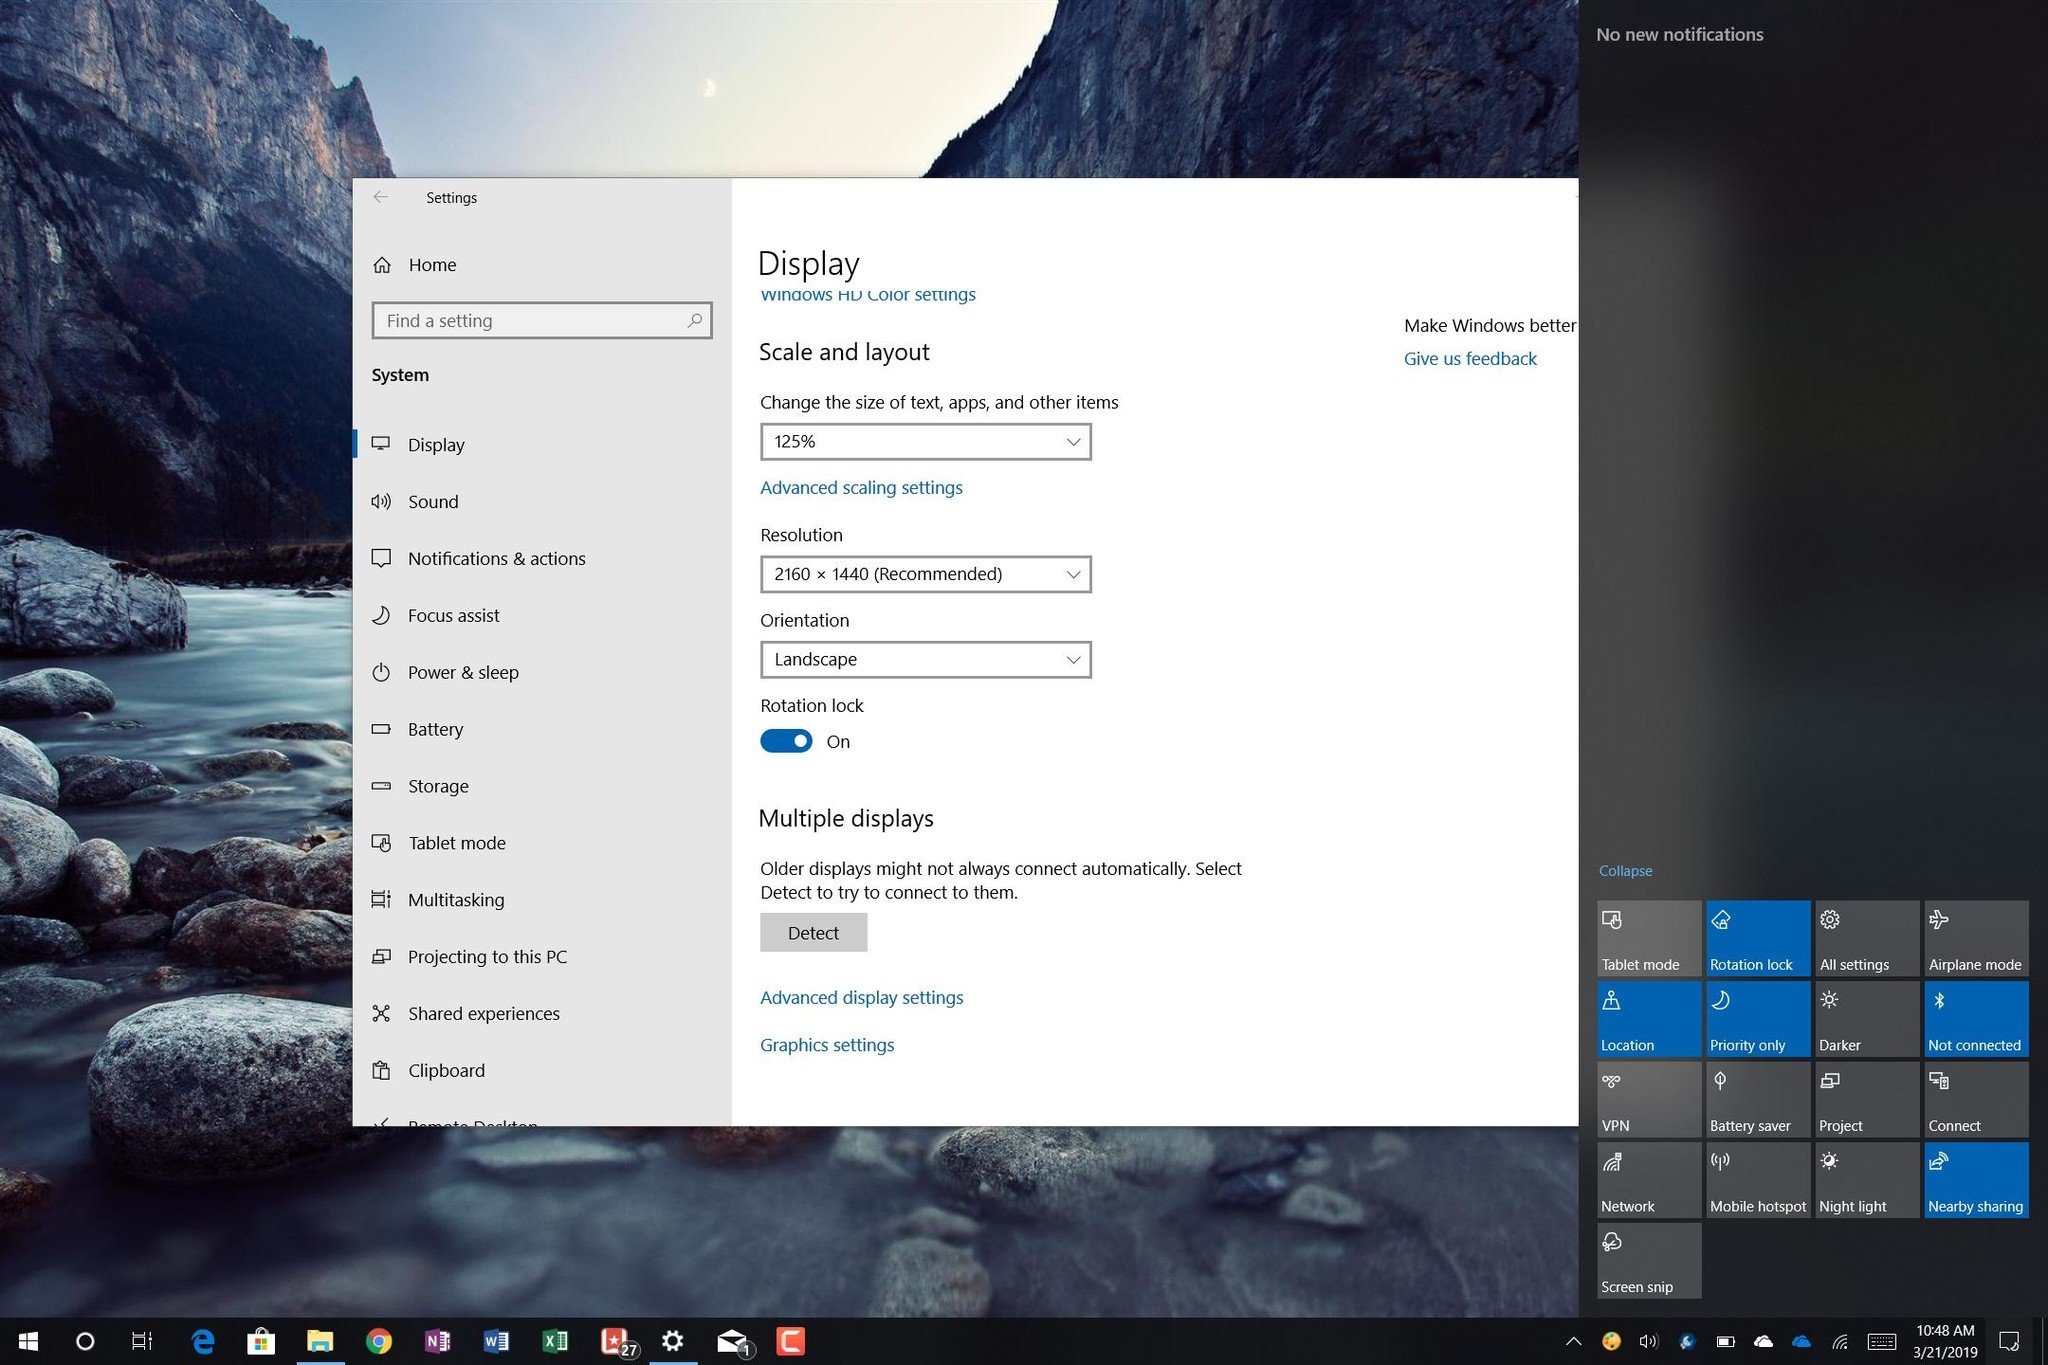
- Open Action Center.Quick tip: You can open Action Center using the Windows key + A keyboard shortcut or clicking the icon in the notification area of the taskbar.
- Click the Rotation lock button.
If you can't see the button, click the Expand option in the top-left of the Quick actions area. If the option isn't available, your device doesn't support this feature or you need to add the button from Settings > System > Notifications & actions > Add or remove quick actions, and enabling the Rotation lock toggle switch.
Also, sometimes, the "Rotation lock" option will be available, but it'll be grayed out. When this happens it's likely that your device has a removable keyboard attached, or the convertible is in laptop mode. You can quickly enable the option by removing the keyboard or changing the convertible to tablet mode. If you're still having problems with this feature, refer to this guide.
Once you complete these steps, the screen will no longer change its orientation automatically as you rotate the device.
All the latest news, reviews, and guides for Windows and Xbox diehards.
How to disable screen rotation using Settings
To turn off auto-rotation using the Settings app, use these steps:
- Open Settings.
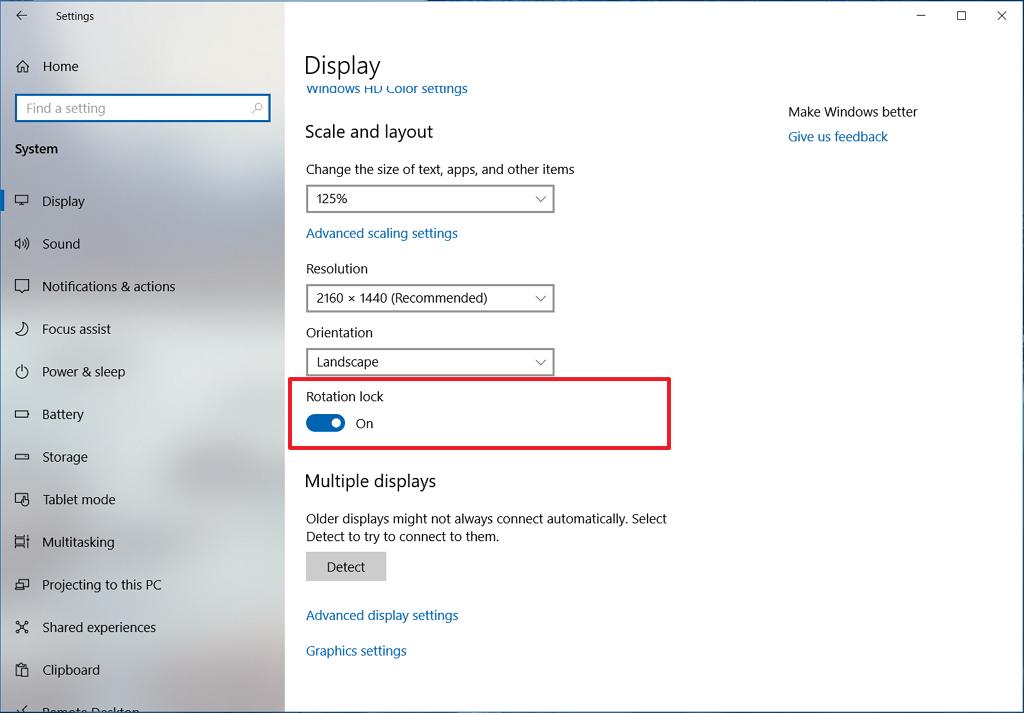
- Click on Display.
- Under the "Scale and layout" section, turn off the Rotation lock toggle switch.
If you don't see the option, your device doesn't support this feature.
After completing the steps, the screen won't rotate automatically as the device changes its orientation.
How to disable screen rotation using Registry
Alternatively, you can also prevent the screen from switching to portrait or landscape mode automatically by modifying the Registry.
Warning: Editing the Registry is risky, and it can cause irreversible damage to your installation if you don't do it correctly. We recommend making a full backup of your PC before proceeding.
To disable automatic screen rotation with the Registry, use these steps:
- Open Start.
- Search for regedit and click the top result to open the Registry.
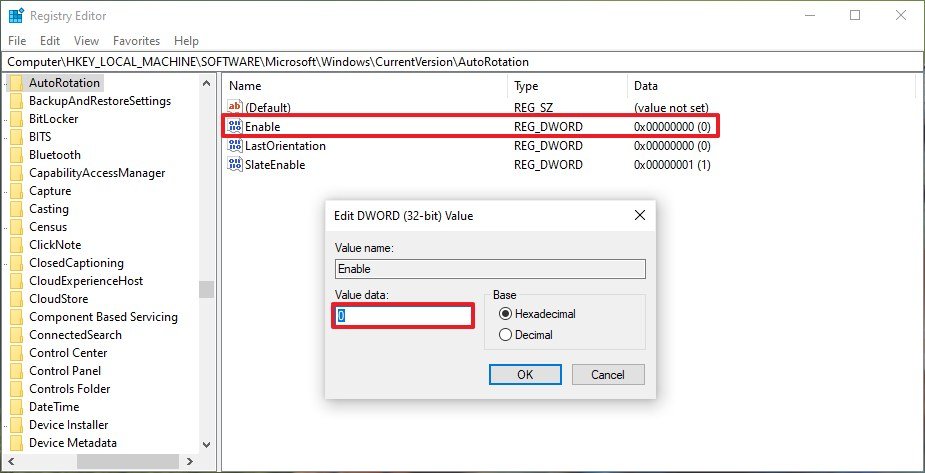
- Browse the following path:
HKEY_LOCAL_MACHINE\SOFTWARE\Microsoft\Windows\CurrentVersion\AutoRotationQuick Tip: On Windows 10, you can copy and paste the path in the Registry's address bar to quickly jump to the key destination. - Double-click the Enable DWORD and set the value from 1 to 0.
- Click OK.
Once you complete these steps, restart your computer to apply the settings, and the feature will disable, preventing the screen from rotating automatically.
If you change your mind, you can always revert the changes using the same instructions, but on step No. 4, make sure to change the value from 0 to 1.
More Windows 10 resources
For more helpful articles, coverage, and answers to common questions about Windows 10, visit the following resources:
- Windows 10 on Windows Central – All you need to know
- Windows 10 help, tips, and tricks
- Windows 10 forums on Windows Central

Mauro Huculak has been a Windows How-To Expert contributor for WindowsCentral.com for nearly a decade and has over 22 years of combined experience in IT and technical writing. He holds various professional certifications from Microsoft, Cisco, VMware, and CompTIA and has been recognized as a Microsoft MVP for many years.
