How to fix high CPU usage after installing update KB4512941 on Windows 10
Are you seeing unexpected processor spikes after installing Windows 10 update KB4512941? You're not the only one — Here's how you can fix it.
All the latest news, reviews, and guides for Windows and Xbox diehards.
You are now subscribed
Your newsletter sign-up was successful
Updated September 5, 2019: Microsoft confirmed that it has received reports of the issue and stated that they "are working on a resolution and estimate a solution will be available in mid-September."
On August 30, Microsoft started rolling out update KB4512941 to address a slew of issues with devices running the Windows 10 May 2019 Update (version 1903), but it appears that the update is causing some new problems.
According to a number of complaints from users seen here and here on Reddit, Microsoft forums, and Feedback Hub app, after installing update KB4512941 — which bumps the version to build 18362.329 — Task Manager may report constant high CPU usage (even when idle) negatively impacting performance on devices where Bing has been disabled for Windows Search.
While Microsoft hasn't acknowledged this as a problem on Windows 10, reports suggest that there's a problem with the Cortana integration causing the SearchUI.exe process to spike, which also affects the Start menu functionality.
The problem doesn't seem to be widespread. But if you recently updated your computer, and you're noticing high CPU usage, you can fix this problem by removing the cumulative update or modifying the Registry.
In this Windows 10 guide, we'll walk you through the steps to deal with the high CPU usage after installing build 18362.329.
- How to fix high CPU usage with KB4512941 removing update
- How to fix hight CPU usage with KB4512941 using Registry
How to fix high CPU usage with KB4512941 removing update
The easiest method to overcome the high CPU usage on Windows 10 is to remove the update from your device.
All the latest news, reviews, and guides for Windows and Xbox diehards.
To uninstall update KB4512941 from Windows 10, use these steps:
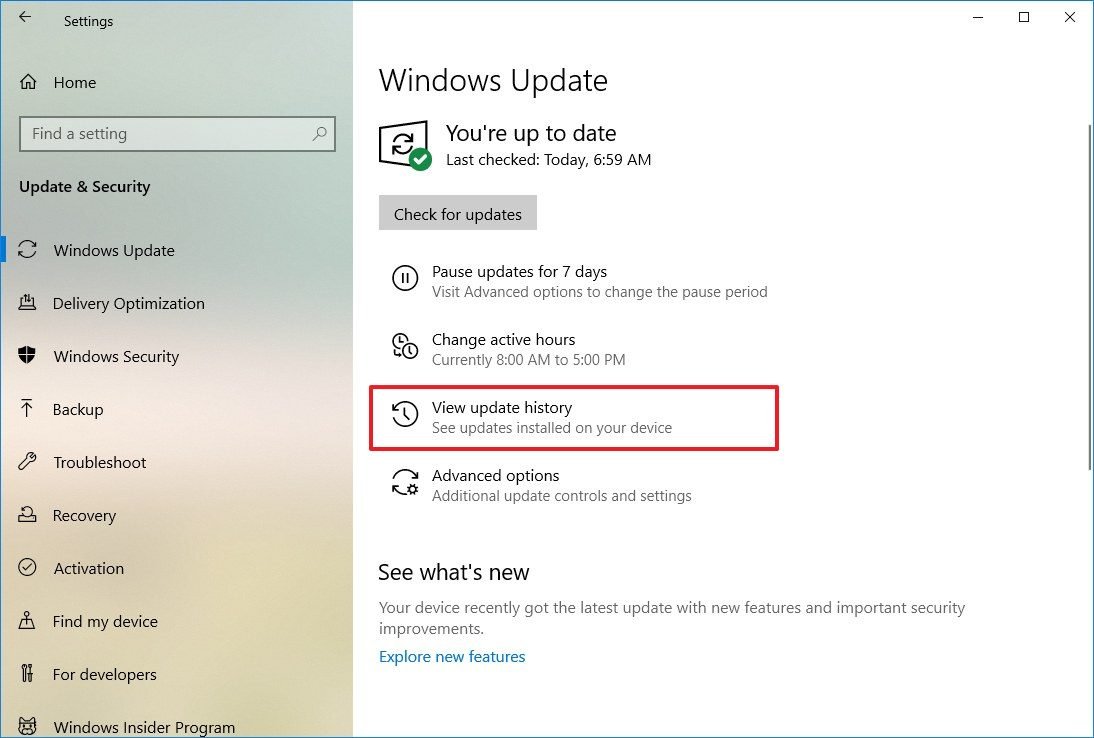
- Open Settings.
- Click on Update & Security.
- Click on Windows Update.
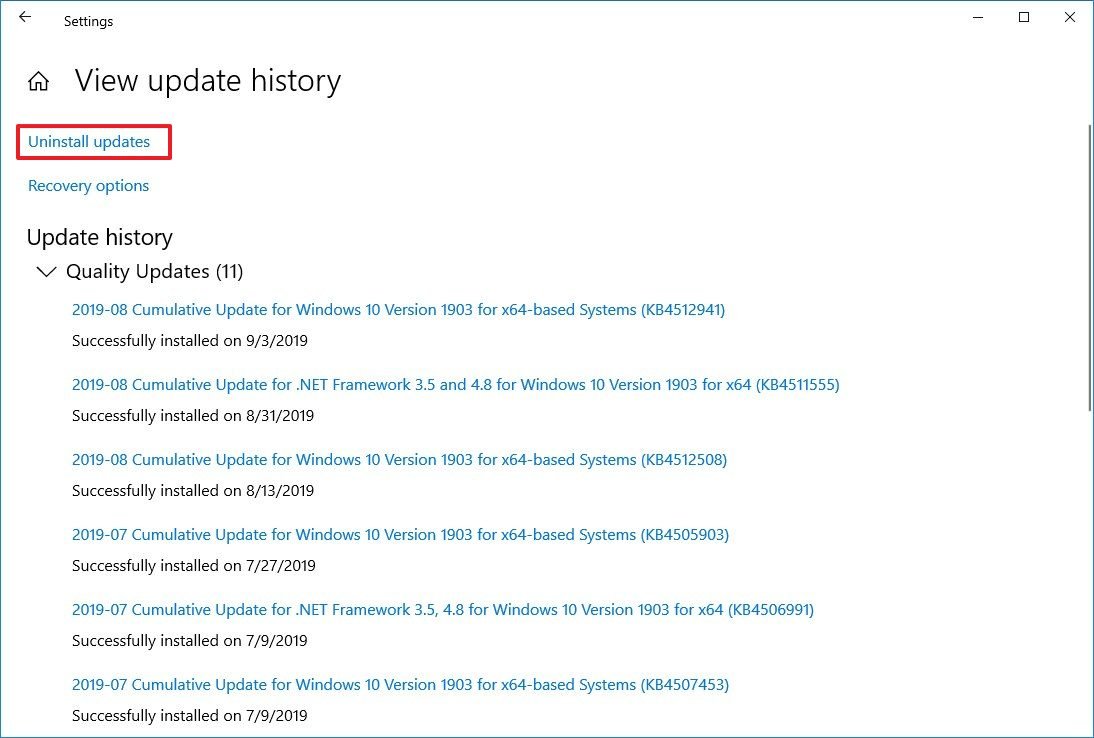
- Click the View update history option.
- Click the Uninstall updates option.
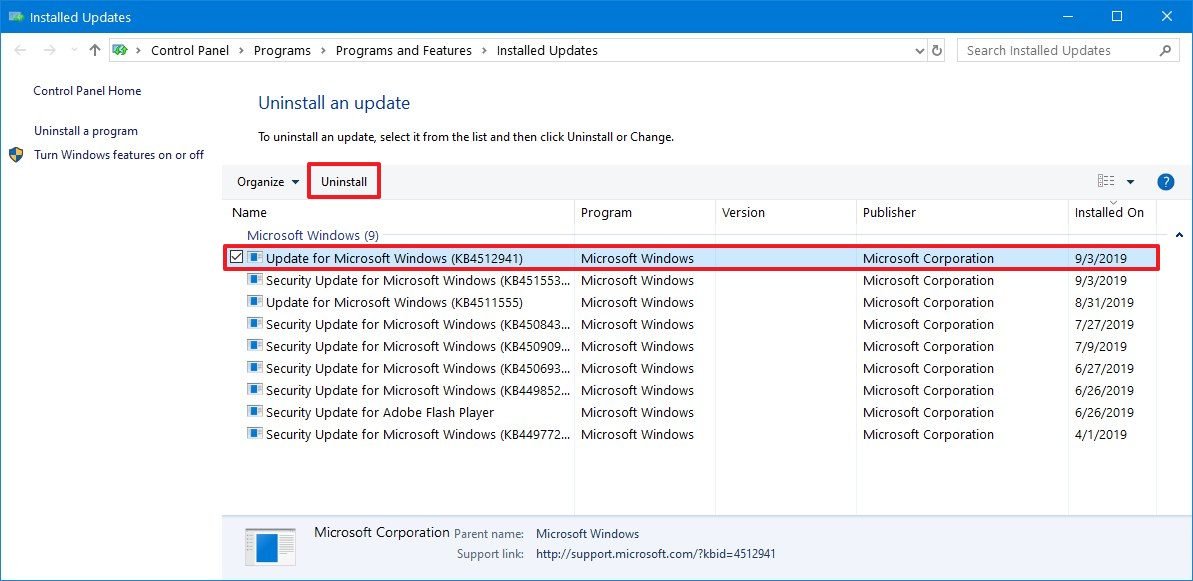
- Select the "Update for Microsoft Windows (KB4512941)" item.
- Click the Uninstall button.
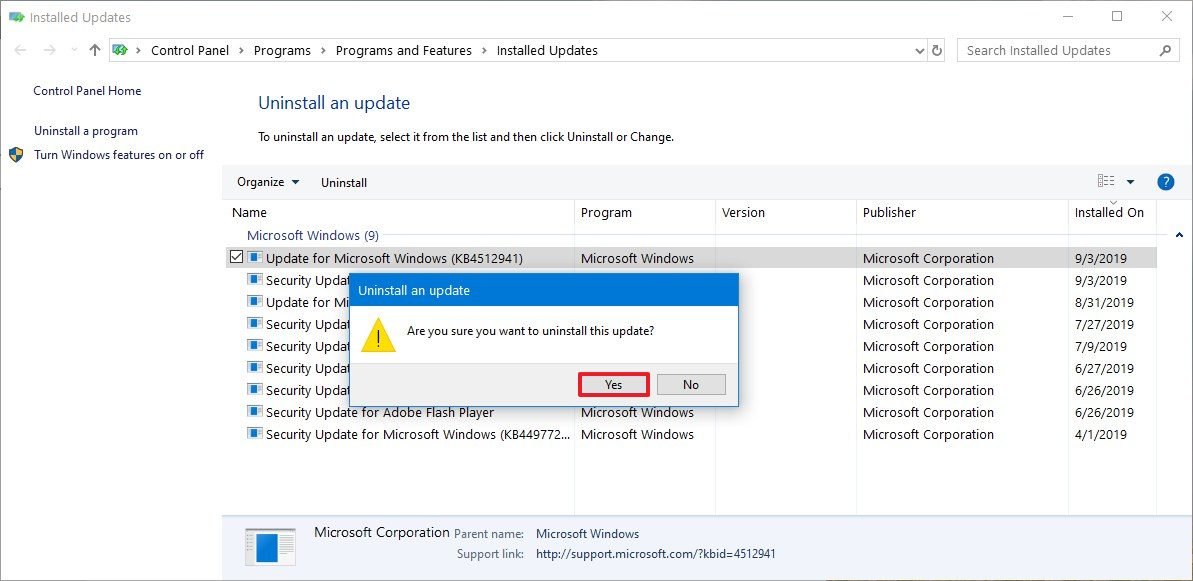
- Click the Yes button.
- Click the Restart Now button.
Once you complete the steps, your device will go back to the more stable build 18362.295, which isn't affected by the excessive processor usage.
How to fix hight CPU usage with KB4512941 using Registry
If you're unable to remove the update or don't want to rollback, you can tweak the Registry settings to mitigate the high processor usage on Windows 10.
Warning: This is a friendly reminder that editing the Registry is risky, and it can cause irreversible damage to your installation if you don't do it correctly. It's recommended to make a full backup of your PC before proceeding.
To fix high CPU usage after installing KB4512941, use these steps:
- Open Start.
- Search for regedit and click the top result to open the Registry.
- Browse the following path:
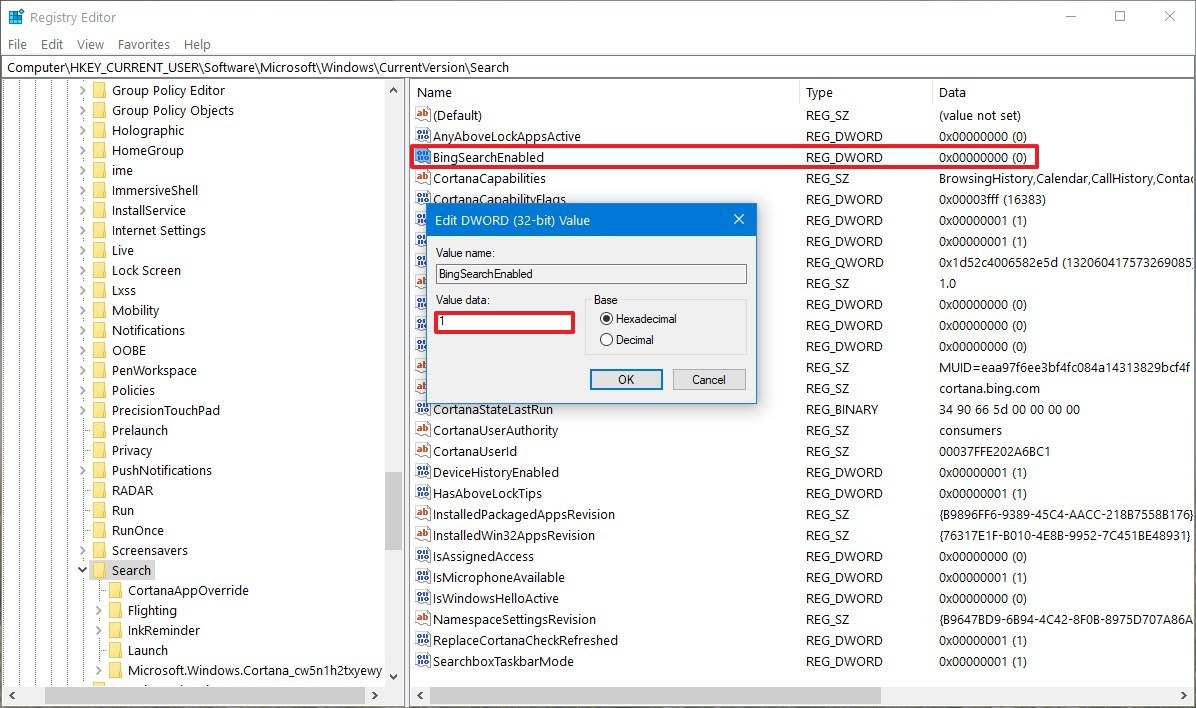
HKEY_CURRENT_USER\Software\Microsoft\Windows\CurrentVersion\SearchQuick tip: On Windows 10, you can now copy and paste the path in the Registry's address bar to quickly jump to the key destination. - Double-click the BingSearchEnabled DWORD and set the value from 0 to 1.Important: Alternatively, users have also reported that right-clicking and deleting the "BingSearchEnabled" DWORD also fixes the problem.
- Click the OK button.
- Restart your computer.
After you complete the steps, you should no longer notice processor spikes as a result of the possible bug with update KB4512941 for Windows 10 version 1903.
Once the company permanently fixes the problem, you can revert the changes using the same instructions, but on step No. 4, make sure to set the value of the DWORD to 0.
Update September 3, 2019: Microsoft has acknowledged the problem, and it's currently investigating to address it.

Mauro Huculak has been a Windows How-To Expert contributor for WindowsCentral.com for nearly a decade and has over 22 years of combined experience in IT and technical writing. He holds various professional certifications from Microsoft, Cisco, VMware, and CompTIA and has been recognized as a Microsoft MVP for many years.
